Grande
User Instructions
The mechanism
We only use the 6-way adjustable, extra heavy-duty mechanism for the Grande chairs because it has the
biggest range of movement (both forward tilting and back reclining) available on the market with the added
advantages that both the seat and back tilts can be locked independently in any position and it has been rated
up to 190kgs.It comes with seat slide as standard as well as a ratchet backrest height mechanism and seat tilt
tension controller.
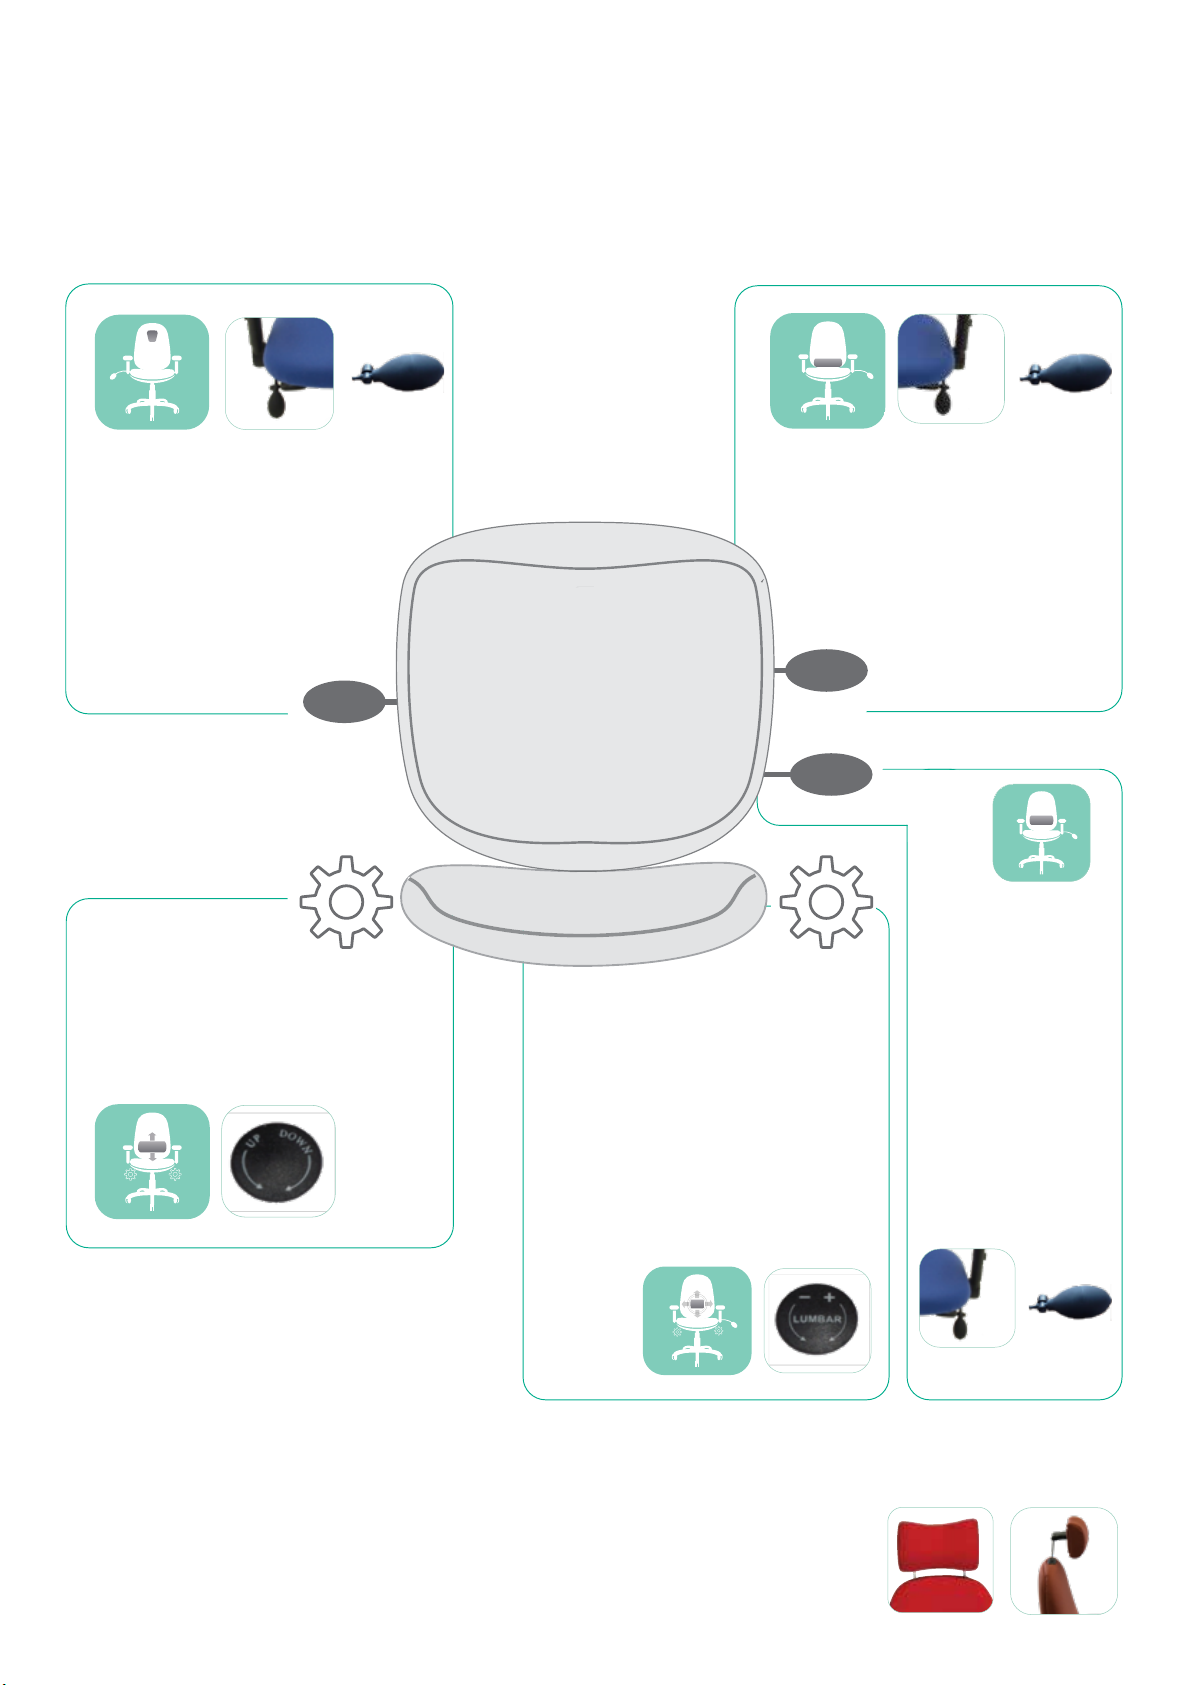
Sliding seat for adjustable
seat depth: 70mm
Backrest tilt (16 degrees)and
height (ratchet) adjustable (65mm)
Seat height adjustment
(average 465-600mm)
Independent seat tilt adjustment
(6 degrees forward, 14.5 degrees
reclining)
Seat tilt tension control
Forward (negative) seat tilt limiter
(blocks forward 6 degrees)
2
6
1
3
4
5
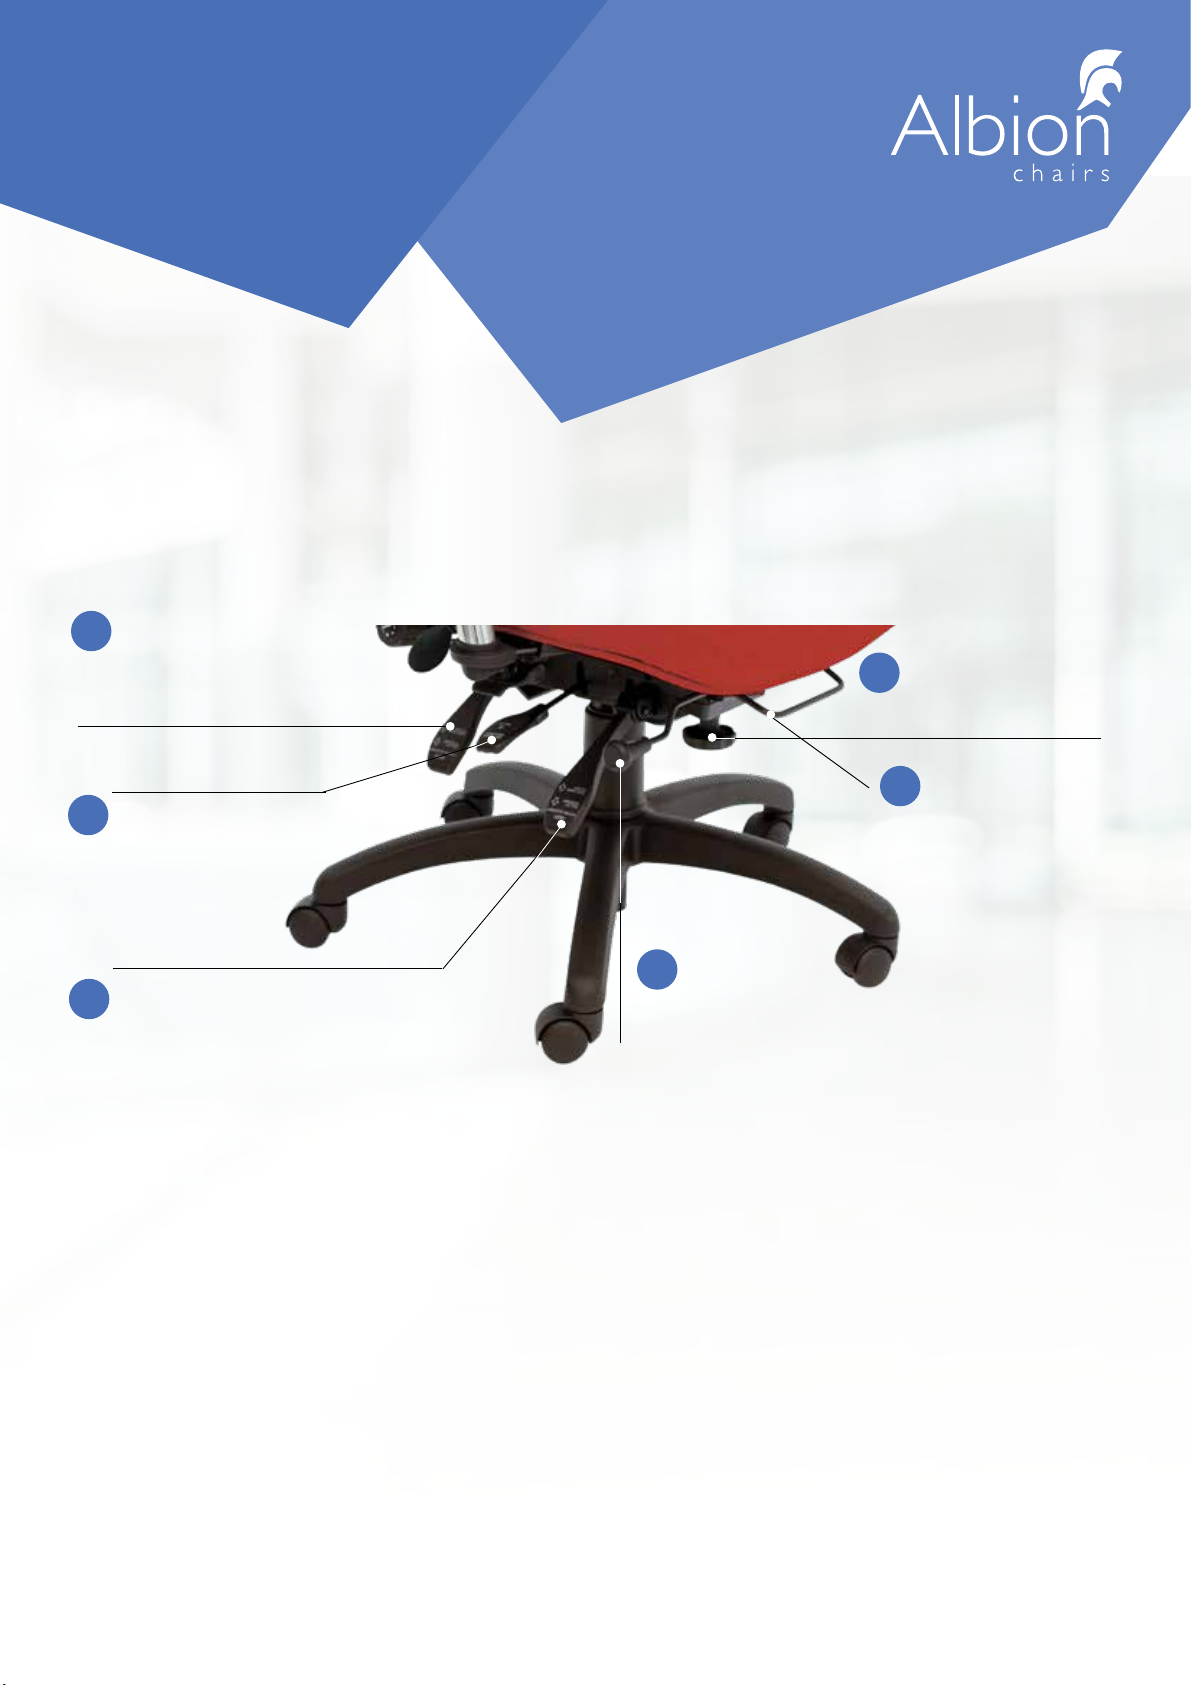
1. The bar
Under the front edge of the seat is for sliding the seat forwards
and backwards and allows the seat to be adjusted by up to 70mm
2. The In-Out Limiter Rod
When it is ‘IN’ it blocks off the furthest forward 6 degrees of
forward tilt. When it is ‘OUT’ it allows the full forward tilt range.
It is only able to be pushed in or pulled out when the SEAT
POSTURE LEVER (3) is activated (up) and the seat tilt is
slightly reclined. Leave in ‘OUT’ position.
3. Seat Posture Lever
Controls the seat tilt. When you lift this lever, the seat is free to
move. Push the lever down to lock. The best position is tilting
forward slightly as a slightly tilting forward angle means your hips
should be a little higher than your knees; i.e. your thighs should
slope downwards slightly.
This promotes better posture Also, the further back you sit into
your chair, the easier you will nd it to control the seat tilt angle.
If you nd the seat tilt too difcult to control, then you willneed to
slacken the spring by turning knob (6) anti clockwise. If you nd
it too easy to tilt, you need to tighten the knob (6) by
turning clockwise.
4. The Seat Height Adjustment Lever
Controls the gas lift for the seat height adjustment. Contrary to
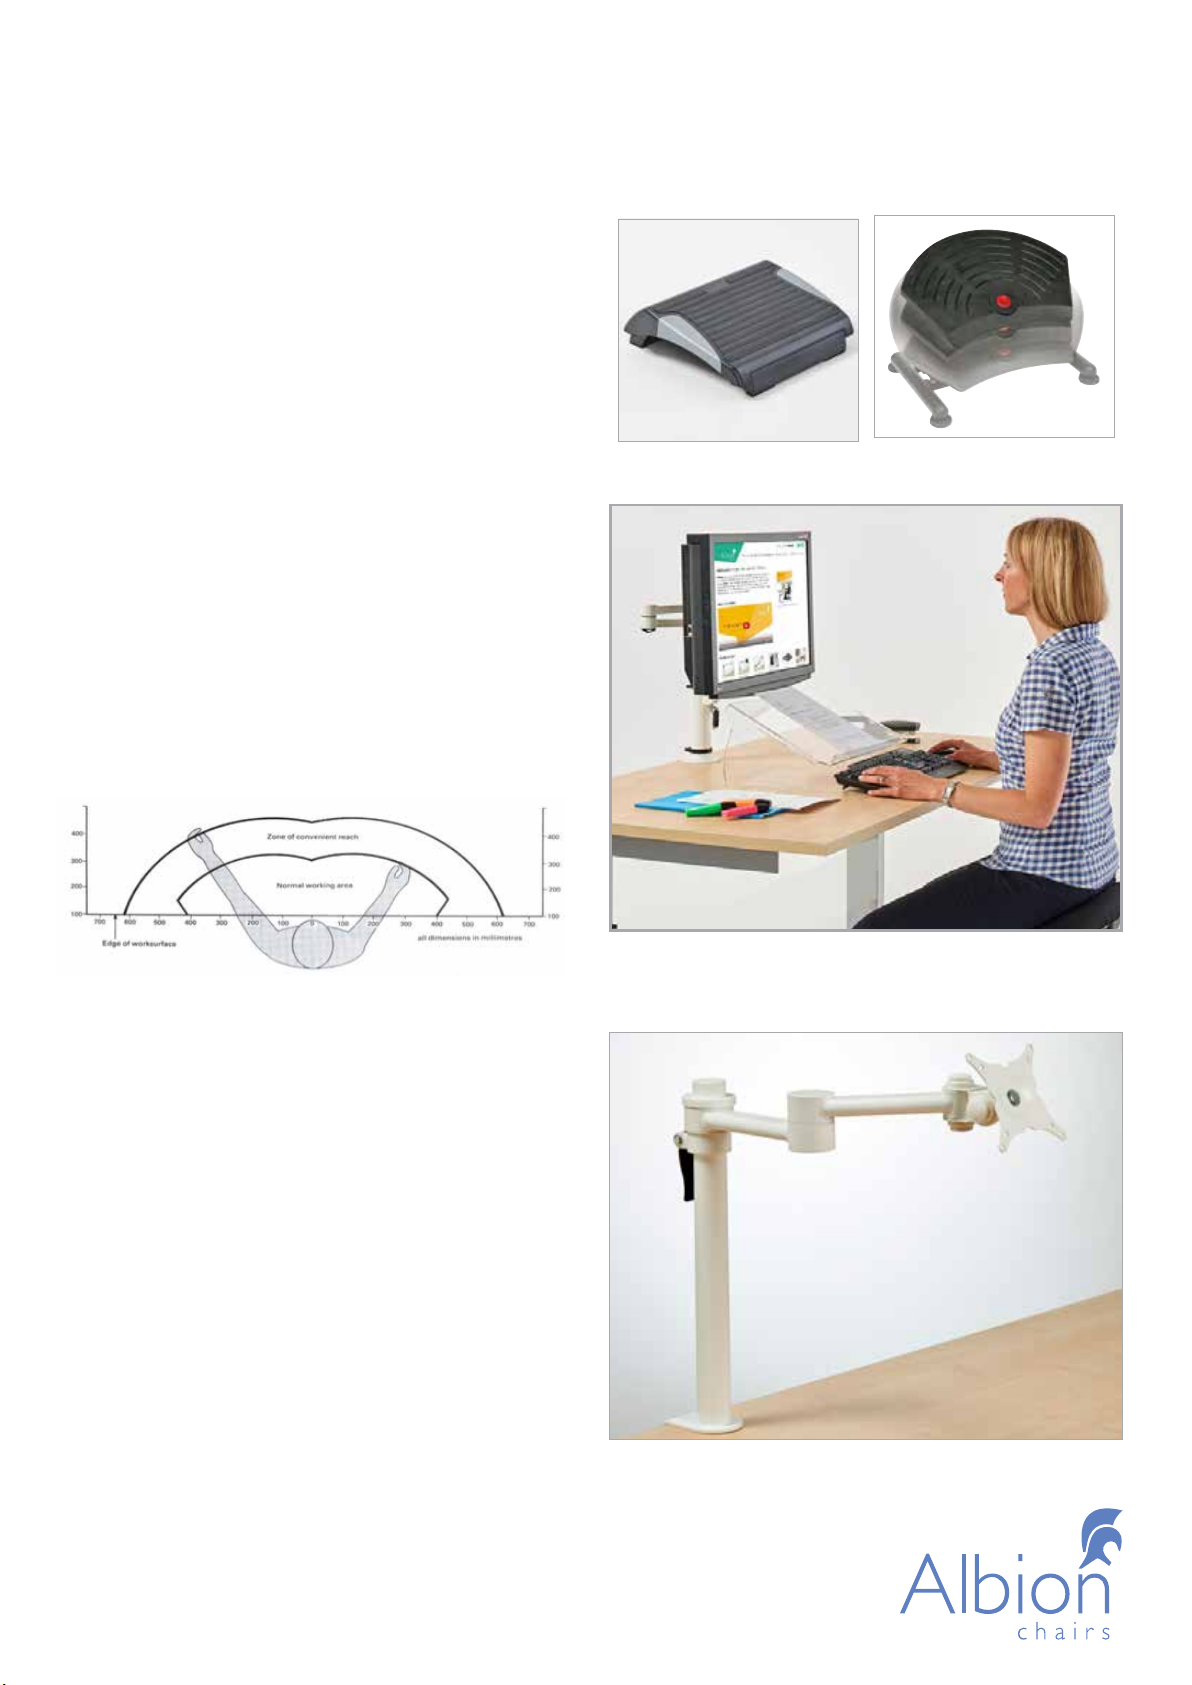
popular belief, the rst consideration is to ensure your elbows/
forearms are at the correct height. Raise or lower your seat so
your desk height is at elbow height. If you can’t reach the oor af-
ter this adjustment, then you need a footrest. The nal seat height
will depend on the nal seat angle you set.
5. The Back Posture Lever
Controls the back angle. Lift the lever to unlock. Push the lever
down to lock. This can be locked in any position. It is recommend-
ed to set the backrest in an upright position to ensure your spine is
as straight as possible. The backrest height works using an easy lift
ratchet mechanism. To raise the backrest simply lift the back with
both hands one click at a time. There are 5 clicks (locks) before
you reach the top of the ratchet and it will disengage. Drop the
back down to the bottom to re-engage.
6. Seat Tilt Tension Control
The tension of the tilt is controlled by turning the handle clockwise
(to increase) or anti clockwise (to decrease) the internal spring.
Order of setting posture: 4, 3, 6, 5, 1, 2