6
Chapter 2: Getting started
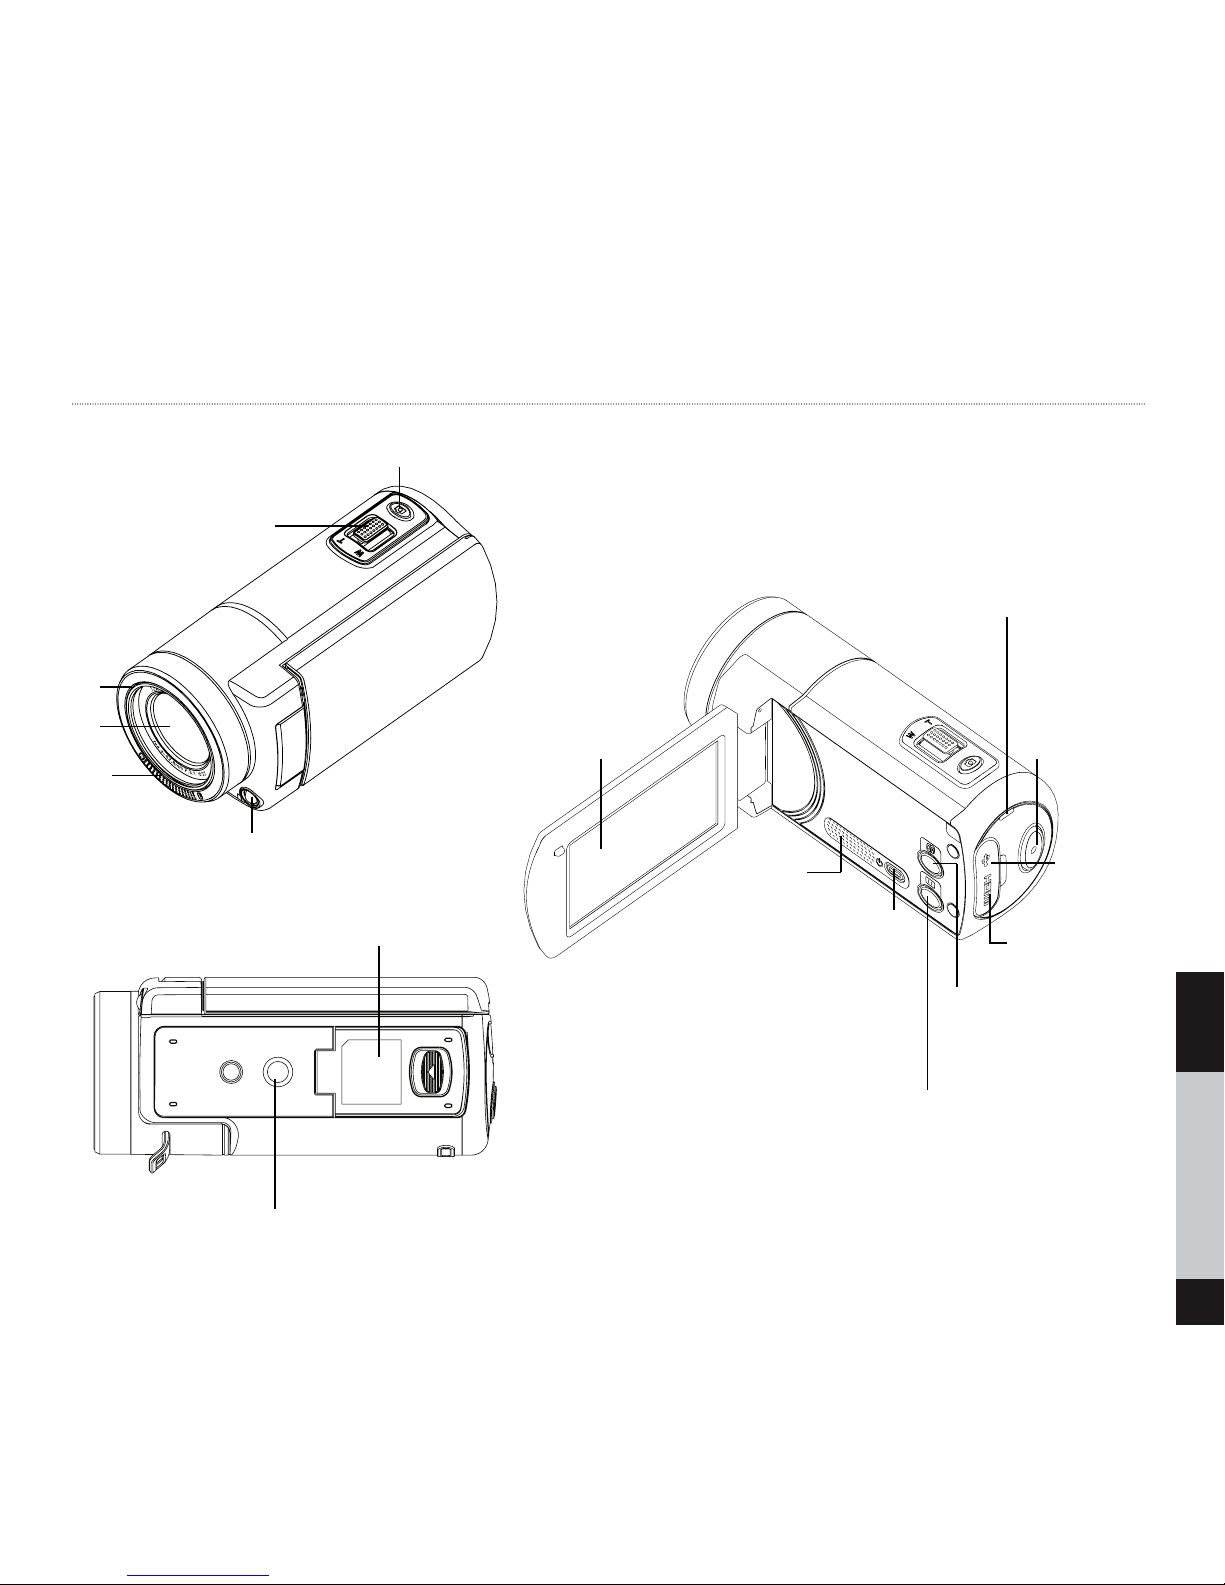
Loading the battery
Before using the camera, you must load the Lithium-
ion rechargeable battery. Insert the battery according
to the correct polarity marks ( + or -). Close the battery
cover firmly.
Charge the battery
When the camera is turned OFF, use the supplied
AC charger or the USB cable. The full charge time is
about 4 to 5 hours.
The blinking light confirms that the camera is currently
charging, and it shines steady when the charging is
completed. In AC charging mode, the light will turn
itself off automatically after 3-5 minutes.
Inserting and Removing an SD Card
The camera comes with an internal memory that al-
lows you to store photos and videos. You can ex-
pand the memory capacity by using a SD memory
card.
Insert the memory card into its slot (see bottom
view). To remove the installed SD card, press the
card inward to release it.
Turn on the camera
Flip out the LCD panel or press the Power button.
Configuring the Initial Date and Time Setup
The time setting screen appears to allow you to set
date and time:
1. Touch Year, Month, Day, Hour, Minute, and AM/
PM to set.
2. Adjust the numeric value by touching /
3. Touch the OK icon to validate the setting.
4. Touch the Exit icon ( ) to exit.
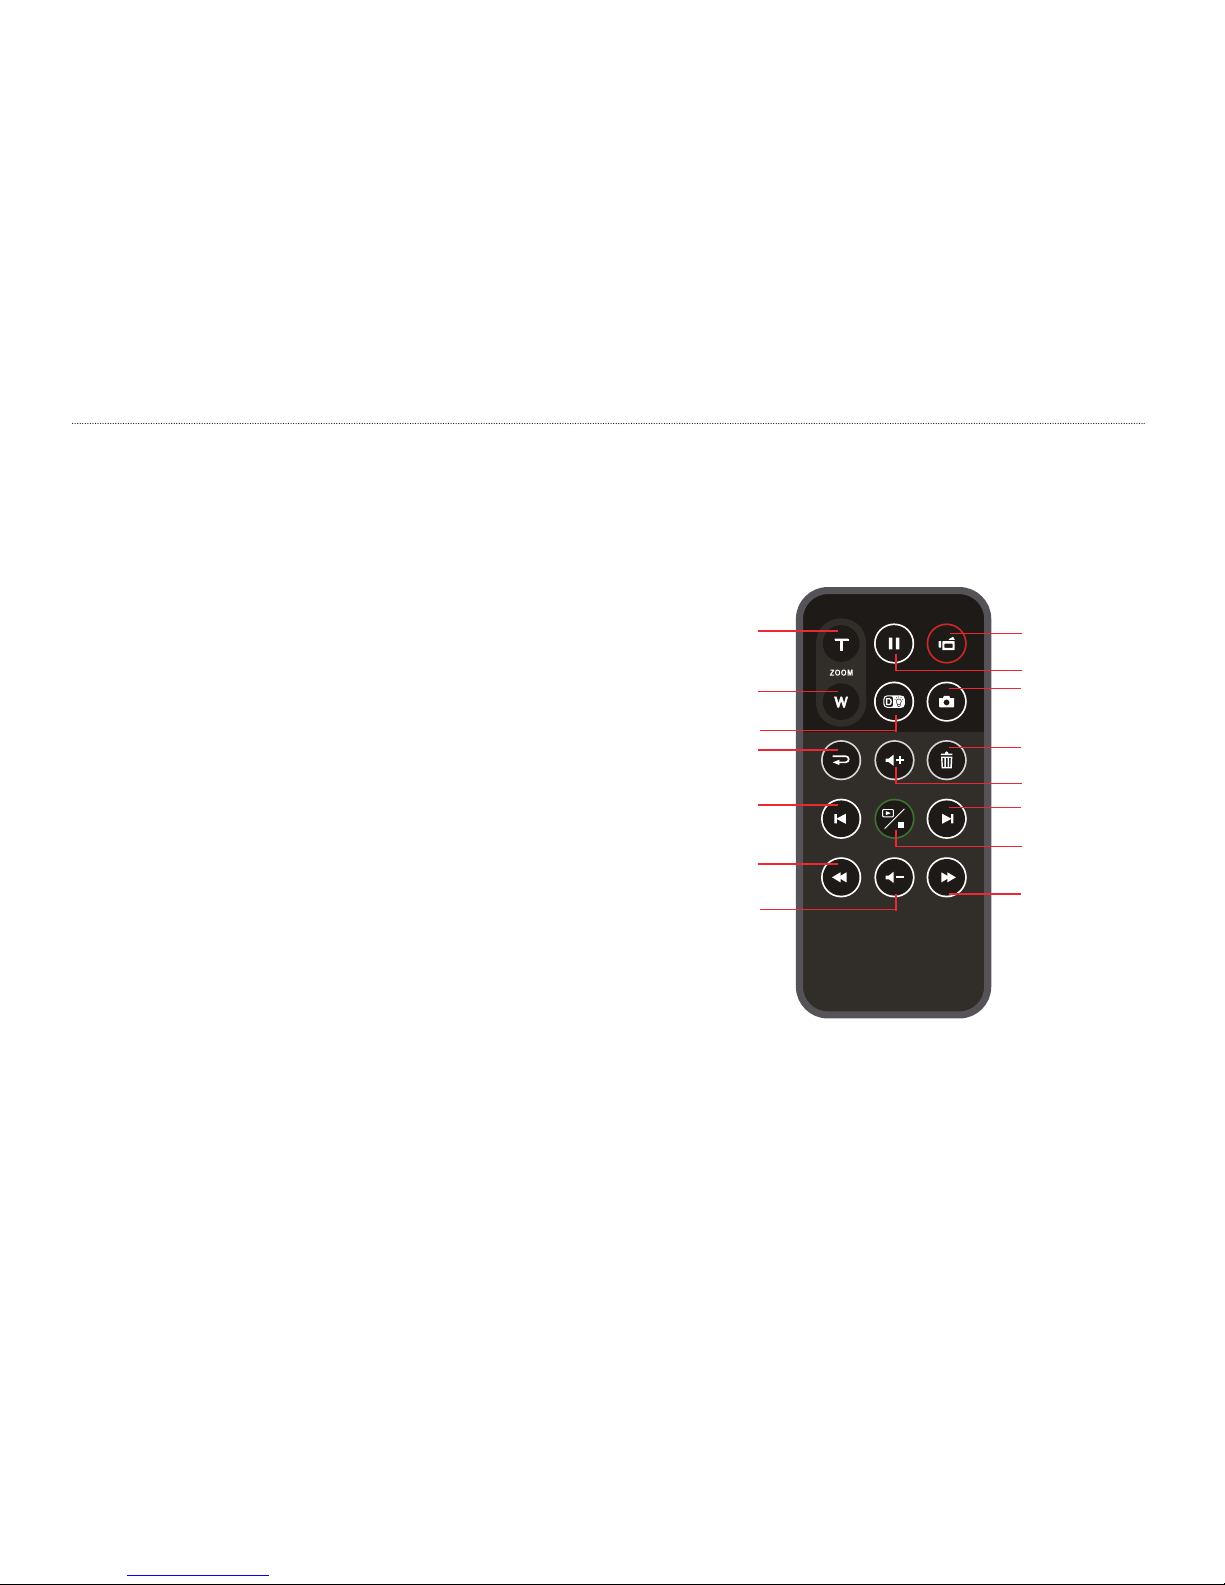
Quick guide
To record video: Press the Video button to record
and stop.
To pause recording: Press the Pause button.
To take a photo during video recording: Press the
Photo button to capture the image. The Snapshot
icon ( ) appears on the LCD monitor.
To take a photo: Press the Photo button halfway
down until the focusing frame changes from white
to green (see image below). Then, press it fully down
to take photo.