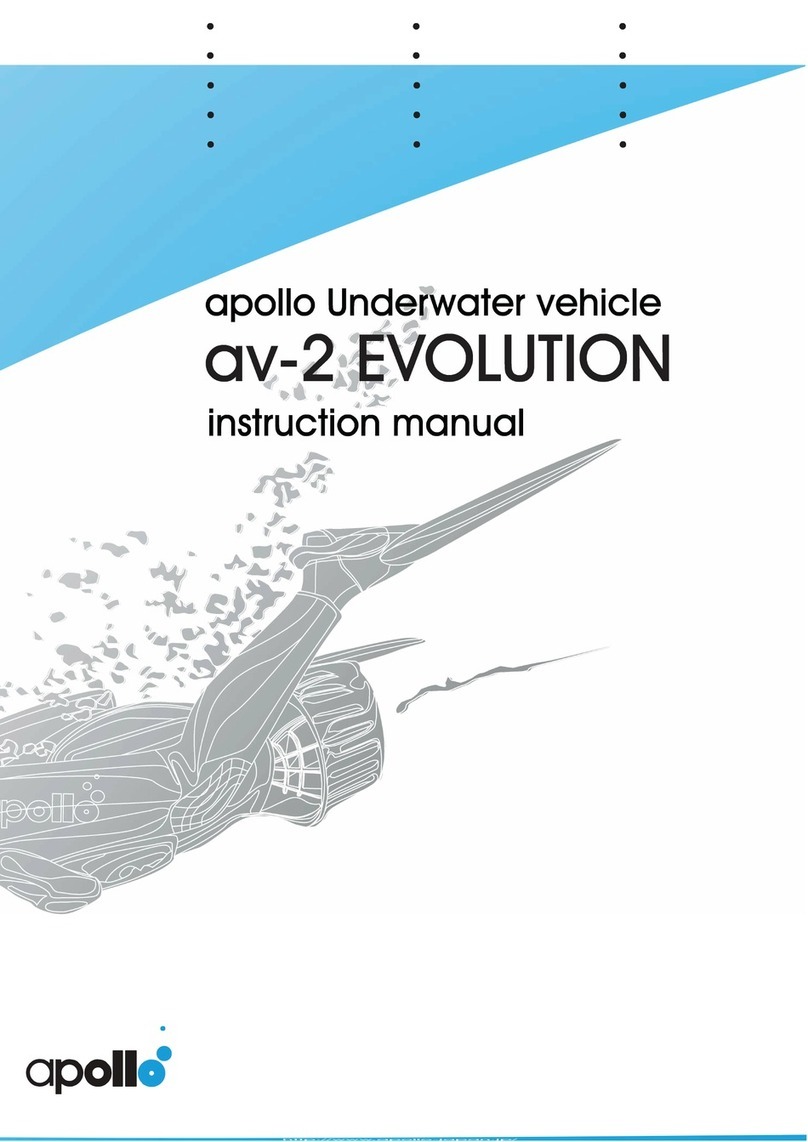
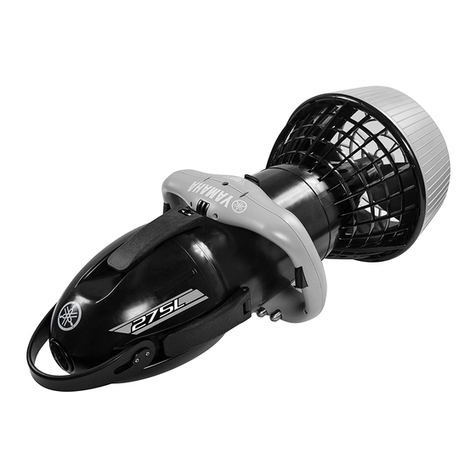
Apollo av Series User manual

Nippon Sensuiki Co., Ltd.
905 Shake, Ebina-City,
Kanagawa-Pref, 243-0424, Japan
TEL 046-233-4111
FAX 046-233-5886
39545000022018.09.14
instruction manual
riding manual
apollo Underwater vehicle
avx
av-2 EVOLUTION

Hands-free riding with the scooter saddle (PATENTED)
Hands-free is an innovative riding style that allows an operator to steer the scooter with body movement; much
like a seal.
This inline body placement is more streamlined to effectively decrease fatigue, reduce air consumption, and
extend your dive time. Go further, get there faster, and have a lot more fun along the way.
The hands-free riding style increases your options while diving.
You are no longer limited to the hands-on riding style required by other vehicles.
The possibilities are endless.
Variable speed control (except for av-2C)
Quick and smooth speed control is now at your fingertip.
Speed adjustments are made via an accelerator lever that changes
the rotational speed of motor while vehicle is in use.
Adjustments are very smooth, allowing user to fine tune speed.
These enhancements are a significant improvement on the apollo vehicle
series.
This new design provides a far more advanced control system than is
available on other underwater scooter.
The apollo underwater vehicle is not heavy burden
The hands-tree riding style decreases fatigue, reduces air consumption, and extends your dive time.
In the past some divers have become fatigued from the energy and effort required to hold and steer an
underwater vehicle.
In addition to being a potential source of fatigue, the traditional hands-on riding style requires the user to place
themselves above the vehicle rather than inline.
Improvement in transportation options
The apollo underwater vehicle improves your ability to transport items underwater.
Your hands are free to carry what you need.
Additionally, fold out wings on both sides of the saddle are available for towing
ther divers or attaching other items of equipment.
The innovative apollo underwater vehicle challenges divers to create and find
new techniques and methods of use.
Go out and enjoy diving with this great new generation diving product.
If you want more information about apollo DPV, please check website.
㸭
Thank you for purchasing an apollo underwater vehicle.
The apollo underwater vehicle is revolutionary new underwater vehicle equipped with
functions and features that set it apart from previous models and other brands.

Introduction
Contents
Before reading the manual
Main warnings and notes
Specification (avx)
Specification (avx)
Preparation (avx)
Specification (av-2 series)
Preparation (av-2 series)
Preparation (all DPV)
Operation and use (all DPV)
Maintenance (all DPV)
Trouble shooting (all DPV)
The avx name of each part
Exclusive battery/charger
Charging the battery
Each part name/spec
Exclusive battery/charger
Charging the battery
Battery warranty/ Battery care
Check before use (confirming operations)
Entry method㸭Exit
How to operate
Maintenance after use
Note on maintenance and storage
The propeller doesn't rotate even through the throttle
lever is activated
P1
P2
P3
P4
P5
P6
P7
P9
P10
P11
P13
P14
P18
P19
P20
P21
P22
For the safety diving
STEP 1
STEP 2
STEP 3
STEP 4
STEP 5
STEP 6
STEP 7
Stopping
Take off
Riding
Turning
Advanced operations
Advanced operations
Advanced operations (Carrying)
P23 - 24
P25 - 26
P27 - 28
P29 - 30
P31
P32
P33
P34
Riding manual
Instruction manual

Failure to read understand and obey the instructions under this heading may lead to accidents that may result
in serious injury or death.
Failure to obey the instructions under this heading may lead indirectly to accidents that result in serious injury,
death and or serious damage to equipment.
Failure to obey the instructions under this heading may lead to minor accidents and/or damage to equipment.
Items with the following headings marked with this symbol " " describe scuba diving
techniques and how to handle diving equipment.
These sections must be completely understood, so be sure to read them with special care.
DANGER
CAUTION
WARNING
DANGER
ەIt is extremely important that scuba divers using this product have undergone theoretical and practical training
ࠉgiven by an internationally-recognized entity providing diving instruction.
ࠉDue to safety considerations, those who have not obtained a C-Card (attesting to the completion of training)
ࠉfrom an entity providing diving instruction must not under any circumstances use this product.
ࠉ(This does not apply to those using this product during training, under the supervision of an instructor attached to
ࠉan entity providing diving instruction.)
ࠉAmateurs lacking knowledge of basic scuba diving techniques risk serious injury or death.
ەNever scuba dive alone. Always dive under the buddy system.
ࠉDiving alone could lead to serious injury and death.
ەDue to the speed of the apollo underwater vehicle depth & pressure change may happen faster than usual.
ࠉThe diver must be aware at all times with regards the status of his depth and direction and carefully monitor his
ࠉascent rate as rapid surfacing and collisions could cause serious injury or death.
ࠉPlease practice driving at low speed until you become accustomed to the handling of the scooter.
CAUTION
ەMake sure you are in good physical condition before you scuba dive.
ࠉIf you begin to feel anxious, cold, tired or unwell, do not over exert yourself and stop your dive.
ەNever take alcohol or medicines (especially a nasal spray or medicine for a cold) before scuba diving.
ࠉThose who are in poor physical shape or suffer from a chronic ailment should consult a doctor before
ࠉconsidering diving.
WARNING
ەBefore deciding to use your scooter in an adverse environment or special situation please consult with a
ࠉqualified instructor at the place of purchase prior to undertaking your dive.

The above-mentioned table does not mention all prevention matters that could cause danger and injury.
Please carefully read and follow the instructions whenever you see the " " symbol in this book.
CAUTION
CAUTION
CAUTION
CAUTION
CAUTION
CAUTION
CAUTION
CAUTION
CAUTION
CAUTION
CAUTION
WARNING
WARNING
WARNING
WARNING
WARNING
WARNING
ە
ࠉ
ࠉ
ࠉ
ࠉ
ࠉ
ࠉ
ە
ࠉ
ە
ࠉ
ࠉ
ࠉ
ە
ࠉ
ە
ࠉ
ࠉ
ە
ࠉ
Please only use our purpose-built battery and purpose-built
charger.
Please do not change, remodel or disassemble.
Please do not touch the electrodes etc.
Please do not jump into water with the scooter.
Please ensure that string, hose, hair or foreign objects do not
become entangled in the propeller. Remove the battery
before attempting to disentangle any items should the
propeller become obstructed.
Please do not throw the scooter from a high place.
Please execute a thorough check prior to use.
Please do not run the scooter for more than five seconds out
of water.
Please disconnect the battery terminal when the scooter is
not in use.
Please check the main body O-rings for impurity and dust
before usage.
Please do not use other than the specified silicone grease
lubricant supplied by Nippon Sensuiki.
Please take careful note of your surroundings and
circumstances prior to preparing your equipment on land
and in the water.
Please do not enter with the scooter when you are boat diving.
Have the scooter passed down to you.
If your scooter has stopped abnormally or been for repair
please do not run it for a long distance until after you have
confirmed it is safe.
Please do not drive the scooter to the surface as there are
dangers caused by rapid ascent.
Please only charge the battery in a well-ventilated area and
keep it away from an open flame.
Otherwise there is a danger of an explosion and fire.
There is danger of injury.
There is a possibility of injury.
The inertia and weight of the scooter is dangerous and could
cause injury.
Hydrogen gas is generated from the battery while charging.
There are possibilities of poisoning and fire.
The inertia and weight of the scooter is dangerous and could
cause injury.
The inertia and weight of the scooter is dangerous and could
cause injury.
An unknown fault or unfinished repair may cause an unexpected
accident.
An accident may be caused by a malfunction after it enters the
water.
The seal part on the propeller shaft is damaged by frictional
heat, and there is a possibility of water leakage.
Damage may be caused to the materials the scooter is made
from by using lubricants other than what Nippon Sensuiki Co.,
Ltd. supply. This in turn may cause an unexpected accident.
Equipment and materials may be damaged by unexpected
operation.
Unexpected operation due to the switch being accidentally
operated may cause an unexpected accident.
There is a possibility of water leakage by imperfect sealing,
which may cause damage and an unexpected accident.
There is danger of electric shock because of high currents and
voltage.
There are dangers of the explosions and of fire if the electric
circuit is tampered with. There are dangers of damage and
water leaks in the body and circuits.
The rapid pressure decrease associated with a rapid ascent
may cause decompression disease or embolism.
Please do not touch unnecessarily any moving parts
(especially the propeller).

●Propeller cover
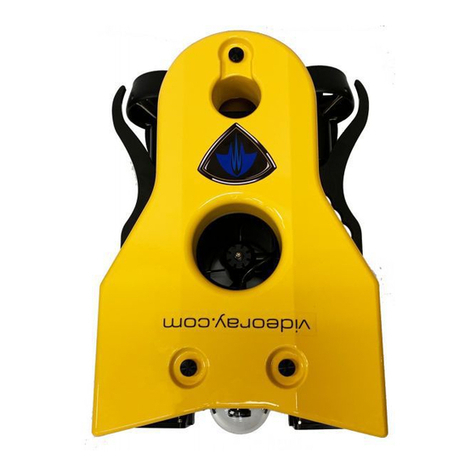
The avx name of each part
Specification
●Propeller screen
●Propeller Assy
●Clamp ring
●Body Assy
●Head Assy
●Locking buckle
●Wing arms
●Starter switch
●Main switch
●Grips
●Battery plug
●Water leak sensor
●Guide pin
●Saddle
●Accelerator lever
Length and width
Weight
Submerged unit weight
Speed
Depth rating
Active range
Body material
Motor
REV reducer
Speed adjuster
Safety devices
Accessories
: 806 x 350 x 340mm
: 23.1kg with battery
: ±0kg (in the sea water)
: 0~5.7km/h
: approx 150m
: 41km (Running at pitch2 3.0km/h)
: Aluminum body
: Brushless DC motor
: Ring epicyclical gear speed reducer
: Rotational speed control
: Variable pitch-type propeller (3 steps)
: Sensation current shut-down device
: Thermal switch function
: Water leakage sensor function
: Water-cooling motor deployment
: Exclusive battery/charger
: O-ring seal for the main body
: Silicone grease
: CR-ROM with an instruction manual
●Pitch control dial
(avx)

●Please never use other batteries than those supplied by Nippon Sensuiki. (Supplied separately)
●Please never use other chargers than those supplied by Nippon Sensuiki. (Supplied separately)
●Please charge the battery in the room
●AC plug
●Charger body
●Charger plug
Battery (avx)
Chargers (avx)
CAUTION
●Outer dimension: 276 x 169 x 135mm
without connectors
●Capacity: DC50.4V 27AH
●Weight: 10kg
●Charger plug
Storage case for avx
●Grip
●Fuse holder
●Battery socket (output)
●Outer dimension: 175 x 91 x 51mm
●Output: DC58.4V 6A
●Input: AC100 - 240V 50 - 60Hz
●Please keep the storage case avx is delivered in. This box is more stronger than a styrofoam
box and will help prevent damage during transport.
●Please remove the single hand unit when you keep avx in the storage case.

CAUTION
WARNING
●Li-ion battery is deployed on the avx. Please charge by the exclusive charger.
Precautions concerning the handling of the battery housing (head Assy) after removal.
●Silicone grease has been applied to the seals on the battery housing. Sand and other debris easily stick to this.
Be careful to avoid this situation.
●Water leakage is caused almost entirely by sand or other debris adhering to the seal area.
●Please put the battery housing (head Assy) in a safe clean place lying
down on the ribs located on its base.
●Please do not place it on sand or on rocks etc.
●Please stand the scooter vertically on the propeller cover.
Make sure it's on a flat stable surface so that it cannot fall over and cause
damage to the propeller cover and blades.
●If the scooter is wet, wipe all moisture off completely.
●Unfasten two locking buckles on the body seal.
A locking mechanism is attached to the locking buckle to prevent it from
releasing as a result of unexpected shocks.
①First, while pushing the square button in the center of
the locking buckle, lift the end of the buckle.
②Next, after releasing the buckle hook, flip the buckle
downward. Release two parts.
●It may be difficult to remove the battery housing (head Assy) due to negative pressure inside the body caused
by contact with the O-ring, temperature variation and other factors.
In this case, place the buckle latch under the locking hook and apply pressure with your
thumb while pushing upwards. Do this on both sides of the scooter concurrently to break
the seal and easily release the battery housing (head Assy).
■STEP3 Removing the battery housing.
■STEP2 Unfasten the locking buckles.
■STEP1 Preparation for charging.
Charging the battery
(avx)
(avx)
●Hook
●Arms
If it is hard to remove head Assy・・・
Push the hook with arms.
Remove the head Assy.
Unnecessary to disassemble
the single hand unit when
removing the head assy.

U S E : -20℃~60℃(-4 ~ 140
°F)
STORAGE : -20℃~45℃(-4 ~113
°F)
CHARGE : 0℃~55℃(32 ~131
°F)
Temperature range for battery
WARNING
WARNING
CAUTION
CAUTION
●Altering the battery connector plug in any way is very dangerous and
should not be done. Any alterations will cause unexpected trouble.
●The battery is quite heavy, so be careful not get your fingers pinched
or to drop it onto your feet.
●Hold and squeeze the release levers on both sides of the battery connector
plug and pull upwards.
●Hold the battery grip firmly and lift it away from the body.
Place in on a clean and dry flat stable surface.
●After connecting the AC plug of the charger to a domestic outlet, connect to the battery.
●The connector is polarized, so when connecting, insert in a direction so it will smoothly enter
the connector receptor.
CAUTION
●Please do not set the battery into the scooter for at least 30 minutes after completing the charge as the battery
continues to emit hydrogen gas. Please keep clear of an open flame.
●LED 1 will indicate the red light when connect AC plug to a domestic outlet.
●LED 2 change from the red light to green when charging is completed.
●The green light of LED 2 shows when no connecting to the battery.
LED 2 will indicate charging status.
Charging : Red light Finished : Green light
The battery charger automatically changes into trickle
charge mode after charging is complete however please
avoid leaving the charger connected after the charge
lamp becomes green.
①At first, turn the power off and remove the
AC plug from the domestic outlet.
②Next, remove the battery connector.
■STEP4 Releasing the battery connector plug.
■STEP5 Removal of the battery.
■STEP6 Connecting the single-purpose charger to begin recharging.
■STEP7 Disconnect the charger when charging is completed.
■STEP8 Charge completion.
Charging time of the charger
①First, connect the AC (alternating current) plug of the charger to a domestic outlet.
②Next, connect the DC58.8V output connector from
the battery to the connector receptor plug on the
charger. The charging will automatically start upon
connection after the power is turned on at the
domestic outlet. AC100~240V
AC plug
110V
Inlet voltage selector
220V
110V
↑
↓
●Set the inlet voltage selector to AC voltage of your region.
90~132V: Set to110V position / 200~264V: Set to 220V position

●Propeller cover
The av-2 EVOLUTION name of each part
Specification
●Propeller screen
●Propeller Assy
●Propellers
●Clamp ring
●Clamp ring lock lever
●Body Assy
●Head Assy
●Locking buckle
●Wing arms
●Starter switch
●Main switch
●Grips
●Handle
●Battery plug
●Water leak sensor
terminal
●Water leak alert lump
●Saddle
●Accelerator lever
●Battery indicator
●Pitch control dial
Length and width
Weight
Submerged unit weight
Speed
Active depth
Active range
Body
Motor
REV reducer
Speed adjuster
Safety devices
Accessories
: 720mm × 340mm
: 20.4kg with battery
: 0.5kg
: 0~4.5km/h
It depends on the divers posture, physique and
equipment.
: approx 70m
: 9400m
: Shock resistant ABS resin
: 24V Brushless motor
: Ring epicyclical gear speed reducer
: Rotational speed control
: Variable pitch-type propeller (3 steps)
: Sensation current shut-down device
Water leakage sensor function turns on warning
lamp when water enters the motor or battery
housing and automatically shuts down operations.
: Water-cooling motor deployment
: O-ring seal for the main body
: O-ring seal for the propeller end of the body
: Silicone grease
09
(av-2 series)

●Lithium ion Battery 27Ah for av-2 (Use only batteries supplied by Nippon Sensuiki)
●Charger for Lithium ion Battery for av-2 (Use only the specific charger supplied by Nippon Sensuiki)
●Please never use other batteries than those supplied by Nippon Sensuiki. (Supplied separately)
●Please never use other chargers than those supplied by Nippon Sensuiki. (Supplied separately)
●Grip
●AC plug
●Charger body
●Charger plug
●Battery socket
●Please refer to the handling manual that is attached to each product explaining usage of the battery and
charger.
Separately purchased accessories (av-2 series)
Exclusive Batteries for av-2 series
Exclusive Chargers for av-2 series
CAUTION
CAUTION
Battery charger for Lithium ion Battery
Outer dimensions: 174X125X165mm
Normal Capacity: 27Ah (DC25.2V)
Weight: 9kg
10
Outer dimensions: 178mm x 80mm x 46mm
Output: DC29.4V 5A
Input voltage: AC100 - 240V 50 - 60Hz
Lithium ion battery

CAUTION
WARNING
●In this page, it explains only the Lithium ion battery and av-2E as an example.
Precautions concerning the handling of the battery housing (head Assy) after removal.
●Silicone grease has been applied to the seals on the battery housing. Sand and other debris easily stick to this.
Be careful to avoid this situation.
●Water leakage is caused almost entirely by sand or other debris adhering to the seal area.
●Please put the battery housing (head Assy) in a safe clean place lying
down on the ribs located on its base.
●Please do not place it on sand or on rocks etc.
●Please stand the scooter vertically on the propeller cover.
Make sure it's on a flat stable surface so that it cannot fall over and cause
damage to the propeller cover and blades.
●If the scooter is wet, wipe all moisture off completely.
●Unfasten four locking buckles on the body seal. (avx has two buckles)
A locking mechanism is attached to the locking buckle to prevent it from
releasing as a result of unexpected shocks.
①First, while pushing the square button in the center of
the locking buckle, lift the end of the buckle.
②Next, after releasing the buckle hook, flip the buckle
downward. Release all four parts.
●It may be difficult to remove the battery housing (head Assy) due to negative pressure inside the body caused
by contact with the O-ring, temperature variation and other factors.
In this case, place the buckle latch under the locking hook and apply pressure with your thumb while pushing
upwards. Do this on both sides of the scooter concurrently to break the seal and easily release the
battery housing (head Assy).
●Hook
■STEP3 Removing the battery housing.
■STEP2 Unfasten the locking buckles.
■STEP1 Preparation for charging.
Charging the battery (av-2 series)
●Arms
If it is hard to remove head Assy・・・
Push the hook with arms.
Remove the head Assy.
(av-2 series)
11
If with the single hand unit,
unnecessary to disassemble
the single hand unit when
removing the head assy.
In addition, after you've removed the saddle panel,
insert the driver, such as the hole is shown by
the arrow, you can open
the valve at inside.
Please be pry gently in
the direction of the arrow.

WARNING
CAUTION
CAUTION
CAUTION
●Altering the battery connector plug in any way is very dangerous and should not
be done. Any alterations will cause unexpected trouble.
●The battery is quite heavy, so be careful not get your fingers pinched or to
drop it onto your feet.
●Hold and squeeze the release levers on both sides of the battery connector
plug and pull upwards.
●Hold the grip of the battery firmly and lift it away from the body.
Place in on a clean and dry flat stable surface.
●You must use the correct exclusive charger suitable for the type of battery being used.
Please refer to the handling manual that is attached to each product about the battery.
●The connector is polarized, so when connecting, insert in a direction so it will smoothly enter the connector
receptor.
CAUTION
●Please do not set the battery into the scooter for at least 30 minutes after completing the charge.
Please do not use if the battery become high temperature.
●The red is changed into green as the charge progresses.
●A green lamp shows when the battery connector is not
connected (open circuit) but the power is on.
The color of LED will indicate when charging is completed. LED
Remove the connector
Charging : Red light Finished : Green light
The battery charger automatically changes into trickle
charge mode after charging is complete.
Please do not keep the trickle charging for
extended period of hours exceeding a day
as it may damage the battery life.
①At first, turn the power off and remove the
AC plug from the domestic outlet.
②Next, remove the plug of charger.
■STEP4 Releasing the battery connector plug.
■STEP5 Removal of the battery.
■STEP6 Connecting the exclusive charger to begin recharging.
■STEP7 Disconnect the charger when charging is completed.
■STEP8 Charge completion.
Charging time of the charger
①First, connect the AC (alternating current) plug of the charger to a domestic outlet.
②Next, connect the socket from the battery to
the plug on the charger.
The charging will automatically start upon
connection after the power is turned on
at the domestic outlet.
12
AC100~240V
DC29.4V

Usage of batteries except Lithium ion battery (av-2 series)
(all apollo DPV)
13
U S E : -20℃~60℃(-4 ~140
°F)
STORAGE : -10℃~45℃(14 ~113
°F)
CHARGE : 0℃~45℃(32 - 113
°F)
Temperature range for battery
Li-ion
Lead-Acid/Ni-MH
Battery select switch
In case of using with exclusive battery for av-2 sold in the past
except lithium-ion battery, please set a battery changeover switch
to Lead-Acid/Ni-MH as illustrated.
●
Even if it is equipped with Lead-Acid battery or Ni-MH battery
in full charge and turn on a main switch, battery indicator does not
always display FULL(Green LED won't turn on)
●
About battery warranty and care (all DPV)
Warranty covers if its capacity becomes less than 50% within 3 month from the date of
purchase according to proper usage.
HOW TO CARE BATTERY
●Battery is not charged when delivery so that charge it when in use.
●If the battery is not in use for a long period, it may affect a lost of capacity by
self-discharging.
●If storage temperature is over 25℃(77°F), charge once for every 2 month.
Even if not exceed over 25℃(77°F), charge once for every 3 month.
●Directly contact us when fuse is cut off.
●Never throw the battery into water, keep it under
dry, shady and cool circumstance when not use.
●Never keep the battery beside high temperature
source examples: fire, heating machine and ect.
●Never upside down the positive and negative.
●Never cut the battery in socket directly
●Never throw the battery into fire or heating machine.
●Never connect the positive and negative of battery with metal.
●Never knock, throw or trample the battery.
●Never cut through the battery with nail or other edge tool.
●Never use or keep the battery under the high temperature. Otherwise it will cause
battery heat, get into fire or lose some function and reduce the life.
●Never use the battery under strong static and strong magnetic field, otherwise it will
destroy the protecting device.
●If battery leaked, the electrolyte get into eyes, please don¡¦t knead, please wash
eyes by water and send to hospital. Otherwise it will hurt eyes.
●If battery emit peculiar smell, heating, distortion or appear any unconventionality
during using, storage or charging process, please take it out from device or charge
and stop using.
●If the pole of the battery plug was duty, please clear it before using.
Warning
●Do not over discharge until a propeller won't turn or slowly turn around.
LEAD-
ACID
Ni-MH
&
Warning
●The protective circuit is equipped in the lithium-ion battery inside.
When this circuit stops to discharge, be careful as you can not reset by turning main switch on again.
Only it can be reset by re-charging the battery.
Li-ion battery for av-2

14
Use Super Knob and M6 screw of the scooter
saddle.
1. Put the Stay of the Propeller Cover; place the Handle ASSY to the Propeller Cover.
Place the Handle ASSY well to put it in top
and bottom like above illustration.
2. Fix the Saddle ASSY and the Handle ASSY by the Super Knob.
Fit the Joint lever of the Handle ASSY into the Switch Cam to
operate the switch lever.
3. Confirm operation of the switch lever after completion.
(All apollo DPV)
■STEP1 Preparation for placement
Placement for the single hand unit
■STEP2 Placement to the body
Picture for avx
Fitting mark
Please insert into the propeller cover diagonally.
4. Adjust the position of upper handle depend on the thickness
of arm and usage.
Attached the rubber
band as shown in the
figure when using
the throttle auto
return function.
Upper handle
Knob for upper
handle adjusting
Rubber band
(Optional)

WARNING
●Please only use a fully charged battery otherwise damage will be caused.
Also check again that the correct charger was used with the correct battery.
WARNING
●After setting the housing, confirm that there is a uniform space of
about 0.5mm between the battery housing (head Assy) and the motor
housing (body Assy).
If the space is less than 0.5mm or if the two parts are joined, there is the
possibility of the O-ring coming out of the O-ring groove.
Confirm that this not the case before proceeding.
●Pull up the lever by finger and check wheter all buckles are locked securely.
(In case of avx, locking buckles are double buckle of both side)
Connect the socket to right way.
Check no gap after setting
Do not set wrong side!
Battery Selection Switch
●Please confirm that there is no debris adhering to the O-ring, O-ring groove or O-ring connecting surface.
Also confirm that there are no scratches and that an appropriate amount of silicone grease has been used.
①Check the switch of "Battery Selection Switch"
to same position as the battery type.
②Place the battery housing (head Assy) carefully in
position taking note that the ribs on the underneath
of the scooter match up.
■STEP1 Set the battery.
■STEP2 Set the battery housing (head Assy).
■STEP3 Checking the housing seal.
■STEP4 Checking the locking buckle.
①Please set the fully charged battery in the body housing in the correct position.
③At this time, confirm that the warning lamp isn't on.
Please do not use the scooter if the warning lamp is on as this may indicate a water
leak has occurred.
②Next, the battery socket is connected with the body plug.
(Please always remove the connector when not in use or during travel to your destination.)
Checking before use. (setting)
Water Leak Alert Lamp
(All apollo DPV)
15
(Except avx)
●avx has no sticker of "Battery Selection Switch",
please check the switch to ①Lithium ion side.
②
①
①Lithium ion
②Lead-Acid/Ni-MH
LEAD-
ACID
Ni-MH
●When the locking button (square shaped button) is deformed to inside,
pull the button by finger to correct position carefully and check the locking action.
Locking button

①Check your surroundings.
Always confirm that nothing can obstruct or become entangled in the propeller.
②Place the scooter vertically on a level surface.
③Turn on the main switch. It is located on the right hand grip.
①Push up the accelerator lever.
②Slowly push up and down on the accelerator lever.
③Confirm rotational speed changes are occurring
with vertical motion.
④Also, confirm the sound of propeller for check.
⑤Check the battery indicator for battery condition with turning on the motor.
⑥Take all pressure off the accelerator lever.
⑦Confirm the rotation of the propeller has stopped completely.
●Confirm that all lights are illuminated. (i.e. Green, yellow, and red)
●It is necessary to synchronize the battery indicator for each type of battery (Lithium ion or LEAD-ACID /
Ni-MH) to ensure an accurate display of the remaining battery life. (Refer to STEP 2 on page 15)
●The display accuracy may be affected by an exhausted battery and ambient temperature.
Please refer to the battery indicator as a rough guide only.
Lights the Battery indicator
Push the accelerator
lever up and down.
All colors are tuned on after full charged, then changed
color with consumption.
About battery indicator
■STEP1 Turning on the main switch.
■STEP2 Checking the battery indicator light.
■STEP3 Operate the motor.
Check before use. (confirming operations)
Check the indicator
Check the noise
●Red : empty
●Yellow
●Blue : full
16
●If avx has any water leak trouble, even voltage is normal, only the red lamp lights, the motor does not rotate.
●In case of using Lead-Acid / Ni-MH battery, green LED does not
always turn on even if at full charge.
●Indicator operates following by battery voltage at propeller pitch 2 with full throttle.
Please note that it can not be measured accurately because the battery voltage is recovered
gradually when the motor Is stopped.

WARNING
●If switch is left on the standby current will continue to flow.
It is possible that damage will occur from over discharge of the battery.
WARNING
●Do not miss the check before diving in order to prevent from serious injury.
●Move the main switch to off position.
●Confirm that all battery indicator lights are off.
Main switch OFF
●Lay the scooter down on a level surface.
●Pull and turn the pitch control dial knob to make adjustments
to the propeller angle.
●Push the dial back after speed selection.
●All apollo DPV: Confirm that pitch operation moves smoothly through the three stages.
●All apollo DPV: Recommended position is Pitch 2 or 3 because of law consumed power.
Acceleration purpose
(need more power for pulling a heavier person or weight - reduces battery life)
Standard purpose
(most efficient setting)
Low speed purpose
■STEP4 Turn off the main switch.
■STEP5 Using the variable pitch propeller.
Pitch selection
Lay the scooter down on a level surface
Pull the pitch dial Choose the speed level
with pulling dial
(All apollo DPV)
17

CAUTION
●Never jump into the water with scooter from a boat or any other elevated location.
Never throw the scooter, as it is potentially very dangerous. Please refer to the boat entry method for further
instruction.
CAUTION
●Please turn off the main switch so that the propeller cannot operate by mistake when passing it to a diver.
●Do not enter from a boat or other elevated position while holding the scooter.
Don't jump from a high place with the scooter
Do not enter the water while holding the scooter Please turn off the main switch
Moving along the surface !Waist deep ・・・ or underwater !
Don't throw the scooter
■STEP1 Entry from shore.
■STEP2 Entry from boat and other elevated areas.
■STEP2 Boat
■STEP1 Beach
The scooter is very light when in the water - just slightly negative. While hands free riding it's very easy to use the
scooter in shallow water even up to waist deep. You don't need to stay on the bottom in shallow water.
You can enjoy cruising along the surface quite comfortably until you find a deeper area you would like to dive to.
●Please secure the scooter by a lanyard or rope in the water or hand it to the diver after he or she has entered the
water.
●When passing the scooter to a diver already in the water please lower the scooter in so the diver can easily grasp
a handle or grip.
Its recommended to drive the scooter up to waist deep water and leave it close to or on the edge the shore.
The scooter is heavy when out of water. It is strongly recommended that you remove your diving equipment on
the shore prior to lifting the scooter.
Securely attach the scooter with a rope or lanyard to the boat.
Lift the scooter from the water after the diver has exited.
Entry method
Exit
18
(All apollo DPV)

CAUTION
●If the motor has stopped please carefully check for debris that may be obstructing or entangled in the propeller
area. Please ensure the debris is completely cleared away prior to resetting and reactivating the motor otherwise
damage may occur.
apollo underwater scooter has a built-in safety device that protects the motor if overloading occurs.
For example if rope gets wound around the propeller shaft the scooter will automatically stop.
The scooter safety sensor protects the diver's safety from rotation rebound if the propeller becomes entangled or
otherwise obstructed.
The scooter is equipped with a safety sensor to protect the motor from burn out and deterioration caused by
overloading.
If the safety device is activated, turn off the main switch once and it will be reset.
After resetting, the motor should works as usual.
apollo underwater scooter speed is controlled by the rotational speed of the propeller with the accelerator unit
and by adjustment of the propellers pitch. The rotational speed of the propeller rises when the accelerator lever is
pulled up. The rotational speed decreases when the accelerator is pushed down.
■STEP1 Accelerator operation
How to operate.
Pull out accelerator Push down accelerator
Overload protection safety sensor
(All apollo DPV)
19
This manual suits for next models
1
Table of contents
Other Apollo Diving Vehicle manuals