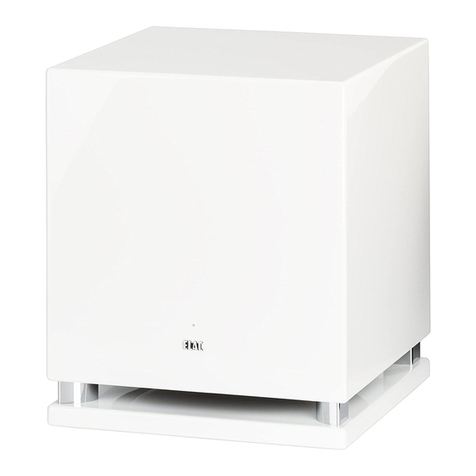
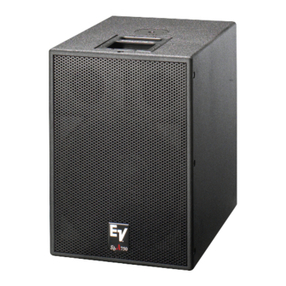
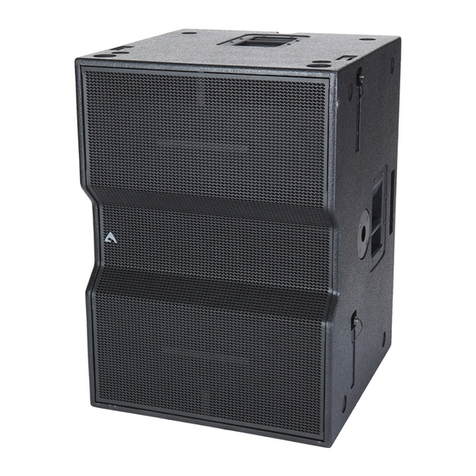
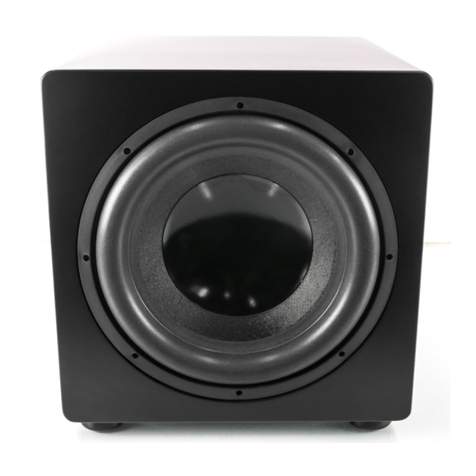
audium Sub 12 Active User manual

Sub 12 Active / Air
User Manual

-2-

-3-
Thank you very much for your trust in AUDIUM products.
This AUDIUM Sub 12 is the link to fundamental sound bass reproduction. In the Active version,
it can be seamlessly connected to stereo and surround sources. In the Air version, it allows a
step in the direction of cutting-edge music playback by allowing connection to other music
sources via LAN / WLAN, as well as a configuration via computer / smartphone / tablet.
Please read this manual before installing your subwoofer.
It provides all the information and tips you need to set up and get the best music from your
AUDIUM subwoofer.
Many Thanks,
Your AUDIUM team!
You’ll find enclosed:
1x AUDIUM subwoofer
1x power cable
1x user manual
1x warranty card
4x spikes (M8 thread)
1x WiFi-Antenna (Air-Version only)

-4-
Warranty
By registering your product, you extend the warranty to 5 years for speakers and 3 years for
electronics. This is independent of your dealer / distributor. Please visit
www.audium.com/registration or fill out the enclosed warranty card within 2 weeks after
purchase of this device.
Warning - Safety instructions
1. Read this manual and follow the instructions provided.
Keep this manual for future reference.
2. Do not operate this device in damp locations or near water.
3. This device is intended for indoor use only.
Do not operate it outdoors.
4. Do not operate the device near heat sources such as radiant heaters, chimneys,
amplifiers, ... or other devices that produce heat.
5. Disconnect the device from the power supply when not using it for a long time and
during thunderstorms.
Do not try to repossess the device yourself in case of damage or malfunction. Always contact
your dealer or authorized service personnel.
WARNING - RISK OF ELECTRIC SHOCK!
To avoid the risk of electric shock, do not open the device.
Do not expose the device to rain or moisture. There are no parts inside which require service or
care.
Burn In Time:
Loudspeakers are equipped with moving parts. Therefore, you need a so-called Einspielzeit until
the moving parts can move within their tolerances.
Play back broad-spectrum signals for at least 2 days. It is best to use special burn-in CDs (with
"pink noise") or your FM radio after placing it on an unoccupied frequency.
Please note that after a prolonged period of inactivity, the moving parts can return to their
original "Rigid". Then give your subwoofer a few hours' warm up time by playing music, and
you'll surely notice the increase in fidelity!

-5-
Care oft he Subwoofer
Please use for cleaning a soft cloth. Do not use aggressive cleaning agents as well as veneer
cleaning solutions.Verwenden Sie zur Reinigung ein weiches, leicht angefeuchtetes Tuch.
Terminology
Instructions fort the Air Version oft he Subwoofer are printed
in blue Colour (Arrows / Headings).
Unpacking the Subwoofer
Do not use any sharp tools to open the subwoofer packaging. You coud damage the contents
or the surface oft he subwoofer.
Screw the spikes completely into the nuts on the lower side oft he subwoofer.
Place the sub on a flat, horizontal surface and adjust the spikes that it has a stable position.
At last, counter the spikes with the nuts.
Note: To prevent scratches on wooden floors we recommend to use special discs under the
spikes. Your HiFi Dealer has some for sure in his portfolio.
As a workaround you can use and metal disks.
Note: Please store the packagin oft he Subwoofer in a dry plae. Only with the packaging is is
possivble to transport the subwoofer in a save way and prevent it from damage.

-6-
Controls and Connectors:
1. Display: OLED graphic display
shows the current device status
2. Knob / push button.
3. Power LED: lights red when
subwoofer active, dimmed red in
standby.
4. Input LEDs: indicate active input
5. Analog Input 1 (Coax LFE / Stereo):
Connect these inputs to the PreOut
of your pre-amp or the Sub / LFE
outputs of your surround pre-amp.
6. Analog input 2 (XLR balanced): If
your pre-amp has a balanced LFE
output and a longer cable is
required because your sub is further
away from the system, this input is
recommended.
7. Analog Input 4 (Speaker Stereo): if
your amplifier has no PreOut or
Sub/LFE Out, use this input
8. Power socket: Plug in the power
cable here.
Make sure that the voltage
indicated next to the socket agrees
with your mains voltage..
Connectors, only available with Air
variant:
9. SMA socket for WLAN antenna
10.RJ45 Network socket
11.Digital Input (Coax SPDIF)
12.Digital Output (Coax SPDIF)
13.USB-B Socket
2
3
9
10
12
5
7
6
11
8
4
1
3
1

-7-
Display:
The display shows the current status, settings and the setup menu.
Use
the
rotary knob
to make settings on the subwoofer: Turn clockwise or anticlockwise to
navigate through the menu / change values. You can also use this feature to lock or mute the
subwoofer (see "
Muting and locking the subwoofer
" section). shows the speaker model and the
current speaker status:
Mute and lock the subwoofer:
Mute the subwoofer:
If you press the rotary knob while the status is displayed, the subwoofer will be muted. So you
can simply stop the playback to hear the difference in music playback with or without subwoofer.
Press again to cancel the muting.
This also happens automatically after 10 seconds (this value can be changed in the settings
menu).
Lock the subwoofer:
To prevent unwanted changes to the parameters, you can lock the subwoofer. Press and hold
the knob while the speaker is displaying the statute. The knob is then locked (preventing you
from adjusting the subwoofer by your children!). To unlock, press and hold the knob again.
If the power supply is interrupted, the lock is released again.
Muted
Unmuted
Locked
Unlocked
WiFi Mode
Model
Playback Status:
Subwoofer Type
Active or Air
Playback active
Bits and sampling rate with
SPDIF:16/24 bit, 44k-192k
No Music Signal
No playback
WiFi (AP-Modus)
WiFi (WLAN Modus)

-8-
Automatic switching on and off.
The subwoofers have built-in music signal detection. If no music is played back,
the subwoofer switches to standby after 15 minutes (this value can be changed in
the settings menu). If music signal is detected, the subwoofer automatically switches on again.
If you disconnect the subwoofer from the mains you have nothing to consider. Restarting /
plugging brings your subwoofer back to its last state. All parameters (except the subwoofer lock -
see above) are stored in a long-term memory that does not lose its contents.
The settings menu
Navigation through the menu is extremely straightforward: turn the knob while the status is
displayed, then open the settings menu.
Navigate by turning the knob in the menu. When you have found the setting you want to
change, press the knob and change the value. Press again to save the value.
Also open submenus by pressing the knob and exit by:
The menu is automatically exited after a certain time (timeout)
Symbol
Menü
Beschreibung
Kommentar
Input
Selects the active input for
audio signals
Cinch, XLR, LS, LAN/WLAN, SPDIF
Profile
If you operate your Sub 12
with AUDIUM loudspeakers,
you can call up predefined
profiles (frequency, slope, high
pass) here.
Attention - their current settings will
be replaced by these values.
Volume
Bass playback volume
0...100
Cut-off
Frequency
The upper limit frequency of
the subwoofer
30...180 Hz
Slope
The steepness of the filter
above the cutoff frequency
6, 12, 18 oder 24 dB/Oct.
HighPass
This 12dB filter can be used to
reduce the lowest frequencies
20...50 Hz.
Phase
Changes the phase position.
Serves to adapt to the main
speakers
0...180 Grad
Polarity
Inverts the audio signal
Normal / Invers
EQ
A customizable EQ filter to
reduce the drone slope of a
given (room-dependent)
frequency.
EIN/AUS
Frequency
Q 1...10
Gain +3...-20dB

-9-
Memory
Memory for your personal
settings
3 memories
Setup
More Settings
Auto Off, Display, Info, ...
Air Setup
More Settings for the Air
Model
WLAN zurücksetzen, AP/WiFi
Modus, ...
Exit
Exit Menu
Setup Menü
Symbol
Menü
Beschreibung
Kommentar
Auto Off
Time after which the subwoofer
goes into standby without an
audio signal.
Standardwert 15 Minuten.
Stummschalt
Dauer
Duration after which the mute is
canceled.
Default value 10sec
Display
Helligkeit
Changes the brightness of the
display
Standard ist 5 (Maximum)
Display
Abdunklungs
Zeit
Time after which the dipslay is
automatically switched to dark.
Standard: Display wird nie
abgedunkelt (die liegende 8 steht
für unendlich)
Sprache
Language of the display
messages
Info
Information about this device
Exit
Exit Menu

-10 -
Air Setup Menu
Symbol
Menu
Beschreibung
Kommentar
Channel
Selects the audio channel to be
played
Left / Right / Mono.
WiFi Mode
Switches between AP and WiFi
mode
Reset
Reset the WiFi receiver
Speaker Settings (bass, position, ...)
remain unchanged
Exit
Exit the Menu
Profile
The AUDIUM Sub 12 has predefined profiles which simplify a combination with
other AUDIUM loudspeakers. To do this, select the menu item "Profiles". In the
following submenu you will find an entry for Comp3, 5, 7, 8 and 9. If you select
the entry (by pressing the rotary knob) you will be given the option to select the item "Load" or
"Back".
" Load" then loads the selected profile. This means that the current values of frequency, slope,
high-pass, phase and polarity are overwritten with the values of the profile. The menu entry then
changes to "Active" (until you change one of the parameters).
" Back" lets you return to the profile selection.
If you want to save your current settings before loading a predefined profile, save them in one of
the 3 user memories
User Memories
The AUDIUM Sub 12 has 3 user memories in which all set parameters can be
stored. This means that in addition to frequency, slope, high-pass, phase and
polarity, the selected input, volume and all other parameters such as display brightness, mute
duration, ...
Select the menu item "Memory". In the following submenu you will find an entry for User1, User2
and User3. If you select the entry (by pressing the rotary knob) you will be given the option to
select the item "Load", "Save" or "Back".
"Load" then loads all settings from the user memory.
"Memory" stores all settings in the user memory.
"Back" lets you return to the profile selection.
If a user memory has been loaded or saved, the menu item changes to "Active" (until you
change one of the parameters).

-11 -
Placement Tips
Keep in mind that a wall-mounted setup enhances bass response, a lineup in one corner
maximizes you! Try not to place the sub near the corner, if possible.
The same applies to your listening position: sit close you will notice an amplification of the bass
response.
Connection Tips:
Je nach vorhandener Audio-Ausstattung stehen unterschiedliche Anschlussmöglichkeiten zur
Verfügung. Versuchen Sie nach Möglichkeit Kabelwege kurz zu halten und Masseschleifen zu
vermeiden.
Option 1: AV / Surround / Preamp with Sub / LFE Out as RCA:
This is a standard scenario for home theater applications.

-12 -
Option 2: AV / Surround / Preamp with Sub / LFE Out as XLR:
This scenario is recommended in the presence of a balanced sub-output and greater distance
between preamp and subwoofer
Option 3:
Integrated amplifier without pre-out:
Connect the speaker outputs of the integrated amplifier to the speaker inputs of the subwoofer.
These are no additional burden on the amplifier.

-13 -
Option 4: Pre / final stage combination with only one pre-out:
In this setup, use 2 Y splitters between preamplifier and power amp to divert the signal for the
sub Or connect the sub to the power amp as in option 3.

-14 -
Appendix 1: Glossar
Access Point
" Base Station" for wireless transmission. Gives access to your wireless
LAN. Abbreviated as AP. Often included in a router.
AP Mode
" Access Point Mode" - your Air Master Speaker builds a WLAN on its
own. No access pointer / router necessary..
AirPlay
Wireless Audio Transmission, developed by Apple IncWireless Audio
Transmission, developed by Apple Inc..
AUDIUM App
The APP to configure your Air for your home Wi-Fi
Detection circuit
Electronics that detects audio signal
Digital Amplifier
Electronics to amplify music digitally with high efficiency. Low heat
production, low space.
DLNA
Digital Living Network Alliance (similar to UPnP) - a standard to stream
music over a LAN
DSP
Digital Signal Processor - a computer processor optimized for calculations
on digital audio signals
Input Priority
Priority of audio input at the Air Master speaker
LAN
Local area network - cable based local network infrastructure
Master Speaker
The Speaker with the WiFi / WiFi Receiver and coax. SPDIF and Toslink
input connector.
Priority Scheme
Assignment of priorities to the inputs
PSU
Power Supply Unit
Router
Device that connects your LAN to the Internet. Often has a Access-Point
built inside.
Slave Speaker
The Speaker which has only a single digital in- and output
SPDIF
Sony/Philips Digital Interface: a customer standard for transmission of
digital audio signals over a cable
TosLink
Toshiba Link (or optical SPDIF): a customer standard for transmission of
digital audio signals via fiber-optics, designed by Toshiba.
UPnP
Universal Plug and Play (similar to DLNA) –a standard to stream music
over a LAN
WiFI / WLAN
Wireless LAN –wireless network infrastructure
WiFi Mode
Your Air Master speaker is connected to an existing WLAN.

-15 -
Appendix 2: Questions and Answers
Q: The subwoofer has 2 RCA inputs (LFE and R), but my surround pre-amp only has a
subwoofer output. Is it OK to leave an entrance open?
A: Yes, that is not a problem. You can, however, double the pre-amp signal with a Y-splitter and
feed it into both RCA inputs of the subwoofer. The bass reproduction then doubles as a result
Q: My surround pre-amp has both a cinch and XLR output. Which one should I use?
A: If the cable length between the preamplifier and subwoofer is more than 5m, or if you hear
interference from the subwoofer with cinch cable connection, you should use a balanced XLR
cable.

-16 -
Appendix 3: Technical Data
Property
Sub 12 Active
Sub 12 Air
Woofer Ø
300mm (12”)
300mm (12”)
Power Supply
250W
250W
Max Power Woofer
230W
230W
Control
Display+Drehknopf
App auf Tablet, Display+Drehknopf
Inputs analog
2x Cinch, XLR, Lautsprecher
2x Cinch, XLR, Lautsprecher
Inputs digital
Cinch SPDIF
Outputs digital
Cinch SPDIF
Input Network
RJ45, WiFi
Supply Voltage
230V
230V
Dimensions
58 x 50 x 62 cm
58 x 50 x 62 cm
Weight
25kg
25kg
Appendix 4: Disclaimer
iPhone, iPad, iPod, Macbook, MacBook Pro, AirPlay are trademarks of Apple Inc.
DLNA are trademarks of Digital Living Network Alliance .
This manual can be subject to change without notice.
You can download the newest version from www.audium.com/downloads .
Version 1.0.0-EN –20.8.2018
This manual suits for next models
1
Table of contents

