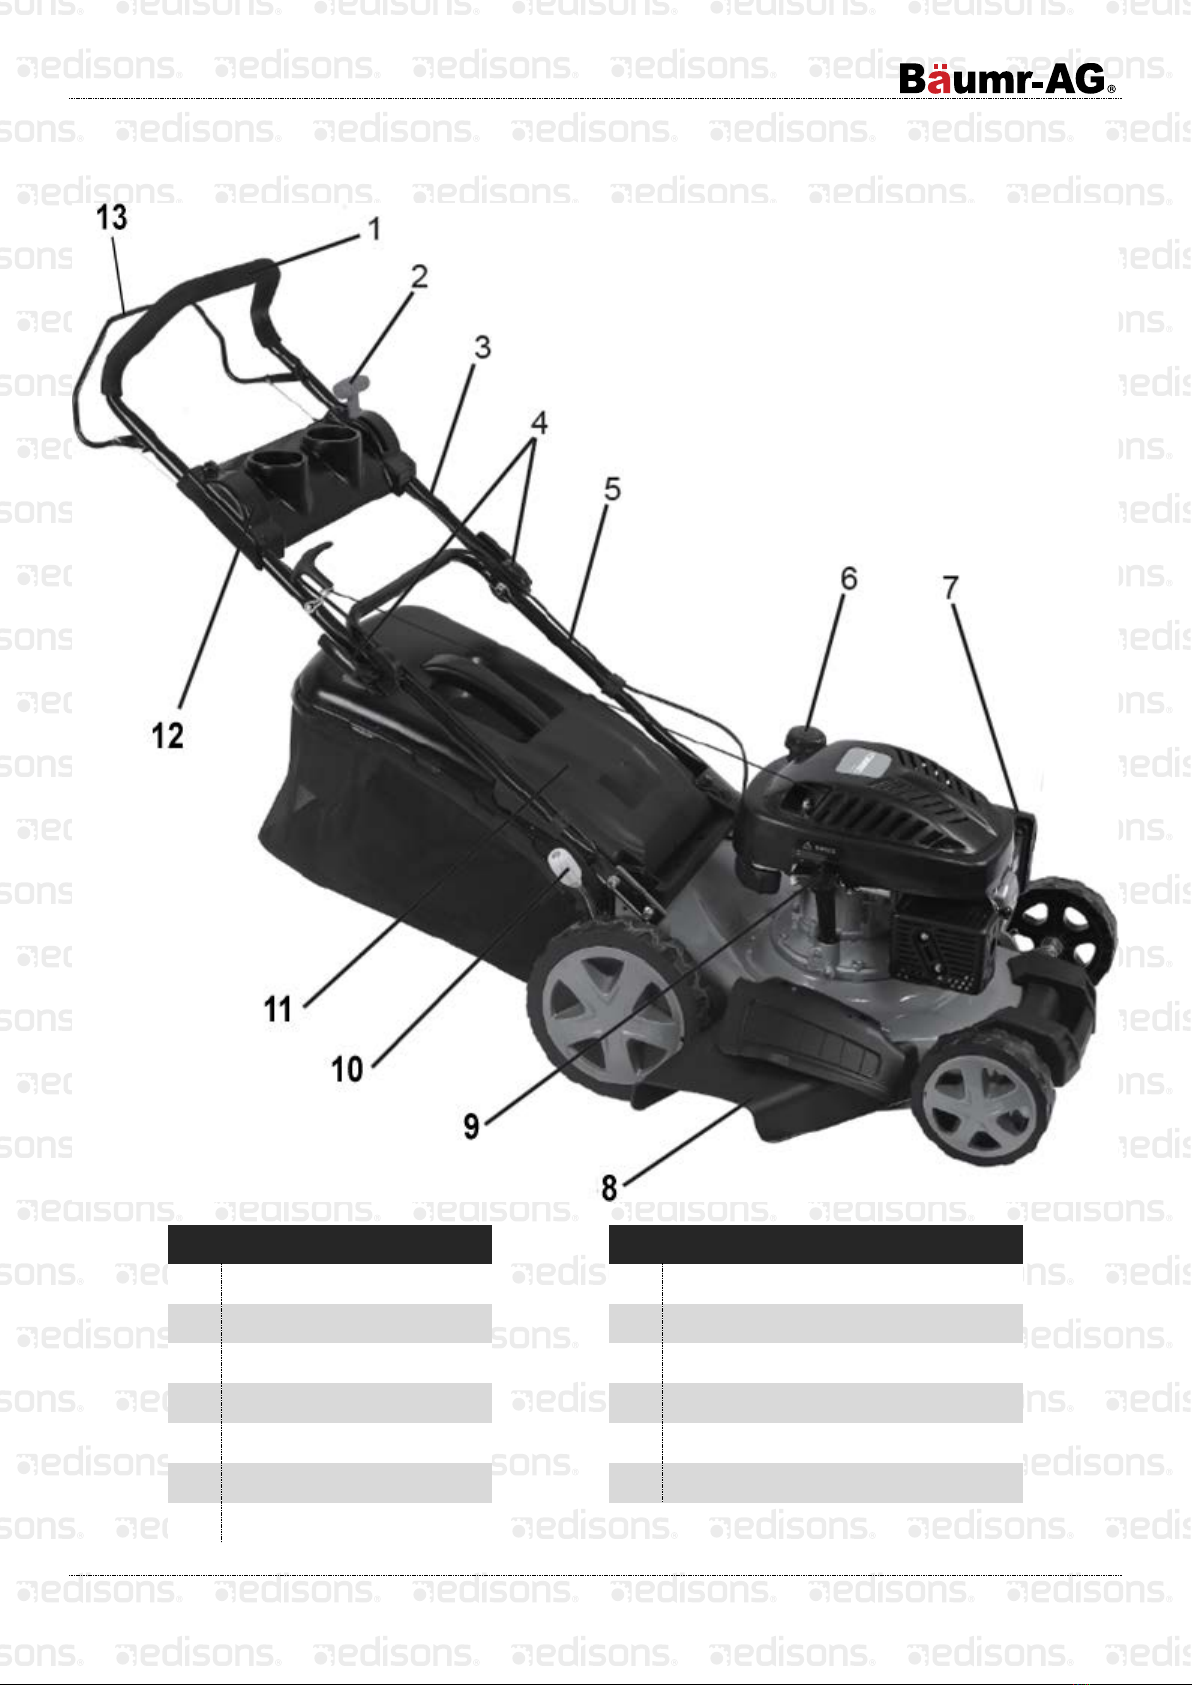
Self-Propelled Lawnmower
1
Safety
General safety Instructions
Carefully unpack the product and take care not to throw away any part of the packaging before you find all
the parts of the product.
Store the machine in a dry place out of reach of children. Never allow children or persons who are not
acquainted with the contents of this user’s manual to work with the machine.
Read all warnings and instructions. Not following warnings or instructions may lead to injury by electrical
shock, a fi re and/or serious injuries.
The product is packed in a package that prevents damage during transport. This package is a resource and
so can be handed over for recycling.
Before you start working with the machine, read the following safety and usage instructions.
Acquaint yourself with the operating elements and the correct use of the machine. Keep the user’s manual in
a safe place where it can be easily retrieved for future use. Save the original packaging, including the
internal packing material, warranty card and proof of purchase receipt at least for the duration of the
warranty. If you need to ship this machine, pack it in the original cardboard box to ensure maximum
protection during shipping or transport (e.g. when moving or when you need to send this product for repair).
NOTE: If you hand over the machine to somebody else, do so together with the user's manual. Following the
instructions in the included user's manual is a prerequisite for the proper use of the machine. The user's
manual also contains operating, maintenance and repair instructions.
The manufacturer takes no responsibility for accidents or damages resulting from not following the
instructions in this manual.
This product is used exclusively for mowing grass. Do not use it for any other purposes than those intended.
Otherwise there is a risk of damaging it or an injury.
The person operating the lawnmower is responsible for the safety of persons in the work area.
Never operate the lawnmower in the near vicinity of other people, children or freely roaming animals.
Before starting mowing, check the terrain where the lawnmower will be used and remove stones, wires,
sticks, splinters, bones and other foreign objects, which could become caught in it or deflected or cause
injuries.
Instructions for Use
All nuts, pins and bolts must be properly tightened so that the machine is in a safe and operational condition.
Never use the lawnmower without the grass catcher or protective cover.
Never use the lawnmower with loose mowing blades. Always check in advance that all respective bolts are
securely tightened. Blunt blades must be sharpened evenly.
Damaged blades must be replaced.
When working with the lawnmower, wear long pants and solid footwear.
Never start the lawnmower in enclosed or poorly ventilated areas where fumes could accumulate. Emissions
from the engine contain carbon monoxide, which is life threatening.
Work only during sufficient light conditions (in daylight or sufficient artificial lighting).
Do not use the lawnmower when it is raining or if the grass is wet.
Proceed especially carefully when mowing in elevated terrain (on a slope). Always mow perpendicular to the
slope, parallel to the contour, and not directly up/down.