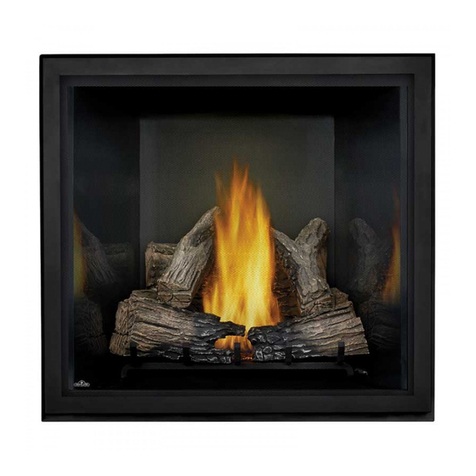
Bellfires Corner Bell Large 3 CF User manual

Corner Bell Large 3 CF
Direct Vent Gas Fireplace
Operating manual
- Do not store or use gasoline or other flammable vapors and liquids in
the vicinity of this or any other appliance.
- WHAT TO DO IF YOU SMELL GAS:
• Do not try to light any appliance.
• Do not touch any electrical switch; do not use any phone in your
building.
• Immediately call your gas supplier from a neighbor’s phone.
Follow the gas supplier’s instructions.
• If you cannot reach your gas supplier, call the fire department.
- Installation and service must be performed by a qualified installer,
service agency or the gas supplier.
WARNING: If the information in these instructions are not
followed exactly, a fire or explosion may result causing property damage,
personal injury or loss of life.
This appliance may be installed in an aftermarket, permanently located,
manufactured home (USA only) or mobile home, where not prohibited by
local codes. This appliance is only for use with the types of gas indicated
on the rating plate. A conversion kit is supplied with the appliance.
WARNINGS
INSTALLER:
Leave this manual with
the appliance.
CONSUMER:
Retain this manual for
future reference.
A barrier designed to reduce the risk of burns from the
hot viewing glass is provided with this appliance and
shall be installed for the protection of children and other
at-risk individuals.
HOT GLASS WILL
CAUSE BURNS.
DO NOT TOUCH GLASS
UNTIL COOLED.
NEVER ALLOW CHILDREN
TO TOUCH GLASS.
WARNING


3
Bellfires Instructions for use
Page
IMPORTANT SAFETY INSTRUCTIONS ................................
...
.......
......
.......... 5
CODE APPROVAL ..............................................................
..........
..
...
...... 7
OPERATING INSTRUCTIONS ..................................
...............
..
........
.
.
...
..
....
..
. 8
INTRODUCTION ....................................................................
...........
....
..
. 8
SAFETY ....
........................................................
.............................
.....
.
..
... 8
FLAME EFFECT .
............................................
...............
.....
......
....
..
.....
...
.
. 12
REMOTE CONTROL .
......................................
..........
.......
...............
.....
...
. 13
USING THE APPLIANCE FOR THE FIRST TIME .
......................
..
..
....
..
......
....
. 27
CLEANING AND MAINTENANCE .................................................................... 28
DAILY MAINTENANCE .....................................................
.......
.....
.....
.
....
. 28
ANNUAL MAINTENANCE ........................................................
.......
.....
...
. 29
WARRANTY TERMS ........................................................................................ 32
CONTENTS

4
Bellfires Instructions for use

5
Bellfires Instructions for use
IMPORTANT SAFETY INSTRUCTIONS
WARNING: Improper installation, adjustment, alteration,
services or maintenance can cause serious injury or property damage.
Refer to this manual.
SAVE THESE INSTRUCTIONS
Make yourself fully aware of all the following instructions and the many
features of the Bellfires direct vent gas fireplace appliance.
INSTALLER: Leave this manual with the appliance.
CONSUMER: Retain this manual for future reference.
1. This appliance reaches high temperatures. Keep children and adults away from
hot surfaces to avoid burns or clothing ignition. The appliance will remain hot for
a time after shutdown. Allow surfaces to cool before touching.
2. A barrier designed to reduce the risk of burns from the hot viewing glass is
provided with this appliance and shall be installed for the protection of
children and other at-risk individuals.
3. If the barrier becomes damaged, the barrier shall be replaced with the
manufacturer’s barrier for this appliance.
4. Any safety screen, guard or barrier removed for servicing the appliance, must
be replaced prior to operating the appliance.
5. Children and adults should be alerted to the hazards of high surface
temperature and should stay away to avoid burns or clothing ignition.
6. Young children MUST be carefully supervised when they are in the same room
as the appliance. Toddlers, young children and others may be susceptible to
accidental contact burns. The remote control handset should be kept out of
reach of children. A physical barrier is recommended if there are at risk
individuals in the house. To restrict access to a fireplace or stove, install an
adjustable safety gate to keep toddlers, young children and other at risk
individuals out of the room and away from hot surfaces.
A barrier designed to reduce the risk of burns from the
hot viewing glass is provided with this appliance and
shall be installed for the protection of children and other
at-risk individuals.
HOT GLASS WILL
CAUSE BURNS.
DO NOT TOUCH GLASS
UNTIL COOLED.
NEVER ALLOW CHILDREN
TO TOUCH GLASS.
WARNING

6
Bellfires Instructions for use
IMPORTANT SAFETY INSTRUCTIONS
7. Keep the area around your appliance clear of combustible materials, gasoline
and other flammable vapor and liquids.
8. Do not place embers, vermiculite granules, wood logs or pebbles against the pilot
light burner. Make sure that the pilot flame can burn at all times freely over the
main burner. Only in this way is proper ignition of the main burner ensured.
Ignoring these directions could lead to a dangerous situation
9. Never place anything on top of the appliance.
10. Do not use this appliance to cook food or burn paper or other objects.
11. Do not use any solid or liquid fuels in this appliance. Use only the gas type
indicated on the rating plate.
12. This appliance is only for use with the type of gas indicated on the rating plate.
This appliance is convertible for use with other gases. A conversion kit is supplied
with this appliance.
13. Installation and service must be performed by a qualified installer, service agency
or gas supplier.
14. DO NOT operate the appliance with glass removed, cracked or broken.
15. DO NOT use abrasive cleaners on the panels. DO NOT attempt to clean the
glass when it is hot.
16. DO NOT strike or slam the glass panel.
17. DO NOT modify the appliance under any circumstances. Any parts removed for
servicing must be replaced prior to operating the appliance.
18. Turn the appliance off and let cool before servicing, installing or repairing. ONLY
a qualified service person should install, service or repair the appliance. Have
burner system inspected annually by a qualified service person.
19. Keep control compartments, burners and circulating air passages clean. More
frequent cleaning may be needed due to excessive lint and dust. Turn off the gas
valve and appliance (OFF on remote control) before cleaning the appliance.
20. The venting system MUST checked annually by a qualified service person.
If needed, have the venting system cleaned or repaired.
21. When the appliance is installed directly on carpeting, tile or other combustible
material non-combustible, it must be set on a metal panel or hearth pad
extending at least the full width and depth of the appliance.
22. DO NOT obstruct the flow of combustion and ventilation air in any way. Provide
adequate clearances around air openings into the combustion chamber along
with adequate accessibility clearance for servicing and proper operation.

7
Bellfires Instructions for use
23. DO NOT use the appliance if any part has been exposed to or has been under
water. Immediately call a qualified service technician to inspect the appliance and
replace any part of the control system and any gas control which has been
submerged in water.
24. DO NOT operate the appliance if any log is broken.
25. The installation must conform with local codes or, in the absence of local codes,
with the National Fuel Gas Code, ANSI Z223.1/NFPA 54, or the Natural Gas and
Propane Installation Code, CSA B149.1.
26. This appliance, when installed, must be electrically grounded in accordance with
local codes or in the absence of local codes, with the National Electrical Code,
ANSI/NFPA 70, or the Canadian Electrical Code, CSA C22.1.
27. The appliance is equipped with a safety system, whereby hatches will extract
any over-pressure that arises in a controlled way. In this, the hatches (located in
the ceiling of the combustion chamber) will briefly open. This may cause a loud
noise. If this happens, immediately close the gas tap and call a qualified service
technician.
To avoid any possible personal harm when the hatches open due to an
over-pressure, always maintain a minimum distance of 40 in (100 cm) to the
appliance, when igniting and when burning.
WARNING: Never connect unit to private (non-utility) gas wells.
This gas is commonly known as well-headed gas.
CODE APPROVAL
Direct Vent type appliances draw all combustion air from outside of the dwelling through
the vent pipe.
These appliances have been tested by CSA and found to comply with the established
standards for VENTED GAS FIREPLACES in the USA and Canada as follows:
LISTED VENTED GAS FIREPLACES
Corner Bell Large 3 CF tested to:
- ANSI Z21. 88 - 2009 / CSA 2.33 - 2009 Vented Gas Fireplace Heaters
- ANSI Z21.88a - 2012 / CSA 2.33a - 2012 - Addenda 1 to ANSI Z21.88 - 2009 /
CSA 2.33 - 2009
- CSA P4.1 - 09 Testing method for measuring annual fireplace efficiency (Canada).
A manufactured home (USA only) or mobile home OEM installation must conform with
the Manufactured Home Construction and Safety Standard, Title 24 CFR, Part
3280, or when such a standard is not applicable, the Standard for Manufactured
Home installations, ANSI/NCSBCS A225.1, or Standard for Gas Equipped
Recreational Vehicles and Mobile Housing, CSA Z240.4.
IMPORTANT SAFETY INSTRUCTIONS

8
Bellfires Instructions for use
Keep this booklet in a safe place.
SAFETY
The appliance is fully protected by means of a thermo-electric pilot light shut off in the
event of a gas escape from the main burner.
In addition, the appliance is equipped with a safety system, whereby hatches will relieve
in a controlled manner a potential developing overpressure. In this, the hatches (located
in the ceiling of the combustion chamber) will briefly open. This may cause a loud noise.
If this happens, immediately close the gas tap and call a qualified service technician.
WARNING: If the information in these instructions is not followed
exactly, a fire or explosion may result causing property damage, personal
injury or death.
OPERATING INSTRUCTIONS
STOP! Read the safety instructions information above.
INTRODUCTION

9
Bellfires Instructions for use
OPERATING INSTRUCTIONS
WARNING:
Do not place embers, vermiculite granules, wood logs, pebbles, glass beads
or crushed glass against the pilot light burner. Make sure that the pilot flame
can burn at all times freely over the main burner. Only in this way is proper
ignition of the main burner ensured. Ignoring these directions could lead to
a dangerous situation.
Do not place flammable objects within 40” (100 cm) of the appliance.
Pay special attention to furnishings and ornaments around the fire.
When igniting the pilot light and burner, always keep a minimum distance
of 40” (100 cm) from the front of the appliance.
If the pilot flame goes out for any reason, wait for 5 minutes before
attempting to re-light it.
It is essential that the appliance, the complete concentric flue system and
the outlet are cleaned and inspected annually by a recognised fitter/gas
specialist. The safe operation of the appliance will thus remain guaranteed.
For this, please refer to the Installation instructions (Chapter: ANNUAL
MAINTENANCE), that are supplied separately with each appliance.
The gas fire must never be used with the door open or the door glass
removed.
Never place flammable material on the ceramic log set, pebbles or glass.
The filling of the main burner with embers, vermiculite granules, wood logs,
pebbles or glass may not under any circumstances be changed or added to.
Do not place easily-flammable materials, such as nylon clothing or
flammable liquids, in the vicinity of the gas fire.
Ensure at all times that children and other people who are not aware of the
operation of the gas appliance are only in the vicinity of the appliance
exclusively under supervision.
Use the provided barrier (fireguard) to protect the people and children
mentioned above against possible burns.

10
Bellfires Instructions for use
IMPORTANT: When igniting the pilot light and burner, always
keep a minimum distance of 40” (100 cm) from the front of the appliance.
If the pilot flame goes out for any reason, wait for 5 minutes before
attempting to re-ignite it.
OPERATING INSTRUCTIONS
BEFORE OPERATING smell around the appliance area for gas. Be sure to smell next
to the floor because some gas is heavier than air and will settle on the floor.
WHAT TO DO IF YOU SMELL GAS:
• Do not try to light any appliance.
• Do not touch any electrical switch; do not use any phone in your building.
• Immediately call your gas supplier from a neighbor’s phone. Follow the gas
supplier’s instructions.
• If you cannot reach your gas supplier, call the fire department.
DO NOT use the appliance if any part has been exposed to or has been under water.
Immediately call a qualified service technician to inspect the appliance and replace any
part of the control system and any gas control which has been submerged in water.
Use only the remote control to operate the appliance. Never use other means. If the
remote control does not function, try changing the batteries in the remote control and/
or the batteries in the receiver (see page 26 of this manual). If, after changing the
batteries, the appliance still not works, do not try to repair it. Call a qualified service
technician. Force or attempted repair may result in a fire or explosion.
The appliance is fully protected by means of a thermo-electric pilot light shut off in the
event of a gas escape from the main burner.
In addition, the appliance is equipped with a safety system, whereby hatches will relieve
in a controlled manner a potential developing overpressure. In this, the hatches (located
in the ceiling of the combustion chamber) will briefly open. This may cause a loud noise.
If this happens, immediately close the gas tap and call a qualified service technician.

11
Bellfires Instructions for use
OPERATING INSTRUCTIONS
WARNINGS:
• Never place combustible material on the ceramic log set, pebbles or glass.
The filling of the main burner with embers, vermiculite granules, wood
logs, pebbles or glass may not under any circumstances be changed or
added to.
• Do not place easily-combustible materials, such as nylon clothing or
combustible liquids, in the vicinity of the appliance.
• Ensure at all times that children and other people who are not aware
of the operation of the gas appliance are only in the vicinity of the
appliance exclusively under supervision.
• Use the provided barrier (fireguard) to protect the people and children
mentioned above against possible burns.

12
Bellfires Instructions for use
OPERATING INSTRUCTIONS
Natural gas: The above sketches provide an impression of the flame
effect. This can differ from reality. The flame effect is
dependant on the composition and supply pressure of
the natural gas present.
Propane: The flame effect produced by propane
is less realistic than with natural gas.
The flame effect is less as far as flame
volume and height are concerned!
FLAME EFFECT
The appliance is supplied with a “Centre Fire” double burner, from the factory.
This burner has its own specific flame effect, see below for an impression.
Corner Bell Large 3 CF
The appliance is supplied with a “Centre Fire” double burner:
Both burners ON
Only front burner ON

13
Bellfires Instructions for use
OPERATING INSTRUCTIONS
REMOTE CONTROL
General
Read these instructions carefully before lighting the fire !!
The appliance is operated by radio remote control. This comprises a hand-held
transmitter and a receiver. The receiver is part of the gas control block assembly.
The receiver and the gas control block are behind the (white) panel door (operating unit)
next to the appliance. Press the door inwards to open; this will release the catch and the
door will spring out.
The hand-held transmitter and receiver are powered by batteries.
Hand-held transmitter : 1x 9V battery.
Receiver : 4x 1.5V battery type LR6 or AA.
Option: 6V adapter (120 VAC). Available from your fitter.
Note: Hand-held transmitter and receiver are not interchangeable with previous models.
The pilot light is situated in the front of the burner, behind a cowl. Should the pilot light
go out, you must wait five (5) minutes before attempting to re-ignite the fire.
IMPORTANT: Once the fire is lit, it must burn at maximum for
approx. 10 minutes to allow the chimney to come up to temperature!

14
Bellfires Instructions for use
OPERATING INSTRUCTIONS
Figure 1: Hand-held transmitter
Hand-held transmitter
The remote control works by radio signal. The hand-held transmitter is configured in the
factory with a unique signal code.
Figure 2: Display hand-held transmitter
ON/OFF Temperature
setting
Possibilities
of operation
(Company modes)
Program
Timer
setting
Temperature
setting
Fan-symbol: has no
function for the appliance
Signal indication
Battery status
Time setting
Light-symbol:
has
no function for the
appliance
Fan level-symbol:
has no function for
the appliance
°C/24 hour or °F/12 hour
Clock setting
AUX-symbol:
indicates that the
rear burner is ON

15
Bellfires Instructions for use
OPERATING INSTRUCTIONS
Set the display - °C/24 hour or °F/12 hour Clock setting
• Connect the batteries. By simultaneously pressing OFF and
(small flame), can be switched from °F (and 12 hour clock)
to °C (and 24 hour clock), or vice versa.
• The display will automatically return to mode after some
time, but you may immediately return to mode by
pressing the OFF button.
Set the current time
• The time display will flash after either:
a installing the battery or
b simultaneously pressing the
(large flame) and
(small flame).
• While the screen is flashing, you can adjust the time.
• Press
(large flame) to set the hour and
(small flame)
to set the minute.
• Wait or press OFF to return to mode.
Important: Setting up signal code before using the appliance for the first time.
Before the appliance can be used, the receiver must first learn the hand-held
transmitter’s signal code.
• Press the “RESET” button on the receiver, and keep this pressed until 2 audio signals
are heard. See figure 3.
Release the “RESET” button after the second (somewhat longer) audio signal.
• Press, within 20 seconds, the
(small flame) button on the hand-held transmitter,
until 2 short signals are heard
.
The signal code has now been set up on the receiver
.
If, however, a single long sound is heard, this means that setting the signal code has
failed or that the wiring has been connected incorrectly.
You only need to set up the signal code once. It is not necessary when changing the
batteries of the hand-held transmitter or receiver.

16
Bellfires Instructions for use
OPERATING INSTRUCTIONS
Figure 3: Receiver “RESET” button
Burner:
The appliance’s entire burner consists of a “front burner” and a “rear burner”.
Burner operation described below applies to:
1 Both “front burner” and “rear burner”.
(The AUX-symbol on the hand-held transmitter’s display is visible.)
or
2 Only “front burner”. The “rear burner” is turned off.
(The AUX-symbol on the hand-held transmitter’s display is not visible.)

17
Bellfires Instructions for use
OPERATING INSTRUCTIONS
Possibilities of operation
The following can be set with the remote control:
1 : = Manual operation
2 : = Operating day temperature thermostat
3 : = Has no function for the appliance
4 : = Has no function for the appliance
5 : = Operating night temperature thermostat
6 : = Timer setting
You can cycle through the menu with operating possibilities by repeatedly depressing
the SET button:
and back to
At the selected starting time (P1 or P2
) or stopping
time (P1
or P2
) is also shown.
Returning to
is also possible by pressing the
(small
flame) or
(large flame) button.

18
Bellfires Instructions for use
Operating night temperature thermostat
(The appliance must be in the standby position and the
pilot light is burning.)
Automatic temperature regulation of the pre-set night
temperature.
The room temperature is measured and compared with
the pre-set night temperature.
The flame height is automatically regulated so as to
reach the pre-set night temperature.
Also see: Setting the desired temperature.
OPERATING INSTRUCTIONS
Manuel operation
Here you can turn the burner on and off, and adjust the
height of the flames.
• Press
(large flame) to turn on the burner and to
increase the flame height.
• Press
(small flame) decrease the flame height to
turn the burner off.
The pilot light will keep burning. (Stand-by position)
• The appliance will automatically revert to stand-by if
the batteries in the receiver are fully depleted. (The
pilot light will also be turned off.)
This also applies to the Thermostat and Timer operation.
• When one of the buttons on the hand-held transmitter
is pressed (except the SET button), the transmission
symbol
appears on the screen. The receiver
confirms the transmission with an audio signal.
Operating day temperature thermostat
(The appliance must be in the standby position and the
pilot light is burning.
)
Automatic temperature regulation of the pre-set day
temperature. The room temperature is measured and
compared with the pre-set day temperature. The flame
height is automatically regulated so as to reach the
pre-set day temperature.
Also see: Setting the desired temperature.

19
Bellfires Instructions for use
Timer operation
(The appliance must be in the standby position and the
pilot light is burning.)
Appliance functions automatically according to the two
pre-set heating periods;
P1 and P2. These heating periods repeat automatically
every 24 hours.
Also see: Programming the timer: P1 and P2.
The appliance works thermostatically at the pre-set
starting times P1 and P2 and the room temperature
is automatically regulated to the pre-set day temperature
.
The appliance works thermostatically at the pre-set
stopping times P1
and P2
and the room temperature
is automatically regulated to the pre-set night temperature
.
In order to allow the appliance to regulate the temperature
at night, the night temperature must be set to at
least 5°C.
If the setting is lowered to , the appliance will
switch to stand-by at night. The appliance will automatically
operate at the following day cycle .
N.B.: The pre-set temperature is shown on the screen
every 30 seconds.
OPERATING INSTRUCTIONS
Setting the desired temperature
• Select the desired mode of operation or
by pressing the SET button
briefly.
• Press the SET button until the temperature indication on the display begins to flash.
• Set the temperature with (large flame) or
(small flame).
• Wait or press the OFF button briefly to go to mode.
• If the temperature control in should be off (lower battery consumption),
decrease the night temperature until appears on the display.
Important: Place the hand-held transmitter in a place that is not
influenced by direct sunlight, draught, heat from
the appliance and other heat sources.

20
Bellfires Instructions for use
Programming the timer: P1 and P2
• Select the desired mode of operation by pressing the SET button briefly.
• Press the SET button until P1 (ON) (start heating period P1) and the time appear
in the display. (The time indication flashes.)
• Set the time for the beginning of the first heating period by pressing (large flame)
for houre and (small flame) for minute’setting.
• Press the SET button briefly; P1
(OFF) appears on the display. Set the time for the
end of the first heating period.
• Press SET again to set the second heating period P2
(heat ON) and P2
(heat
OFF).
• Wait a moment or press OFF to switch back to
mode.
AUX -symbol on the display
The AUX-symbol on the hand-held transmitter’s display indicates that the “front
burner” and “rear burner” are both being operated. All functions apply to both burners
together.
If the AUX-symbol on the hand-held transmitter’s display is not visible, then the
“rear burner” is turned off and all functions only apply to the “front burner”
OPERATING INSTRUCTIONS
OPERATION (REMOTE CONTROL)
Igniting the fire
• Open the gas supply valve in the gas pipe to the fire.
• Switch the hand-held transmitter to the
position.
• On the hand-held transmitter, press the OFF and
(large flame) buttons simultaneously. A short tone
will signal the start.
Release the buttons. Short beeps will then follow until
the pilot light and main burner are ignited.
Once the main burner has been ignited, the flame
height will automatically rise to the maximum position.
Table of contents