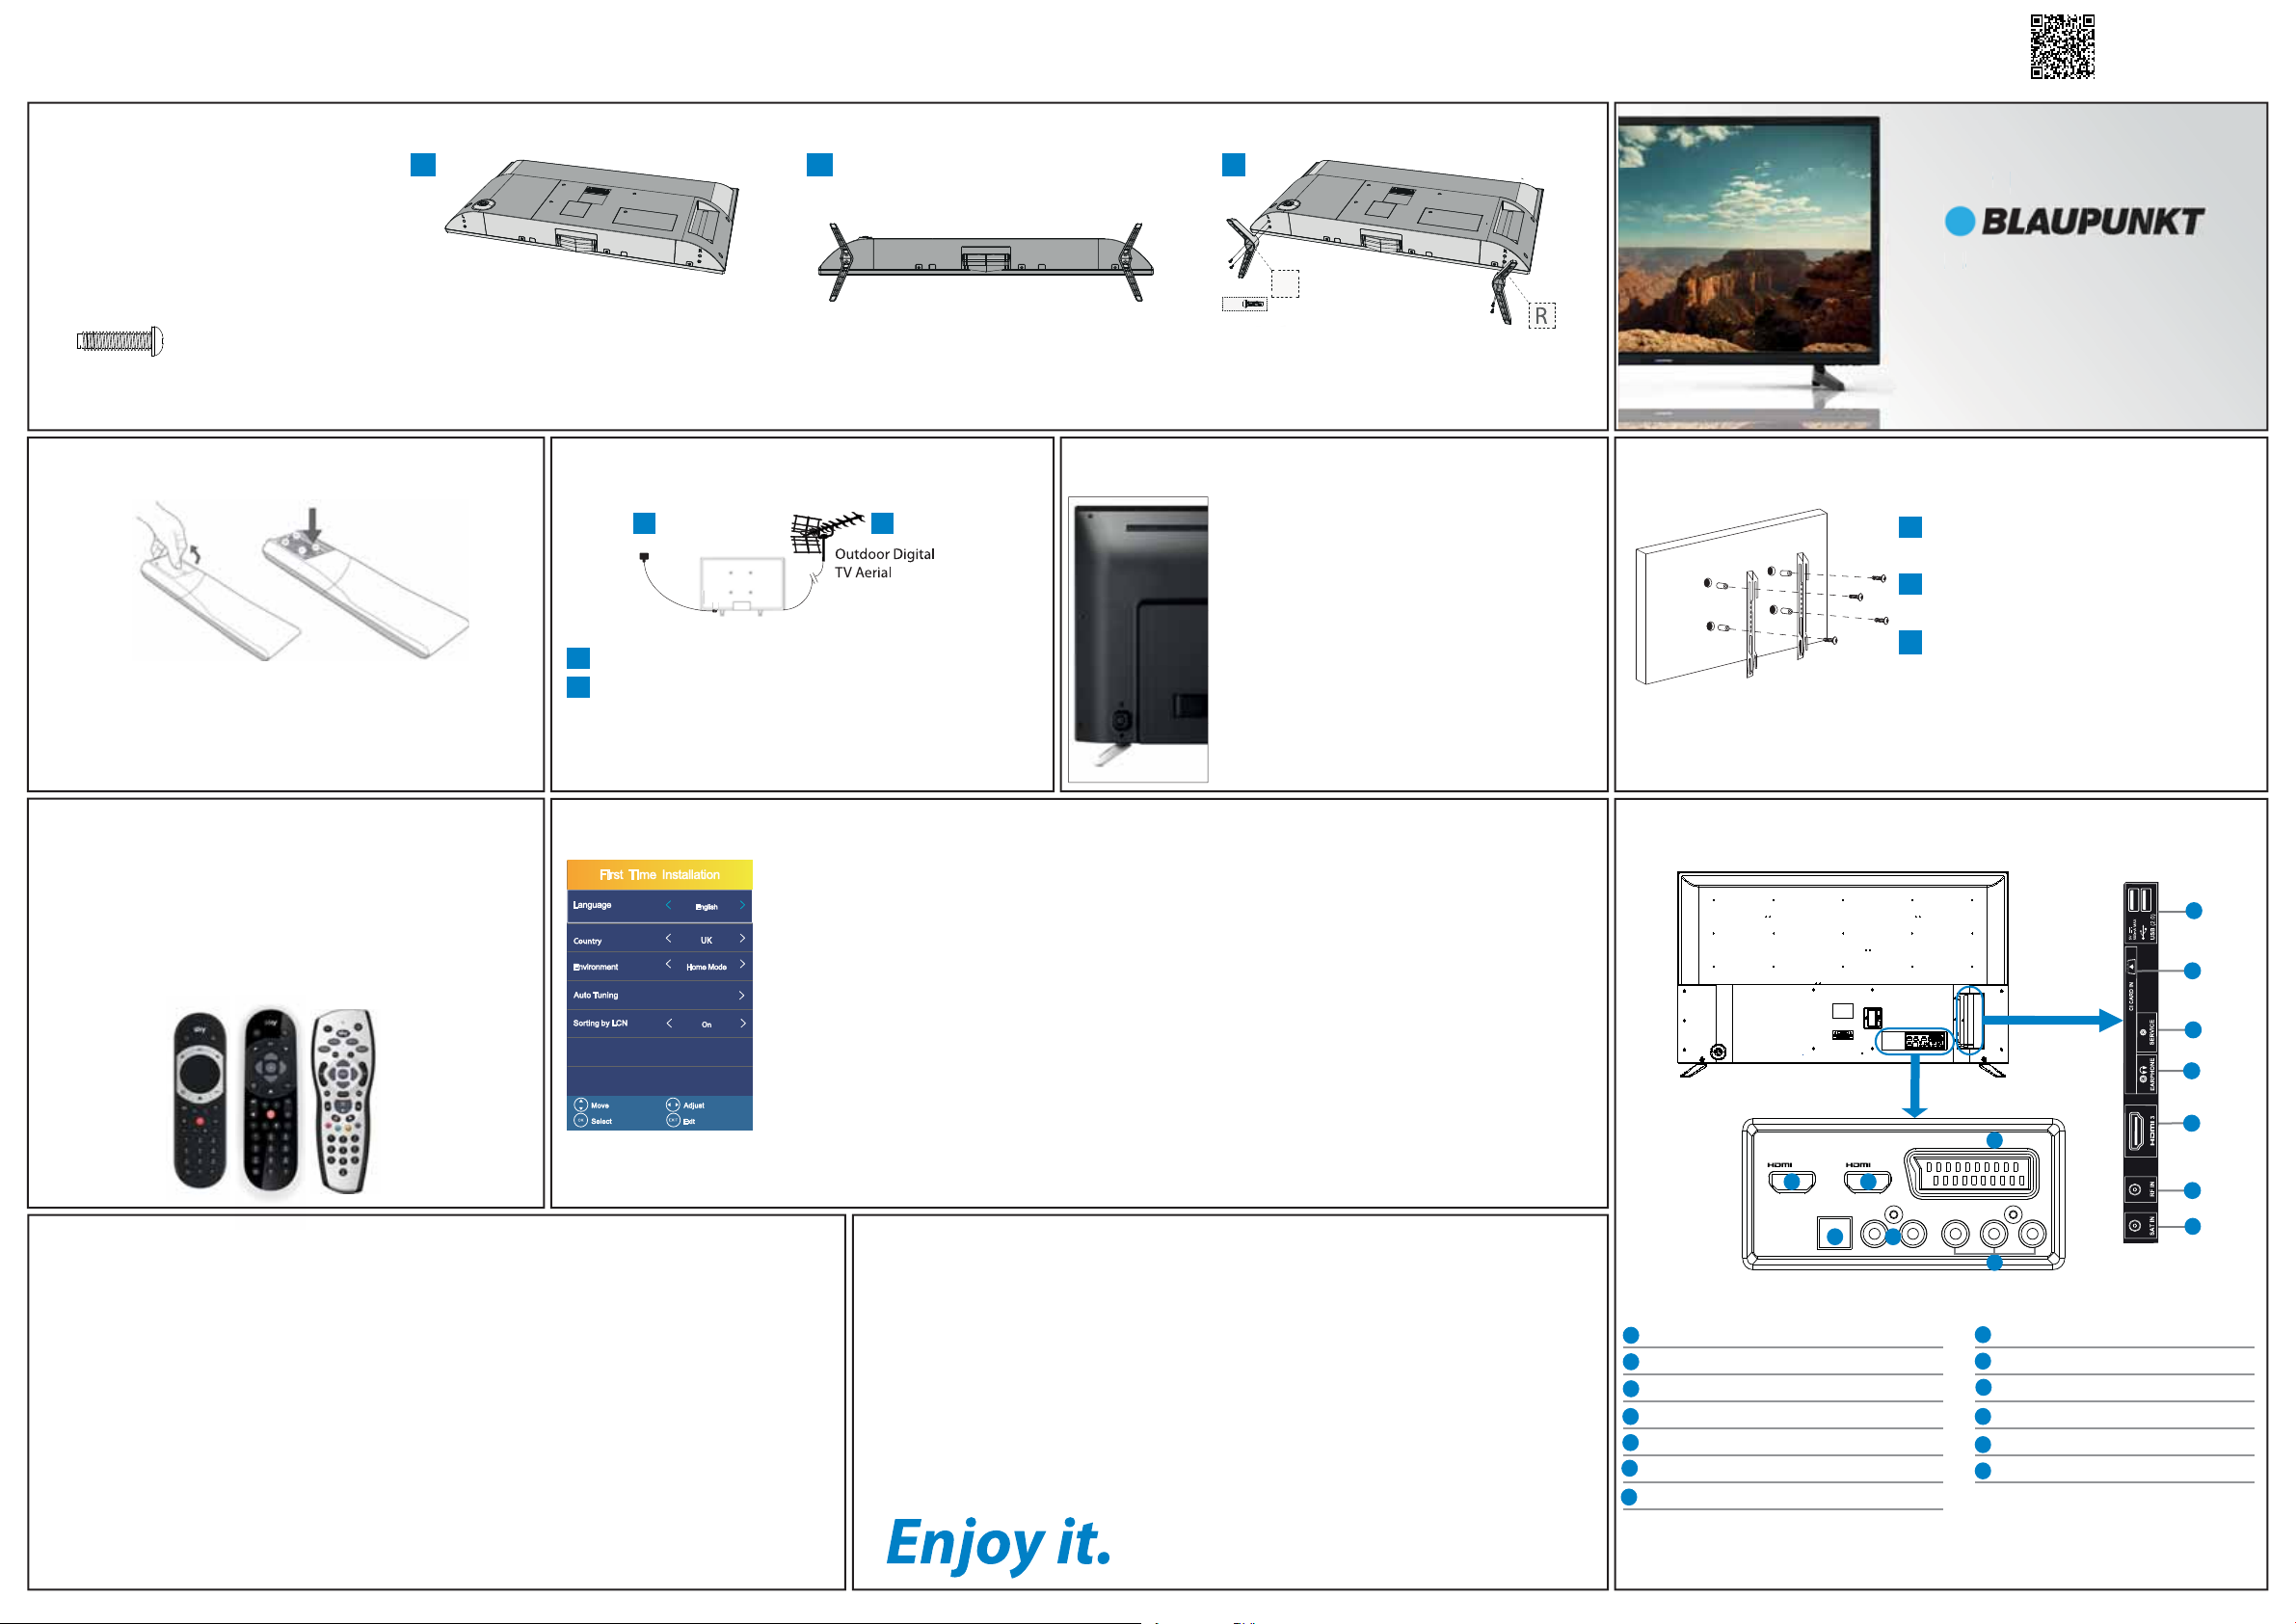
1 Fitting the stand
L
4 x
2 Installing batteries
Remove the battery cover from the rear of the remote control and
insert the AAA batteries which are supplied in the accessory pack.
Ensure that the polarity of the batteries is as shown in the battery
compartment. Replace the battery cover. The remote control is ready
for use.
Setting up the TV set for the rst time
3 Connecting your set
Connect the TV to your power socket.
If you wish to use the TV to receive Freeview/Saorview
channels, connect the RF input from the TV to your outdoor
Digital TV aerial. If you do not wish to receive Freeview/
Saorview, skip this step.
Wall Mounting the TV
Image for illustration only.
Remove the four screws that are supplied
in the wall mounting holes.
The wall mount can now be easily
attached to the mounting holes on
the rear of the TV.
Install the wall mounting bracket to the
television as advised by the bracket
manufacturer.
The picture shows the use of spacers, which
are not applicable to all sets/installations.
Register For Your
Manufacturers Warranty
Register your manufacturers guarantee
online within 14 days of purchase at
www.registertv.co.uk/blaupunkt
n
f
e
ster
ou
nline with
ww.re
4 TV Control Stick
Connections
Digital Audio Digital Optical Audio Output
HDMI 1 HDMI input
HDMI 2 HDMI input (ARC)
L/R HDMI input (ARC)
Video/YPbPr HD input (YPbPr)
SCART SCART input
SAT IN Satellite input
RF in RF / TV aerial input
HDMI 3 HDMI input
Earphones Earphone input
Service Input Input is used only by service centres
CI card in Common interface module
USB 2.0 USB port 2.0
To obtain a copy of your Operating Instructions, please go to: https://www.umc-uk.co.uk/instruction-manuals/Blaupunkt-Television_information.html or use this QR code:
For the stand installation, there is
one type of screw provided as shown
below.
To complete the stand installation you
will require a cross head screw driver.
Place the TV set on a flat and
clean surface with the panel facing
downwards to avoid damage.
Used for attaching the stand
to the TV set (g.2)
4 x
TV panel must be facing downwards.
J
I
H
K
M
AH
L
K
BI
M
C
D
E
F
G
J
1 2 (ARC)
SCART
ETHERNET DIGITAL
AUDIO OUT
OPTICAL L R VIDEO/Y Pb Pr
A
BC
D
E
F
Audio shared for Video/Composite
and component/ YPbPr
Video Input (green) and HD input
(Ypbpr)
G
L
Important information - Retuning the TV - Please keep this information to hand.
To ensure you are receiving the very latest channels on your Television, we suggest that
you retune the set on a monthly basis. This is because channels can be added and/or
moved by the broadcaster.
To retune using the buttons on the remote control:-
Press Menu, then press the number 8 (4 times) so Menu > 8, 8, 8, 8.
You will enter the first time installation mode. Follow the onscreen prompts to retune
your set.
12
1
2
Place the TV set on a flat and clean surface
with the panel facing downwards to avoid
damage. Ensure the panel is not resting on
any object.
Feet should be pointing away from each
other as shown in the picture above.
When the stand feet are in the correct
position, secure the stand feet to the TV
set using the 4 screws provided.
1
2
3
1
2
3
The TV control stick is located on the back of the TV.
The control stick can be used to control many of the
TV functions. The shape of the TV’s control stick may
vary by model.
While TV is in standby mode:
• Press the centre of the control stick once - Power
on the TV set.
While watching TV:
• RIGHT/LEFT – volume up/volume down.
• UP/DOWN – changes channel up/down.
• Press the centre of the control stick once
– displays the menu.
• Press and hold the centre of the control stick
– Standby/Power Off.
Other functions are described in the manual.
Thank you
Thank you for purchasing this television.
We hope you have many years of trouble free enjoyment from your purchase.
Your product is covered under the manufacturers guarantee for 12 months
from the date of purchase.
If you experience any difficulties with your TV, please refer to the 'Frequently
asked questions' in the manual.
Please make a note of your TV model, the serial number and the date of
purchase.
You will need this information should you need to call the helpline.
Retuning your TV
If you wish to use your Sky remote to operate the TV’s basic
functions, you will need a Sky remote control (Revision 9 or later)
and you will need to program it with the code 2134.
If you wish to use your Sky Q remote to operate the TV’s basic
functions, you will need to program it with the code 4170.
Sky remote code
When you first turn on the set, you will be welcomed by the First Time Installation screen as shown.
Once you have decided the options as described below, select Auto Tuning and press OK.
Language: Select your preferred on-screen display language. This will change the language in which the menus
and associated information is displayed in.
Country: Select the country which the TV is to be used in.
Environment: Use this option to select either Home or Store mode.
Home Mode: Power saving mode which reduces the energy used (by reducing the power to the LED/LCD
panel).
Store Mode: The picture will be brighter and you can personalise the settings within the picture settings
menu (Contrast, Brightness, Colour etc.
Note: In Home Mode, the TV will switch itself to the standby mode after 4 hours in the event that the buttons on
the remote control or TV are not used.
Auto-Tuning: Starts the tuning process with the selected parameters.
Sorting by LCN: Automatically sorts the channel listing in logical order where main channels on 1, 2, 3, 4, 5 etc will
be BBC 1, BBC 2, ITV, Channel 4, Channel 5 etc.
DVB Antenna: Select type of TV signal you wish to tune: DVB-T (Freeview channels) or DVB-S (Satellite channels).
This option only appears in the second step after confirming the “Auto Tuning” option.
First Time Installation


