manuals.online logo
Brands
  1. Home
  2. •
  3. Brands
  4. •
  5. Christie
  6. •
  7. Projector
  8. •
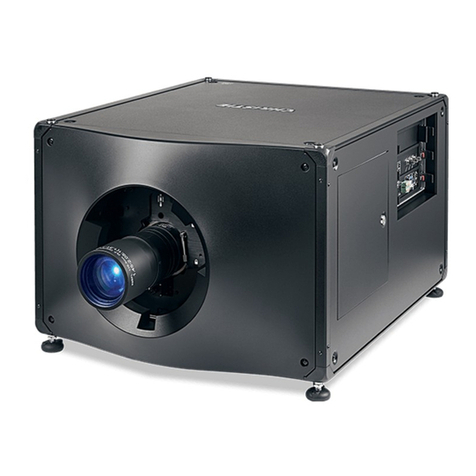
  9. Christie TruLife+ Griffyn 4K32-RGB Use and care manual

Christie TruLife+ Griffyn 4K32-RGB Use and care manual

Technical Reference
020-103316-01
Christie TruLife+
Serial Commands
NOTICES
COPYRIGHT AND TRADEMARKS
Copyright © 2020 Christie Digital Systems USA Inc. All rights reserved.
All brand names and product names are trademarks, registered trademarks or trade names of their respective holders.
GENERAL
Every effort has been made to ensure accuracy, however in some cases changes in the products or availability could occur which may not be reflected in this
document. Christie reserves the right to make changes to specifications at any time without notice. Performance specifications are typical, but may vary
depending on conditions beyond Christie's control such as maintenance of the product in proper working conditions. Performance specifications are based on
information available at the time of printing. Christie makes no warranty of any kind with regard to this material, including, but not limited to, implied
warranties of fitness for a particular purpose. Christie will not be liable for errors contained herein or for incidental or consequential damages in connection
with the performance or use of this material. Manufacturing facilities in Canada and China are ISO 9001 certified. Manufacturing facilities in Canada are also
ISO 14001 certified.
PREVENTATIVE MAINTENANCE
Preventative maintenance is an important part of the continued and proper operation of your product. Failure to perform maintenance as required, and in
accordance with the maintenance schedule specified by Christie, will void the warranty.
REGULATORY
The product has been tested and found to comply with the limits for a Class A digital device, pursuant to Part 15 of the FCC Rules. These limits are designed
to provide reasonable protection against harmful interference when the product is operated in a commercial environment. The product generates, uses, and
can radiate radio frequency energy and, if not installed and used in accordance with the instruction manual, may cause harmful interference to radio
communications. Operation of the product in a residential area is likely to cause harmful interference in which case the user will be required to correct the
interference at the user’s own expense. Changes or modifications not expressly approved by the party responsible for compliance could void the user's
authority to operate the equipment
CAN ICES-3 (A) / NMB-3 (A)
이 기기는 업무용(A급)으로 전자파적합등록을 한 기기이오니 판매자 또는 사용자는 이점을 주의하시기 바라며, 가정 외의 지역에서 사용하는 것을 목적으로 합니다.
ENVIRONMENTAL
The product is designed and manufactured with high-quality materials and components that can be recycled and reused. This symbol means that electrical
and electronic equipment, at their end-of-life, should be disposed of separately from regular waste. Please dispose of the product appropriately and according
to local regulations. In the European Union, there are separate collection systems for used electrical and electronic products. Please help us to conserve the
environment we live in!
Content
Communicating with Christie TruLife+..................................6
Model names......................................................6
Product documentation................................................6
Technical support................................................... 6
Connection and use..................................................7
Connecting to a computer or server with 10/100/1000 base-T Ethernet................7
Configuring the RS232 port...........................................7
Setting up the Ethernet............................................. 8
Understanding message format...........................................8
Basic message structure...............................................9
Special characters for text...........................................10
Sample messages and their meaning......................................11
Sample messages for a single projector...................................11
Sample messages for querying a projector.................................11
What is sent in a message.............................................12
Maximizing message integrity...........................................12
Error messages....................................................13
Descriptive error.................................................14
Flow control......................................................14
Serial API commands..............................................15
ADR–Projector Address...............................................15
APW–Auto Power On.................................................16
BDR–Baud Rate....................................................16
BGC–Gamma Function............................................... 17
CAV–Video Input Configuration..........................................17
CCA–Color Adjustment...............................................18
CHA–Channel.....................................................21
CLE–Color Enable.................................................. 22
CSP–Color Space Selection.............................................23
CUC–1D Color Uniformity..............................................23
DEF–Factory Defaults................................................25
DMX–DMX/ArtNet.................................................. 25
DRK–3D Dark Interval................................................26
Christie TruLife+ Technical Reference–Serial Commands 3
020-103316-01 Rev. 1 (09-2020)
Copyright © 2020 Christie Digital Systems USA, Inc. All rights reserved.
DTL–Sharpness....................................................26
EBB–Black Level Blending............................................. 27
EBL–Edge Blending Select.............................................27
EDO–EDID Override.................................................28
EME–Enable Asynchronous Serial Messages..................................29
ETP–Engine Test Pattern..............................................29
EVT–Event Manager.................................................31
FCS–Lens Focus Position Adjustment...................................... 32
FMD–Film Mode Detect...............................................32
FRD–Frame Delay..................................................33
FRZ–Image Freeze..................................................34
GAM–Gamma Power Value.............................................35
GIO–General Purpose Input/Output.......................................35
ITP–Test Pattern...................................................36
KEN–Keypad Enable.................................................38
LAS–Light & Output Settings........................................... 39
LCB–Lens Motor Calibration............................................41
LHO–Lens Horizontal Position Adjustment................................... 41
LMV–Lens Move................................................... 42
LOC–Localization Settings............................................. 43
LVO–Lens Vertical Position Adjustment..................................... 44
MSP–OSD Menu Position Presets.........................................44
NET–Network Setup.................................................45
OSD–On Screen Display.............................................. 46
OTR–Output Resolution...............................................47
PNG–Ping....................................................... 47
PRO–Profile......................................................47
PWR–Power......................................................48
RAL–Remote Access Level.............................................49
SDI–SDI Payload Overrride............................................ 49
SHU–Shutter..................................................... 50
SIN–Select Input...................................................50
SNM–SNMP Configuration............................................. 52
SOR–Screen Orientation.............................................. 53
SPS–Splash Screen................................................. 53
SST–Status...................................................... 54
SZP–Resize Presets................................................. 55
TDD–3D Sync Delay.................................................55
TDM–3D Mode.................................................... 56
Content
Christie TruLife+ Technical Reference–Serial Commands 4
020-103316-01 Rev. 1 (09-2020)
Copyright © 2020 Christie Digital Systems USA, Inc. All rights reserved.
TDN–Invert 3D Input................................................57
TDO–3D Sync Out..................................................57
TDT–3D Test Pattern.................................................58
THM–Video Thumbnails...............................................59
TMC–Thermal Management Control....................................... 59
TMD–Time and Date.................................................60
UID–User ID..................................................... 60
WRP–Warp Selection................................................ 61
ZOM–Lens Zoom Position Adjustment......................................62
Asynchronous messages...........................................63
Content
Christie TruLife+ Technical Reference–Serial Commands 5
020-103316-01 Rev. 1 (09-2020)
Copyright © 2020 Christie Digital Systems USA, Inc. All rights reserved.
Communicating with
Christie TruLife+
Understand the information and procedures for communicating with Christie TruLife+ from a remote
location.
Model names
The Christie TruLife+ User Guide (P/N: 020-103315-XX) applies to the following models.
• Griffyn 4K32-RGB
• Mirage 4K32-RGB
Product documentation
For installation, setup, and user information, see the product documentation available on the Christie
website. Read all instructions before using or servicing this product.
1. Access the documentation from the Christie website:
• Go to this URL: https://bit.ly/3fbZLx8 or
https://www.christiedigital.com/products/projectors/all-projectors/griffyn-series/.
• Scan the QR code using a QR code reader app on a smartphone or tablet.
2. On the product page, select the model and switch to the Downloads tab.
Technical support
• North and South America: +1-800-221-8025 or [email protected]
• Europe, Middle East, and Africa: +44 (0) 1189 778111 or [email protected]
• Asia Pacific
• Australia: +61 (0)7 3624 4888
• China: +86 10 6561 0240
• India: +91 (80) 6708 9999
Christie TruLife+ Technical Reference–Serial Commands 6
020-103316-01 Rev. 1 (09-2020)
Copyright © 2020 Christie Digital Systems USA, Inc. All rights reserved.
• Japan: 81-3-3599-7481
•Singapore: +65 6877-8737
• South Korea: +82 2 702 1601
• Christie Professional Services: +1-800-550-3061 or [email protected]
Connection and use
Once you have connected your computer to either the RS232 IN port (depending on which standard is
supported by your computer) or to the Ethernet port on Christie TruLife+, you can remotely access
controls and image setups, issue commands or queries, and receive replies.
Use these bidirectional messages to:
• Control multiple projectors
• Obtain a projector’s status report
• Diagnose performance problems
Refer to the User Manual provided with the projector for all cable requirements and other connection
details.
Some commands are operational only when projector is powered up.
Connecting to a computer or server with 10/100/1000 base-T
Ethernet
Communicate with a remote computer
, server, or an existing network using a RJ-45 cable.
The port located on the Video Input panel uses Christie-proprietary protocol or Art-Net control protocol
and is intended for Christie accessories or automation controllers only.
1. Use an RJ-45 cable to connect the Ethernet hub or switch to the Ethernet port, located on the
projector Video Input panel.
2. When using the Christie serial protocol over Ethernet, connect to port 3002.
3. For applications or equipment using serial communications, use the Christie-proprietary serial
protocol or Art-Net protocol to communicate with the Ethernet port on the Video Input panel.
Configuring the RS232 port
Configure the RS232 port to send Christie serial commands using a standard RS232 serial cable.
1. Select Menu > Communications > Projector Communication.
Communicating with Christie TruLife+
Christie TruLife+ Technical Reference–Serial Commands 7
020-103316-01 Rev. 1 (09-2020)
Copyright © 2020 Christie Digital Systems USA, Inc. All rights reserved.
2. Use the down arrow to select Baud Rate.
3. Select the appropriate baud rate and select Enter.
4. Use the down arrow to select Network Routing.
5. Select the type network routing appropriate for your projector and select Enter.
Setting up the Ethernet
Ethernet is setup to obtain an IP address automatically if a DHCP server is on the network, modify IP
settings, or manually enter an address.
Christie recommends using the Ethernet port on the Video Input panel as the HDBaseT port is limited
to 100 Mb/s.
You cannot change the IP settings using the web interface.
1. From the display panel, use the arrow keys to select IP Settings.
2. To set the type of network, select DHCP or Static.
3. If you selected Static, manually enter the network information for the IP Address, Subnet,
and Gateway.
4. Select Apply and select Enter.
5. Select MENU > Communications > Network Settings.
6. Select Device name.
7. Use the up and down keys to enter the name of the projector.
8. Select Enter.
Understanding message format
Commands sent to and from Christie TruLife+ are formatted as simple text messages consisting of a
three letter command code, an optional four letter subcode, and optional data.
Source Format Function Example
From controller (Code Data) SET (set power on) (PWR1) or (PWR 1)
(Code+Subcode
Data)
SET (set input port configuration) (SIN+PORT 1)
(Code ?) REQUEST (what is current power
state?)
(PWR?) or (PWR ?)
(Code+Subcode ?) REQUEST (what is current input port
configuration?)
(SIN+PORT?)
From projector (Code Data) REPLY (power state is 1 "On") (PWR!001 "On")
(Code+Subcode
Data)
REPLY (input port configuration is 1
"One-Port")
(SIN+PORT!001 "One-
Port")
Generally, most commands include 0 or 1 data fields or parameters. Where applicable, a message may
expand to include additional parameters of related details.
Communicating with Christie TruLife+
Christie TruLife+ Technical Reference–Serial Commands 8
020-103316-01 Rev. 1 (09-2020)
Copyright © 2020 Christie Digital Systems USA, Inc. All rights reserved.
The smallest step size for any parameter is always 1. For some controls (such as Size) the value
displayed on the screen has a decimal point (for example, 0.200 to 4.000). In this case, the values
used for the serial communications is an integer value (for example, 200 to 4000), not the decimal
value seen on the screen.
Available message types
Message type Description
Set A command to set a projector parameter at a specific level, such as changing the
brightness.
Request A request for information, such as what is the current brightness setting.
Reply Returns the data in response to a request or as confirmation of a command.
Basic message structure
Understand the component fields that comprise a standard ASCII message.
Components Description
Start and end of message Every message begins with the left bracket character and ends with the right bracket
character.
If the start character is received before an end character of the previous message,
the partial (previous) message is discarded.
Prefix characters (optional) To acknowledge that Christie TruLife+ has responded, and/or maximize message
integrity, insert one or two special characters before the three-character function
code:
• $ (Simple Acknowledgment)—Causes a dollar sign ($) character to be sent from
Christie TruLife+ when it has finished processing the message.
• # (Full Acknowledgment)—Causes an echo of the message as a reply to be sent
from Christie TruLife+ when it has finished processing the message.
• & (Checksum)—Allows a checksum to be put as the last parameter in the
message for verification at Christie TruLife+.
Function code The Christie TruLife+ function you want to work with, such as channel selection or
gamma, is represented by a three-character ASCII code (A-Z, upper or lower case).
This function code appears immediately after the leading bracket that starts the
message. In messages sent to Christie TruLife+ that do not have a subcode, a space
between the function code and the first parameter (or special character) is optional.
+Subcode The Christie TruLife+ function you want to work with may have one or more
subcodes that allow you to select a specific source, image, channel or subfunction.
The subcode is represented by a four-character ASCII code (A-Z, upper or lower
case, and 0-9). This subcode appears immediately after the function code, with a
plus sign (+) character to separate the code and subcode. If there is no subcode, the
plus sign (+) is also omitted. In messages sent to Christie TruLife+ that have a
subcode, a space between the subcode and the first parameter (or special character)
is optional.
Communicating with Christie TruLife+
Christie TruLife+ Technical Reference–Serial Commands 9
020-103316-01 Rev. 1 (09-2020)
Copyright © 2020 Christie Digital Systems USA, Inc. All rights reserved.
Components Description
Request/reply symbols If the controller is requesting information from Christie TruLife+, a question mark (?)
appears directly after the function code. If Christie TruLife+ is replying, an
exclamation mark (!) appears directly after the function code. For set messages to
Christie TruLife+, neither of these characters appear—data directly follows the code
and subcode.
A request for information is represented by a question mark (?) that appears directly
after the function code. A reply is represented by an exclamation mark (!) that
appears directly after the function code or subcode, if one is provided. The first
parameter located after the exclamation mark (!) reply character cannot have a
space, for example (PWR!000).
Data The value for a given Christie TruLife+ state, such as on or off, appears in ASCII-
decimal format directly after the request/reply symbol. You can add an optional
space after the symbol—such as before the data—in a set message, but data in
replies follow the exclamation mark (!) symbol without a space. Other details to
remember about data:
• All values returned by Christie TruLife+ (reply messages) have a fixed length,
regardless of the actual value. For a specific parameter, the length is always the
same (for example, contrast is always returned as three characters, Christie
TruLife+ number is always returned as five characters). The minimum
parameter size is three characters. Values less than the predefined size are
padded with leading zeros as needed. Parameters which have negative signs are
zero padded after the negative sign, and have one less digit to make space for
the sign.
• Data in set messages to Christie TruLife+ do not require padding with zeros.
• Within each message, multiple parameters of data must be separated by one
space character.
• Text parameters such as channel names are enclosed in double quotes following
the data, as in Name.
Text parameters Most data is simply a numerical value; however, some messages also require text.
For example, a channel naming message typically includes a text-based name—
enclose this text in double quotation marks, as in "Tilt the Wagon". For example, the
time command requires time to be provided in text enclosed in double quotation
mark, as in "19:45:23". Use all characters as required except for special characters
—these require a two-character combination.
Related information
Special characters for text (on page 10)
Maximizing message integrity (on page 12)
Special characters for text
To use special characters in the API commands, you must use a two-character combination.
Special character Two-character
combination
Description
” \” Double quotation mark
\ \\ Backslash
Communicating with Christie TruLife+
Christie TruLife+ Technical Reference–Serial Commands 10
020-103316-01 Rev. 1 (09-2020)
Copyright © 2020 Christie Digital Systems USA, Inc. All rights reserved.
Special character Two-character
combination
Description
( \( Left bracket
) \) Right bracket
Line break \n New line—If the text can be displayed on more than one
line, this sets the line break.
Send arbitrary code \h## Sends one arbitrary code defined by the two
hexadecimal digits ##.
Sample messages and their meaning
For a more detailed understanding of messages and their meaning, review the provided sample
messages.
Sample messages for a single projector
Messages can be sent and received for a single projector.
Message format Function Example
(Code Data) SET Power on (PWR 1)
(Code+Subcode Data) SET input port configuration (SIN+PORT 1)
(Code?) REQUEST (what is current power
state?)
(PWR?)
(Code+Subcode?) REQUEST (what is current input port
configuration?)
(SIN+PORT?)
(Code!Data) REPLY (power state is 1 "on") (PWR!001 "On")
(Code+Subcode!Data) REPLY (input port configuration is 1
"One-Port")
(SIN+PORT!001 "One-Port")
($Code Data) SET AND ACKNOWLEDGE MESSAGE
(change test pattern and request
acknowledge)
($ITP 1)
$ REPLY with acknowledgment (from
projector)
$
Sample messages for querying a projector
Messages to query a list, enabled state, and minimum/maximum values can be sent and received for a
projector.
Options Function Example
Query a list QUERY test pattern options (ITP?L)
REPLY test pattern options (ITP!L001 001 00000 "Off")
Communicating with Christie TruLife+
Christie TruLife+ Technical Reference–Serial Commands 11
020-103316-01 Rev. 1 (09-2020)
Copyright © 2020 Christie Digital Systems USA, Inc. All rights reserved.
Options Function Example
(ITP!L001 001 00001 "Grid")
(ITP!L001 001 00002 "Gray
Scale 16")
(ITP!L001 001 00003 "Flat
White")
(ITP!L001 001 00004 "Flat
Gray")
...
(ITP!L000 001 00024
"Flare")
(ITP!L111 "--END--")
Query enabled state QUERY test pattern enabled state (ITP?E)
REPLY test pattern (enabled) (ITP!E000)
REPLY test pattern (disabled) (ITP!E001)
Query minimum/maximum QUERY gamma slider minimum/
maximum
(GAM?M)
REPLY gamma minimum/maximum (GAM!M1000 3000)
What is sent in a message
Although you send and read messages as strings of ASCII characters, the actual message travels as a
sequence of bytes. Each character in this sequence requires one byte.
The following example illustrates a lamp limit is 2000 hours reply from the projector.
ASCII = ( L P L ! 2 0 0 0 )
HEX = 0x28 0x4 0x50 0x28 0x21 0x32 0x30 0x30 0x30 0x29
Maximizing message integrity
For additional reassurance and/or maximum message integrity, insert one or two special characters.
Message
requirement
Description
Acknowledgments For assurance from Christie TruLife+ (or group of projectors) that a set message has been
processed, request an acknowledgment.
The acknowledgment is returned after the message has been received and fully executed
by Christie TruLife+ (such as in the case of a source switch it is not sent until the switch is
complete). If the message cannot be executed for some reason (such as invalid
parameters, time-out, and so on) a NAK is returned instead (not-acknowledge).
Requesting an acknowledgment serves no purpose when included in a request message,
as the acknowledgment is redundant to the actual reply from Christie TruLife+. However, if
requested, the dollar sign ($) acknowledgment from Christie TruLife+ follows the reply.
Communicating with Christie TruLife+
Christie TruLife+ Technical Reference–Serial Commands 12
020-103316-01 Rev. 1 (09-2020)
Copyright © 2020 Christie Digital Systems USA, Inc. All rights reserved.
Message
requirement
Description
There are two types of acknowledgments:
•Simple Acknowledgments—Insert a dollar sign ($) character just after the start code
bracket. This only returns a $. This only returns a dollar sign ($) on success, or a
caret (^) on failure (NAK).
• Full Acknowledgments—Insert a hash (#) character just after the start code bracket.
This returns the message sent, as a reply.
This is a quick way to confirm success with set messages and is useful with long distance
communication links or where the projectors and/or images are not visible from the
controller. Acknowledgments can also be a type of flow control.
Checksums For maximum message integrity, add a checksum character ampersand (&) just after the
start code bracket. You must also include the correct checksum total (0-255) just before
the end code bracket. Make sure to add a space before the calculated checksum to
separate it from the last data parameter:
The checksum is the low byte of the sum of the ASCII values of all characters between the
start bracket and the beginning of the checksum, but not including either. It does include
the space in front of the checksum.
Calculate the checksum for the above set contrast to 64 command as follows:
CHECKSUM EXAMPLE = & + c + o + n + 6 + 4 + ‘space’
= 26h+63h +6Fh +6E h +36h +$34h +$20h
= 01F0h
= F0h when only the low byte is used
= 240
Christie TruLife+ collects all of the message bytes as defined in the first byte of the
message, then creates its own checksum value for comparison with the checksum included
in the controller’s message. If the values match, the message is considered to have been
correctly received; otherwise, the message is discarded.
Note the following:
• h indicates a hex number.
• If a request message has a checksum, so does the reply.
• If using both acknowledge and checksum, either character can occur first.
Error messages
If a command cannot be performed, a descriptive error identifying the problem appears.
For example, the following message indicates a syntax error:
(ITP) - (65535 00000 ERR00005 "ITP: Too Few Parameters")
Communicating with Christie TruLife+
Christie TruLife+ Technical Reference–Serial Commands 13
020-103316-01 Rev. 1 (09-2020)
Copyright © 2020 Christie Digital Systems USA, Inc. All rights reserved.
Descriptive error
The following error codes indicate a problem if a command cannot be performed.
Error code Description Error code Description
3 Invalid parameter 105 Disabled control
4 Too many parameters 106 Invalid language
5 Too few parameters 107 Exceeded list size
6 Channel not found 110 Communication timeout
7 Command not executed 111 Communications failure
8 Checksum error 112 Failed to set hardware
9 Unknown request 113 Bad file
10 Error receiving serial data 114 Memory failure
101 Control not found 115 Not implemented
102 Subcontrol not found 116 Invalid security
103 Wrong control type 117 Invalid access group
104 Invalid value 118 System busy - Try again later
Flow control
Normally messages can be sent to the projector before processing of earlier messages is complete—
Christie TruLife+ stores messages in a buffer until ready to process. However, if a series of messages
is sent, Christie TruLife+ may not be able to process them as fast as they arrive and the buffer
becomes full.
If this happens, Christie TruLife+ sends the 13h (Xoff) code to instruct the controller (or any devices
preparing to transmit) to cease transmission. At this point, the controller must respond immediately
and send no more than 10 extra characters or they may be lost (such as, Christie TruLife+ can
accommodate the receipt of up to 10 more bytes after it sends 13h (Xoff)). When the buffer is once
again available, Christie TruLife+ sends a 11h (Xon) command to resume transmission.
Xon and Xoff controls apply to both directions of communication. Christie TruLife+ does not send more
than three characters after it has received a 13h (Xoff) code.
Communicating with Christie TruLife+
Christie TruLife+ Technical Reference–Serial Commands 14
020-103316-01 Rev. 1 (09-2020)
Copyright © 2020 Christie Digital Systems USA, Inc. All rights reserved.
Serial API commands
The Christie TruLife+ commands can be used to modify product settings.
ADR–Projector Address
Sets or queries the device address.
This command also helps to identify where a response or asynchronous message originates from.
Generally, this command is used for projectors that are daisy-chained together using the RS232 style
communication.
Commands
Command Description Values
ADR? Checks the current projector address.
(Read-only)
—
ADR <value> Sets the projector address to <value>.
(Saved value)
0 to 999
65535 = Reserved broadcast address
Examples
Set all devices to address 0:
(65535 ADR 0)
Set first device at address 0 to address to 5:
(0 ADR 5)
Query address for all devices and return results to address 1001:
(65535 1001ADR?)
Result:
(01001 00005ADR!005)
Christie TruLife+ Technical Reference–Serial Commands 15
020-103316-01 Rev. 1 (09-2020)
Copyright © 2020 Christie Digital Systems USA, Inc. All rights reserved.
APW–Auto Power On
Automatically powers up the projector to the on state if the projector was on when the AC power was
lost.
Commands
Command Description Values
APW <0 | 1> Automatically powers up the projector to the on
state. (Saved value)
0 = Disables auto power up
1 = Enables auto power up
Examples
Turn off auto power:
(APW 0)
Turn on auto power:
(APW 1)
Related information
PWR–Power (on page 48)
BDR–Baud Rate
Sets the baud rate for a serial communications port.
Commands
Command Description Values
BDR+PRTA? Returns the baud rate for the RS232-IN
port. (Read-only)
—
BDR+PRTA <value> Sets the baud rate for the RS232-IN port.
This command requires service level access.
(Saved value)
1 = 2400
2 = 9600
3 = 19200
4 = 38400
5 = 57600
6 = 115200 (Default baud rate on each
port)
Examples
Verify that RS232-IN is set to 115200 bits per second:
(BDR+PRTA?)
Serial API commands
Christie TruLife+ Technical Reference–Serial Commands 16
020-103316-01 Rev. 1 (09-2020)
Copyright © 2020 Christie Digital Systems USA, Inc. All rights reserved.
Result:
(BDR+PRTA!006 "115200")
Set the baud rate on port A to 115200 bits per second:
(BDR+PRTA 6)
BGC–Gamma Function
Applies a predefined gamma transfer function to the image.
Commands
Command Description Values
BGC <value> Applies a predefined gamma transfer function to the
image. This command is only available if the video
electronics are on. (Saved value)
0 = Auto Detect (Default)
1 = sRGB
2 = Power Law Function
3 = Classic
4 = ITU-R BT.1886
6 = HDR/PQ (SMPTEST 2048)
7 = Raw PQ clipped at GAM
+PQWL level
100 = First custom table
Examples
Select the sRGB gamma transfer function:
(BGC 1)
Select a Power Law function with a 2.6 exponent:
(BGC 2)
Result:
(GAM 2600)
Related information
GAM–Gamma Power Value (on page 35)
CAV–Video Input Configuration
Selects the video input configuration mode used by the video processing path of the CAVE board.
This command selects the scaler FPGA image loaded, which is responsible for providing the video
inputs. When selecting from the options, the FPGA is reloaded and may take 15 to 20 seconds to
complete.
Serial API commands
Christie TruLife+ Technical Reference–Serial Commands 17
020-103316-01 Rev. 1 (09-2020)
Copyright © 2020 Christie Digital Systems USA, Inc. All rights reserved.
Commands
Command Description Values
—
CAV+MODE <value> Determines which FPGA image to load into
the scaler
, which defines the input structure
supported by the system. (Saved value)
0 = DP mode (Default)
1 = SDVoE mode
Examples
Select the DisplayPort mode for the CAVE scaler FPGA:
(CAV+MODE 0)
CCA–Color Adjustment
Configures the color adjustments for the projector
.
Use this command to also set the native colors for the projector.
Commands
Command Description Values
CCA+COPY <value> Copies the values from one of the other pre-
defined color tables into the custom color
table. This command is only available if
video electronics are on.
0 = Max Drives
1 = Color Temperature
2 = HD Video (ITU-RBT.709)
5 = DCI P3
6 = DCI P3 (D65)
7 = ITU-R BT.2020
CCA+CTMP <value> Sets the color temperature of the projector.
This command is only available if the video
electronics are on, the projector is
configured to use Color Temperature for its
color table, and Color Temperature is
selected. (Saved value)
3200 to 9300
6500 (Default)
CCA+SLCT <value> Sets the color table. This command is only
available if the video electronics are on.
(Saved value)
1 = Color Temperature—Selects
color adjustments based on a
color temperature
2 = HD Video (ITU-R BT.709)
3 = Custom settings
4 = Auto Detect (Default)
5 = DCI P3 color gamut
6 = DCI P3 (D65)
7 = ITU-R BT.2020
Serial API commands
Christie TruLife+ Technical Reference–Serial Commands 18
020-103316-01 Rev. 1 (09-2020)
Copyright © 2020 Christie Digital Systems USA, Inc. All rights reserved.
Command Description Values
CCA+RDCX <x coordinate for
red>
CCA+RDCY <y coordinate for
red>
CCA+GNCX <x coordinate for
green>
CCA+GNCY <y coordinate for
green>
CCA+BLCX <x coordinate for
blue>
CCA+BLCY <y coordinate for
blue>
CCA+WHCX <x coordinate for
white>
CCA+WHCY <y coordinate for
white>
Defines a custom color table using x,y
coordinates, scaled by a factor of 10,000.
For example, an x value of 3350
corresponds to x=0.3350 in the CIE 1931
chromaticity scale.
This command is only available if the video
electronics are on and Custom is selected.
(Saved value)
The valid range for each value
depends on which of the red/
green/blue point is being
adjusted.
CCA+GOFR <green of red
saturation value>
CCA+BOFR <blue of red
saturation value>
CCA+ROFG <red of green
saturation value>
CCA+BOFG <blue of green
saturation value>
CCA+ROFB <red of blue
saturation value>
CCA+GOFB <green of blue
saturation value>
Defines a custom color table using
saturation values.
Each control represents a percentage of
each native RGB component needed to
produce a target RGB space.
This command is only available if the video
electronics are on and Custom is selected.
(Saved value)
-1000 to 1000, where 1000 =
100%
A negative value reduces the
influence of the component by
scaling up the other two
components.
CCA+ROFR <red of red
saturation value>
CCA+GOFG <green of green
saturation value>
CCA+BOFB <blue of blue
saturation value>
Defines a custom color table using
saturation values.
Each control represents a percentage of
each native RGB component needed to
produce a target RGB space.
• Red of red is equivalent to red of white.
• Green of green is equivalent to green of
white.
• Blue of blue is equivalent to blue of
white.
This command is only available if the video
electronics are on and Custom is selected.
(Saved value)
0 to 1000, where 1000 = 100%
CCA+ROFW <red of white
saturation value>
CCA+GOFW <green of white
saturation value>
Defines a custom color table using
saturation values. Each control represents a
percentage of each native RGB component
needed to produce a target RGB space.
0 to 1000, where 1000 = 100%
Serial API commands
Christie TruLife+ Technical Reference–Serial Commands 19
020-103316-01 Rev. 1 (09-2020)
Copyright © 2020 Christie Digital Systems USA, Inc. All rights reserved.
Command Description Values
CCA+BOFW <blue of white
saturation value>
This command is only available if the video
electronics are on and Custom is selected.
(Saved value)
CCA+RDPX <x coordinate for
red>
CCA+RDPY <y coordinate for
red>
CCA+GNPX <x coordinate for
green>
CCA+GNPY <y coordinate for
green>
CCA+BLPX <x coordinate for
blue>
CCA+BLPY <y coordinate for
blue>
CCA+WHPX <x coordinate for
white>
CCA+WHPY <y coordinate for
white>
Sets the native color primaries for the
projector using the x,y coordinate form,
scaled by a factor of 10,000. For example,
an x value of 3350 corresponds to x=0.3350
in the CIE 1931 chromaticity scale.
This command is only available if the video
electronics are on and Max Drives is
selected. It is only available to a service
user.
The valid range for each value
depends on which of the red,
green, blue, or white point is
being adjusted.
CCA+RSET Resets the native color primary settings to
their defaults.
If primary settings have not been saved
(CCA+SAVE), this resets the primary
settings to hard-coded defaults.
This command is only available if video
electronics are on. It is only available to a
service user.
—
CCA+SAVE Saves the current primary settings (for
example, CCA+RDPX, and so on) as the new
default color primary settings.
Save these settings after calibrating the
color primaries (such as measuring the
primary x,y coordinates using a
spectroradiometer or similar equipment).
This command is only available if video
electronics are on. It is only available to a
service user.
—
Examples
Use a custom color table:
(CCA+SLCT 3)
Reset values to "HD Video (ITU-R BT.709)”:
(CCA+COPY 2)
Change the x-coordinate of the custom color table to 0.6753:
Serial API commands
Christie TruLife+ Technical Reference–Serial Commands 20
020-103316-01 Rev. 1 (09-2020)
Copyright © 2020 Christie Digital Systems USA, Inc. All rights reserved.

Other manuals for TruLife+ Griffyn 4K32-RGB

2

This manual suits for next models

1

Other Christie Projector manuals

Christie LW650 User manual

Christie

Christie LW650 User manual

Christie CP2306-RGBe User manual

Christie

Christie CP2306-RGBe User manual

Christie Vivid LX41 User manual

Christie

Christie Vivid LX41 User manual

Christie Mirage SST Assembly instructions

Christie

Christie Mirage SST Assembly instructions

Christie MultiSync EA274WMi User manual

Christie

Christie MultiSync EA274WMi User manual

Christie Roadie 4K35 User manual

Christie

Christie Roadie 4K35 User manual

Christie DS+5K User manual

Christie

Christie DS+5K User manual

Christie LW751i Technical Document

Christie

Christie LW751i Technical Document

Christie E Series User manual

Christie

Christie E Series User manual

Christie HS Series User manual

Christie

Christie HS Series User manual

Christie CP2215 User manual

Christie

Christie CP2215 User manual

Christie CP2308 User manual

Christie

Christie CP2308 User manual

Christie CP2000-ZX User manual

Christie

Christie CP2000-ZX User manual

Christie RPMSP-D120U Installation and operating instructions

Christie

Christie RPMSP-D120U Installation and operating instructions

Christie DWU1052 User manual

Christie

Christie DWU1052 User manual

Christie Mirage M Series User manual

Christie

Christie Mirage M Series User manual

Christie 38-MX3001-01 User manual

Christie

Christie 38-MX3001-01 User manual

Christie Mirage HD14K-M2 User manual

Christie

Christie Mirage HD14K-M2 User manual

Christie CP2208 User guide

Christie

Christie CP2208 User guide

Christie 38-VIV211-01 User manual

Christie

Christie 38-VIV211-01 User manual

Christie Roadster S+12K User manual

Christie

Christie Roadster S+12K User manual

Christie LX501 Owner's manual

Christie

Christie LX501 Owner's manual

Christie LWU421 User manual

Christie

Christie LWU421 User manual

Christie LX1200 User manual

Christie

Christie LX1200 User manual

Popular Projector manuals by other brands

NEC MultiSync SX4000 user manual

NEC

NEC MultiSync SX4000 user manual

Hughes JVC G2000 instruction manual

Hughes JVC

Hughes JVC G2000 instruction manual

Epson V11H268220 - PowerLite 1716 XGA LCD... Declaration of conformity

Epson

Epson V11H268220 - PowerLite 1716 XGA LCD... Declaration of conformity

BenQ MX815ST quick start guide

BenQ

BenQ MX815ST quick start guide

NEC GT5000 Series Control commands

NEC

NEC GT5000 Series Control commands

Mitsubishi Electric WD385U-EST Brochure & specs

Mitsubishi Electric

Mitsubishi Electric WD385U-EST Brochure & specs

ViewSonic PJD5122 Specifications

ViewSonic

ViewSonic PJD5122 Specifications

Sanyo PLC-9000NA owner's manual

Sanyo

Sanyo PLC-9000NA owner's manual

BOXLIGHT Beacon CP720e user manual

BOXLIGHT

BOXLIGHT Beacon CP720e user manual

Dukane Portable LCD Projector ImagePro 8943A Specifications

Dukane

Dukane Portable LCD Projector ImagePro 8943A Specifications

Toshiba TDP-MT8U user guide

Toshiba

Toshiba TDP-MT8U user guide

Epson EH-TW570 user guide

Epson

Epson EH-TW570 user guide

FAVI RioHD-LED-2 user guide

FAVI

FAVI RioHD-LED-2 user guide

ViewSonic PJ556D user guide

ViewSonic

ViewSonic PJ556D user guide

Kodak DP2000 - Digital Projector user guide

Kodak

Kodak DP2000 - Digital Projector user guide

Sanyo PLV-Z4000 Specifications

Sanyo

Sanyo PLV-Z4000 Specifications

Hitachi CP-X380W user manual

Hitachi

Hitachi CP-X380W user manual

DLP Texas Instruments vivitek DU6098Z user manual

DLP Texas Instruments

DLP Texas Instruments vivitek DU6098Z user manual

manuals.online logo
manuals.online logoBrands
  • About & Mission
  • Contact us
  • Privacy Policy
  • Terms and Conditions

Copyright 2025 Manuals.Online. All Rights Reserved.