CLIMAVETENTA W3000 User manual

W3000
TECHNICAL MANUAL
C0240111-01-06-GB
Replaces C0240111-10-05-GB
CLIMAVENETA S.p.A
Via Sarson, 57C
36061 Bassano del Grappa(VI)-ITALY
Tel. (+39) 0424 509 500
Fax. (+39) 0424 509 509
HTUwww.climaveneta.itUTH
HTU[email protected]UTH
The information contained in this document may be modified without prior notice.
No part of this document may be reproduced and/or disclosed to third parties or competitors.
January 2006
GB

C0240111-01-06-GB
2
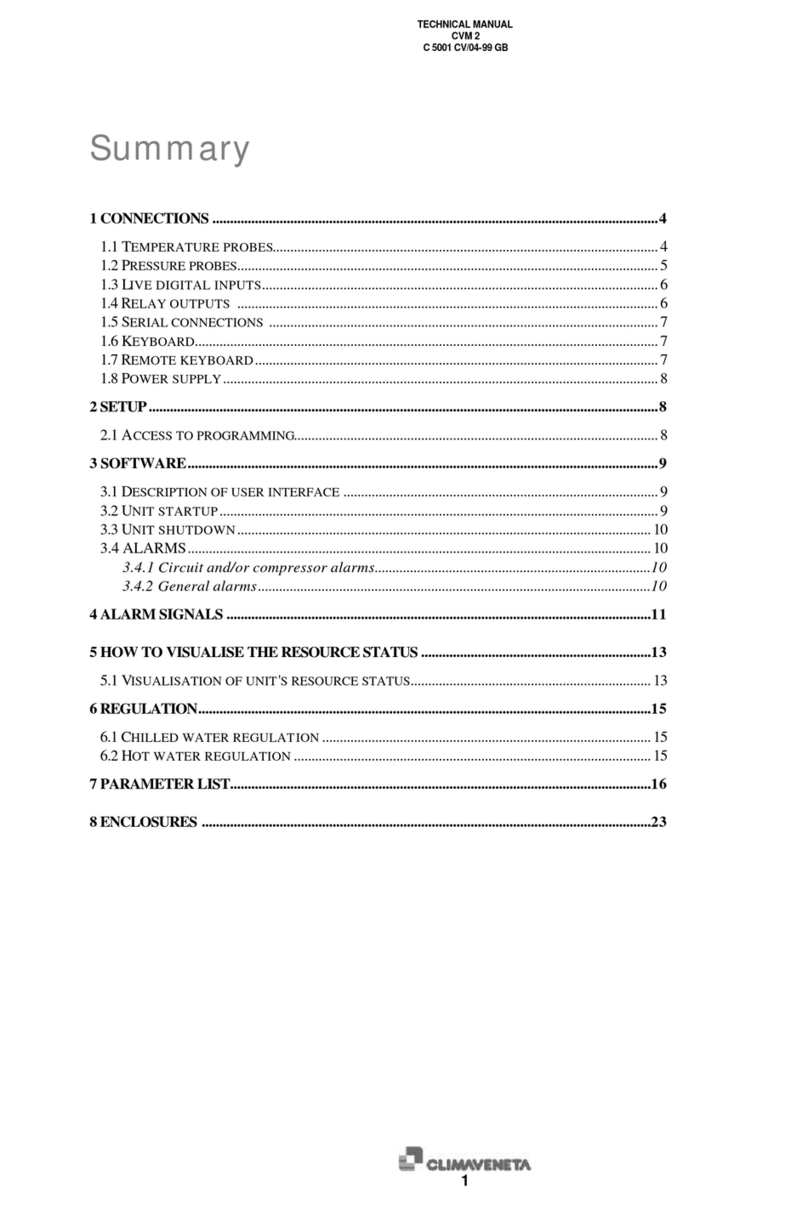
Summary
1USER INTERFACE................................................................................................................3
2MENU STRUCTURE .............................................................................................................. 4
3SETTING THE CONNECTIONS..............................................................................................6
3.1 Available hardware ............................................................................................................6
3.2 Connecting more than one unit............................................................................................ 9
3.3 Additional connections ..................................................................................................... 13
3.4 Configuring the terminals ................................................................................................. 14
4SWITCHING THE UNIT ON AND OFF .................................................................................21
5USER PROGRAMMING.......................................................................................................23
5.1) SETTING THE OPERATING MODE ...................................................................................... 23
5.2) USER MENU................................................................................................................... 25
5.2.1 ) ADJUSTMENT............................................................................................................. 25
5.2.2 ) RECOVERY................................................................................................................. 31
5.3) SETPOINT MENU ............................................................................................................ 33
5.4) CLOCK MENU.................................................................................................................33
6MANUFACTURER PROGRAMMING ..................................................................................... 34
6.1) FREECOOLING ............................................................................................................... 35
6.2) CONDENSATION ............................................................................................................ 36
7ALARMS............................................................................................................................38
ANNEX 1A : TABLE OF W3000 MASKS .....................................................................................43
ANNEX 1B : TABLE OF W3000 BASE MASKS .............................................................................66
ANNEX 1C : PARAMETERS TABLE .............................................................................................70
ANNEX 2 : INPUT/OUTPUT TABLE .......................................................................................... 77
“L” HARDWARE: ...................................................................................................................77
“XL” HARDWARE: ................................................................................................................. 82
“B” HARDWARE (for hermetic compressors).............................................................................. 85
EXPANSIONS ....................................................................................................................... 87
Notice: The W3000 controller software is protected by a digital signature.
This means that it can only work on cards supplied by Climaveneta and not on cards
purchased from other dealers.

C0240111-01-06-GB
3
1 USER INTERFACE
There are three types of user interface:
Depending on the type of user interface installed, there are more or less keys available for controlling the
unit and for accessing system information:
Key Description
W3000,
W3000 base
W3000
compact
[MENU key]: accesses the main menu.
[UP key]: moves around the masks and sets control parameter values
[DOWN key]: moves around the masks and sets control parameter
values
[ENTER key]: confirms entered data.
[ESC key]: goes back one level in the mask tree if you are in the
header masks, or returns to the unit controller.
[ALARM key]: displays the alarms and resets normal operating
conditions.
--- [SETPOINT key]: directly accesses the setpoint menu.
--- [ON/OFF key]: switches the machine on and off.
For each compressor, the following LED's are also located on the W3000 user interface:
Symbol Colour Description
Green If the LED shines steady the compressor is on, if it flashes the compressor
is demanded
Red The compressor is blocked by a compressor or circuit alarm
Green The compressor is in the “chiller” mode
Green The circuit is in the “freecooling” mode
Green The compressor is in the “heat pump” mode
Green If the LED shines steady the circuit is in the “recovery mode”, if it flashes
there is a “recovery alarm”
Green If the LED shines steady the circuit is in the “defrost mode”, if it flashes it
is in the “drip mode”
W3000 W3000 com
p
act
W3000 base

C0240111-01-06-GB
4
2 MENU STRUCTURE
The tree structures for moving around the various menus are shown below.
Termoregolatore
Selezione
Menù utente
Menù Alarm
Password
utente
Password
costruttore
Power On
Selezione
Menù unità
Selezione
Menù setpoint
Selezione
Menù I/O
Selezione
Menù orologio
Selezione
Menù costruttore
Esc
Tasto
Menù
↑ / ↓
↑ / ↓
↑ / ↓
↑ / ↓
↑ / ↓
Tasto
Alarm
Esc
Esc Menù utente
Menù costruttore
Menù setpoint
Menù I/O
Menù orologio
Esc
Esc
Esc / ↵↵
↵
Esc / ↵
Esc / ↵
Esc / ↵
Menù unità
↑ / ↓
↑ / ↓
Esc
Esc
Esc / ↵
↑ / ↓
Esc / ↵
Esc ↑ / ↓
↑ / ↓
↑ / ↓
↑ / ↓
↑ / ↓
↑ / ↓
↑ / ↓
Esc
Tasto
Setpoint
Figure 2.1: menu tree for W3000-W3000 compact
Termoregolatore
Selezione
Menù utente
Menù Alarm
Password
utente
Password
costruttore
Power On
Selezione
Menù unità
Selezione
Menù setpoint
Selezione
Menù I/O
Selezione
Menù orologio
Selezione
Menù costruttore
Esc
Esc
Tasto
Menù
↑ / ↓
↑ / ↓
↑ / ↓
↑ / ↓
↑ / ↓
Tasto
Alarm
Esc
Esc Menù utente
Menù costruttore
Menù setpoint
Menù I/O
Menù orologio
Esc
Esc
Esc / ↵↵
↵
Esc / ↵
Esc / ↵
Esc / ↵
Menù unità
↑ / ↓
↑ / ↓
Esc
Esc
Esc / ↵
↑ / ↓
Esc / ↵
Esc Visual. Alarm
Visual. utente
Visual. costruttore
Visual. setpoint
Visual. I/O
Visual. orologio
Visual. unità
Esc / ↵
Esc / ↵
Esc / ↵
Esc / ↵
Esc / ↵
Esc / ↵
Esc / ↵
↑ / ↓
↑ / ↓
↑ / ↓
↑ / ↓
↑ / ↓
↑ / ↓
↑ / ↓
Esc / ↵Visual. Termoreg.
Tasto
Setpoint
Figure 2.2: menu tree for W3000 base
Thermoregulator
Menu
key
Unit menu
selection
Setpoint menu
selection
I/O menu
selection
Clock menu
selection
User menu
selection
Manufacturer
menu selection
User
Password
Factory
Password
Alarm menu
Unit menu
Setpoint menu
I/O menu
Clock menu
User menu
Manufacturer
menu
Alarm
key
Thermoregulator
Menu
key
Unit menu
selection
Setpoint menu
selection
I/O menu
selection
Clock menu
selection
User menu
selection
Manufacturer
menu selection
User
Password
Factory
Password
Alarm menu
Unit menu
Setpoint menu
I/O menu
Clock menu
User menu
Manufacturer
menu
Alarm
key
Setpoint
key
Setpoint
key
Display
Thermoregulator
Display alarm
Display unit
Display setpoint
Display I/O
Display clock
Display user
Display
manufacturer

C0240111-01-06-GB
5
The menus are briefly described below:
• The “Unit Menu” contains information such as temperature, pressure and circuit states.
• The “Setpoint menu” is used to set the setpoints for the various available functions.
• The “I/O menu” shows the status of the digital inputs and values read from the analogue inputs.
It also shows the status of the digital outputs and the voltage supplied to the analogue outputs.
If expansions are necessary (depending on the configuration parameters), the inputs and outputs
of the latter are also shown.
• The “Clock menu”, if the clock card is present, is used to set and display the date and time.
• Parameters relative to user programming of the unit can be displayed and set in the “User
menu”.
• The “Manufacturer menu” is used to display and set critical system parameters.

C0240111-01-06-GB
6
3 SETTING THE CONNECTIONS
Set the hardware connections before switching on the unit. The inputs/outputs table explaining the
functions of the various connectors on the unit is contained in [annex 2] at the end of this manual.
3.1 Available hardware
UNIT “B”
UNIT “M”

C0240111-01-06-GB
7
UNIT “L”
UNIT “XL”

C0240111-01-06-GB
8
EXPANSION “E”
W3000

C0240111-01-06-GB
9
3.2 Connecting more than one unit
Caution: perform the following operations before touching the cards in order to prevent
electrostatic discharge:
• wear the bracelet (connected to the earth circuit) and the heel strap
• the card should be closed inside an antistatic bag protecting it from electrostatic
discharge: remove it from the bag and place it on the light-blue mat with the yellow
edge or on the dark-blue mat.
• You can now work on the card.
Several intercommunicating cards can be connected together on units “L” or “XL”.
There are two connection types: “base-expansion” on the expansion serial line and “master-slave” on the
“plan” serial line. The “mixed” connection is a combination of the other two. Details are shown below.
3.2.1 “BASE-EXPANSION” CONNECTION
In the “base-expansion” connection, the entire intelligence of the unit resides in the base. The connected
expansions are exclusively used as additional I/O. The cards must be connected together with a three-
wire shielded cable connected from terminal J23 of the base to terminal J3 of expansion “E” or to
terminal J11 of expansion “M” (see figure 3.1).
Figure 3.1: “base-expansion” connection
The expansions must be given a specific address depending on the type of chiller and the enabled
functions:

C0240111-01-06-GB
10
EXPANSIONS FOR HERMETIC COMPRESSORS:
Additional function Function, chiller type Expansion
address
Expansion
type
Recovery enable Chiller with heat recovery 1 E
Recovery enable Multi-use
Heat pump with total heat recovery 2 M
Freecooling enable
HP relay enable
Low temperature control enable
Low pressure transducer enable
Freecooling chiller
Chiller with HP relay
Low temperature chiller
Any chiller with hermetic
compressors where low pressure
monitoring is required
3 E
Number of compressors for circuit 3 or 4 Chiller with 3 or 4 hermetic
compressors per circuit 4 E
EXPANSIONS FOR SEMI-HERMETIC COMPRESSORS:
Additional function Function, chiller type Expansion
address
Expansion
type
Recovery enable Chiller with heat recovery 1 E
Recovery enable Multi-use
Heat pump with total heat recovery 2 M
Freecooling enable
HP relay enable
Setpoint variation enable
Recovery setpoint variation enable
Secondary setpoint enable
Freecooling chiller
Chiller with HP relay
Unit with setpoint or secondary
setpoint enable
3 E
Number of evaporators 0
Number of compressors per circuit 2
Condensing units
Unit with 2 alternative compressors
per circuit
4 E
At least one pump enable
Heat pump
Recovery enable
Freecooling enable
HP relay enable
Low temperature control enable
2 evaporators
Chiller with pumps on card
Heat pump chiller
Chiller with heat recovery
Freecooling chiller
Chiller with HP relay
Low temperature chiller
Chiller with more than one
evaporator
5 E
EXPANSIONS FOR CENTRIFUGE COMPRESSORS:
Additional function Function, chiller type Expansion
address
Expansion
type
Setpoint variation enable
Secondary setpoint enable
Unit with setpoint or secondary
setpoint enable 3 E

C0240111-01-06-GB
11
3.2.2 “MASTER-SLAVE” CONNECTION
Intelligence is distributed instead in the “master-
slave” connections. Suppose we have a unit with 4
cooling circuits: the master card manages circuits 1 and
2 while the slave card manages circuits 3 and 4. In this
case, the additional card is not simply an input/output
expansion, but is fully involved managing part of the
unit. The card software is the same and identifies its
functions depending on the card address: the one with
address 1 will be the master and will communicate
with the card with address 11 (master address plus
10). Pay special attention to card addresses for this
reason.
Connect the cards together with a 3-wire shielded
cable connected between terminals J11 of the cards,
as shown in figure 3.2.
Figure 3.2: “master-slave” connection

C0240111-01-06-GB
12
3.2.3 “MIXED” CONNECTION:
The “mixed” connection is used in units with 3/4 cooling circuits where an increase in inputs/outputs is
required. The master card manages circuits 1 and 2 while the slave card manages circuits 3 and 4.
Additionally, depending on the required functions or the type of machine, cards used simply as
expansions can be connected. The expansions will be connected to both the master and the slave if the
required inputs/outputs are circuit functions (recovery valves, freecooling,…). They will only be connected
to the master if they are machine functions (pumps, external air temperature,…).
Figure 3.3 shows the connections between the cards and the expansions: a 3-wire shielded cable
connects terminals J11 of the master and slave cards, and a 3-wire shielded cable connects terminals J23
of the master and/or slave cards with terminal J3 or J11 of expansions “E” or “M”.
Figure 3.3: “mixed” connection

C0240111-01-06-GB
13
3.3 Additional connections
In this case set the card address with the following dip-switches:
ON
123456
DIP
ON
1234
DIP
Cards “L”,”XL”
Cards ”E”
Table of possible combinations: (0 = off, 1= on)
Address 1 2 3 4
0 0 0 0 0
1 1 0 0 0
2 0 1 0 0
3 1 1 0 0
4 0 0 1 0
5 1 0 1 0

C0240111-01-06-GB
14
3.4 Configuring the terminals
The first operation to perform when a network is started up for the first time or a card is replaced, is to
perform the procedure for terminal configuration.
This cannot be achieved with the basic W3000 keypad. In this case, configure the terminals using the
W3000 or W3000 compact keypad and then connect the W3000 basic display.
Before starting, it is advisable to check that each card and each terminal has been identified with the
correct address established when the network was designed. It is important to remember that as the set
address is only read by the boards during startup, it is best to perform a global reset of all the devices if
a mistake is made when configuring the addresses (more than one card with the same address). Reset
the network by disconnecting all the devices from the power supply .
The configuration procedure can be activated from any terminal (keypad), which may also be connected
temporarily only to perform configuration operations and removed upon completion. The operations to
perform are described in the following paragraphs.
3.4.1 SETTING THE KEYPAD ADDRESS
After connecting the keypad to the device, perform the following procedure:
1) Press [UP], [DOWN] and [ENTER] together and hold down until the
mask shown to the side appears.
Display address
Setting..........:00
I/O Card address:
2) Press [ENTER] to move the cursor to “Display address setting”. Press
[UP] and [DOWN] to set the required keypad address (e.g.: 21 ).
Display address
Setting..........:21
I/O Card address:--
3) This mask means that the address of the keypad has been set.
Display address
changed
4) If an empty mask or a mask showing “NO LINK” appears after
pressing [ESC], it means that the keypad is not communicating with
any card. Either the card must be addressed or the plan network
must be configured.
NO LINK
N.B.: This is a timed procedure; if the parameters are not set within a few seconds, the display turns off.
In this case, the operation must be repeated.

C0240111-01-06-GB
15
3.4.2 SETTING CARD ADDRESSES
The card address is set by the software using the keypad.
Proceed as follows:
1 Make sure the keypad address is set to 0 ( see para 3.4.1). Display address
Setting..........:00
I/O Card address:
2 Disconnect the card from the power supply (turn off the general
switch).
3 Power the card by pressing [ALARM] and [UP] together; hold the
keys down until the mask shown to the side appears.
pLan address: 0
UP: increase
DOWN: decrease
ENTER: save & exit
4 Set the required address (e.g.: 1 )
To do this, press [UP] or [DOWN]; press [ENTER] to confirm.
pLan address: 1
UP: increase
DOWN: decrease
ENTER: save & exit
5 An “empty” mask appears because the address of the keyboard is 0
and that of the board is (as shown in the example) 1; the two devices
cannot communicate.
In any case, card address 1 has been set.
6 Now perform “NETWORK CONFIGURATION” to allow the card to
communicate with its keypad

C0240111-01-06-GB
16
3.4.3 CONFIGURING THE PLAN NETWORK
• CONFIGURING THE PLAN NETWORK (local):
For each unit with an on-board keyboard, perform the following procedure to create a “locale” plan
network:
0 Make sure the card has been addressed (see para 3.4.2). pLan address: 1
UP: increase
DOWN: decrease
ENTER: save & exit
1 Press [UP], [DOWN] and [ENTER] together and hold down until the
mask shown to the side appears.
Display address
Setting..........:00
I
/
O Card address:
2 Set the required address for the keypad (e.g.: 21 ) Display address
Setting..........:21
I
/
O Card address:--
3 Press [ENTER] to display the address of the cards in pLan (in this
case 1 ).
N.B.: If there is more than one card, press [UP] or [DOWN] to choose
which card to configure.
Display address
Setting..........:21
I/O Card address:01
4 Press [ENTER] to configure the terminals; press [ENTER] to confirm Terminal config
Press ENTER
To continue
5 In this mask, the [ENTER] key moves the cursor from one field to
another and the [UP] or [DOWN] keys change the values.
P:01 means that the card with address 1 is being configured.
P:01 Adr Priv/Shared
Trm1 None --
Trm2 None --
Trm3 None -- Ok?No
6 Configure keyboard 21 (previously set) as Pr=private (usually the one
on the unit). (Sp=printer, or Sh=shared)
P:01 Adr Priv/Shared
Trm1 21 Pr
Trm2 None --
Trm3 None -- Ok?No
7 The remote keypad must also be configured. Simply define the
keypad addressed with 32 (even if not present) as Sh.
P:01 Adr Priv/Shared
Trm1 21 Pr
Trm2 32 Sh
Trm3 None -- Ok?No
8 To save the settings and exit the configuration procedure, move the
cursor to “No”, change it to “Yes” and press [ENTER]. To exit without
saving the settings, wait 30 seconds without touching the keypad.
P:01 Adr Priv/Shared
Trm1 21 Pr
Trm2 32 Sh
Trm3 None -- Ok?Yes
9 The following mask may appear. If no expansions are connected,
simply press [ESC] to show the main display menu.
#####################
expansion
connection ……
#####################
To connect several units together and remote control them, thereby forming a plan network (global), a
remote keypad controlling all the units is required.
The remote keypad cannot be used with a W3000 basic keypad. If a W3000 basic keypad is installed on
the machine, replace it with a 3000 compact.

C0240111-01-06-GB
17
• CONFIGURING THE PLAN NETWORK (global):
It is easy to install a PLAN network (global). Just a few but essential operations are required. If just one
of these is not performed correctly, the entire system will not work.
The remote keypad will work problem-free if the following operations are performed one after the other.
1 Set the on-board machine card and keypad
addresses (see configuring the local plan
network)
Leaving the network cable disconnected. configure
the terminals on each card and keypad (J11
connector)
2 Check the chillers work correctly without being
connected to the network.
3 Disconnect the power supply from the chillers
4 Connect all the chillers to the network except
for the remote keypad.
Connect connectors J11 together. Do not connect
the remote keyboard. This creates a plan network
comprising more than one chiller.
5 Power the chillers.
6 Check that all the networked devices work
correctly
If any faults occur, check the configuration of the
terminals to make sure that no two devices have
the same address.
7 Connect the remote keypad to one of the units Disconnect the machine keyboard and connect the
remote keypad to the J10 connector.
8 Make sure the remote keypad address is set to
32.
Follow the procedure for addressing the keyboard
(see para 3.4.1).
9 Make sure that the devices outside the chillers
are correctly configured.
If the power unit for the remote keypad is fitted
(see below: remote keypad from 200 up to 500
metres), make sure the remote keypad is powered.
11 Connect the remote keyboard. Disconnect connector J10 from the last board and
connect it to connector “A” of the “T” shunt.
Connect connector J10 on the last board to
connector “B” of the “T” shunt.
10 Wait a few seconds until network
communication has stabilised.
• If there is global network comprising just W3000 chillers, the W3000-compact can be used as a
remote keyboard. After configuring the various units (each with a different address in order not
to generate conflicts in the global network), connect the remote keyboard and repeat the
procedure.
In this case, the various machines of the network are switched by pressing [ESC] and [UP]
together.
• If the plan network does not comprise just W3000 chillers, a 16-key keypad must be used. In this
case, press [UNIT] to switch between one card and another. In this case, however, the terminals
must be given a special configuration as the 16-key keypad is only recognised on “terminal 3”.
The terminal configuration procedure remains the same up to point 6 of paragraph 3.4.5, after
which:
7 The remote keypad can be configured even if the plan network doe not
comprise just W3000 chillers. Simply define the keypad addressed with
32 (N.B.: on terminal 3) as Sh, i.e.: shared.
P:01 Adr Priv/Shared
Trm1 21 Pr
Trm2 None --
Trm3 32 Sh Ok?No
8 To save the settings and exit the configuration procedure, move the
cursor to “No”, change it to “Yes” and press [ENTER]. To exit without
saving the settings, wait 30 seconds without touching the keypad.
P:01 Adr Priv/Shared
Trm1 21 Pr
Trm2 None --
Trm3 32 Sh Ok?Yes

C0240111-01-06-GB
18
• CONNECTING THE REMOTE KEYPAD:
• “T” SHUNT:
Figure 3.4a: photo of a T shunt
Figure 3.4b: wiring diagram of a T
shunt
Let us analyse a vital component for connecting several
units in a network: the “T” shunt.
This is a shunt with phone connectors (called A,B,C in
figure 3.4b).
CONFIGURATION: For our purposes, configure
terminals J14 and J15 (see Figure 3.4b). There are
several pins in each terminal. Short pins 1 and 2 with a
jumper.
Figure 3.4c: terminal card of a T shunt T
Screw terminal Function
0 Earth (sheath of shielded cable)
1 +VRL=30V
2 GND
3 Rx+/Tx+
4 Rx+/Tx+
5 GND
6 +VRL=30V
• REMOTE KEYPAD UP TO 200 metres:
To connect a remote keypad, two “T” shunt cards must be used, one near the controller and the
other near the remote keypad, configured as indicated above. The T shunt cards must be
connected together by terminals.
1. If the remote keypad monitors just one unit, proceed as follows:
• Disconnect the connector J10 connecting the keypad on the unit with the card,
and connect it to connector “A” of the “T” shunt (see figure 3.5).
• Connect connector J10 on the card to connector “B” of the “T” shunt.
The correct configuration is shown in figure 3.5:

C0240111-01-06-GB
19
Figure 3.5 : connecting the remote keypad (for distances less than 200 metres)
2. If a remote keypad monitors more than one unit, the above configuration may only be
used for the last card in the network (the nearest to the remote keypad).
• REMOTE KEYPAD FROM 200 metres UP TO 500 metres
N.B.: The remote keypad cannot be installed more than 500 m away.
If the remote keypad must be installed over 200 metres away from the plan network, a power
unit must be installed near the remote keypad. The only difference between this and a remote
keypad up to 200 metres is that the power unit must be to terminals 1 and 2 of the T shunt (the
one near the remote keypad)
The connection diagram is:
SHIELDED
TWISTED

C0240111-01-06-GB
20
Figure 3.6: connecting the remote keypad (for distances between 200 and 500 metres)
SHIELDED
TWISTED
Table of contents