Comenius B 10110 User manual
User’s manual
Drilling Machine
B 10110
Read and follow the operating instructions and
safety precautions!
All technical changes and printing/typesetting
are subject to change!
english

PREFACE
Dear teachers and pupils!
This user’s manual contains information and important advice on operating and handling the
machine.
The user’s manual is part of the machine and must not be removed. Preserve it for later purposes!
Attach it to the machine, especially when you give it to a third person!
Please observe the safety advice!
Read this user’s manual carefully before putting the machine in operation The appropriate handling
will be easier for you, misunderstandings and possible damages can be prevented. Adhere to the
warning and safety recommendations. Disregarding the warnings can lead to serious injuries.
1

TABLE OF CONTENTS
1 TECHNICAL ASPECTS 49
1.1 Components and operating elements 49
1.1.1 External appereance 49
1.1.2 Interior 51
1.1.3 Equipment 53
1.2 Technical specifications 54
2 SAFETY 55
2.1 Slated employment 55
2.1.1 Operating conditions 55
2.2 Inadmissible purpose 55
2.3 General safety advice 56
2.4 Warining signs 57
2.5 Remaining risk 58
3 ASSEMBLY 59
3.1 Scope of delivery/workplace 59
3.2 Electrical connection 60
3.3 Work preperation 61
4 OPERATION 62
4.1 Adjusting of the rotational speed and cutting rate 62
4.2 Drill selection 63
4.3 User’s manual 64
5 MAINTENANCE 65
6 TROUBLESHOOTING 66
7 DECOMMISSIONING AND WASTE MANAGEMENT 67
8 DECLARATION OF CONFORMITY 68
2

TECHNIQUE
1 TECHNICAL ASPECTS
1.1 Components and operating elements
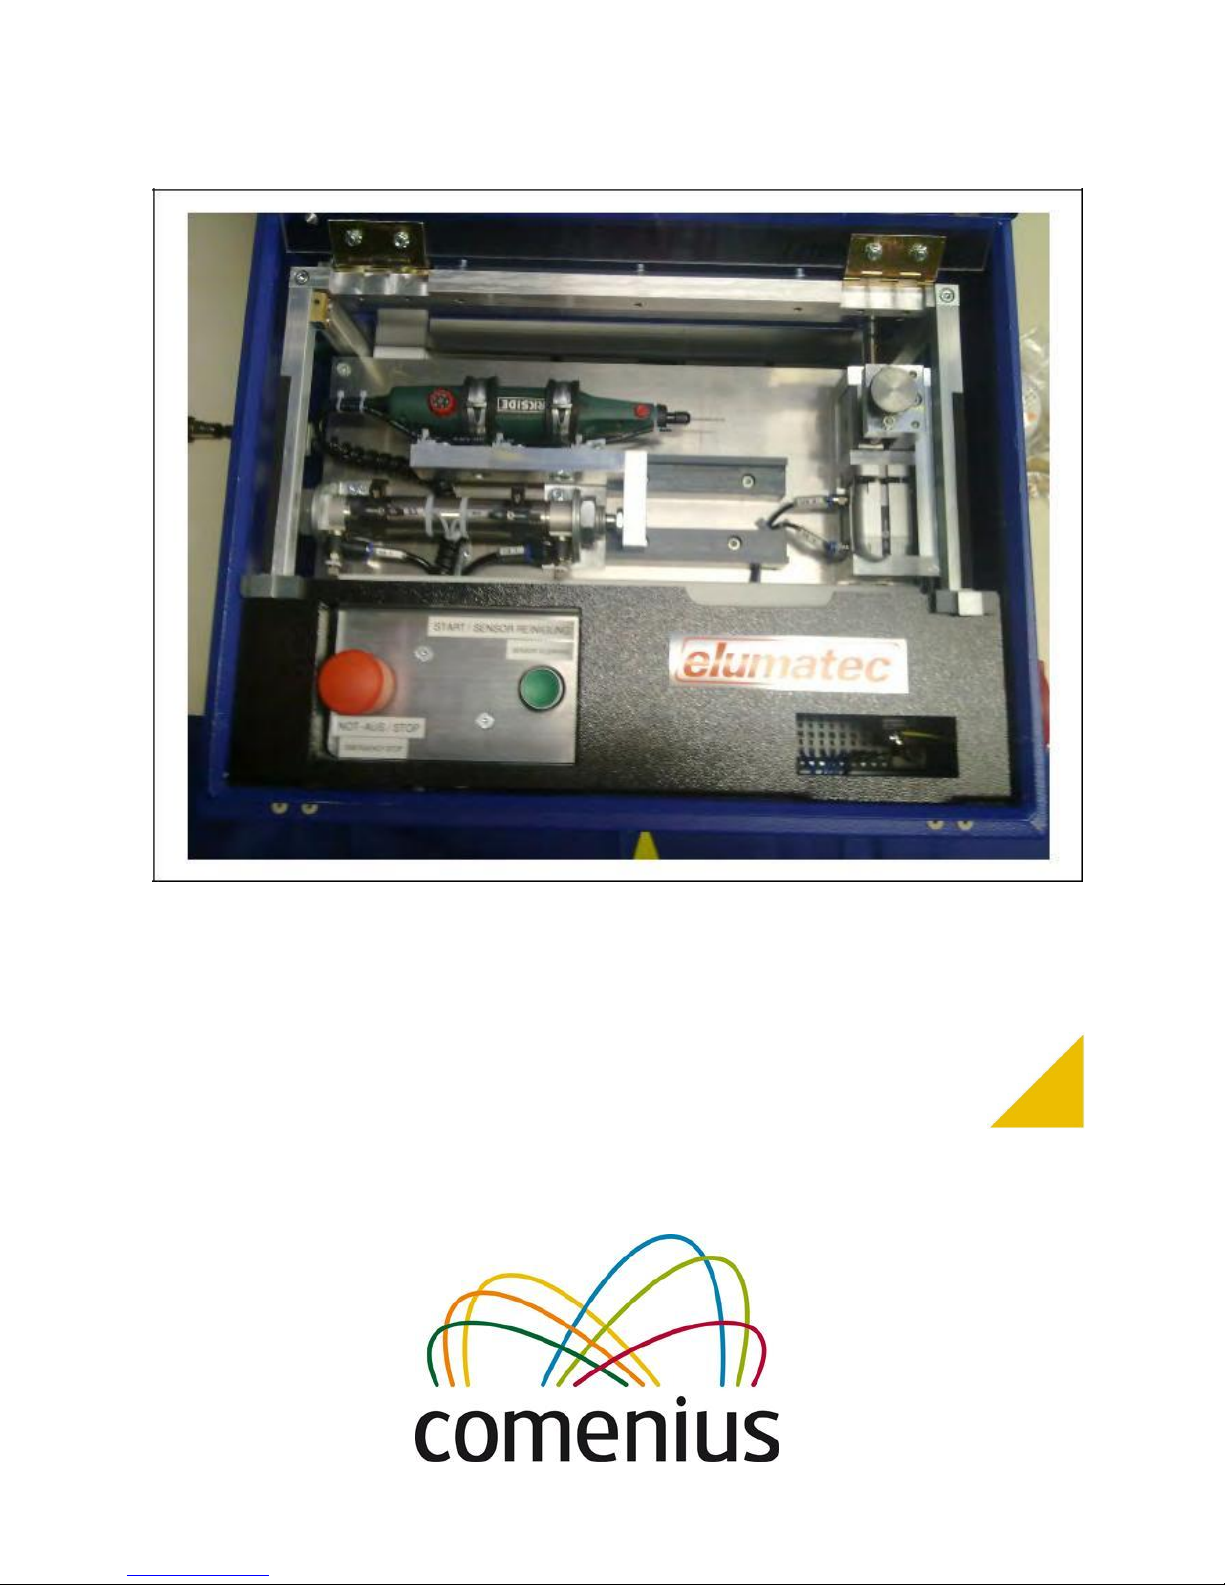
1.1.1 External appereance
socket wrench
main switch
3
TECHNIQUE
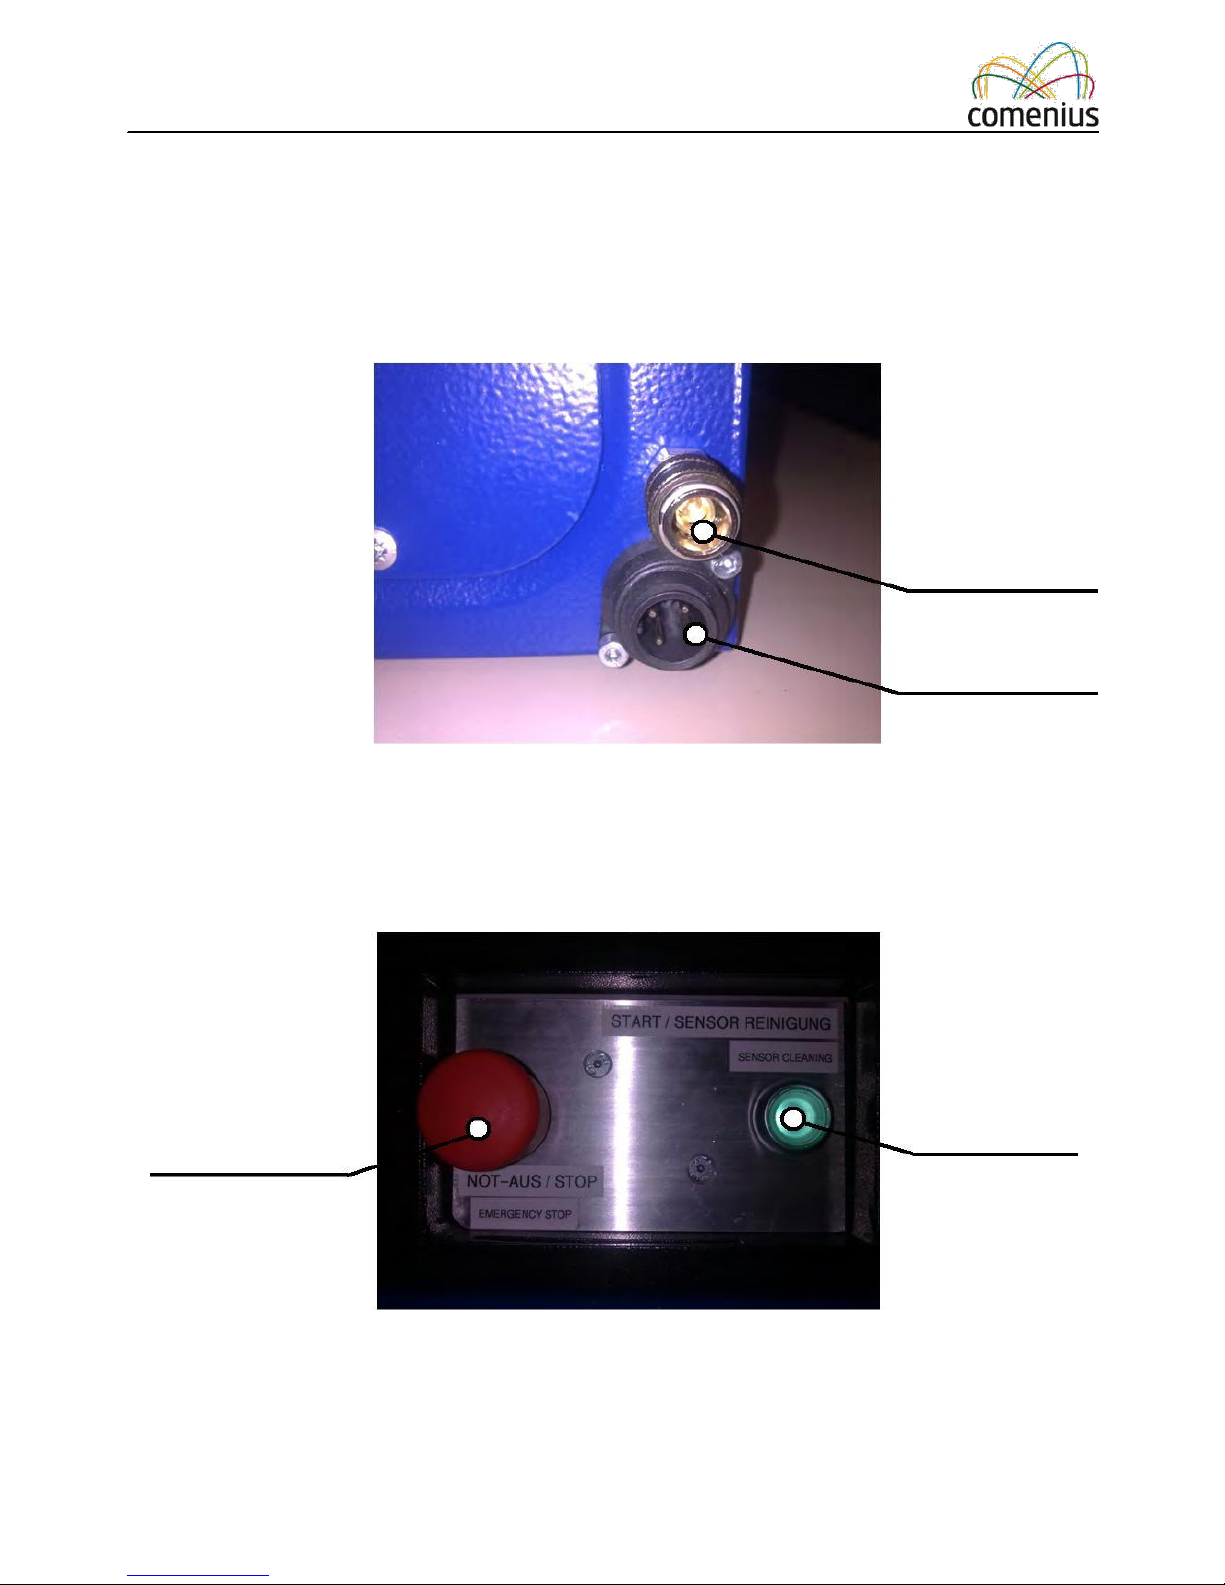
Crompressed
Air connection
current
connection
start button
emergency switch

TECHNICAL ASPECTS
1.1.2 Interior
drilling machine
feed cylinder reed switch
5

TECHNICAL ASPECTS
capacitiv sensor
clamping cylinder
reed switch
vice
6
TECHNICAL ASPECTS
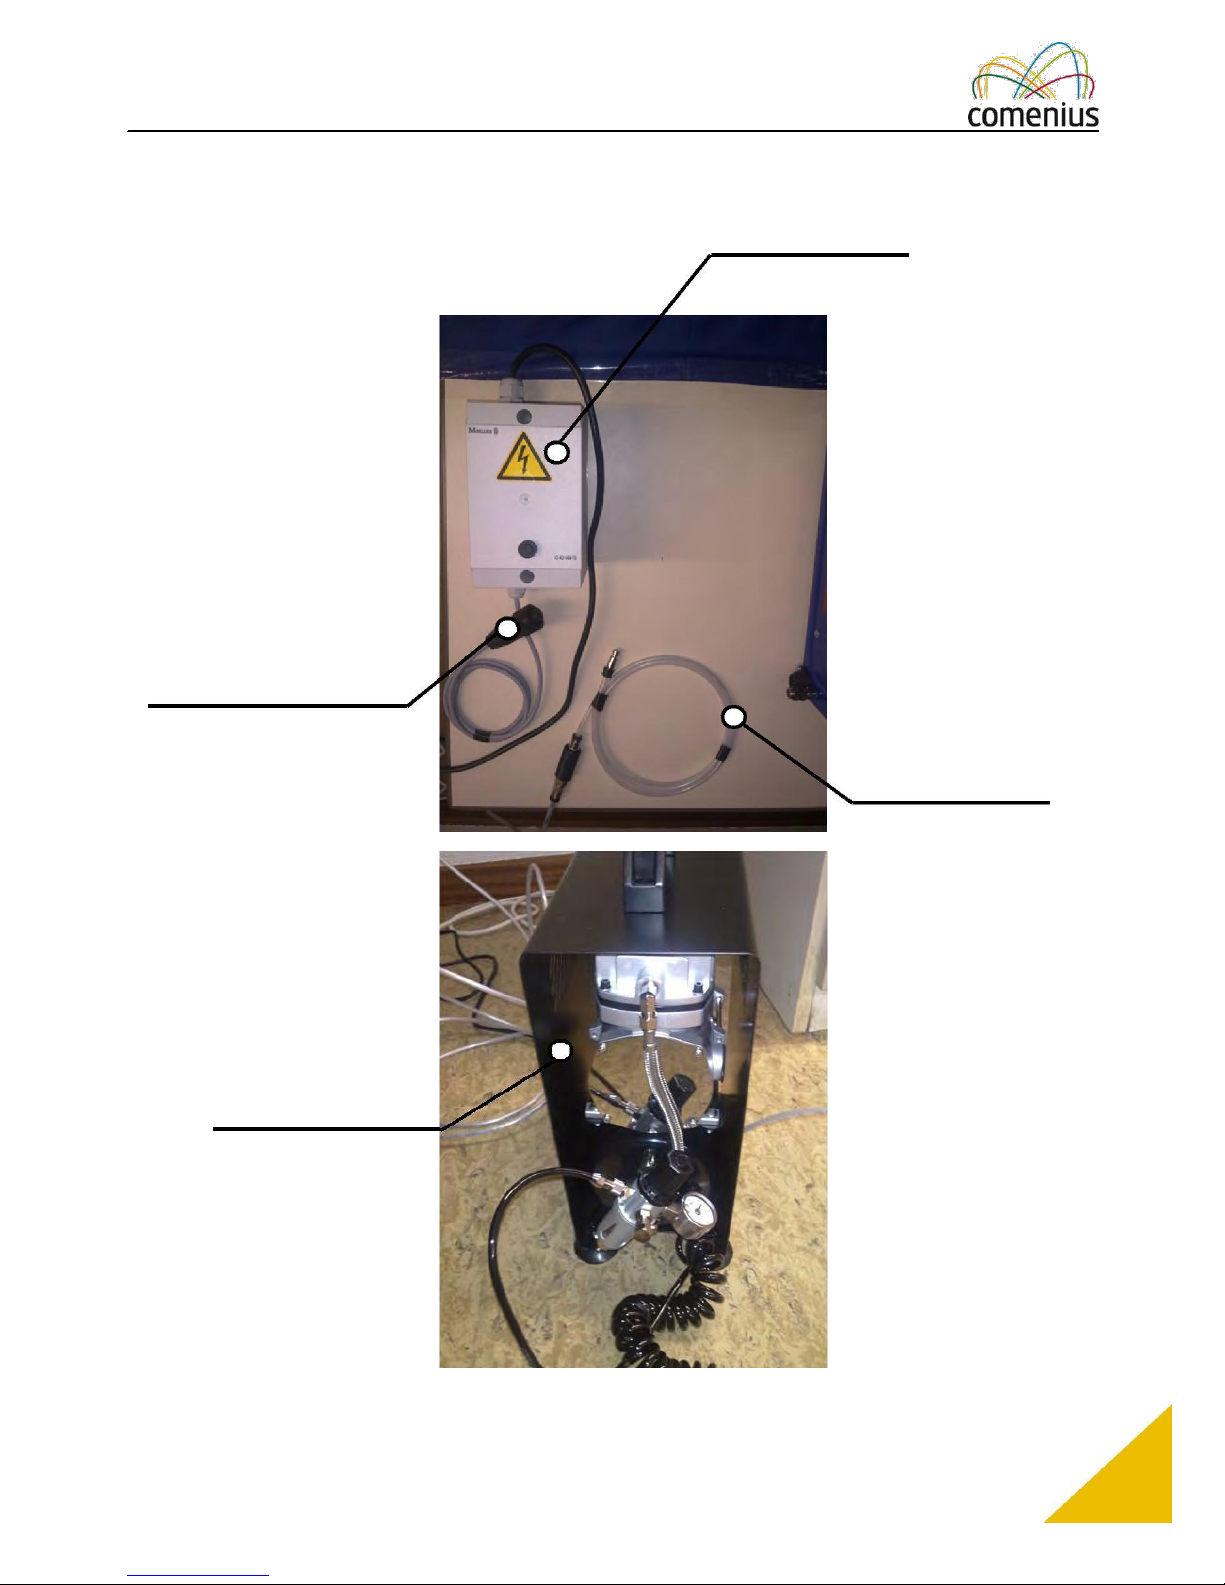
1.1.3 Equipment
power supply
connector for drill
pneumatic supply
line
compressor
7
TECHNICAL ASPECTS
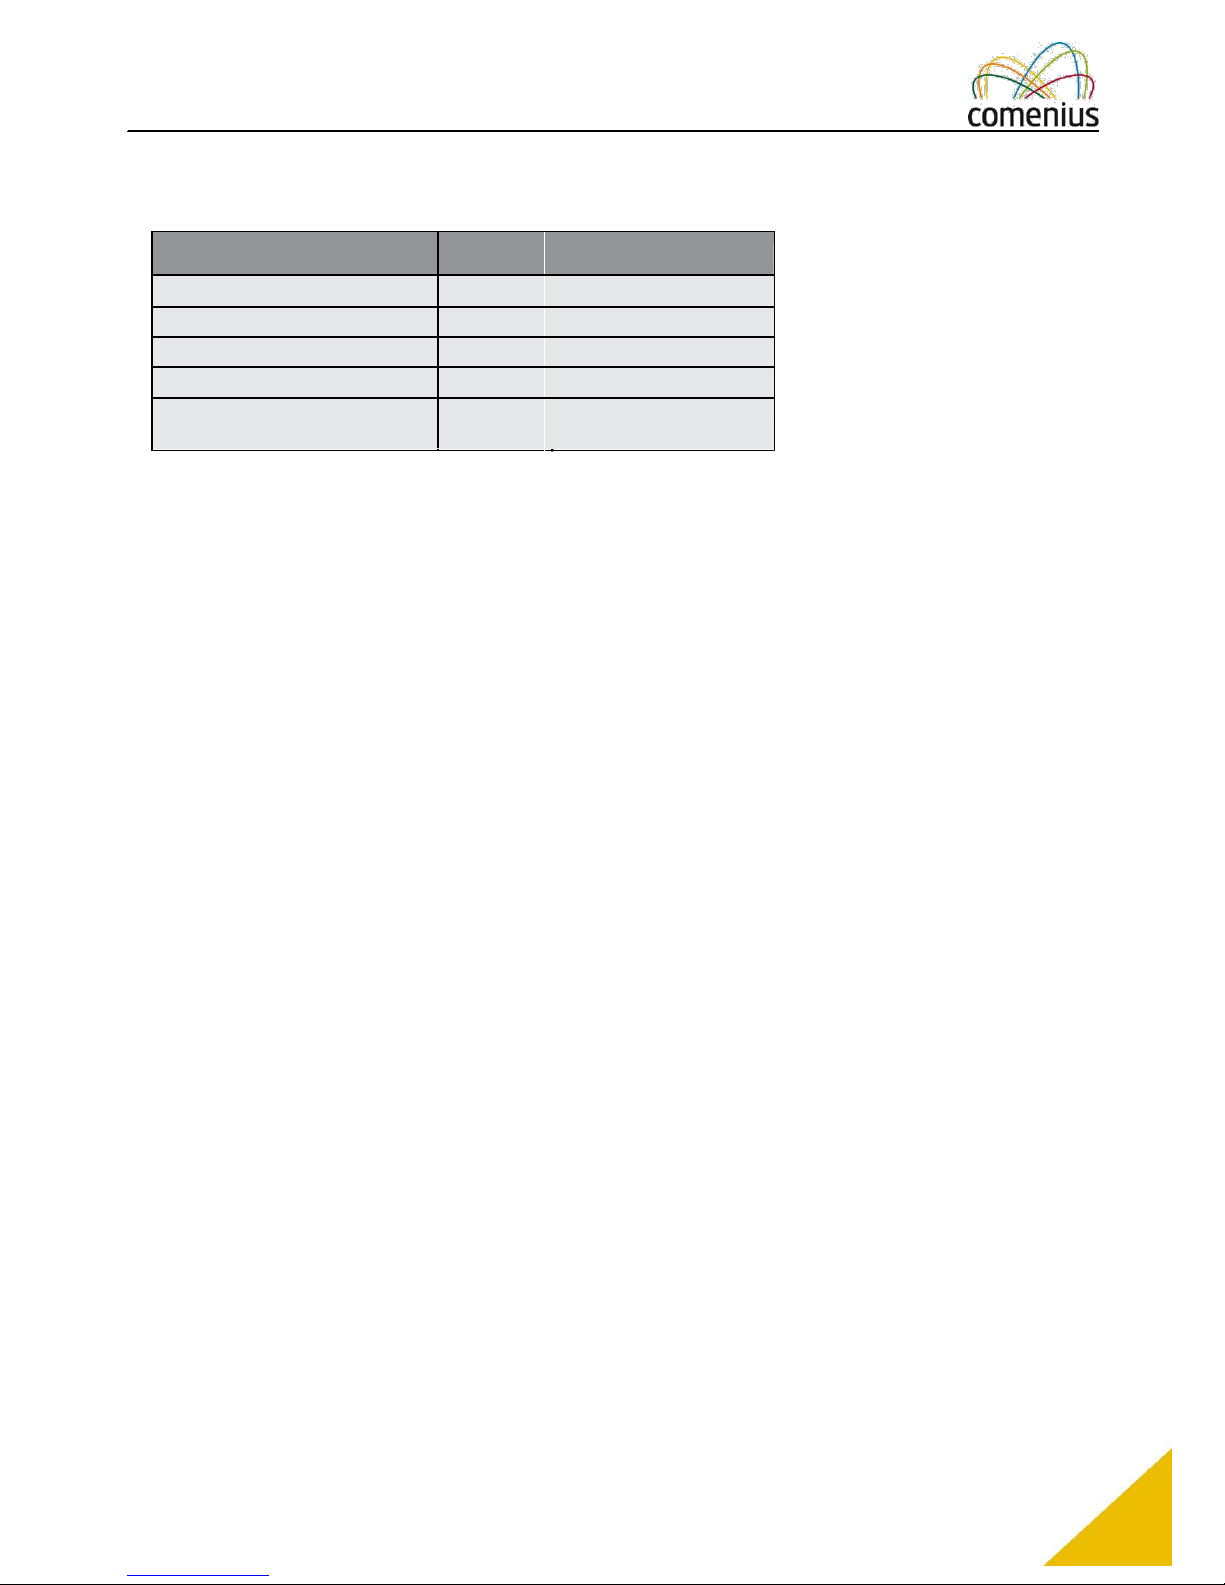
1.2 Technical specifications
Einheit
Maschine
power supply +-
V/Hz
230V/50Hz
operation (DC)
V
15V
power
W
22W
rotational speed
U/min
5000 - 20000 U/min
max. drilling capacity Ø/
mm
3,2 mm
8

SAFETY
2 SAFETY
2.1 Slated purpose
Only use the machine in a flawless, slated and safe condition.
Interruptions which affect safety have to be removed immediately!
The B 10110 is slated for the following activities:
drill 3,2 mm: metal, wood, plastic
Only use suitable drilling bits!
2.1.1 Operating conditions
Use the machine only if under the following conditions:
moisture max. 70%
temprature from +1°Сto+40°С
elevation max. 2000 m
The machine is NOT planed for the operation outside or under explosion-prone conditions.
2.2 Inadmissible purpose
• The operation of the machine under conditions which aren’t mentioned in this user’s manual
is inadmissible.
• The operation of the machine without the slated precautionary measure is inadmissible.
• The disassembly or the removal of the precautionary measure is forbidden.
• Design changes on the Machine are forbidden.
• The operation of the machine is only allowed for the admissible purpose.
9
Table of contents


