connexx CX32A20ETV User manual

/TYZX[IZOUT3GT[GR
3UJKR )>'+:<)>'+:<)>'+:<
(17(57$,10(1779
%8,/7,162 81'%$5

. . . . . . . . . . . . . . . . . . . . . . . . . . . . . . . . . . . . . . . . . . . . . . . . . . . . . . . . . . . . . . . . . . . . . . . .
. . . . . . . . . . . . . . . . . . . . . . . . . . . . . . . . . . . . . . . . . . . . . . . . . . . . . . . . . . . . . . . . . . . . . . . . . . . . . . . . . . . . . . . .
. . . . . . . . . . . . . . . . . . . . . . . . . . . . . . . . . . . . . . . . . . . . . . . . . . . . . . . . . . . . . . . . . . . . . . . . . . . . . . . . . . . . . . . . .
1
5
5
About Your TV
Features
Includes
Contents
. . . . . . . . . . . . . . . . . . . . . . . . . . . . . . . . . . . . . . . . . . . . . . . . . . . . . . . . . . . . . . . . . . . . . . . . . . . .
. . . . . . . . . . . . . . . . . . . . . . . . . . . . . . . . . . . . . . . . . . . . . . . . . . . . . . . . . . . . . . . . . . . . . . . . . . . . . . . .
. . . . . . . . . . . . . . . . . . . . . . . . . . . . . . . . . . . . . . . . . . . . . . . . . . . . . . . . . . . . . . . . . . . . . . . . . . . . . . . . . . . . .
. . . . . . . . . . . . . . . . . . . . . . . . . . . . . . . . . . . . . . . . . . . . . . . . . . . . . . . . . . . . . . . . . . . . . . . . . . . . . . . . . . . . .
. . . . . . . . . . . . . . . . . . . . . . . . . . . . . . . . . . . . . . . . . . . . . . . . . . . . . . . . . . . . . . . .. . . . . . . . . . . . . . . . . . . .
. . . . . . . . . . . . . . . . . . . . . . . . . . . . . . . . . . . . . . . . . . . . . . . . . . . . . . . . . . . . . . . . . . . . . . . . . . . . . . . . . . . .
. . . . . . . . . . . . . . . . . . . . . . . . . . . . . . . . . . . . . . . . . . . . . . . . . . . . . . . . . . . . . . . . . . . . . . . . . . . . . . . . . . . . .
. . . . . . . . . . . . . . . . . . . . . . . . . . . . . . . . . . . . . . . . . . . . . . . . . . . . . . . . . . . . . . . . . . . . . . . . . . . . . . . . . . . . .
. . . . . . . . . . . . . . . . . . . . . . . . . . . . . . . . . . . . . . . . . . . . . . . . . . . . . . . . . . . . . . . .. . . . . . . . . . . . . . . . . . .
. . . . . . . . . . . . . . . . . . . . . . . . . . . . . . . . . . . . . . . . . . . . . . . . . . . . . . . . . . . . . . . . . . . . . . . . . . . . . . . . . . . . . . . . . .
. . . . . . . . . . . . . . . . . . . . . . . . . . . . . . . . . . . . . . . . . . . . . . . . . . . . . . . . . . . . . . . . . . . . . . . . . . . . . . . . . . . .
5
5
10
13
14
15
16
17
18
21
25
Setup
Connecting the Stand
. . . . . . . . . . . . . . . . . . . . . . . . . . . . . . . . . . . . . . . . . . . . . . . . . . . . . . . . . . . . . . . . . . . . . . . . 6
Mounting the TV on a wall
Remote Batteries
Main Menu Operation
Setup Wizard
. . . . . . . . . . . . . . . . . . . . . . . . . . . . . . . . . . . . . . . . . . . . . . . . . . . . . . . . . . . . . . . . . . . . . . . . . . . . . . . . . . . . 12
Source Select
. . . . . . . . . . . . . . . . . . . . . . . . . . . . . . . . . . . . . . . . . . . . . . . . . . . . . . . . . . . . . . . . . . . . . . . . . . . . . 12
Zone B Source Menu
. . . . . . . . . . . . . . . . . . . . . . . . . . . . . . . . . . . . . . . . . . . . . . . . . . . . . . . . . . . . . . . . . . . . . . . . . . . . . . . . . . . . . . 7
Orientation
Front Panel
. . . . . . . . . . . . . . . . . . . . . . . . . . . . . . . . . . . . . . . . . . . . . . . . . . . . . . . . . . . . . . . . . . . . . . . . . . . . . . . . . . . . . . . . 26
Customer Support
Warranty
. . . . . . . . . . . . . . . . . . . . . . . . . . . . . . . . . . . . . . . . . . . . . . . . . . . . . . . . . . . . . . . . . . . . . . . . . . . . . . . . . . . . . . . . . 8
Remote
. . . . . . . . . . . . . . . . . . . . . . . . . . . . . . . . . . . . . . . . . . . . . . . . . . . . . . . . . . . . . . . . . .. . . . . . . . . . . . . . . . . . . . . . . . . 9
Inputs
Setup Menu
Picture Menu
Sound Menu
Time Menu
Lock Menu
Channel Menu
. . . . . . . . . . . . . . . . . . . . . . . . . . . . . . . . . . . . . . . . . . . . . . . . . . . . . . . . . . . . . . . . . . . . . . . . . . . . . . . . . . . . . . . 19
Bluetooth
................................................................. . . . . . . . . . . . . . . . . . . . . . . . 20
FM Radio
Media
Trouble Shooting
. . . . . . . . . . . . . . . . . . . . . . . . . . . . . . . . . . . . . . . . . . . . . . . . . . . . . . . . . . . . . . . . . . . . . . . . . . . . . . . . . . . . 24
Specifications
Important Safety Instructions

1
Important safety precautions
1.Read these instructions.
2.Keep these instructions.
3.Heed all warnings.
4.Follow all instructions.
5.Do not use this apparatusnear water.
6.Clean only with dry cloth.
7.Do not block any ventilation openings. Install in accordance with the menufacturer’s instructions.
8.Do not install near any heat souses such as radiators. Heatregisters, stoves, or other apparatus
(including amplifiers) that produce heat.
9.Do not defeat the safety purpose of the polarized or grounding-type plug A polarized plug has two
blades with one wider than the other. A grounding type plug has two blades and a third grounding prong.
The wide blade or the third prong is provided for your safety. If the provided plug does not fit into your
outlet, consult an electrician for replacement of the obsolete outlet.
10.Protect the power cord from being walked on or pinched particularly at plugs convenience receptacles
and the point where they exit from the apparatus.
11.Only use attachments / accessories specified be the manufacturer.
12.Use only with the cart, stand. Tripod, bracket , or table specified by the
manufacturer, or sold with the apparatus when a cart is used, use caution
when moving the cart / apparatus combination to avoid injury from tip-over.
13.Unplug this apparatus during lightning storms or when unused for long
periods of time.
14.Refer all servicing to qualified service personnel.
Servicing is required when the apparatus has been damaged in any way, such as power-supply cord or
plug is damaged, liquid has been spilled or objects have fallen into the apparatus, the apparatus has been
exposed to rain or moisture, does not operate normally, or has been dropped.
This symbol indicates that this product in corporates double insulation
between haza~ous mains voltage and user accessible pads. When
servicing use only identical replacement pads
Caution: To reduce the risk of electric shock. Do not remove cover(or back). No user serviceable pads
inside. Refer servicing to qualified service personnel.
This symbol indicates important
instructions accompanying the
product.
WARNING
To reduce the risk of fire or electric shock, do not expose this product to rain or moisture.
The apparatus must not be exposed to dripping or splashing. Objects filled with liquids, such as vases
or drinking glasses, must never be placed on the apperatus.
15.If an outside antenna or cable system is connected to the product, be sure the antenna or cable system
is grounded so as to provide some protection against voltage surges and built-up static charges, section 810
of the National Electrical Cord, ANSI/NFPA Number 70-1984(Section 54 of Canadian Electrical Code, Part1)
Provides information with respect to proper grounding of the mast and supporting structure, grounding of the
lead-in wire to an antenna-discharge unit, size of grounding conductors, location of antenna-discharge unit,
connection to grounding electrode. See following example.
This symbol indicates “dangerous voltage”
inside the product that presents a risk of
electric shock or personal injury.
Important Safety Instructions

Important Safety Instructions
2
16. Mian plug is used as the disconnect device, It shall remain readily operable and should not be
obstructed during intended use.
17.
18.Connected to a MAINS socket outlet with a protective earthing connection.
19.minimum distances around the apparatus for sufficient ventilation;
20.the ventilation should not be impeded by covering the ventilation openings with items, such as
newspapers, table-cloths, curtains, etc.;
21.no naked flame sources, such as lighted candles, should be placed on the apparatus;
22.the use of apparatus in tropical and/or moderate climates.
This equipment is a Class II or double insulated electrical appliance. It has been designed
in such a way that is does not require a safety connection to electrical earth.

Important Safety Instructions
3
FCC Statement
This equipment has been tested and found to comply with the limits for a Class B digital device, pursuant
to Part 15 of the FCC Rules. These limits are designed to provide reasonable protection against harmful
interference in a residential installation. This equipment generates uses and can radiate radio frequency
energy and, if not installed and used in accordance with the instructions, may cause harmful interference
to radio communications. However, there is no guarantee that interference will not occur in a particular
installation.If this equipment does cause harmful interference to radio or television reception, which can
be determined by turning the equipment off and on, the user is encouraged to try to correct the interference
by one or more of the following measures:
-- Reorient or relocate the receiving antenna.
-- Increase the separation between the equipment and receiver.
-- Connect the equipment into an outlet on a circuit different from that to which the receiver is connected.
-- Consult the dealer or an experienced radio/TV technician for help.
This device complies with part 15 of the FCC Rules. Operation is subject to the following two conditions:
(1) This device may not cause harmful interference, and
(2) this device must accept any interference received, including interference that may cause undesired
operation.
Changes or modifications not expressly approved by the party responsible for compliance could void the
user's authority to operate the equipment.

Précautions de sécurité importantes
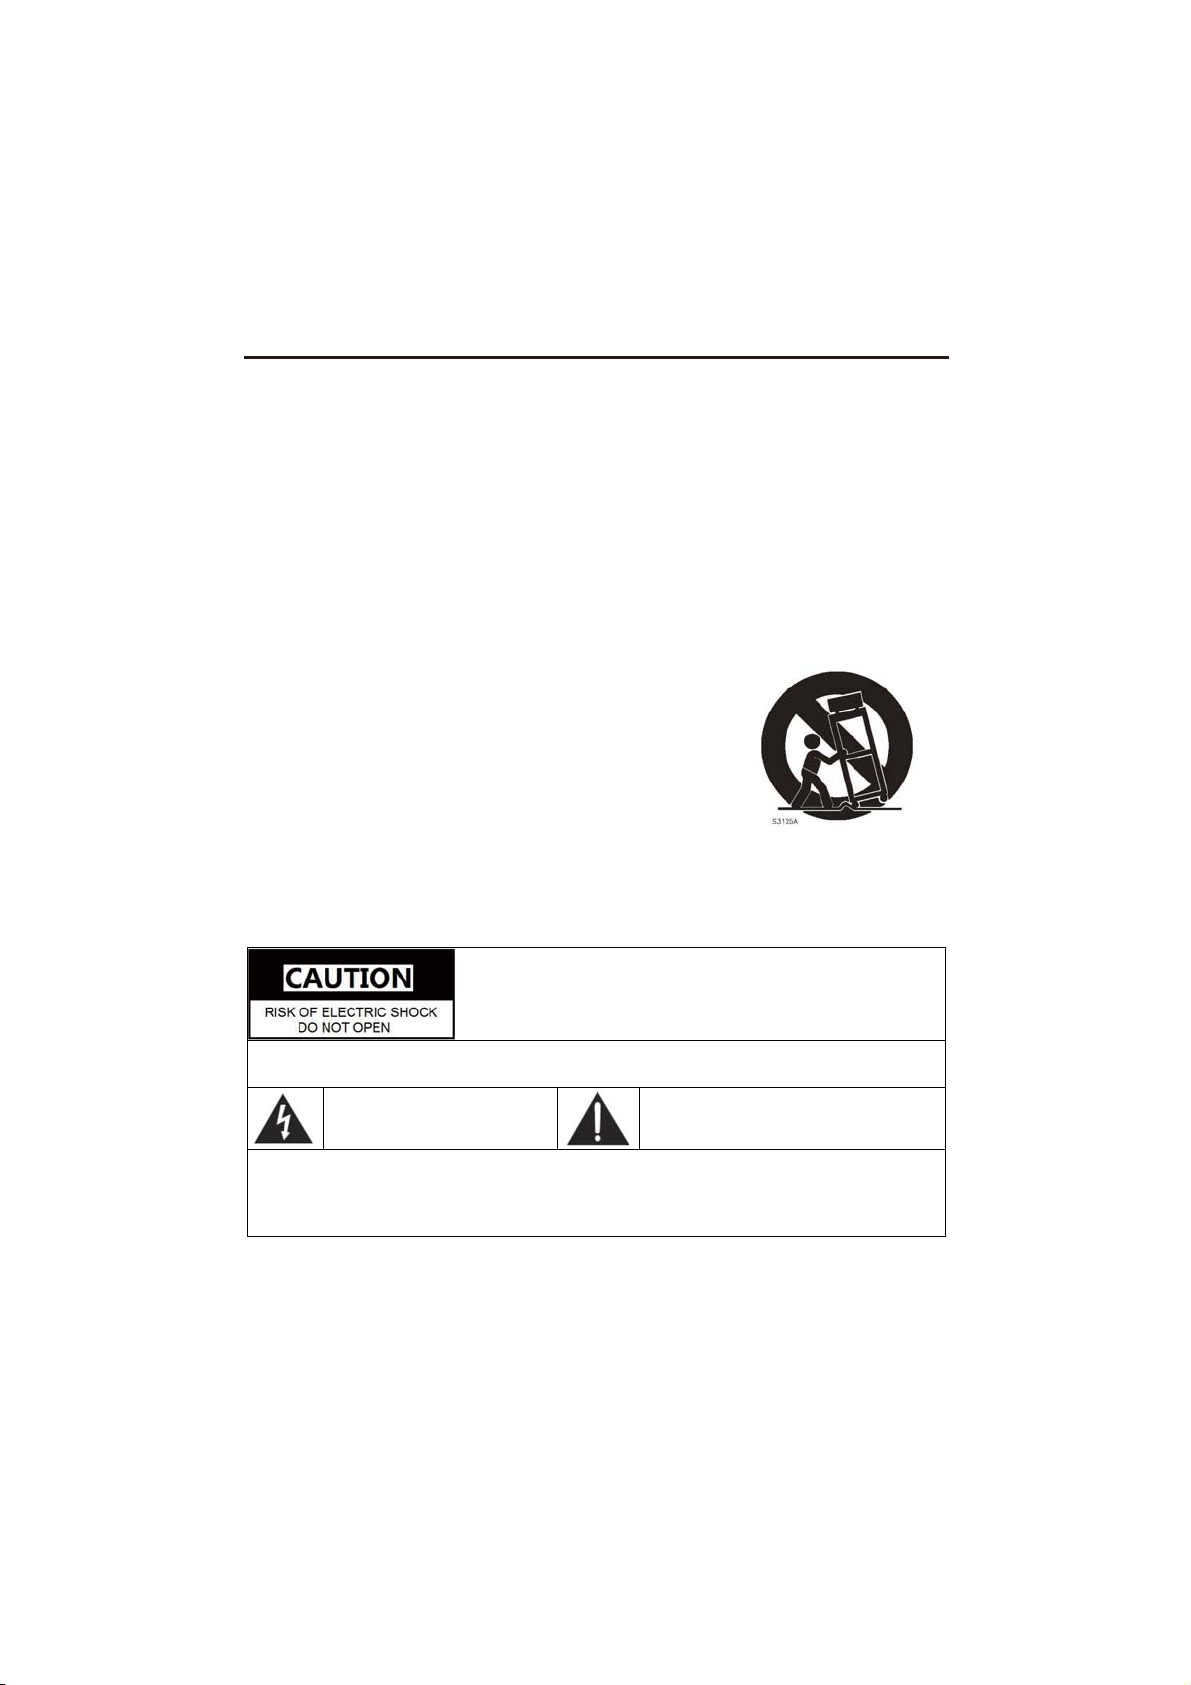
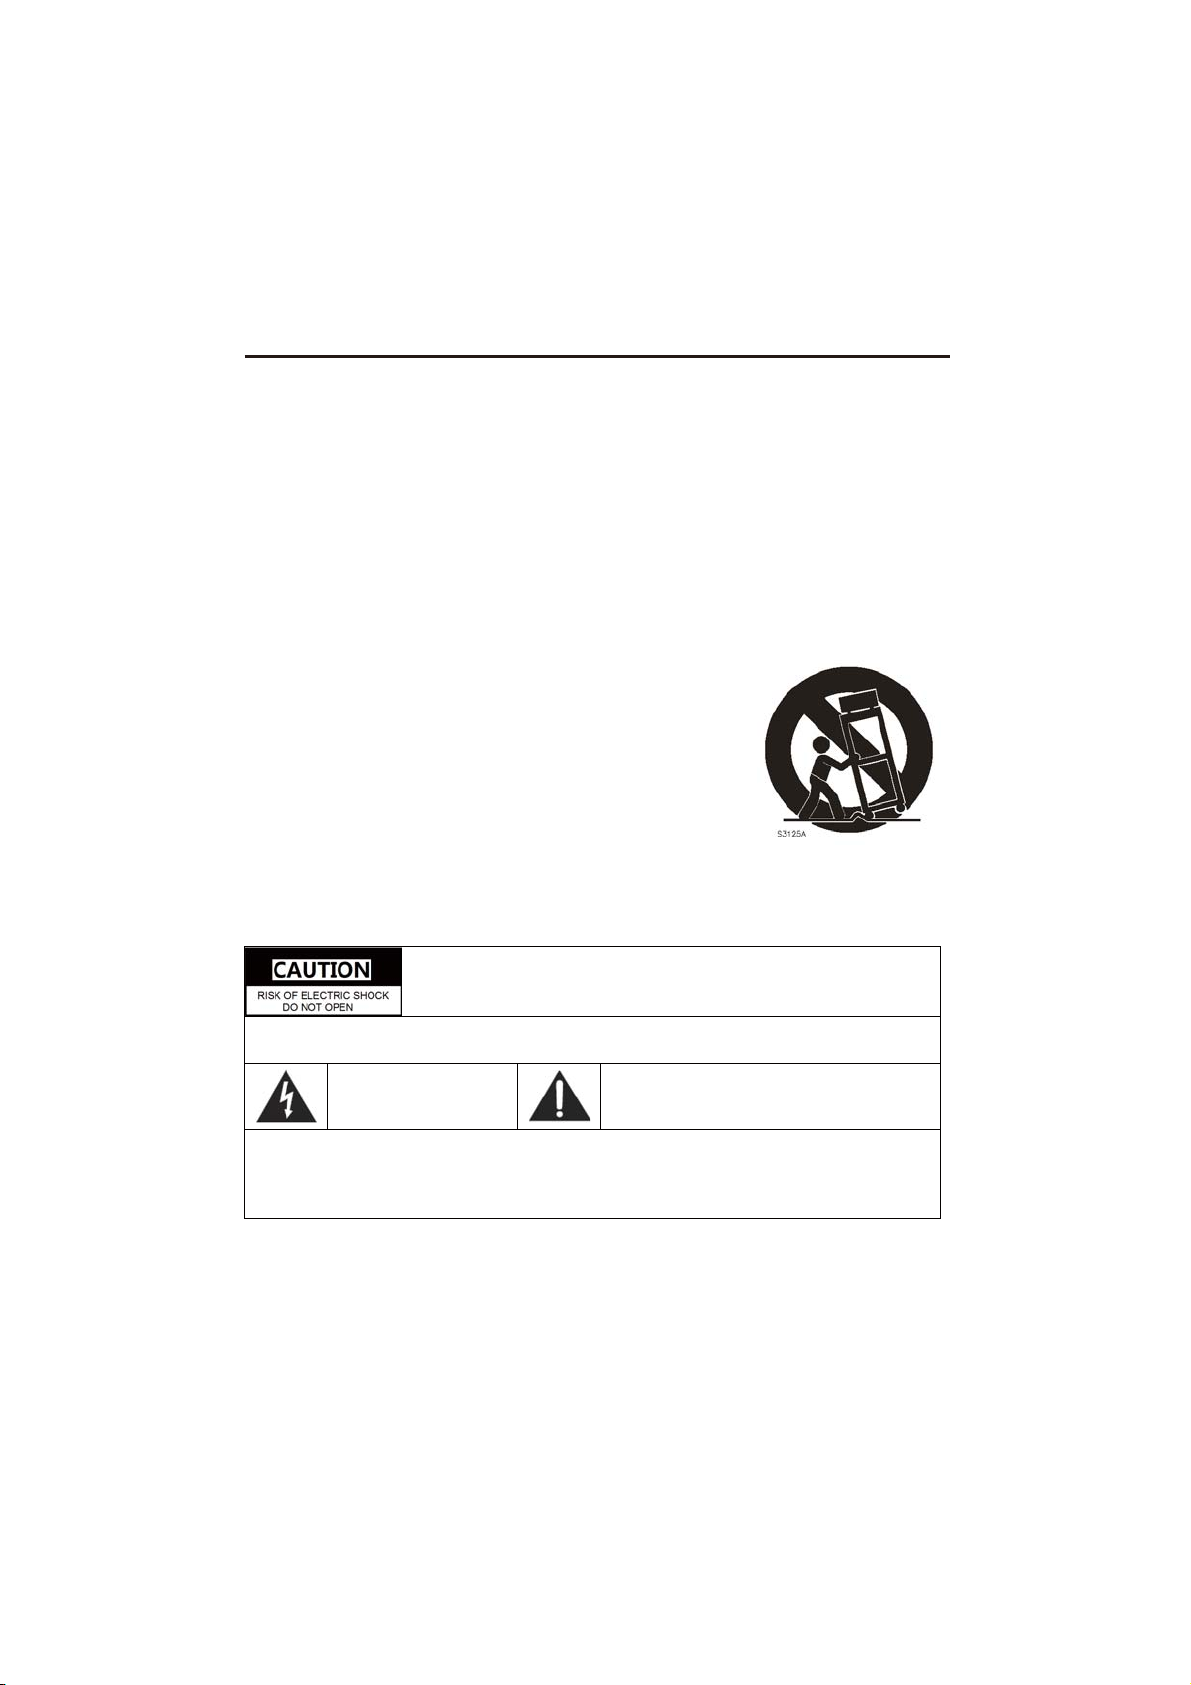
12.Utilisez seulement avec le chariot, stand. Trépied, support, ou table
spécifié par le fabricant, ou vendu avec l'appareil lorsqu'un chariot est
utilisé, faites preuve de prudence lors du déplacement de la combinaison
panier/appareil pour éviter les blessures causées par le basculement.
Ce symbole indique que ce produit dans les entreprises double isolation
entre la tension du réseau hazaous et les pads accessibles à l'utilisateur.
Lors de l'entretien, n'utilisez que des tampons de remplacement identiques
Attention : Réduire le risque de choc électrique. Ne retirez pas le couvercle (ou le dos). Pas de pads
utilisables par l'utilisateur à l'intérieur. Référez l'entretien au personnel de service qualifié.
Attention : Pour réduire le risque d'incendie ou de choc électrique, n'exposez pas ce produit à la pluie
ou à l'humidité.
L'appareil ne doit pas être exposé à des gouttes ou des éclaboussures. Les objets remplis de liquides,
comme des vases ou des verres à boire, ne doivent jamais être placés sur l'apperatus.
Ce symbole indique des
instructions importantes
accompagnant le produit.
Ce symbole indique une « tension dangereuse »
à l'intérieur du produit qui présente un risque de
choc électrique ou de blessure personnelle.
13.Débranchez cet appareil pendant les orages ou lorsqu'il est inutilisé
pendant de longues périodes de temps.
14.Référez tous les services au personnel de service qualifié.
L'entretien est nécessaire lorsque l'appareil a été endommagé de quelque façon que ce soit, comme un
cordon d'alimentation ou une prise est endommagé, du liquide a été renversé ou des objets sont tombés
dans l'appareil, l'appareil a été exposé à la pluie ou à l'humidité, ne fonctionne pas normalement ou a été
abandonnés.
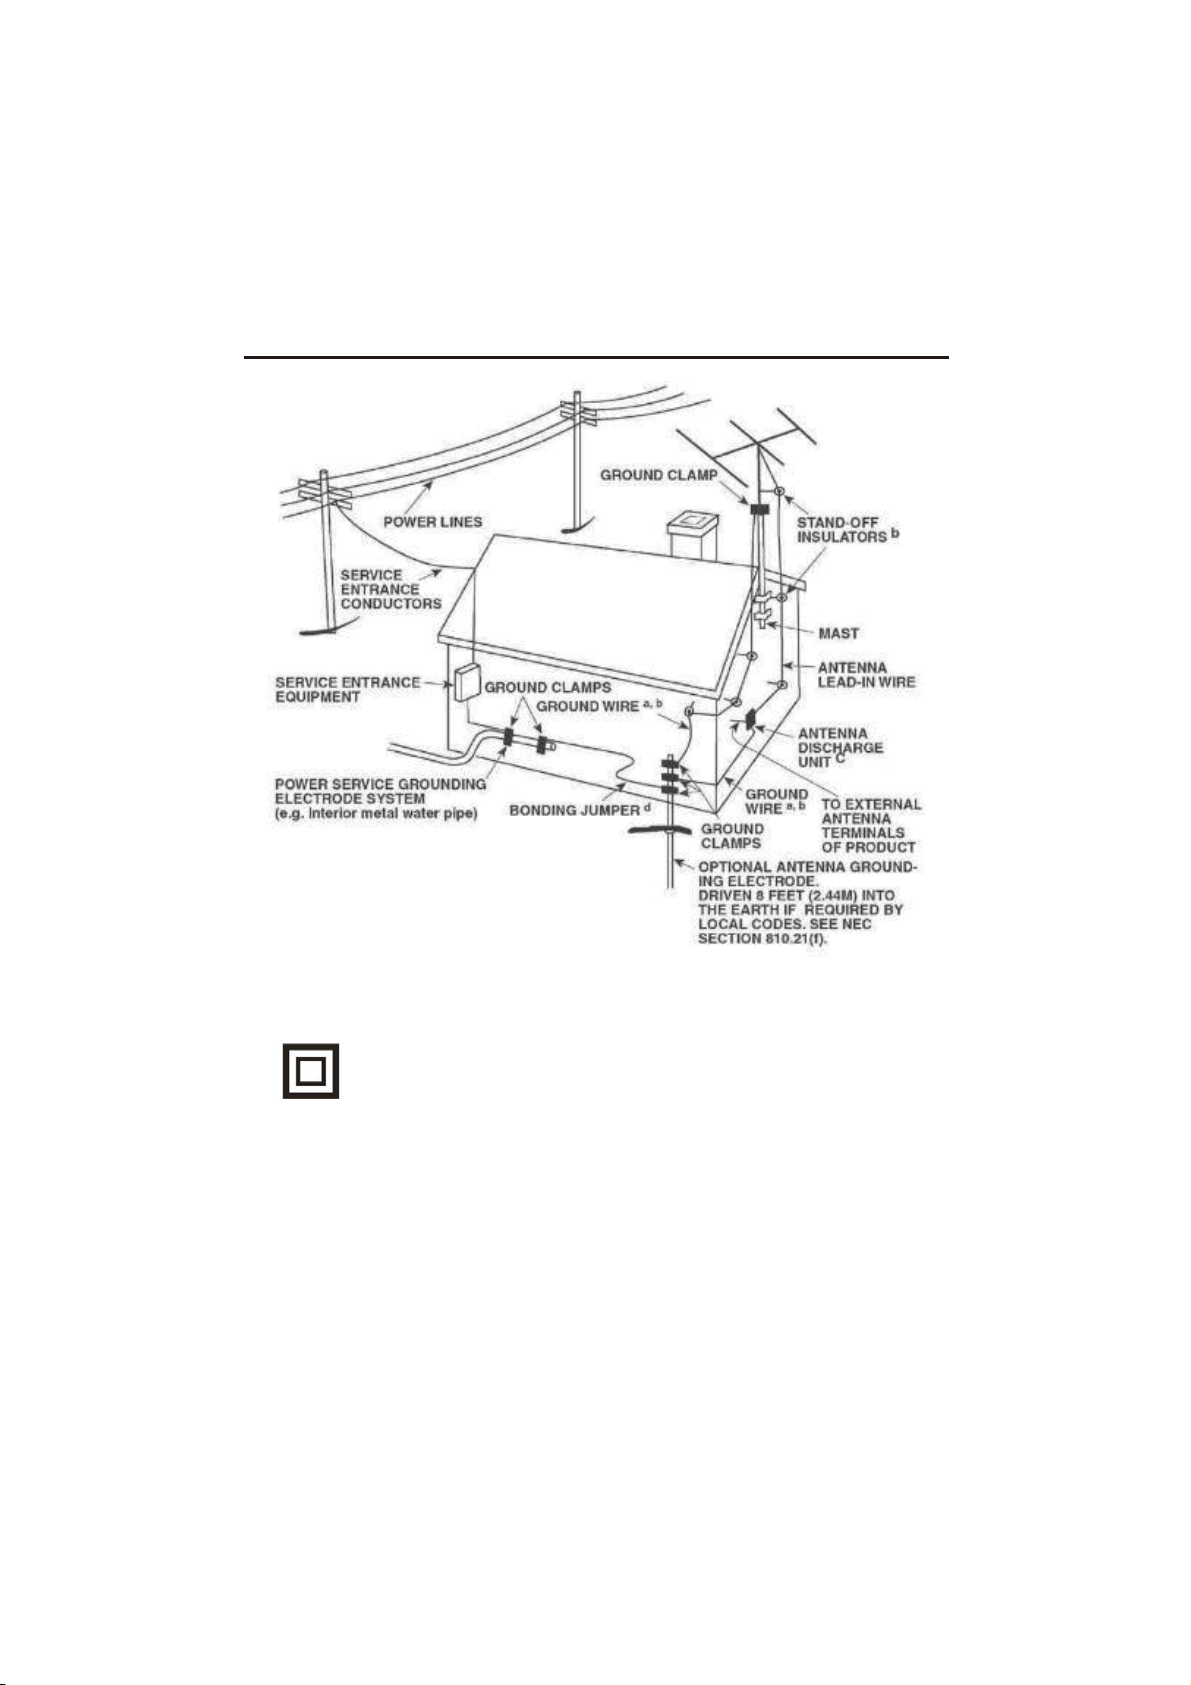
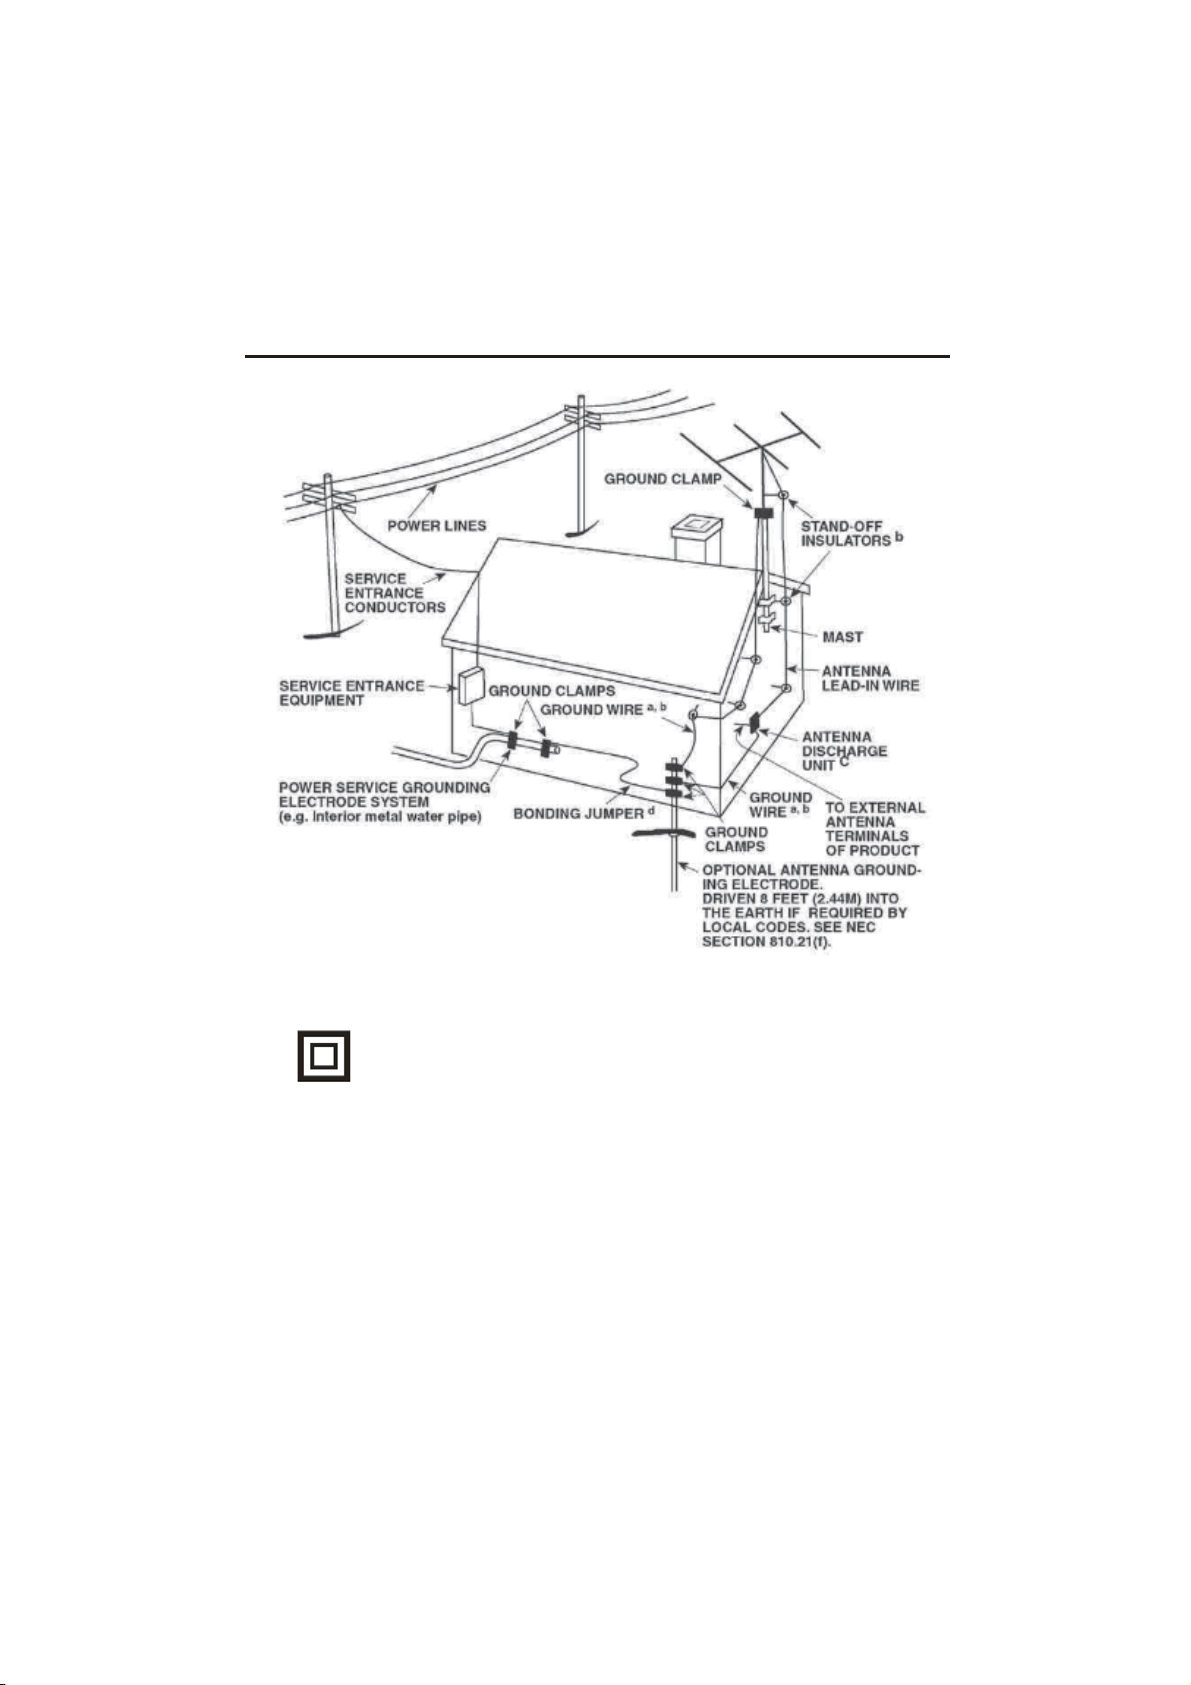
15. Si une antenne extérieure ou un système de câble est connecté au produit, assurez-vous que l'antenne
ou le système de câble est mis à la terre de façon à fournir une certaine protection contre les surtensions et
les charges statiques accumulées, section 810 du cordon électrique national, numéro ANSI/NFPA 70-1984
(article 54 du Code canadien de l'électricité, Partie 1) Fournit des renseignements sur l'échouement approprié
du mât et de la structure de soutien, l'échouement du fil de plomb à une unité de décharge d'antenne, la taille
des conducteurs à la terre, l'emplacement de unité de décharge d'antenne, connexion à l'électrode de mise à
la terre. Voir l'exemple suivant.
1.Lire ces instructions.
2.Gardez ces instructions.
3.Heed tous les avertissements.
4.Suivez toutes les instructions.
5.Do'utilisez pas cet appareil près de l'eau.
6.Clean seulement avec le tissu sec.
7.Do bloquent pas les ouvertures de ventilation. Installer conformément aux instructions du menufacturer.
8.Do'installer à proximité de sous de chaleur tels que les radiateurs. Les registres de chaleur, les poêles ou
tout autre appareil (y compris les amplificateurs) qui produisent de la chaleur.
9.Do pas contrepartie de l'objectif de sécurité de la prise polarisée ou de type mise à la terre Une prise
polarisée a deux lames avec une plus large que l'autre. Une prise de type mise à la terre a deux lames et
une troisième pince à la sol. La lame large ou la troisième prong est fournie pour votre sécurité. Si la prise
fournie ne rentre pas dans votre prise, consultez un électricien pour le remplacement de la prise obsolète.
10.Protéger le cordon d'alimentation d'être marché sur ou pincé en particulier aux récipients de commodité
de bouchons et le point où ils sortent de l'appareil.
11.Seuls les pièces jointes d'utilisation / accessoires spécifiés sont le fabricant.
4

16. La prise de prevue b utilisée comme prevue ble de déconnexion, Il doit rester facilement prevue
ble et ne doit pas être obstrué pendant l’utilisation prevue.
17.
18. Avertissement: connecté à une prise secteur avec une connexion de protection à la terre.
19. distances minimales autour de l'appareil pour une ventilation suffisante;
20. ne gênez pas la ventilation en recouvrant les orifices de ventilation avec des objets tels que
journaux, nappes, rideaux, etc.
21. aucune source de flamme nue, telle que des bougies allumées, ne doit être placée sur l'appareil;
22. l'utilisation d'appareils sous des climats tropicaux et / ou modérés.
Cet équipement est un appareil électrique de classe II ou double isolant. Il a été
conçu de telle manière qu'il n'est pas nécessaire d'avoir une connexion de sécurité
à la terre électrique.
Précautions de sécurité importantes
5

About Your TV
Features
Includes
Setup
Remote Batteries
Requires 2, AAA-size batteries (included)
Connecting the Stand
When placing TV on flat surface, be careful not to push,
scratch, or otherwise damage the front of the TV and
LCD screen. Using a screwdriver, tighten the screws by
hand.Using a power drill could damage the TV stand.
6

Mounting the TV on a wall
Install Steps
If you mount this TV on the wall, follow the instructions exactly as set out by the manufacturer.
Incomplete or improper installation may cause injury to you, and/or damage to the LED TV.
When you have appropriate wall mount brackets, please install them by using the VESA screws
included in TV PE bag.
1.Assemble the wall mount adapter.
2.Install the wall mount adapter on a wall with screws.
3.Install the wall mount brackets onto rear cabinet with the VESA screws.
4.Buckle the brackets with TV into the wall mount adapter.
Please refer to the table below to ensure the correct size VESA mount is used with the TV.
TV size in
inches
VESA screw hole specs
Screw Size Quantity
Width
mm
Height
mm mpcsm
3
50
2 200 100 BM6*10 4
40 200 200 BM6*10 4
200 200 BM6*10 4
7

Power button: Press to Turn ON/OFF the TV.
Source button: Press repeatedly to select desired audio and/or video source.
Arrow buttons: Press to seek up and down radio stations and TV channels.
Also use with Virtual Sound button (6) for function selection.
Pair button: In Bluetooth Source, press to connect a Bluetooth compatible
audio device.
Play button: In Bluetooth, Media and FM Source, press for play/pause selection.
Virtual Sound button: Press to toggle through Zone
A: ON/OFF - Zone A Volume - Zone B: ON/OFF - Zone B Volume.
Use the Arrow buttons (3) to select Zone ON/OFF and Volume levels
Press and briefly hold the Virtual Sound button (6) to access the Zone B
Source menu.
Press the Arrow buttons (3) to choose the active source for Zone B.
Front Panel
Orientation
8
21
1.
2.
3.
4.
5.
6.
3 4 5 6

Remote
Orientation
9
1. :
1
3
7
9
13
16
21
27
30
34
33
37
36
2
4
5
6
8
11
10
12
15
14
17
18/19
22
20
28
29
31
32
35
38
Turn ON/OFF the TV .
2. Source: Select desired audio and/or video source.
3. P.MODE: Select a picture mode.
4. S.MODE: Select a sound mode.
5. : Select amount of time before TV turns off automatically.
6. NUMBER Buttons(0-9): Enter numbers or select channels;
In FM radio source, press SET and one of the 0-9 numeric numbers to
preset radio stations, then press one of the 0-9 buttons to recall desired
radio station preset.
7. -/--: Switch between single and double digit input.
8. : Switch between the current and previous channel.
9. Red VOL +/-(ZONE A): Adjust Volume level for Zone A.
10. Green VOL+/-(ZONE B): Adjust Volume level for Zone B.
11. : Shut off sound of TV temporarily, press again to restore TV sound.
12. INFO: Display current channel information;
Turn off screen in BT and FM source.
13. CH-(TUNE-): Seek down FM radio stations or TV channel.
14. CH+(TUNE+): Seek up FM radio stations or TV channel.
15. SET: When a new radio station searched, Press the SET button
and one of the 0-9 numeric buttons to preset your radio station.
16. MENU: Enter the main menu. In menu mode, moves up one level.
17. EXIT: Exit the current menu.
18. : Navigate within a menu ; Select for fine tuning in FM radio source.
19. : Navigate within a menu; Choose the active source for Zone B
source menu.
20. ENTER: Confirm the operation.
21. / : Switch closed captions on and off in TV;
During playback, press it to select play or pause the current playback.
22. / : Display the electronic program guide; Stop playing.
23. : Press and hold it to fast backward.
24. : Press and hold it to fast forward.
25. : During playback, select the previous track / chapter.
26. : During playback, select the next track/chapter.
27. REPEAT: Select repeat playback mode.
28. GOTO: Jump to a specific time on a DVD/VCD/MPS/WMA or CD.
29. A-B: Start A-B repeat function.
30. F.LIST: Display favorite channel list.
31. FAV: Assign current channel to favorite channel list.
32. ZOOM: Set picture size.
33. CH.LIST: Display the channel list.
34. MTS: Select MTS sound system, press repeatedly to choose one of
the modes among Mono, Stereo, Snap.
35. FREEZE: Display frozen image on screen.
36. RED A: Switch Zone A ON and OFF.
37. BT PAIR: Connect to a Bluetooth compatible audio device.
38. GREEN B: Switch Zone B ON and OFF;
Press and briefly hold the green B button to access the Zone B Source menu.
®
23/24/25/26

FRONT HDMI 3 IN: HDMI input.
FRONT USB: USB Port for media playback when Media is the TV’s selected source.
HDMI 1 IN: HDMI input.
HDMI 2(ARC) IN: HDMI(ARC) input.
AV IN: Connects to the Audio out and composite Video out of an AV device (L / R / V).
YPbPr IN: Composite/Component Video in.
LINE OUT: Connects to the Audio in ports of an audio device.
RF IN: Connects to the ANTENNA, CABLE, or CABLE BOX.
USB: USB Port for media playback when Media is the TV’s selected source.
OPTICAL OUT: Connects to the Optical Audio in port of an audio device.
SPEAKER OUT ZONE B: Connects to 2 external loud speakers(L / R).
FM ANT: Connects to the FM ANTENNA.
Inputs
Orientation
5V 500mA OPTICAL FM ANT
SPEAKER OUT ZONE B
LR
RL YV
A V I N
ARC
10

Connect RF cable to the RF IN connector.
Select Language
Pres utton to select the language to be used for menus and message.
Press button to select Go to next step and press ENTER button to enter the sub-menu.
Setup Wizard
Main Menu Operation
Select Time
Press button to select the time zone, daylight saving time and time format you want.
Pres utton on the remote control to adjust.
P
to enter the sub-menu.
ress button on the remote control to select Go to next step and press ENTER button
11

Auto Scan
Pres utton to select t
Press utton to select Go to next step and press ENTER
Air: Auto Scan →
Setup Wizard
Main Menu Operation
12

Press Source button on the remote or front panel,
Press button on the remote or / button on the front panel to choose the desired source.
Use this Menu to select Zone B source – TV All (same as Zone A), Bluetooth® or FM.
Press and briefly hold the green B button on the remote control or button on the front panel to access the
Zone B Source menu.
Press button on the remote control or / button on the front panel to choose the active source for Zone B.
Source Select
Zone B Source Menu
13

ENU to enter the main menuPress button to select Setup.Press M
Press to enterENTER or
ENU again to exit or back to parent menuPress M
Press buttontoselectamong Menu Languag Transparen SD Timeou lose aptio ver Scan nput Labe
ther setting estore Defaul Voice Guidance Video Description.
Press to enterENTER or
Press button to adjust
ENU again to move back to parent menuPress M
Setup Menu
14

ENU to enter the main menuPress button to select Picture.Press M
Press to enterENTER or
ENU again to exit or back to parent menuPress M
buttontoselectamong Picture Mod Brightness ontras olo Tin harpnes olor TemperaturePress
Advance ettings.
Press to enterENTER or
Press button to adjust
ENU again to move back to parent menuPress M
Picture Menu
15

ENU toenter the mainmenuPress buttontoselect Sound.Press M
Press toenterENTER or
ENUagain toexitorbacktoparentmenuPress M
Press buttontoselectamon
Surround Sound V
Press to enterENTER or
Press button to adjust
ENU again to move back to parent menuPress M
Sound Menu
16

ENU to enter the main menuPress button to select Time.Press M
Press to enterENTER or
ENU again to exit or back to parent menuPress M
buttontoselectamong Sleep Time Time Zon aylight Saving Tim Time Forma Auto Cloc lock.Press
Press to enterENTER or
Press button to adjust
ENU again to move back to parent menuPress M
Time Menu
17

ENU to enter the main menuPress button to select Lock.Press M
Press to enterENTER or
ENU again to exit or back to parent menuPress M
buttontoselectamong Change Password ystem Loc nput Bloc atin anad atin Press
Tettin ese T.
Press to enterENTER or
Press button to adjust
ENU again to move back to parent menuPress M
Enter your4digital password. Defaultpasswordis0000,and if you forget what you set, please call the service center.
Lock Menu
18
This manual suits for next models
2
Table of contents
Other connexx LED TV manuals