supply on the floor at the base of the light stand as well,but it is recommended to use the
carabiner to hang on the light stand for optimum heat dispersion from the power supply into the
air. Figure 4shows the carabiner attached to the top riser thumbscrew of the light stand.
Plug the AC to DC power supply into the wall socket. Using the included American
power plug, insert the plug into the wall socket. The ballast can operate on any voltage in the
world from 100v to 240v 50/60hz. To adapt the American power plug to another socket type in
another country is a simple mechanical type adapter and no other transformer or other type of
adaptation is necessary. There is no on/off switch on the power supply, only on the panel
itself.
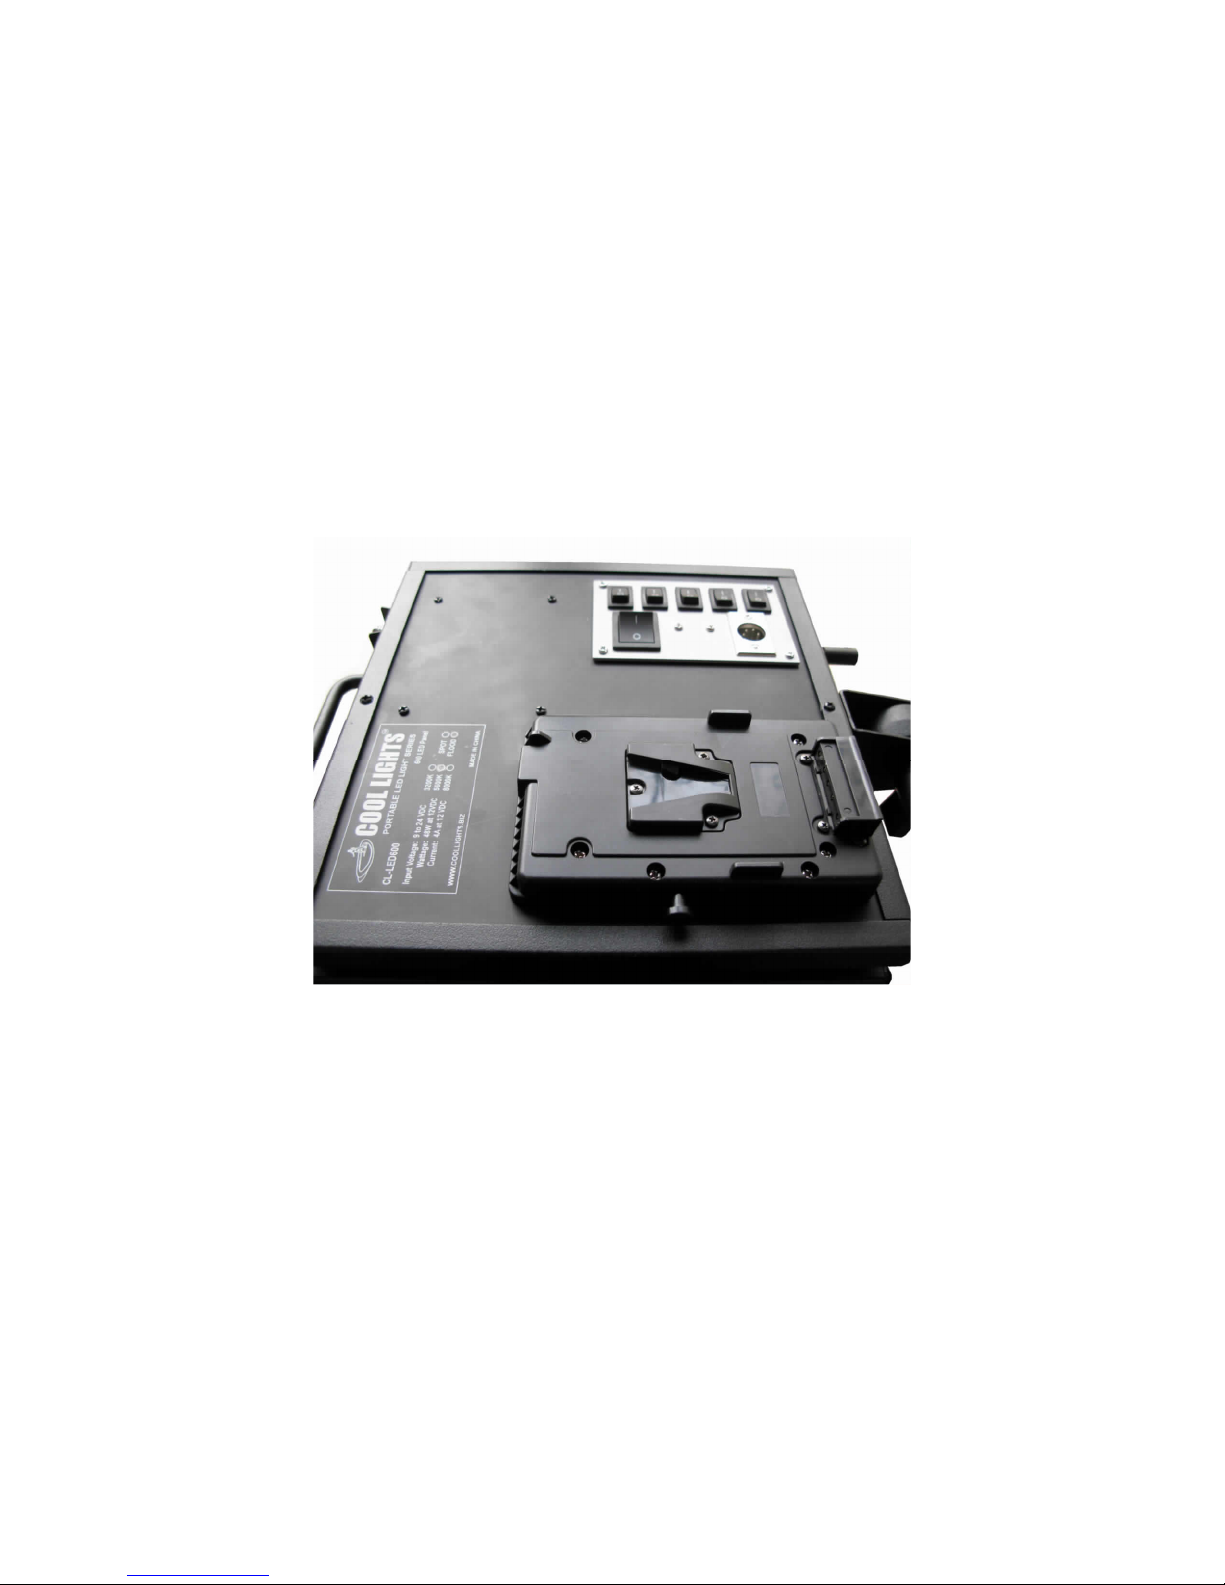
Turn on the panel. Figure 5 shows the back of the LED 600 panel and the various parts.
Simply make sure all the bank select switches are in the “1”or on position, turn the dimmer dial
to full intensity and finally, turn the master switch to the “1”or on position. Once started, the
light comes on instantly (as long as the dimmer is on full and the bank select switches are all
on as well). Since there are both a dimmer and bank select switches, dimming with your LED
600 is extremely versatile and can be accomplished with a number of combinations of the bank
selects and/or the dimmer.
Your LED 600 has the ability to attach
common styles of professional camcorder
batteries directly to the back of the panel
through optionally available battery mount
plates (see Battery Plate Adaptation and
Installation section of this manual). The
switching panel includes the master on/off, 5
bank select switches and the XLR 4 pin male
input for external DC power. Thanks to the
internal DC to DC converter which conditions
the input power, you can power the panel on
anything from 10VDC to 24VDC through this
4 pin XLR input (or through the optional
battery adaptation plates as well). This
includes quite a variety of commonly
available power supplies which you may
already have in your tool arsenal. For
instance, many camcorder battery chargers
also include a 4 pin XLR female output cable
to allow you to power a camcorder directly
(output is nominally the same as a battery—
around 14.4V average). This same
connection will allow you to power the LED
600 panel from this type of power supply.
Figure 5 –Various parts of the panel.