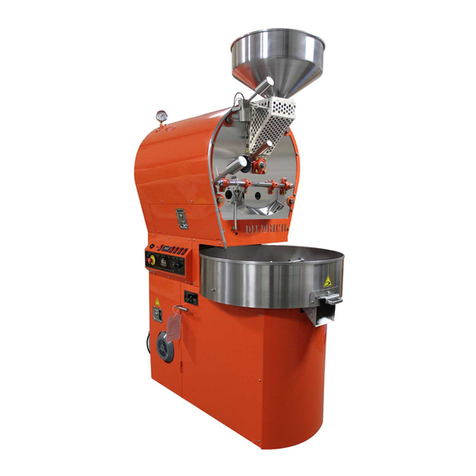
DRUM SEASONING PROCEDURE
PLEASE READ AND FULLY UNDERSTAND THIS PROCEDURE PRIOR TO
STARTING THE SEASONING PROCESS
The drum of the roaster must be seasoned before roasted coffee is fit
for consumption. Use an inexpensive coffee for the seasoning process.
Do not use a Robusta coffee as it does not emit as much oil for
seasoning the drum. The new drum requires from 8 to 12 seasoning
roasts to become properly oiled. Each seasoning roast requires about
50% of roaster capacity (IR 1 / 2.5 USE FULL BATCH) of coffee,
enough to fully cover the drum's lower surfaces. During seasoning, the
roaster should be operated for 30 –60 minutes with the oily beans
tumbling in the drum at a temperature of 425°F –460°F or until the
beans become dry. After completion of each seasoning roast, discard
the roasted coffee after it cools. It may take additional roasts to achieve
the best flavor from your new roaster. Seasoning the roasting drum will
also give you the opportunity to become familiar with the roaster's
controls and the roasting process.
1. Preheat the roaster to ~ 420ºF.
2. Fill hopper with the pre-described amount of beans.
3. Move the air control lever to the “THROUGH COOLING BIN”
position.
4. Activate the hopper gate handle to load the green beans from the
hopper into the drum to start the roasting/seasoning process
5. Set the gas output to approximately 50%.
The coffee will change in color from green to a pale yellow (4-6
minutes).
6. When the coffee reaches the yellow stage ~280°F, move the air
control handle to the “50/50" (middle) position. This allows for a
more uniform heat.
7. When the coffee approaches ~385°F “1st crack”, reduce fuel % and
let the roast progress in the full roasting stage until the coffee develops
through the second crack (~435°F) and oil begins to appear at the tips
of the beans (try and reach ~460°F slowly).
8. When you begin to notice the first traces of oil, turn the gas control
“OFF.” Note: Due to the exothermic reaction (the chemistry creates its
own heat), the bean temperature can continue to rise on its own with
gas turned off.
9. Let the coffee roast in its own liberated heat until the beans are fully
oiled and almost black. Leave the coffee turning in the drum for 30 –60
minutes or until the beans are dry to help fully coat (season) the drum.
10. Once the beans become less oily, turn on the “AGITATOR” and
move the air lever control to the “THROUGH COOLING BIN”
position and discharge the coffee into the Cooling Bin.
Repeat seasoning cycle if scorching or tipping occurs during normal
roasting.
ROASTING FOR CONSUMPTION
1.
Preheat the empty drum until the Bean temp display (1)
reads 415º F or until you reach your desired charge
temperature.
2.
Load the green beans into the hopper funnel after the
roaster's empty drum has been preheated.
3.
Prior to starting the roasting process, move the airflow control
lever to the "Through Cooling Bin" position.
4.
Move the hopper gate lever up to release the greenbeans
from the hopper into the drum.
5.
Move the lever down to close the hoppergate.
6.
Adjust the flame control to an appropriate heat setting
batch size.
7.
When the beans appear yellow in color (~270°F), move the
air flow control lever to the "50/50" (mid)position.
8.
When the beans approach “1st crack” (~385°F), move the
air control lever to the “Through RoastingDrum”
position.
9.
Reduce gas setting and approach the desired finish
temperature
10.
In preparation for discharge of the roasted beans, move the
air flow control lever to the “Through Cooling Bin”
position.
11.
Turn on the “Agitator” (8)
12.
Switch the flame “Pilot Only” (3)
13.
Using the Sample Trier, sample the beans frequently.
14.
When the beans reach the desired color /development,
move the Drum Door lever up to discharge the beans into
the Cooling Bin.
15.
After the coffee has been in the Cooling Bin for a minute or
so, turn off the “Agitator” (8) and spread out thecoffee.
16.
With the Agitator “OFF”, the cool air can find a path through
the beans allowing the coffee to coolfaster.
17.
When the beans have cooled to room temperature, position
a container under the cooling binchute.
18.
Turn “ON” the “Agitator” (8), and discharge the beans from
the Cooling Bin.
W A R N I N G
Pay close attention to the temperature at this point. DO NOT LET
THE TEMPERATURE RISE ABOVE 480°F!! The roaster is equipped
with a High Temperature Limit System that shuts the gas off at 485°F.
However, the temperature can continue to rise due to the exothermic
reaction of the bean. If the coffee is not removed from the drum
before 500°F, the coffee may ignite. Have a water source or CO2
fire extinguisher nearby.
High Temperature Limit Module Explanation
At 475°F, the main burner shuts off, but the pilot does NOT shut
off (No alarm sounds). At 485°F, the alarm will sound and the
High Temperature limit shuts down the roaster's entire gas
system. (If this happens, wait for temperature to reduce and reset
the roaster)


