9
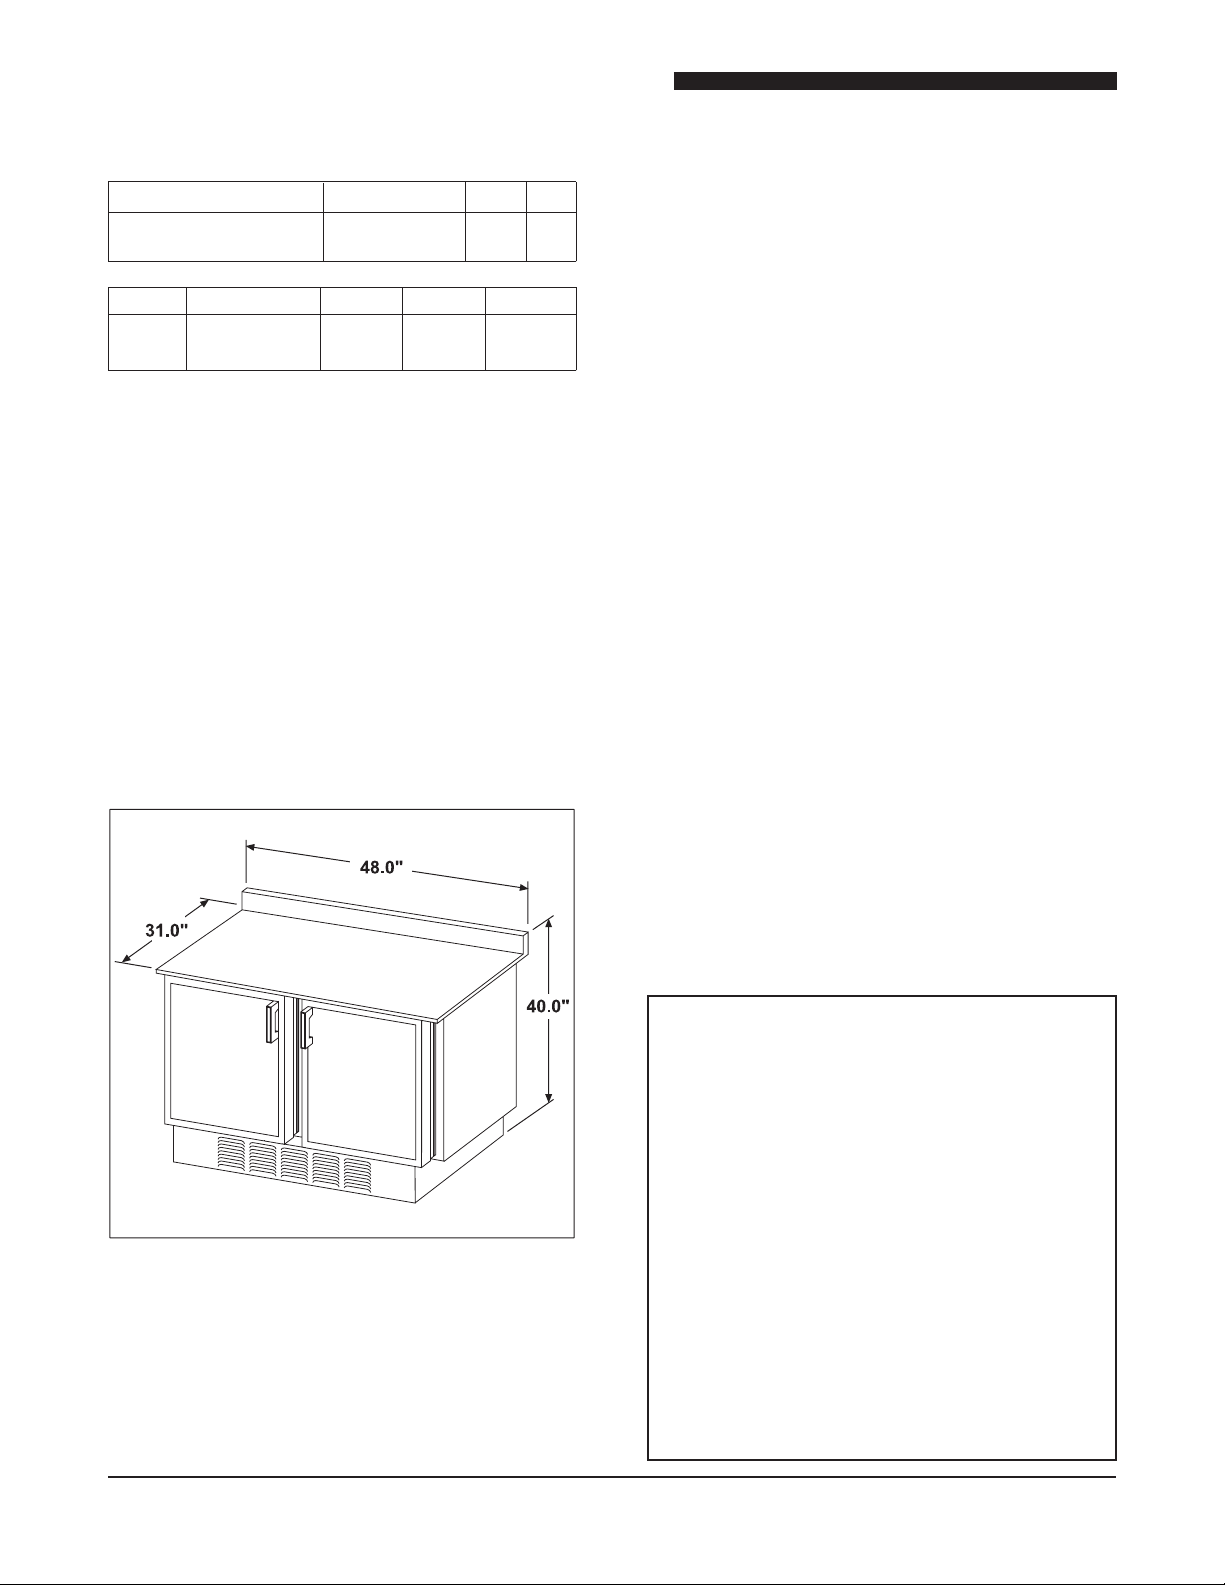
Service Manual for Refrigerated Back Bar Model RUF 48
Door Replacement and Adjustment
General
Doorsmaybecomemisalignedduringshipment
butareeasilyadjusted.
1. Foralowhangingdoor,usea3/8”openwrench
totighten,butdonotovertighten,bothtopand
bottomhingescrews.
2. Placeaatscrewdriveragainstoutersideof
bottomhingeandlightlytapwithahammer
untildoorisproperlyaligned.
3. If necessary, place at screwdriver against
inner side of top hinge and tap lightly with
hammeruntildoorisproperlyaligned.
4. Afterproperlyaligningdoors,tightenallhinge
screwssecurely.
Door Gasket Replacement
General
Thedoorgaskethasaretainingpanel.
1. Remove gasket door panel and mounting
screws.
2. Removegasketanddoorpanel.
3. Positionnewgasketandpanelondoor.
4. Securewithmountingscrews.Tightenscrews
evenlyarounddoorpanel.
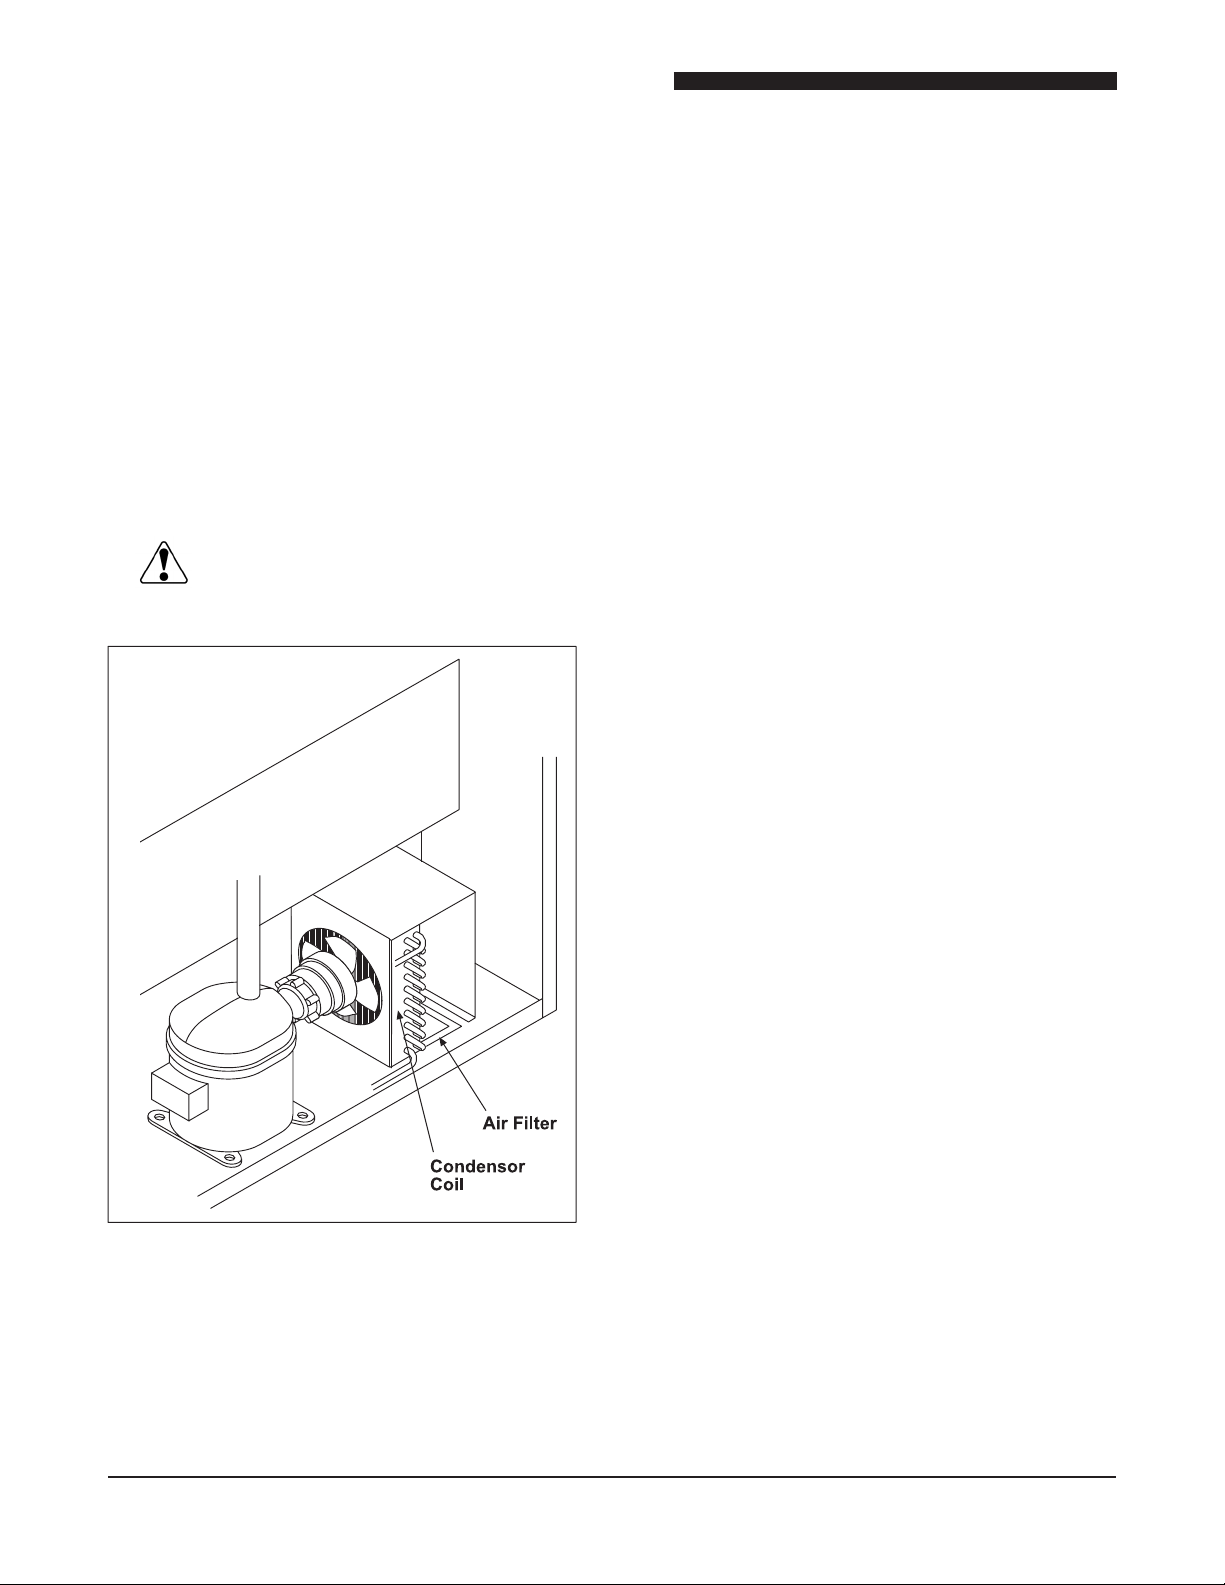
Recharging Refrigeration System
General
To analyze the performance of a refrigeration
system,temperaturereadingsarerecordedand
convertedtopressurereadingsusingastandard
pressure/temperaturechart.
Whenitisnecessarytoserviceafactory-sealed
refrigerationsystemandreturnittoitsproperly
sealedcondition,strictlyadheretothefollowing
approvedprocedure.
Tools
• Standardhandandrefrigerationtools
• RefrigerantType:R-134A,Refertodatatag
foramount
Charging Procedure
NOTE:Priortorefrigerationsystemservice,special
caremustbetakenduringtheevacuationprocessto
removeair,moistureandothernon-condensables
fromthesystem.DukeManufacturingrecommends
thefollowingtripleevacuationmethod.Failureto
followthisproceduremayresultinpoorrefrigeration
systemperformance.
1. Evacuatesystemto1500microns.
2. Breakvacuumto2psigwithdrynitrogen.If
drynitrogenisunavailable,usesametypeof
refrigerantasusedinsystem.
3. Evacuatesystemto500microns.
Thesystemisnowreadytoreceiverefrigerant
chargeaccordingtoinformationondataplate.
CAUTION: Never use oxygen or acetylene in
place of dry nitrogen or refrigerant
forleaktesting.Aviolentexplosion
mayresult,causingpropertydamage,
personalinjuryordeath.Whenusing
nitrogentopressuretest,alwaysuse
apressureregulator.Failuretodoso
willresultinextremelyhighpressure
ofthecompressororothersystem
components and result in property
damage,personalinjuryanddeath.
NOTE: Prior to repair, ensure there is enough
process hose (approximately 12”) present to
completetherepairusingtheaboveprocedure.
Ifnot,installa newprocesshosebeforerepair
sequence.