EGi DOMOS2 User manual
Electroacústica
General
Ibérica, S. A.
english user's manual

Dear customer,
Thank you for choosing EGi Sound & Domotic System for your home.
DOMOS2 System enables you to enjoy high quality audio in any room
of your home, as well as intercom and domotic services that make your
everyday life easier and safer.
The latest technology has been applied to product design and manufacture.
With a strong emphasis on high quality, the system offers a great number
of services that you will discover through this manual.
We hope you enjoy the services of your EGi installation, designed to give
you years of exceptional and reliable service.
YOUR INSTALLATION
DOMOS2 Series is based on a modular structure.
The main module of the installation is the CENTRAL UNIT for DIN rail
mounting (or Ø 60 mm box).
This module distributes audio and manages all additional services
provided by the series.
It is usually installed with the main audio equipment. Central units for
Ø 60 mm box have the same function as central units for DIN rail
mounting, but they must be combined in order to have similar features.
You will find an EGi CONTROL UNIT installed in each room. This module
allows you to listen to the audio programs of the system in the room,
turn the volume up/down, change the audio program, intercom with other
rooms, etc.
There are other modules available that give additional services to the
installation when connecting them to the Central Unit, for instance: door
phone intercom, domotic services, lighting control, GSM communication,
GPS clock, etc.
This manual gives a detailed description of each module and describes
how to configure them.
www.egiaudio.com
Turned on
Turned off
OK
Cancel
Increase
Decrease
Menu key
Menu exit key
Turn the volume up
Turn the volume down
Next memory /
program
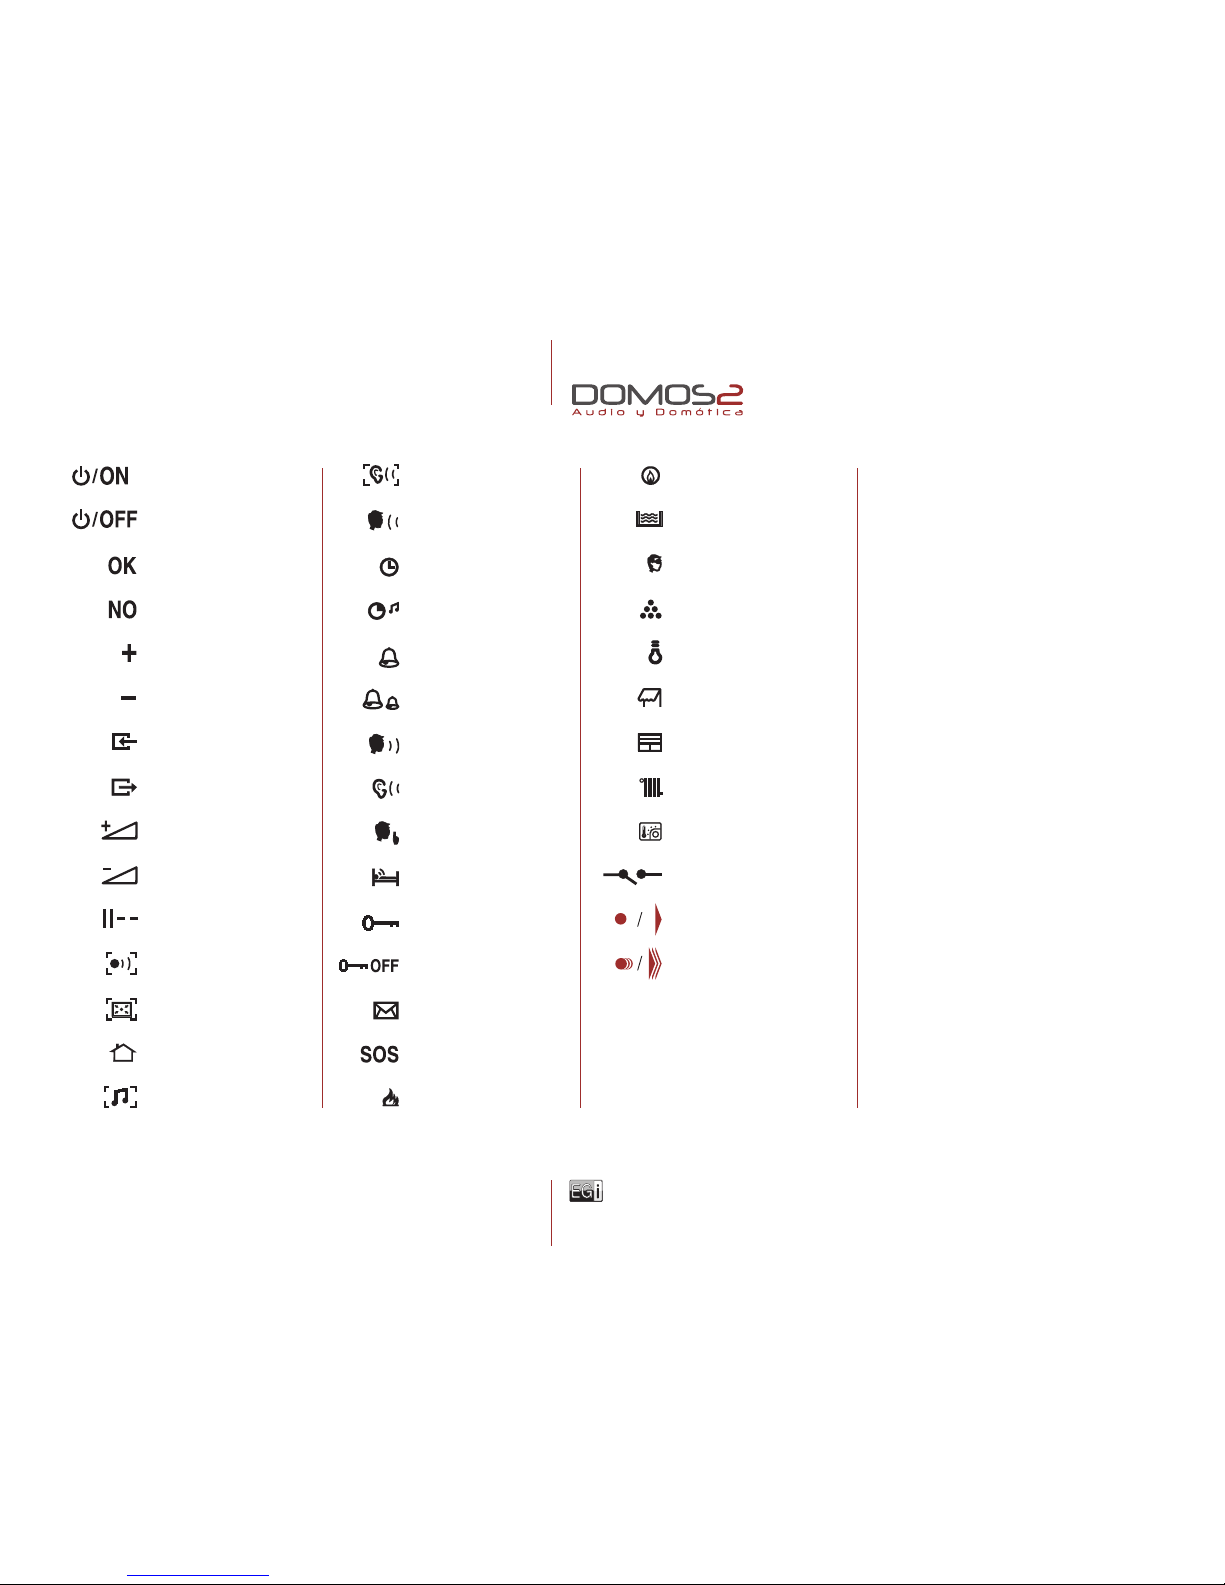
General function
Local function
Domotic functions
Audio function
simbols
3
Listen function
Intercom function
Clock
Timer
Alarm clock
Carillon
Talk
Listen
Do not disturb
Surveillance/Baby sitter
Open door phone
Cancel door phone
Messages
SOS Alarm
Fire alarm
Gas alarm
Flooding alarm
Intruder alarm (1 and 2)
Miscellaneous
Lighting atmospheres
(1,2,3 and 4)
Awning
Blind
Heating
Thermostat
Relay
Press the key
Hold the key
main features
of the DOMOS2 series
•Up to 5 audio programs.
•Remote control over the audio sources.
•Control over the installation with a remote
control.
•GPS Clock.
•Acoustic surveillance of rooms (baby sitter).
•Door phone control
•General call and room-to-room intercom,
up to 50 zones.
•SOS Function.
•Message recorder.
•Carillon service.
•Access control system.
•Remote control over the installation
through a mobile.
•Alarm status and intruder access report
via telephone.
•Lighting control and adjustment.
•Management up to 8 local or general relays.

www.egiaudio.com
information
4
ABOUT THIS MANUAL
We have taken all efforts to make the contents of this manual reliable and updated. However, EGi does not guarantee the
accuracy of the contents which are subject to change without previous notice.
COPYRIGHT INFORMATION
This manual in whole or in part, and any product or software described herein, may not be reproduced, transmitted, saved
in data recovery systems, or translated into any language in any form or by any means, except all documents saved by the
user to make security copies; without the previous written consent of the manufacturer.
All products or corporate names herein may (or not) be registered trademarks or copyright of their respective companies
and are used for identification or explanatory reasons only, and in interest of the owner without the intention of infringing
any regulation or rule.
Copyright © 2010. All rights reserved.
SAFETY INSTRUCTIONS
Your DOMOS2 system has been designed and manufactured to comply with the latest safety standards for domestic electronic
equipment.
•No EGi product should be covered with anything that impedes ventilation.
•Do not place any sources of naked flame such as lighted candles or similar elements on top of the device.
•Do not expose the device to poured, splashed or sprayed water.
•Disconnect the Mains supply before carrying out any work on the installation.
•Do not expose the equipment to direct sunlight.
•Do not use excessive force when handling the controls.
•The user should abstain from carrying out any alterations or repairs on the product, reserving these actions for qualified
personnel.
•Only use accessories supplied by EGi.
•EGi will not be held liable for any damage arising from misuse of the product or usage other than what is was designed
for (See "Guarantee" section).
TECHNICAL SUPPORT
If, while using the system, you encounter a problem that cannot be solved by consulting
the manual, please contact the installer. You can also consult the website www.egiaudio.com
to find the latest information and other resources to solve your problem.
EMC INFORMATION
DOMOS2 series products comply with all current regulations on electromagnetic
compatibility. Operation of the equipment is subject to the following conditions:
1. This device should not emit problematic interference.
2. This device should withstand any interference received, including any that could
cause undesirable operation.
This equipment has been subject to extensive testing and complies with all current
regulations established for Class B digital devices. The product is designed to ensure
reasonable protection against troublesome interference in residential installations.
This equipment generates, uses and can transmit radio frequency energy, and if not
correctly installed and used, i.e. in compliance with the instructions, it may cause
interference in radio communications.
However, it cannot be guaranteed that this interference will not arise in a specific installation.
If this equipment were to produce radio or TV interference, something that can be proven
just by switching it on and off, try to eliminate the problem as follows:
•Move the antenna or relocate it.
•Increase the distance between the equipment and the receiver in question.
•Plug the equipment into a mains socket on a different circuit.
•Consult your distributor or a radio/TV technician.
LIABILITY
Due to the wide variety of services and devices the DOMOS2 system interacts with, the
manufacturer cannot be held liable for failure or faulty operation of devices not manufactured
by EGi and connected or used by any module in the DOMOS2 series.
IMPORTANT
Please read these "Safety instructions" carefully before using any EGi product.
www.egiaudio.com
Simbols 3
Information 4
40010, 40020, 40040, 40050, 40060 Central units for DIN rail mounting 6
40070, 40080, 40090, 40200 Central units for Ø60 mm box 17
40220, 40221, 40271, 40281, 40620, 40300, 40310 Controls units 24
40410, 40420, 40521 Interface modules 57
40610, 40140, 40510 Auxiliary modules 64
Accessories 73
index
5

www.egiaudio.com
3
5 6
2
1
4
6
40010 1 RCA AUDIO INPUT (1 AUDIO PROGRAM)
40050 3 RCA AUDIO INPUT (3 AUDIO PROGRAMS)
overview
Central units in a DOMOS2 installation, distribute audio and manage additional services provided by the series.
Central Units can manage up to 50 zones and, depending on the model, distribute up to 3 general stereo
audio programs.
Central Units ref.40010/40050 have the following specifications:
•1/ 3 stereo audio programs (RCA audio input).
•Acoustic surveillance (baby sitter).
•Clock (manages the installation clock system. It must be adjusted from the control units).
•Intercommunication (The Central Unit manages this service).
•Message recorder (20 sec. maximum recording time) if the installation provides this service.
•Sound system remote control ( IR Link, infrared remote control for sound system from any room
where a control unit is installed, using EGi ref.40130 or 40100 or the sound system remote control).
NOTE: This service may not work with all remote control units.
•Doorbell (a tone is generated in all the installation when the door bell rings).
NOTE: This service must be activated wiring the door bell to the Central Unit.
•SOS: Alerts about a dangerous situation or someone in need of help.
•Door entry phone: You can answer a call to the door entry phone from any room with a control unit. 1Active module.
2Audio signal present.
3IR link for remote control.
4RCA audio input.
5Power connector.
6Doorbell connector.
EGi ref. 40050
40010, 40050 central units
for DIN rail mounting

www.egiaudio.com
7
ACOUSTIC SURVEILLANCE
This function does not need any interaction from the user in this module. Please refer to the control unit
manual for detailed working instructions.
DOOR ENTRY PHONE
This function does not need any interaction from the user in this module. Please refer to the control unit
manual for detailed working instructions.
CLOCK
This function does not need any interaction from the user in this module. Please refer to the control unit
manual for detailed working instructions.
MESSAGE RECORDER
This function does not need any interaction from the user in this module. Please refer to the control unit
manual for detailed working instructions.
Message recording is allowed when using control units EGi ref. 40220, 40221, 40271 and 40281. Please
refer to the control unit manual for details.
SOS
This function alerts about a dangerous situation or someone in need of help. The system generates an audio
signal in the zone where the alarm is generated. If not cancelled, the alarm spreads to the rest of the installation
for 2 minutes.
DOORBELL
The unit manages the doorbell function by connecting the door entry bell to the central unit (6).
Working description.Working description.
Working description
working description
The central module must be connected to a power supply unit (EGi ref. 40710,
40720 or 40730) that provides the needed power for proper function of the
system.
These units have been designed to distribute stereo audio from an audio source
(MP3, CD player, radio…) to the DOMOS2 installation.
before starting
Once the DOMOS2 system has been correctly installed, the different modules
must be configured for proper performance whitin the system. Each room is
called a ZONE.
This procedure will assign a zone to each control unit, so that the central unit
will detect and assign functions to each control unit, and intercomm will be set.
To reset or change the configuration on a system using the central unit
module EGi ref. 40050 or 40010, the control unit configuration manual
must be checked.
AUDIO
The central unit provides 1 (40010) or 3 (40050) RCA audio inputs (input
A, input B, input C), where a music source (walkman®, sound system, MP3…)
can be connected.
The central unit provides audio to the installation. To correctly listen the audio
provided by this unit, please refer to the control unit manual.
40010, 40050 central units
for DIN rail mounting
central units

www.egiaudio.com 8
REMOTE CONTROL
The RCA inputs in the central unit connect to the music source. This music source can be controlled through
the infrared capsule EGi ref. 40110, using the sound system own remote from the room where it is being
listened, just pointing the remote control to the EGi in-wall control unit.
40010, 40050 central units
for DIN rail mounting
www.egiaudio.com
6
7
OK/+ 8
NO/– 9
13
14
15
16
11
10
4
3
17
1
2
5
12
40020, 40040, 40060 central units
for DIN rail mounting
9
40020 1 RCA AUDIO INPUT (1 PROGRAM + FM + IR)
40040 1 RCA AUDIO INPUT (2 PROGRAMS + FM + IR)
40060 1 RCA AUDIO INPUT (3 PROGRAMS + FM + IR)
overview
Central units in a DOMOS2 installation, distribute audio and manage additional services provided by the
series. Central Units can manage up to 50 zones and, depending on the model, distribute up to 3 general
stereo audio programs.
The central module must be connected to a power supply unit (EGi ref. 40710, 40720 or 40730) that
provides the needed power for proper function of the system.
These units have been designed to distribute stereo audio from a sound source (MP3, CD player, radio…)
to the DOMOS2 installation.
Central Units ref.40010/40050 have the following specifications:
•Up to 3 FM programs and 1 stereo audio channel.
•Acoustic surveillance (baby sitter).
•Clock.
•Intercommunication.
•Message recorder (20 sec. maximum recording time) if the installation provides this service.
•Sound system remote control (IR Link, infrared remote control for sound system from any room
where a control unit is installed, using EGi ref. 40130 and 40100 or the sound system remote control).
•
Door entry phone: You can answer a call to the door entry phone from any room with a control unit.
•Doorbell (generates a tone in all the control units when the house doorbell is pressed).
NOTE: This service must be activated using a voltage free wiring of the doorbell to the central unit.
•Carillon. •SOS.
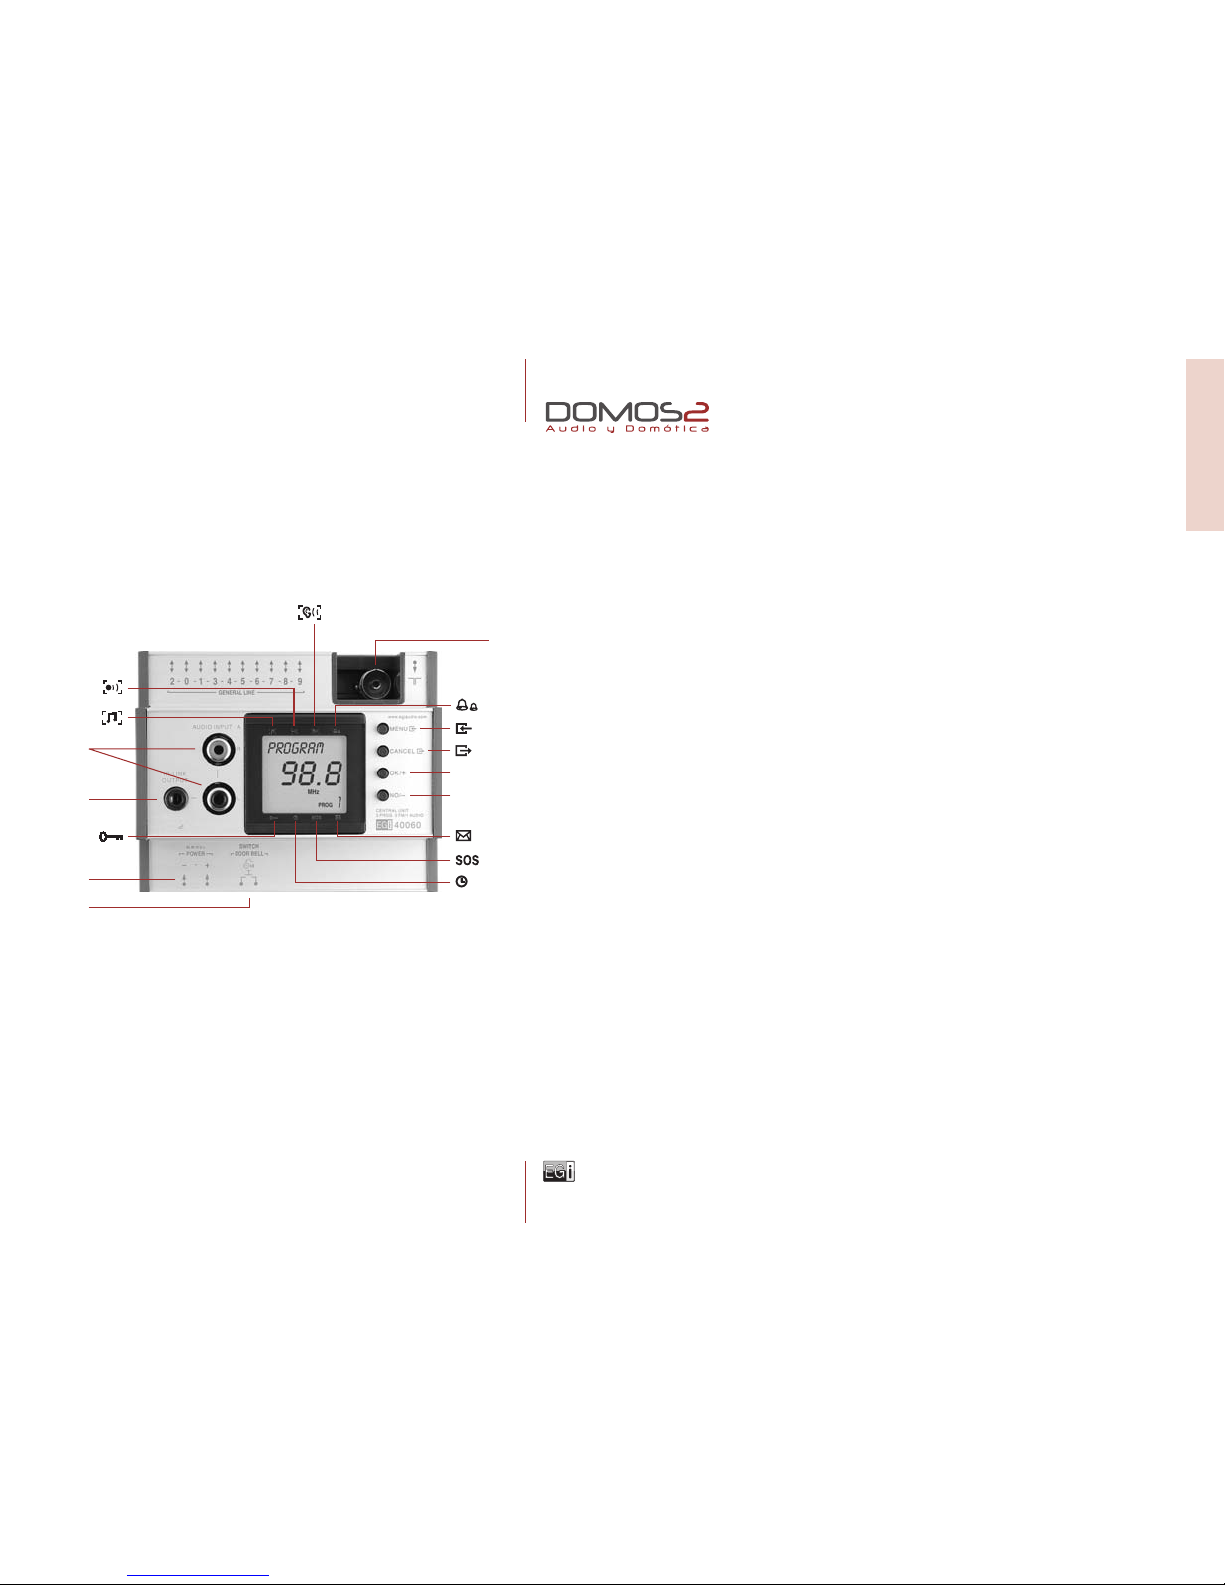
EGi ref. 40060
1Power connector
2Doorbell connector
3IR Link output
4RCA audio input.
5FM antenna.
6MENU key.
7MENU exit key.
8OK/+.
9NO/–.
10 Audio.
11 General function.
12 Listen function.
13 Carillon.
14 Messages.
15 SOS.
16 Clock.
17 Door phone.
central units
www.egiaudio.com
1st
10
before starting
Once the DOMOS2 system has been correctly installed, the different modules must be configured for proper
performance whitin the system. Each room is called a ZONE.
This procedure will assign a zone to each control unit, so that the central unit will detect and assign functions
to each control unit, and intercom will be set.
RESET SYSTEM ZONES
If a reset of the installation has to be done, please proceed as follows:
1. Press MENU key several times until MISCELL. appears on the screen.
2. Press (OK/+), and press the same key (OK/+) for 2 seconds.
3. GAIN appears on the display.
4. Press repeatedely MENU key until SETUP appears on the screen. Then, press OK for 2 seconds.
The assigned zone assigned to the module will flash on the display.
5. Navigate until RESET appears. Then, press OK for 2 seconds.
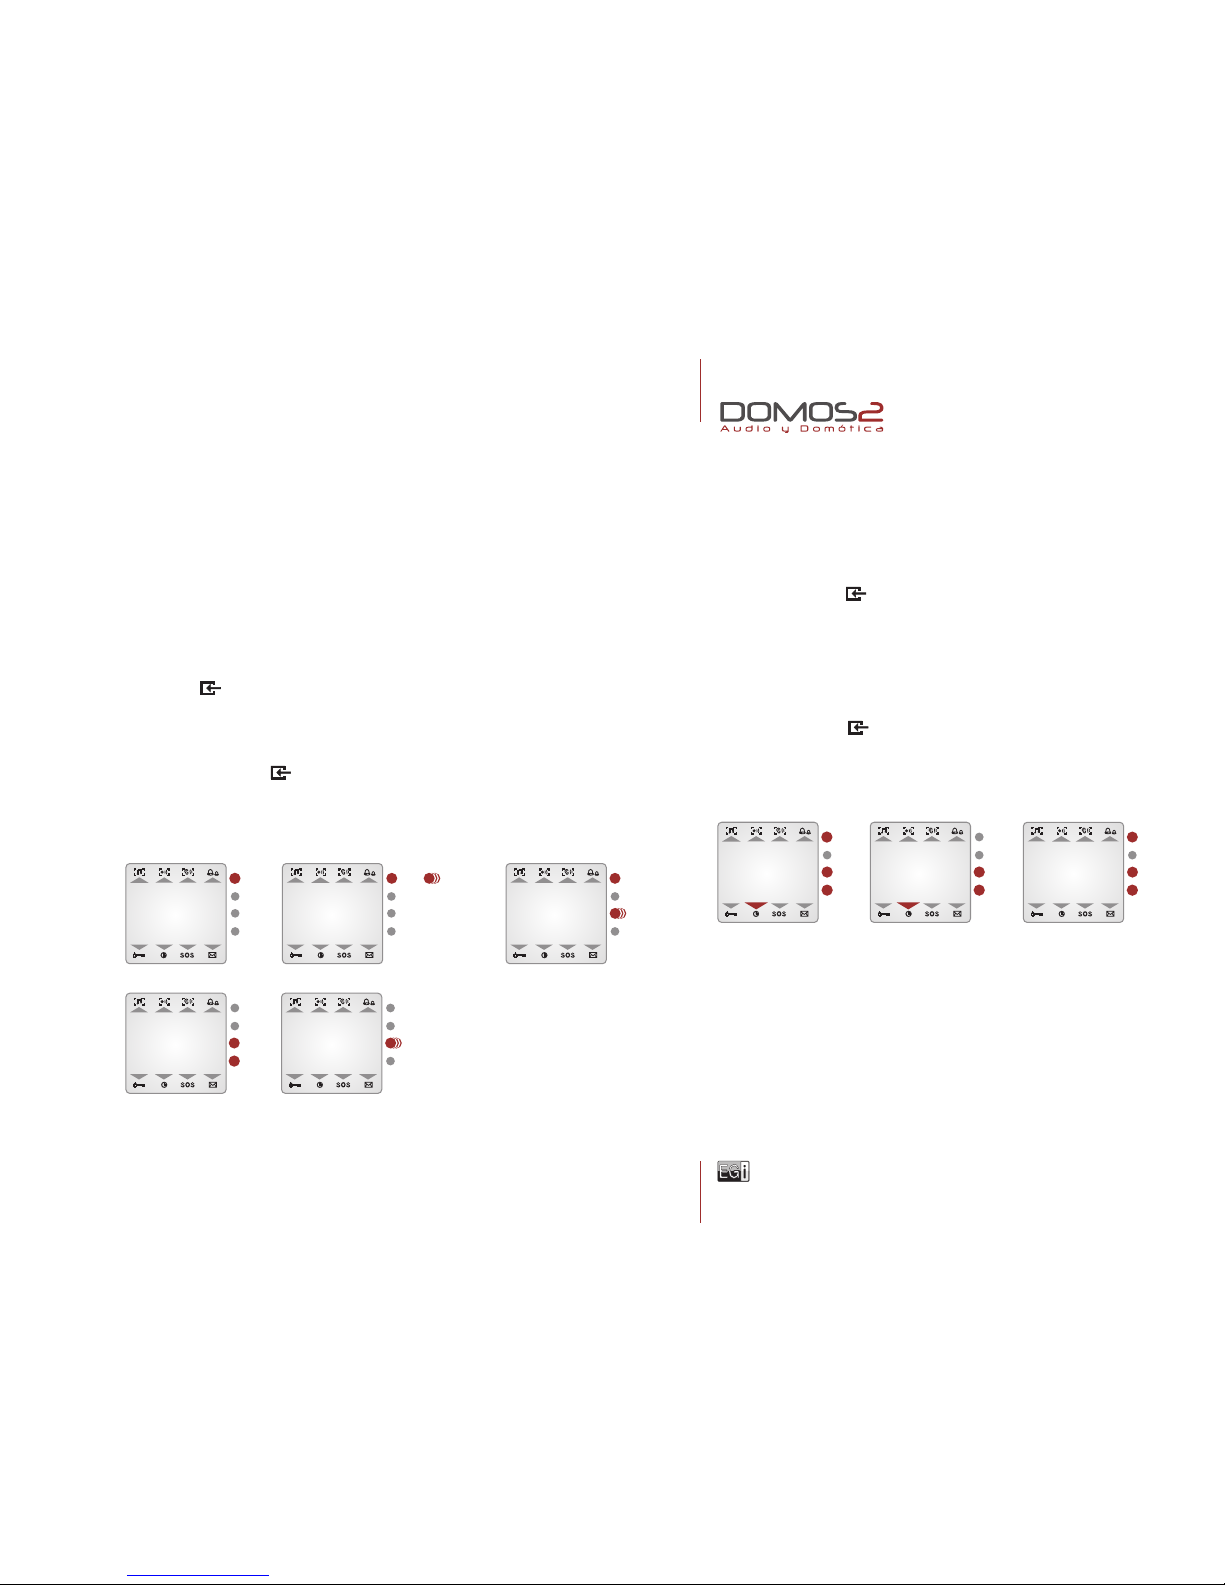
CLOCK CONFIGURATION
One of the central unit main functions is to manage the services provided by
the system. To make some of the services work properly, clock installation
must be correctly configured.
1. Press MENU key until CLOCK appears on the screen. From here, the
installation clock can be activated or deactivated by using (OK/+) or (NO/–).
2. For time adjustment, press (OK) to activate installation clock and (OK)
again for clock adjustment (HOUR will flash).
3. Modify the hour pressing (OK/+) or (NO/–).
4. Press MENU key to modify MINUTE the same way.
NOTE: You can abandon the programming at any time by pressing CANCEL
several times.
1st
2nd
MISCELL. SETUP 1
SETUP 1RESET
––––
GAIN
AUTO
HOur
11:15
clock
yes MINUTe
11:15
40020, 40040, 40060 central units
for DIN rail mounting
1st 1st
2nd
1st
2nd
1st
2nd
2nd
www.egiaudio.com
11
audio functions
Depending on the model, 1 (40020), 2 (40040) or 3 (40060) audio programs
can be configured in the system.
These audio programs can be different radio stations or Central Unit RCA
stereo input.
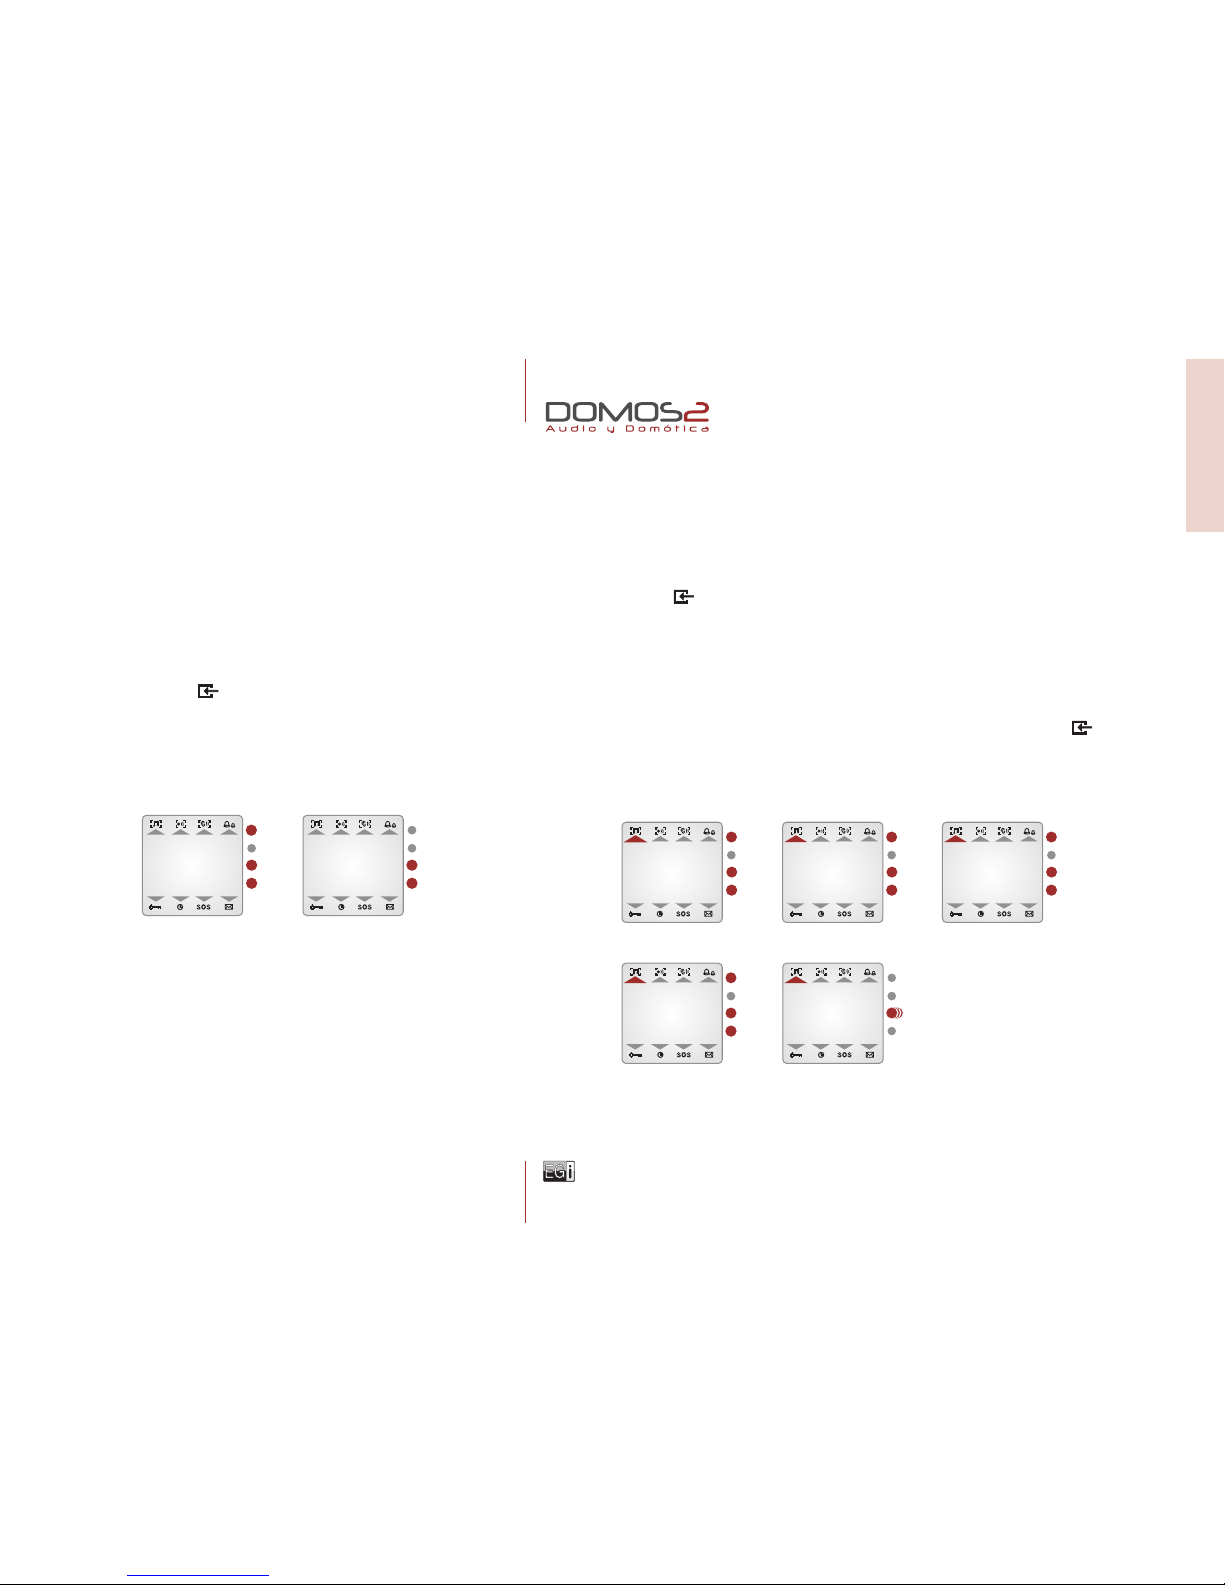
CHANGE PROGRAMS
To select any of the programs:
1. Press MENU key until AUDIO appears on the screen. From this menu,
audio can be activated or deactivated using (OK/+) or (NO/–).
2. With AUDIO in YES position, press (OK/+) again to go to program 1,
2or 3(if available).
SELECT A RADIO STATION OR RCA AUDIO FOR A PROGRAM
Once the program that is tuning a radio station is selected, if you want to change this radio station, please
do as follows:
1. Select the PROGRAM following the steps described at “Change programs”.
2. Press MENU key . Now, using (+) and (–) check the different stored radio stations for the program.
The RCA audio input can also be selected here (AUD appears on the screen).
3. If you want to listen a radio station that is not stored, press MENU again and SEARCH will appear
on the display. Press (+) or (–) for 2 seconds to perform an automatic search, or short pressings for
manual search.
4. If a non stored radio station is tuned, the frequency value flashes. Pressing MENU key again, you
have the chance to store it. Press (+) or (–) shortly to select the memory position (1 to 9) where you want
it stored and press (OK/+) for 2 seconds. SAVED appears on the display.
PROGRAM
aUD
AUDIO
YES PRESET 3
92.8
PROGRAM
92.0 SEARCH
89.7
22
SAVE
91.3
6
SAVED
91.3
40020, 40040, 40060 central units
for DIN rail mounting
central units
1st
2nd
1st
2nd
2nd
1st
1st
2nd
1st
2nd
1st
2nd

www.egiaudio.com 12
DELETE A STORED RADIO STATION
1. Press MENU key until AUDIO appears on the screen. From this menu, audio can be activated or
deactivated using (OK/+) or (NO/–).
2. With AUDIO in YES position, press (OK/+) again to go to program 1, 2or 3(if available).
3. In the chosen program, press MENU key and then use (+) and (–) to select the memory position to be deleted.
4. Press now MENU key a few times until ERASE appears on the display.
5. Then, press (OK/+).
6. ERASED appears on the display.
Altough most of these functions are used from the control units, the Central unit manages the service.
If a service is not authorized by the central unit, it can not be used from the control unit.
To configure this service:
1. Press MENU key until CARILLON appears on the screen. Use (OK/+)
or (NO/–) to activate or deactivate the service .
2. To adjust the starting and finishing time, and the signal frequency,
press (OK).
3. Using (OK/+) and (NO/–), select the starting time.
4. After this, press MENU key To modify the finishing time. Use (OK/+)
or (NO/–) to adjust the time.
5. Then, press MENU key to select the frequency for the musical tune.
Pressing (OK/+) and (NO/–) you can choose between 1 hour, 30 min. or 15 min.
6. Pressing now MENU key , you will be able to adjust the tune volume
between 0and 64, using (OK/+) and (NO/–).
intercom functions
CARILLON FUNCTION
Using this service, a musical tone will be produced for the installation every 15, 30 or 60 minutes.
ERASEPROGRAM
89.5 ERASED
MEM 1
MODe
1:00 VOLUME
49
carillon
yes st.time
9:00 end time
22:00
40020, 40040, 40060 central units
for DIN rail mounting
1st
2nd
2nd
1st
2nd
1st
2nd
1st
2nd
1st

www.egiaudio.com
13
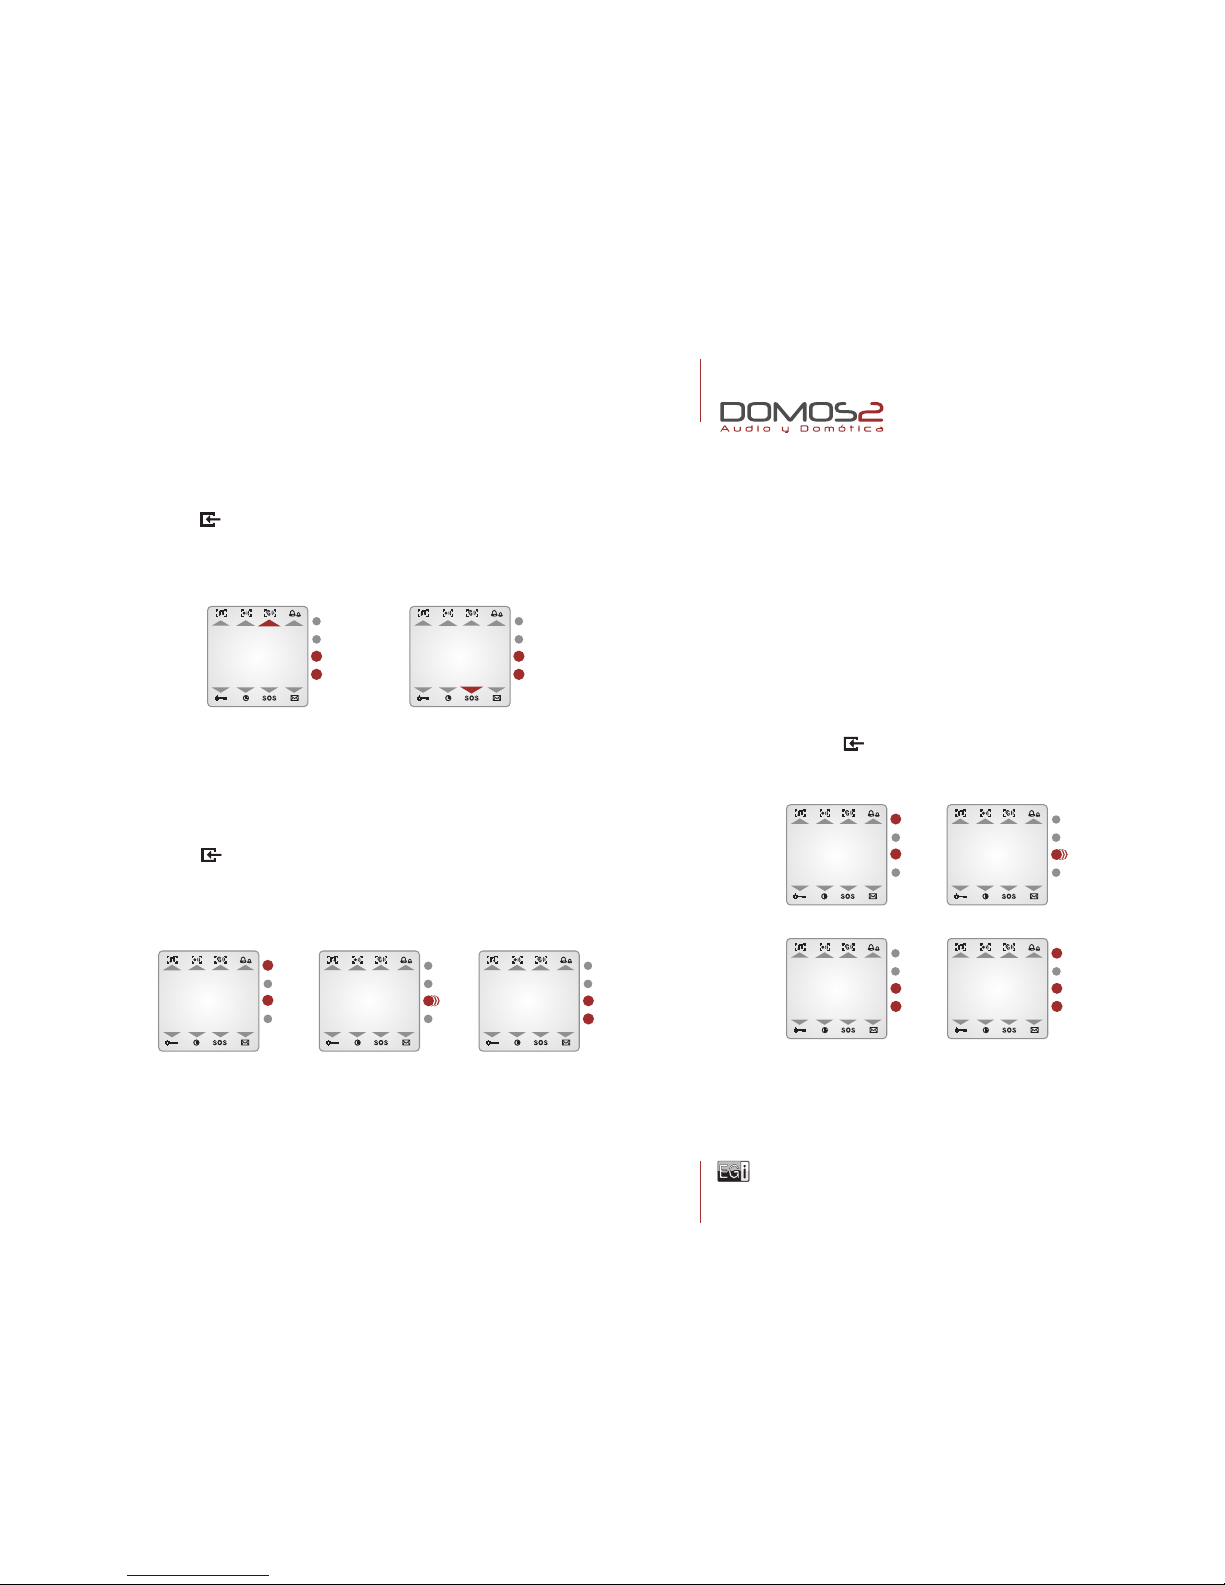
ENTRY DOOR PHONE FUNCTION
Using this service, you will be able to answer a call to the entry phone from
anywhere in the installation.
To use this service, your installation must have the entry phone module EGi
ref. 40410 (40420 for EDS systems) installed and a compatible door entry
phone.
Please refer to the door entry phone module manual for detailed information.
This service is used from the control units, altough it must be activated in the
central unit.
To activate the service, do as follows:
1. Press MENU key several times until DOOR-PHO appears. From this
menu, the service can be activated or deactivated using (OK/+) or (NO/–).
DOORBELL FUNCTION
The unit manages the doorbell function by connecting the door entry bell to
the central unit (2).
MESSAGE RECORDER
Using this service, up to 20 seconds voice messages can be left to other user.
This service is used from the control units, altough it must be activated
in the central unit.
To use this function, compatible control units must be installed. Please refer
to your control unit manual for details.
To activate the service, do as follows:
Press MENU key several times until MESSAGE appears. From this menu, the service can be activated
or deactivated using (OK/+) or (NO/–).
surveillance functions
Your EGi DOMOS2 system can control and listen any zone of the installation.
This service is used from the control units, altough it must be activated in the central unit.
Please refer to the control unit manual for detailed information and configuration.
To activate the service, do as follows:
1. Press MENU key several times until SURVEIL. appears. From this menu, the service can be activated
or deactivated using (OK/+) or (NO/–).
SOS FUNCTION
This function alerts about a dangerous situation or someone in need of help. The system generates an audio
signal in the zone where tha alarm is generated. If not cancelled, the alarm spreads to the rest of the installation
for 2 minutes.
This service is used from the control units, altough it must be activated in the central unit.
MESSAGE
YES
MESSAGE FUNCTION
DOOR-PHO
YES
DOORPHONE SERVICE
40020, 40040, 40060 central units
for DIN rail mounting
central units
www.egiaudio.com
To activate the service, do as follows:
1. Press MENU key several times until SOS appears. From this menu, the service can be activated
or deactivated using (OK/+) or (NO/–).
14
TUNER GAIN ADJUSTMENT
Once GAIN appears on the screen, use the keys (OK/+) or (NO/–)to change
the values choosing from 0to 3or AUTO (the tuner gain is automatically
adjusted this way).
MONO MODE ADJUSTMENT
This parameter modifies the internal tuner mode from stereo to mono. This
way, the quality of the reception can be improved in areas with poor reception.
To activate or deactivate this parameter, do as follows:
1. Follow steps 1 and 2described on “More adjustments”.
2. Press MENU key until MONO appears. From this menu, the parameter
can be changed using (OK/+) or (NO/–).
more adjustments
On top of the previous services, your DOMOS2 central unit provides the following parameters and services.
To configure the rest of adjustments, please follow the procedure ahead:
1. Press MENU key several times until MISCELL. appears.
2. Press (OK/+). ADJUSTMS appears on the screen.
3. Keep (OK/+) pressed until GAIN appears on the screen.
SURVEIL.
YES
SURVEILLANCE
SOS
YES
SOS FUNCTION
miscell.adjustms gain
AUTO
40020, 40040, 40060 central units
for DIN rail mounting
1st
2nd
miscell.adjustms
gain
AUTO MONO
yes
2nd
1st
1st
2nd
www.egiaudio.com
CENTRAL UNIT FM MEMORIES
40020
40040
40060
9
18
27
To perform an Autoscan, proceed as follows:
1. Follow steps 1 and 2described on “More adjustments”.
2. Press MENU key several times until AUTOSCAN appears on the display. Press (OK/+) to start.
NOTE: All stored stations will be overwritten by this process.
15
AUTOSCAN
The AUTOSCAN service automatically scans the FM band and stores
the radio stations with the highest signal level.
The amount of radio stations stored depends on the memory positions that
are available in the central unit.
OFFSET
OFFSET is a function used to compensate the internal clock of the system and correct the fluctuations that
might appear due to temperature or other evironmental conditions.
This adjustment is expressed in minutes per month. (A positive value indicates added minutes).
To set this parameter, do as follows:
1. Follow steps 1 and 2described on “More adjustments”.
2. Press MENU key several times until TIM.ADJ. appears on the display. Press (OK/+) to add minutes
or (NO/–) to remove them until the central unit clock is accurate.
NOTE: For proper adjustment, the clock must be working normally for one month. After this time, check the
offset and correct it following the previous procedure.
40020, 40040, 40060 central units
for DIN rail mounting
central units
MISCELL.ADJUSTMS autoscan
87.5
1
1st
2nd
1st
2nd
BLOCKING RADIO STATION MODIFICATION
This parameter, if activated, allows the change of radio station for the selected
program only to the control unit that set it first. This way, changing the preset
station by another user is avoid. If the service is deactivated, any control unit
can change the radio station tuned.
To activate the service, do as follows:
1. Follow steps 1 and 2described on “More adjustments”.
2. Press MENU key several times until PR.BLOCK appears. From this
menu, the service can be activated or deactivated using (OK/+) or (NO/–).
miscell.adjustms
gain
AUTO pr.block
yes
2nd
1st
1st
2nd

www.egiaudio.com
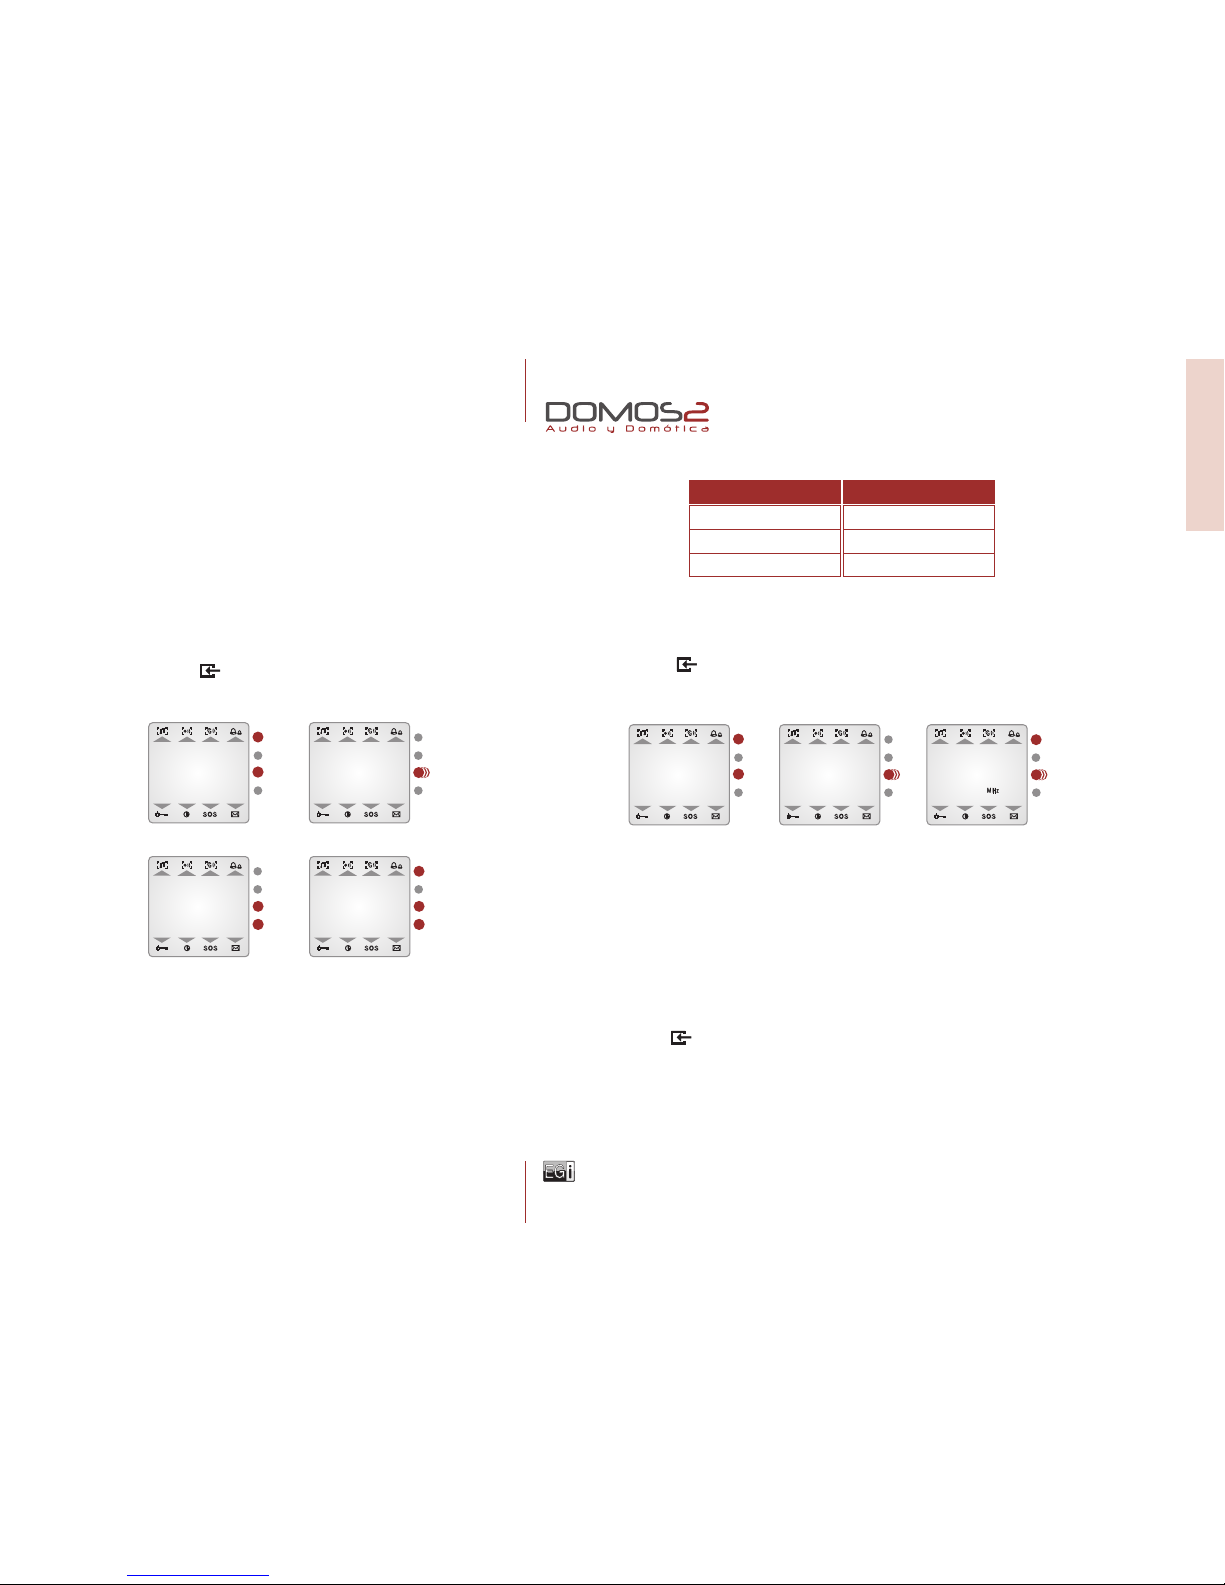
SYSTEM INFORMATION
To display information about system configuration and available audio programs, the option LOCAL PR
indicates the program number (1 for 40020, 2 for 40040 and 3 for 40060). INST PR indicates other
technical value that varies depending on your installation.
16
LANGUAGE SELECTION
The menu language can be changed following this procedure:
1. Press MENU key several times until MISCELL.appears.
2. Press (OK/+). ADJUSTMS appears on the screen.
3. Keep (OK/+) pressed until GAIN appears on the screen.
4. Press MENU until the menu language appears (Spanish by default).
5. To change the language, press (OK/+) or (NO/–) to choose from the available languages.
TECHNICAL SERVICE INFORMATION
If you need technical support on the product, it is possible that you are asked
about the software version and other parameters. All this values can be found
in the MISCELL menu.
1. Follow steps 1 and 2described on “More adjustments”.
2. Press MENU key several times until VER - appears on the screen,
showing a number with the software version
3. Press MENU key some more times until I.R. DEV and I.R KEY appears,
in case you are experiencing problems whith the remote control unit.
MISCELL, ADJUSTMS TIM.ADJ.
2
MISCELL. ADJUSTMS GAIN
AUTO ENGLISH
I.R. DEV0
VER -3
0
GAIN
AUTO
ADJUSTMSmiscell
40020, 40040, 40060 central units
for DIN rail mounting
1st
2nd
1st
2nd
2nd
1st
1st
2nd
1st
2nd

www.egiaudio.com
Each central unit for ø60 mm box (EGi ref. 40070, 40080, 40090 and 40200)
must be connected to a power supply (EGi ref. 40710, 40720 or 40730)
through the system bus. Central units for ø60 mm box allow several services
depending on the central unit model.
40070 Central unit has 1 RCA stereo audio input to connect audio sources
through 0501 or 0502 wire. It has also 1 IR output for 40110 IR transmitter
wire, which allows the remote control of the audio source (provided it is compatible
with the system) from any room with a DOMOS2 in-wall control unit, using the
remote control of the audio source (CD, DVD, audio equipment, etc.).
40080 Central unit gives a FM program with 9 presets that are stored on
the module.
40070, 40080, 40090, 40200 central units
for Ø 60mm box
17
40070 1 RCA AUDIO INPUT (1 AUDIO PROGRAM + IR)
40080 1 AUDIO PROGRAM + FM
40090 CLOCK + INTERCOM + SURVEILLANCE + SOS + DOOR PHONE
40200 1 USB INPUT
overview
The function of the DOMOS2 central units ref. 40070 and 40080 is to give
additional audio programs to a system based on a central unit for DIN rail
mounting. 40090 Central unit gives the following services: radio, clock,
intercom and surveillance (baby sitter). A system can support up to a maximum
of 4 central units for ø60 mm box (3 audio programs + 40090 central unit).
1Infrared output (IR) for 40110 IR transmitter wire.
2RCA Stereo audio input.
3LED Indicator for audio detection. 2
2
1
3
EGi ref. 40070
40090 Central unit gives additional services to your DOMOS2 installation. It provides the clock for the
installation and manages room-to-room intercom, acoustic surveillance (baby sitter) and SOS function.
40200 Central unit allows your system to play music in MP3 format thanks to its USB connector.
40070 1 RCA AUDIO INPUT (1 AUDIO PROGRAM + IR)
WARNING: The services that are activated/deactivated on the central unit will
affect the whole installation. Therefore, the menus displayed on the control units
will change depending on the services activated on the central units.
Connect your audio equipment to the installation using 0502 connection wire, if your audio source has a
RCA connection, or using 0501 connection wire, if your audio source has a 3.5 mm jack output connector.
Gradually, turn the volume up on the audio source until the LED indicator for audio detection blinks.
Ø60mm central units

www.egiaudio.com 18
Connect a 40110 wire to the IR connector of the 40070 central unit and put the capsule on the audio source
sensor in order to control the audio source from any room with a DOMOS2 in-wall control unit, using the
remote control of the audio source or 40100/40130 remote control.
CHANGE A STORED RADIO STATION
1. Press the MENU key several times until AUDIO is displayed.
2. Press (OK/+) or (NO/–) to navigate through the stored radio stations
(from MEM 1 to MEM 9).
RADIO STATION SEARCH
To search for a radio station by frequency, do as follows:
1. Press the MENU key several times until AUDIO is displayed.
2. Press (OK/+) or (NO/–).
3. Press again. SEARCH is displayed.
4. Use(OK/+) and (NO/–), to search up or down through the radio band. To
start automatic search, hold the keys. To start manual search, press the
keys shortly, and it will start searching up/down through the radio band
every 50 KHz.
40080 Central unit has a FM program with 9 presets.
1Menu key.
2Menu exit key.
3OK/+ key.
4NO/– key.
5LCD display.
40080 1 AUDIO PROGRAM + FM
WARNING: If you turn the volume quite high, the installation will deliver distorted sound, losing quality. If this
situation happens, turn the volume down on the audio source until distortion disappears.
WARNING: This function may not be available for all remote control models.
CHANGE STORED
RADIO STATION
MEM 4
1st
RADIO STATION
SEARCH
MANUAL
AUTO
2nd
2nd
MEM 4
1st
2nd
2nd
103.2 6
1st
2nd
2nd
103.2 6
1st
2nd
2nd
1
3
4
2
5
EGi ref. 40080
40070, 40080, 40090, 40200 central units
for Ø 60mm box

www.egiaudio.com
19
STORE A RADIO STATION
To store the radio station that you have tuned in the previous step, please do
as follows:
1. Follow the steps of “Radio station search” process.
2. Press the MENU key several times until SAVE is displayed.
3. Hold (OK/+)until SAVED is displayed.
DELETE A STORED RADIO STATION
To delete a stored radio station, please do as follows:
1. Search the memory that you want to delete following the steps of “Change
a stored radio station” process.
2. Press the MENU key several times until DELETE is displayed.
3. Press (OK/+).
other configurations
DISPLAY BACKLIGHT ADJUSTMENT IN STAND-BY MODE
1. Press the MENU key several times until ADJUSTM is displayed.
2. Press the (OK/+) key for a few seconds.
3. LIGHT will be displayed.
4. Press (OK/+) or (NO/–) to adjust the light intensity.
GAIN ADJUSTMENT
EGi control units are factory calibrated to deliver optimum performance. Nevertheless, there might be
situations, where FM reception is not good enough. In those situations, manual gain adjustment could sort
out the problem. To perform this operation, do as follows:
1. Press the MENU key several times until ADJUSTM is displayed.
2. Press the (OK/+) key for a few seconds.
3. Press the MENU key several times until GAIN is displayed.
4. Use (OK/+) or (NO/–) to increase or decrease the value.
SAVEMEM 4
1st
2nd
2nd
SAVED
deleteMEM 4
1st
2nd
2nd
deletEd
LIGHTADJUSTM
1st
2nd
BACKLIGHT ADJUSTMENT
GAIN 3ADJUSTM
1st
2nd
GAIN ADJUSTMENT
1st
2nd
2nd
40070, 40080, 40090, 40200 central units
for Ø 60mm box
Ø60mm central units

www.egiaudio.com 20
BLOCKING FUNCTION
Using this funtion, only one control unit will control the program.
If you select NO, any control unit can change the radio station of the program at any moment.
If you select YES, only the first control unit that is connected to the program can change the radio station.
To activate this service, please do as follows:
1. Press the MENU key several times until ADJUSTM is displayed.
2. Press the (OK/+) key for a few seconds.
3. Press the MENU key several times until PRBL– is displayed.
4. Use (OK/+) or (NO/–) to activate or deactivate this service.
AUTOSCAN
The autoscan service automatically finds the strongest available 9 FM stations. To activate this function,
please do as follows:
1. Press the MENU key several times until ADJUSTM is displayed.
2. Press the (OK/+) key for a few seconds.
3. Press the MENU key several times until AUTOSCA is displayed.
4. Use (OK/+) to start the autoscan.
PRBL–ADJUSTM
1st
2nd
BLOCK ADJUSTMENT
AUTOSCAADJUSTM
1st
2nd
AUTOSCAN
1st
2nd
1st
2nd
2nd
VERS 1ADJUSTM
PROGRAM ADJUSTMENT
SOFTWARE VERSION
If you need technical support on the product, it is possible that you are asked
about the software version. To check this parameter, do as follows:
1. Press the MENU key several times until ADJUSTM is displayed.
2. Press the (OK/+) key for a few seconds.
3. Press the MENU key several times until VERS is displayed. The
number that appears on the display is the software version number.
WARNING: The installation can stop working when modifying the
parameters of this menu.
Modify this menu following the indications of your installer only.
An installation based on 40080 module can provide up to 3 programs. This
function allows you to choose the number of the program that is going to be
distributed through the installation.
1. Press the MENU key several times until ADJUSTM is displayed
2. Press the (OK/+) key for a few seconds.
40070, 40080, 40090, 40200 central units
for Ø 60mm box
1st
2nd
Other manuals for DOMOS2
6
Table of contents


