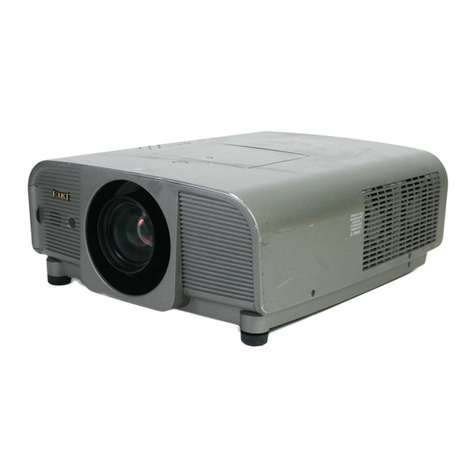
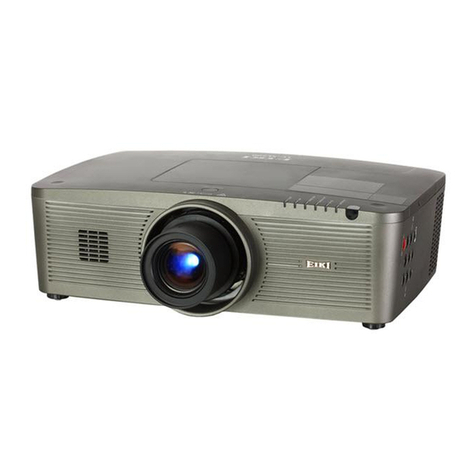
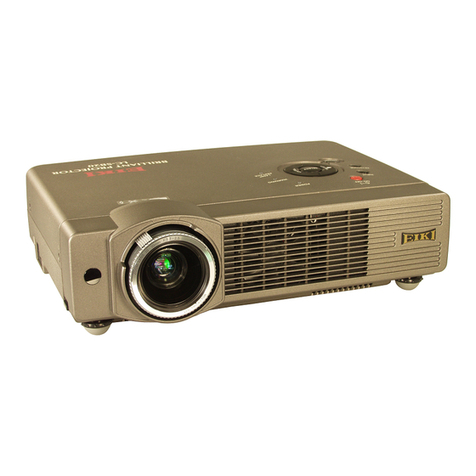
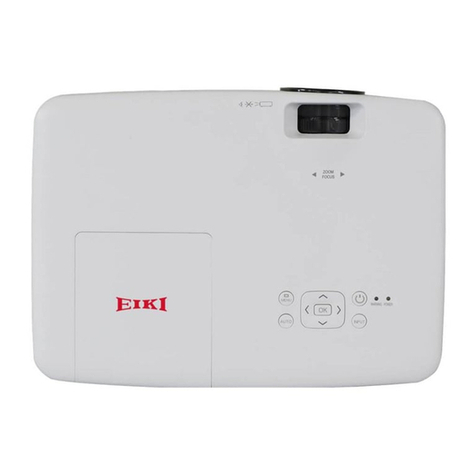
Eiki EK-300U User manual

EIKI Model Name:
EK-300U
EK-301W
EK-302X
EK-303U
Service Manual
LCD Multi-media Projector
Version: 1.2
2016/10/15

&RQWHQW
&RQWHQW............................................................................
SDIHW\LQVWUXFWLRQ.............................................................
0DLQWHQDQFH DQG FOHDQLQJ...............................................
/DPS5HSODFHPHQW........................................................0
Warraning ,QGLFDWRU........................................................2
7URXEOHVKRRWLQJ.............................................................4
MHFKDQLFDOGLVDVVHPEO\..16
Appendix-Technical Specification...................................23
Appendix-Configuration of terminals...............................24
$SSHQGL[Serial control.........25
Appendix-PABA Diagrams................0
2
,QGLFDWRUDQGSURMHFWRUVWDWH...........................................3
$SSHQGL[RS232 control mode.......26
$SSHQGL[RS232 control commands.......27

3
Please read this manual completely before installing
and operating the projector.
The projector provides many convenient features
and functions. Proper operation may enable you to
fully utilize the features and keep it in good condition.
Otherwise, it will not only shorten the service life of
the unit, but also may cause malfunction, a fire, or
other accidents.
If your projector cannot work properly, please read
this manual again, check the operating methods and
cable connection, and try the solutions in the part of
Troubleshooting. If the problem still exists, contact the
dealer or the service center.
The lamp of the projector is a wearing part. The
luminance may decrease after a period of operation
and be weaker than that of a new lamp. This is
normal. Please strictly follow the steps in Turning
on the unit and Turning off the unit to turn on/off
the projector, and the requirements in Maintaining
and cleaning the projector to service and clean the
projector regularly. Otherwise the high temperature
residual heat may not radiate, greatly shorten the
service life of the projector and lamp, or even damage
them within a short period.
Caution
ELECTRIC SHOCK
DO NOT OPEN
CAUTION:
TO REDUCE THE RISK OF ELECTRIC SHOCK,
DO NOT REMOVE COVER (OR BACK). NO
USER SERVICEABLE PARTS INSIDE EXCEPT
LAMP REPLACEMENT. REFER SERVICING TO
QUALIFIED SERVICE PERSONNEL.
THIS SYMBOL INDICATES THAT
DANGEROUS VOLTAGE CONSTITUTING A
RISK OF ELECTRIC SHOCK IS PRESENT
WITHIN THIS UNIT.
THIS SYMBOL INDICATES THAT THERE
ARE IMPORTANT OPERATING AND
MAINTENANCE INSTRUCTIONS IN THE
USER’S MANUAL WITH THIS UNIT.
Safety precautions
Caution: ƔThe projector must be grounded.
ƔDo not expose the projector to raindrops
RUKLJKKXPLGLW\WRDYRLGD¿UHRUHOHFWULF
shock.
- This projector produces intense light from the
projection lens. Avoid staring directly into the lens,
otherwise eye damage could be caused.
Be especially careful that children do not stare
directly into the beam.
- Place the projector in a proper position.
2WKHUZLVHLWPD\UHVXOWLQ¿UHKD]DUG
- Leave an appropriate space from the top, sides,
and back of the shell in order to ventilate and cool
GRZQWKHSURMHFWRU7KH¿JXUHVEHORZLQGLFDWHWKH
PLQLPXPGLVWDQFHWREHOHIW,WPXVWEHVDWLV¿HGLI
the projector is placed in sealed environment like
a cabinet.
0.7’(20cm)
1.5’(50cm) 3’(1m) 3’(1m)
- Do not cover the vent of the projector. Poor
radiation may shorten the service life or even
cause dangers.
- Remove the AC power plug if the projector is not
to be used for a long time.
- Do not project the same image for a long time;
otherwise, a residual image may appear on the
LCD panel due to its characteristic.
Caution:
Do not set the projector in greasy, wet, or smoky
conditions such as in a kitchen, to prevent a
malfunction or accident. If the projector comes
in contact with oil or chemicals, it may become
deteriorated.
Read and keep this manual for future reference.
SIDE and TOP REAR
FOR EU USERS
The symbol mark and recycling systems described below
apply to EU countries and do not apply to countries in other
areas of the world.
Your product is designed and manufactured with high quality
materials and components which can be recycled and/or
reused.
The symbol mark means that electrical and electronic
equipment, batteries and accumulators, at their end of life,
should be disposed of separately from your household
waste.
Note:
If a chemical symbol is printed beneath the symbol mark,
this chemical symbol means that the battery or accumulator
contains a heavy metal at a certain concentration. This will
be indicated as follows: Hg: mercury, Cd: cadmium, Pb: lead
In the European Union there are separate collection systems
for used electrical and electronic equipment,
batteries and accumulators.
Please, dispose of them correctly at your local
community waste collection/recycling centre.
Please help us to conserve the environment we
live in!
The mains plug/appliance coupler is used as
disconnect device, the disconnect device shall
remain readily operable.
Caution:
Contains mercury
For more information on safe handling procedures,
the measures to be taken in case of accidental
breakage and safe disposal options
visit: ec.gc.ca/mercure-mercury/
Dispose of or recycle in accordance with applicable
laws.
6DIHW\LQVWUXFWLRQ
5
Air circulation
Vents in the cabinet are provided for ventilation.
To ensure reliable operation of the product and
to protect it from overheating, these openings
must not be blocked or covered.
Caution
Hot air is exhausted from the exhaust vent.
When using or installing the projector, the
following precautions should be taken.
'RQRWSXWDQ\ÀDPPDEOHREMHFWVRUVSUD\
can near the projector. Hot air is exhausted
from the air vents.
- Keep the exhaust vent at least 1m away from
any objects.
- Do not touch a peripheral part of the exhaust
vent, especially screws and metallic part. This
area will become hot while the projector is
being used.
- Do not put anything on the projector. Objects
put on the cabinet will not only get damaged
EXWDOVRPD\FDXVH¿UHKD]DUGE\KHDW
- Cooling fans are provided to cool down the
projector.
- The fan’s running speed is changed according
to the temperature inside the projector.
Installing the projector properly
Please set the projector on nearly-level.
Be sure to install the projector properly.
Improper installation may reduce the lamp
OLIHWLPHDQGHYHQFDXVHD¿UHKD]DUG
Caution in ceiling installation the
projector
Do not roll the projector over 10o
from side to side.
Do not point the projector up to
project an image.
Do not point the projector down
to project an image.
Do not put the projector on either
side to project an image.
±2QO\TXDOL¿HGSHUVRQDOLVDXWKRUL]HGIRUFHLOLQJ
installation.
– We are not responsible for the hurt and damage
caused by ceiling bracket that purchased from
unauthorized dealer even in warranty period.
– Remove the ceiling bracket immediately while
not use.
– While installing, torque screwdriver is
suggested, don't use electric or impact-type
screwdriver.
– Please read the manual of bracket for details.
(
Do not pitch the projector more
than 10obackward and forward.
Air Intake Vent
Exhaust Vent
6DIHW\LQVWUXFWLRQ

VDIHW\SUHFDXWLRQV
± 'O NOTDWWHPSWWRPDNHDFLUFXLWPRGLILFDWLRQIRUWKHVDNHRIVDIHW\IRUORQJ
± XQSOXJWKHSRZHUFRUGIURPWKHSRZHURXWOHWEHIRUHUHPRYLQJWKHSURMHFWRU
± 3OHDVHXVHWKHUDQGRPVXSSO\OLQHFRUUHFWO\DQGPDNHVXUHWKDWWKHOLQHPXVWEHHUDWKHG
± X VHLQVXODWLRQWUDQVIRUPHURQWKHDFSRZHUFRUGEHIRUHPDLQWHQDQFH
± 'RQR 7WRXFKDQ\URWDWLQJSDUWVRIWKHSURMHFWRUFRROLQJIDQHWFZKHQWKHOLGLVUHPRYHGDQGWKHSRZHULV
SRZHUHGRQ
± 3OHDVHSD\DWWHQWLRQWRWKHRULJLQDOOD\RXWRIWKHZLUHLQWKHPDLQWHQDQFHSURFHVVR QFHWKHUHLVDVKRUWFLUFXLW
SOHDVHUHSODFHDOOWKHSLQWKHPDLQWHQDQFHSURFHVVDUWVWKDWDUHRYHUKHDWHGDQGGDPDJHGGXHWRVKRUWFLUFXLW
± PDNHVXUHWRLQVWDOOWKHSURWHFWLYHGHYLFHVVXFKDVLQVXODWLRQEDUULHULQVXODWLRQSDSHUVFUHHQDQGLQVXODWLRQ5&
FRQQHFWLRQHWFDIWHUWKHPDLQWHQDQFHLVFRPSOHWHG
± 3OHDVHFKHFNIRUWKHOHDNDJHDIWHUWKHPDLQWHQDQFHLVFRPSOHWHGWRSUHYHQWFXVWRPHUVIURPHOHFWULFVKRFN
X 9DQGXK 3ODPSVSUHYHQWLYHPHDVXUHV
± %HVXUHWRXQSOXJWKHSRZHUFRUGIURPWKHSRZHURXWOHWZKHQUHSODFLQJWKHODPS
± 7KHODPSZLOOUHDFKWRUDWKHUKLJKWHPSHUDWXUHGXULQJWKHOLJKWLQJSURFHVV<RXQHHGVSHQGVRPHWLPHWRFRRO
ODPSRIIFRPSOHWHO\EHIRUHUHSODFLQJLWZLOOHPLWDVPDOODPRXQWRIX 9UDGLDWLRQ
± 7KHUHZLOOEHKLJKSUHVVXUHLQWKHODPSLQWHUQDOFRPSRQHQWV RLWPD\OHDGWRDQH[SORVLRQMXVWIRU\RXUDEQRUPDO
RSHUDWLRQ
± 'RQR 7WRXFKWKHODPSZLUHVGXULQJPDLQWHQDQFHDVWKHUHLVPXFKKLJKSUHVVXUHLQWKHODPSLQWHUQDOFRPSRQHQW
/HDNDJHFKHFN
%HUHDG\WRPHDVXUHFLUFXLWLQILJXUHEHOR
PDNHVXUH\RXUYROWPHWHUDUHRIWKHVDPHSURSHUWLHVDVGHVFULEHGLQWDEOH
&RQQHFWWKHFLUFXLWDVILJXUHVKRZV3OXJWKHSRZHUFRUGLQWRDQHOHFWULFDORXWOHW
&RQQHFW0WR7DVILJXUHVKRZVDQGPHDVXUHWKHYROWDJH
&RQQHFWPWR7DQGPHDVXUHWKHYROWDJHDJDLQ
7KHUHDGYDOXHRIWKHYROWPHWHULQVWHSPXVWEHYROWVRUOHVVLQVWHSDQG7KLVPHDQVWKDWWKHFXUUHQW
PXVWEHP$RUOHVV
LIWKHUHDGYDOXHVH[FHHGWKHDERYHFULWHULDWKHSURMHFWRUPXVWEHUHSDLUHGDQGUHH[DPLQDWLRQLQRUGHUWR
SUHYHQWWKHULVNRIHOHFWULFVKRFNEHIRUHUHWXUQLQJWRWKHFXVWRPHU
6DIHW\LQVWUXFWLRQ
*HQHUDO3ROLF\
5

&LUFXLWSURWHFWLRQ
7KHSURMHFWRUKDVWKHIROORZLQJVHFXULW\RSHUDWLRQFLUFXLWSURWHFWLRQIXQFWLRQVLIWKHUHLVDQ\DEQRUPDOLQ
WKHLQVLGHRIWKHSURMHFWRURQHRIWKHIROORZLQJSURWHFWLRQFLUFXLWDFWLRQZLOOPDNH\RXUSURMHFWRUVKXWGRwQ
DXWRPDWLFDOO\
Fuse
/DPSFRYHUVZLWFK
7KHUPDOVZLWFK
Thermal switch
7KHWKHUPDOVZLWFKLQVLGHWKHSURMHFWRULVXVHGWRGHWHFW
DEQRUPDOWHPSHUDWXUHLQVLGHWKHSURMHFWRU:KHQWKHLQWHUQDO
WHPSHUDWXUHLVFORVHWRÛ&Û&WKHWKHUPDOVZLWFKZLOO
FXWRIIWKHODPSSRZHUWRVWRSSRZHUVXSSO\
LIWKHWKHUPDOVZLWFKLVRII\RXFDQQRWWXUQRQWKHSURMHFWRU
Lamp cover switch
:KHQWKHODPSFRYHULVUHPRYHGRUQRWIXOO\FORVHGWKHODPS
FRYHUVZLWFKZLOOFXWRIIWKHGULYHVLJQDORIWKHODPSFLUFXLW
3OHDVHPDNHVXUHWRLQVWDOOWKHODPSFRYHUFRUUHFWO\DIWHU\RX
RSHQODPSFRYHUDQGUHSODFHLWRWKHUZLVHWKHSURMHFWRUFDQW
SRZHURQSURSHUO\
Fuse
7KHIXVHLVSODFHGLQVLGHWKHSURMHFWRU
:KHQ\RXILQGWKHVWDQGE\UHGLQGLFDWRUOLJKWLVRII
LWLVKLJKO\SRVVLEOHWKDWWKHIXVHLVGLVFRQQHFWHG3OHDVH
FKHFNWKHIXVH DVIROORZVDQGXVHWKHIROORZLQJVSHFLILHG
IXVHW\SHWRUHSOFDH
S(59I&(&O'(
7<3(9U&US%$ $93FFUS(
&ON4U(5
How to replace the fuse
7KHIXVHLVSODFHGDERYHWKHILOWHUERDUG 5HPRYHWKHFDVH
WKHPDLQERDUG$9ERDUGDQGVSHDNHUEUDFNHWDVWKHVWHSV
LQPHFKDQLFDO'LVDVVHPEO\
5HPRYHWKHIXVHIURPWKHIXVHKROGHUWKHQUHSODFHLWZLWK
WKHVSHFLILHGW\SH
6
7KHUPDOVZLWFKEXWWRQ
3OHDVHSUHVVWKHWKHUPDOVZLWFKEXWWRQWRUHVHWWKHUPDOVZLWFK
6DIHW\LQVWUXFWLRQ
6DIHW\IXQFWLRQLQVWUXFWLRQ
7KLVSURMHFWRUSURYLGHV&ORVHGFDSWLRQ.H\ORFNDQG3LQFRGHORFNHQVXUHWKH
SURMHFWRU¶VRSHUDWLRQVDIHW\RQO\ZKHQXVHUVHQWHUWKHFRUUHFWSDVVZRUGFDQ\RX
RSHQ\RXUSURMHFWRUZKHQ\RXKDVVHWXSWKHWKUHHVHFXULW\IHDWXUHV<RXZRQWVWDUW
WKHSURMHFWRUZLWKRXWSDVVZRUGLQFDVHRIWKHDERYHLVVXHVSOHDVHUHVHWVXFKWKUHH
VHFXULW\IHDWXUHVDFFRUGLQJWRWKHIROORZLQJUHVHWSURFHGXUHDQGWKHQUHFKHFN
)XQFWLRQ 'HVFULSWLRQ
&ORVHGFDSWLRQ
SHWXSLWRQWKHWRSSDQHORUUHPRWHFRQWUROOHU
VHOHFWWKH&ORVHGFDSWLRQIXQFWLRQZLOOPDNH\RXXQDEOH
WRSRZHURQ\RXUSURMHFWRU
IQLWLDOVHWXS&ORVHGFDSWLRQRII
3,1FRGHORFN 3UHYHQWXQDXWKRUL]HGSHUVRQQHOIURPRSHUDWLQJWKH
SURMHFWRU
LQLWLDO3DVVZRUG
/RJR3,1FRGHORFN
$QGWKHQHWZRUNIXQFWLRQZLOOZRUNIDLOXUHDIWHU\RXWXUQ RIIWKHSURMHFWRU
RQFH\RXVHOHFWWKH(FRPRGHVRPHIXQFWLRQZLOOEHOLPLWHG
/LPLWHGIXQFWLRQVLQVWDQGE\PRGH
FXQFWLRQ (FRPRGH 1RUPDOPRGH
SHULDOFRQWURO 9
NHWZRUN
MRQLWRURXWSXW
$XGLRRXWSXW
$XWRVWDUWXS 99
RQO\EHHIIHFWLYHZKHQSOXJJHGLQWRSRZHU
7KHSURMHFWRUKDVWZRNLQGVRIVWDQGE\PRGHQDPHO\(FRPRGHDQGWKHQRUPDO
PRGHLQWKHWZRPRGHWKHIROORZLQJIXQFWLRQVZLOOEHOLPLWHGDVVKRZQLQWKH
WDEOH3OHDVHVZLWFKWRVWDQGE\PRGHRQWKHVHWWLQJPHQX
1RUPDOPRGH,WFDQVWLOOFKDUJHWKHSURMHFWRUHYHQLIWXUQHGRIILW
(FRPRGHVHOHFW(FRPRGHZLWKRXWQHWZRUN
9
3UHYHQWXQDXWKRUL]HGSHUVRQQHOIURPFKDQJLQJWKH/RJR
LQLWLDO3DVVZRUG
VWDQGE\PRGHLQVWUXFWLRQ
7
9
If forget all password, thus please following the steps to reset the PIN lock or Logo PIN lock:
1. Un-plug the projector
2. Press and (Power) button at same time then plug on AC power cord.
3. The unit will be reseted to defult password: 111

Maintenance and cleaning
&OHDQLQJWKH¿OWHU
Filter counter reset
7KHDLU¿OWHUSUHYHQWVGXVWIURPDFFXPXODWLQJRQWKHVXUIDFHRIWKHRSWLFDOHOHPHQWVLQVLGH
WKHSURMHFWRU6KRXOGWKHDLU¿OWHUEHFRPHFORJJHGZLWKGXVWSDUWLFOHVLWZLOOUHGXFHFRROLQJ
fans’ effectiveness and may result in a buildup of internal heat and adversely affects the life of
WKHSURMHFWRU,IWKH)LOWHUZDUQLQJLFRQDSSHDUVRQWKHVFUHHQWKHDLU¿OWHUVKRXOGEHFOHDQHG
LPPHGLDWHO\&OHDQWKHDLU¿OWHUIROORZLQJWKHVWHSVEHORZ
%HVXUHWRUHVHWWKH¿OWHUFRXQWHUDIWHUFOHDQLQJ
RUUHSODFLQJWKH¿OWHU
1. Press Menu on the remote control to display
the screen menu. PressST to select
"Expand", then press the OK button.
2. Press ST to select "Filter counter", and then
press the OK button.
Press ST to select "Filter counter reset" and
press the OK button, "Filter counter
Reset?" appears on screen, select "Yes" to
continue.
3. When another dialog box pops up, select
<HVWRUHVHWWKH¿OWHU
1 Turn off the projector, and unplug the AC
power cord from the AC outlet.
5HPRYHWKHDLU¿OWHU
*HQWO\FOHDQWKH¿OWHUZLWKDEUXVK
5HLQVWDOOWKH¿OWHULQWRWKHSURMHFWRUSURSHUO\
Caution
Do not operate the projector with
WKHDLU¿OWHUUHPRYHG'XVWPD\
accumulate on the optical elements,
degrading picture quality.
Do not put any small objects into the
air intake vents. Otherwise, it may
result in malfunction of the projector.
Recommendation
We recommend avoiding dusty/smoky
environments when you operate the projector.
Usage in these environments may cause poor
image quality.
When you use the projector under dusty or
smoky conditions, dust may accumulate on the
lens, LCD panels, or optical elements inside the
projector. When the symptoms above are
noticed, contact your authorized dealer or
service station for proper cleaning.
Filter
Filter counter
Expend
Language
Auto setup
Keystone
Logo
Security
Power management
Filter counter
Test pattern
Network
Factory default
Lamp counter
8

Maintenance and cleaning
Clean the projector lens
Clean the cabinet
Unplug the AC power cord before cleaning.
Gently wipe the projection lens with a cleaning
cloth that contains non-abrasive camera
lens cleaner, or use a lens cleaning paper or
commercially available air blower to clean the
lens.
Avoid using an excessive amount of cleaner.
Abrasive cleaners, solvents, or other harsh
chemicals might scratch the surface of lens.
Unplug the AC power cord before cleaning.
Gently wipe the projector surface with a soft
dry cleaning cloth. When the cabinet is heavily
soiled, use a small amount of mild detergent
DQG¿QLVKZLWKDVRIWGU\FOHDQLQJFORWK$YRLG
using an excessive amount of cleaner. Abrasive
cleaners, solvents, or other harsh chemicals
might scratch the surface of the cabinet.
When the projector is not in use, put the
projector in a pouch to protect it from dust and
scratches.
9

Lamp Replacement
When the projection lamp of the projector
reaches its end of life, the Lamp replacement
icon appears on the screen. Replace the lamp
with a new one of the same type promptly.
The timing when the lamp replacement icon
appears is depending on the lamp mode.
Lamp replacement icon
Lamp replacement
As temperature inside the projector is high,
you should cool the projector for at least 45
minutes before you open the lamp cover.
When the lamp isn’t illuminated, it may indicate that the lamp has been damaged.
When you replace the lamp in a projector installed on the ceiling, you should stand beside
the lamp cover other than under it; for the broken glass may fall down to hurt you. To do that,
remove the lamp cover gently to avoid being hurt by falling debris. If debris drops into your
eyes or mouth, you should see the doctor immediately.
For the sake of safety, only use the lamp of
the same model. Never drop the lamp onto the
ground nor touch the glass bulb! The glass can
shatter and hurt.
CAUTION
CAUTION
CAUTION
To replace the lamp, follow the steps below:
1. Power off the projector and unplug the power
cord. Then let the projector cool for at least
45 minutes.
2. Remove the screw on the lamp cover
to remove the cover.
3. Make sure the lamp is well protected and
loosen three screws. Hold the handle to
take out the lamp.
4. Install a new lamp with the same model and
tighten the three screws. Make sure the
installation is correct. Put lamp cover in place
and then tighten the screw.
5. Plug the AC power cord and power on the
projector.
Handle
10
screw
Lamp cover
Screw

Order Replacement lamp
Replacement lamp can be ordered through your dealer. When ordering a projection lamp, give the
following information to the dealer.
Replacement Lamp Model No.: 23040049
This projector uses a high-pressure lamp which must be handled carefully and properly.
,PSURSHUKDQGOLQJPD\UHVXOWLQDFFLGHQWVLQMXU\RUFUHDWHD¿UHKD]DUG
Ɣ/DPSOLIHPD\GLIIHUIURPODPSWRODPSDQGDFFRUGLQJWRWKHHQYLURQPHQWRIXVH7KHUHLVQR
guarantee of the same life for each lamp. Some lamps may fail or terminate their life in a shorter
period of time than other similar lamps.
Ɣ,IWKHSURMHFWRULQGLFDWHVWKDWWKHODPSVKRXOGEHUHSODFHGLHLIWKH:$51,1*LQGLFDWRUOLJKWVXS
replace the lamp with a new one IMMEDIATELY after the projector has cooled down. (Follow
carefully the instructions in the Lamp Replacement section of this manual.) Continuous use of the
lamp with the WARNING indicator lighted may increase the risk of lamp explosion.
Ɣ$/DPSPD\H[SORGHDVDUHVXOWRIYLEUDWLRQVKRFNRUGHJUDGDWLRQDVDUHVXOWRIKRXUVRIXVHDVLWV
lifetime draws to an end. Risk of explosion may differ according to the environment or conditions in
which the projector and lamp are being used.
IF A LAMP EXPLODES, THE FOLLOWING SAFETY PRECAUTIONS SHOULD
BE TAKEN .
If a lamp explodes, disconnect the projector’s AC plug from the AC outlet immediately. Contact an
authorized service station for a checkup of the unit and replacement of the lamp. Additionally, check
carefully to ensure that there are no broken shards or pieces of glass around the projector or coming
out from the cooling air circulation holes. Any broken shards found should be cleaned up carefully.
No one should check the inside of the projector except those who are authorized trained technicians
and who are familiar with projector service. Inappropriate attempts to service the unit by anyone,
especially those who are not appropriately trained to do so, may result in an accident or injury caused
by pieces of broken glass.
LAMP HANDLING PRECAUTIONS
Replace the lamp
11

&DXWLRQ
'RQRWOHDYHWKHSURMHFWRUZLWKWKH$&SRZHUFRUGFRQQHFWHGXQGHUDQDEQRUPDOFRQGLWLRQ
,WPD\UHVXOWLQILUHRUHOHFWULFVKRFN
:$51,1*LQGLFDWRU
:$51,1*LQGLFDWRU
:$51,1*LQGLFDWRU
7KH:$51,1*LQGLFDWRUVKRZVWKHVWDWHRIWKHIXQFWLRQZKLFKSURWHFWVWKHSURMHFWRU&KHFNWKH
VWDWHRIWKH:$51,1*LQGLFDWRUWRWDNHSURSHUPDLQWHQDQFH
7KHSURMHFWRULVVKXWGRZQDQGWKH:$51,1*
LQGLFDWRULVIODVKLQJUHG
:KHQWKHWHPSHUDWXUHLQVLGHWKHSURMHFWRU
H[FHHGVWKHQRUPDOWHPSHUDWXUHWKHSURMHFWRU
LVDXWRPDWLFDOO\VKXWGRZQWRSURWHFWLQWHUQDO
FRPSRQHQWV7KH:$51,1*LQGLFDWRULV
EOLQNLQJZKLOHWKHSURMHFWRULVEHLQJFRROHG
GRZQ:KHQWKHSURMHFWRUKDVFRROHGGRZQ
HQRXJKWRLWVQRUPDORSHUDWLQJWHPSHUDWXUH
LWFDQEHWXUQHGRQDJDLQE\SUHVVLQJWKH
32:(5EXWWRQ
&KHFNWKHLWHPVEHORZ
± 'LG\RXSURYLGHDSSURSULDWHVSDFHIRUWKH
SURMHFWRUWREHYHQWLODWHG"
&KHFNWKHLQVWDOOLQJFRQGLWLRQWRVHHLI
YHQWLODWLRQVORWVDUHQRWEORFNHG
± +DVWKHSURMHFWRUEHHQLQVWDOOHGQHDUWKH
GXFWRUYHQWRIDQDLUFRQGLWLRQLQJ"
0RYHWKHLQVWDOODWLRQRIWKHSURMHFWRUDZD\
IURPWKHGXFWRUYHQW
± $UHWKHDLUILOWHUVFOHDQ"&OHDQWKHDLUILOWH
SHULRGLFDOO\
7KHSURMHFWRULVVKXWGRZQDQGWKH:$51,1*
LQGLFDWRUOLJKWVUHG
:KHQWKHSURMHFWRUGHWHFWVDQDEQRUPDO
FRQGLWLRQLWLVDXWRPDWLFDOO\VKXWGRZQWR
SURWHFWWKHLQWHUQDOFRPSRQHQWVDQGWKH
:$51,1*LQGLFDWRUOLJKWVUHG,QWKLVFDVH
XQSOXJWKH$&SRZHUFRUGDQGSOXJLWDQG
WKHQWXUQRQWKHSURMHFWRURQFHDJDLQWRYHULI\
RSHUDWLRQ,IWKHSURMHFWRUFDQQRWEHWXUQHGRQ
DQGWKH:$51,1*LQGLFDWRUOLJKWVUHGXQSOXJ
WKH$&SRZHUFRUGDQGFRQWDFWWKHVHUYLFH
VWDWLRQIRUVHUYLFLQJDQGPDLQWHQDQFH
9Note:
7KH:$51,1*LQGLFDWRUFRQWLQXHVWR
EOLQNHYHQDIWHUWKHWHPSHUDWXUHLQVLGH
WKHSURMHFWRUUHWXUQVWRQRUPDO:KHQWKH
projector is turned on again, the
:$51,1*LQGLFDWRUVWRSVEOLQNLQJ
:$51,1*LQGLFDWRU
IODVKHVUHG
:$51,1*LQGLFDWRU
OLJKWVUHG
12

,QGLFDWRUDQGSURMHFWRUVWDWH
&KHFNWKHLQGLFDWRUWRNQRZDERXWWKHVWDWHRISURMHFWRU
:KHQWKHODPSUHDFKHVWKHHQGRILWVOLIHWKH/$03LQGLFDWRUOLJKWV<HOORZ,QWKLVFDVH
UHSODFHWKHODPSZLWKDQHZRQHSURPSWO\
*UHHQ 5HG <HOORZ 2II
)ODVKJUHHQ
)ODVKUHG )ODVK<HOORZ
,QGLFDWRU
6WDWHRISURMHFWRU
:$51,1*
5HG
32:(5
*UHHQ5HG
<HOORZ
3URMHFWRULVLQ2IIVWDWXVZLWKRXW$&SRZHUVXSSO\
3URMHFWRULVLQVWDQGE\VWDWXV3UHVV6WDQGE\EXWWRQWRWXUQLWRQ
3URMHFWRULVLQQRUPDOVWDWXV
,WLVUHDG\IRUVWDQGE\RUWKHODPSLVFRROLQJ<RXPD\SRZHURQ\RXUSURMHFWRU
RQO\DIWHUWKHODPSLVIXOO\FRROHGDQGWKH32:(5OLJKWLQGLFDWRUVWRSVIODVKLQJ
3URMHFWRULVLQ5HDG\PRGH
3URMHFWRUFDQQRWSRZHURQDVLWVLQWHUQDOWHPSHUDWXUHLVWRRKLJK8VHUPD\
SRZHU LW RQ DIWHU LW LV IXOO\ FRROHG WHPSHUDWXUH EDFNV WR QRUPDO DQG WKH
32:(5OLJKWLQGLFDWRUWXUQVUHG
3URMHFWRUGHWHFWVODPSDEQRUPDOLW\DQGVZLWFKHVLQWRVWDQGE\PRGH
3URMHFWRUGHWHFWVWKHWHPSHUDWXUHDEQRUPDOLW\DQGVZLWFKHVLQWRVWDQGE\PRGH
3URMHFWRUGHWHFWVSRZHUDEQRUPDOLW\
3URMHFWRUGHWHFWVIDQDEQRUPDOLW\
3URMHFWRUGHWHFWVLWVXVDJHWLPHWKHOLIHRIWKHSURMHFWRU+ZKHQWKH
SURMHFWRUXVDJHWLPHWLPHVWKHOLIHRIWKHSURMHFWRU
3URMHFWRUGHWHFWVLWVXVDJHWLPHWLPHVWKHOLIHRIWKHSURMHFWRU
3URMHFWRUFDQQRWOLJKWRQ3OHDVHFKHFNWKHXQLWVODPSFRYHUZKHWKHUFORVHZHOO
RUWKHFRYHUVZLWFKXQQRUPDO,IODPSFRYHUDQGFRYHUVZLWFKLVRNEXWWKHXQLW
VWLOOQRWOLJKWXSWKXVSOHDVHFKHFN/DPS%DOODVWLWVFRQQHFWLRQSXOJZHOO

7URXEOHVKRRWLQJ
3RZHURQDEQRUPDO
)ROORZWKHVWHSVEHORZIRUFKHFN
:KLOHLQ67$1'%<
VWDWXVLQGLFDWRUWXUQV
2II
0DLQERDUGDEQRUPDO
&KHFNZKHWKHUPDLQERDUG0%
GHIHFWLYLWVFRQQHFWLRQ
ZKHWKHUSOXJZHOO
1R
1R
1R
&KHFNZKHWKHUWKHODPSFRYHULVLQVWDOOHGFRUUHFWO\DQGODPSFRYHUVZLWFKH
DUHQRUPDORUQRW
&KHFNZKHWKHUWKHODPSZRUNZHOOWKHEDOODVWLWVFRQQHFWLRQSOXJZHOO
<HV
3RZHU6XSSO\DEQRUPDO
&KHFNWKHPDLQERDUGDQGSRZHUVXSSO\YROWDJHVZKHQWKH32:(5
LQGLFDWRUWXUQV\HOORZ
<HV 7HPSHUDWXUHDEQRUPDO
&KHFNWKHSURMHFWRUVWHPSHUDWXUHDQGZKHWKHU\RXKDYHDOUHDG\LQVHUWHG
WKHWHPSHUDWXUHVHQVRUOLQH
&KHFNWKHIDQDQGWKHILOWHU
)DLOWRSRZHURQ
%RWK32:(5
LQGLFDWRUDQG
:$51,1*
LQGLFDWRUIODVKV UHG
<HV
<HV 1R
<HV
3RZHUDEQRUPDO
&KHFN:KHWKHU3RZHUVXSSO\
FRQQHFWLRQVRU)XVH
GHIHFWLYH
&KDQJH3RZHUVXSSO\
RU)XVH
<HV
&KDQJH0DLQ%RDUG
5H3OXJFRQQHFWLRQV
/DPSODPSFRYHURU%DOODVWDEQRUPDO
)DLOWRSRZHURQ
32:(5LQGLFDWRU
)DLOWRSRZHURQ
32:(5
LQGLFDWRUWXUQV\HOORZ
)DLOWRSRZHURQ
32:(5LQGLFDWRUWXUQV
IODVKHV\HOORZ &KHFNDOOIDQVZKHQWKH32:(5LQGLFDWRUIODVKHV\HOORZ
)DQDEQRUPDO
WXUQVIODVKH\HOORZ
DQG:$51,1*
LQGLFDWRUWXUQVUHG
:KHQ WKH WHPSHUDWXUH LQVLGH WKH SURMHFWRU LV WRR KLJK RU WKH FRROLQJ IDQ VWRSV URWRWDWLQJ RU ORVV RI SRZHU WKH
SURMHFWRUZLOOVKXWGRZQDXWRPDWLFDOO\
WKHSRZHULQGLFDWRUWXUQVVWHDG\UHGZKHQWKHSURMHFWRULVLQVWDQGE\PRGH
WKHSRZHULQGLFDWRUWXUQVVWHDG\JUHHQGXULQJWKHZRUNLQJWLPH
WKHSRZHULQGLFDWRULVÀDVKLQJJUHHQZKHQWKHSURMHFWRULVLQSRZHUPDQDJHPHQWPRGH
WKHSRZHULQGLFDWRULVIODVKLQJUHGZKHQWKHSURMHFWRULVLQFRROLQJPRGH
WKHSRZHULQGLFDWRUWXUQVVWHDG\\HOORZZKHQWKHSURMHFWRUSRZHULVDEQRUPDO
='84/4-LQGLFDWRU
WKHLQGLFDWRULVIODVKLQJUHGZKHQWKHLQWHUQDOWHPSHUDWXUHRIWKHSURMHFWRUH[FHHGVWKHRSHUDWLQJUDQJH
32:(5 LQGLFDWRU
,QGLFDWRU
<HV

7URXEOHVKRRWLQJ
,PDJHGLVSOD\DEQRUPDO
&KHFNWKHLPDJHDVWKHIROORZLQJVWHSV
6LQJDOLQSXWEXWQR
LPDJHGLVSOD\
&KHFNVLJQDOSURFHVVLQJDQG/&'GULYHUERDUG
&KHFNWKHSRZHUVXSSO\
&KHFNWKHFRQQHFWLRQEHWZHHQWKHPDLQERDUGWR/&'GULYHUERDUG
DQGWKHSRZHUVXSSO\RI/&'GULYHUERDUG
9LGHRLQSXWEXWQR
LPDJHGLVSOD\ &KHFNWKHFRQQHFWLRQEHWZHHQWKHWHUPLQDODQG)&)OLQHV
1R
1R
1R
&KHFNWKHFRQQHFWLRQEHWZHHQ+'0,&DEOHDQGPDLQERDUG&KDQJH
RWKHUIXQFWLRQZHOO+'0,FDEOHZKHWKHUZRUNZHOOZLWKWKHXQLW
+'0,LQSXWEXWQR
LPDJHGLVSOD\
&KHFNZKHWKHUWKHSRZHUOLQHVEHWZHHQPDLQERDUGWRWKHWHUPLQDO
FRQQHFWSURSHUO\ZLWKWKH)&)OLQHV
9*$ LQSXW EXW QR
LPDJHGLVSOD\
<HV
<HV
<HV
<HV
5
1RVRXQG
)ROORZWKHVWHSVEHORZIRUFKHFN
&KHFNWKHFRQQHFWLRQ))&ZLUHEHWZHHQ0DLQEDRUGDQG$9EDRUG
&KHFNWKHRZHUZLUHҒEHWZHHQ0DLQERDUGDQG$9ERDUG
&KHFNZKHWKHU$9ERDUG
ZKHWKHUGHIHFWLHҒ
<HV
1R
&KDQJH$9ERDUG
&KHFNZKHWKHUWKHVSHDNHUFDEOHLVSOXJJHGLQRUEURNHQ
&NHFNZKHWKHUWKHVSHDNHULVGDPDJHGRUQRW,IVSHDNHUGHIHFWLYH
WKHQFKDQJHVSHDNHU
&KHFNZKHWKHULWKDVDX
GLRVLJQDORXWSXW
1R
<HV

0HFKDQLFDO'LVDVVHPEO\
7KHSDUWVDQGVFUHZVVKRXOGEHSODFHGH[DFWO\WKHVDPH
SRVLWLRQDVWKHRULJLQDORWKHUZLVHLWPD\FDXVHORVVRI
SHUIRUPDQFHDQGSURGXFWVDIHW\
2SWLFDOHQJLQH$VV\GLVDVVHPEO\
0DLQEDRUGDQGAVERDUGGLVDVVHPEO\
LCD Driver boardGLVDVVHPEO\
'XVWILOWHU,/DPS&RYHU & Top caseUHPRYDO
Speaker$VV\GLVDVVHPEO\
0HFKDQLFDOGLVDVVHPEO\VKRXOGEHPDGHIROORZLQJSURFHGXUHV
LQQXPHULFDORUGHU
)ROORZLQJVWHSVVKRZWKHEDVLFSURFHGXUHVWKHUHIRUH
XQQHFHVVDU\VWHSPD\EHLJQRUHG
)DQGULYHU3RZHUVXSSO\%DOODVWGLVDVVHPEO\
&DXWLRQ
16
%70FDVH$VV\GLVDVVHPEO\
'XFWDQG/DPS&RROLQJ)DQGLVDVVHPEO\

B
A
A
AA
A
A A
A
A
Mechanical Disassembly
Dust filter, Top Case removal
2. Loosen 1screw B, 11 screw A, remove Lamp cover and Top case .
1. Open dust filter cover and remove out Dust filter
The chapter is only designed to show exploded image of the projector.
For updated part numbers, please refer to RSPL
Dust Filter PN:
63340044
Lamp Cover
PN:63220093
Top-Case PN:
63220092
PCBA-Keypad
PN: 63730087
17

A
AA
A
AAA
AA
A
A
Mechanical Disassembly
LCD driver board and Main board (MB) Ass'y disassembly
The chapter is only designed to show exploded image of the projector.
For updated part numbers, please refer to RSPL
1. Loosen 4 screws A and remove LCD driver board
2. Loosen 7 screws A and remove Main board& AV board Ass'y
EK-301W/302X
LCD Driver BD
PN: 63730080
EK-300U/303U
LCD Driver BD
PN: 63730092
EK-300U_MB PN: 63730093
EK-301W_MB PN: 63730094
EK-302X_MB PN: 63730095
EK-303U_MB PN: 63730100
PCBA-AV BD
PN: 63730086
Lamp Cover Switch
PN: 63720006
18

A A
A
A
A A
Mechanical Disassembly
Optical Engine(OE) and Speaker disassembly
1.Loosen 4 screw and remove OE
The chapter is only designed to show exploded image of the
projector. For updated part numbers, please refer to RSPL
Lamp Ass'y
PN: 23040049
OE+IRIS Ass'y-EK300U/303U_PN:63010029
OE+IRIS Ass'y-EK301W_PN: 63010030
OE+IRIS Ass'y-EK302X_PN:63010031
A
19

Mechanical Disassembly
The chapter is only designed to show exploded image of the projector.
For updated part numbers, please refer to RSPL
A
A
C
A
A
A
A
A
A
AA
CA
C
Fan of OE & Lamp duct disassembly
1. Loosen 11 screw A, and remove OE Duct Ass'y
2. Loosen 3 screw C, and remove Fan of Penal.
Fan-LS
PN: 63260044
Panel Fan-1
PN: 63260042
Exhaust Fan
PN: 63260040
Fan-RT
PN: 63260045
Panel Fan-2
PN: 63260043
Fan
PN: 63260041
PCBA_TempB
PN: 63730099
Thermal Switch
PN: 63730099
20
This manual suits for next models
3
Table of contents
Other Eiki Projector manuals

Eiki
Eiki LC-SB20 User manual

Eiki
Eiki LC-XB40N User manual

Eiki
Eiki Projector User manual

Eiki
Eiki LC-SVGA860 User manual

Eiki
Eiki Conference LC-WUL100 Installation and operation manual

Eiki
Eiki EK-600LU User manual

Eiki
Eiki LC-X8 User manual

Eiki
Eiki LC-XGA982U User manual

Eiki
Eiki EK-501W User manual

Eiki
Eiki LC-XGA980U Setup guide