Fpower 50000 Instructions for use

Self-Priming Portable Utility Pump
MANUAL
OPERATING INSTRUCTIONS & PARTS
Model:
50000

PREINSTALLATION CHECKLIST - ALL INSTALLATIONS
ATTENTION: READ CAREFULLY BEFORE ATTEMPTING TO INSTALL OR OPER-
ATE YOUR PUMP. PROTECT YOURSELF AND OTHERS BY OBSERVING ALL
SAFETY INFORMATION AND ADDITIONAL INSTRUCTIONS INCLUDED WITH
EQUIPMENT. FAILURE TO COMPLY WITH INSTRUCTIONS COULD RESULT IN
PERSONAL INJURY AND/OR PROPERTY DAMAGE! RETAIN FOR FUTURE
REFERENCE.
1. Make sure that the pump is plugged into a properly grounded electrical receptacle.
Use an Underwriters Labo¬ratory listed circuit analyzer to test for proper installation
of the circuit and ground. Any service to circuits or receptacles should be conducted
by a qualified licensed electrician.
2. Do not remove the ground pin from the plug under any circumstances. If the ground
pin is damaged, replace the power cord or plug before use.
3. All electrical installations must conform to the requirements of the National Electric
Code and all local codes.
4. It is strongly recommended that the unit be plugged into a GFI protected circuit.
5. Disconnect power before servicing the pump or motor by unplugging the unit from
the outlet.
6. Do not touch the motor when operating and allow the motor to cool before
touching it afterwards.
7. This pump is designed for water only. It has not been evaluated for pump¬ing of
chemicals.
8. Do not use this product to pump flammable or explosive liquids.
9. Do not use this product in hazardous environments or any¬where a spark
could potentially ignite explosive gases.
10. Do not handle this product with wet hands or while standing in water or on a
wet or damp surface.
11.the pump is supplied with an automatically resetting thermal overload device and
can restart without warning.
12. Do not submerge the pump or motor in water.
13.Secure the discharge line before starting the pump. An unsecured hose can whip,
possibly causing personal injury or property damage.
-1-

14. Provide a means of pressure relief if the pump dis-charge can be shut off or
obstructed. Pumps operat-ing against a closed discharge can create very hot pumped
liquid, which can cause burns.
15.Do not operate this product while unattended.
16. Product is portable, and not intended to be permanently installed outdoors.
If installed outdoors, care should be taken to protect the unit from rain and other
elements of the weather.
17.According to the state of California (Prop 65), this product contains chemicals
known to the state of California to cause cancer and birth defects or other reproduc-
tive harm
1. Make certain that the power source conforms to the requirements of the equipment
as stated on the product nameplates.
2. Check hoses for weak or worn conditions before use and make certain that all
connections are secure.
3. Periodically inspect the pump for damage and perform routine maintenance as
required.
4. The maximum temperature of the pumped liquid must not exceed 120° F. The
minimum allowable temperature is 40° F.
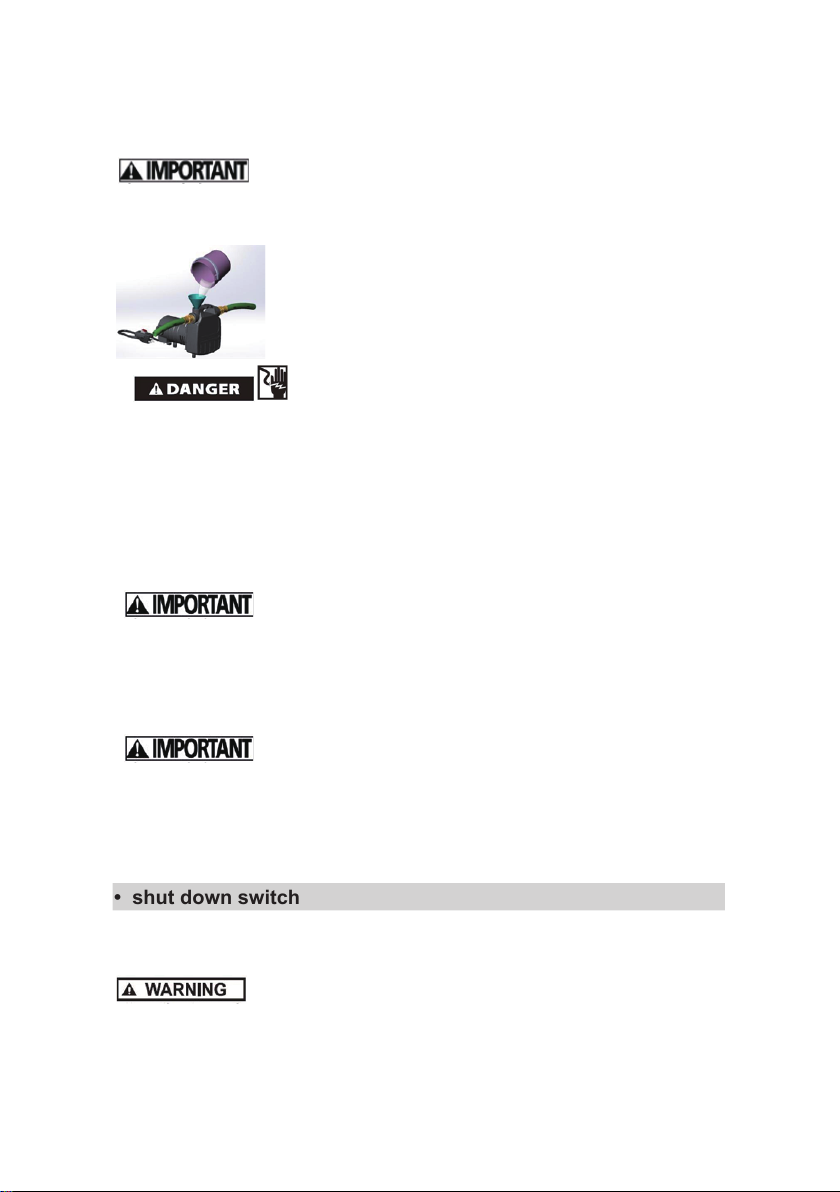
5. Use a screen or strainer on the inlet to prevent solids from entering the pump.
6. To avoid internal pump damage, pump should not be run for more than five minutes
while attempting to prime.
DESCRIPTION
This portable utility pump is designed to be used as a transfer pump for such applica-
tions as emptying water heaters, swimming pools, livestock tanks, boats, etc. Pump
can also be used for an intermittent pressure booster for applications such as
washing cars, cleaning driveways, etc. The motor is air cooled. It is NOT designed to
operate under water.
INSTALLATION
Always disconnect power source before attempting to install,
service or maintain the pump. Never handle a pump with wet hands or when standing
on wet or damp surface or in water. Fatal electrical shock could occur.
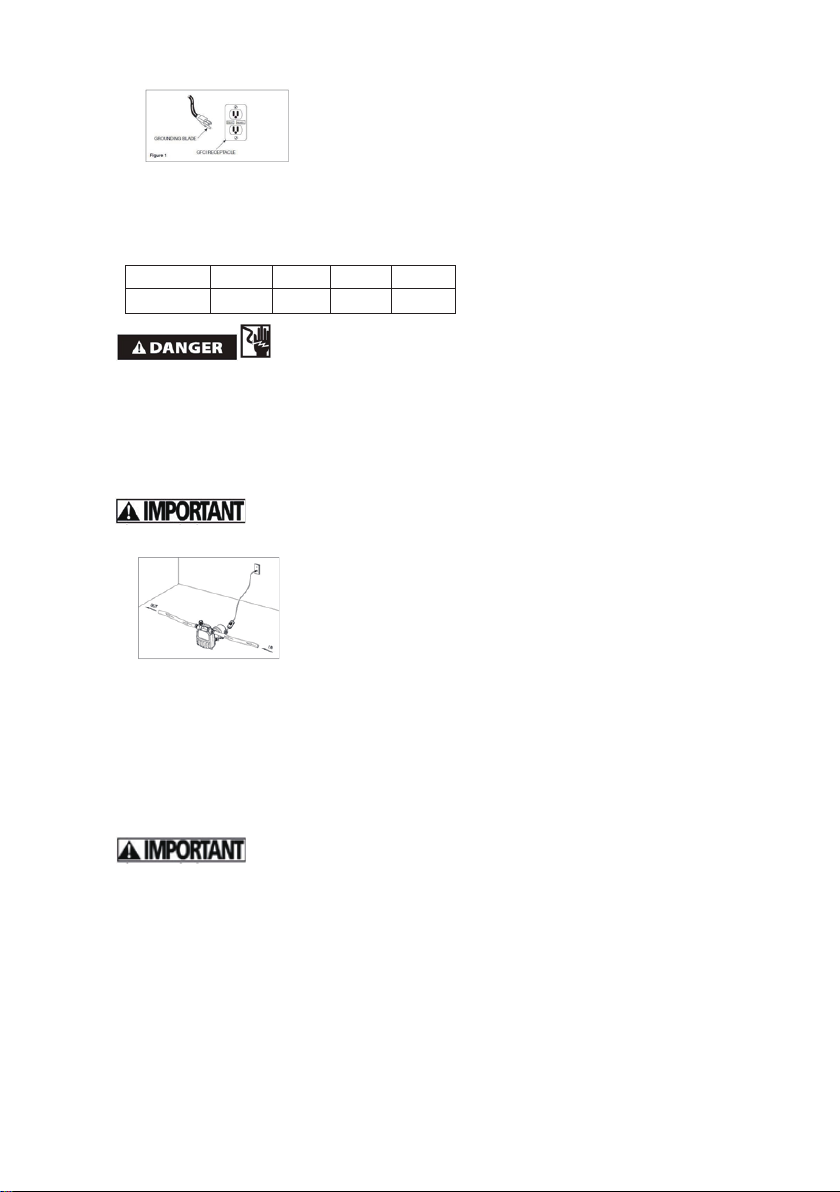
1.A ground fault circuit interrupter (GFCI) is recommended.
Risk of electrical shock. This pump is supplied with a grounding conductor and
grounding type attachment plug. A grounded receptacle in conformance with current
NEC and local codes must be used
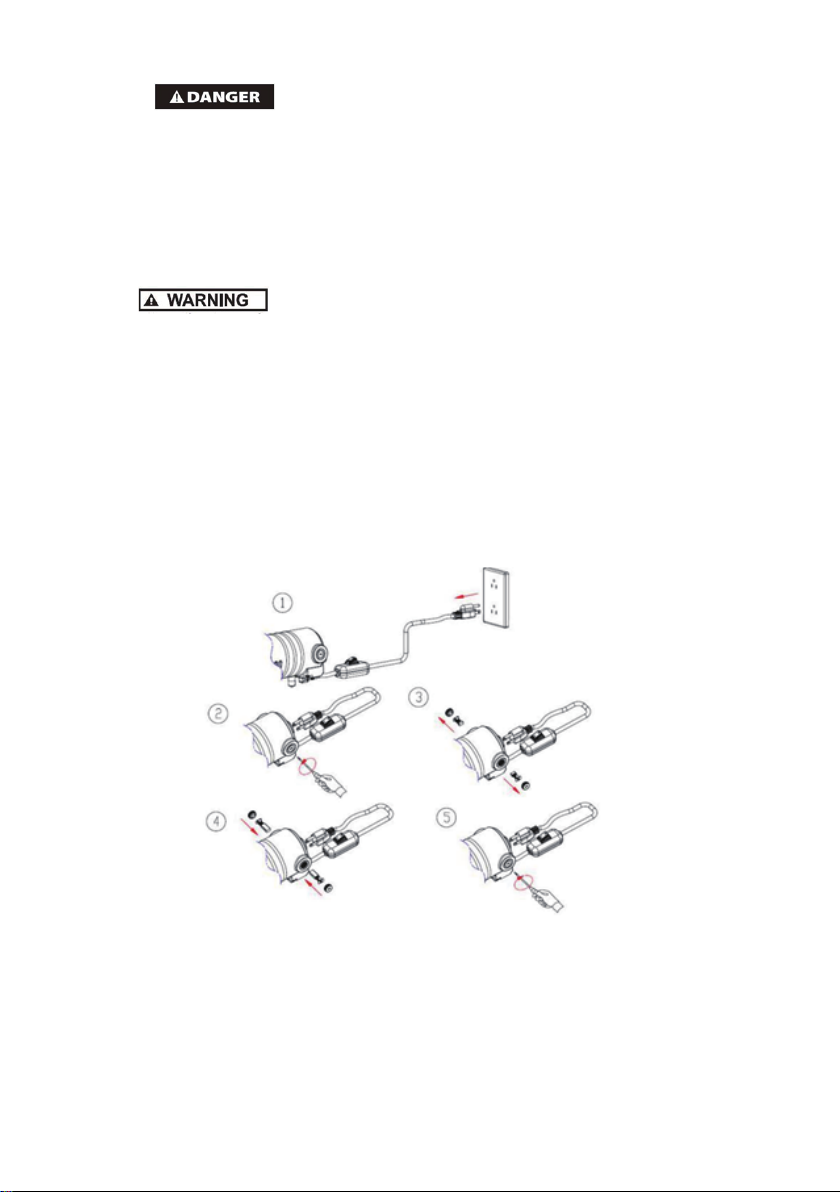
2.Figure 1
-2-

3.This pump operates on 115V, 60Hz AC, single phase.
4.Use an extension cord only if necessary. Follow the Extension Cord Length Table
for proper gage of 3-wire, grounding type extension cord.
Extension Cord Length Table
Wire size #18 #16 #14 #12
Length 25 ft 50 ft 100 ft 150 ft
Risk of fatal electrical shock. Never cut off the round grounding
prong. Cutting the cord or plug will void the warranty and make the pump inoperable.
3. Figure 2 shows a typical installation. Threaded adapters are furnished for attaching
garden hose where conditions permit its use. In no case should the pump be more
than 15 feet above or away from inlet source. Use of foot valve on inlet line is recom-
mended.
Make sure the inlet hose is NOT coiled or kinkedabove or below
water level.
Figure 2
1.The inlet line may be galvanized pipe, plastic pipe, or non-collapsible hose. Small
leaks in inlet line greatly reduce efficiency of pump and may prevent priming.
Regular garden hose will collapse under suction conditions and should not be used in
the inlet, except for pressure boosting situations.
Regular garden hose will collapse under suction conditions and
should not be used in the inlet, except for pressure boosting situations.
2. Use a strainer when pumping from a creek, pond, or source where foreign objects
may be sucked into the pump. The strainer should prevent solids from entering the
inlet line.
3. A regular 3/4” garden hose may be used as a dischargedline. Keep the total length
as short as possible to prevent excessive friction loss.
-3-

OPERATION
Pump must be filled with water before operation. Running the
pump dry or pumping any sand or other abrasives will cause damage to the shaft seal
or impeller and void the warranty
Figure 3
1. Product is portable, and not intended to be
permanently installed outdoors. If installed outdoors, care should be taken to protect
the unit from rain and other elements of the weather. This unit is not waterproof or
weatherproof and is not intended to be used in showers, saunas, or other potentially
wet locations. The motor is designed to be used in a clean, dry location with access
to adequate cooling air. Ambient temperature around the motor should not exceed
104°F (40°C).
2. Remove priming plug and fill with water. Reinstall plug.
To help with the priming of the pump, a foot valve can be installed
on the inlet line. The use of a foot valve is strongly recommended to be installed on
inlet lines lifting over five feet.
3. Plug power cord into GFCI protected electrical outlet. The pump will prime in a few
minutes, depending on inlet line length.
To avoid internal pump damage, if after five minutes the pump
has not begun pumping water, turn off the pump, remove priming plug, re-fill pump
with water, reinstall priming plug and plug pump back in.
4. In the case of pressure boosting, turn water on before starting pump. This force
primes the pump. Then, plug power cord into GFCI protected electrical outlet.
• shut down switch
5. Unplug cord to turn unit off.
MAINTENANCE
Let pump cool for at least 20 minutes before attempting to service.
Motor may be extremely hot. Personal injury may result.
1.Pump should be checked periodically for proper operation.
-4-

2. Always disconnect the electrical supply before attempting to
install, service, or perform any maintenance. If the power source is out of sight, lock
and tag in the open (off) position to prevent unexpected power applications. Discon-
nect electrical cord from power supply. Failure to do so could result in fatal electrical
shock. Only qualified electricians should repair this unit. Improper repair could result
in fatal electrical shock.
Brush Replacement
Brushes for this pump should be inspected after every 120 hours
of operation.
Pumps with excess of 120 hours of operation may stop operating or fail to start. This
could be due to worn brushes or carbon build-up. The brushes should be removed
and carbon removed. Worn brushes are not covered under warranty.
1. Disconnect electrical cord from power supply.
2. Remove brush caps with screwdriver.
3. Remove old brush assembly.
4. Insert new brush assembly.
5. Replace brush caps.
Figure 4
For other problems, consult troubleshooting chart
SPECIFICATIONS
Motor :1/2 HP Single Phase, 120 V, 60Hz, 8,000 RPMSeries Wound (brush type)
AC operation
Maximum Fluid Temperature:120°F
Inlet/Outlet Openings 3/4” NPT
Maximum Case Pressure 100 PSI
-5-

SSymptom Possible Cause(s) CCorrective Action
Pump will not start or run
1
.Blown fuse If blown, replace with proper sized
fuse or reset breaker
2
.Low line voltage
Contact an electrician
Worn brushes
Replace brushes
Impeller blocked
Remove blockage
Defective motor
Replace pump
Pump will not prime or retain
prime after operating
Air leak in suction line
Repair or replace suction line (use
plumbers tape to install garden hose
adapter fittings and priming plug
onto pump body)
Impeller blocked
Remove blockage
Worn seal
Replace seal
Suction lift too high
Lower pump
Hose kinked or looped
Straighten hose
Fittings not tight
Tighten fittings
Suction hose out of water Submerge suction hose end
Clogged inlet Clean inlet
Flow rate is too low Piping or hose is fouled or damaged Clean or replace
Low line voltage Contact an electrician
Seal leaks
Worn seal Replace seal
Backhead damaged or cracked Replace backhead
Insure proper assembly and no
obstruction, tighten bolts
Thermal Protector Tripping
Damage or misalignment causing rotating
parts to bind
Take to motor repair shop or locate
and repair mechanical binding
High surrounding temperature Provide a shaded, well-ventilated
area for pump
Low line voltage Contact an electrician
Motor housing air-vents blocked Remove air-vent blockage
Pump head loose on motor
TROUBLESHOOTING CHART
-6-

•
Explosive view and parts list
-7-
Table of contents
Popular Water Pump manuals by other brands

Rebel TOOLS
Rebel TOOLS RB-1060 user manual

Conair
Conair 10 user guide

Geotech
Geotech AR4 Series Installation and operation manual

Baker Hughes
Baker Hughes Druck PV 212 instruction manual

Reefe
Reefe PRJ100E Exploded View & Instruction Manual

Hartell Pumps
Hartell Pumps KT15 Installation operation & maintenance

Ecotech Marine
Ecotech Marine VorTech MP60wES Setup guide

Grundfos
Grundfos SQ Series Installation and operating instructions

Goulds Pumps
Goulds Pumps SMVT Installation, operation and maintenance manual

Grundfos
Grundfos Conlift1 LS instructions

Hayward
Hayward Super Pump VS 1115V Quick reference guide

FLEXXOLUTIONS
FLEXXOLUTIONS Flexxopomp user manual