Generac Power Systems PRO AT45026GENG User manual

Owner’s Manual
Field and Brush Mower
SAVE THIS MANUAL FOR FUTURE REFERENCE
MODEL NUMBER: _________________________
SERIAL NUMBER: _________________________
DATE PURCHASED:________________________
005811
Register your Generac product at:
WWW.GENERAC.COM
1-888-GENERAC
(888-436-3722)

ii Owner’s Manual for Field and Brush Mower
(000393a)
WARNING
CANCER AND REPRODUCTIVE HARM
www.P65Warnings.ca.gov.

Owner’s Manual for Field and Brush Mower iii
Table of Contents
Section 1: Safety Rules & General
Information
Introduction ..................................................................1
Read This Manual Thoroughly ....................................1
Safety Rules .................................................................1
How to Obtain Service .................................................1
General Hazards ...........................................................2
Exhaust and Fuel Hazards ..........................................3
Fire Hazards .................................................................3
Safety and Operating Decals ......................................4
Section 2: General Information and Setup
Emissions .....................................................................6
Remove Contents from Carton ...................................6
Installing Brush Deck ..................................................6
Removing Brush Deck .................................................7
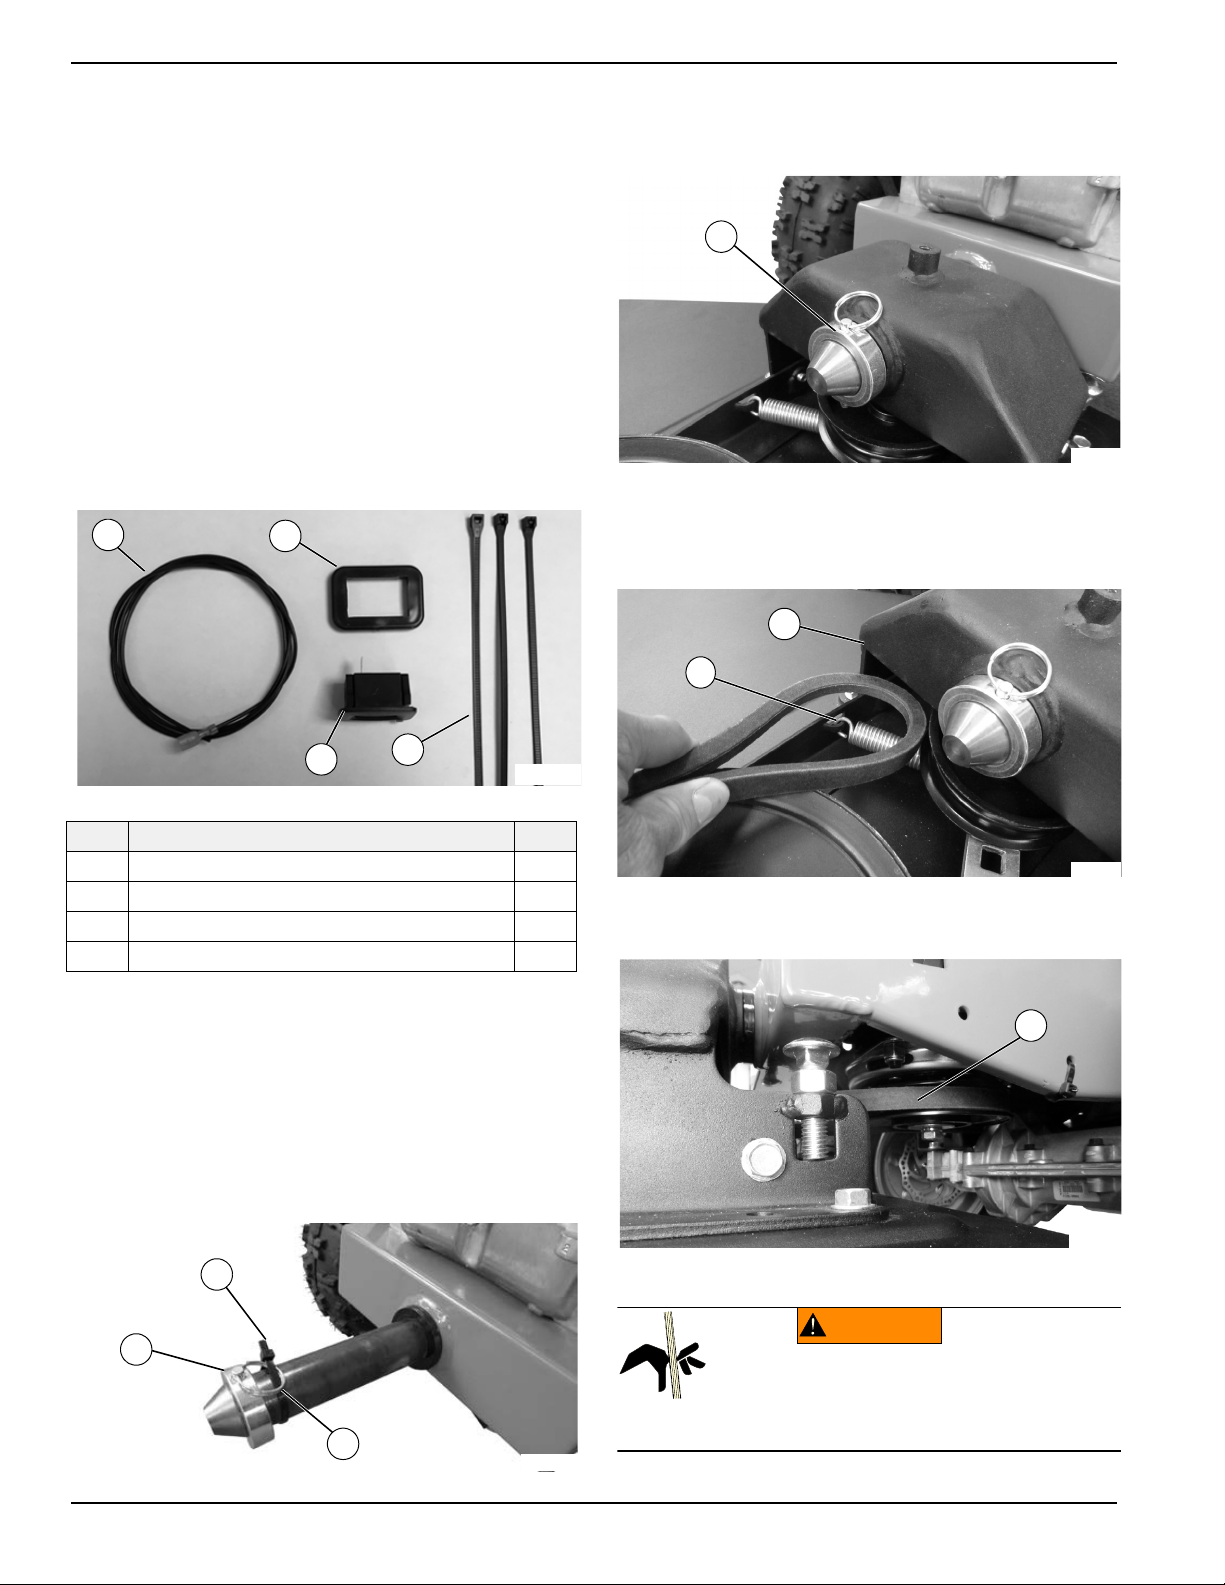
Maintenance Meter Installation ...................................8
Adding Oil .....................................................................8
Adding Fuel ..................................................................9
Checking Tire Pressure ...............................................9
Connecting Battery Cable ...........................................9
Handlebar Height Adjustment ...................................10
Deck Pivot Bolt Check/Adjustment ..........................10
Steering Brake Burnishing ........................................10
Blade Clutch Burnishing ...........................................10
High Altitude Replacement Kit ..................................10
Section 3: Operation
Operation and Use Questions ..................................11
Controls and Symbols ...............................................11
Before Starting Engine ..............................................11
Starting the Unit .........................................................11
Engaging Wheel Drive ...............................................12
Engaging Mower Blade .............................................12
Disengaging Mower Blade ........................................12
Stopping the Engine ..................................................12
Operating Steering Brakes ........................................12
Steering with Brake Assist ........................................13
Traction Control with Brakes ....................................13
Setting Parking Brake ................................................13
If Mower Gets Stuck ...................................................13
Mowing on Slopes .....................................................13
Deck Pivot Bolt Adjustment for Aggressive
Mowing Conditions ....................................................13
Section 4: Maintenance and
Troubleshooting
Maintenance ...............................................................15
Operating the Maintenance Meter ............................16
Changing Engine Oil and Filter ................................16
Air Filter Maintenance ...............................................16
Servicing Spark Plug .................................................17
Idler Arm Lubrication .................................................17
Cable Lubrication .......................................................17
Adjusting Traction Drive Cable ................................17
Adjusting Shift Cables ...............................................17
Replacing the Drive Belt ............................................18
Removing Wheels ......................................................18
Replacing Mower Blade .............................................19
Replacing the Mower Blade Pulley ...........................19
Adjusting Brake Cables .............................................19
Adjusting Brake Pads ................................................20
Adjusting Caliper Alignment .....................................20
Battery Care ................................................................20
Charging the Battery .................................................21
Troubleshooting .........................................................21

iv Owner’s Manual for Field and Brush Mower
This page intentionally left blank.

Safety Rules & General Information
Owner’s Manual for Field and Brush Mower 1
Section 1: Safety Rules & General Information
Introduction
Thank you for purchasing a Generac Power Systems Inc.
product. This unit has been designed to provide high
performance, efficient operation, and years of use when
maintained properly.
The information in this manual is accurate based on
products produced at the time of publication. The
manufacturer reserves the right to make technical
updates, corrections, and product revisions at any time
without notice.
Read This Manual Thoroughly
If any section of this manual is not understood, contact
your nearest authorized dealer, or contact Generac Cus-
tomer Service at 1-888-436-3722 (1-888-GENERAC), or
www.generac.com with any questions or concerns.
This manual must be used in conjunction with the
appropriate installation manual.
SAVE THESE INSTRUCTIONS: The manufacturer
suggests that this manual and the rules for safe operation
be copied and posted near the unit installation site.
Safety should be stressed to all operators and potential
operators of this equipment.
Safety Rules
The manufacturer cannot anticipate every possible cir-
cumstance that might involve a hazard. The alerts in this
manual, and on tags and decals affixed to the unit, are
not all inclusive. If using a procedure, work method, or
operating technique that the manufacturer does not spe-
cifically recommend, verify that it is safe for others and
does not render the equipment unsafe.
Throughout this publication, and on tags and decals
affixed to the unit, DANGER, WARNING, CAUTION, and
NOTE blocks are used to alert personnel to special
instructions about a particular operation that may be
hazardous if performed incorrectly or carelessly. Observe
them carefully. Alert definitions are as follows:
NOTE: Notes contain additional information important to
a procedure and will be found within the regular text of
this manual.
These safety alerts cannot eliminate the hazards that
they indicate. Common sense and strict compliance with
the special instructions while performing the action or
service are essential to preventing accidents.
How to Obtain Service
When the unit requires servicing or repairs, contact your
nearest authorized dealer, or contact Generac Customer
Service at 1-888-436-3722 (1-888-GENERAC), or
www.generac.com for assistance.
When contacting Customer Service about parts and
service, always supply the complete model and serial
number of the unit as given on its data decal located on
the unit. Record the model and serial numbers in the
spaces provided on the inside front cover of this manual.
(000100a)
WARNING
Consult Manual. Read and understand manual
completely before using product. Failure to
completely understand manual and product
could result in death or serious injury.
(000001)
DANGER
Indicates a hazardous situation which, if not avoided,
will result in death or serious injury.
(000002)
WARNING
Indicates a hazardous situation which, if not avoided,
could result in death or serious injury.
(000003)
CAUTION
Indicates a hazardous situation which, if not avoided,
could result in minor or moderate injury.

Safety Rules & General Information
2Owner’s Manual for Field and Brush Mower
General Hazards
(000130)
WARNING
Accidental Start-up. Disconnect the negative battery
cable, then the positive battery cable when working
on unit. Failure to do so could result in death
or serious injury.
(000128a)
Personal injury. Keep out of reach of children.
Failure to do so could result in death or serious injury.
WARNING
WARNING
Personal injury and equipment damage. Do not
tamper with engine governed speed. Operating
engine too fast or slow increases the risk of injury
or permanent engine damage. (000254)
(000407)
WARNING
Vision loss. Eye protection is required when
operating unit. Failure to wear appropriate eye
protection could result in vision loss or serious
injury.
(000377)
WARNING
Vision loss. Eye protection is required when
servicing unit. Failure to do so could result in
vision loss or serious injury.
(000107)
WARNING
Hearing Loss. Hearing protection is
recommended when using this machine.
Failure to wear hearing protection could
result in permanant hearing loss.
(000115)
WARNING
Moving Parts. Do not wear jewelry when
starting or operating this product. Wearing
jewelry while starting or operating this product
could result in death or serious injury.
(000111)
WARNING
Moving Parts. Keep clothing, hair, and
appendages away from moving parts. Failure
to do so could result in death or serious injury.
(000108)
WARNING
Hot Surfaces. When operating machine, do not
touch hot surfaces. Keep machine away from
combustibles during use. Hot surfaces could
result in severe burns or fire.
(000110)
WARNING
Risk of Fire. Hot surfaces could ignite
combustibles, resulting in fire. Fire could
result in death or serious injury.
WARNING
Risk of injury. Do not operate or service this machine
if not fully alert. Fatigue can impair the ability to service
this equipment and could result in death or serious
injury. (000215)
WARNING
Environmental Hazard. Always recycle batteries at an
official recycling center in accordance with all local
laws and regulations. Failure to do so could result in
environmental damage, death or serious injury.
(000228)
WARNING
(000492)
Personal injury. Wear sturdy shoes with no-slip tread,
long pants, and gloves when operating this unit.
Failure to do so could result in death or serious injury.

Safety Rules & General Information
Owner’s Manual for Field and Brush Mower 3
Exhaust and Fuel Hazards Fire Hazards
Asphyxiation. Running engines produce
carbon monoxide, a colorless, odorless,
poisonous gas. Carbon monoxide, if not
avoided, will result in death or serious injury.
(000103)
DANGER
(000143)
DANGER
Explosion and Fire. Fuel and vapors are extremely
flammable and explosive. Store fuel in a well
ventilated area. Keep fire and spark away. Failure
to do so will result in death or serious injury.
(000192)
DANGER
Explosion and fire. Fuel and vapors are extremely
flammable and explosive. No leakage of fuel is
permitted. Keep fire and spark away. Failure to do
so will result in death or serious injury.
(000166b)
DANGER
Explosion and Fire. Do not overfill fuel tank. Fill to
1/2 inch from top of tank to allow for fuel expansion.
Overfilling may cause fuel to spill onto engine causing
fire or explosion, which will result in death or
serious injury.
(000174)
DANGER
Risk of fire. Allow fuel spills to completely dry
before starting engine. Failure to do so will
result in death or serious injury.
WARNING
Fire risk. Fuel and vapors are extremely
flammable. Do not operate indoors. Doing so
could result in death, serious injury, or
property or equipment damage. (000281)
WARNING
Explosion and fire risk. Do not smoke near unit.
Keep fire and spark away. Failure to do so could
result in death, serious injury, or property or
equipment damage. (000282)
WARNING
Explosion and Fire. Do not smoke while
refueling unit. Failure to do so could result in
death, serious injury, or property or equipment
damage. (000284a)
(000109)
WARNING
Risk of Fire. Verify machine has properly
cooled before installing cover and storing
machine. Hot surfaces could result in fire.
Risk of fire. Never operate engine without
the air cleaner installed. Operating engine
without the air cleaner could result in death
or serious injury.
WARNING
(000249)
WARNING
(000418)
Fire hazard. Keep a fire extinguisher near unit at all
times. Failure to do so could result in death, serious
injury, or property or equipment damage.

Safety Rules & General Information
4Owner’s Manual for Field and Brush Mower
Safety and Operating Decals
This unit features numerous safety and operating decals. These decals provide important operating instructions and
warn of dangers and hazards. Replace damaged or missing safety and operating decals immediately.
006157
005999
006518
006001
!
CAUTION
HIGH TEMPERATURE PART! DON’
T TOUCH IT!
006516
005999
006782
006157
006516
006000
006002

Owner’s Manual for Field and Brush Mower 5
General Information and Setup
Section 2: General Information and Setup
Figure 2-1. Features and Controls
A complete specification sheet is included in the docu-
mentation provided with the unit at the time of purchase.
For additional copies, contact your nearest authorized
dealer, or contact Generac Customer Service at 1-888-
436-3722 (1-888-GENERAC), or www.generac.com
MKey Switch
NOperator Presence Control
OBrake/Steering Lever
PFuel Filter
QMuffler
ROil Filter
SOil Drain
ABrush Blade (under deck)
BBrush Bar
CBrush Deck
DBelt Guard
EOil Fill/Dipstick
FEngine (18.67 hp shown)
GFuel Tank
HFuel Fill
IWheel Speed Lever
JTraction Drive Lever
KThrottle Lever
LPTO Knob
005828
B
A
C
E
D
G
H
IJ
F
O
P
Q
R
L
M
K
N
S
Field and Brush Mower Specifications
General AT45026GENG AT47030GENG
Cutting
Capacity
4 ft (1.2 m) Tall Grass
8 ft (2.4 m) Tall Brush
2.5 in (6.4 cm) Thick
Saplings
6 ft (1.8 m) Tall Grass
8 ft (2.4 m) Tall Brush
3 in (7.6 cm) Thick
Saplings
Cutting
Width 26 in (60 cm) 30 in (76.2 cm)
Cutting
Height 4 in (10 cm) 4 in (10 cm)
Speeds 3 Forward
1 Reverse
3 Forward
1 Reverse
Tires
18 in (45.72 cm) x
7 in (17.78 cm)
All Terrain
Sealant Filled
18 in (45.72 cm) x
7 in (17.78 cm)
All Terrain
Sealant Filled
Machine
Weight 290 lb (131.5 kg) 325 lbs (141.42 kg)
Machine
Dimensions
80.5 in (294.5 cm) L
30.25 in (76.85 cm) W
48.2 in (198.63 cm) H
80.5 in (294.5 cm) L
30.25 in (76.85 cm) W
48.2 in (198.63 cm) H
Engine Specifications
General AT45026GENG AT47030GENG
Engine Generac G-Force Generac G-Force
Oil
Capacity 40.6 oz (1.2 L) 54.1 oz (1.6 L)
Oil Type See chart in
Adding Oil
See chart in
Adding Oil
Spark Plug Champion RC12YC
or equivalent
Tor c h F7 RT C
or equivalent
Spark Plug
Gap
.024-.031 in
(0.6-0.8 mm)
.024-.031 in
(0.6-0.8 mm)

6Owner’s Manual for Field and Brush Mower
General Information and Setup
Emissions
The United States Environmental Protection Agency (US
EPA) (and California Air Resources Board (CARB), for
engines/equipment certified to California standards)
requires that this engine/equipment complies with
exhaust and evaporative emissions standards. Locate
the emissions compliance decal on the engine to deter-
mine applicable standards. For emissions warranty infor-
mation, reference the included emissions warranty. It is
important to follow the maintenance specifications in the
manual to ensure the engine complies with the applicable
emissions standards for the duration of the product’s life.
Remove Contents from Carton
1.
See
Figure 2-2.
Remove and verify carton contents
prior to assembly. Carton contents should contain the
following:
Figure 2-2. Maintenance Meter
2. Contact Generac Customer Service at 1-888-436-
3722 or www.generac.com with unit model and
serial number for any missing carton contents.
3. Record model, serial number, and date of pur-
chase on front cover of this manual.
Installing Brush Deck
1. See Figure 2-3. Cut cable tie (A) and remove
detent pin (B) and collar (C) from power unit.
Figure 2-3. Detent Pin and Collar
2. Place brush deck in front of power unit.
3. See Figure 2-4. Slide power unit pin into deck
bracket and install collar and detent pin (D).
Figure 2-4. Detent Pin and Collar Installed
4. See Figure 2-5. Insert belt into area just above
tensioner spring (F) and deck pivot bracket (G) and
install belt onto pulley.
Figure 2-5. Belt Insertion Point
5.
See
Figure 2-6
. Wrap belt around clutch pulley (H).
Figure 2-6. Belt Installed
Item Description QTY
A Wire, 66 in 1
B Meter 1
C Panel Adapter 1
D Cable Ties 3
008072
A
D
C
B
005829
A
B
C
005830
D
005831
G
F
005832
H
WARNING
(000411)
Personal injury. Use caution when installing
belt onto deck pulley. Failure to do so could
result in serious injury.

Owner’s Manual for Field and Brush Mower 7
General Information and Setup
6.
See
Figure 2-7
. Place belt onto deck pulley. Gradu-
ally turn belt pulley to assist belt into pulley groove.
Figure 2-7. Install Belt on Spindle Pulley
7. See Figure 2-8. Install and secure belt guard with
provided hardware.
Figure 2-8. Deck Installation Complete
Removing Brush Deck
NOTE: Only remove the brush deck to install other
attachments, or when performing maintenance.
1. See Figure 2-9. Remove knob (A) securing belt
guard to brush deck, and remove belt guard (B).
Figure 2-9. Belt Guard Knob
2.
Place a screw driver between blade pulley and belt.
3. See Figure 2-10. Rotate blade pulley to roll belt off
blade pulley (C).
Figure 2-10. Removing Belt from Blade
4. See Figure 2-11. Push the belt toward the power
unit, and the belt will fall off clutch pulley (D).
Figure 2-11. Belt Installed
5. Pull the belt toward deck and remove the belt.
6.
See
Figure 2-12
. Remove collar (E) and detent pin (F).
Figure 2-12. Detent Pin and Collar
7. Shift wheel speed lever into neutral.
8. Pull power unit back to remove power unit pin from
deck pivot bracket.
005833
005826
005811
A
B
005833
C
005853
D
005830
E
F

8Owner’s Manual for Field and Brush Mower
General Information and Setup
Maintenance Meter Installation
1. Gently pry black panel insert from control panel
2.
Insert panel adapter from kit into open hole in con-
trol panel. Verify adapter engages panel completely.
3. See Figure 2-13. Insert meter (A) firmly into panel
adapter (B) until it snaps into place. The meter
flange should be flat against the adapter face.
Figure 2-13. Maintenance Meter Installation
4. Slide sensor wire onto sensor wire connector on
the back of the meter.
5. See Figure 2-14. Run sensor wire from meter to
handlebar and secure with two cable ties (C).
Figure 2-14. Maintenance Meter Installation
6.
Route the balance of sensor wire forward following
the existing wiring harness toward the engine spark
plug wire. Do not bind it too tightly with the cable
ties. Trim the excess material from the cable tie.
7. See Figure 2-15. At a convenient point along the
spark plug wire wrap four or five turns of meter wire
(D) tightly around spark plug wire (E) and secure it
to itself with cable tie (F). Cut and discard the bal-
ance of the wire.
Figure 2-15. Maintenance Meter Installation
NOTE: Avoid placing the wire on, or near hot surfaces.
Adding Oil
IMPORTANT NOTE: The unit is shipped without oil in
the engine. Oil must be added prior to operation.
1. Place unit on a firm, level surface, and verify
engine is cooled.
2. See Figure 2-16. Remove oil dipstick/fill cap (A)
and wipe dipstick clean.
Figure 2-16. Adding Oil
3. Add 20 oz (600 mL) of engine oil. Climate deter-
mines proper engine oil viscosity. See Table 1:
Engine Oil Requirements to select correct
viscosity.
NOTE: Use only detergent oil classified SF-SG. Do not
mix oils of different brands and features.
Table 1 – Engine Oil Requirements
4. Wait one minute for oil to settle.
5. Reinsert dipstick into oil filling hole without screw-
ing it in. Pull the dipstick out, and verify oil is
between the “MIN” and “MAX” marks.
008074
A
B
0058075
C
F
ED
008078
(000135)
CAUTION
Engine damage. Verify proper type and quantity of
engine oil prior to starting engine. Failure to do so
could result in engine damage.
(000210)
WARNING
Skin irritation. Avoid prolonged or repeated contact with
used motor oil. Used motor oil has been shown to cause
skin cancer in laboratory animals. Thoroughly wash
exposed areas with soap and water.
005836
A
SAE 30
Synthetic 5W-30/10W-30
5W-30/10W-30

Owner’s Manual for Field and Brush Mower 9
General Information and Setup
6. If oil level is low, add a few ounces of oil at a time,
rechecking the dipstick until the oil reaches the
“MAX” mark. Do not overfill.
7. Fully tighten the cap, and wipe i[ any spilled oil.
Adding Fuel
NOTE: Never use contaminated gasoline or mixed gaso-
line with oil. don’t allow dust, foreign matter or water to
enter into the fuel tank.
1. Place unit on a firm, level surface in a well venti-
lated area.
2. Verify unit is OFF and cooled for a minimum of two
minutes.
3. See Figure 2-17. Remove the gas fill cap (A).
Figure 2-17. Fuel Cap
4. Fill tank with fresh, unleaded gas with a minimum
90 octane rating to 0.25 in (6.4 mm) from the bot-
tom of the fill neck to allow for fuel expansion.
5. Install fuel fill cap.
NOTE:
Allow spilled fuel to evaporate before starting unit.
Checking Tire Pressure
1.
See
Figure 2-18
. Remove valve stem protective cap
(A) and check tire pressure with tire pressure gauge.
Figure 2-18. Valve Stem Location
2.
Compare tire pressure reading to the manufac-
turer’s recommended tire pressure stamped on tire.
3. If pressure is too low, add air through valve stem
with an air hose.
4. Replace valve stem protective cap when finished.
Connecting Battery Cable
Units are shipped with negative terminal battery cable
disconnected. Before use, connect battery cable.
1. See Figure 2-19. Connect the negative (black)
cable to the negative (-) battery terminal.
Figure 2-19. Connecting Battery Cable
(000105)
DANGER
Explosion and Fire. Fuel and vapors are
extremely flammable and explosive. Add fuel
in a well ventilated area. Keep fire and spark
away. Failure to do so will result in death
or serious injury.
(000214)
DANGER
Explosion and Fire. Do not fill fuel tank past full line.
Allow for fuel expansion. Overfilling may cause fuel
to spill onto engine causing fire or explosion, which
will result in death or serious injury.
WARNING
Explosion and Fire. Do not smoke while
refueling unit. Failure to do so could result in
death, serious injury, or property or equipment
damage. (000284a)
006485
A
WARNING
Loss of control. Do not overinflate tires. Overinflation
could cause a blow out, which could result in loss of
control. Loss of control could result in death, serious
injury, property or equipment damage. (000428)
005838
A
005835

10 Owner’s Manual for Field and Brush Mower
General Information and Setup
Handlebar Height Adjustment
All units are shipped with the handlebar set to the highest
position. To adjust the handlebar to lower positions:
1. See Figure 2-20. Remove rear handlebar bolt (A)
with a 9/16 in wrench from both sides of the unit.
Figure 2-20. Handlebar Height Adjustment
2. Loosen front handlebar bolt (B) on both sides of
the unit. Do not remove.
3. Align handlebar rear hole to handlebar low position
hole (C) in the frame.
4. Reinstall rear bolts on both sides of the unit.
5. Tighten front and rear bolts on both sides of Unit.
Deck Pivot Bolt Check/Adjustment
NOTE: Deck carriage bolts should be adjusted to the
lowest setting for easy to moderate mowing. For instruc-
tions on aggressive mowing see Deck Pivot Bolt
Adjustment for Aggressive Mowing Conditions
Verify the machine had been shipped with the deck pivot
carriage bolts installed at the lowest position. If they are
not in the lowest position, perform the following proce-
dure on both deck pivot bolts:
1. See Figure 2-21. Hold the square portion of car-
riage bolt (A) using a 1/2 in wrench.
Figure 2-21. Carriage Bolt and Locknut
2. Turn locknut (B) up to bottom of bolt head (C) using
a 3/4 in wrench.
3. Turn the carriage bolt down using a 1/2 in wrench
until threaded end contacts deck bracket.
4. Hold the square portion of carriage bolt (A) using a
1/2 in wrench.
5. Tighten locknut (B).
Steering Brake Burnishing
Brake pads and rotors must be burnished during first use.
To burnish the steering brake system:
1. See Starting Unit. Shift unit into second gear.
2. Engage traction drive lever to drive the machine
forward.
3. Apply both brakes equally with moderate force and
hold brakes on for 100 ft (30.5 m).
4. Release brakes for 25 ft (7.6 ft).
5. Reapply both brakes equally with moderate force
and hold brakes for 100 ft (30.5 m).
Blade Clutch Burnishing
The blade clutch must be burnished before initial use for
optimum engaging and braking action.
NOTE: The machine must be fully assembled and set up
before performing the burnishing procedure.
1. Start the engine and set the machine to half throt-
tle. See Starting Unit.
2. Engage blade clutch for two seconds, disengage
and let cool down for 10 seconds.
3. Repeat step 2 for 50 cycles.
High Altitude Replacement Kit
At high altitude, standard carburetor air-fuel mixture will
be too rich. A rich mixture decreases performance,
increases fuel consumption, fouls the spark plug and
causes hard starting. Operation at high altitude for
extended periods of time, may increase emissions.
Proper operation at higher altitudes can be improved by
installing an altitude kit when required. See Table 2:
High Altitude Replacement Kit
Table 2 – High Altitude Replacement Kit
Kits can be obtained by contacting Generac Customer
Service at 1-888-436-3722 (1-888-GENERAC), or
www.generac.com. Kits must be installed by a qualified
individual.
NOTE: If a
carburetor
is
replaced, the proper high altitude
kit
jet will
need
to be
installed into the replacement
carburetor.
NOTE: The warranty may be void if installation of a
high altitude kit is not made for high altitude use.
005839
A
B
C
005840
A
BC
Altitude Range Part Number
0-5000 ft Not required
5000-8000 ft 10000035259

Owner’s Manual for Field and Brush Mower 11
Operation
Section 3: Operation
Operation and Use Questions
Contact your nearest authorized dealer, or contact
Generac Customer Service at 1-888-436-3722 (1-888-
GENERAC), or www.generac.com with questions or
concerns about unit operation and maintenance.
Controls and Symbols
See Figure 3-1. The control panel uses icons to repre-
sent settings. Be familiar with icon meanings prior to unit
operation.
Figure 3-1. Control Symbols
Before Starting Engine
IMPORTANT NOTE: Oil must be added before starting the
engine for the first time. Units are shipped without oil.
1. Check engine oil level.
2. Check fuel level.
3. See Figure 3-2. Verify fuel shut-off valve (A)
located under the fuel tank is open.
Figure 3-2. Fuel Shut-Off Valve
Starting Unit
1. See Figure 3-3. Set wheel speed lever (A) to
NEUTRAL.
Figure 3-3. Wheel Speed Lever
NOTE: The wheel speed lever must be in NUETRAL and
blade control knob (B) pushed down to the BLADE DIS-
ENGAGE position for the engine to start.
2. See Figure 3-4. Verify neutral safety switch (C) at
the rear of the transaxle is connected.
Figure 3-4. Neutral Safety Switch
(000100a)
WARNING
Consult Manual. Read and understand manual
completely before using product. Failure to
completely understand manual and product
could result in death or serious injury.
(000108)
WARNING
Hot Surfaces. When operating machine, do not
touch hot surfaces. Keep machine away from
combustibles during use. Hot surfaces could
result in severe burns or fire.
WARNING
(000402)
Personal injury. Disengage mower blades when crossing
roadways or walkways. Engage mower blades on grass or
brush only. Failure to do so could result in death, serious
injury, property damage, or equipment damage.
WARNING
(000410)
Projectile risk. Remove all debris from work area
before operating unit. Failure to do so could result in
death, serious injury, or property or equipment
damage.
WARNING
Accidental startup. Before clearing debris from mower
deck, shut engine OFF and allow to cool. Disconnect
spark plug wire. Failure to do so could result in death
or serious injury. (000488)
CHOKE
NUETRAL
IDLE
FAST
START
RUN
STOP
BLADE ENGAGE
BLADE DISENGAGE
N
005841
A
005826
A
B
005842
C

12 Owner’s Manual for Field and Brush Mower
Operation
3. Move throttle lever to CHOKE or FAST if the
engine is already warm.
4. Rotate key to the START position until the engine
starts, then release. The key will return to the RUN
position.
5. Set throttle lever to the FAST position.
Engaging Wheel Drive
The unit has a three speed forward, single speed reverse
transmission. General guidelines are as follows:
•1st Gear: Thick, woody vegetation
•2nd Gear: Stalky material or field mowing
•3rd Gear: Lighter mowing or for transporting.
•Reverse Gear: Maneuvering in tight spots.
•Set throttle in the FAST position for mowing.
•Transport the machine in 3rd gear and use the
throttle to adjust speed.
•Mowing speed impacts cutting performance. Mow
at a slower gear to improve cut quality.
•For best control, select a drive speed that matches
the conditions. Use a slower speed when in wet or
heavy growth, or on slippery or steep slopes.
1. See Figure 3-5. Set wheel speed lever (A) to the
desired gear.
Figure 3-5.
2. Gently push down traction drive lever (B) to
engage the wheels.
3. Release the traction drive lever to slow or stop.
IMPORTANT NOTE: The steering brakes will not stop
the machine if the machine is in gear and the traction
drive lever is engaged.
Engaging Mower Blade
1. See Figure 3-6. Press operator presence lever (A)
against handlebar grip.
2. Pull up blade control knob (B) to the BLADE
ENGAGE position to engage the blade.
NOTE: Pulling up the blade control knob before holding
down the operator presence lever shuts off the engine.
Figure 3-6. Mower Blade Controls
Disengaging Mower Blade
Stop the mower blade by pushing down the blade control
knob into the BLADE DISENGAGE position.
NOTE: Releasing the operator presence lever to disen-
gage the mower blade will shut off the engine.
Stopping the Engine
1. Disengage mower blade.
2. Set throttle control to the IDLE position.
3. Turn key to the STOP position and remove key.
NOTE: On units equipped with a fuel shutoff valve, close
the valve before transporting or storing the mower.
Operating Steering Brakes
The steering brakes apply a stopping force to the desired
wheel. Using the steering brakes can assist with:
•Shifting drive power from one wheel to the other to
improve traction.
•Keeping the mower driving straight on side slopes.
•Turning the mower left or right.
CAUTION
(000412)
Equipment damage. Always release the traction drive
lever before shifting gears. Failure to do so could result
engine and transmission damage.
005826
B
A
WARNING
(000405)
Personal injury, equipment damage. Always disengage
mower blade before shifting into reverse. Failure to do
so could result in serious injury or equipment damage.
005826
A
B

Owner’s Manual for Field and Brush Mower 13
Operation
Steering with Brake Assist
1. See Figure 3-7. Set wheel speed lever (A) to gear
best suited for the application. See Engaging
Wheel Drive.
2.
Engage traction drive lever (B) to drive the machine.
•
Turn left by squeezing left brake lever (D)
•Turn right by squeezing right brake lever (C).
Figure 3-7. Brake Assist
Traction Control with Brakes
Occasionally, the machine may lose traction on one or
both wheels. To regain traction:
1. Stop the mower blade by pushing the blade control
knob to the BLADE DISENGAGE position.
2. Apply the brake on the spinning wheel to direct
power to the wheel that has traction.
3. If both wheels are spinning, alternate brakes.
Setting Parking Brake
1.
See
Figure 3-8
. Set wheel speed lever (A) to NEU-
TRAL.
Figure 3-8.
2.
Engage brake lever (B) and push brake lock (C) for-
ward. The brake lever will remain up when locked.
3. Repeat step 2 for other brake.
If Mower Gets Stuck
1. Disengage mower blade. Never attempt to free the
unit from an obstruction with the blade engaged.
2. Push down on the handlebars to lift the mowing
deck over the obstruction.
3. Shift the machine in reverse and back away.
Mowing on Slopes
z
•
When mowing sloped terrain, mow across the face
of the slope. Do not mow up and down the slope.
•To avoid excessive speed, shift into a lower gear
before descending a slope.
•When mowing side hills, feather the uphill brake to
keep the machine moving in a straight line.
Deck Pivot Bolt Adjustment for
Aggressive Mowing Conditions
NOTE: The machine must be on a flat surface when
making any deck adjustments.
Adjust the deck carriage bolts to the highest setting for
aggressive mowing.
1. See Figure 3-9. Hold the square portion of locknut
(A) with a 3/4” wrench.
Figure 3-9.
2. Turn carriage bolt (B) up using a 1/2” wrench until
the top of the head contacts the frame.
3. Tighten locknut (C) against deck bracket while
holding the carriage bolt stationary.
4. Repeat the process on the other deck pivot bolt.
005826
A
D
C
B
005846
A
C
B
Personal injury, equipment damage. Always mow across the
face of a slope. Never mow slopes greater than 20 degrees.
Failure to do so could result in a slip and fall, resulting in loss
of control of the equipment and could result in death or
serious injury. (000404)
WARNING
WARNING
(000413)
Personal injury. Never operate mower on wet or slippery
slopes as loss of control may result. Operating on wet or
slippery slopes could result in death, serious injury, or
property or equipment damage.
WARNING
(000414)
Personal injury. Never shift gears while operating on a slope.
Doing so could result in loss of control and could cause
death, serious injury, or property or equipment damage.
005847
A
B
C

14 Owner’s Manual for Field and Brush Mower
Operation
This page intentionally left blank.

Owner’s Manual for Field and Brush Mower 15
Maintenance and Troubleshooting
Section 4: Maintenance and Troubleshooting
Maintenance
Regular maintenance will improve performance and extend
engine/equipment life. Regular maintenance, replacement,
or repair of the emissions control devices and systems may
be performed by any repair shop or person of the owner’s
choosing. To obtain emissions control warranty service free
of charge,
contact Generac Customer Service at 1-888-
436-3722 (1-888-GENERAC), or www.generac.com
.
See the emissions warranty.
Table 3 – Maintenance Schedule
WARNING
(000415)
Accidental start-up. Before servicing or detangling, shut
down unit, allow to cool, remove keys, and disconnect spark
plug wire(s). Failure to do so could result in death, serious
injury, or equipment damage.
WARNING
(000400)
Personal injury. Mower blades are extremely sharp. Use
appropriate personal protective equipment when handling
and servicing blades, or use blade protection. Failure to do
so could result in death or serious injury.
(000108)
WARNING
Hot Surfaces. When operating machine, do not
touch hot surfaces. Keep machine away from
combustibles during use. Hot surfaces could
result in severe burns or fire.
Procedure Before Each Use Every 25 Hours Every 100 Hours
Verify operator presence switch function
Check engine oil level
Inspect general equipment condition
Check blade sharpness
Clean engine exterior and cooling fins
Inspect all belt tensions and condition
Brake maintenance
Lubricate grease fittings
Lubricate cables
Check tire pressures
Change engine oil and filter if equipped 1st time 5 hours
Verify battery charge
Inspect cable connections
Replace air filter and precleaner if equipped
Replace belt
Replace spark plug(s)
Replace fuel filter

16 Owner’s Manual for Field and Brush Mower
Maintenance and Troubleshooting
Operating the Maintenance Meter
See Figure 4-1. The maintenance meter monitors the
accumulated running time, time until the engine oil needs
to be changed, and time until lubrication is
recommended. Pressing function button (A) cycles
through meter functions.
Figure 4-1. Operating Maintenance Meter
After 25 hours of running time, the meter will automati-
cally blink as a signal for oil change. It will continue to
blink for two hours of accumulated running time. The next
alert will automatically appear in 25 hours. No reset is
required.
If the RPM indication is not responding to changes in
engine speed, check the connections at the meter and
verify meter wire is wrapped tightly around spark plug
wire.
Air Filter Maintenance
NOTE: To order a replacement air filter, contact Generac
Customer Service at 1-888-436-3722 (1-888-GEN-
ERAC), or www.generac.com.
1. Clean the area around the filter cover.
2. Remove cover by unscrewing the two knobs.
3. Remove filtering element.
4.
Tap cartridge on a solid surface and blow it from the
inside with compressed air to remove dust and
debris.
5. Clean the inside of the filter housing. Do not allow
dust or debris to enter the inlet duct.
NOTE: If the cartridge is too dirty to clean, clogged, or
damaged, replace the cartridge with a new one.
6. Install the cartridge and refit the cover.
Changing Engine Oil and Filter
NOTE: Drain oil when engine is warm. Warm oil drains
more completely.
1. See Figure 4-2 and Figure 4-3. Place an approved
oil container near oil drain (A).
Figure 4-2. 16 HP Oil Drain
Figure 4-3. 18.67 HP Oil Drain
2. Remove drain plug with a 8 mm Allen wrench and
allow oil to drain into the container.
3.
Remove oil filter with an oil filter wrench and replace
with a
new
oil filter.
4. Replace drain plug and fully tighten.
5. Add 16 oz (473 ml) of oil into the oil fill and wait one
minute for the oil to settle. See Adding Oil for
information on engine oil requirements.
6. Check the dipstick and continue adding a few
ounces of oil at a time, rechecking the dipstick until
the oil reaches the fill mark. Do not overfill.
A
008079
(000135)
CAUTION
Engine damage. Verify proper type and quantity of
engine oil prior to starting engine. Failure to do so
could result in engine damage.
(000210)
WARNING
Skin irritation. Avoid prolonged or repeated contact with
used motor oil. Used motor oil has been shown to cause
skin cancer in laboratory animals. Thoroughly wash
exposed areas with soap and water.
006455
A
005848
A
This manual suits for next models
1
Table of contents
Other Generac Power Systems Lawn Mower manuals