MÖLLER-WEDEL
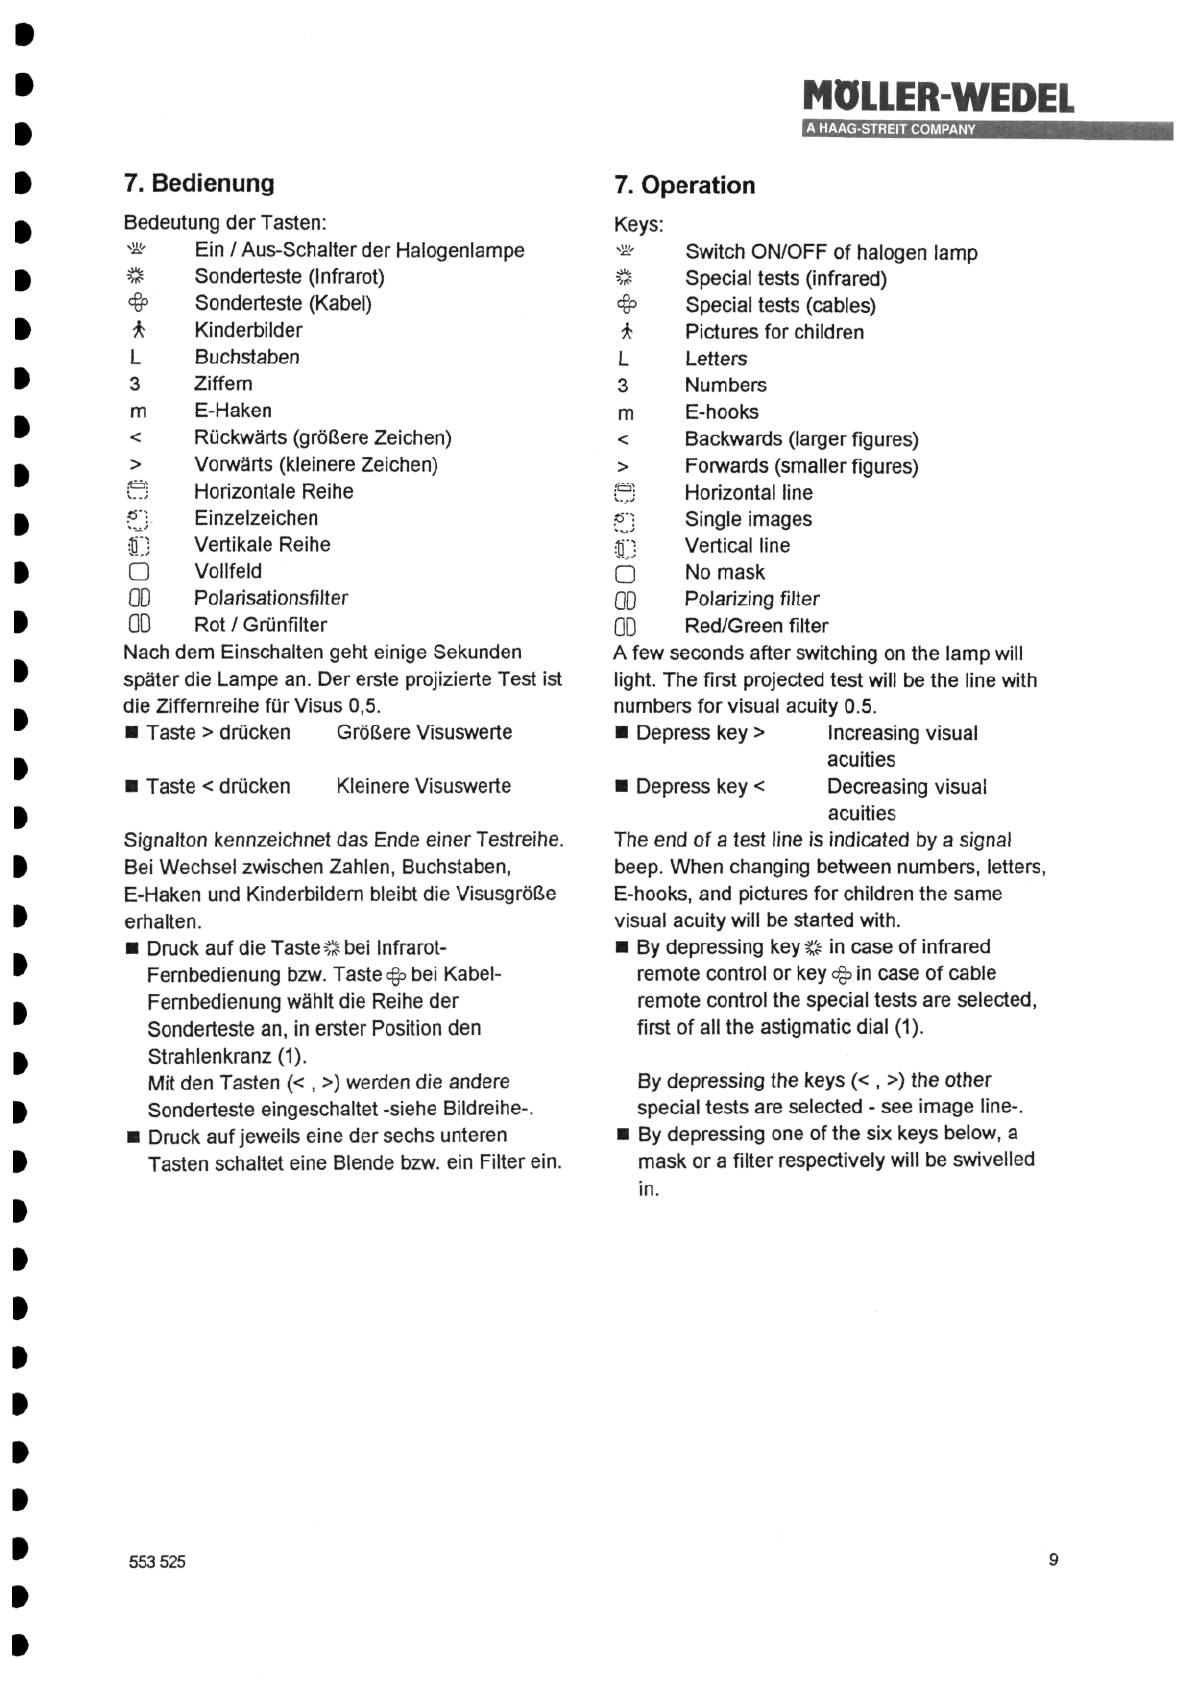
3.
Funktionsbeschreibung
Der
SehzeichenprojektorbildetSehzeichen
auf
einerAluminium-Projektionswand
ab.
Über
eineFernbedienungwerdenTeste
weitergeschaltet.
Auf
einemVollfeldbefindensich
entwederSonderzeichenoderSehzeichen
in
einer,zweioderdreiReihenunterschiedlicher
Visusstufen.
DurchBlendenwerdenSehzeichen
ausgeblendet.
Über
ein
Interfacekann
der
Projektor
mitdem
PhoropterVISUTRONPLUSverbundenwerden.
Je
nach
Testanwahl
wird
das
jeweilsandere
Gerätautomatischpassendeingestellt.
A
HAAG-STREIT
COMPANY
3.
Description
of
Functions
The
M
1000
projects
testtypes
ontoan
aluminumscreen.
The
tests
are
switched
remote
controlled.Specialimages
or
testtypes
are
positioned
in
one,two,
or
three
lines
of
different
visual
acuity.Testtypes
are
blocked
offby
masks.
The
projector
can
be
connected
to
the
phoropter
VISUTRONPLUS
viaan
Interface.
The
other
Instrument
will
automatically
be
matched
depending
onthe
selecedtest.
4.
Montage
•
Kartonöffnen.
•
Projektionswandherausnehmen.
•
Projektor
herausnehmen.
•
Kabel,Fernbedienung,Adapter
aus
dem
geöffneten
Seitenkartonnehmen.
•Je
nachDurchmesser
der
Aufnahme
für
den
Projektor
(Tischfuß
oderRefraktionseinheit)
muß
eventuell
ein
Adapterstückmontiert
werden.
•
Adaptermontieren:
Zwei
äußereInnensechskantschrauben
ander
Projektoraufnahme
mit2,5mm
Schlüssel
lösen.
Inneres
Teil
entfernen.
Adaptereinsetzen
undmit
denselben
Schrauben
befestigen.
•
Projektormontieren.
•
Handschaltermontieren
O'e
nachLieferumfang)
Infrarot-Fernbedienung
Batteriefach-Deckel
in
Pfeilrichtung
entfernen.
Batterie
mit
Kabelverbinden.
Batterieeinlegen.
Deckelzuschieben.
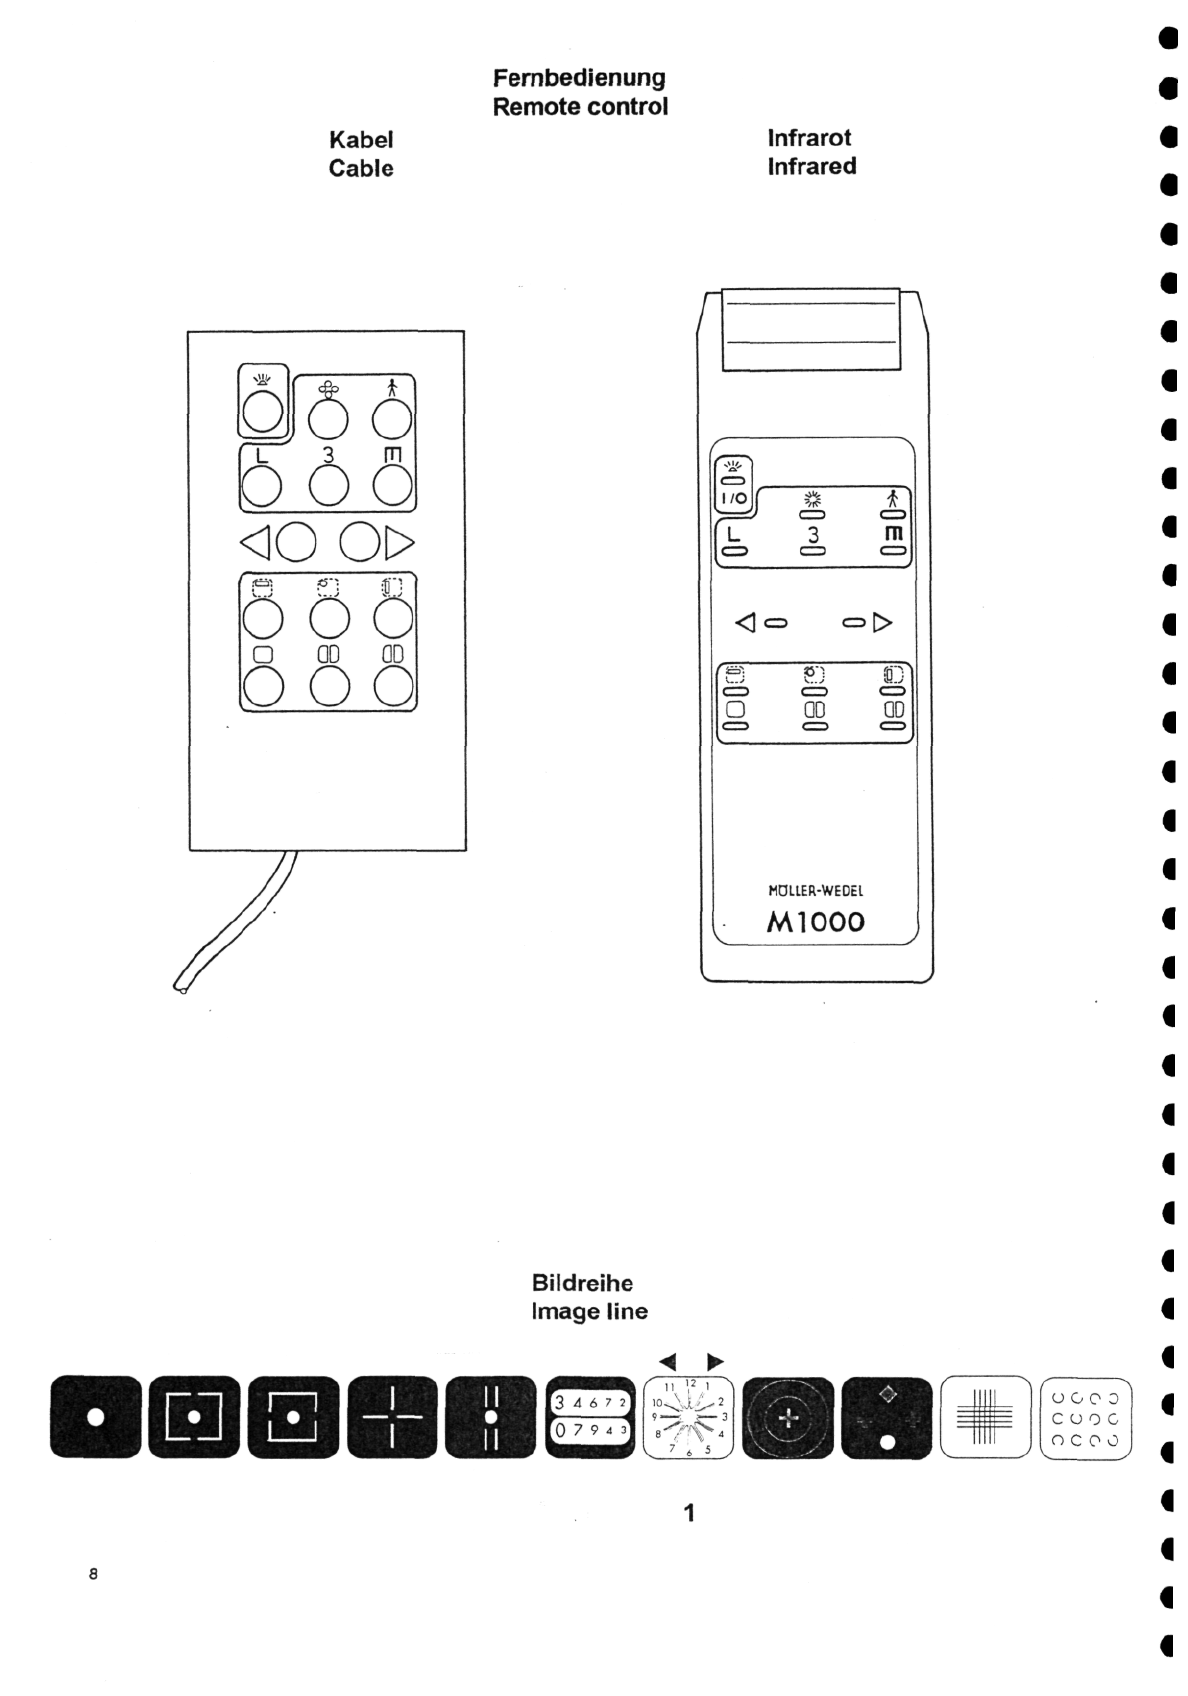
Fernbedienung
mit
Kabel
Kabel
der
Fernbedienung
mit
Projektor
verbinden.
•
Netzanschlußherstellen.
•
Projektionswandaufhängen.
4.
Assembly
•
Open
the
cardboard.
•
Take
off
the
projection
screen.
•
Take
off
the
projector
•
Take
off
cable,
remote
control,
and
adapter
from
the
cardboard
located
atthe
side.
•
Depending
onthe
mount
diameter
forthe
projector
(table
base
or
refraction
unit)
an
adaptershould
be
mounted
if
required.
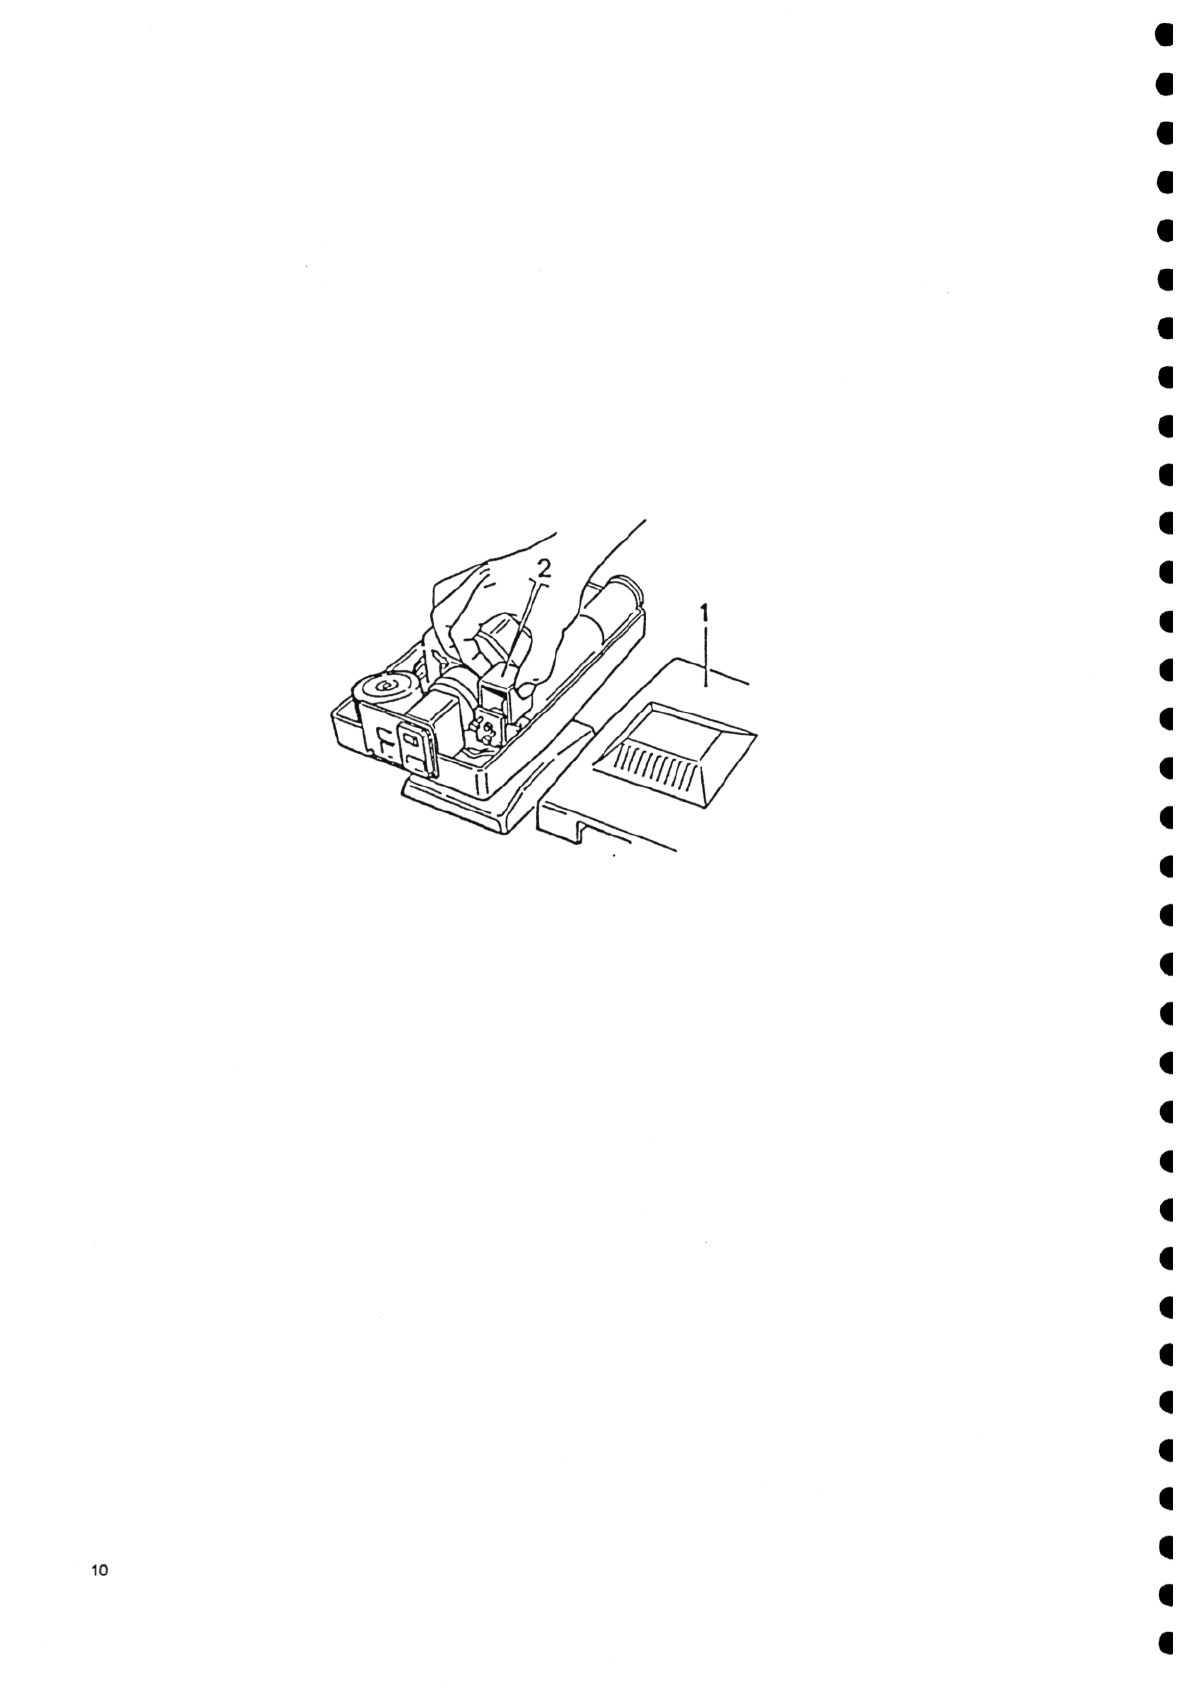
•
Assembly
of
the
adapter
Loosen
two
Allan
screwsoutside
the
projector
mount
by
Allan
key
width
2.5mm.
Remove
the
inner
pari.
Insert
the
adapter
and
fasten
bythe
same
screws.
•
Install
the
projector.
•
Mount
the
hand
switch
(depending
onthe
type)
Infraredremotecontrol
Remove
cover
of
battery
case
into
direction
of
arrow.
Connect
cable
to
battery.
Insertbattery.
Shut
cover.
Remotecontrol
via
cable
Connectcable
of
remotecontrol
to
projector.
•
Provide
mains
power.
•
Hang
on
screen.
5.
In
Betriebnehmen
•
Geräteinschalten.
•
ProjektordurchDrehen,Kippen
und
Neigen
auf
die
Projektionswandausrichten.
•
TestdurchHerausziehen
bzw.
Hineinschieben
des
Objektivs
aufder
Projektionswand
scharfstellen.
NacheinigenSekundenschaltetsich
die
Lampe
zur
Schonung
aus.
6.
Betriebbeenden
•
Gerätausschalten.
553525
5.
Start
Up
•
Switch
on
the
Instrument.
•
Adjust
the
projector
tothe
projectionscreen
by
rotating,
tilting,
and
inclining.
•By
pulling
or
pushing
the
objective
focus
the
Image
ontothe
projectionscreen.
The
lamp
will
automatically
be
switched
off
after
a
few
seconds.
6.
Endof
Operation
•
Switch
off
the
instrument.