6
Before the use
Please read through the instructions
carefully before using the unit and
carefully note the safety advice.
Always keep this manual accessible
to any users of the drill.
Area of application
The control unit can be set up in a
cabinet, or can be used as a porta-
ble unit (e.g. in a carry case). It is
suitable for the following scopes:
•
Footcare/Manicure: Milling, trim-
ming and polishing
. (Attention:
Additional spray or suction might
have to be in operation during foot
care in your country).
•Dental technique / -laboratory:
Milling-, trimming and polishing
work at plaster casts and models
(Do not use this unit for dentist
purposes, i.e. working directly on
the patient).
•Industry: Grinding, milling and
polishing works.
Installation Site / location
The installation of the workroom
must correspond to any regulations
according to your country laws. Set
up the control unit, so that the venti-
lation slits are not covered or
blocked, and the exhaust air can
escape well.
The drill and the charging unit may
only be operated in confined spac-
es. Temperature rising of the hous-
ing is normal during operation. Alt-
hough the unit should never be
covered, nor be located near heat-
ing devices or in direct sun impact.
Fully charge the unit before its first
use. Read the instructions in the
following chapter on how to pro-
ceed.
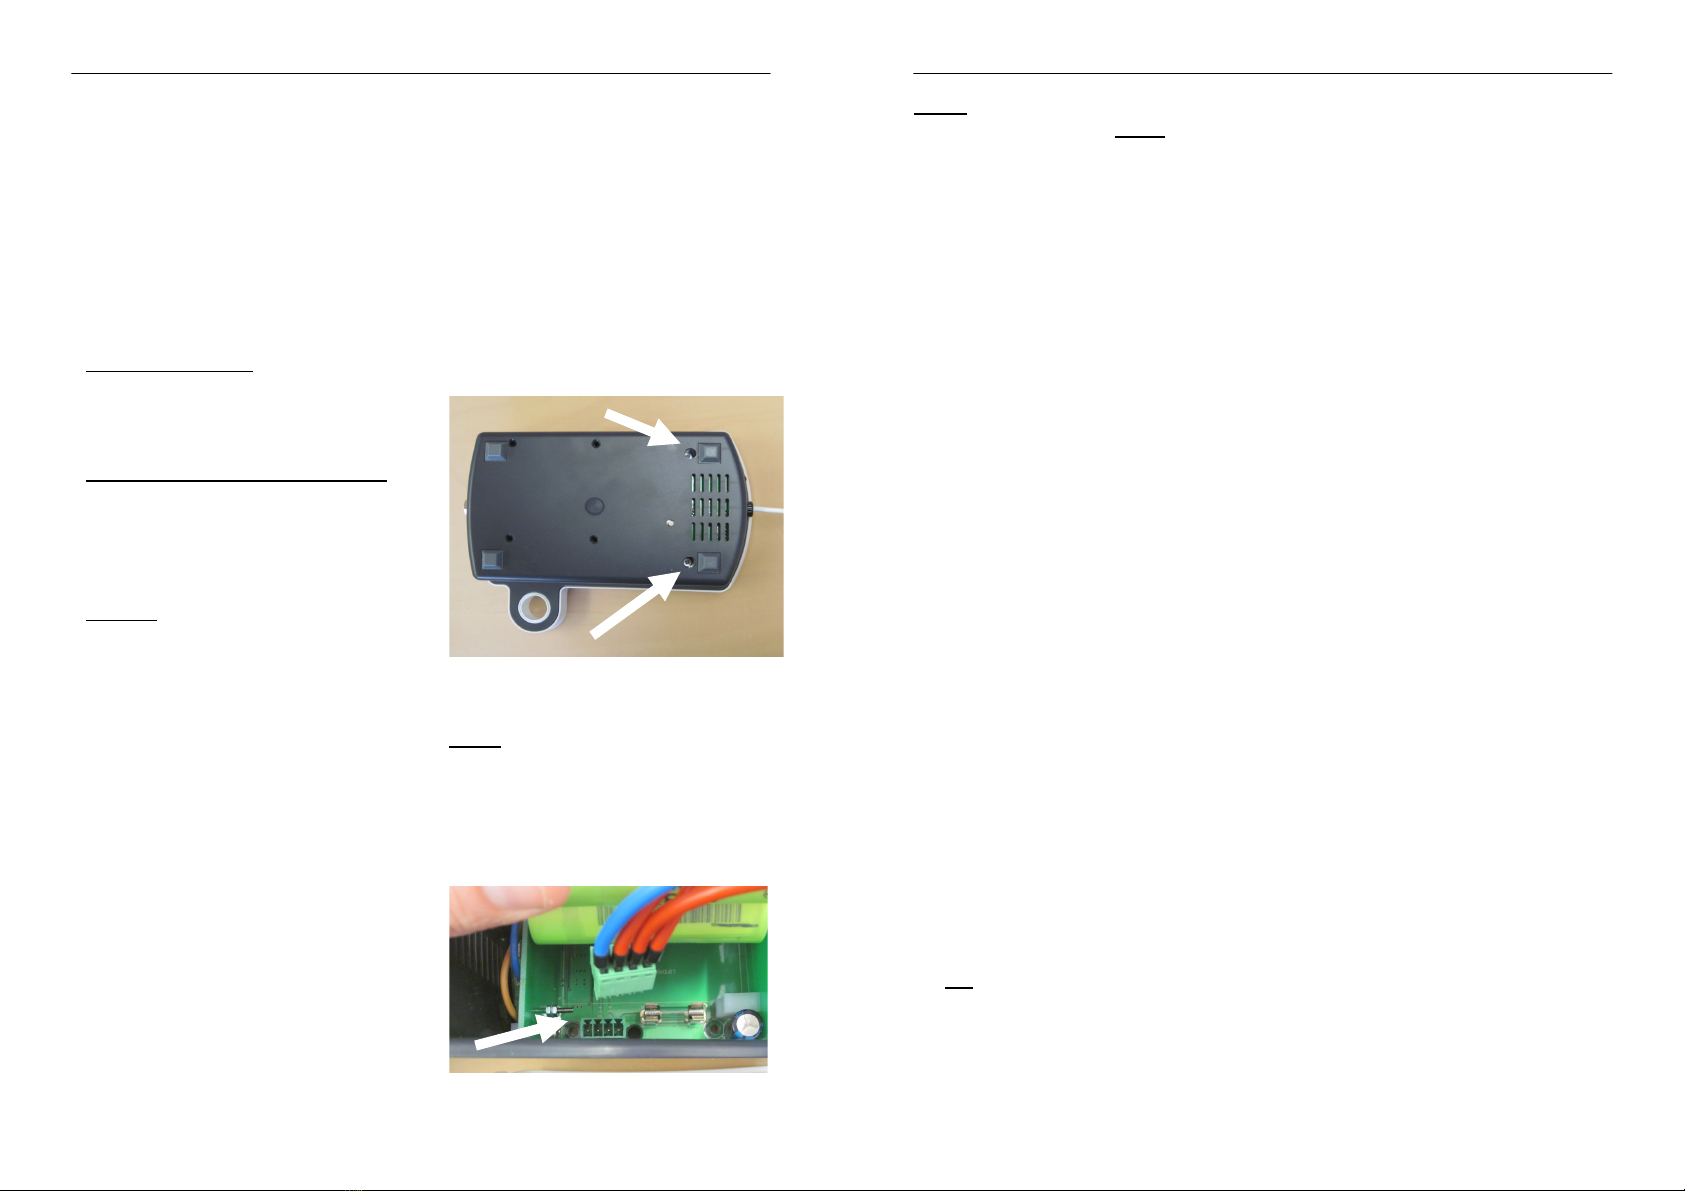
Before first use
1. Unscrew the screws at the bot-
tom of the unit, and carefully re-
move the lid (upper housing), since
it is connected to the electronic
board.
2. Make sure that the handpiece is
safely secured, so that it will not
move, should the unit be started
accidently. Connect the
accumulators to the electronic
board as shown in the picture. An
acoustic signal will occur.
11
Handling details
Never put the handpiece into any
kind of liquid, and never oil or
grease the handpiece. Clean its
surface with a damped cloth. Pay
attention, that no moisture or liquid
enters the handpiece.
Never put any wet burs or instru-
ments into the handpiece. Its mois-
ture could damage the interior parts
of the handpiece.
Any materials used by hadewe pre-
vent a formation of rust. In cases in
which a rust infestation was found
within the handpiece, thorough in-
spections and examinations always
have proved, that the rust had a
foreign origin (which was usually
caused by the tools used in these
circumstances). Even in high-grade
steel instruments of well known
manufacturers, formation of rust
can appear, e.g., through wrong
treatment with chemical cleaning
and disinfection liquids. This extra-
neous rust affects internal parts of
the handpiece in form of rust bloom
and causes pitting. Therefore, when
you not working with the handpiece,
always remove the bur/ tool from it.
Always make sure that you do not
let the handpiece fall down or ex-
poses it to any shocks. The ball
bearings and the motor could be
damaged by this. Only work with
tools, which are flawless.
Do not work with tools which
- are bent or out of balance,
- whose shaft is worn out or
- are rusty.
Working with faulty tools will cause
a stronger vibration of the hand-
piece. A damage or even devasta-
tion of the ball bearings, clamping
technique or motor could be the
consequence.
Working with high pressure will not
improve the outcome of your work,
since the motor will even be slowed
down. A second disadvantage is the
stronger impact on the ball bearings
and the motor, which will shorten
their life span in the long run.
Always working with maximum
speed might have a similar effect.
Please make sure that the speed
setting you use is according to the
work you are doing and the instru-
ments you are working with.