VLP2 0 B - VL P 2 0 C
V. 01 – 22 / 10 / 20 1 3 3 © Vellem an nv
•A qual if ie d t e chn ic ian sho uld in st all and ser v ice t h is dev ic e.
•Do not switch the device on im mediately after it has been exposed to changes in t em perat ure.
Protect the device against dam age by leaving it switched off until it has reached room temperature.
•This device is designed for professional use on stage, in discos, theatres, etc. The device should only
be used indo o rs w it h t he appro pr iat e cur rent and pow er supply ( see Technical Specif icat io ns) .
•Light in g ef fect s ar e no t designed fo r perm anent o per at io n: r egular o perat io n br eaks w ill p ro lo ng t heir
liv e s.
•Ther e m ay be a par t icula r sm e ll w hen t he d ev ice is act iv at ed fo r t he f ir st t im e. This is no rm al and
an y sm ell w ill g ra dua l ly disapp ear .
•Do not connect t he device t o a dim m ing pack, ev en if t he dim m er channel is used so lely fo r 0% to
100% switch.
•Use t he o rigina l pack aging if t he d ev ice is t o be t r an spo r t ed.
•Keep this m anual for fut ure reference.
4 . Features
•light w eight a lum in ium co nst ruct io n
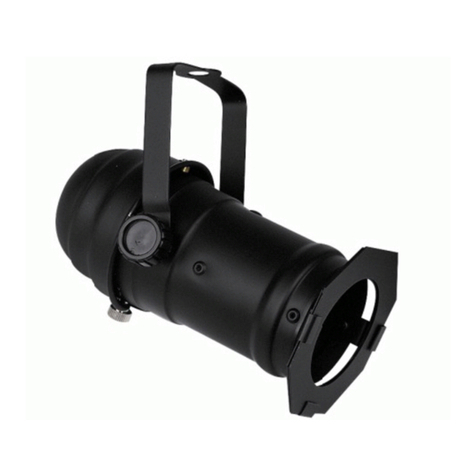
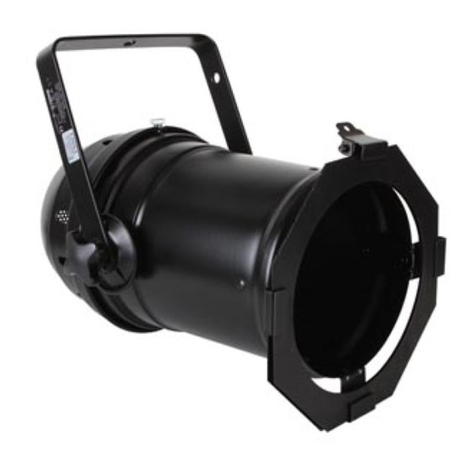
•so cket fo r 50 W / 230 V lam ps
•pow er cable w it h plug
5 . I nstallation
Lam p
•Only f it o r re place a lam p w he n t h e dev ice is unp lugged fr om t he m ains.
•Let a lam p cool dow n before replacing it as the t em perat ure o f a lam p can reach 7 00°C during
operation.
•When handling a halo gen lam p, do no t to uch it w it h your bare hands. Use a clot h to insert o r remove
it .
•Do no t inst a ll lam ps w it h a h igher w at t age. They get hot t er t han t his dev ice was designed fo r.
•Do not operate t he device as long as t he lam p is not securely fastened or t he cover st ill o pened.
•Replace any deform ed or dam aged lam p w ith a lam p of the same type ( see Technical Spe cif icat io ns).
To replace the lam p:
1 . Pull t he ex t ensio n spring and o pen t he ho using.
2 . Remove the old and insert a new o ne.
3 . Fix t he socket and close the device.
Mount ing guidelines
•Hav e t he dev ice inst alled by a qua lif ied per so n, respect ing EN 6 05 98-2-17 a nd all o t her applicable
no rm s.
•The co nst ruct io n to w hich t he dev ice is at t ached sho uld be able t o suppo rt 10 t im es t he w eight o f t he
device for one hour without deformation.
•The inst allat io n m ust alw ay s be secured w it h a seco ndar y at t achm ent e.g. a safet y cable.
•Nev er st and dir ect ly be lo w t he dev ice w h en it is be ing m ounted, removed or serviced.
•Have a qualified t echnician check the device once a year and once before you bring it into service.
•Inst a ll t he dev ice in a lo cat io n w it h few pa ssers-by t h at is inaccessible to unauthorised persons.
•Overhead mounting requires extensive experience: calculat ing work load lim its, determ ining the
installat ion m aterial t o be used. Have the mat erial and the device itself checked regularly. Do not
att em pt to install t he dev ice yo ur self if y o u lack t hese q ualif icat io ns as im p r o pe r inst allat io n m a y
result in inj u r ies.
•Make sure t her e is no flam m able m ater ial w it h in a 0 .5 m r adius o f t he d ev ice.
•Connect t he device to t he m ains w it h t he pow er plug.
•The inst allat io n has to be approved by an expert before the device is taken into service.
6 . Cleaning and Maintenance
•Disconnect t he device from the m ains prior t o m aintenance activit ies. Let the device cool dow n.
