IDWolesaler Credential cam User manual

User Manual

Contents 2
Contents
What’s in the box? ........................................................................................................3
Introduction ..................................................................................................................4
Specifications ................................................................................................................5
Getting Started ..............................................................................................................7
System requirements ..............................................................................................7
Physical set-up ........................................................................................................7
Installing the drivers................................................................................................8
PC: instructions for installation of AMCAP driver: ............................................8
MAC: instructions for installation of webcam monitor driver.........................10
Functionality................................................................................................................14
AmCap (PC) ...........................................................................................................14
Special effects .................................................................................................14
Capturing images and videos ..........................................................................14
Webcam Monitor (Mac)........................................................................................17
Changing the settings ......................................................................................17
Capturing still images and videos ....................................................................17
The video will now begin recording and can be stopped at the users prompt. 18
Special effects .................................................................................................18
Chat Programs.............................................................................................................19
PC:.........................................................................................................................19
MSN/Windows Live Messenger.......................................................................19
Skype...............................................................................................................21
Yahoo Messenger............................................................................................23
MAC: .....................................................................................................................25
Skype...............................................................................................................25
iChat................................................................................................................26
Troubleshooting/FAQs ................................................................................................27
Cleaning and Handling.................................................................................................29
Warranty Information .................................................................................................29
Contact Details/More Information .................................. Error! Bookmark not defined.

What’s in the box 3
What’s in the box?
•Credential Cam with USB cord (1)
•Notebook/Mac book clip (2)
•Desktop stand (3)
•LCD/iMac clip (4)
•Cord wrap (5)
•Lens protective pouch/lens cleaner, Webcam carry pouch (6)
•Driver/software CD (7)
•User manual (8)
(4)

Introduction 4
Introduction
Congratulations on purchasing the Credential Cam. The Credential Cam is a true piece
of revolutionary technology. It is compatible with both PC and Mac operating systems.
Its 5 layer glass, true Full HD 2.0 megapixel lens provides some of the sharpest pictures
around. The Credential Cam also includes a host of other features including bright light
auto exposure, internal microphone, 3 different stands, a protective lens cover and
carry case, and a software suite with an amazing range of features. Manufactured to
the highest standards, the Credential Cam is backed by a 2-year warranty, so you can
be confident that you have made the right choice.
The Credential Cam has a number of upgrade features from its earlier editions. Its new
sensor is able to achieve some of the greatest picture clarity on the market, and an
upgraded built-in microphone that runs solely through the USB cord will ensure you
will sound crystal clear every time. A range of new features and additions to the
accessory list have also been included to help you get the most out of your new
Credential Cam.
The Credential Cam can be used for a number of different purposes, which will be run
through in this manual including, but not limited to:
-Video email/capture, editing, and special effects using the webcam
monitor/AmCap applications;
-Video conferencing with MSN, Skype, Yahoo messenger, iChat, and many
others; and
-Snapshot images up to an incredible full HD 2MP resolution or 8MP
interpolated resolution.
The following manual will provide you with a step-by-step procedure for setting up
and using your webcam. We hope this helps you on your way to having an enjoyable
experience with your Credential Cam.

Specifications 5
Specifications
Compatibility PC and Mac
Min Operating
System
Windows® XP, Vista, 7
Mac OSC 10.4.3 or higher, G3, G4, G5 and Intel Macs
Video Capture Full HD 2MP. Up to 5MP by interpolation
Still Capture Image Full HD 2MP. Up to 8MP by interpolation
Lens 5 Layer glass 2.0 MP resolution
UVC Plug and play for Windows XP SP2 and Vista, Mac OSX 10.4.3
or greater, and iChat 10.4.9 or later
Casing German quality steel casing
Webcam Software
Compatibility
Works with iChat, MSN, Yahoo, Skype, AOL, and all other
major chat programs
Driver Software Plug and play webcam with additional Mac and PC drivers and
utilities and webcam software
Connections 1 x USB 2.0 connection
Focus Adjustment Manual focus and auto exposure with bright light technology
Digital Zoom 4 with compatible driver
Continuous Speed
Shooting
30 frames per second
Cables 1 x USB cable: 5”8 in/175 cm

Specifications 6
Video Input Motion sensor software, automatic face tracking technology
software compatible with driver.
Peripheral Devices CD-ROM, Graphics card
Image Focus Length 5cm – infinity
Brightness/Contrast
Automatic color compensation and brightness adjustment
Dynamic Range Greater than 72 db
Warranty 12 month warranty
Getting Started 7
Getting Started
System requirements
PC
•Windows XP, Vista or Windows 7
•Pentium III 300 (Pentium III 500 recommended), Celeron, AMD Athlon
processor
•512 MB RAM (or minimum OS requirement, whichever is higher)
•200 MB free hard drive space
•1 available USB port
•CD-ROM drive
•16-bit color display adaptor
MAC
•OSX 10.4.3 or higher, G3, G4, G5, and Intel Macs
•500 MHz processor
•512 MB RAM
•200 MB free hard drive space
•1 available USB port
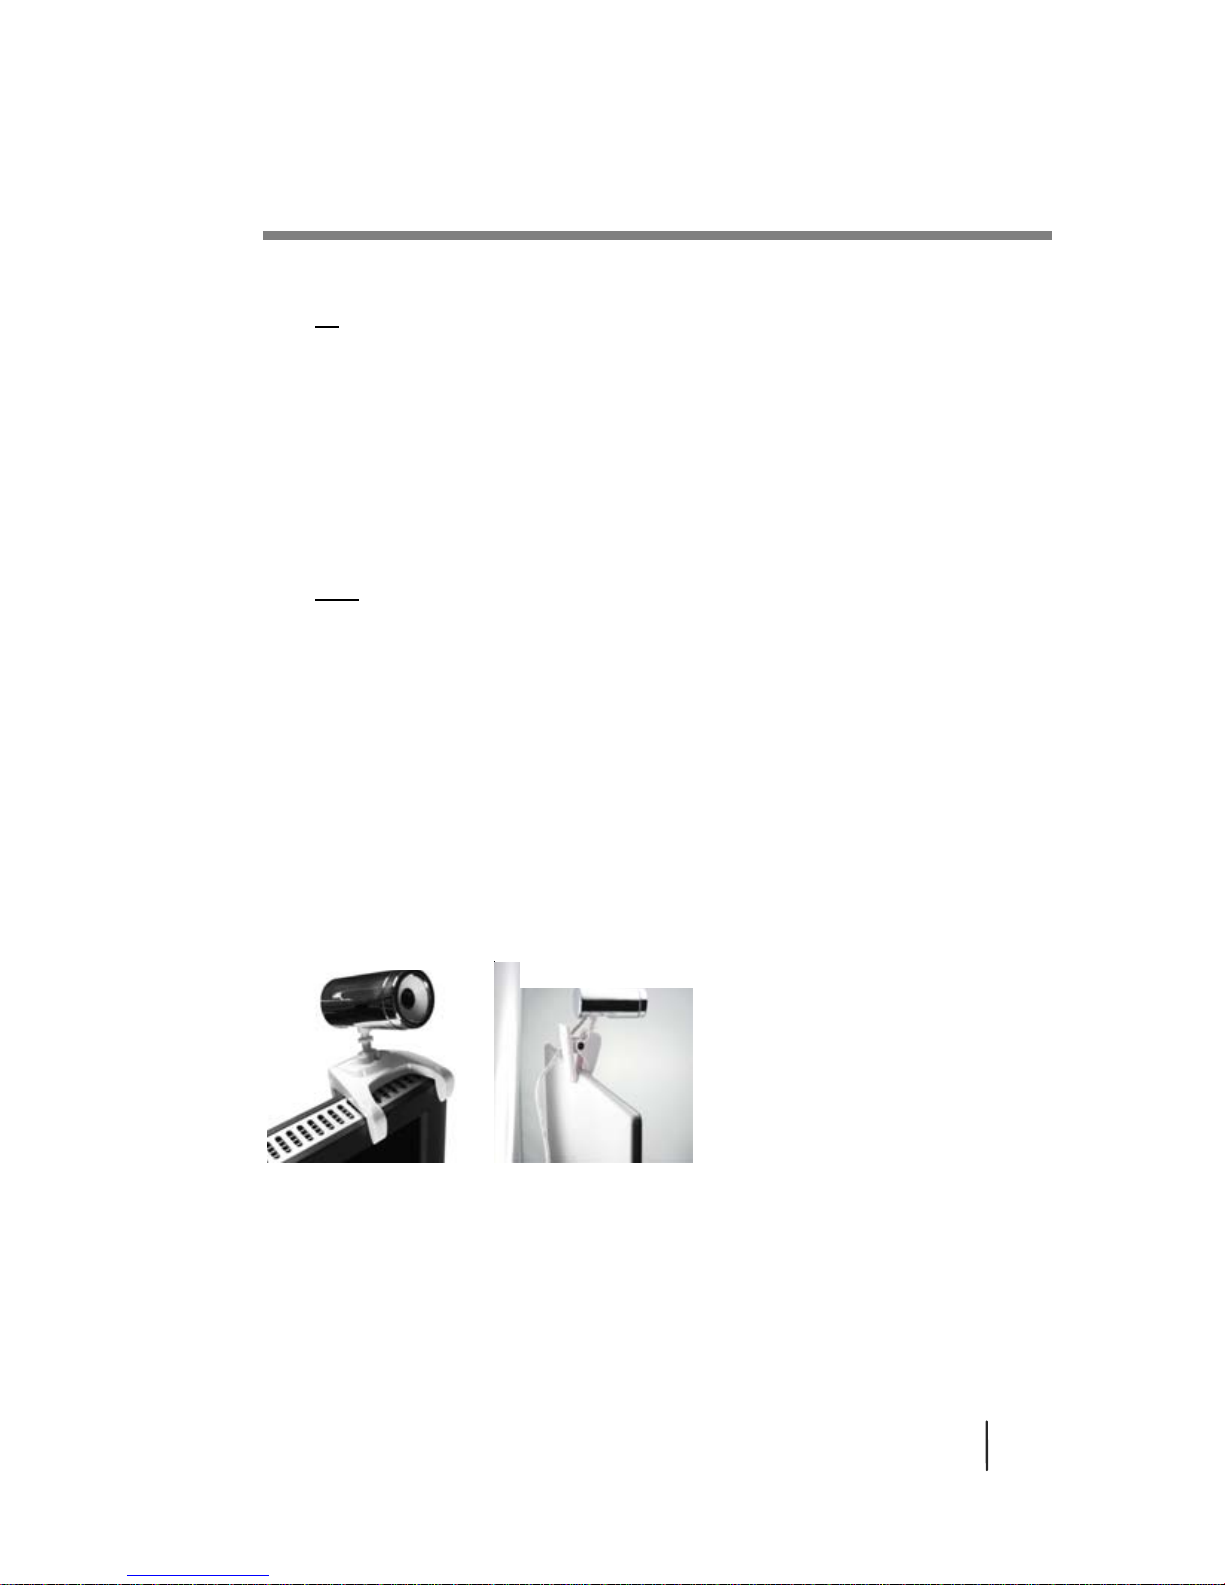
Physical set-up
Your package includes a number of different stands to suit your preference. Simply
screw the stand into the bottom of the webcam and position accordingly.
LCD/iMac Clip
Macbook/Notebook
Clip
Desktop Stand

Getting Started: PC 8
Installing the drivers
PC:instructions for installation of AMCAP driver
The AMCAP driver allows the user to utilize a great number of features, such as
facetracking, zoom, video recording, image capture, image manipulation, and more
i. Plug the Credential Cam webcam into a USB port (not through a USB hub) and
set position. (See page 7 for options.) The Webcam should install automatically
with notification appearing in the bottom right hand corner of your screen
notifying you that the device is ready to use.
ii. Insert CD. The installer should load automatically. If not, select the CD-drive
from the My Computer menu. Then open the PC Driver folder on the CD and
select the Credential Cam PC Driver.EXE file.
iii. Follow instructions on the Installation Wizard to install the AMCAP driver.

Getting Started: PC 9
iv. After installation is complete, click Finish and restart your computer.
v. Open AMCAP through the desktop shortcut or the Windows Start Bar – look for
AMCap under the VIMICRO USB 2.0 UVC Camera folder.
vi. If the Credential Cam is not automatically selected, do so in the Devices menu.
Select Venus USB 2.0 Camera. Be sure to also select Microphone (Venus USB
2.0 Camera).
If the picture does not appear, select Preview in the Options menu.
vii. To manually adjust the focus, turn the focus ring at the front of the webcam.
Getting started: Mac 10
MAC:instructions for installation of webcam monitor
driver
The Credential Cam is plug-and-play for all Mac users. No driver is required; however,
for added functionality you may install the included Webcam Monitor driver.
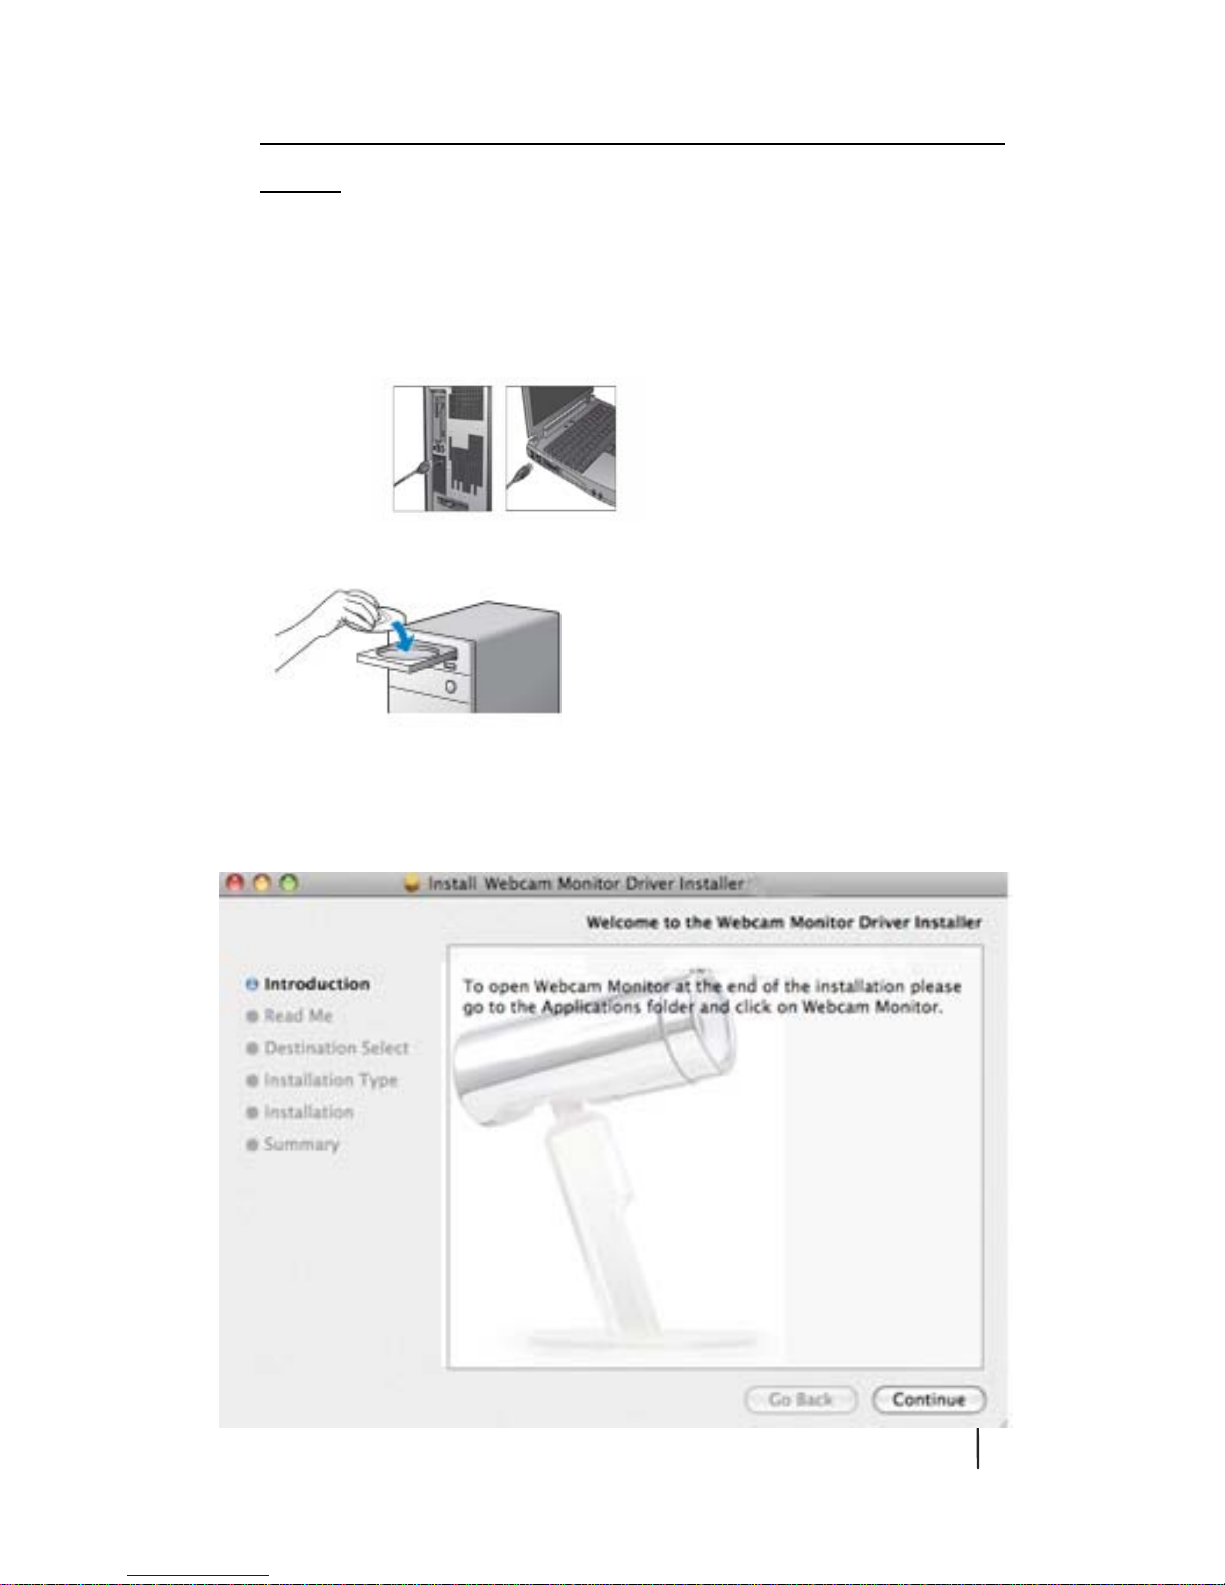
i. Plug the Credential Cam webcam into a USB port (not through a USB hub) and
set position.
ii. Place the Credential Cam CD into your CD drive.
iii. Open the CD folder and click on Credential Cam Driver Installer.mpkg.
iv. The installation screen will appear. Follow the onscreen instructions.
Getting started: Mac 11
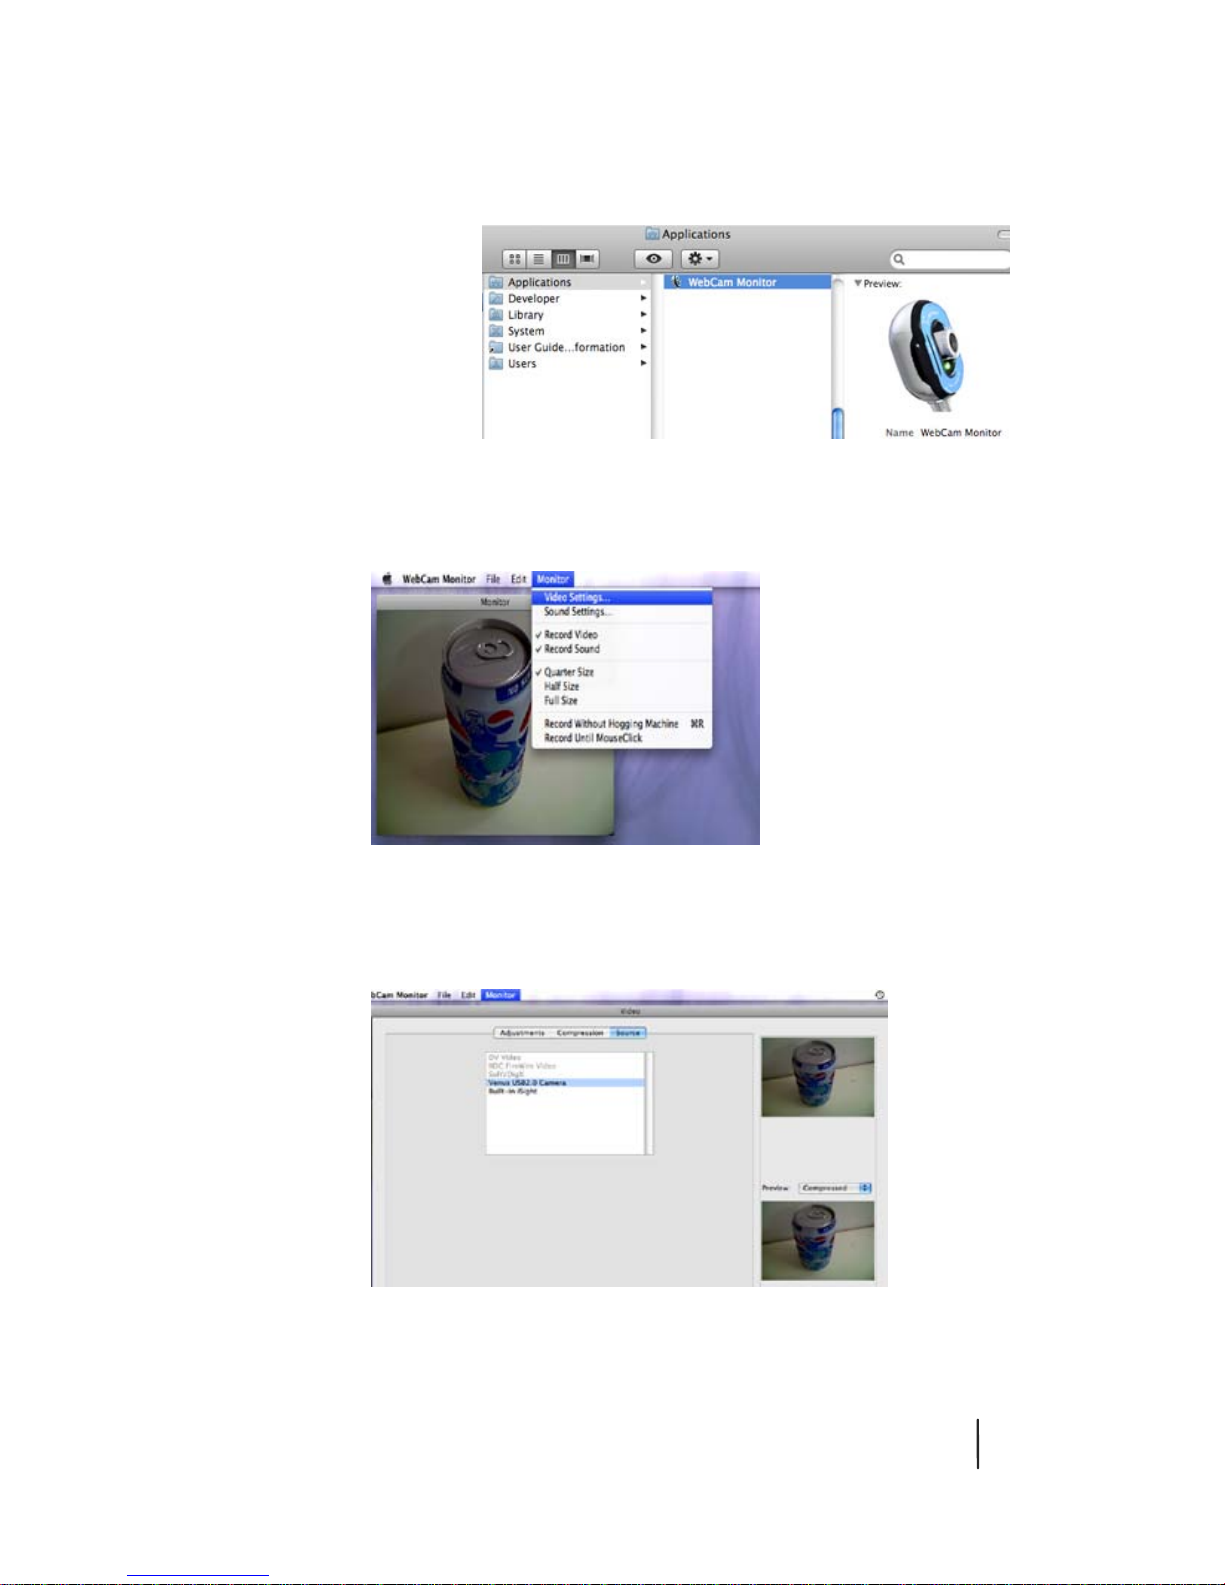
v. Open the application folder on your hard drive and click Webcam Monitor
(typically under Applications). This will open the webcam image.
vi. To alter the video and audio settings go to the Monitor menu. Here you will find
the video and sound settings as well as the image size controls and recording
options.
vii. To select the Credential Cam webcam click Video Settings > Source and select
Venus USB2.0 Camera.
Getting started: Mac 12
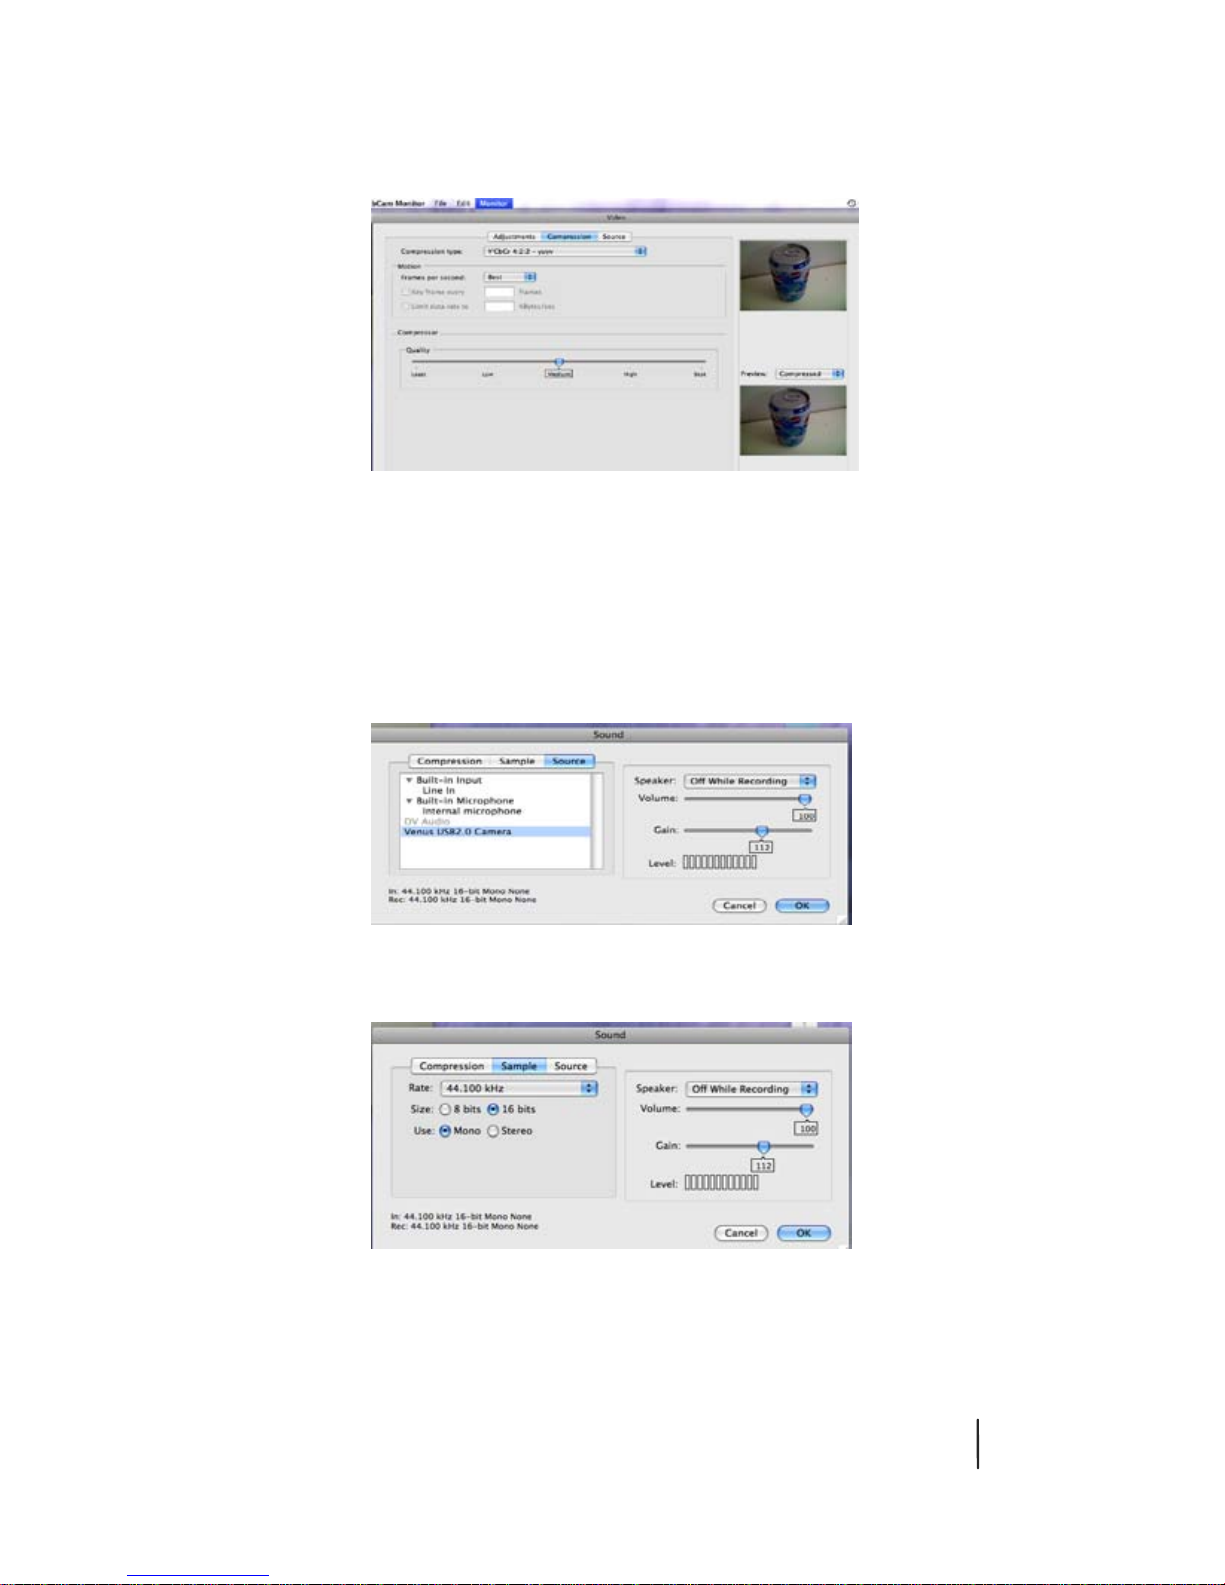
viii. To adjust image quality/speed of frames, select the Compression tab and adjust
accordingly. A higher image quality will reduce the video speed and vice versa.
ix. To setup the microphone, select Monitor > Sound Settings. Under the Source
tab, select Venus USB 2.0 Camera. When you tap or talk into the microphone,
the level bars should rise and fall.
From this menu, you can also adjust gain and volume, by shifting the bars across
to your desired level.
To switch between mono and stereo modes, select Sample and adjust accordingly.
To adjust compression settings, select the Compression tab and adjust accordingly.

Getting started: Mac 13
x. To manually adjust the focus, turn the focus ring at the front of the webcam.

Functionality:PC 14
Functionality
AmCap (PC)
AMCap can perform a range of functions. You may first want to get the basic settings
sorted.
Changing the settings
To adjust the video settings, such as contrast and brightness, click on Video Capture
Filter under the Options menu. Select the Video Proc Amp tab.
Click Apply once the desired changes have been made.
Special effects
While in the Preferences menu, you can also select a range of other functions, such as
face tracking, face effects, zoom, flip, and others
•Use the Feature tab to choose from a range of screen effects
•Use the Face Effects tab to choose from a range of novelty face effects
•Use the Camera Control tab to modify exposure levels
•Use the Face Tracking tab to utilize the zoom and face tracking features.
Capturing images and videos
To capture a still image, use the Get Image application that appears in the program
bar in the bottom right hand corner of your screen. Right click it and then select your
desired image size.

Functionality:PC 15
After the image appears on your screen, you can save by clicking File > Save. Please
note that in order for this to function correctly, you will have to select RGB Format in
the Color Space box in the Preferences menu. To do this, click on Video Capture Pin
under the Options menu and then change accordingly if it has not defaulted to this
option.
To record video, first select a file path for which you want the file to be saved under.
To do this, click on File > Set Capture File and save accordingly.
You can then select the desired output size by clicking on Options > Video Capture
Pin. Click on the Output Size Dropdown menu to select the appropriate size. Note that
the majority of special effects will not work on resolutions greater than 640 X 480 and
that increasing the output size and frame rate will increase the file size.
Get Image icon used to capture
still images.

Functionality:PC 16
To start recording, click on Start Capture under the Capture menu.
To stop recording (if a time limit has not been set or if you want to finish recording
early) click on Stop Capture, under the Capture menu.
To find the video file you just recorded, go the folder that you chose the video file to
be saved and the video file will be there in .avi format.
Functionality:Mac 17
Webcam Monitor (Mac)
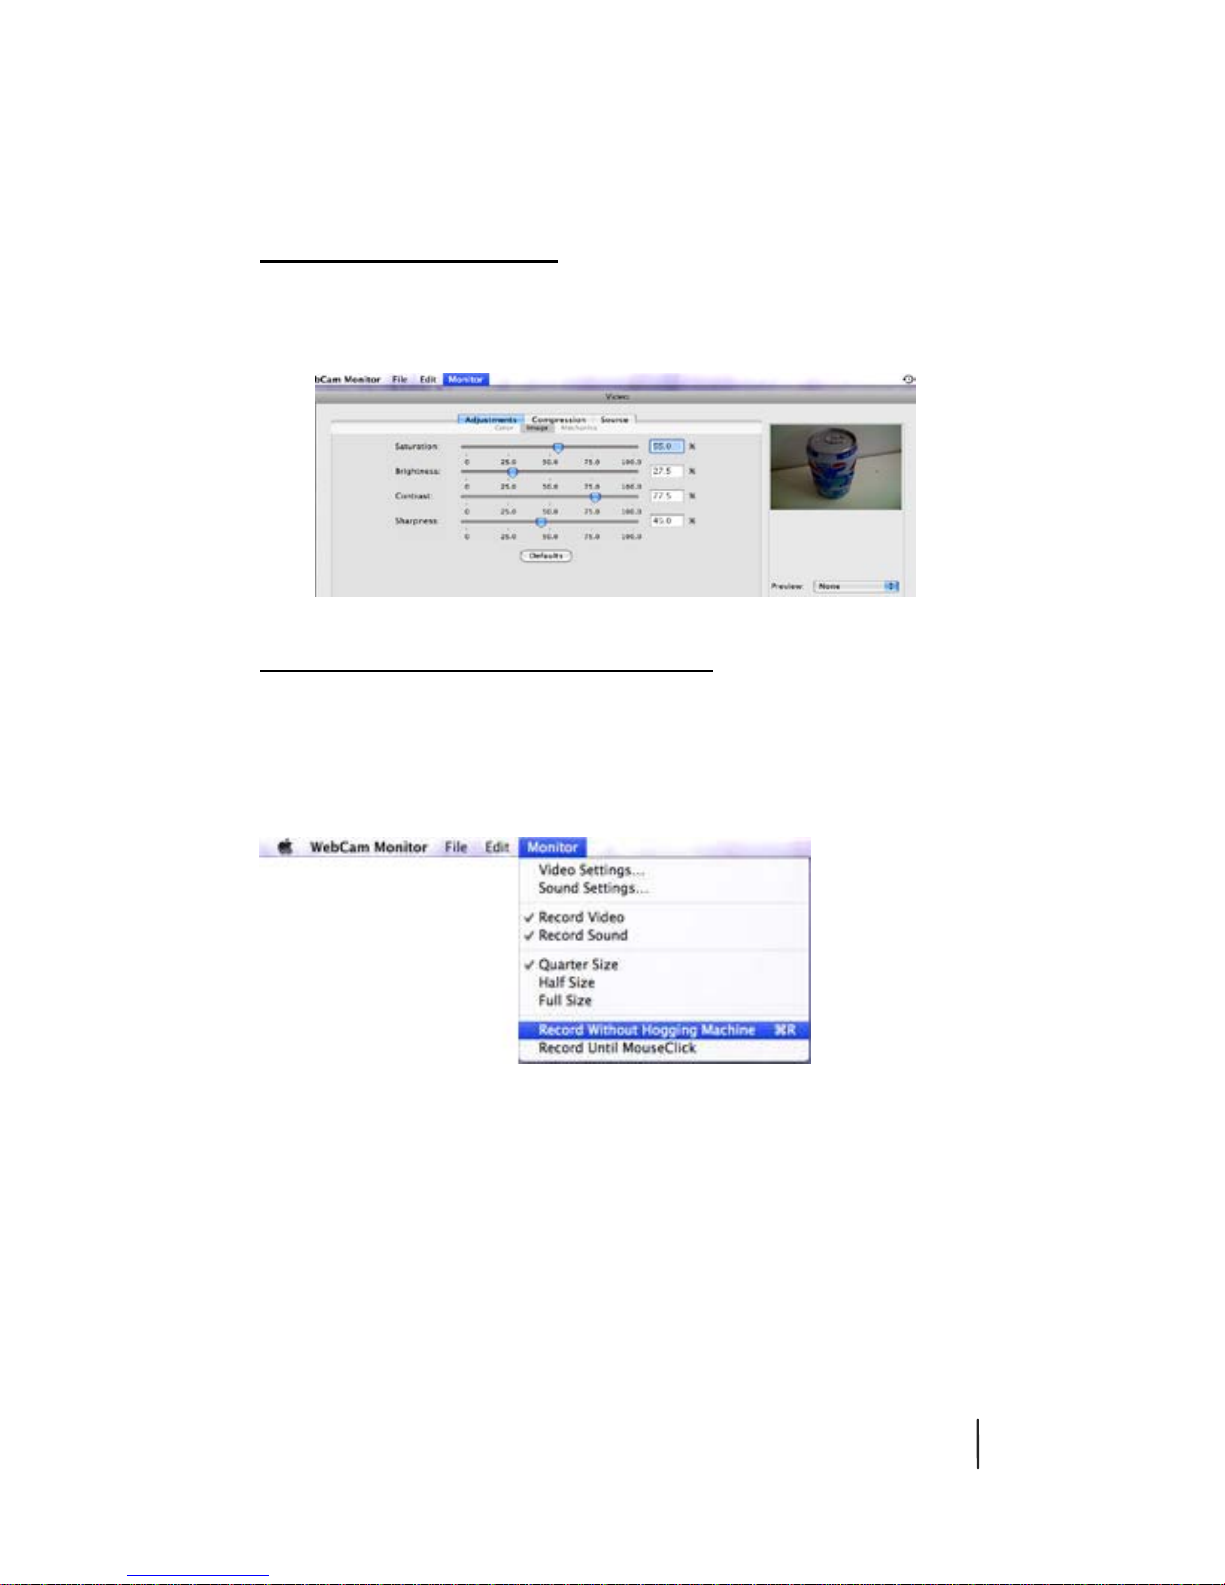
Changing the settings
To adjust settings, such as saturation, brightness, and contrast, select Monitor > Video
Settings > Adjustments.
Capturing still images and videos
The Camgrabber application is included in the software bundle. This can be used to
capture still images.
To record videos in webcam monitor, click Monitor > Record Without Hogging
Machine (or Record Until MouseClick).
You will now be prompted to select the file path and file name of the video you wish
to record.

Functionality:Mac 18
The video will now begin recording and can be stopped at the user’s prompt.
The video will now be saved at the selected location with an image.
Special effects
To utilize a range of special effects, we recommend you use the Camtwist application
that is included in the software bundle. Please note that this will not install
automatically. You will need to select the application in the installation process.
Once installed:
1. Open Camtwist.
2. Select Webcam.
3. Under the Tools Menu, select Preview.
4. Open Webcam Monitor Mac driver.
5. Select Monitor.
6. Select Video Settings.
7. Select Source.
8. Select Camtwist.

Chat programs: PC 19
Chat Programs
The Credential Cam is compatible with all major chat programs. Find instructions on
how to get started with some of these programs below.
PC:
MSN/Windows Live Messenger
1. Log in to the chat program, ensuring that any other programs using the webcam
are closed.
2. Select Audio and Video Setup
from the Tools menu.
3. From the Microphone menu,
select Microphone (Venus USB
2.0 Camera). You can test the
volume here. The green volume
bar should rise and fall when
you talk. Click Next to proceed
to the next step.

Chat programs: PC 20
4. Select Credential Cam from the
Webcam dropdown menu
(Venus USB 2.0 Webcam).
The picture should preview in the
square below it. Click Webcam Settings
to adjust the picture settings, such as
brightness and exposure. Otherwise,
click Finish.
5. To use the webcam, select
Actions > Video > Show my
Webcam.
Your Credential Cam webcam is now ready to be used with MSN/Windows Live
Messenger!
Table of contents


