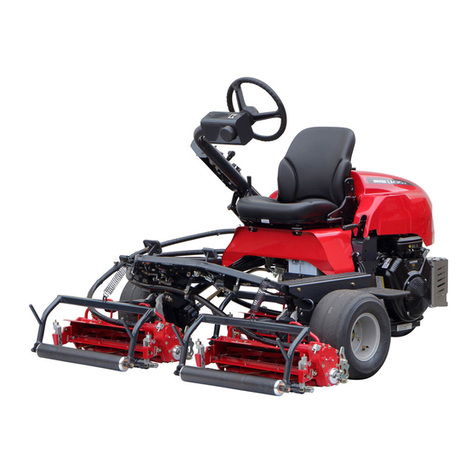
IHI Shibaura G-FLOW22 User manual

Introduction
Thankyouforpurchasingthismower.Readtheuser'smanualcarefullybeforeoperatingthismower.Thisuser's
manualincludeswarninginformationbased on certain regulationsregardingtheuseofthismower.Besureto
understandtheseregulationsbeforeoperatingthismower.
Warning Information
Therearethreetypesofwarningsusedinthismanual.
Warning:
Thisinformationcallstheuser'sattentiontotheriskofinjuryifoperationsarenotperformedasindicated.
Prohibited:
Thisinformationindicatesactionsandworkthatareprohibitednotonlyfortheworkerbutalsoforall other
people as well.
Required: Thisinformationindicatesactions that must be takenbytheworkerwhileperformingthework.
Thesethreetypesofwarningsaredescribedinmoredetailbelow.
When using this equipment
IMPORTANT
Be sure to perform the "Daily" inspections indicated in this manual, to prevent breakdown. Shibaura shall not be responsible for any breakdown that
occurs as a result of failure to perform these "Daily inspections".
Warning Information
Prohibited Required
Failure to observe the information indicated will result in serious injury or death.
DANGER
Failure to observe the information indicated could result in serious injury or death.
WARNING
Failure to observe the information indicated could result in damage to the mower.
IMPORTANT
・ Failure to observe the information indicated could result in injury.
・
Failure to observe the information indicated could result in criminal punishment or repair costs.
NOTE
NOTE
Do not dispose of waste oil in rivers or sewerages. Perform appropriate disposal methods, such as requesting the services of a specialized vendor.
WARNING
The G―EXE22/26 mower (hereinafter "equipment") described in this operator's manual (hereinafter "manual") is designed for mowing golf courses. Do
not use this equipment for any other purpose that exceeds its performance, such as mowing embankments or the steep slopes of mountainous areas.
Do not disassemble any part of this equipment other than for inspection, maintenance, or repair, and do not make modications without approval from
Shibaura.
When leasing this equipment, provide thorough guidance and training to the operator, and include this manual along with the equipment.
If you are operating a leasing business, request additional copies of this manual from the business or sales oce indicated under "For Additional
Manuals" on the back cover, in case the original manual becomes lost or damaged. You man not make photocopies of this manual. The content of this
manual is subject to revision.
Therefore, you should keep a spare copy of the manual you received at the time of purchase.
If ownership of this equipment is transferred to another party, be sure to include this manual along with the equipment.
If the warning labels axed to this equipment become damaged or soiled to the point they are no longer legible, request new labels from the business or
sales oce indicated on the back cover. Ax the new labels according to the instructions under "Locations of Labels" on page 2 of this manual, and
make sure they are always legible.
Be sure to make a note of the information under "For Additional Manuals", and store this manual in a location where it is safe from loss and can be
easily referenced.
Operationsandactionsthatmustnotbeperformedwhenusing
themowerareindicatedalongwiththe
“”Prohibitedsymbol.
Whenappearing togetherwith anillustration, adrawing ofthis
symbolmightbeused.
Operationsandactionsthatmustbeperformedwhenusingthe
mowerare indicatedalong withthe“○
!”Requiredsymbol.When
appearingtogetherwithanillustration,adrawingofthissymbol
mightbeused.
Whenappearingwithan
illustration:
Whenappearingasa
drawingofthesymbol:
Whenappearingwithan
illustration:
Whenappearingasa
drawingofthesymbol:

Contents
1.Labels and Warning Labels 3
■ Descriptions of the warning labels 3
2.Names of Parts 4
■ Names and Functions of Parts 5
3.Cautions before Operation 6
■ In Case of Injury 6
■ Be sure to stop the engine before performing inspection, maintenance, or repair. 6
■ Allow the engine to cool before performing inspection, maintenance, or repair. 6
■ Be sure to install the basket before operating the mower. 7
■ Do not operate the mower on inclines of 10 degrees or greater. 7
■ Do not allow children to operate the mower. 7
■ If the mower does not match your height, contact Shibaura. 7
■ Handle fuel with care. 8
■ Start the engine when outdoors only. 8
■ Stop the engine if there are abnormal vibrations. 9
■ Stop the engine before loading the mower onto a vehicle. 9
■ Perform a preliminary inspection of the area to be mowed. 9
■ Maintain correct posture when operating the mower and/or running the engine. 10
■ Wear appropriate clothing. 10
■ Regarding chills and vibration 11
■ Do not operate the mower while taking medication or under the inuence of alcohol. 11
4.Preparations before Operation 12
■ Installing the basket 12
■ Engaging the stand and removing/installing the tires 12
■ Adding fuel 14
■ Inspecting/replacing engine oil 15
■ Checking the operation of the brakes, main clutch, and blade clutch 17
5.Operation 19
■ Starting and stopping the engine 19
■ Operating the mower 21
■ Transporting the mower by truck 22
■ Operation prior to mowing 23
■ Grass clipping work 25
6.Adjustments 26
■ Adjusting cutting sharpness 26
■ Adjusting grass clipping height 28
■ Adjusting cutting sharpness with lapping (polishing the blades) 30
■ Adjusting various parts 32
7.Maintenance 37
■ Inspecting and replacing spark plugs 37
■ Maintenance of the main clutch 38
■ Cleaning the mower 38
■ Cleaning the air cleaner 38
■ Cleaning the strainer 39
■ Cleaning the fuel lter 39
■ Removing/installing the reel unit 40
■ Removing/installing the bedknife support 41
■ Removing/installing the blades 42
■ Removing/installing the engine 43
■ Long-term storage 44
■ Adding grease 45
8.Troubleshooting 46
9.Features/Specications/Models/Accessories/Options 47
■ Features 47
■ Eects of blade position on grass 48
■ Specications 49
■ Models 49
■ Accessories 49
■ Options 50
■ Consumable parts 50
■ About refueling, oil, and grease 50

1. Labels and Warning Labels
Name Q'ty Meaning
Label: Shibaura logo 1 Company name
Label: G-FLOW22 1 Model name
Label: Mower speed 1 Mower speed (L=low, N=neutral, H=high)
Label: Clutch 1 Clutch lever position (up=engaged,
down=disengaged)
Warning label: general 1 Refer to next page.
Warning label: belt 2 Refer to next page.
Label: instructions related
to the bae plate 1Bae plate position according to the grass
condition (DRY=dry grass, WET=wet grass)
Warning label: reel 1 Refer to next page.
Label: work attachment
clutch 1Direction of the work attachment rotation
(Forward, Stop, and Reverse)
Label: parking 1 Parking brake position
Label: clothing 1 Clothing for operating the mower

Labels and Warning Labels
Warning
●Before operating this mower, be sure to read this
operator's manual and understand its contents.
Warning
●Before performing any maintenance work, be sure
to understand the contents of the operator's
manual and stop the engine.
Danger
●Personnel other than operators should keep
enough distance from the mower. An accident may
occur due to scattering of hazardous materials.
■ Descriptions of the warning labels
Danger
●Be sure to mount all the covers. There is a risk of
getting hands or legs caught in the mower.
Danger
●Be sure to stop the engine before performing any
maintenance work. Failure to do so, there is a risk
of accident due to scattering of hazardous
materials or getting hands or legs caught in the
mower.
Danger
●Be sure to mount all the
covers. There is a risk of
getting hands or legs caught
in the mower.
●The warning labels are axed near the dangerous areas. Before operating this mower, be sure to ob-
tain a thorough understanding of their meanings.

2. Names of Parts
●In this manual, the front, back, top, bottom, left, and right sides of the mower are referred to as repre-
sented by the arrows shown in the top left corner of the gure below.
●Explanations in this manual are based upon the grooming specications shown in the gure below.
Names shown in parentheses indicate parts that are not shown in gures.

Name Function
Handle
Grip
Brake lever
Stand grip
Stand
Front cover
Blade clutch lever
Rear roller
Bedknife adjustment handles
(left), (right)
Tires
Blade alignment clamp
Blade axis
Work attachment height adjustment
knobs (left), (right)
Front roller height adjustment knobs
(left), (right)
Front roller
Work attachment
Blades
Work attachment clutch knob
Engine switch
Fuel gauge
Fuel tank
Main clutch lever
●Hold the grips to maintain the position and change the direction of the
mower during operation.
●Hold the grips when operating the mower.
●This lever is used to engage the brakes and stop the progress of the mower.
●These grips are used when engaging/releasing the stand.
●This stand is used to support the front roller and the mower when remov-
ing/installing the tires.
●The front cover prevents the operator from becoming caught in and injured
by the clutch and transmission, which transmit the power from the engine.
Do not remove the cover while operating the mower.
●This lever is used to "Start" and "Stop" the blades.
●This roller is used to move the mower after removing the tires.
●These handles are used to adjust the gap between the blades. One handle
is on the left side and one is on the right side.
●These tires are used when transporting the mower to a workplace.
●This clamp is used to manually rotate the blades.
●This bolt is used during lapping work.
●These knobs are used to adjust the height of the work attachment from the
ground. One knob is on the left side and one is on the right side.
●These knobs are used to raise/lower the front roller to adjust blade height.
●This roller is used to maintain the blades at a given height above the
ground to cut the grass at the determined height.
●This roller is used to remove dead grass, and align grass grain and feed it
to the blades.
There are two types of rollers : a grooming cutter and brush reel.
●These blades are used to cut grass.
●This knob is used to switch between "Forward", "Stop", and "Reverse" for
the work attachment.
●This switch is used to start and stop the engine. To start the engine, move
the switch to "ON". To stop the engine, move the switch to "OFF".
●This gauge is used to indicate the amount of fuel remaining in the fuel tank.
●This tank holds the fuel.
●This lever is used to transmit power from the engine to the various parts,
and switch between "Start" and "Stop".
The blades and work attachment will rotate only when this lever is in the
"Start" position.
Throttle lever
Basket
One-touch lever
Basket stay
Fuel cock
Recoil starter
Strainer
Air cleaner
Muer
Choke lever
Oil gauge
Blade height gauge
●This lever is used to adjust the speed of the engine.
●The basket is used to collect grass cuttings, and to prevent the operator
from coming into contact with the blades and/or the mower.
●The one-touch lever is used to install or remove the reel unit.
●The basket stay supports the basket. Also, it is used to install or remove
the reel unit.
●This knob is used to supply fuel.
●The starter is used to start the engine when the handle is pulled.
●The strainer removes air and contaminants from the fuel.
●The air cleaner prevents dust and contaminants from entering the air
sucked into the engine.
●The muer is used to reduce the noise of the engine.
●The choke lever is used to increase the fuel mix when starting a cold en-
gine.
●The oil gauge is used to check the remaining volume and contamination
level of engine oil.
●The blade height gauge is used to x the front roller and work attachment
at a specied height, by using screws in two locations to set blade height
and bring the front and rear rollers into contact.
Names of Parts
■ Names and Functions of Parts

6
Warning
●When performing inspection, maintenance, or re-
pair, be sure to turn o the engine and make sure
rotation of the blades has stopped.
●Do not perform inspection, maintenance, or repair
while the mower is operating. If an object becomes
trapped in the blades while the engine is running
and causes the blades to stop, removal of that ob-
ject could cause the blades to begin moving again
instantly, resulting in a serious accident.
3. Cautions before Operation
■ In Case of Injury
●Keep a list of phone numbers for medical facilities, re
departments, and ambulance services in an easily vis-
ible location near a telephone.
●A list of landmarks (addresses, buildings, etc.) near
locations where you often work can be helpful for
providing precise information in an emergency when
contacting a re department.
●When working alone, make a habit of noting information
about the workplace on a blackboard, etc. so that the
workplace can be clearly recognized by anyone. Such a
sign can be useful in case an accident occurs and you
are unable to return.
●Keep a rst aid kit and extra cloths and towels at the
workplace. Cloths and towels are useful to stop bleed-
ing in an emergency.
●Local fire departments are trained in emergency
response procedures, and work to promote related tech-
niques and knowledge. Do not miss any opportunity to
receive such training, in order to learn the techniques
and knowledge for responding to emergencies.
■ Be sure to stop the engine before performing inspection, mainte-
nance, or repair.
●Do not perform inspection, maintenance, or repair while
the mower is operating.
●Prepare the necessary tools and equipment to perform
this work after the engine has completely cooled.
■ Allow the engine to cool before performing inspection, mainte-
nance, or repair.
Firedepartment
Hospital
Destination
Firstaidkit
Warning
Do not touch extremely hot areas such as the
engine or muer immediately after the engine
is stopped.
Doing so could result in serious burns.

Cautions before Operation
7
Warning
●Be sure to keep the basket installed whenever
the engine is running.
The basket is used to prevent the operator
from coming into contact with the blades and/
or the mower.
Warning
●Do not use the mower to perform mowing work
in areas where the ground has an incline of 10
degrees or greater. Doing so could result in ac-
cidents such as falling and slipping.
Warning
●Do not allow children to operate the mower.
●Do not allow operators with no capability to op-
erate the mower even after training.
■ Be sure to install the basket before operating the mower.
■ Do not operate the mower on inclines of 10 degrees or greater.
●In addition to collecting grass clippings, the basket is also similar to the bumpers on a car.
●Be sure to keep the basket installed whenever the engine is running, to prevent accidents.
■ Do not allow children to operate the mower.
■ If the mower does not match your height, contact Shibaura Dealer.
●The height of the handle can be adjusted to match your height, so that the mower is easy to operate.
(See “Adjusting handle height” on page 34.) However, if you nd the mower dicult to operate even
after making such adjustments, contact a Shibaura business or sales oce for assistance.

Cautions before Operation
8
■ Handle fuel with care.
■ Start the engine when outdoors only.
●The fuel used for the mower is highly volatile, and might
cause re or burns if ignited. Be sure to observe the
information listed above when handling fuel.
●The exhaust gas from the engine includes toxic sub-
stances such as carbon monoxide.
●Pay careful attention to ventilation when starting the
engine. Do not start the engine in enclosed indoor
areas, or areas with poor ventilation.
Danger
●
Be sure to stop the engine before adding fuel.
●Do not smoke or use open flames while han-
dling fuel.
Doing so could cause ignition or explosion, re-
sulting in death.
●Fuel should be added and/or stored in a facility
that conforms with the ordinances of the Fire
Service Act.
●Do not store fuel in small quantities such as in
plastic containers, or add fuel to the mower
from such containers.
Doing so could result in ignition or re due to
static electricity.
●Be sure to wipe away any fuel that is spilled.
●Keep fuel storage areas separate from work-
places. Do not perform work that could cause
ignition near fuel, such as starting an engine.
●Keep an oil re extinguisher in areas where fuel
is stored.
Danger
●Start the engine when outdoors, where there
is good ventilation.
●The exhaust gas from the engine is toxic to hu-
mans, and might cause death.

Cautions before Operation
9
■ Stop the engine before loading the mower onto a vehicle.
■ Perform a preliminary inspection of the area to be mowed.
■ Stop the engine if there are abnormal vibrations.
●When loading the mower onto a truck for transport,
be sure to engage the brake and perform loading/
unloading together with at least one other person. See
“Transporting the mower by vehicle” on page 22.”)
Warning
●When loading the mower onto a truck for trans-
port, do not drive the mower by running the en-
gine.
Otherwise, mistaken operation could cause a
serious accident.
Warning
●Before performing work, inspect the workplace
and remove any objects that could become
caught in the blades, such as small rocks and
hard debris.
If objects become caught in the blades, they
could be scattered throughout the nearby area
and cause injury to workers and/or supervi-
sors.
●Before performing work, inspect the workplace
for areas with steep inclines. The mower can-
not be used on inclines of 10 degrees or great-
er.
Warning
●If vibrations of unknown origin occur while per-
forming work, immediately turn the engine
switch to “OFF”.
Failure to do so could damage the engine or
blades, or cause personal injury due to the
scattering of hazardous material, hot oil, or
gas.

Cautions before Operation
10
■ Maintain correct posture when operating the mower and/or run-
ning the engine.
■ Wear appropriate clothing.
Warning
●Maintain correct posture when operating the
mower and/or running the engine. Falling and/
or slipping can cause injuries or accidents.
Warning
●Wear clothing that ts your body.
Drooping or hanging clothing could become
caught in the rotating parts of the mower or
snag on other parts, causing an impediment to
work or serious injury.
●Wear gloves and boots.
Gloves and boots prevent insects and grass
clippings from coming into direct contact with
your skin, protecting you from insect stings
and bites.
●Wear a safety helmet.
A safety helmet protects your head from im-
pediments such as low―hanging branches at
the workplace.
Loose
clothing Barefeet
Safetyhelmet
Workclothes(long
sleeves)
Worktrousers
Gloves
Safety
shoes
●When performing mowing work, be sure to install the
basket before running the engine, and maintain correct
basic posture.
〈Basic posture〉
●Always face in the direction in which the mower is
moving, carefully hold the grips on the handle, and walk
while keeping your feet shoulder―width apart.
●While walking and looking in the direction the mower is
moving, avoid placing your feet in front of the other in a
straight line.
●When operating the mower, wear gloves and clothing
with sleeves and other openings that close snugly.
Make sure your clothing ts well and does not droop or
hang.
●Wear non―slip boots or laced shoes, and make sure
there is no opening between the bottom of your trousers
and top of your shoes.
●Wear a safety helmet to protect your head from low―
hanging branches and other obstructions.

Cautions before Operation
11
■ Do not operate the mower while taking medication or under the in-
uence of alcohol.
■ Regarding chills and vibration
Warning
●Do not operate the mower while taking medica-
tion.
Even commonly used medication can affect
judgment and alertness. Be especially careful
when using cold medicine or pain relievers.
●Do not operate the mower when drinking or un-
der the inuence of alcohol.
Alcohol affects judgment and alertness, and
leads to accidents that cause serious injury.
Warning
●Take appropriate breaks when performing mow-
ing work during cold seasons. During long
hours of work, symptoms such as pain in fin-
gertips, hands, and arms due to vibration and
chill could appear.
●If you experience pain while operating the mow-
er, immediately stop working and consult a phy-
sician.
These symptoms could be signs of Raynaud’s
syndrome.
Firstaidkit
●If you experience pain in your ngertips, hands, or arms while operating the mower in low tempera-
tures, immediately stop working and consult a physician. The symptoms of Raynaud’s syndrome,
including chronic pain in ngertips, hands, and arms, are said to appear during long exposure to low
temperatures.
It is unknown whether this syndrome is caused by temperature or time of exposure. Therefore, when
performing mowing work in cold areas or during cold seasons, be sure to take sucient breaks in
order to restore body temperature to your ngertips and hands.

12
4. Preparations before Operation
■ Installing the basket
■ Engaging the stand and removing/
installing the tires
〈Installing the basket〉
1. Insert the projecting parts of the mower's right and left
basket stays between the round bar and plate on the
right and left basket clamps, and press down the bas-
ket until it stops.
2. Make sure the basket is installed rmly, is not angled,
and is not in contact with the blades.
〈Engaging/releasing the stand〉
Engaging the stand
1.
Grab the horizontal section of the handle with your left
hand, hold the stand grip with your right hand, and
then place your right foot on the stand and press it to
the ground.
Do not remove your right foot from the stand.
2.
While pressing the stand to the ground with your right
foot, pull the stand grip up and toward you.
● The stand becomes engaged, the mower is supported by
the front roller and the stand, and the tires are lifted from
the ground.
● In this position, you can now remove/install the tires.
Releasing the stand
1. Firmly grab the stand grip with your right hand, and
press the stand down with your right foot.
2.
Hold the horizontal section of the handle with your left hand, and carefully push the mower forward
with both hands while being careful to keep your right foot pressing down on the stand.
●The stand is released, and the tires (rear rollers) come down to the ground.
3.
Make sure the tires (or the rear rollers if the tires have been removed) are on the ground before care-
fully removing your right foot from the stand and allowing it to return to its original position. (This is
easy to perform by hooking your shoe on the return pin on the right side of the stand.)
Warning
●Be sure to install the basket before performing
mowing work or operating the mower.
Warning
●Be sure to engage/release the stand in a level
area where the mower will not move on its
own, before removing/installing the tires.

13
Preparations before Operation
〈Removing/installing the tires〉
●Follow the “Engaging the stand” procedure on the previ-
ous page to make sure the stand is in a stable position
before removing/installing the tires.
Removing the tires
1. Engage the stand, and then insert a rock or stick in
front of the front roller as a stopper so that the stand
will not disengage even if the mower is bumped by a
worker.
2. While supporting a tire with one hand, use the thumb
on your other hand to press down on the quick―release
lever on the inside of the wheel, until it stops.
3.
Pull the tire perpendicularly o of the tire axle.
4. Use the same method to install the other tire, and then
remove the rock or stick inserted to the front of the
front roller and follow the "Releasing the stand" proce-
dure to carefully release the stand.
●An impact to the rear roller will bend the tire axle, break the
rear roller, and interfere with grass clippings.
Installing the tires
1.
Follow the “Engaging the stand” procedure on the previ-
ous page to engage the stand, and then insert a rock
or stick in front of the front roller as a stopper so that
the stand will not disengage even if the mower is
bumped by a worker.
2. While supporting a tire with one hand, use the thumb
on your other hand to press down on the quick―release
lever on the inside of the wheel, until it stops.
3. While continuing to press down on the quick―release
lever, insert the tire perpendicularly so that it matches
the shape of the spline on the tire axis. When you see
the tire axis coming through the wheel, release the
quick―release lever, and continue pushing the wheel
until you hear the sound of the quick―release lever
snapping into the tire axle groove.
4. Use the same method to install the other tire, and then
remove the rock or stick inserted to the front of the
front roller and follow the "Releasing the stand" proce-
dure to carefully release the stand.
Removal/
installation
board

14
Preparations before Operation
■ Adding fuel
Important
●Use regular gasoline (unleaded) in the mower.
●Be sure that the fuel lter is installed correctly
before adding fuel.
●Add fuel when the needle of the fuel gauge on the top
of the fuel tank is at “E”.
1. Turn the fuel cap counterclockwise to loosen and re-
move it.
●There is a fuel lter inside the ll opening.
2. Inspect the fuel lter for contaminants. If necessary, re-
move it from the ll opening and wash it with fuel.
●Be careful not to damage fuel lter when removing/installing
it.
●If there is damage to the fuel lter such as holes, contact a
Shibaura dealer to request a replacement lter.
3. Conrm that the fuel lter is installed in the ll opening,
and then carefully pour fuel into the ll opening up to
the fuel lter.
●Avoid adding too much fuel. Otherwise, the fuel will spill out
when the fuel cap is replaced.
●Do not remove the fuel lter when adding fuel.
Fuelcap
Gaugeneedle
(Empty)
(Full)
Fuelfilter
Fueltank
Danger
●Be sure to stop the engine before adding fuel.
Do not smoke or use open ames while adding
fuel.
Otherwise, the fuel will ignite and explode, re-
sulting in death.
●Do not add fuel immediately after stopping the
engine while the engine is still very hot.
●Fuel should be added and/or stored in a facility
that conforms with the ordinances of the Fire
Service Act.
●Be sure to wipe away any fuel that is spilled
while adding fuel.
●Do not store fuel in small quantities such as in
plastic containers, or add fuel to the mower
from such containers.
Doing so could result in ignition or re due to
static electricity.
●Do not start the engine in areas where fuel is
stored.

15
Preparations before Operation
■ Inspecting/replacing engine oil
Important
●Use API : SE, SAE : 10W―30, or a similar type
of engine oil in this mower.
●Inspect the engine oil every day before starting
work.
〈Inspecting engine oil〉
●The engine oil inspection opening is on the front of the
engine.
1. Place the mower in a level area, and place a strong
board (wood, block, etc.) under the front roller so that
the inspection openings on the front and back are level.
●Use a strong board and make sure the front roller does not
slide o of it during the inspection.
2. Turn the oil gauge counterclockwise to remove it.
3.
Use a clean white cloth to wipe the graduations on the
oil gauge, and then inspect the oil on the cloth for con-
taminants.
●If the oil is black or contains contaminants, replace the oil
even if the replacement date has not yet been reached.
4. Insert the oil gauge once again into the inspection
opening (do not screw it in), and then remove it and in-
spect the oil on the graduations to check the volume of
oil.
●Always maintain the oil volume so that oil marks the top
graduation position on the oil gauge. If the oil volume is
below that position, add oil until it once again reaches the
top position.
5. Insert the oil gauge into the inspection opening, and
turn it clockwise to tighten it securely.
6. Use a dry cloth to completely wipe away any oil that
was spilled on the mower during this procedure.
Upperline
Lowerline
Oilgauge
Oilgauge
Danger
●Be sure to stop the engine before inspecting/
replacing oil. Keep tobacco, sparks, and open
ames away during the inspection/replacement
of oil.
●Be sure to wipe away any engine oil that is
spilled during inspection/replacement.
●Do not touch extremely hot areas such as the
engine or muer immediately after the engine
is stopped.

16
Preparations before Operation
〈Replacing engine oil〉
●Drain engine oil from the drain bolt installation opening on the back of the engine.
●Replace the engine oil for the rst time after the rst 20 hours of use from the date the mower was
purchased, and then at approximately every 100 hours
of use thereafter.
1.
Place the mower in a level area, hold the handle, place
the stand on the ground, and lower it carefully back-
wards into a stable position.
●Place a weight on the handle to prevent the mower from fall-
ing forward.
2.
Place an oil drain pan behind the engine.
●The engine can hold 0.6 liters of engine oil. Prepare an oil
drain pan of sucient size.
3.
Use a box wrench to turn the drain bolt on the back of
the engine counterclockwise to loosen and remove it.
●As the drain bolt loosens, oil will begin to drain out of the
engine. Slowly remove the drain bolt while adjusting the
position of the oil drain pan as necessary.
●The oil will ow out more quickly and smoothly if you loosen
the oil gauge in the engine oil inspection opening on the
front of the engine.
4.
After the oil is completely drained, return the drain bolt
to its original position, and turn it clockwise to tighten
it securely.
5. Holding the handle, return the mower to its original po-
sition. Use a cloth to wipe away any oil on the mower.
6. Place the mower in a level area, and place a strong
board (wood, block, etc.) under the reel unit so that the
inspection openings on the front and back are level.
●Use a strong board and make sure the reel unit does not
slide o of it during the inspection.
7. <1}<}60{>Turn the oil gauges on the front and back of
the engine counterclockwise to remove them, and then
add oil until it reaches the top position on the oil gaug-
es.
●Pour oil in through the oil gauge installation opening.
8. Insert the oil gauge into the inspection opening, and
turn it clockwise to tighten it securely.
9. Use a dry cloth to completely wipe away any oil that
was spilled on the mower during this procedure.
Upperline
Lowerline
Oilgauge

17
Preparations before Operation
■ Checking the operation of the brakes, main clutch, and blade clutch
〈Checking the operation of the brakes〉
1. When griping the brake lever, if you do not feel any
braking power, or if the brakes do not operate at all, it
is possible that the brake wire has snapped or rusted.
Contact a Shibaura sales office to request inspection
and replacement of the brake wire.
2. Holding the grips on the handle with both hands,
squeeze and hold the brake lever (locked) while trying
to move the mower forward and backward, and conrm
that the mower does not move.
●If the mower does move, the brake wire has stretched and
requires adjustment. See “Adjusting the brakes” on page
32.”)
〈Checking the operation of the main clutch〉
1. With the engine stopped, grip the main clutch lever and
pull it into the “Run” position (toward you).
●When the midpoint of the range in which the main clutch
lever moves has been passed, the lever will naturally fall
toward the operator.
●When the main clutch lever is in the “Run” position, if you
do not feel any resistance, or if the clutch does not operate
at all, it is possible that the clutch wire has snapped or
rusted. Contact a Shibaura business or sales office to
request inspection and replacement of the clutch wire.
2.
Place the shift knob in the “H” or “L” position.
3. Move the main clutch lever completely in to the “Run”
position, hold the handle with both hands, and try
pushing and pulling the mower forward and backward
to conrm that the mower will not move.
●If the mower does move, the main clutch wire has stretched
and requires adjustment. See “Adjusting the main clutch”
on page 33.)
Warning
●Before operating this mower, inspect the opera-
tion of the brakes, main clutch, and blade
clutch.
●Do not operate the mower if any of these in-
spections produce abnormal results.

18
Preparations before Operation
〈Checking the operation of the blade clutch〉
1. W i t h the engine stopped, grip the blade clutch lever and
pull it into the “Run” position (toward you).
●When the midpoint of the range in which the blade
clutch lever moves has been passed, the lever will
naturally fall toward the operator.
●When the blade clutch lever is in the “Run” position,
if you do not feel any resistance, or if the clutch does
not operate at all, it is possible that the clutch wire has
snapped or rusted. Contact a Shibaura business or
sales office to request inspection and replacement of
the clutch wire.
2.
Place the shift knob in the “H” or “L” position.
3. Move the blade clutch lever completely in to the “Run”
position, hold the handle with both hands, and try pull-
ing the mower backward to conrm that the blades turn
in reverse.
●If the blades do not turn, the blade clutch wire has
stretched and requires adjustment. See “Adjusting the
blade clutch” on page 34.)

19
〈Starting the engine〉
1. Follow the procedures on page 17 to check the opera-
tion of the brakes and main clutch.
2.
Follow the “Installing the basket” procedure on page 12
to install the basket.
3. Place the shift knob in the “N” position.
4. Make sure the main clutch and blade clutch are not en-
gaged (in the “Stop” position).
5.
Place the engine manual switch in the “ON” position.
6. Move the fuel cock to the “ON” position to open the
cock.
7. Move the choke lever to the “|●
/
|”position to close the
choke.
●After starting the engine once, it is not necessary to close
the choke to start it again.
Close
Open
Open
Closed
Danger
●Be sure to start the engine outdoors.
●Before starting the engine, place the shift knob
in the “N” p o s i t i o n .
●Before starting the engine, make sure the main
clutch and blade clutch are not engaged.
●Make sure you are at least 5m away from the
fuel storage area before starting the engine.
●Be sure to install the basket before starting
the engine.
●Before starting the engine, make sure there
are no people within 5m in front of the mower,
or 3m behind and to either side of the mower.
●Before starting the engine, make sure you un-
derstand how to stop the engine.
■ Starting and stopping the engine
5. Operation
Table of contents
