ili OneTouch 21B User manual

ili Ltd "integrated lifestyle innovations"
Table of Contents
OneTouch 21B Powering On and Off
Getting Started
................................
SKYPE ................................
................................
To add music using separate computer
To play music on the OneTouch
T on the OneTouch 21B
................................
Live tv ................................
................................
Recorded tv
................................
T guide ................................
................................
To record a future program
................................
To record a current program
................................
You tube................................
................................
T NZ on demand
................................
To add photos from camera memory stick
To add photos from camera using USB cable
To add photos using separate computer
To rotate the photos after import
To touch up the photos after import
To delete
unwanted photos after import
To view photos on the OneTouch
Internet ................................
................................
To add favourite web sites
................................
To add Google news web site as a favourite
To use favourites that have been previously added
The Back icon
................................
The Forward icon
................................
The Home Page icon
................................
The Refresh screen icon
................................
The navigation icons
................................
Using Google
................................
www.ili.co.nz
ili Ltd "integrated lifestyle innovations"
+64 9 974 4109
Page 1 of 21
OneTouch 21B Powering On and Off
................................................................
................................
................................
................................................................
................................
................................
................................
................................
To add music using separate computer
................................................................
................................
To play music on the OneTouch
................................................................
................................
................................
................................
................................
................................
................................
................................
................................
................................
................................
................................
................................
................................
................................
................................................................
................................
To add photos from camera memory stick
................................
................................
To add photos from camera using USB cable
................................
................................
To add photos using separate computer
................................
................................
To rotate the photos after import
................................................................
................................
To touch up the photos after import
................................................................
................................
unwanted photos after import
................................
................................
To view photos on the OneTouch
................................................................
................................
................................
................................
................................
................................
................................
................................
To add Google news web site as a favourite
................................
................................
To use favourites that have been previously added
................................
................................
................................
................................................................
................................
................................
................................................................
..............................
................................
................................
................................
................................
................................
................................
................................
................................
................................
................................
................................................................
................................
................................
..... 3
................................
....... 4
................................
......................
................................
. 6
................................
............. 7
................................
........................ 8
................................
.................. 8
................................
......... 8
................................
.................. 8
................................
................... 9
................................
.................. 9
................................
.................. 9
................................
.. 10
................................
......................... 10
................................
...................... 11
................................
............................. 11
................................
....... 12
................................
... 12
................................
........................... 12
................................
........ 12
................................
................. 13
................................
............... 13
................................
................... 14
................................
....... 14
................................
.... 14
..............................
14
................................
......................... 14
................................
................... 14
................................
......................... 14
................................
..... 1

ili Ltd "integrated lifestyle innovations"
Using Google calendar
................................
To set up Google calendar:
To use Google calendar
................................
Recipes ................................
................................
Big Oven ................................
................................
Food in a minute
................................
Jamie Oliver.com
................................
Big Oven Instructions
................................
To add new recipes from BigOven to the OneTouch
To use the meal calendar
................................
To use the shopping list
................................
Maps ................................
................................
News ................................
................................
Watching D D’s
................................
www.ili.co.nz
ili Ltd "integrated lifestyle innovations"
+64 9 974 4109
Page 2 of 21
................................
................................
................................
To set up Google calendar:
................................................................
................................
................................
................................
................................
................................
................................
................................
................................
................................
................................
................................
................................................................
...............................
................................
................................................................
..............................
................................
................................
................................
To add new recipes from BigOven to the OneTouch
................................
................................
................................
................................
................................
................................
................................
................................
................................
................................
................................
................................
................................
................................
................................
................................................................
................................
................................
..................... 1
................................
.......... 1
................................
................ 16
................................
.................. 17
................................
............ 17
...............................
17
..............................
17
................................
....................... 18
................................
.. 19
................................
............. 19
................................
............... 19
................................
..................... 20
................................
..................... 20
................................
.... 21
ili Ltd "integrated lifestyle innovations"
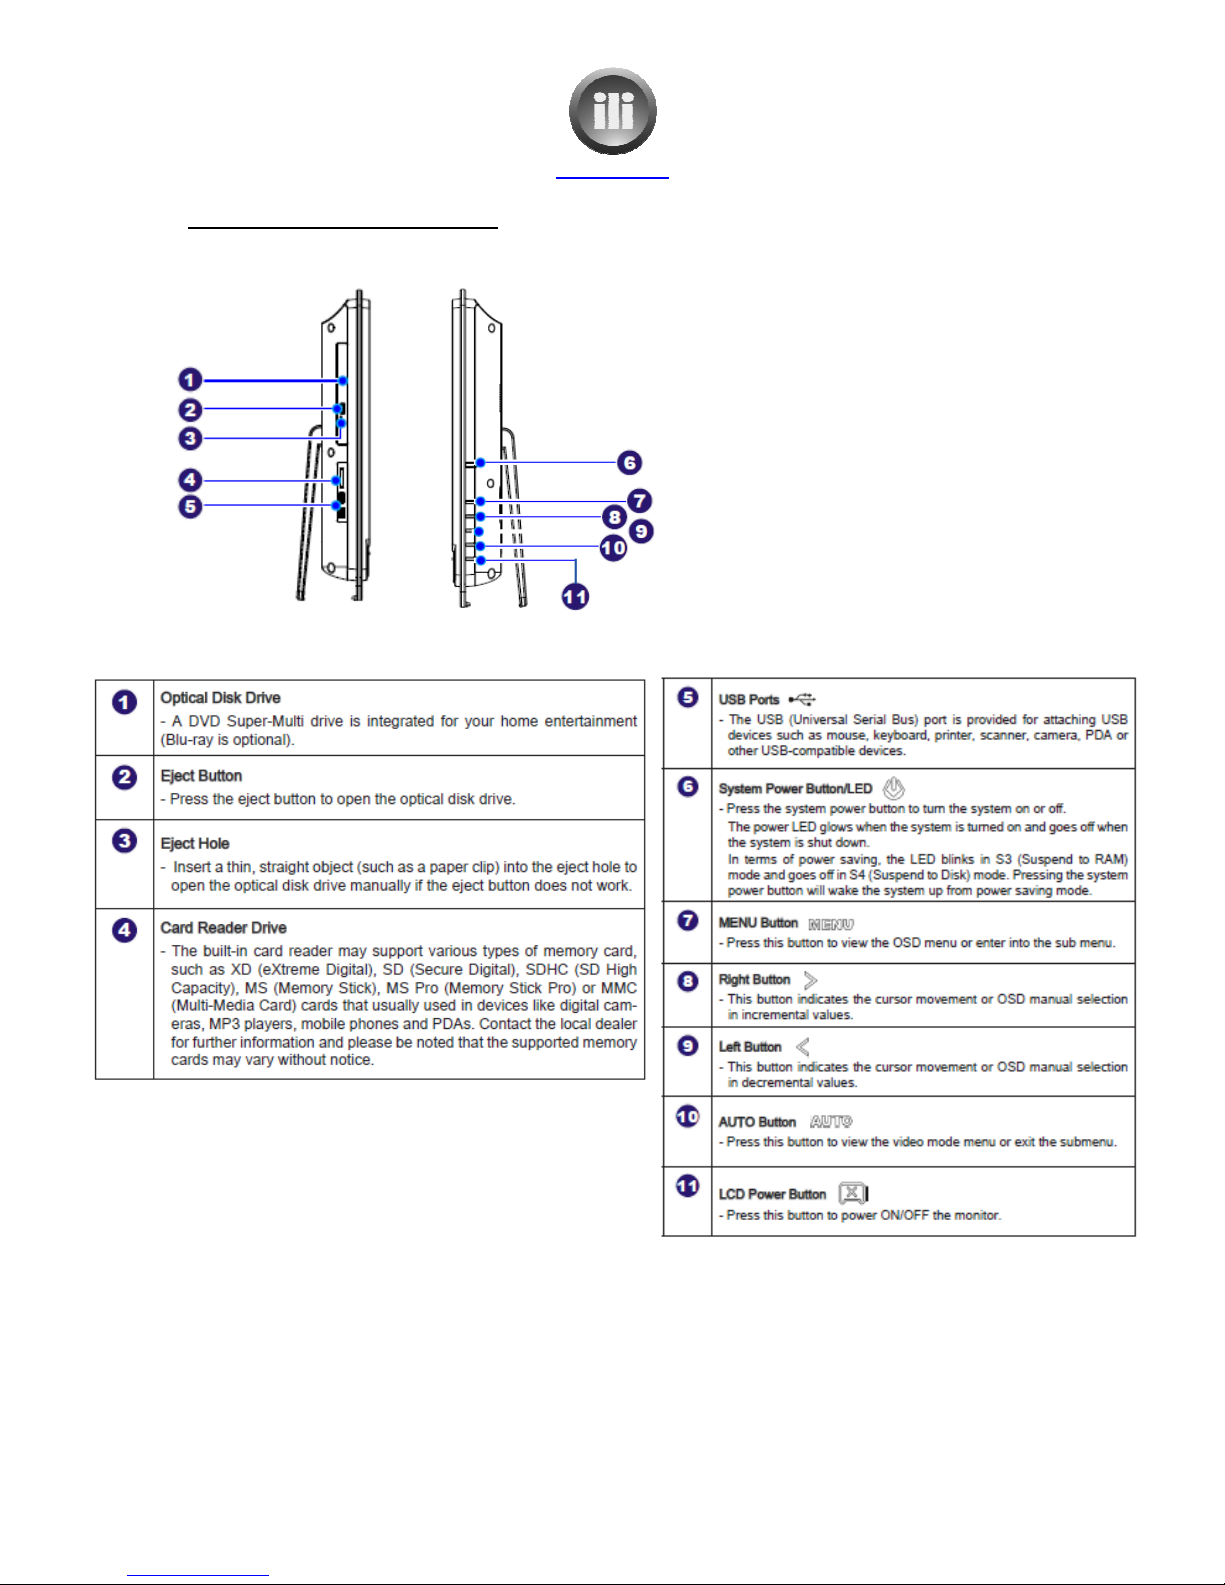
OneTouch 21B
Powering On and Off
6.
System Power Button/LED.
power on and off physically. (Not
recommended)
11.
LCD Power Button. (Recommended method to
turn the OneTouch on and off)
www.ili.co.nz
ili Ltd "integrated lifestyle innovations"
+64 9 974 4109
Page 3 of 21
Powering On and Off
System Power Button/LED.
Used to turn the
power on and off physically. (Not
LCD Power Button. (Recommended method to
turn the OneTouch on and off)
ili Ltd "integrated lifestyle innovations"
Getting Started
On starting your ili OneTouch
the screen will look like:
The navigation bar is
used to select
The pane on the right hand side display
performed.
These buttons
(for most function
1. Play
2. Pause
3. Stop
4. Eject disk
. Back track
6. Forward track
7.
Change channel, up and down
8. Volume + and –
9. Go back
10. Information
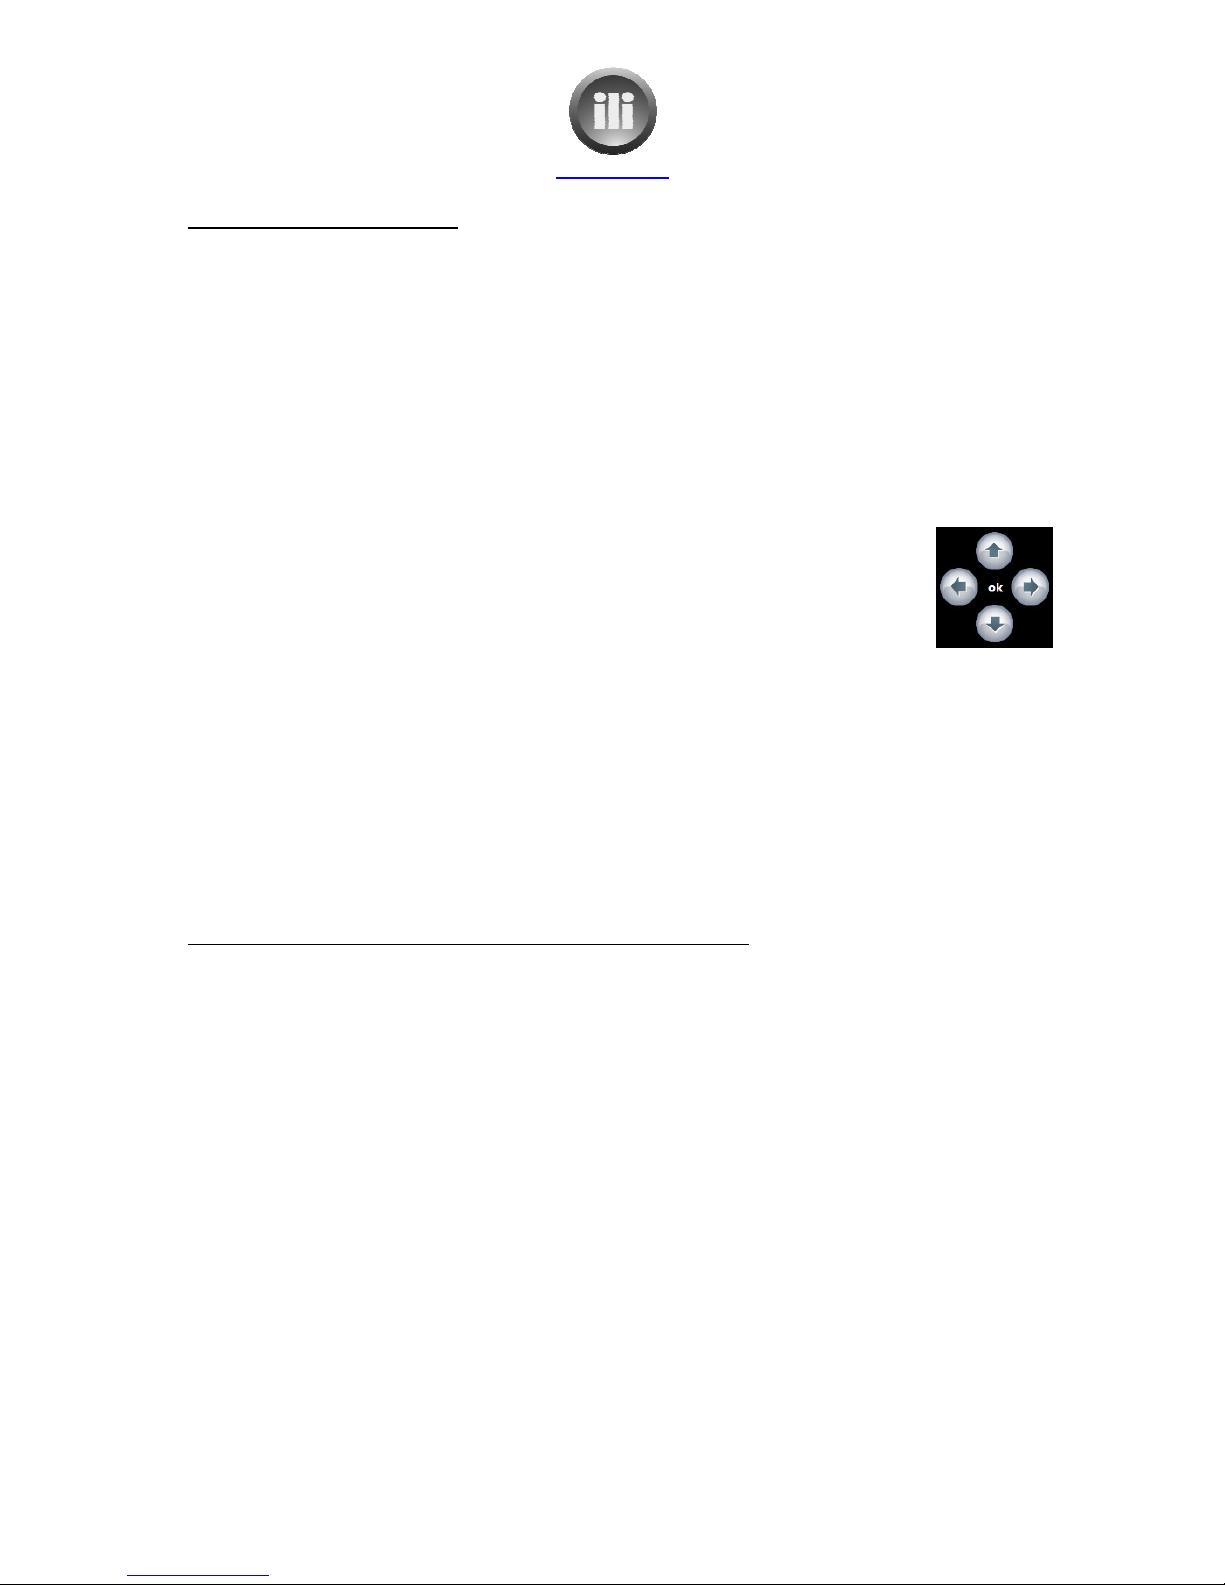
11. Arrows –
up, down, left right
12. Display keyboard
13. Full screen
www.ili.co.nz
ili Ltd "integrated lifestyle innovations"
+64 9 974 4109
Page 4 of 21
the screen will look like:
used to select
the function which is to be performed.
The pane on the right hand side display
s a different control panel depending on
the function
(for most function
s) are:
Change channel, up and down
up, down, left right
and ok or select in the centre
the function
being

ili Ltd "integrated lifestyle innovations"
SKYPE
When SKYPE is selected from
the navigation bar the screen will be displayed with these options on
the right hand side.
•Answer call
•Answer call with video
•Ignore call
•Hang up
•Mute Microphone
There will also be a keyboard icon
sele
ctions which require typing may be made.
Skype may now be used as normal, but with the added OneTouch features to answer calls, ignore
calls, mute calls etc.
Under the keyboard icon there is a ‘Show SKYPE’ button. This brings up the Skype screen if it not
already showing.
It is also used when adding a contact. If the ‘Add contact’ option is selected the user will then need
to touch the ‘Show Skype’ button so that the contact search screen will be displayed. The keyboard
will need to be turned on so the
The ‘Show Skype’ button will again be used to get back to the main Skype screen
www.ili.co.nz
ili Ltd "integrated lifestyle innovations"
+64 9 974 4109
Page of 21
the navigation bar the screen will be displayed with these options on
There will also be a keyboard icon
which will enable the on screen keyboard so that any
ctions which require typing may be made.
Skype may now be used as normal, but with the added OneTouch features to answer calls, ignore
Under the keyboard icon there is a ‘Show SKYPE’ button. This brings up the Skype screen if it not
It is also used when adding a contact. If the ‘Add contact’ option is selected the user will then need
to touch the ‘Show Skype’ button so that the contact search screen will be displayed. The keyboard
contact to search for can be entered and the selections made.
The ‘Show Skype’ button will again be used to get back to the main Skype screen
the navigation bar the screen will be displayed with these options on
which will enable the on screen keyboard so that any
Skype may now be used as normal, but with the added OneTouch features to answer calls, ignore
Under the keyboard icon there is a ‘Show SKYPE’ button. This brings up the Skype screen if it not
It is also used when adding a contact. If the ‘Add contact’ option is selected the user will then need
to touch the ‘Show Skype’ button so that the contact search screen will be displayed. The keyboard
contact to search for can be entered and the selections made.
The ‘Show Skype’ button will again be used to get back to the main Skype screen

ili Ltd "integrated lifestyle innovations"
To add music using OneTouch
1.
Touch ‘music’ navigation button
2. Put CD into the
CD drive located on the right side of the OneTouch
3.
OneTouch will display album cover and an option to “Copy CD” will be highlighted.
4. Touch “Copy CD”
.
The first time this process is done it will ask you to set some options.
displayed.
a.
Select “Do not add
b.
Then touch “next”
c.
Touch box next to statement about
d.
Then touch “next”
e. It will ask
for some options to be
this message
and touch “Finish”
6.
You will be asked “Are you sure you want to copy this CD to your Media Library?”
Touch “yes”
7.
As each song is copied a tick will appear next to the song in the queue.
8.
When the CD has been copied the screen will return to the “Music Librar
be ejected.
To add music using separate computer
Music can be added to the OneTouch by loading it onto another computer connected to the
network.
1.
Go to START button on computer
2. Click on “Network”
3.
Double click on “OneTouch” icon.
4.
Double click on “Media” icon
.
Double click on “Music” icon
6.
Create a folder with the album name
7.
Copy the music to this folder.
It will then be available to play on the OneTouch.
www.ili.co.nz
ili Ltd "integrated lifestyle innovations"
+64 9 974 4109
Page 6 of 21
Touch ‘music’ navigation button
CD drive located on the right side of the OneTouch
.
OneTouch will display album cover and an option to “Copy CD” will be highlighted.
The first time this process is done it will ask you to set some options.
“Copy Options” will be
Select “Do not add
copy protection to your music”
Then touch “next”
Touch box next to statement about
copyright
laws to put a tick in it
Then touch “next”
for some options to be
set by
going into Windows Media player. Ignore
and touch “Finish”
You will be asked “Are you sure you want to copy this CD to your Media Library?”
As each song is copied a tick will appear next to the song in the queue.
When the CD has been copied the screen will return to the “Music Librar
To add music using separate computer
Music can be added to the OneTouch by loading it onto another computer connected to the
Go to START button on computer
Double click on “OneTouch” icon.
Double click on “Media” icon
Double click on “Music” icon
Create a folder with the album name
Copy the music to this folder.
It will then be available to play on the OneTouch.
OneTouch will display album cover and an option to “Copy CD” will be highlighted.
“Copy Options” will be
laws to put a tick in it
going into Windows Media player. Ignore
You will be asked “Are you sure you want to copy this CD to your Media Library?”
When the CD has been copied the screen will return to the “Music Librar
y” and the CD will
Music can be added to the OneTouch by loading it onto another computer connected to the
ili Ltd "integrated lifestyle innovations"
To play music on the OneTouch
When the “music” button at the bottom of th
The music can be viewed by:
•Albums
•Artists
•Genres
•Songs
•Playlists
•Composers
•Years
•Album artists
To scroll through the library use the arrow icons on the control panel on the right of
the screen, or the keyboard can be displayed, by touching the keyboard icon on the
control panel. The keyboard can then be used to type the album or artist name or
part
thereof to search the library.
When the keyboard is displayed two additional icons appear on the control panel under the arrow
icons
. These may be used to scroll across screen by screen rather than scrolling one at a time. This
is particularly useful
for large music libraries.
NB: if the screen appears faded and is unable to be read, touch the down arrow on the control
panel.
Select the desired music to play by touching the screen.
The whole album or individual songs may be selected.
A queue can
be created so that music may be played continuously.
Rather than selecting “Play Song” or “Play Album”, select “Add to Queue”.
At the bottom left on the screen this symbol will be displayed and the queue will begin to play.
To view the queue:
•Touch the
symbol on the bottom left.
•
The queue will be displayed.
•
The queue may be edited to remove songs or change the order of play.
•
The queue may also be cleared
www.ili.co.nz
ili Ltd "integrated lifestyle innovations"
+64 9 974 4109
Page 7 of 21
To play music on the OneTouch
When the “music” button at the bottom of th
e screen is touched the music l
ibrary appears.
To scroll through the library use the arrow icons on the control panel on the right of
the screen, or the keyboard can be displayed, by touching the keyboard icon on the
control panel. The keyboard can then be used to type the album or artist name or
thereof to search the library.
When the keyboard is displayed two additional icons appear on the control panel under the arrow
. These may be used to scroll across screen by screen rather than scrolling one at a time. This
for large music libraries.
NB: if the screen appears faded and is unable to be read, touch the down arrow on the control
Select the desired music to play by touching the screen.
The whole album or individual songs may be selected.
be created so that music may be played continuously.
Rather than selecting “Play Song” or “Play Album”, select “Add to Queue”.
At the bottom left on the screen this symbol will be displayed and the queue will begin to play.
symbol on the bottom left.
The queue will be displayed.
The queue may be edited to remove songs or change the order of play.
The queue may also be cleared
ibrary appears.
To scroll through the library use the arrow icons on the control panel on the right of
the screen, or the keyboard can be displayed, by touching the keyboard icon on the
control panel. The keyboard can then be used to type the album or artist name or
When the keyboard is displayed two additional icons appear on the control panel under the arrow
. These may be used to scroll across screen by screen rather than scrolling one at a time. This
NB: if the screen appears faded and is unable to be read, touch the down arrow on the control
At the bottom left on the screen this symbol will be displayed and the queue will begin to play.
ili Ltd "integrated lifestyle innovations"
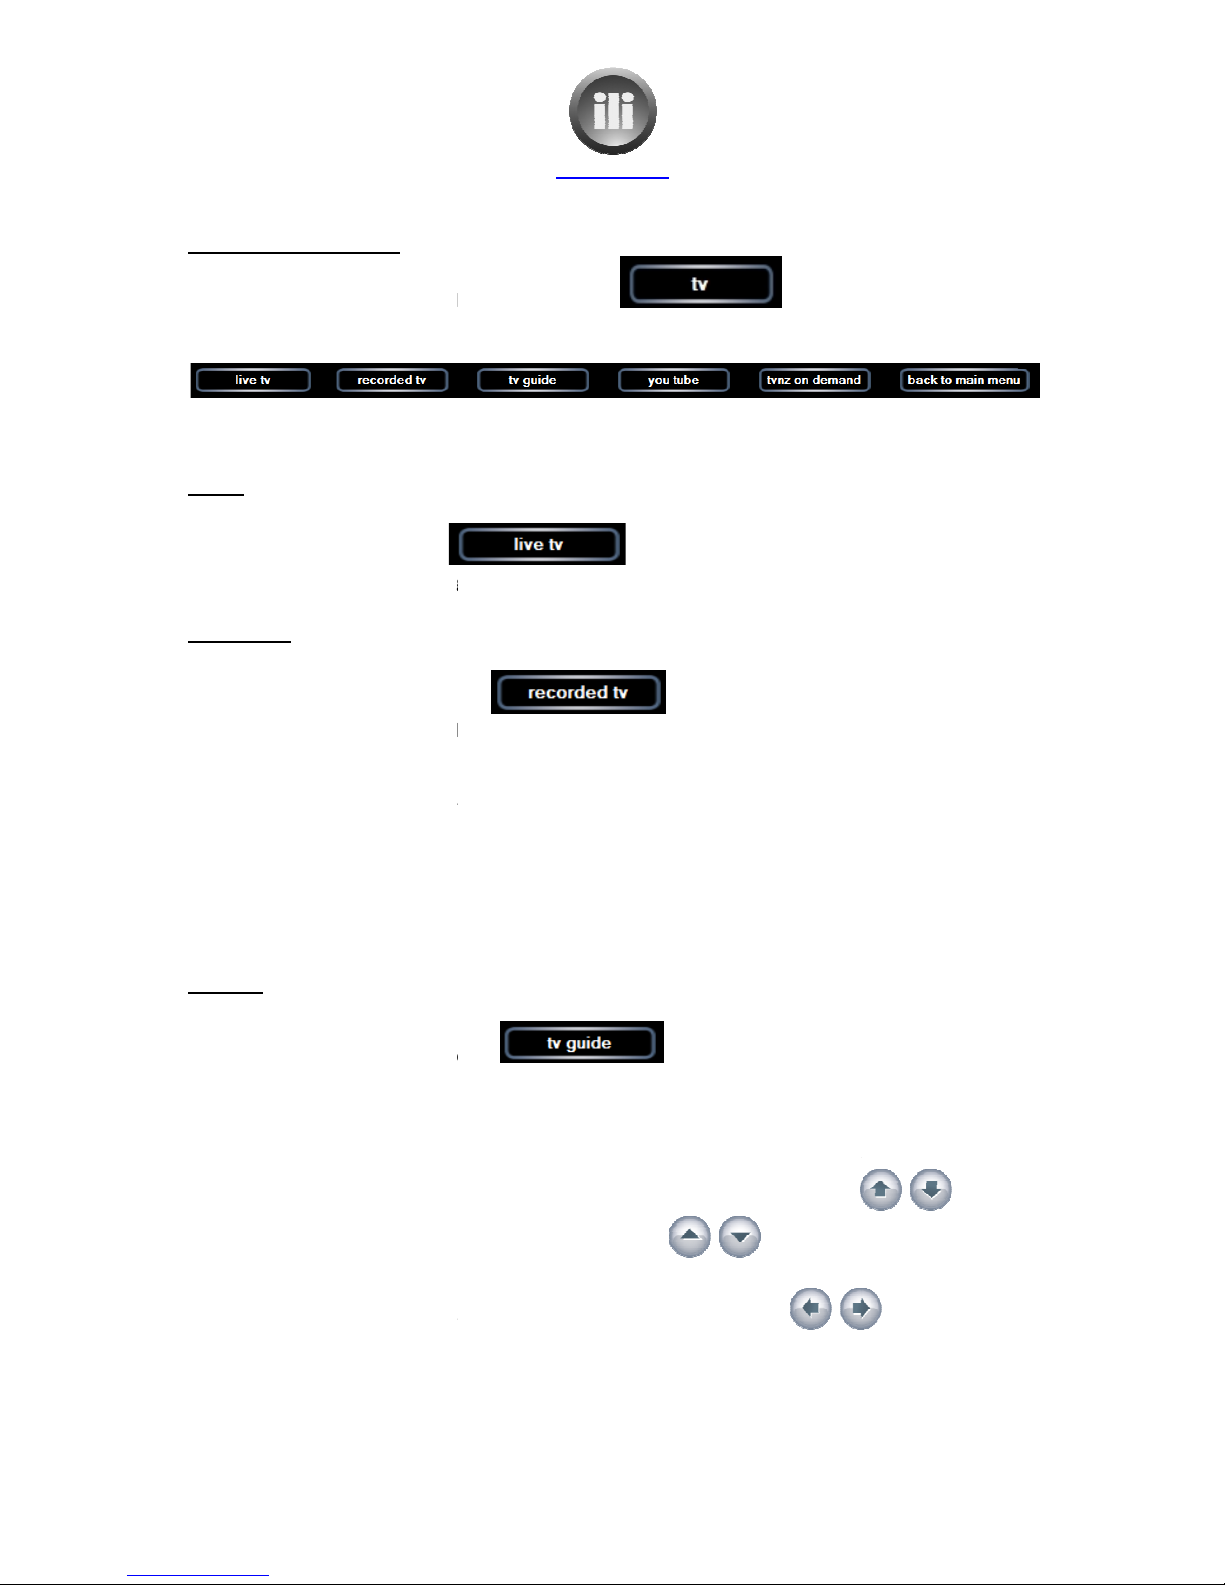
T on the OneTouch 21B
1.
Touch the “tv” icon on the navigation bar.
2.
The navigation bar will now
3.
The “recorded tv” screen will be displayed.
Live tv
If the “live tv” icon is selected
The channel that was last playing will resume.
Recorded tv
If the “recorded tv” icon is selected
a list of the programs that have been recorded wi
To play a program:
1.
Touch the desired program
2.
Select from the options of:
a. Play
b. Delete
c. Keep until
d. Burn CD/DVD
T guide
When the “tv guide” icon is selected
the
guide will be displayed with the programs currently playing displayed in white and the programs
in the future will be displayed in yellow.
1.
A current program can be selected by touching the program to be viewed.
2.
The channels can be scrolled through by usi
one channel at a time or using the channel icons
channels at a time.
3.
Time can be scrolled through by using the left and right arrows
www.ili.co.nz
ili Ltd "integrated lifestyle innovations"
+64 9 974 4109
Page 8 of 21
Touch the “tv” icon on the navigation bar.
The navigation bar will now
look like:
The “recorded tv” screen will be displayed.
The channel that was last playing will resume.
If the “recorded tv” icon is selected
a list of the programs that have been recorded wi
ll be displayed.
Touch the desired program
Select from the options of:
When the “tv guide” icon is selected
guide will be displayed with the programs currently playing displayed in white and the programs
in the future will be displayed in yellow.
A current program can be selected by touching the program to be viewed.
The channels can be scrolled through by usi
ng the up and down arrows
one channel at a time or using the channel icons
to scroll moving a screen of
Time can be scrolled through by using the left and right arrows
guide will be displayed with the programs currently playing displayed in white and the programs
A current program can be selected by touching the program to be viewed.
to move
to scroll moving a screen of
ili Ltd "integrated lifestyle innovations"
To record a future program
1. Touch the desired
program displayed in yellow.
2.
The “program info” screen will be displayed.
3.
Choose from “Record” or “Record Series”.
a.
If “Record” is chosen the program will have a red dot beside it.
b.
If “Record Series” is chosen the program will have a red dot with a shadow
c.
If “Advanced Record” is selected you will be given options.
i.
Frequency
ii. Stop –
On time, mins after, 10 mins after etc.
iii. Quality
–
iv. Keep –
Until space needed, For 1 week, Until I watch, Until I delete
d. Or
“Other Showings” will display when else this program is showing
To record a current program
1.
Ensure the program desired to be recorded is selected/playing.
2.
Select the information icon
3.
Select “Record” or “Record Series”.
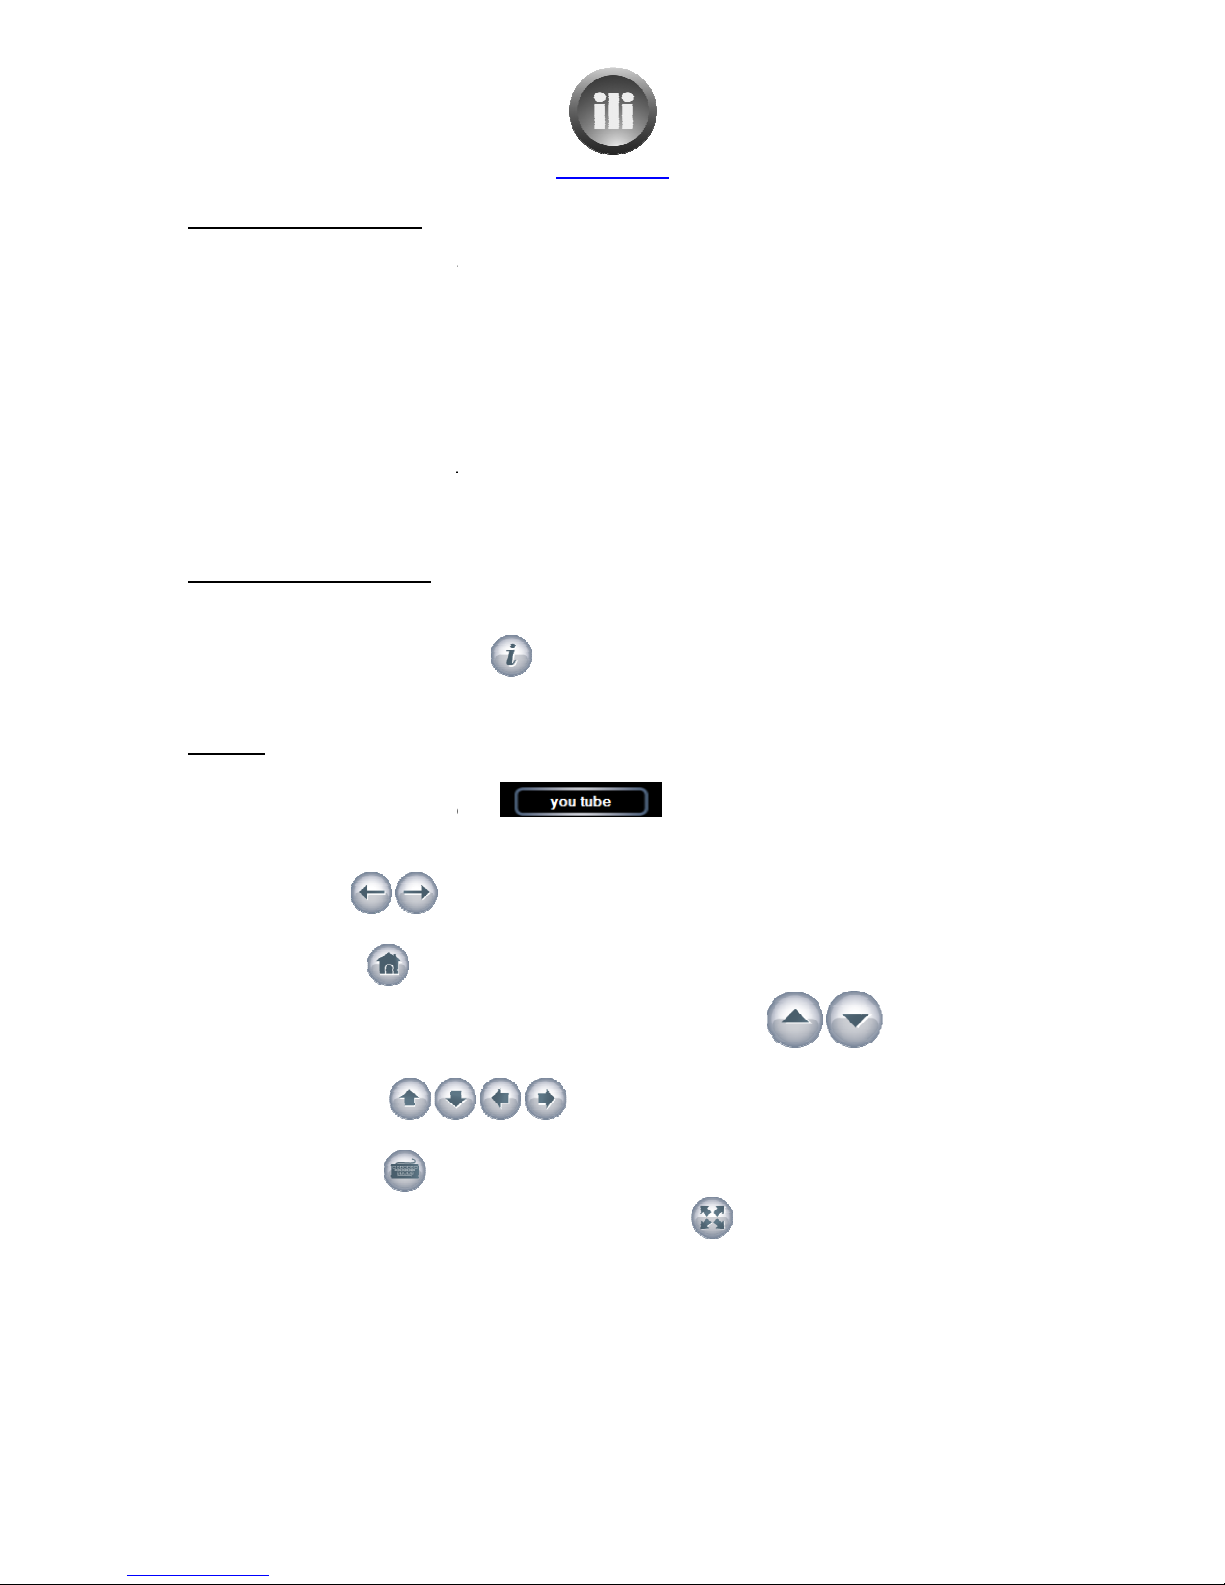
You tube
When the ‘you tube’ i
con is selected
The ‘you tube’ website will be displayed.
The control panel on the right of the screen has icons to help navigate the website.
•The two icons
at the top of the control panel are used to ‘go back’ or ‘go forward’
while navigating thro
ugh the website.
•The ‘home” icon
returns to the main
•
The large up and down arrows with the word ‘scroll’ in between
quickly scrolling up and down on the current web page.
•The smaller arrows
page, but at a much slower rate than the large up and down arrows.
•The keyboard icon
turns on a screen keyboard to enable typing where necessary.
•
Full screen mode can be select
screen again.
www.ili.co.nz
ili Ltd "integrated lifestyle innovations"
+64 9 974 4109
Page 9 of 21
program displayed in yellow.
The “program info” screen will be displayed.
Choose from “Record” or “Record Series”.
If “Record” is chosen the program will have a red dot beside it.
If “Record Series” is chosen the program will have a red dot with a shadow
If “Advanced Record” is selected you will be given options.
Frequency
– program or series
On time, mins after, 10 mins after etc.
–
Fair, good, better, best
Until space needed, For 1 week, Until I watch, Until I delete
“Other Showings” will display when else this program is showing
Ensure the program desired to be recorded is selected/playing.
Select the information icon
Select “Record” or “Record Series”.
con is selected
The ‘you tube’ website will be displayed.
The control panel on the right of the screen has icons to help navigate the website.
at the top of the control panel are used to ‘go back’ or ‘go forward’
ugh the website.
returns to the main
you tube screen, wh
ere a new selection can be made.
The large up and down arrows with the word ‘scroll’ in between
quickly scrolling up and down on the current web page.
scroll up and down, left and right on the current web
page, but at a much slower rate than the large up and down arrows.
turns on a screen keyboard to enable typing where necessary.
Full screen mode can be select
ed by touching this icon.
To exit full screen just touch the
If “Record Series” is chosen the program will have a red dot with a shadow
beside it.
Until space needed, For 1 week, Until I watch, Until I delete
“Other Showings” will display when else this program is showing
The control panel on the right of the screen has icons to help navigate the website.
at the top of the control panel are used to ‘go back’ or ‘go forward’
ere a new selection can be made.
are used for
scroll up and down, left and right on the current web
turns on a screen keyboard to enable typing where necessary.
To exit full screen just touch the
ili Ltd "integrated lifestyle innovations"
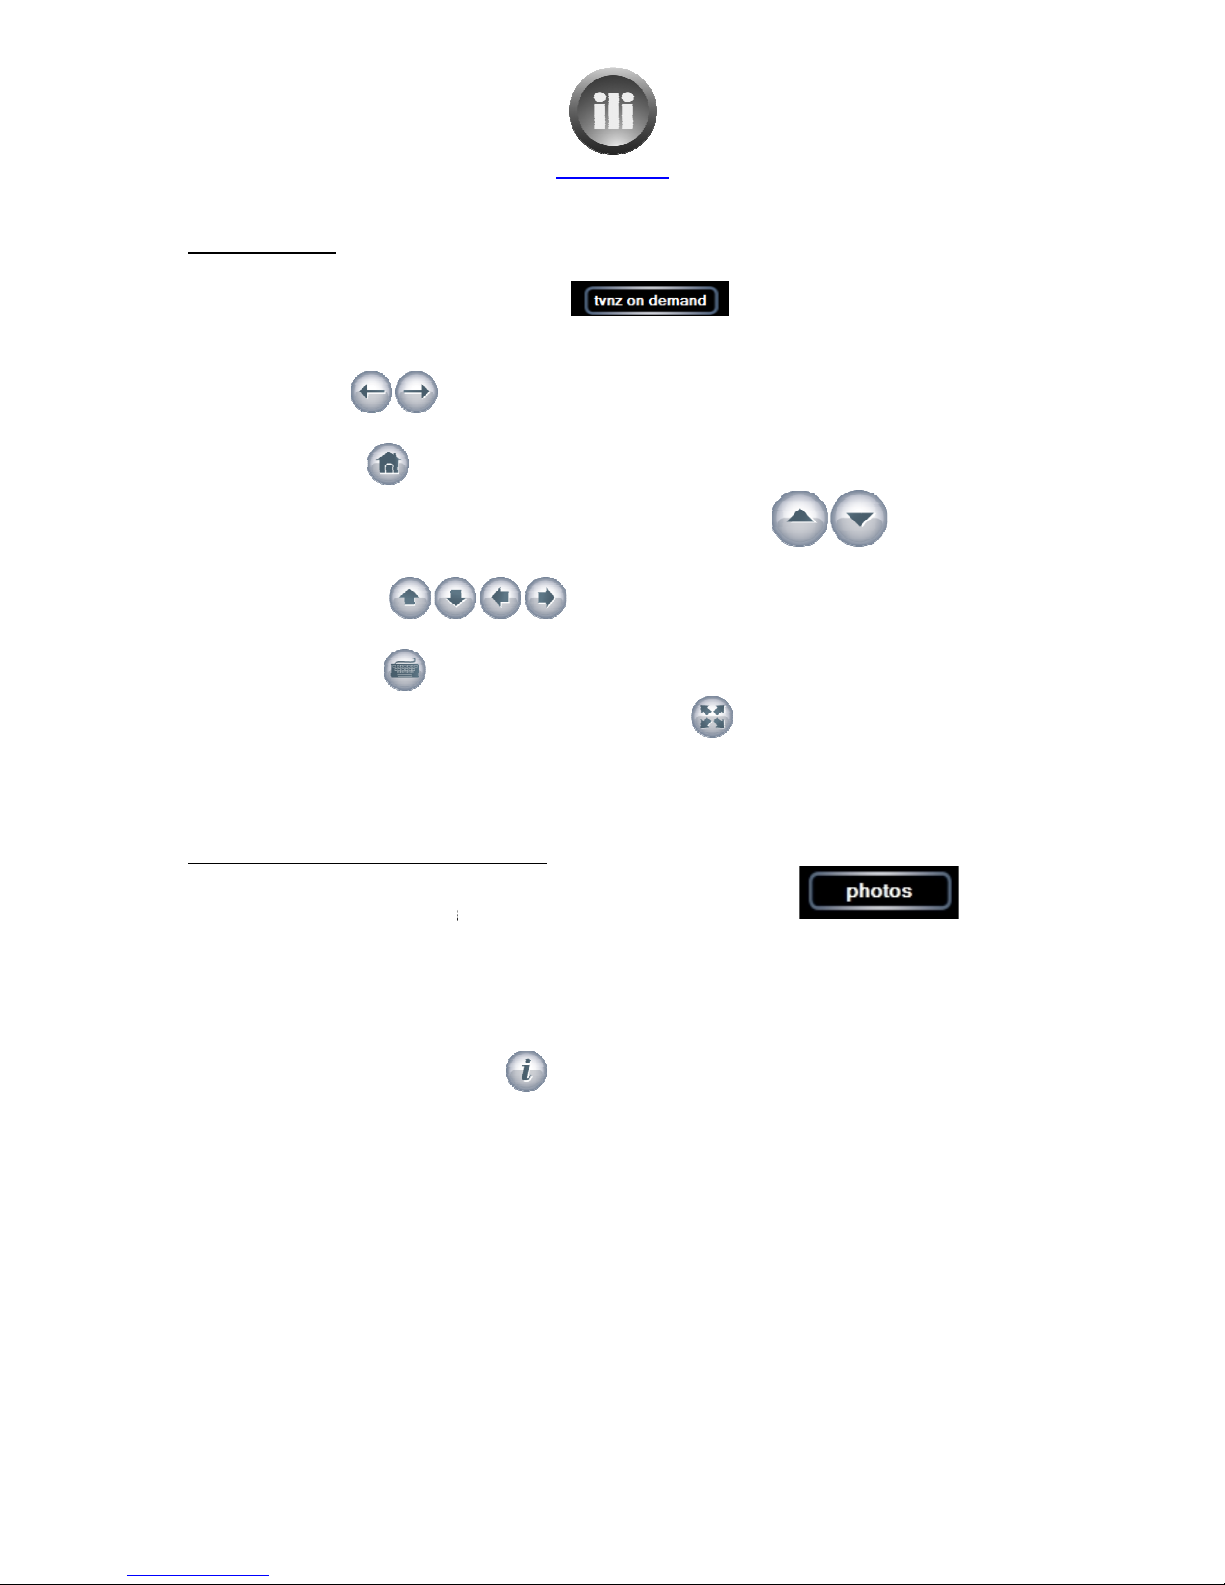
T NZ on demand
When the ‘TVNZ on demand’ icon is selected
The ‘TVNZ’ website will be displayed.
The control panel on the right of the screen has icons to help navigate
•The two icons
at the top of the control panel are used to ‘go back’ or ‘go forward’
while navigating through the website.
•The ‘home” icon
returns to the main TVNZ website, where a new selection can be made.
•
The large up and down arrows
quickly scrolling up and down on the current web page.
•The smaller arrows
page, but at a much slower rate than the large up and down arrows.
•The keyboard icon
turns on a screen keyboard to enable typing where necessary.
•
Full screen mode can be selected by touching this icon.
screen again.
To add photos from camera m
emory
1. Touch the ‘photos”
navigation icon at the bottom of the screen.
2.
Place memory stick from camera
OneTouch.
3.
There will be a small delay while the memory stick loads.
4.
The folders on the memory stick will be displayed.
.
Navigate to the folder containing the photos.
6.
Select the ‘information’ icon
7. Select ‘import’
8.
The default folder name of today’s date will be displayed. If you wish to change this name:
a. Turn the keybo
ard on using the keyboard icon on the control panel.
b.
Select the default folder name of the date
c.
Type the new folder name
d.
Turn the keyboard off
9. Select “Import”
10.
A message “Import in Progress” will be displayed and the progress of import will be
displayed. I
f you wish to continue doing other things while the photos are imported, select
“OK”. The photos will them be imported in the background
11.
When the photos have been imported a message will be displayed “Import Complete”.
www.ili.co.nz
ili Ltd "integrated lifestyle innovations"
+64 9 974 4109
Page 10 of 21
When the ‘TVNZ on demand’ icon is selected
The ‘TVNZ’ website will be displayed.
The control panel on the right of the screen has icons to help navigate
the website.
at the top of the control panel are used to ‘go back’ or ‘go forward’
while navigating through the website.
returns to the main TVNZ website, where a new selection can be made.
The large up and down arrows
with the word ‘scroll’ in between
quickly scrolling up and down on the current web page.
scroll up and down, left and right on the current web
page, but at a much slower rate than the large up and down arrows.
turns on a screen keyboard to enable typing where necessary.
Full screen mode can be selected by touching this icon.
To exit full screen just touch the
emory
stick
navigation icon at the bottom of the screen.
Place memory stick from camera
in the express c
ard slot, located on the left hand side of the
There will be a small delay while the memory stick loads.
The folders on the memory stick will be displayed.
Navigate to the folder containing the photos.
Select the ‘information’ icon
The default folder name of today’s date will be displayed. If you wish to change this name:
ard on using the keyboard icon on the control panel.
Select the default folder name of the date
Type the new folder name
Turn the keyboard off
A message “Import in Progress” will be displayed and the progress of import will be
f you wish to continue doing other things while the photos are imported, select
“OK”. The photos will them be imported in the background
When the photos have been imported a message will be displayed “Import Complete”.
the website.
at the top of the control panel are used to ‘go back’ or ‘go forward’
returns to the main TVNZ website, where a new selection can be made.
are used for
scroll up and down, left and right on the current web
turns on a screen keyboard to enable typing where necessary.
To exit full screen just touch the
ard slot, located on the left hand side of the
The default folder name of today’s date will be displayed. If you wish to change this name:
ard on using the keyboard icon on the control panel.
A message “Import in Progress” will be displayed and the progress of import will be
f you wish to continue doing other things while the photos are imported, select
When the photos have been imported a message will be displayed “Import Complete”.

ili Ltd "integrated lifestyle innovations"
To add photos from c
amera using USB
1. Touch the ‘photos’
navigation icon at the bottom of the screen.
2.
Plug the camera into the USB port in the front of the OneTouch base (ensure camera is
turned off)
3. Turn on camera
. There will be a small delay while the camera loads.
4. The camera will b
e displayed.
.
Navigate the camera folders to the folder containing the photos.
6.
Select the ‘information’ icon
7. Select ‘import’
8.
The default folder name of today’s date will be displayed. If you wish to change this name:
a.
Turn the keyboard on using the
b.
Select the default folder name of the date
c.
Type the new folder name
d.
Turn the keyboard off
9. Select “Import”
10.
A message “Import in Progress” will be displayed and the progress of import will be
displayed. If you wish to con
“OK”. The photos will them be imported in the background
11.
When the photos have been imported
To add photos using separate c
omputer
This needs to be done if the photos are stored on a CD or if they have been previously saved on
another computer.
Photos can be added to the OneTouch by loading it onto another computer connected to the
network.
1.
Go to START button on computer
2. Click on “Network”
3.
Double click on “OneTouch” icon.
4.
Double click on “Media” icon
.
Double click on “photos” icon
6.
Create a folder with the desired name
7.
Copy the photos from the CD or from the folder on the computer where they are stored to
new folder that has just be
It will then be available to view on the OneTouch.
www.ili.co.nz
ili Ltd "integrated lifestyle innovations"
+64 9 974 4109
Page 11 of 21
amera using USB
cable
navigation icon at the bottom of the screen.
Plug the camera into the USB port in the front of the OneTouch base (ensure camera is
. There will be a small delay while the camera loads.
e displayed.
Navigate the camera folders to the folder containing the photos.
Select the ‘information’ icon
The default folder name of today’s date will be displayed. If you wish to change this name:
Turn the keyboard on using the
keyboard icon on the control panel.
Select the default folder name of the date
Type the new folder name
Turn the keyboard off
A message “Import in Progress” will be displayed and the progress of import will be
displayed. If you wish to con
tinue doing other things while the photos are imported, select
“OK”. The photos will them be imported in the background
When the photos have been imported
a message will be displayed “Import Complete
omputer
This needs to be done if the photos are stored on a CD or if they have been previously saved on
Photos can be added to the OneTouch by loading it onto another computer connected to the
Go to START button on computer
Double click on “OneTouch” icon.
Double click on “Media” icon
Double click on “photos” icon
Create a folder with the desired name
Copy the photos from the CD or from the folder on the computer where they are stored to
new folder that has just be
en created.
It will then be available to view on the OneTouch.
Plug the camera into the USB port in the front of the OneTouch base (ensure camera is
The default folder name of today’s date will be displayed. If you wish to change this name:
keyboard icon on the control panel.
A message “Import in Progress” will be displayed and the progress of import will be
tinue doing other things while the photos are imported, select
a message will be displayed “Import Complete
”.
This needs to be done if the photos are stored on a CD or if they have been previously saved on
Photos can be added to the OneTouch by loading it onto another computer connected to the
Copy the photos from the CD or from the folder on the computer where they are stored to

ili Ltd "integrated lifestyle innovations"
To rotate the photos after i
mport
1.
Select the ‘information’ icon
2. Select “Picture Details”
3. Select “Rotate”
4.
Then move to the next photo using
until all photos have been rotated if necessary.
To touch up the photos after i
mport
1.
Select the ‘information’ icon
2. Select “Picture Details”
3. Select “Touch Up”
4.
Red eye, contrast and cropping all may be altered.
. Select “Save” to
keep the changes and replace the original or select “Cancel” to return
without keeping alterations.
6.
Then move to the next photo using the “Next” and “Previous” icons and repeat the process
until all photos have been touched up if necessary.
To delete unwanted photos a
fter
1.
Select the ‘information’ icon
2. Select “Picture Details”
3. Select “Delete”
4.
Confirm Delete by selected “yes”
.
The next photo will be displayed and the process
To view p
hotos on the OneTouch
1. Select
the “photos’ navigation icon.
2.
The photo folders will be displayed.
3. Select “play
slideshow” to start a slideshow of all your photos, or select the folder you wish
to view
and then select “play slideshow”
4. To view a single photo,
select it by touching it.
. To
move to the next photo use the arrow icons on the
www.ili.co.nz
ili Ltd "integrated lifestyle innovations"
+64 9 974 4109
Page 12 of 21
mport
Select the ‘information’ icon
Then move to the next photo using
the “Next” and “Previous” icons
and repeat the process
until all photos have been rotated if necessary.
mport
Select the ‘information’ icon
Red eye, contrast and cropping all may be altered.
keep the changes and replace the original or select “Cancel” to return
without keeping alterations.
Then move to the next photo using the “Next” and “Previous” icons and repeat the process
until all photos have been touched up if necessary.
fter
import
Select the ‘information’ icon
Confirm Delete by selected “yes”
The next photo will be displayed and the process
may be repeated
if necessary.
hotos on the OneTouch
the “photos’ navigation icon.
The photo folders will be displayed.
slideshow” to start a slideshow of all your photos, or select the folder you wish
and then select “play slideshow”
.
select it by touching it.
move to the next photo use the arrow icons on the
control panel.
and repeat the process
keep the changes and replace the original or select “Cancel” to return
Then move to the next photo using the “Next” and “Previous” icons and repeat the process
if necessary.
slideshow” to start a slideshow of all your photos, or select the folder you wish
ili Ltd "integrated lifestyle innovations"
Internet
By selecting the “internet” icon on the navigation bar you will be connected to the internet.
The Google home page will be displayed.
The Control Panel buttons available are:
1. Back
2. Forward
3. Favourites
4. Add to Favourites
. Home
6. Refresh Screen
7. Page up
8. Page Down
9.
The arrow keys for line up, line down, left and right
10. Keyboard
To add favourite web sites
1.
Turn the keyboard on using “keyboard” icon on the contro
2.
If the web address is known, touch in the web address area at the very top of the screen.
3.
Type in the desired web address eg:
keyboard.
4.
From this web page select
.
Then select the location at the top of the screen eg: Auckland to get to the desired web
page.
6.
To add this web page to the favourites so it can be returned to easily, select the “add to
favourites” icon on the control pa
7.
An Add to Favourites screen will be displayed. The ‘favourites’ name will be displayed and
highlighted in blue. If the name doesn’t need changing press “Add”. If the name needs to
be altered, type the new name using the screen keyboard and then pr
www.ili.co.nz
ili Ltd "integrated lifestyle innovations"
+64 9 974 4109
Page 13 of 21
By selecting the “internet” icon on the navigation bar you will be connected to the internet.
The Google home page will be displayed.
The Control Panel buttons available are:
The arrow keys for line up, line down, left and right
Turn the keyboard on using “keyboard” icon on the contro
l panel
If the web address is known, touch in the web address area at the very top of the screen.
Type in the desired web address eg:
www.metservice.com
and press ‘enter’ on the
From this web page select
the desired link eg.: local weather
Then select the location at the top of the screen eg: Auckland to get to the desired web
To add this web page to the favourites so it can be returned to easily, select the “add to
favourites” icon on the control pa
nel.
An Add to Favourites screen will be displayed. The ‘favourites’ name will be displayed and
highlighted in blue. If the name doesn’t need changing press “Add”. If the name needs to
be altered, type the new name using the screen keyboard and then pr
ess “Add”.
By selecting the “internet” icon on the navigation bar you will be connected to the internet.
If the web address is known, touch in the web address area at the very top of the screen.
and press ‘enter’ on the
Then select the location at the top of the screen eg: Auckland to get to the desired web
To add this web page to the favourites so it can be returned to easily, select the “add to
An Add to Favourites screen will be displayed. The ‘favourites’ name will be displayed and
highlighted in blue. If the name doesn’t need changing press “Add”. If the name needs to
ess “Add”.
ili Ltd "integrated lifestyle innovations"
To add Google news web site as a favourite
1.
At the Google home page press the “News” link at the top of the page.
2.
When the Google news screen is displayed, select the “Add to Favourites” icon.
3.
An ‘Add to Favourite’ screen will be displayed.
4.
Next time Google News is required, select the “Favourite” icon from the control panel.
.
A favourite list will drop down on the left hand side of the screen.
6.
Select Google news and the web site will be displayed.
To use favourites that
have been previously added
1.
Select the “Favourites” icon on the control panel.
2.
The favourite list will be drop down on the left hand side of the screen.
3.
Touch the desired site from the favourite list. The selected web page will be displayed.
The Back icon
You can return to the previous web page by using the “Back” icon on the control panel.
The Forward icon
If you have gone back to many web sites, the “Forward” icon can be selected to go forward a web
site.
The Home Page icon
The Google search en
gine has been set up as the home page. To return to Google at any time select
the “Home” icon on the control panel.
The Refresh screen icon
If the screen is not displaying properly, select the “refresh screen” icon on the control panel
and the screen
will be redisplayed correctly.
The navigation icons
1.
To move up or down a screen of information at a time use the “Page Up” and “Page Down”
icons.
2.
To move up or down line by line use the “Up” and “Down” arrow icons.
www.ili.co.nz
ili Ltd "integrated lifestyle innovations"
+64 9 974 4109
Page 14 of 21
To add Google news web site as a favourite
At the Google home page press the “News” link at the top of the page.
When the Google news screen is displayed, select the “Add to Favourites” icon.
An ‘Add to Favourite’ screen will be displayed.
Select “add”.
Next time Google News is required, select the “Favourite” icon from the control panel.
A favourite list will drop down on the left hand side of the screen.
Select Google news and the web site will be displayed.
have been previously added
Select the “Favourites” icon on the control panel.
The favourite list will be drop down on the left hand side of the screen.
Touch the desired site from the favourite list. The selected web page will be displayed.
You can return to the previous web page by using the “Back” icon on the control panel.
If you have gone back to many web sites, the “Forward” icon can be selected to go forward a web
gine has been set up as the home page. To return to Google at any time select
the “Home” icon on the control panel.
If the screen is not displaying properly, select the “refresh screen” icon on the control panel
will be redisplayed correctly.
To move up or down a screen of information at a time use the “Page Up” and “Page Down”
To move up or down line by line use the “Up” and “Down” arrow icons.
When the Google news screen is displayed, select the “Add to Favourites” icon.
Next time Google News is required, select the “Favourite” icon from the control panel.
Touch the desired site from the favourite list. The selected web page will be displayed.
You can return to the previous web page by using the “Back” icon on the control panel.
If you have gone back to many web sites, the “Forward” icon can be selected to go forward a web
gine has been set up as the home page. To return to Google at any time select
If the screen is not displaying properly, select the “refresh screen” icon on the control panel
To move up or down a screen of information at a time use the “Page Up” and “Page Down”

ili Ltd "integrated lifestyle innovations"
Using Google
Google may
be used to search for information from the internet.
1.
Turn the screen keyboard on by selecting the “keyboard” icon on the control panel.
2.
Type the keywords that you want Google to search on and press ‘Enter’ on the keyboard or
select “Google Search” on the
3.
Turn the keyboard off by selecting the “Keyboard” icon again.
4.
Select the links to be explored by touching the screen on the desired site.
.
Use the navigation icons on the control panel to move around the site (up and down, etc)
and to go backwards
and forwards in the web sites visited.
Using Google calendar
Google calendar can be used as a diary. It can record appointments and events. It will send
reminders to your email address. It is great to have this set up as a favourite and be used as a
calendar so all the family events can be recorded in a central location.
To set up Google calendar:
1.
Select the “internet” icon on the navigation bar you will be connected to the internet.
2.
The Google home page will be displayed.
3. Select “more” at
the top of the Google screen
4.
Choose “calendar” from the list that drops down.
.
Select “Create an account” button
6.
Turn on the keyboard by selecting the “keyboard” icon from the control panel.
7.
Enter your email address.
8.
Select the password box and type a pas
9. Select the Re-
enter password box and re
10.
Make sure the option for “Stay signed in” has a tick beside it.
11.
Fill in the rest of the fields that are required.
12.
Then select “create my account.
13. An account verificati
on email will be sent to your email address, so Google Calendar will not
be able to be used until that email is received and opened.
www.ili.co.nz
ili Ltd "integrated lifestyle innovations"
+64 9 974 4109
Page 1 of 21
be used to search for information from the internet.
Turn the screen keyboard on by selecting the “keyboard” icon on the control panel.
Type the keywords that you want Google to search on and press ‘Enter’ on the keyboard or
select “Google Search” on the
screen.
Turn the keyboard off by selecting the “Keyboard” icon again.
Select the links to be explored by touching the screen on the desired site.
Use the navigation icons on the control panel to move around the site (up and down, etc)
and forwards in the web sites visited.
Google calendar can be used as a diary. It can record appointments and events. It will send
reminders to your email address. It is great to have this set up as a favourite and be used as a
calendar so all the family events can be recorded in a central location.
Select the “internet” icon on the navigation bar you will be connected to the internet.
The Google home page will be displayed.
the top of the Google screen
Choose “calendar” from the list that drops down.
Select “Create an account” button
Turn on the keyboard by selecting the “keyboard” icon from the control panel.
Enter your email address.
Select the password box and type a pas
sword of your choice.
enter password box and re
-enter your password again.
Make sure the option for “Stay signed in” has a tick beside it.
Fill in the rest of the fields that are required.
Then select “create my account.
on email will be sent to your email address, so Google Calendar will not
be able to be used until that email is received and opened.
Turn the screen keyboard on by selecting the “keyboard” icon on the control panel.
Type the keywords that you want Google to search on and press ‘Enter’ on the keyboard or
Select the links to be explored by touching the screen on the desired site.
Use the navigation icons on the control panel to move around the site (up and down, etc)
Google calendar can be used as a diary. It can record appointments and events. It will send
reminders to your email address. It is great to have this set up as a favourite and be used as a
family
Select the “internet” icon on the navigation bar you will be connected to the internet.
Turn on the keyboard by selecting the “keyboard” icon from the control panel.
on email will be sent to your email address, so Google Calendar will not

ili Ltd "integrated lifestyle innovations"
To use Google calendar
1.
Select the “internet” icon on the navigation bar you will be connected to the internet.
2. The Goo
gle home page will be displayed.
3.
Select “more” at the top of the Google screen
4.
Choose “calendar” from the list that drops down.
.
Turn on the keyboard by selecting the “keyboard” icon from the control panel.
6.
Enter your email address and password and select
7.
The calendar will then be displayed.
The way it is displayed can be altered:
a. Day
b. Week
c. Month
d. 4 days
e. Agenda –
All events in expanded or summary form
8. Events
can be added by selecting he “Create Event” button on the top left of the screen.
a.
Enter “what” the event is.
b.
Change the date and times, or select an “All day” event e.g. birthday
c.
Enter “where” the event is to take place.
d.
Enter a description of the event if required.
e.
Reminder options can be selected. Either by email or by pop
f. Privac
y options can be selected. Either default, private or public.
g.
Guests can be added by entering their email addresses on the right hand side.
h.
Finally “Save” at the bottom of the screen must be selected to save the event.
9. Tasks
can be added. If the task pan
can be turned on by selecting the “Tasks” button on the left of the screen.
a.
To add a task, select the “+” beside the actions button on the task panel and then
type the description of the task.
b. Th
e task details can be expanded on by touching the > next to the task.
c.
When the task is completed this may be indicated by touching the box next to the
task and a tick will appear in the box and the task description will have a
strikethrough through it.
d. The
tasks may then be deleted by touching the rubbish tin at the bottom of the task
panel.
www.ili.co.nz
ili Ltd "integrated lifestyle innovations"
+64 9 974 4109
Page 16 of 21
Select the “internet” icon on the navigation bar you will be connected to the internet.
gle home page will be displayed.
Select “more” at the top of the Google screen
Choose “calendar” from the list that drops down.
Turn on the keyboard by selecting the “keyboard” icon from the control panel.
Enter your email address and password and select
“sign in”.
The calendar will then be displayed.
The way it is displayed can be altered:
All events in expanded or summary form
can be added by selecting he “Create Event” button on the top left of the screen.
Enter “what” the event is.
Change the date and times, or select an “All day” event e.g. birthday
Enter “where” the event is to take place.
Enter a description of the event if required.
Reminder options can be selected. Either by email or by pop
-
up.
y options can be selected. Either default, private or public.
Guests can be added by entering their email addresses on the right hand side.
Finally “Save” at the bottom of the screen must be selected to save the event.
can be added. If the task pan
el is not displayed on the right hand side of the screen, it
can be turned on by selecting the “Tasks” button on the left of the screen.
To add a task, select the “+” beside the actions button on the task panel and then
type the description of the task.
e task details can be expanded on by touching the > next to the task.
When the task is completed this may be indicated by touching the box next to the
task and a tick will appear in the box and the task description will have a
strikethrough through it.
tasks may then be deleted by touching the rubbish tin at the bottom of the task
Select the “internet” icon on the navigation bar you will be connected to the internet.
Turn on the keyboard by selecting the “keyboard” icon from the control panel.
can be added by selecting he “Create Event” button on the top left of the screen.
Change the date and times, or select an “All day” event e.g. birthday
up.
y options can be selected. Either default, private or public.
Guests can be added by entering their email addresses on the right hand side.
Finally “Save” at the bottom of the screen must be selected to save the event.
el is not displayed on the right hand side of the screen, it
can be turned on by selecting the “Tasks” button on the left of the screen.
To add a task, select the “+” beside the actions button on the task panel and then
e task details can be expanded on by touching the > next to the task.
When the task is completed this may be indicated by touching the box next to the
task and a tick will appear in the box and the task description will have a
tasks may then be deleted by touching the rubbish tin at the bottom of the task

ili Ltd "integrated lifestyle innovations"
Recipes
Select the ‘Recipes’ navigation
icon
Select from the following choices:
Big Oven
Food in a minute
Jamie Oliver.com
Selecting any of the above options
instructions for selecting recipes.
The control panel on the right of the screen has icons to help navigate.
•The two icons
at the top of the control panel are used to ‘go back’ or ‘g
while navigating through the website.
•The ‘home” icon
returns to the main recipes screen, where a new selection can be made
from Big Oven, Food in a minute or Jamie Oliver.com
•
The large up and down arrows with the word ‘scroll’ in between
quickly scrolling up and down on the current web page.
•The smaller arrows
page, but at a much slower rate than the large up and down arrows.
•The keyboard icon
turns on a screen keyboa
The ‘back to main menu’ icon at the bottom of the screen leaves recipes and returns to the main
OneTouch screen. However when ‘recipes’ is selected again it will return to the screen that was
being displayed when the
‘back to main menu’ icon was selected. The ‘home’ icon may be used to
return to the main recipe selection screen if desired.
www.ili.co.nz
ili Ltd "integrated lifestyle innovations"
+64 9 974 4109
Page 17 of 21
icon
.
Select from the following choices:
Selecting any of the above options
will take you to that respective web site. Then follow the website
instructions for selecting recipes.
The control panel on the right of the screen has icons to help navigate.
at the top of the control panel are used to ‘go back’ or ‘g
while navigating through the website.
returns to the main recipes screen, where a new selection can be made
from Big Oven, Food in a minute or Jamie Oliver.com
The large up and down arrows with the word ‘scroll’ in between
quickly scrolling up and down on the current web page.
scroll up and down, left and right on the current web
page, but at a much slower rate than the large up and down arrows.
turns on a screen keyboa
rd to enable typing where necessary.
The ‘back to main menu’ icon at the bottom of the screen leaves recipes and returns to the main
OneTouch screen. However when ‘recipes’ is selected again it will return to the screen that was
‘back to main menu’ icon was selected. The ‘home’ icon may be used to
return to the main recipe selection screen if desired.
will take you to that respective web site. Then follow the website
at the top of the control panel are used to ‘go back’ or ‘g
o forward’
returns to the main recipes screen, where a new selection can be made
are used for
scroll up and down, left and right on the current web
rd to enable typing where necessary.
The ‘back to main menu’ icon at the bottom of the screen leaves recipes and returns to the main
OneTouch screen. However when ‘recipes’ is selected again it will return to the screen that was
‘back to main menu’ icon was selected. The ‘home’ icon may be used to

ili Ltd "integrated lifestyle innovations"
Big Oven Instructions
To display all recipes select the “All” button next to the “Views” icon on the left hand side of the
screen.
To search for specific recipes:
Under the “views” icon on the left hand side of the screen there are ways of searching your
recipes
•Cuisines
This allows selection of recipes by either:
American, Asian, Cajun, Caribbean, Chinese, English, French, Ge
Italian, Japanese or Mexican
•
Main Ingredient
This allows selection of recipes by ingredient: such as Asparagus, Beans, Blueberry,
Cake, Cheese, Chicken, Fish, Lamb etc.
•Course
This allows selection of recipes by course: such as Breakf
Appetizers, Bread, Salad, Main Dish, Side Dish, Dessert
•R. Boxes
This groups recipes under the headings of:
Lowcarb, Quick, Standard
Another
way in which recipes may be viewed
the left hand side of the screen.
The first selection choice allows:
1. All (by A-Z)
2. All (by Recency)
3. Marked recipes
4. Viewed today
. Viewed Yesterday
6. Last 7 days
7. Last 30 days
The second selection choice allows:
1. All
2. @Favorite
3. @Try Soon
4. @My diet
. Appetizers
6. Salads
The recipe may be viewed by touching its name. The ‘Previous’ and ‘Next’
navigate though the recipes.
www.ili.co.nz
ili Ltd "integrated lifestyle innovations"
+64 9 974 4109
Page 18 of 21
To display all recipes select the “All” button next to the “Views” icon on the left hand side of the
Under the “views” icon on the left hand side of the screen there are ways of searching your
This allows selection of recipes by either:
American, Asian, Cajun, Caribbean, Chinese, English, French, Ge
rman, Greek, Indi
Italian, Japanese or Mexican
Main Ingredient
This allows selection of recipes by ingredient: such as Asparagus, Beans, Blueberry,
Cake, Cheese, Chicken, Fish, Lamb etc.
This allows selection of recipes by course: such as Breakf
ast, Lunch, Snack,
Appetizers, Bread, Salad, Main Dish, Side Dish, Dessert
This groups recipes under the headings of:
Lowcarb, Quick, Standard
way in which recipes may be viewed
is
by using the 2 selections next to the ‘Views’ icon on
The first selection choice allows:
The second selection choice allows:
7. Main Dish
8. Side Dish
9. Dessert
10. Low cal
11. Low carb
12. Low fat
The recipe may be viewed by touching its name. The ‘Previous’ and ‘Next’
buttons may be used
To display all recipes select the “All” button next to the “Views” icon on the left hand side of the
Under the “views” icon on the left hand side of the screen there are ways of searching your
rman, Greek, Indi
an,
This allows selection of recipes by ingredient: such as Asparagus, Beans, Blueberry,
ast, Lunch, Snack,
by using the 2 selections next to the ‘Views’ icon on
buttons may be used
to

ili Ltd "integrated lifestyle innovations"
To add new recipes
from BigOven
1.
Select the ‘Recipes’ navigation button
2.
Select the “Views” icon on the left hand side of the screen.
3.
Select “Web” from the left hand side panel.
4.
To type the keyword to search for in the title select the ‘keyboard’ icon from the
panel
and then touch “Go”
.
Or the recipe can be searched for by selecting
ingredient, Type of Cuisine, Occasion/Season, Preparation method or Course/ Dish from the.
6. Choose
the desired recipe by touching t
7.
To add the recipe to your recipe box select ‘import’ icon displayed above the recipe. The
recipe will then be added to the OneTouch recipe box.
To use the meal calendar
1.
Select the desired recipe
2.
Select ‘View meal calendar’ icon on control
3.
Select the desired date from the calendar displayed on the right
4.
Drag and drop the recipe into either ‘Breakfast”, “Lunch”, or “Dinner”
.
Enter the number of servings desired and press “OK”.
To use the shopping list
1.
Select the desired recipe
2.
Select “Add Shop” icon from the top toolbar.
3. Press ‘OK’.
The ingredients will be added to the shopping list.
4.
To view the shopping list, select ‘view shopping list’ icon from the control panel on the right
hand side
. If th
e same ingredient is on the shopping list more than once, the “Combine” icon may be
used to combine the quantities into one item on the shopping list. They can also be split
apart again by selecting the icon which will now say “Combined”.
6. Items may be del
eted from the shopping list by selecting the line to remove and then
pressing the ‘Del’ button on the keyboard. (Items may only be deleted if they have not been
combined)
7.
The shopping list may be cle
8. The shopping list may b
e printed by selecting ‘Print’ from the top toolbar.
www.ili.co.nz
ili Ltd "integrated lifestyle innovations"
+64 9 974 4109
Page 19 of 21
from BigOven
to the OneTouch
Select the ‘Recipes’ navigation button
Select the “Views” icon on the left hand side of the screen.
Select “Web” from the left hand side panel.
To type the keyword to search for in the title select the ‘keyboard’ icon from the
and then touch “Go”
Or the recipe can be searched for by selecting
from the lists provided. Which are: Main
ingredient, Type of Cuisine, Occasion/Season, Preparation method or Course/ Dish from the.
the desired recipe by touching t
he screen.
To add the recipe to your recipe box select ‘import’ icon displayed above the recipe. The
recipe will then be added to the OneTouch recipe box.
Select the desired recipe
Select ‘View meal calendar’ icon on control
panel
Select the desired date from the calendar displayed on the right
Drag and drop the recipe into either ‘Breakfast”, “Lunch”, or “Dinner”
Enter the number of servings desired and press “OK”.
The recipe quantities will be altered.
Select the desired recipe
Select “Add Shop” icon from the top toolbar.
The ingredients will be added to the shopping list.
To view the shopping list, select ‘view shopping list’ icon from the control panel on the right
e same ingredient is on the shopping list more than once, the “Combine” icon may be
used to combine the quantities into one item on the shopping list. They can also be split
apart again by selecting the icon which will now say “Combined”.
eted from the shopping list by selecting the line to remove and then
pressing the ‘Del’ button on the keyboard. (Items may only be deleted if they have not been
The shopping list may be cle
ared totally by pressing ‘Clear’.
e printed by selecting ‘Print’ from the top toolbar.
To type the keyword to search for in the title select the ‘keyboard’ icon from the
control
from the lists provided. Which are: Main
ingredient, Type of Cuisine, Occasion/Season, Preparation method or Course/ Dish from the.
To add the recipe to your recipe box select ‘import’ icon displayed above the recipe. The
The recipe quantities will be altered.
To view the shopping list, select ‘view shopping list’ icon from the control panel on the right
e same ingredient is on the shopping list more than once, the “Combine” icon may be
used to combine the quantities into one item on the shopping list. They can also be split
eted from the shopping list by selecting the line to remove and then
pressing the ‘Del’ button on the keyboard. (Items may only be deleted if they have not been
e printed by selecting ‘Print’ from the top toolbar.
ili Ltd "integrated lifestyle innovations"
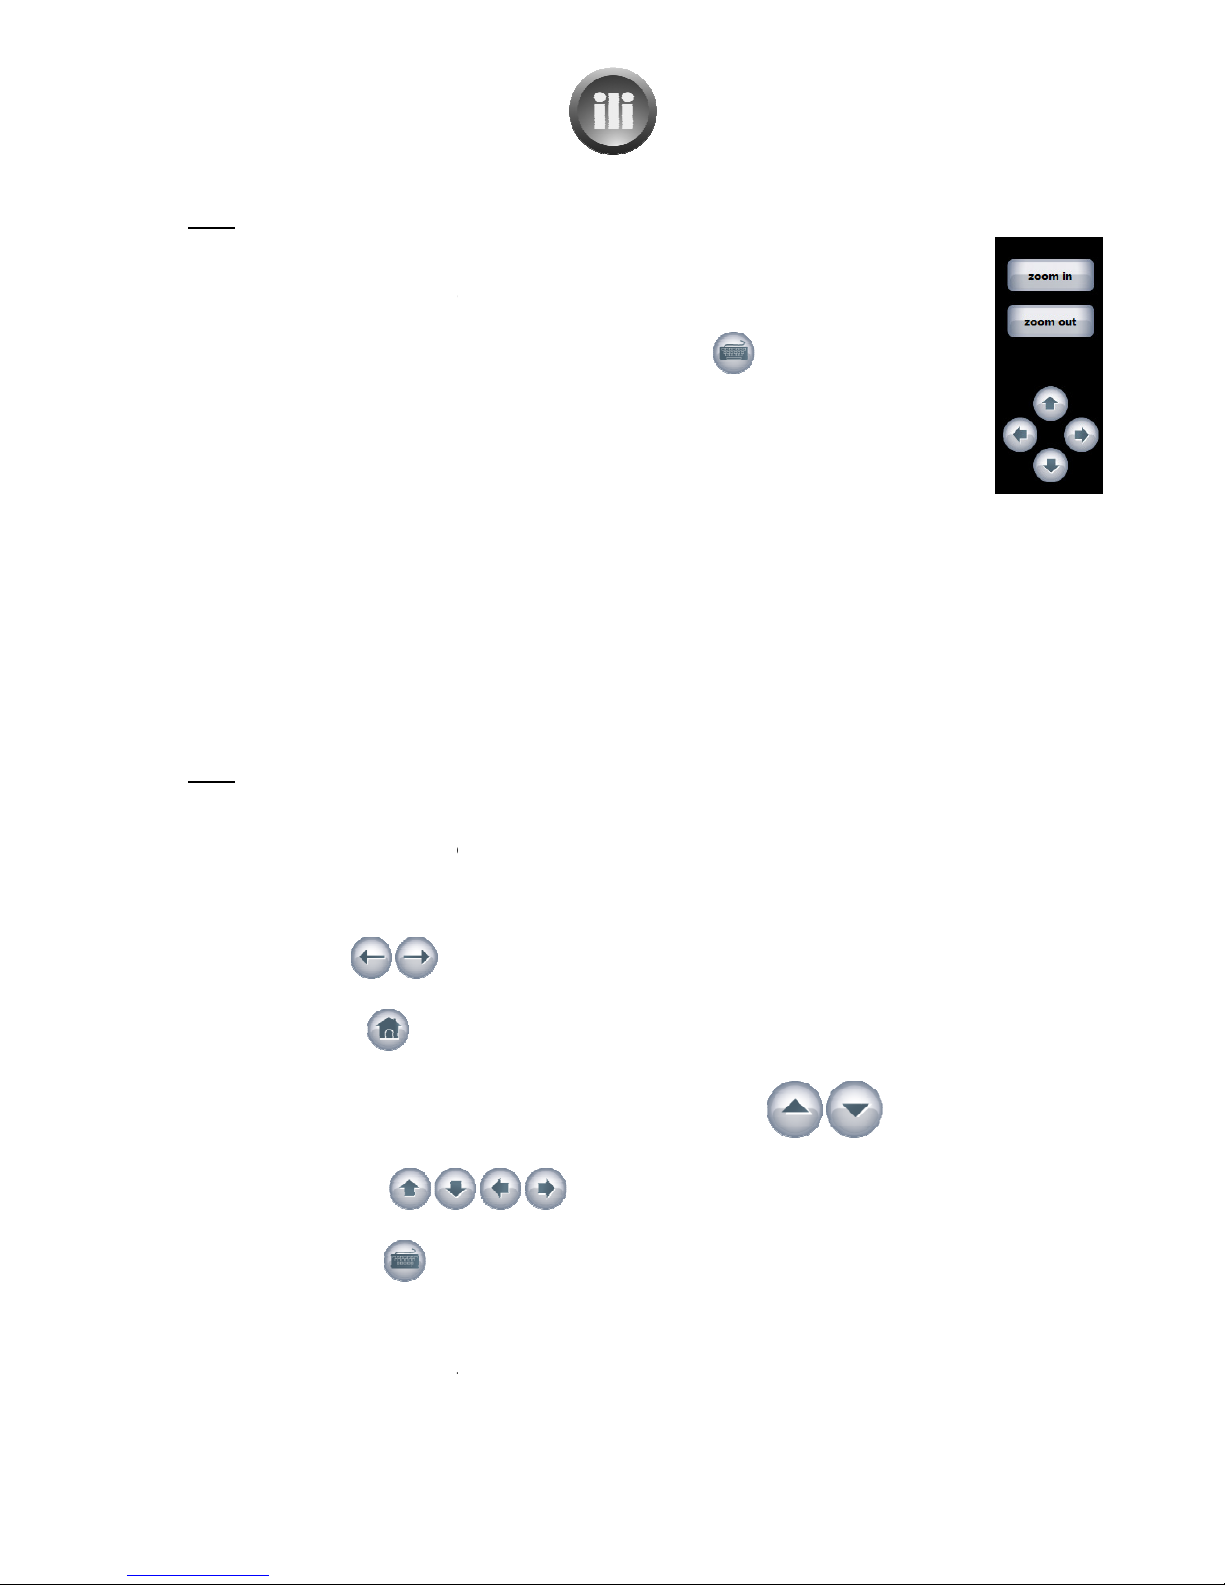
Maps
Select the ‘maps’ navigation icon.
The desired location can be s
elect
typing the location into the Google maps ‘Search Maps’ area at the top of the screen. The
screen keyboard can be turned on by using the keyboard icon
The map can be moved by touching the screen a
map needs to move.
Zooming in and out
can be done by
an iphone or itouch or zooming in can be done by double
The control panel on
the right of the screen has icons to help navigation.
•
The ‘zoom in’ and ‘zoom out’ icons can be used to zoom in or out on the map, as desired.
•The arrow icons are
used to move the map up, down, left and right.
The ‘back to main menu’ icon at the bottom
OneTouch screen. W
hen ‘maps’ is selected again it will return
News
Select the ‘news’
navigation icon.
Select from one of the National or International news sites listed.
The website will
be displayed. Follow the website instructions for
The control panel on the right of the screen has icons to help navigate.
•The two icons
at the top of the control panel are used to ‘go back’ or ‘go forward’
while navigating through
the website.
•The ‘home” icon
returns to the main
from
one of the news sites listed.
•
The large up and down arrows with the word ‘scroll’ in between
quickly scrolling up and down on the current web page.
•The smaller arrows
page, but at a much slower rate than the large up and down arrows.
•The keyboard icon
turns on a screen keyboard to enable typing where necessary.
The ‘back to main menu’ icon at the bottom of the screen leaves
main OneTouch screen. However when ‘
being displayed when the ‘back to main menu’ icon was selected. The ‘home’ icon may be used to
return to the main news
selection screen if desired.
www.ili.co.nz
ili Ltd "integrated lifestyle innovations"
+64 9 974 4109
Page 20 of 21
Select the ‘maps’ navigation icon.
elect
ed from the world map
by double tapping the screen or by
typing the location into the Google maps ‘Search Maps’ area at the top of the screen. The
screen keyboard can be turned on by using the keyboard icon
on the control panel.
The map can be moved by touching the screen a
nd dragging your finger in the direction the
can be done by
using the ‘pinch to zoom’
technique, just as you would on
an iphone or itouch or zooming in can be done by double
tapping the screen.
the right of the screen has icons to help navigation.
The ‘zoom in’ and ‘zoom out’ icons can be used to zoom in or out on the map, as desired.
used to move the map up, down, left and right.
The ‘back to main menu’ icon at the bottom
of the screen leaves maps and returns to the main
hen ‘maps’ is selected again it will return
to the world map
navigation icon.
Select from one of the National or International news sites listed.
be displayed. Follow the website instructions for
viewing the news.
The control panel on the right of the screen has icons to help navigate.
at the top of the control panel are used to ‘go back’ or ‘go forward’
the website.
returns to the main
news
screen, where a new selection can be made
one of the news sites listed.
The large up and down arrows with the word ‘scroll’ in between
quickly scrolling up and down on the current web page.
scroll up and down, left and right on the current web
page, but at a much slower rate than the large up and down arrows.
turns on a screen keyboard to enable typing where necessary.
The ‘back to main menu’ icon at the bottom of the screen leaves
the news option
main OneTouch screen. However when ‘
news
is selected again it will return to the
being displayed when the ‘back to main menu’ icon was selected. The ‘home’ icon may be used to
selection screen if desired.
by double tapping the screen or by
typing the location into the Google maps ‘Search Maps’ area at the top of the screen. The
on the control panel.
nd dragging your finger in the direction the
technique, just as you would on
The ‘zoom in’ and ‘zoom out’ icons can be used to zoom in or out on the map, as desired.
of the screen leaves maps and returns to the main
viewing the news.
at the top of the control panel are used to ‘go back’ or ‘go forward’
screen, where a new selection can be made
are used for
scroll up and down, left and right on the current web
turns on a screen keyboard to enable typing where necessary.
the news option
and returns to the
is selected again it will return to the
website that was
being displayed when the ‘back to main menu’ icon was selected. The ‘home’ icon may be used to
Table of contents


