Kencove FSG175 User manual

1
OPERATING MANUAL
FSG175 FENCE STAPLE GUN
To reduce the risk of possible injury, read the instructions
before using the tool. Do not use the tool if you don’t
understand the instructions. Do not use tools without
warning and/or danger labels.
Keep the manual in a safe place for future reference.
Kencove Farm Fence Supplies
344 Kendall Rd
Blairsville, PA 15717
1-800-KENCOVE
www.kencove.com

2
TABLE OF CONTENT
1. GENERAL WARNING ............................................................................3
General safety warning...........................................................................3
Tool safety warning .................................................................................4
Fuel safety warning.................................................................................5
Battery safety warning ............................................................................5
Charger safety warning...........................................................................5
2. OPERATION INSTRUCTION .................................................................6
Load and unload the fuel cell..................................................................6
Load and unload the fastener .................................................................6
Depth of drive adjustment.......................................................................7
Actuation mode and the steps to re the tool .........................................7
Jam clearing ...........................................................................................7
Charge the battery and LED on tool and charger ...................................8
3. MAINTENANCE INSTRUCTION............................................................9
General maintenance .............................................................................9
Lubrication and cleaning.........................................................................9
Cold weather...........................................................................................9
4. TROUBLE SHOOTING ...................................................................10-11

3
1. GENERAL WARNING
GENERAL SAFETY WARNING
Always wear approved safety glasses with side shields or other
approved front and side eye protection, when handling, operating or
servicing the tool. It is employer’s responsibility to enforce user and
all other nearby personnel at worksite to wear eye protection when
the tool is operated. Failure to wear complete eye protection can
result in serious injury.
Wear hearing protection at the job site. Constant or repeated
unprotected exposure to noise may cause permanent hearing loss.
Wear approved head protection whenever working in an area
where overhead work or the operation of other fastening tools
may pose a potential overhead hazard. Head protection should
also be worn when working around scaffolding, elevated work
platforms, ladders, or any other work platform that is elevated and
poses a risk of injury from falling items or the operation of hand and power tools.
Failure to wear approved head protection can result in serious head injury.
Beware of the danger of entangled clothing and hair. Do not dress loose
clothing and jewelry at work. Keep your hair, clothing and gloves away from
moving parts of the tool.
Keep your nger AWAY from the trigger when the tool is not in use.
This will prevent accidental ring of the tool.
This tool is not designed to be used in an explosive atmosphere. The tool
can generate sparks and the exhaust can also cause possible danger to ignite
highly ammable fuel or gas. Do not use the tool in this kind of environment. Do
not smoke while using or handling the tool and fuel cell.
The fuel cell contains high pressure liqueed gas. Keep it away from sparks,
re, high temperatures and explosive environments. Do not puncture the bottle
or attempt to open the fuel cell. When the fuel is used up, do not burn the cell.
Follow the recycle instructions.
Do not store the tool in temperatures above 120°F (50°C). High temperature
can result in explosion or re and the release of ammable gas. When not in
use, keep the tool away from high temperature sources, like direct sun light.
The tool needs to be used in a well ventilated area. Do not inhale the exhaust
gasses or fume, because these are a potential health risk.
!
!
!
!
!
!

4
Keep body balance when operating the tool, do not over reach.
Keep the tool, fuel, charger and battery out of the reach of children. The tool is
dangerous in the hand of untrained persons.
TOOL SAFETY WARNING
Do not modify or repair the tool in any method other than the original design.
The tool may function unexpectedly after the modication and result dangerous.
Never point the nozzle of the tool to anyone including yourself. This tool will
be dangerous if not used with care. Always assume the tool is loaded with
fasteners and fuel.
Never drive fasteners in extremely hard materials or directly on top of other
fasteners. The tool may recoil or the fastener can ricochet away from the work
piece, causing injury to the operators or bystanders.
Use only lubrication liquid specied in this manual to perform the lubrication.
The use of other lubrication may damage the tool and lead to malfunctioning
that can injure the operators or bystanders.
Keep the tool in clean condition, wipe off grease or oil after work. Do not use any
solvent based cleaner to clean the tool. It is possible the solvent will deteriorate
the rubber or plastic components of the tool. A greasy handle and tool body may
cause accidental drop of the tool and injury to nearby persons.
Always use fasteners of the type and dimensions specied for this tool
model. The use of incorrect or improperly sized fasteners can cause jamming,
cutting or separation of the fastener head, and/or loss of fastener control during
driving, and result in risk of injury from ying fasteners or fastener debris.
Do not use the tool to perform other jobs than the designated function. Especially
not use the tool as a hammer, impact on the tool will increase the risk of a
cracked body and accidental discharge of fasteners.
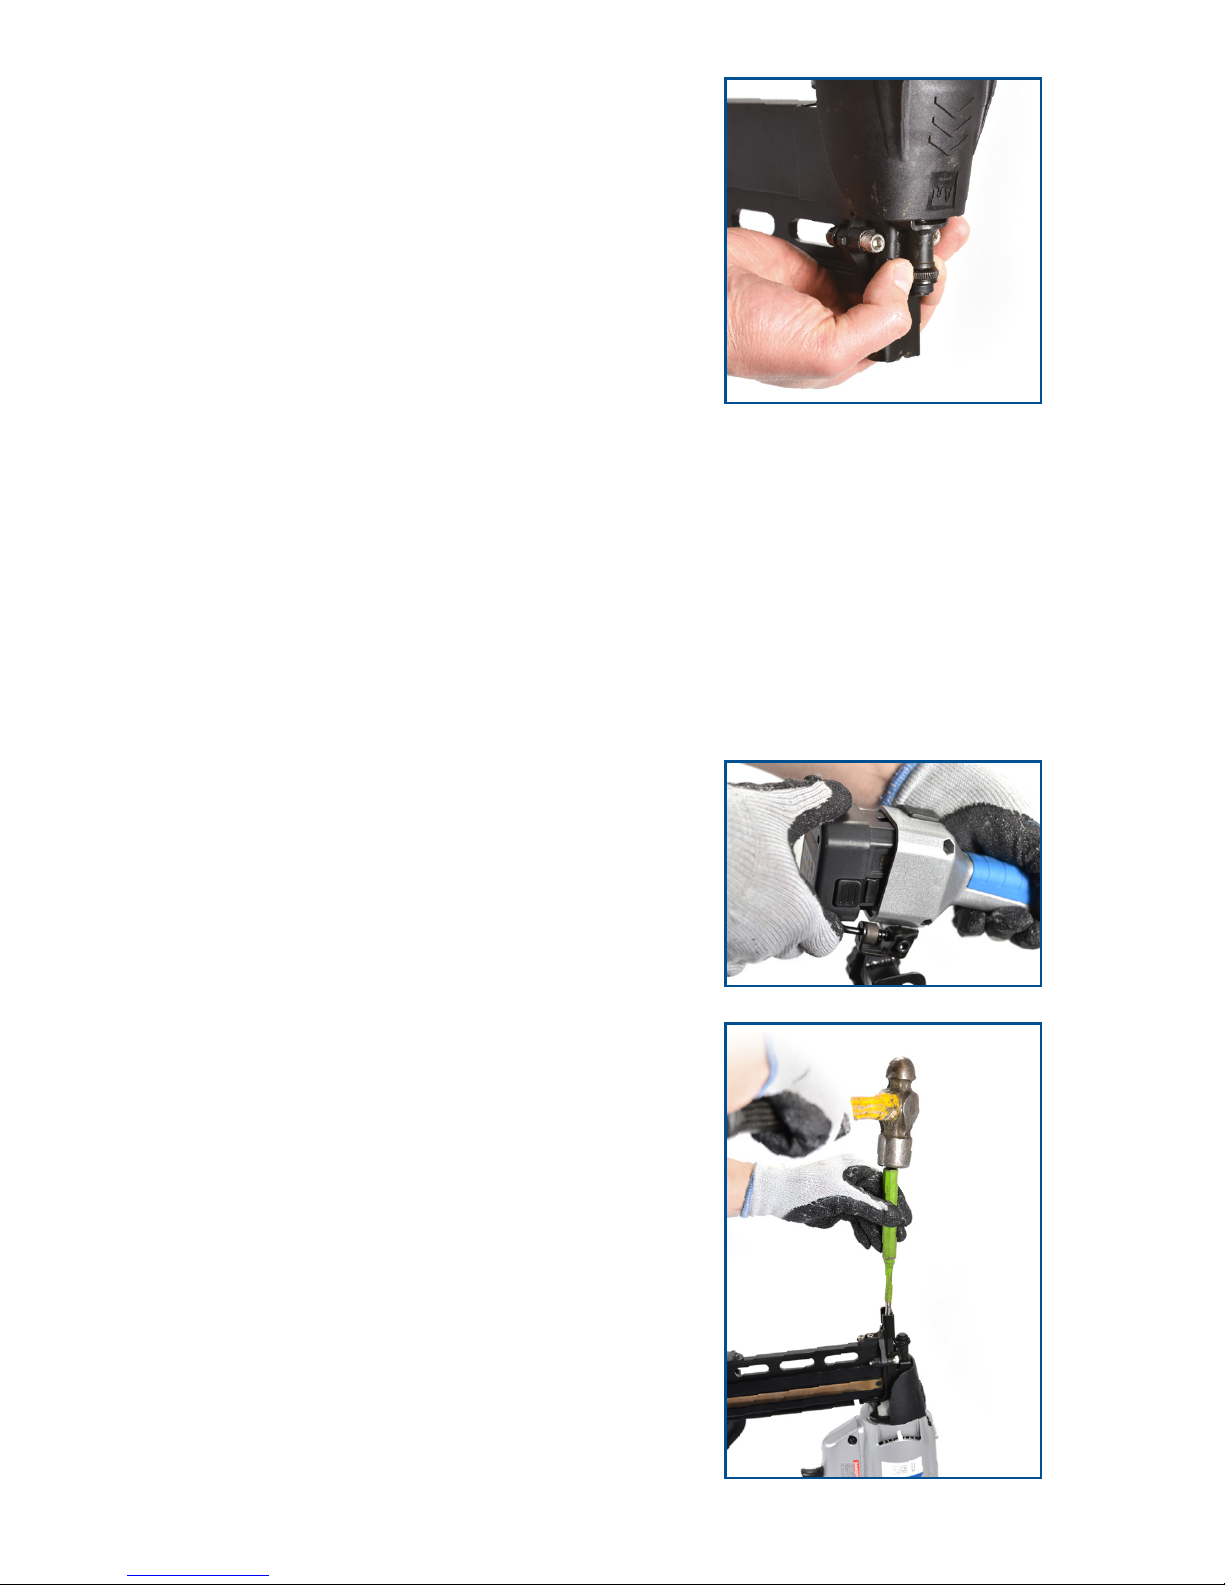
Remove the fuel cell and battery before performing maintenance, repair,
cleaning and jam clearing.
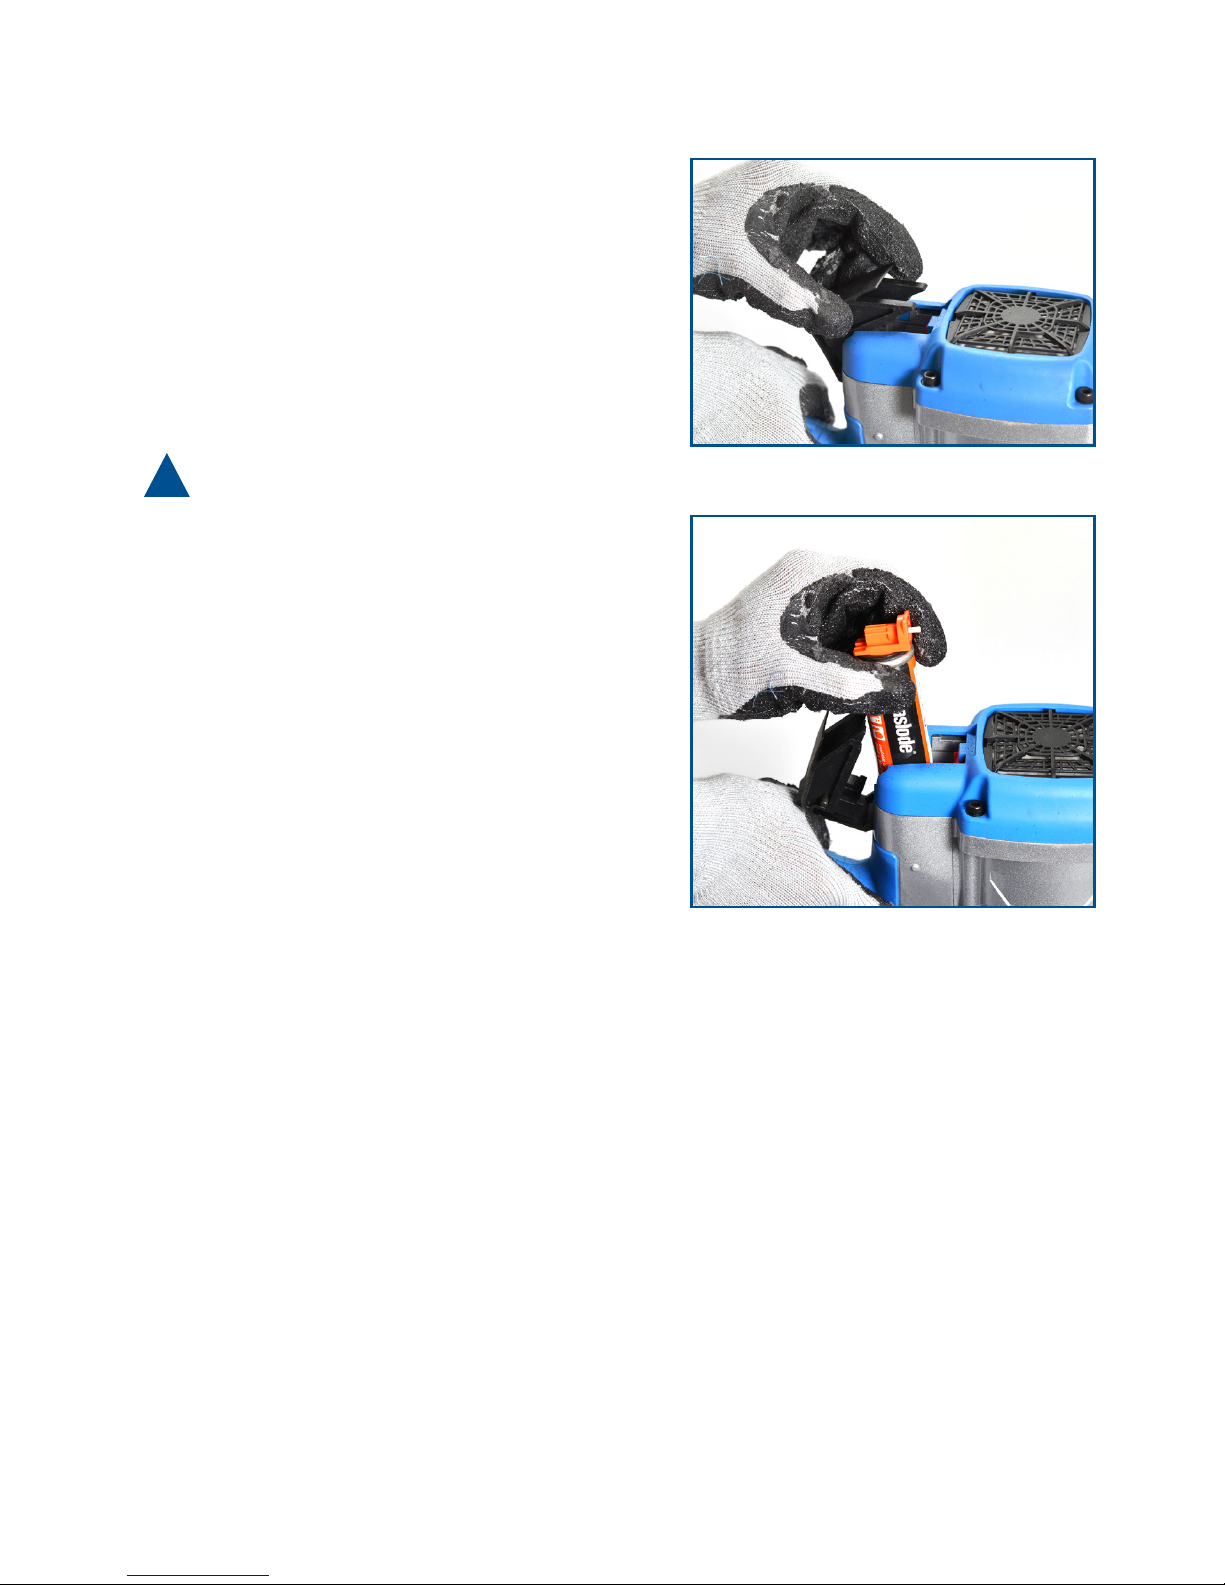
Load the fastener at last to prevent unexpected danger of loading fuel cell and battery.
Never use the tool if the trigger and safety or springs are damaged in any way.
When fastening electrical cables, make sure the cables are not connected to
the power supply. Hold the tool only by insulated gripping surfaces. Use only
fasteners designed for electrical cable installations. Inspect that the fastener
has not damaged the insulation of the electrical cables. A fastener that damages
the insulation of electric cables can lead to electric shock and re hazards.
!
!

5
FUEL SAFETY WARNING
Use only the fuel cells recommended by the manufacturer. Read the Safety
Data Sheet to understand more about your fuel cell contents.
Recycle the empty fuel cell according to the local law. Do not attempt to recharge
the fuel cell. Don’t burn the empty fuel cell.
Do not expose the fuel cell or tools loaded with a fuel cell to direct sun light.
Prevent exposure to temperatures higher than 120°F(50°C). Overheating the
fuel cell can result in explosion or re.
Do not puncture or attempt to open the fuel cell. The fuel cell contains ammable
gas even if it appears empty.
The content of the fuel cell is extremely ammable, keep it away from all
possible sources of ignition.
BATTERY SAFETY WARNING
Use only batteries that are supplied by the manufacturer.
Recycle the battery according to local law. Do not burn the battery or attempt to
puncture or crush the battery.
Do not immerse the battery into water or other uids. Do not expose the battery
to rain or snow.
Do not expose the battery or tools loaded with a battery to direct sun light.
Prevent exposure to temperatures higher than 120°F(50°C). Overheating the
battery can result in explosion or re.
Do not allow direct contact of the battery nodes with metal or conductive material.
Charge the batteries every 3 months, even if the tool is not used.
CHARGER SAFETY WARNING
Do not use the charger in an explosive atmosphere. The electrical device is not
designed for use in such environment.
Do not charge the battery outdoors or in temperatures below 40°F (5°C).
Do not puncture or attempt to open the battery case or cells.
Do not immerse the charger into water or other uids. Do not expose the charger
to rain or snow.
Do not use the charger if the cord is damaged or the charger is defect.
Unplug the charger by pulling the adaptor unit, not by pulling the cord.
Do not cover the charger with anything.
Do not use a step up transformer or engine generator as power source of the charger.
Charge a new battery for at least 6 hours before using it for the rst time.

6
2. OPERATION INSTRUCTION
LOAD AND UNLOAD THE FUEL CELL
Open the fuel cell door by pulling the
door and rotate.
Insert the fuel cell into the chamber. Align
the fuel cell nozzle with the fuel stem on
the tool.
Close the fuel cell door.
LOAD AND UNLOAD THE FASTENER
Connect to battery and fuel cell before
you load the fasteners. The tool can cycle
once when connected to the battery. If
you load the fastener before the battery
is connected, the fastener may be shot
accidentally.
Point the nozzle away from any personnel
and keep your nger away from the
trigger when loading the fastener.
To load the staples, pull the pusher to the
rear until it is locked to the magazine.
Insert the staple strips in the magazine.
Release the pusher.
To unload the fastener from the tool, pull the pusher to the rear locking
position. Take the staples out of the magazine.
!

7
DEPTH OF DRIVE ADJUSTMENT
This tool is equipped with tool free depth of
drive adjustment. Test the depth of drive on
a scrap piece before you start your work.
Turn the knob to adjust the depth of drive.
Repeat above procedure until you nd the
desired setting.
ACTUATION SYSTEM
This tool is equipped with a full sequential trigger system.
To actuate the tool, depress the safety against the work piece, and then pull
the trigger.
To actuate the tool again, you will need to release the safety fully and release
the trigger before you can repeat above procedure.
Make sure you are driving against the work piece before you pull the trigger.
JAM CLEARING
In the case of staple jam, disconnect the
power source (fuel cell and battery) before
you perform any action.
Use a screw driver to insert into the drive
channel.
Hit the screw driver with a hammer to push
back the driver blade and release the jam.
Remove the jammed staple with needle
nose pliers or a similar type of tool. Do not
use your hand to remove the staple.
If you failed to remove the jammed staple in
this way, remove the magazine by loosening
the connecting bolt. Remove the jammed
staple with needle nose pliers. Re-assemble
the magazine before further use.

8
CHARGE THE BATTERY AND LED ON TOOL AND CHARGER
The tool is supplied with two batteries. It will take 2 hours before a battery is
fully charged.
There will be no LED light when the charger is connected to the power supply
but no battery is on the charger.
The LED on the charger will turn red when it is charging a battery.
The other LED will turn green when the battery is fully charged.
In the case of battery failure, the red and green LED will blink in sequence.
When the tool is connected to a charged battery, the LED indicator on the tool
will turn green.
If the tool is running out of battery, the LED indicator will turn red. When the
LED indicator turns red, stop using the tool and replace the battery.

9
3. MAINTENANCE INSTRUCTION
GENERAL MAINTENANCE
Keep the tool in clean condition at all times. Wipe off grease or oil with a dry clean
cloth to prevent accidental tool drop. Avoid using a solvent base cleaner to clean the
tool, certain solvent will damage or weaken the composite parts of the tool. Clean
the intake lter regularly to keep the tool in full efciency.
LUBRICATION AND CLEANING
This tool should not need extra lubrication since the fuel already contains some
lubrication oil.
The combustion chamber and cylinder can be cleaned by applying automobile
carburetor cleaner. You will need to remove the 2 screws on the handle and 4
screws on the top cap to expose the internal component of the cylinder.
COLD WEATHER
This tool is not designed to be used in cold winter. The cold weather will decrease
the combustion efciency and also the battery performance. Use the tool only at
temperatures above 19°F (-7°C).
WARNING: disconnect the power
source (fuel cell and battery) before
performing any maintenance

10
4. TROUBLE SHOOTING
SYMPTOM PROBABLE CAUSE AND SOLUTION
Red LED indicator light is on and
the tool does not operate.
Battery charge might be too low.
Replace battery with a fully charged one.
Tool operates normally but does not
drive the staples to ush.
Adjust the depth of drive setting to
deepest.
Clean the cylinder with proper cleaner.
Check fuel cell and replace if required.
Depress the safety and hold for one
minute before activating the trigger. If
the tool did not re, there might be a seal
leaking in the combustion chamber.
Fan does not run and the
indicator light is red.
The battery is out. Replace the battery
with a fully charged one.
The battery contact is dirty or oily. Clean
the battery contact with a clean cloth.
If all above did not work, send to
service center near you.
Battery does not accept charge or
the charger gets hot when charging.
Replace the battery. If this action
corrects the problem, the battery is
damaged or exhausted.
Replace the charger if the battery
works ne on the tool but cannot be
charged on charger.
Charger gets hot, makes noise
or starts to smoke
The charger is damaged and should
not be used any more. Unplug the
charger immediately and replace it with
a new one.
Work contact element is not fully
depressed and the tool cannot be used.
The work contact element is bent or
the track of the safety mechanism is
sticky because of dirt build up. Clean
the safety track. Repair or replace the
work contact element.

11
SYMPTOM PROBABLE CAUSE AND SOLUTION
Tool does not cycle, the indicator
LED is green and the fan runs.
Run out of fuel, load a new fuel cell.
Spark wire is loose, check the spark
wire by removing the cap.
Spark plug is dirty. Clean the spark plug.
If all above did not work, send to
service center near you.
Tool operates normally, but no
staple is driven.
Wrong type of staples was used.
Change to the correct dimensions.
The cylinder needs cleaning.
Staple is jammed, clean the jammed
staple before use.
The pusher did not engage properly
with the staple strip. Adjust to full
engagement.
Combustion chamber is not
returning to start position.
The work contact element is bending or
dirty. Check the work contact element
and repair or replace it. Clean the
safety track.
Driver did not return to initial position,
misre frequency is higher than usual.
Check and replace fuel cell.
Clean the tool with proper cleaning uid.
Check for piston O-ring wear status.
The tool may be over heated. Clean or
replace the intake air lter.
Tool appears to be losing power.
Check fuel cell.
Clean or replace air intake lter.
Check spark plug wire.
Clean the tool with proper cleaning
uid.
For other problems: contact Kencove at 1-800-KENCOVE.

12
Table of contents