Kogan X2 Series User manual

OLED 4K UHD
SMART ANDROID TV
DOLBY ATMOS, SERIES X2
KAOLED55X2SKA, KAOLED65X2SKA

2
Safety & Warnings 3
Components 9
Remote Control 10
Installation 12
Connectivity 15
Operation 17
Voice Functions 19
Specifications 21
Troubleshooting 22
Licence 24
Notes 25

3
WARNING:
To reduce the risk of electric shock do not remove cover (op back). No user serviceable parts
inside. Prefer to qualified service personnel.
The lightning flash with arrowhead symbol, within an equilateral triangle, is
intended to alert the user to the presence of uninsulated “dangerous
voltage” within the products enclosure that may be of sufficient magnitude
to constitute a risk of electric shock to persons.
The exclamation point within an equilateral triangle is intended to alert the
user to the presence of important operating and maintenance(servicing)
instructions in the literature accompanying the appliance.
Important Safety Instructions
•Read these instructions - All the safety and operating instructions should be read before
this product is operated.
•Keep these instructions - The safety and operating instructions should be retained for
future reference.
•Heed all warnings - All warnings on the appliance and in the operating instructions
should be adhered to.
•Follow all instructions - All operating and use instructions should be followed.
•Do not use this apparatus near water - The appliance should not be used near water or
moisture - for example, in a wet basement or near a swimming pool and the like.
•Clean only with dry cloth.
•Do not block any ventilation openings. Install in accordance with the manufacturer ‘s
instructions.
•Do not install near any heat sources such as direct sunlight, radiators, heat registers,
stoves or other apparatus (including amplifiers) that produce heat.
•Keep out of reach of young children. This television is not suitable for use by young
children or infirm persons without supervision. Young children must be supervised to
ensure that they do not play with the television.
•This television is not intended for use by persons (including young children) with reduce
physical, sensory or mental capabilities or lack of experience and knowledge, unless
SAFETY & WARNINGS

4
they are supervised or have been given instructions concerning the use of the television
by a person who is responsible for their safety.
•Protect the power cord from being walked on or pinched particularly at the plugs,
convenience receptacles and at the point where they exit from the apparatus.
•Only use attachments/accessories specified by the manufacturer.
•Use only with the cart, stand, tripod, bracket or table specified by the
manufacturer or sold with the apparatus. When a cart or rack is used, use caution when
moving the cart/apparatus combination to avoid injury from tip-over.
•Unplug the apparatus during lightning storms or when unused for long periods of time.
•Refer all servicing to qualified personnel. Servicing is required when the apparatus has
been damaged in any way, such as power supply cord or plug is damaged, liquid has
been spilled or objects have fallen into the apparatus, the apparatus has been exposed
to rain or moisture, does not operate normally or has been dropped.
•CAUTION: These servicing instructions are for use by qualified service personnel only.
To reduce the risk of electric shock, do not perform any servicing other than that
contained in the operating instructions unless you are qualified to do so.
•Do not install this equipment in a confined or building-in space such as a bookcase or
similar unit and remain a well ventilation conditions at open site. The ventilation should
not be impeded by covering the ventilation openings with items such as newspaper,
tablecloths, curtains etc.
•Please refer the information on rear enclosure for electrical and safety information
before installing or operating the apparatus.
•To reduce the risk of fire or electric shock, do not expose this apparatus to rain or
moisture.
•The apparatus shall not be exposed to dripping or splashing and that no objects filled
with liquids, such as vases, shall be placed on the apparatus. Do not use the set near
dust place.
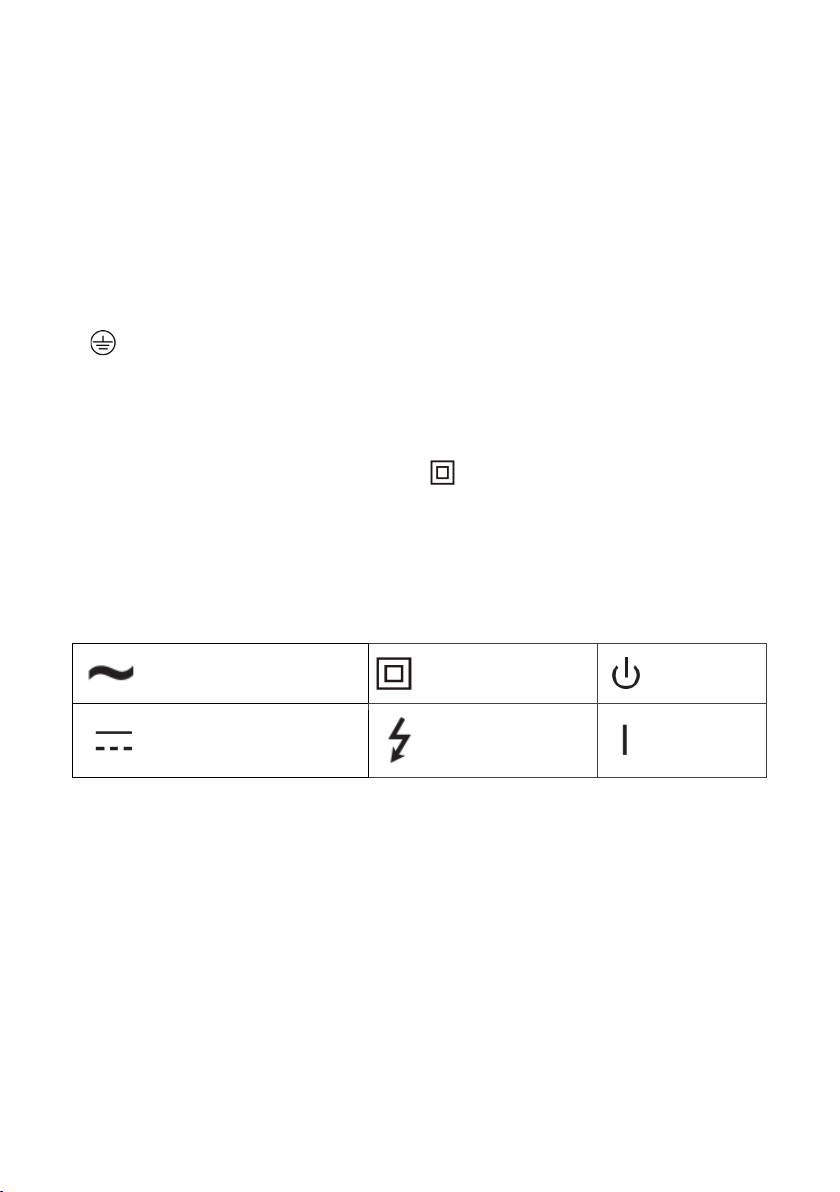
•For the terminals marked with symbol of “ ” may be of sufficient magnitude to
constitute a risk of electric shock. The external wiring connected to the terminals
requires installation by an instructed person or the use of ready-made leads or cords.
•To prevent injury, use the stand/wall-mount bracket to securely install this apparatus
on the table/wall in accordance with the installation instructions.
•Danger of explosion if battery is incorrectly replaced. Replace only with the same or
equivalent type.
•The battery (battery or batteries or battery pack) shall not be exposed toexcessive heat
such as sunshine, fire etc.
•This apparatus can be used in tropical and/or moderate climates.
•Excessive sound pressure from earphones and headphones can cause hearing loss.
Listening to music at high volume levels and for extended durations can damage one’s

5
hearing. To reduce the risk of damage to hearing, one should lower the volume to a
safe, comfortable level and reduce the amount of time listening at high levels.
•The appliance coupler is used as disconnect device, the disconnect device shall remain
readily operable.
•When not in use and during movement, please take care of the power cord set, e.g., tie
up the power cord set with cable tie or something like that. It shall be free from sharp
edges and the like that can cause abrasion of the power cord set. When put into use
again, please make sure the power cord set being not damaged, if any damages found,
please look for the service person to replace the power cord set specified by the
manufacturer or have the same characteristics as the original one.
•Attention should be drawn to environmental aspects of battery disposal.
•Protective earthing terminal. The apparatus should be connected to a mains socket
outlet with a protective earthing connection. (Only for Class I appliance)
•No naked flame sources, such as lighted candles, should be placed on the apparatus.
To prevent the spread of fire, always keep candles or other open flames away from the
apparatus.
•If the apparatus does not have the symbol in its rating label and its power cord has
three pins, it means protective earthing connection is needed. The apparatus should be
connected to a mains socket outlet with a protective earthing connection. (Only for
Class I appliance)
•The following information are recommended to be included as far as applicable where
applicable:
Alternating current (AC)
Class II equipment
Stand-by
Direct current (DC)
Dangerous voltage Power ON
•Never place a television set in an unstable location. A television set may fall, causing
serious personal injury or death. Many injuries, particularly to children, can be avoided
by taking simple precautions such as:
-Using cabinets or stands recommended by the manufacturer of the television set.
-Only using furniture that can safely support the television set.
-Ensuring the television set is not overhanging the edge of the supporting furniture.
-Not placing the television set on tall furniture (for example, cupboards or
bookcases) without anchoring both the furniture and the television set to a suitable
support.
-Not placing the television set on cloth or other materials that may be located
between the television set and supporting furniture.

6
-Educating children about the dangers of climbing on furniture to reach the
television set or its controls.
If the existing television set is going to be retained and relocated, the same considerations
as above should be applied.
Positioning the TV
•Install the display on solid horizontal surface such as a table or desk. For ventilation,
leave a space of at least 10cm free around the unit. To prevent any fault and unsafe
situations, please do not place any objects on top of the unit; or:
•Fix the rear of enclosure to wall following VESA mount instructions.
Notes:The pictures are only for reference.
Mounting on a Wall
An optional wall mount can be used with your television. Consult with your local dealer to
purchase the recommended wall mount bracket. Carefully attach the wall mount bracket
at the rear of the TV. Install the wall mount bracket on a solid wall perpendicular to the
floor. If you are attaching the TV to other building materials, please contact qualified
personnel to install the wall mount. Detailed instructions will be included with the wall
mount. Please use a wall mount bracket where the device is adequately secured to the wall
with enough space to allow connectivity to external devices.
•Disconnect the power before moving or installing the TV. Otherwise, electric shock may
occur.
•Remove the stand before installing the TV on a wall mount by performing the stand
attachment in reverse.
•If you install the TV on a ceiling or slanted wall, it may fall and result in severe injury.
Use an authorized wall mount and contact the local dealer or qualified personnel.
Otherwise, it is not covered by the warranty.
•Do not over tighten the screws as this may cause damage to the TV and void your
warranty.
10 CM
10 CM
10 CM
10 CM

7
•To prevent injury, this apparatus must be securely attached to the wall in accordance
with the installation instructions.
•Use the screws and wall mounts that meet the following specifications. Any damages
or injuries by misuse or using an improper accessory are not covered by the warranty.
Screw
Diameter (mm) "E"
Top Down
M6 M6
Depth (mm) "D"
Max 15 15
Min 13 13
Quantity 2 2
A * B * C 300 * 200 * 300
10 cm (4inch)
10 cm
10 cm
10 cm
Notes:
1. Images shown are for reference only.
2. For TV sets with terminals towards the wall, in order to leave enough space to
use the terminals, a plastic spacer is needed together with each screw to fix the
wall mount. It is a small hollow pillar, the height of which is >50mm.

8
Precautions For Using Remote Control
•Use the remote control by pointing it towards the remote sensor. The items between
the remote control and the remote sensor will interfere the normal operation.
•Do not make remote control vibrate violently. Also, do not splash liquid on the remote
control, also do not put the remote control in high humidity place.
•Do not place remote control under direct sunlight which will cause deformation of the
unit by heat.
•When the remote sensor is under direct sunlight or strong lighting, the remote control
will not work. If so, please change the lighting or TV's position or operate the remote
control closer to the remote sensor.
•Before Bluetooth searching, please make sure you have turned external Bluetooth
devices in the pairing mode. For the Bluetooth remote control supplied with the TV
(may not be available), you can press ◀ and HOME buttons together to open its pairing
mode. For other Bluetooth devices, please read their own instruction manuals for
opening the pairing mode.
Precautions For Using Battery
Improper using of the battery will cause leakage. So please do as the following methods
and use carefully.
1. Please note the batteries’ polarity, to avoid short circuit.
2. When the battery’s voltage is insufficient which affect the use range, you should
replace new battery. Remove the batteries from the remote-control unit if you do
not intend to use it for a long time.
3. Do not use different types of batteries (for example, Manganese and Alkaline
batteries) together.
4. Do not put the battery into fire and charge or decompose the battery.
5. Please dispose of batteries in compliance with relevant environmental protection
regulations.
WARNING:
The batteries (battery pack or batteries installed) shall not
be exposed to excessive heat such as sunshine, fire or the like.

9
Standard Accessories
Base Stand Base Screws (x4) Power Cord
AAA batteries (x2) Remote Control User Guide
AV Converting Cable
TV Restraining Brackets (x2)
COMPONENTS

10
Note:
The image, buttons and functions of remote control may be depending on the region
or model.
REMOTE CONTROL

11
1. Power ( ): Turn the TV on or to standby mode.
2. Mute ( ): Mute or restore the TV sound.
3. Number buttons (0~9): Select the channel directly or input a number.
4. SOURCE: Select the input source.
5. INFO: Access the INFO interface.
6. MENU. Access the menu of quick settings.
7. HOME: Access the home page.
8. Navigation Buttons (▲/▼/◀/▶): Navigate the menu to select the content you need.
9. OK: Confirm, enter or execute the selected item or show the list of Quick Button.
10. EXIT: Exit the current operation.
11. BACK: Return to upper-level content or exit the current screen.
12. Application Buttons: Access specific applications directly.
13. ***Teletext Buttons***
•TEXT: Access or exit the teletext menu.
•REVEAL: Display or hide the concealed information.
•INDEX: Display index page.
•HOLD: Hold the teletext page on screen without updates or changes.
14. Program Up/Down (P /^/v): Switch channels.
15. Volume Up/Down (VOL +/-): Adjust the sound volume.
16. GUIDE: Access the EPG interface in DTV mode.
17. MIC ( ): Start using the near field voice function.
18. *** USB Play Control Buttons***
•Play (▶): Start the playback.
•Pause (II): Pause the playback.
•Fast Backward ( ): Fast backward the playback.
•Fast Forward ( ): Fast forward the playback.
19. SUBTITLE: Turn on or turn off the subtitle menu.
20. AD: Turn on or turn off the function of audio description.
21. Colour Buttons (R/G/Y/B): Execute the prompt function in specific mode.

12
Unpacking
1. Open the package.
2. Take out the TV. Ensure to check all foam packaging for additional components
before disposing.
Base Installation
1. Remove all accessories from the packaging and ensure the below parts are all present
before disposing of any packaging.
Base L Base R Screw (x4)
INSTALLATION
Caution:
•Recommended two or more people to lift and handle a large TV.
•Avoid touching the screen so as not to cause damage to the screen.

13
2. Take out the TV and carefully place it (screen facing down) on a stable and flat table
with a soft cloth or cushion on it as shown below.
3. Attach the base stands to the TV by aligning them to the holes at the base and
inserting the screws. Do not overtighten.
Table
Soft cloth or cushion

14
Install Remote Control Batteries
Place two AAA size batteries in the remote control’s
battery compartment, making sure to match the polarity
markings inside the compartment.
Installation of Restraining Brackets
To prevent the TV from toppling over by some sudden
circumstances (such as earthquake, shock, climbing by a child,
etc.), we recommend installing the restraining brackets before
using the TV. This is recommended when using with the base
stands, and is not required if wall
1. Take outtheaccessories supplied withtheTV from the
package (pic 2).
•TV Restraining Bracket: 2 PCS
•Rope: 2 PCS
2. Remove theTVrestraining screwsfromtwo top wall-
mount holes on the TV rear cabinet with a screwdriver
(pic 1).
3. Use the TV restraining screws to fasten the TV
restraining brackets on the TV rear cabinet (pic 2).
4. Fix wall restraining brackets (not supplied) on the wall
(pic 3).
5. Connect theTVrestrainingbrackets andwall restraining
brackets tightly with rope (pic 2 & 3).
Notes:
•Ensure you’ve installed the TV near the wall so that it
cannot fall backwards.
•Wall restraining brackets (2pcs) not supplied.
Additional rope may also be required.

15
AV IN
Receive audio and video signals from AV devices such as DVD.
ANTENNA IN
Connect a coaxial cable to receive signals from the antenna or cable.
USB
Connect a USB storage device.
HDMI
Receive 4k video input signal from HDMI devices such as DVD.
CONNECTIVITY
AV IN
Camcorder
STB
DVD
Antenna or
cable TV
ANTENNA IN
USB
USB Disk
Recorder/DVD
Camcorder
HDMI
Note:
HDMI input supports ARC (Audio Return Channel) function, connect ARC-enabled
device with the TV via HDMI 1 terminal.

16
DIGITAL AUDIO OUT
Use an optical cable to output your TV ‘s audio signal to a compatible digital audio
receiver.
LAN
Wired network port.
Digital Audio Device
Digital
Audio Out
Router
LAN
Notes:
•Terminal quantities and names may vary depending on the region or model.
•External equipment and cables shown herein are not supplied with the TV.

17
E-Manual
Note:Image is for reference only and may differ.
E-Manual is built into your TV and can be displayed on the screen. To learn more about
your TV features, access your E-Manual by referring to the following:
1. Press HOME button to access the home page.
2. Press (▲/▼/◀/▶) and OK button to select “Apps” “E-Manual”.
E-Manual may not be available depending on the region or model.
TV Control Button
OPERATION
Downward
Left
Right
Upward

18
Press Middle:
1. In standby mode, press it to turn on the TV.
2. In working status,
•Without the source list, short press it to access the source list.
•With the source list, short press it to enter the
•selected source.
•Long press it to exit the source list or turn the TV to standby mode.
Push Left/Right: Adjust the TV sound volume.
Push Upward/Downward: Switch channels or select the input source in source list.
Recommended Picture Mode
There are several choices (User, Standard, Sport, etc.) in picture mode setting. The default
one is Standard, which is recommended for home viewing. If you want to restore the picture
mode to Standard, you can operate as one of the following routes.
1. MENU button Picture Mode Standard.
2. MENU button More TV Setting Picture Picture Mode Standard.
3. MENU button More TV Setting Setup Reset Default.
Eye-protection Function
Prolonged exposure to blue light may cause damage to your eyesight. This TV can protect
your eyes by filtering the blue light. To activate, select MENU More Picture
Picture Mode Movie, or MENU More Picture Colour Temperature Warm.
Notes: All the user settings will lose completely after operating the feature of “Reset
Default”.
Notes:
1. Don’t watch TV tar long time and please take a break every half an hour.
looking into the distance will help your eyes have a good rest.
2. Take eye exercise regularly, which can improve blood circulation, relieve
asthenopia and prevent myopia.
3. The eye-protection function is only available for some models.

19
Far Field Voice
1. Turn Far Field Microphone On/Off
Turn on or turn off the microphones of far field
voice function. Only after turning on the far field
microphones, successfully connecting your TV
to the network and signing into your Google
account, you can start to use the far field voice
function by saying the hot word: "Ok Google" or
"Hey Google".
2. Power Indicator
Indicates the status of the TV power:
Green: in working mode.
Red: in standby mode.
No light: powered off.
3. Far Field Microphone
Microphones of far field voice function. It is best
to keep yourself within 5 meters away from the
far field microphones while using the far field
voice function.
4. Far Field Indicator
Indicate the status of far field microphones and
far field voice function.
White: far field microphones are turned on and
far field voice function is being used.
No light: far field microphones are turned on
warning and far field voice function is not being
used.
Orange: far field microphones are turned off.
VOICE FUNCTIONS
Note:
The colour of indicators lit in various modes or circumstances may vary depending on
the region or model.
On Off

20
Near Field Voice
1. Near Field Microphone
Microphone for Near Field Voice function. It is best to keep
your mouth within 5 cm of the microphone while using the
near field voice function for optimal results.
2. MicButtonofNear FieldVoiceFunction
Press to start using the Near Field Voice function. For the
function to work, ensure you have connected your TV to the
network, paired the Bluetooth remote control with your TV
and be signed into your Google account.
If you have turned your TV off using the Near Field Voice
function, you can turn it back on using the function. If you
have turned your TV off manually, the Near Field Voice will
not be active.
Pairing Bluetooth Remote During Initial Setup
For the remote control supplied with your TV, please finish pairing with your Android TV
before using it for near field voice function. Follow the onscreen prompts to pair the remote
with the TV, holding the LEFT and HOME buttons simultaneously. Your remote’s LED light
will flash while pairing, and the TV will display ‘Remote control paired’ when successful.
Skipping Setup
To skip this step during the first-time setup, select ‘Skip’ in the bottom right corner of the
screen. You can return to this later if desired.
Returning to Bluetooth Pairing Later
To return to the Bluetooth pairing screen and pair your remote control, select ‘Settings’ from
the home screen and navigate down to ‘Remotes & Accessories’. From this submenu, select
‘Add Accessory’ and repeat the steps above to put the remote control into Bluetooth pairing
mode (holding the LEFT and HOME buttons simultaneously).
After selecting ‘Add Accessory’, the TV will scan for nearby available devices. Your remote’s
LED light will flash while pairing, and the TV will display ‘Remote control paired’ when
successful. This will allow you to use voice commands with your remote via the Near Field
Voice function.
This manual suits for next models
2
Table of contents