Tomtone Deluxe Guitar Amplifier Owner’s Manual
PAGE 5
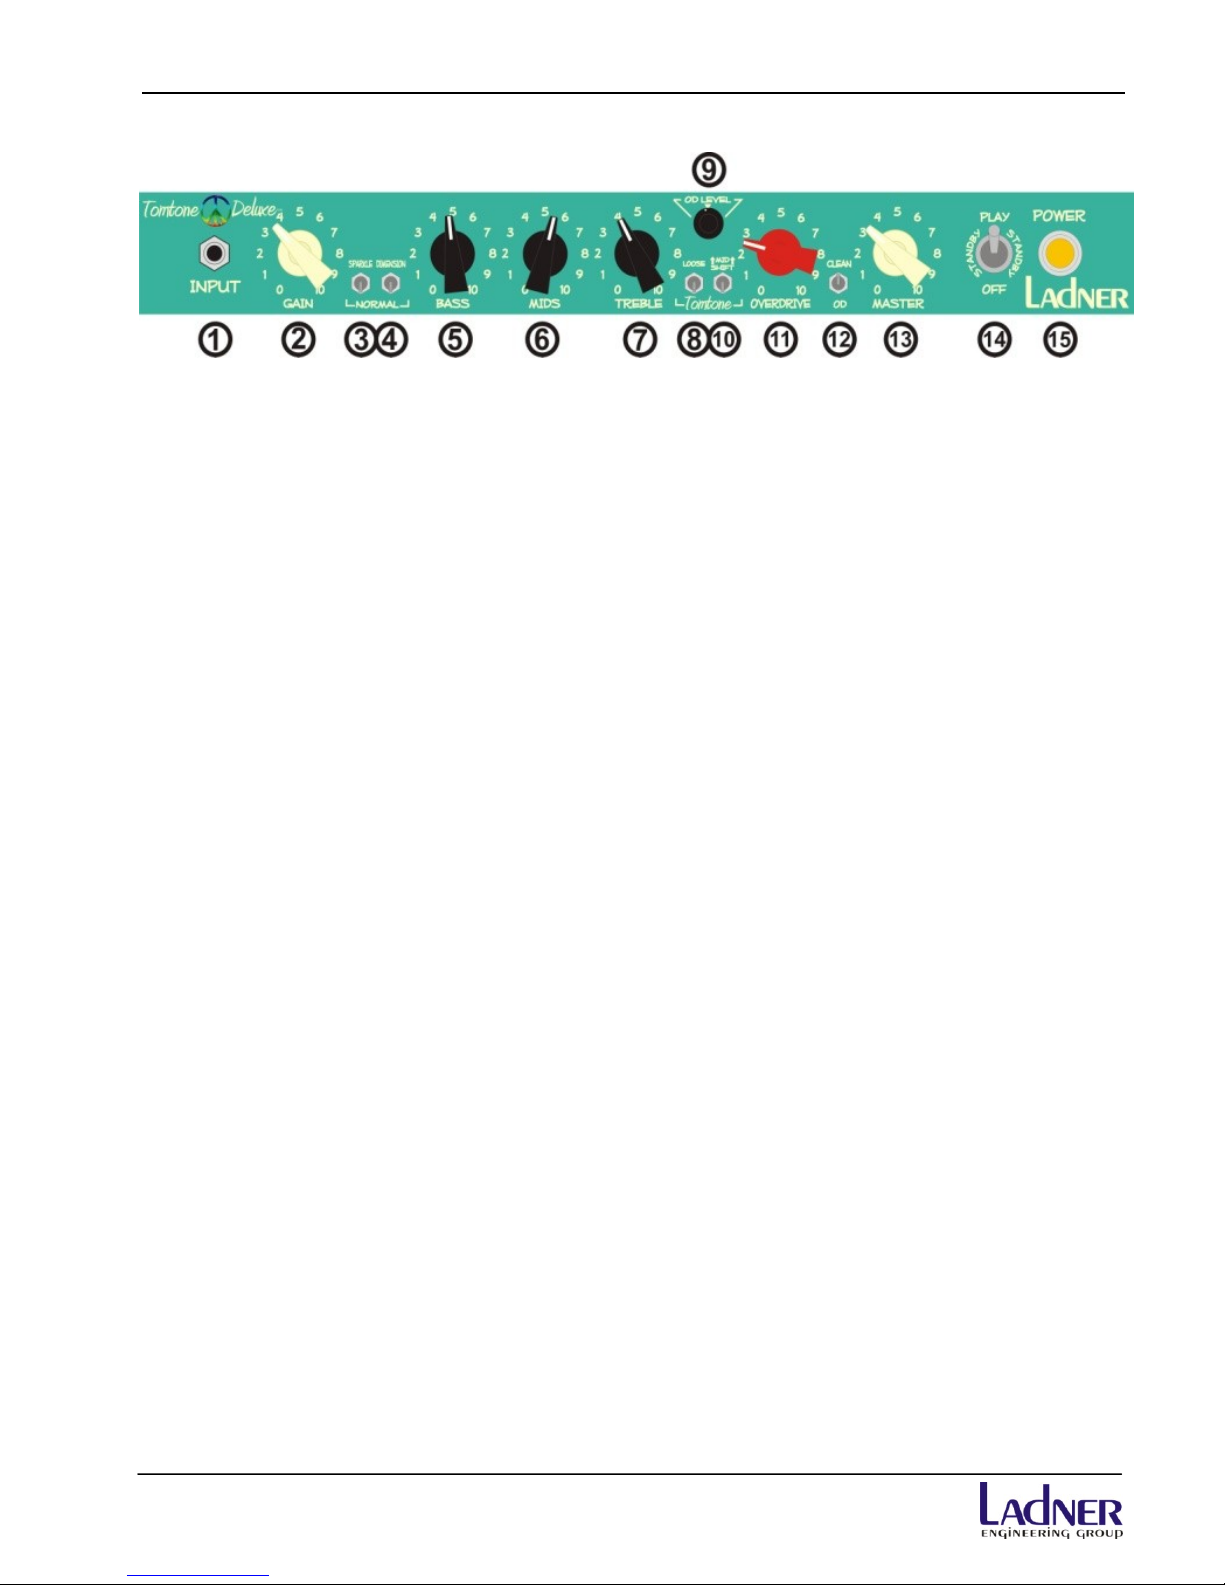
7 - TREBLE –Controls the amount of highs, and is as equally as important as the mid.
The treble is very important and powerful knob in respect to the overall tone. The
Treble knob can bring the amplifier from dark singing, full on mid range punch, to
bright crisp attack.
8 –LOOSE –This setting removes the Tomtone Voicing/Enhancement –The amplifier
is in NORMAL mode of operation. The Loose switch affects the low-end response of
the amplifier yet does not cut or boost any bass. In the Tomtone position this
enhancement can tighten and produce a more detailed bottom sound if desired.
9 –OD LEVEL –Sets the output level of the overdrive channel. It provides a way to
balance the overdrive signal to the clean signal for a balanced sound or even a
boost or cut within the overdrive function.
10 –Tomtone–This voicing embodies three mid-range variations. The bottom
selection captures Tom Riepl’s signature tone, crafted to his exact specifications.
Tom asked for a switch that captures Steely Dan meets Steve Morse, the result was
capturing the high mid attack while retaining the silky smooth overtones. The
middle selection offers a “spongy” midrange response for a looser feel and sound.
The top selection tightens the midrange without adding the high mid attack.
11 - OVERDRIVE –Adjust the amount of overdrive or crunch. Switched by either
footswitch or front panel toggle switch (with footswitch unplugged). The adjustment of
the first-stage GAIN knob is crucial to the response of the OVERDRIVE knob. Another
way to describe this knob is your “overdrive sound” or how much gain you can get
out of the amplifier adding dirty tones to the clean in response to the position of the
gain knob. The GAIN and OVERDRIVE controls represent a cascading gain stage in
a fashion that delivers smooth singing gain.
12 –CLEAN / OD –Switches between CLEAN and OVERDRIVE channels. NOTE: This
switch is disabled when the footswitch is plugged into the rear of the amp. The
footswitch takes precedence when connected.
13 –MASTER –Controls the overall volume and output of the amplifier.
14 –PLAY/STANDBY/OFF –An all-inclusive function control - go from
OFF/STANDBY/PLAY, with one switch. When powering the amplifier on, the unit
should be switched to the STANDBY position for at least five (5) minutes before
switching to the PLAY position. Additionally, when shutting down the amplifier,
place this switch in the STANDBY position for at least five (5) minutes before
switching to the OFF position. After placing the unit in the OFF position, allow the
unit to cool down before transporting, as the tubes are still hot and more likely to be
damaged due to shock or vibration. Taking these precautions can help to greatly
extend the life of the tubes, especially the output tubes.
15 –POWER –This front panel lamp indicates the amplifier is powered.