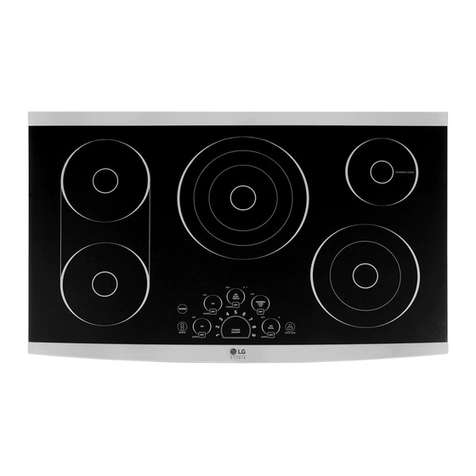
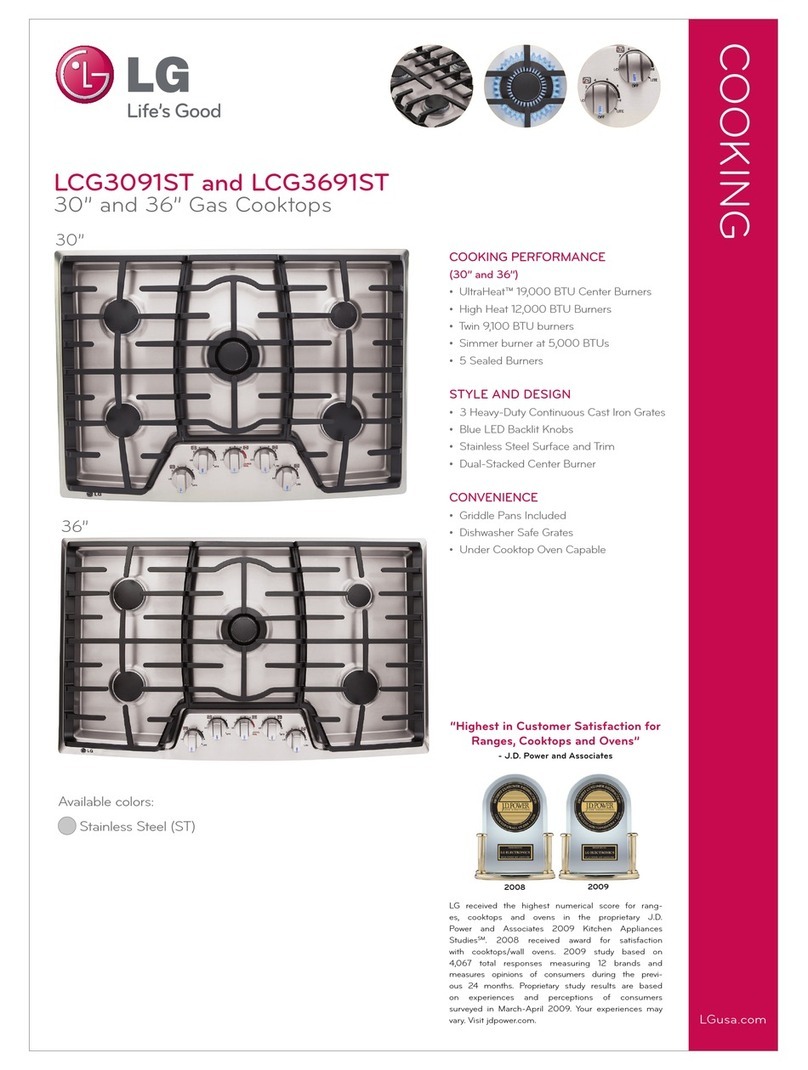
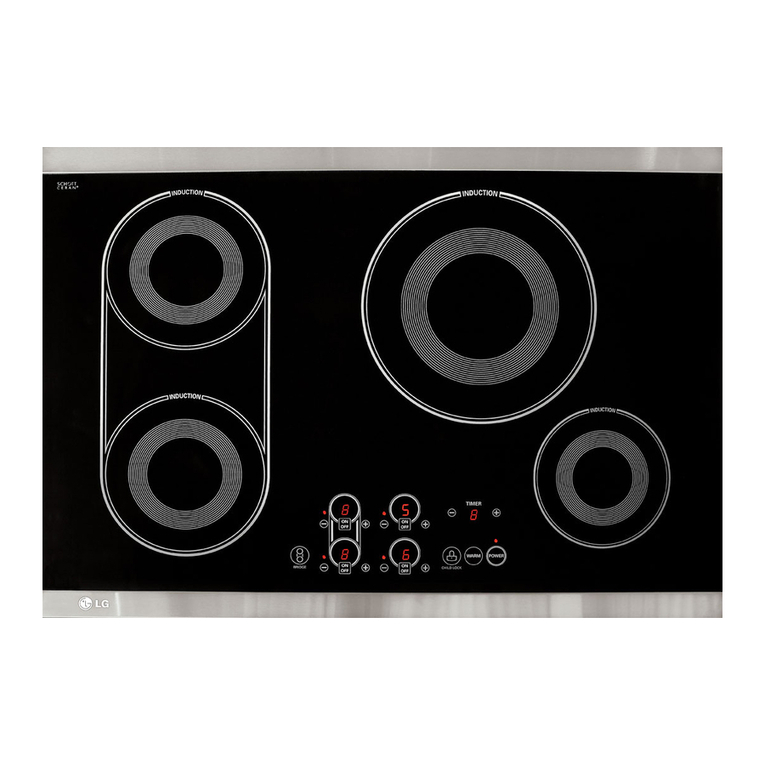
LG LSCG306ST User manual

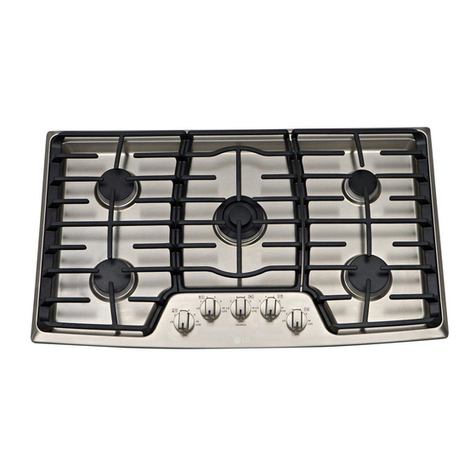
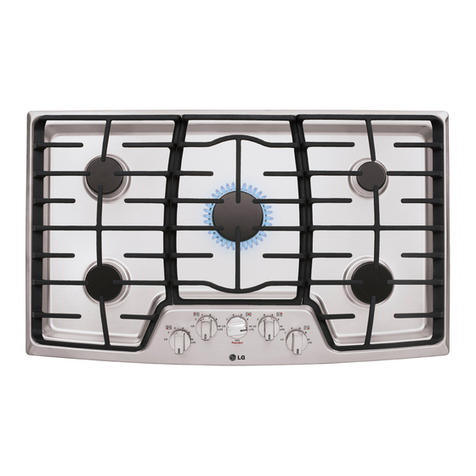
Gas Cooktop
SERVICE MANUAL
MODEL: LSCG306ST
LSCG366ST
CAUTION
BEFORE SERVICING THE UNIT, READ THE SAFETY PRECAUTIONS IN THIS MANUAL.
P/NO : MFL62725602
February, 2010
Printed in Korea
使犯
拙到
Website: http://biz.lgservice.com
Internal Use Only

-2-
CONTENTS
--------------------------------------------------------------------------------
2-3
SAFETY PRECAUTIONS
-------------------------------------------------------------------
4-9
SPECIFICATIONS
---------------------------------------------------------------------------
10
INSTALLATION INSTRUCTIONS
----------------------------------------------------------
11-17
• BEFORE YOU BEGIN
-------------------------------------------------------------------
11
• UNPACKING THE COOKTOP
------------------------------------------------------------
11
• DIMENSIONS AND CLEARANCES
-------------------------------------------------------------
12
• INSTALLING THE COOKTOP UNIT
------------------------------------------------------------
13
• PROVIDE ADEQUATE GAS SUPPLY
-----------------------------------------------------------
14
• CONNECT THE COOKTOP TO GAS
-----------------------------------------------------------
14
• ELECTRICAL CONNECTIONS
-----------------------------------------------------------------
15
• SEAL THE OPENINGS
-------------------------------------------------------------------------
15
• ASSEMBLE THE SURFACE BURNERS
--------------------------------------------------------
16
• CHECK IGNITION OF SURFACE BURNERS
----------------------------------------------------
16
• ADJUST THE SURFACE BURNER LOW FLAME (SIMMER) SETTING
----------------------------
17
OPERATING INSTRUCTIONS
--------------------------------------------------------------
18-20
• USING THE GAS SURFACE BURNERS
-----------------------------------------------------
18-19
• USING THE GRIDDLE
------------------------------------------------------------------------
20
CARE AND CLEANING OF THE COOKTOP
----------------------------------------------
21-24
• CARE AND CLEANING
-----------------------------------------------------------------------
21
• BURNER CAPS AND HEADS
------------------------------------------------------------------
22
• BURNER GRATES
---------------------------------------------------------------------------
23
• COOKTOP SURFACE
------------------------------------------------------------------------
23
• STAINLESS STEEL SURFACES
---------------------------------------------------------------
24
• CONTROL KNOBS
----------------------------------------------------------------------------
24
WIRING DIAGRAM
-------------------------------------------------------------------------
25
COMPONENT LOCATIONS
--------------------------------------------------------------
26-27
CONTENTS
LGE Internal Use OnlyCopyright © 2010 LG Electronics. Inc. All right reserved.
Only for training and service purposes

-3-
COMPONENT REPLACEMENT
------------------------------------------------------------
28-42
• Cooktop Plate
-------------------------------------------------------------------------------
28
• Single Burner Body
--------------------------------------------------------------------------
29
• Double Burner Body
-------------------------------------------------------------------------
30
• Electrode Assembly(Spark Plug)
-------------------------------------------------------------
31
•
Spark Module(I.G. Trans)
-------------------------------------------------------------------
32
•
LED Lamp Module
----------------------------------------------------------------------------
33
• Ignition Switch Assembly
---------------------------------------------------------------------
34
• Single Burner Valve
----------------------------------------------------------------------------
35
• Double Burner Valve Assembly
---------------------------------------------------------------
36
• Burner Pipe Assembly
-----------------------------------------------------------------------
37
• Manifold Pipe Assembly
----------------------------------------------------------------------
38
• Manifold Assembly
---------------------------------------------------------------------------
39
• Inlet Pipe Assembly
--------------------------------------------------------------------------
40
• Center Burner Bracket
-----------------------------------------------------------------------
41
• Side Burner Bracket(Left and Right)
------------------------------------------------------- - - -
42
CONVERSION TO LP GAS
---------------------------------------------------------------
43-46
FAILURE MODE FLOW CHART
----------------------------------------------------------
47-50
TROUBLE SHOOTING
----------------------------------------------------------------------
51
EXPLODED VIEW
---------------------------------------------------------------------------
52
REPLACEMENT PARTS LIST
-------------------------------------------------------------
53-56
LGE Internal Use Only Copyright © 2010 LG Electronics. Inc. All right reserved.
Only for training and service purposes

-4-
FORWARD
This LG Service Manual, “30 inch & 36 inch Gas Cooktop,” provides the technician with
information on the operation and service of the Gas Cooktop. It is to be used as a training
Service Manual. For specific information on the model being serviced, refer to the “Owner’s
Manual” or “Tech Sheet” provided with the Gas Cooktop.
SAFETY PRECAUTIONS
• Repairs of the appliance should be carried out by a authorized service technician only.
Incorrect repairs may result in dangerous situations. If you need repairs, contact an LG
Service Center or your dealer.
• Electrical leads and cables should not be allowed to touch the cooktop.
• Rating plate is located on the bottom side of cooktop.
• The power supply of the appliance should be turned off when it is being repaired.
WARNING:If the information in this manual is not followed exactly, a fire or explosion
may result causing property damage, personal injury or death.
- DO NOT store or use gasoline or other flammable vapors and liquids in the vicinity of
this or any other appliance.
- WHAT TO DO IF YOU SMELL GAS
• Do not try to light any appliance.
• Do not touch any electrical switch.
• Do not use any phone in the building.
• Immediately call the gas supplier from a neighbor’s phone. Follow the gas supplier’s
instructions.
• If you cannot reach the gas supplier, call the fire department.
- Installaton and service must be performed by a qualified installer, service agency or the
gas supplier.
WARNING: To avoid risk of severe personal injury or death, disconnect power before
working/servicing on the appliance to avoid electrical shock.
WARNING: For your safety, the information in this manual must be followed to minimize
the risk of fire, electric shock, or to prevent property damage, personal injury,
or death.
WARNING:
• Replace all parts before operating.
• RECONNECT all grounding devices.
- Failure to do so can result in severe personal injury death or electrical shock.
LG Electronics assumes no responsibility for any repairs made on our products by anyone
other than Authorized Service Technicians.
SAFETY PRECAUTIONS
LGE Internal Use OnlyCopyright © 2008 LG Electronics. Inc. All right reserved.
Only for training and service purposes

-5-
SAFETY PRECAUTIONS
IMPORTANT SAFETY NOTICE
The California Safe Drinking Water and Toxic Enforcement Act requires the Governor of
California to publish a list of substances known to the state to cause birth defects or other
reproductive harm and requires businesses to warn customers of potential exposure to such
substances.
SAFETY PRECAUTIONS
• Proper Installation: Be sure your appliance is properly installed and grounded by a
qualified technician in accordance with the National Electrical Code ANSI/NFPA No. 70,
latest edition in the United States, and all local code requirements. Install only per
installation instructions.
• Do not attempt to repair or replace any part of your cooktop unless it is specifically
recommended in this manual. All other service should be referred to a qualified technician.
• Remove all tape and packaging wrap before using the appliance. Destroy the carton and
plastic bags after unpacking the appliance. Never allow children to play with packaging
material.
• The safety aspects of this appliance comply with accepted technical standards.
• Know how to disconnect the electrical power to the appliance at the circuit breaker
or fuse box in case of an emergency. Mark the breaker or fuse for ease of identification
and swift action if necessary.
• Do not repair or replace any part of the appliance. All servicing should be done only by a
qualified technician to avoid the risk of personal injury and damage to the appliance.
• Never modify or alter the construction of an appliance such as removal of panels,
wire covers or any other permanent part of the product.
• Storage on appliance: Flammable materials should not be stored near or on the
cooking surface. This includes paper, plastic and cloth items, such as cookbooks,
plasticware and towels, as well as flammable liquids. Do not store explosives, such as
aerosol cans, on or near the appliance. Flammable materials may explode and result in fire
or property damage.
• Do not leave children alone. Children should not be left alone or unattended in the
area where an appliance is in use. They should never be allowed to sit or stand on any
part of the appliance.
• Do not store or use gasoline or other flammable vapors and liquids in the vicinity of this or
any other appliance.
CAUTION: Items of interest to children should not be stored in cabinets above a cooktop
or on the backsplash of a cooktop—children climbing on the cooktop to reach
items could be seriously injured.
WARNING: Never use your appliance for warming or heating a room.
LGE Internal Use Only Copyright © 2008 LG Electronics. Inc. All right reserved.
Only for training and service purposes
-6-
SAFETY PRECAUTIONS (cont.)
• Wear proper apparel. Loose-fitting or hanging garments should never be worn while
using the appliance. Do not let clothing or other flammable materials contact hot surfaces.
• Do not use water or flour on grease fires. Smother the fire with a pan lid, or use baking
soda, a dry chemical or foam-type extinguisher.
• When heating fat or grease, watch it closely. Fat or grease may catch fire if allowed to
become too hot.
• Use only dry pot holders. Moist or damp pot holders on hot surfaces may result in burns
from steam. Do not let the pot holders touch hot surface units. Do not use a towel or other
bulky cloth instead of a pot holder.
• Do not heat unopened food containers. Buildup of pressure may cause the container to
burst and result in injury.
CAUTION: DO NOT touch burners or grates after use.
DO NOT allow clothing or other flammable materials to touch burner areas
until they have had sufficient time to cool.
ELECTRICAL SAFETY
WARNING: If the supply cord is damaged, it must be replaced by the manufacturer, its
service agent or similarly qualified persons in order to avoid a hazard.
• The installation and connection of the new appliance must only be carried out by qualified
personnel.
CHILD SAFETY
WARNING: • This appliance is not intended for use by young children or infirm persons
unless they have been adequately supervised by a responsible person to
ensure that they can use the appliance safely.
• Young children should be supervised to ensure that they do not play with
the appliance.
• Accessible parts may become hot during use. Young children should be
kept away.
SAFETY DURING USE
• This appliance may only be used for normal cooking and frying in the home. It is not
designed for commercial or industrial purposes.
• Do not use the cooktop to heat the room.
• Take care when plugging in electric appliances near the cooktop. Cords must not
come into contact with the hot surface. This could cause damage to the cooktop and cable
insulation.
SAFETY PRECAUTIONS
LGE Internal Use OnlyCopyright © 2008 LG Electronics. Inc. All right reserved.
Only for training and service purposes

-7-
SAFETY DURING USE (cont.)
• Overheated fats and oils catch fire quickly. You should supervise cooking when
preparing foods in fat or oil.
• Turn off all burners after use.
• Never place combustible items on the cooktop.
• Never keep any combustible items or aerosol cans in a drawer located under the
cooktop.
• Do not use a wok on the surface burners if the wok has a round metal ring that is
placed over the burner grate to support the wok. This ring acts as a heat trap, which
may damage the burner grate and burner head. Also, it may cause the burner to work
improperly. This may cause a carbon monoxide level above that allowed by current
standards, resulting in a health hazard.
• Clean the appliance regularly to keep all parts free of grease that could catch fire.
Exhaust fan ventilation hoods and grease filters should be kept clean. Do not allow grease
to accumulate on hood or filter. Greasy deposits in the fan could catch fire. Refer to hood
manufacturer's instructions for cleaning.
• Use Proper Pan Sizes. Do not use pans that are unstable or easily tipped. Select
cookware having flat bottoms large enough to cover burner grates. To avoid spillovers,
make sure cookware is large enough to contain the food properly. This will both save
cleaning time and prevent hazardous accumulations of food, since heavy spattering or
spillovers left on range can ignite. Use pans with handles that can be easily grasped and
remain cool.
• NEVER let the flames extend up the sides of the cookware for safe handling of
cookware. Flames larger than the bottom of the cookware will not result in faster heating of
the cookware and could be hazardous.
• Do not place any object on or near the gas knob control area.
• Do not let pot holders come in contact with open flame when lifting cookware off
burners.
• Do not use a towel or other bulky cloth in place of a pot holder.
• Always the turn knob to the “LITE” the position when igniting the top burners and
make sure the burners have ignited.
• Glazed cooking utensils: Only certain types of glass, glass/ceramic, ceramic,
earthenware, or other glazed utensils are suitable for cooktop service without
breaking due to the sudden change in temperature. Check the manufacturer’s
recommendations for cooktop use.
• Ventilating hood: The ventilating hood above your cooking surface should be
cleaned frequently, so the grease from cooking vapors does not accumulate on the
hood or filter.
SAFETY PRECAUTIONS
LGE Internal Use Only Copyright © 2008 LG Electronics. Inc. All right reserved.
Only for training and service purposes
-8-
SAFETY DURING USE (cont.)
• Do not flame foods on the cooktop. If you do flame foods under the hood, turn the fan on.
• Do not lift the cooktop. Lifting the cooktop can cause damage and improper
operation of the cooktop.
• If the cooktop is located near a window, do not hang long curtains that could blow
over the surface burners and catch on fire.
• If you smell gas, turn off the gas to the cooktop and call a qualified service
technician. Never use an open flame to locate a leak.
• Never leave surface units unattended at high flame settings. Boilover causes smoking
and greasy spillovers that may ignite.
• Smother fire or flame in a pan with a lid or cookie sheet. NEVER pick up or move a flaming
pan.
• Do not use water on grease fires. Use baking soda a dry chemical or foam-type
extinguisher to smother fire or flame.
• To prevent burns, always be sure that the controls for all burners are at the “OFF”
position and all grates are cool before attempting to remove them.
• Always the turn knob to the “OFF” position before removing cookware.
SAFETY WHEN CLEANING
• Always switch off the appliance before cleaning.
• For safety reasons, do not clean the appliance with a steam jet or high-pressure
washer.
• Clean the cooktop in accordance with the maintenance and cleaning instructions in
owners manual.
• Do not use a steel wool pad; it will scratch the surface.
• To clean the stainless steel surface, use warm soapy water or a stainless steel
cleaner or polish. Always wipe the surface in the direction of the grain. Follow the cleaner
instructions for cleaning the stainless steel surface.
HOW TO AVOID DAMAGE TO THE APPLIANCE
• Do not operate the burners with empty pots or pans.
• Do not turn on the burners with no pots or pans on the grates.
• Be very cautious if removing or replacing the grates or burner parts. Moving these can
cause scratches on the cooktop.
• Do not use cookware with any dirt build up on the bottom.
CAUTION: Burn Hazard: The burners can remain hot after use. Allow time for the
burners to cool before handling them.
SAFETY PRECAUTIONS
LGE Internal Use OnlyCopyright © 2008 LG Electronics. Inc. All right reserved.
Only for training and service purposes
-9-
DISPOSAL OF OLD APPLIANCES
To protect the environment, it is important that worn-out appliances are disposed of in the
correct manner.
• The appliance must not be disposed of with household rubbish.
• You can obtain information about collection dates or public refuse disposal sites from your
local health council or environmental health office.
CAUTION: Before disposing of old appliances please make them inoperable so they
cannot be a source of danger.
READ AND FOLLOW THIS SAFETY INFORMATION CAREFULLY.
SAVE THESE INSTRUCTIONS
SAFETY PRECAUTIONS
LGE Internal Use Only Copyright © 2008 LG Electronics. Inc. All right reserved.
Only for training and service purposes
SPECIFICATIONS
ITEM DESCRIPTION
MODEL
Power Requirement
The Number of Grates
Knob type
Heating Element
Design
Burners
Left Front
Left Rear
Right Front
Right Rear
Center
Cook top Dimensions
(without Grates)
Countertop Cutout Dimensions
Shipping Weight
LSCG306ST
120 Vac, 60Hz.
3 pcs
Blue Back Light
Gas(Natural / LP)
Stainless Steel Cooktop
Natural / LP [BTU/HR]
9100 / 9100
9100 / 9100
12000 / 9500
5000 / 5000
19000 / 15000
30”(762mm) x 21
11/16”(550mm)
x 41/8”(104mm)
281/2”(724mm) x 19
11/16”(500mm)
57.54lb(26.1kg)
LSCG366ST
120 Vac, 60Hz.
3 pcs
Blue Back Light
Gas(Natural / LP)
Stainless Steel Cooktop
Natural / LP [BTU/HR]
9100 / 9100
9100 / 9100
12000 / 9500
5000 / 5000
19000 / 15000
36”(914.4mm) x 21
11/16”(550mm) x
41/8”(104mm)
3315/16”(862mm) x 19
11/16”(500mm)
61.29lb(27.8kg)
-10-
LGE Internal Use OnlyCopyright © 2008 LG Electronics. Inc. All right reserved.
Only for training and service purposes
-11-
LGE Internal Use Only Copyright © 2008 LG Electronics. Inc. All right reserved.
Only for training and service purposes
INSTALLATION AND SERVICE MUST BE PERFORMED BY A QUALIFIED INSTALLER.
IMPORTANT: SAVE THESE INSTRUCTIONS FOR LOCAL ELECTRICAL
INSPECTOR’S USE.
READ AND SAVE THESE INSTRUCTIONS FOR FUTURE REFERENCE.
BEFORE YOU BEGIN
Read these instructions completely and carefully.
NOTES TO INSTALLER:
• Read all instructions contained in these installation instructions before installing the cooktop.
• Remove all packing material before connecting the electrical supply to the cooktop.
• Observe all governing codes and ordinances.
• Only certain cooktop models may be installed over certain built-in electric oven models.
• Be sure to leave these instructions with the consumer.
NOTE TO CONSUMER:
Keep this User’s Guide and Installation Instructions for future reference.
NOTE: This appliance must be properly grounded.
Damage caused by failure to follow these instructions is not covered by the cooktop
warranty.
UNPACKING THE COOKTOP
• Unpack and visually inspect the cooktop for any damage or missing components.
INSTALLATION INSTRUCTIONS

DIMENSIONS AND CLEARANCES
• Provide enough clearances between the cooktop and adjacent combustible surfaces. These
dimensions must be met for safe use of your cooktop. The location of the electrical outlet and
pipe opening may be adjusted to meet specific requirements. The cooktop may be placed with
23/4” clearance to the back wall.
INSTALLATION INSTRUCTIONS
-12-
LGE Internal Use OnlyCopyright © 2008 LG Electronics. Inc. All right reserved.
Only for training and service purposes
1. MAINTAIN THE FOLLOWING MINIMUM
CLEARANCE DIMENSIONS
13”MAX. Depth of unprotected”
overhead cabinets
30”MIN. clearance
from countertop to
unprotected overhead
surface
A”MIN. clearance
from cutout to side
wall on the left of unit.
A”MIN. clearance
from cutout to side
wall on the right of
the unit
18”MIN. height
from countertop
to nearest cabinet
on either side of
unit
Recommended
gas supply
location
From Cutout
Center Line
1”Min. From Backwall
3. RECOMMENDED GAS SUPPLY
LOCATION FROM BACKWALL
Between
cutout
and the wall
behind the
cooktop
From front
edge of cutout
and front edge
of countertop
2. COOKTOP AND CUTOUT DIMENSIONS
Wall covering,
cabinets and
countertop
must withstand
heat up to 200°F
To ensure accuracy, it is best to make a template when
cutting the opening in the counter
MODEL
30”Cooktop
36”Cooktop
A
1113/16”
1113/16”
B
30”
36”
C
30”
36”
D
2111/16”
2111/16”
E
33/4”
33/4”
F
281/4”
335/8”
G
193/8”
193/8”
H
281/2”
3315/16”
J
1911/16”
1911/16”
K
15/8”
15/8”
L
23/4”
23/4”
4. MAKE SURE WALL COVERINGS,
COUNTERTOP AND CABINETS
AROUND COOKTOP CAN WITHSTAND
HEAT(UP TO 200°F) GENERATED BY
COOKTOP
F
width
C
width
E
height
G
depth
D
depth

-13-
LGE Internal Use Only Copyright © 2010 LG Electronics. Inc. All right reserved.
Only for training and service purposes
INSTALLING THE COOKTOP UNIT
INSTALLATION INSTRUCTIONS
1.LOCATE ELECTRICAL OUTLET AND GAS SHUT-OFF
VALVE BENEATH CABINET
NEVER RE-USE OLD FLEX CONNECTORS.
Install a manual shut-off valve in the gas line in an easily
accessible location outside the cooktop. Be sure you know
how and where to shut off the gas supply to the cooktop.
Install the electrical outlet 12” below the countertop.
2.INSERT COOKTOP INTO CUTOUT
Insert the cooktop centered into the cutout opening. Be
sure the front edge of the countertop is parallel to the
cooktop. Make final check that all required clearances are
met.
3.LOCATE RETAINER BRACKETS
Remove the retainer brackets from the literature package.
4.INSTALL THE RETAINER BRACKETS
Install the retainer brackets to the bottom of the cooktop
unit. then snug the bolts against the bottom of the
countertop as shown
NOTE: The retainer brackets MUST be installed to meet
local codes or, in their absence, with the National
Electrical Code ANSI/NFPA No. 70, latest edition.
Retainer
brackets

PROVIDE ADEQUATE GAS SUPPLY
• This cooktop is designed to operate at a pressure of 5”of water column on natural gas or 10” of
water column on LP, propan or butane gas.
• Make sure you are supplying your cooktop with the type of gas for which it is designed.
•
This cooktop is convertible for use on natural or propane gas. When using this cooktop on LP gas,
conversion must be made by a qualified LP installer before attempting to operate the cooktop on that gas.
• For correct operation, the pressure of natural gas supplied to the regulator should between 5” and
13” of water column.
• For LP gas, the pressure supplied must be between 10”and 13”of water column.
• When checking for correct operation of the regulator, the inlet pressure must be at least 1” more
than the operating -manifold- pressure as given above.
• The pressure regulator located at the inlet of the cooktop manifold must remain in the supply line
regardless of whether natural or LP gas is being used.
• A flexible metal appliance connector used to connect the cooktop to the gas supply line must have
an I.D. of 5/8” and can be 3 feet in length easily for installation. In Canada, flexible connectors
should be single wall metal connectors less than 6 feet in length.
CONNECT THE COOKTOP TO GAS
• Shut off the main gas supply valve before removing the old cooktop and leave it off until the new
hook-up has been completed. Don’t forget to relight the pilot on other gas appliances when you turn
the gas back on.
•
Because hard piping restricts movement of the cooktop, the use of a CSA International-certified flexible
metal appliance connector is recommended unless local codes require a hard-piped connection.
• Never reuse an old connector when installing a new cooktop. If the hard piping method is used, you
must carefully align the pipe; the cooktop cannot be moved after the connection is made.
• To protect gas leaks, put pipe joint compound on, all male -external- pipe threads.
❶Install a manual gas line shut-off valve in the gas line in an easily accessed location outside of the
cooktop. Be sure everyone operating the cooktop knows where and how to shut off the gas
supply to the cooktop.
❷Install male 1/2” flare union adapter to the 1/2” NPT internal thread at inlet of pressure regulator.
Use a backup wrench on the pressure regulator fitting to prevent damage.
❸Install male 1/2” or 3/4” flare union adapter to the NPT internal thread of the manual shut-off valve,
taking care to back-up the shut-off valve to keep it from turning.
❹Connect flexible metal connector to the adapter on the cooktop. Position cooktop to permit
connection at the shut-off valve.
WARNING: DO NOT USE A FLAME TO CHECK FOR GAS LEAKS.
Disconnect the cooktop and its individual shut-off valve from the gas supply piping system
during any pressure testing of that system at test pressures more than 1/2psig(3.5kPa).
Isolate the cooktop from the gas supply piping system by closing its individual shut-off valve
during any pressure testing of the gas supply system at test pressures equal to or less than 1/2
psig(3.5kPa)
INSTALLATION INSTRUCTIONS
-14-
LGE Internal Use OnlyCopyright © 2008 LG Electronics. Inc. All right reserved.
Only for training and service purposes

-15-
LGE Internal Use Only Copyright © 2008 LG Electronics. Inc. All right reserved.
Only for training and service purposes
ELECTRICAL CONNECTIONS
ELECTRICAL REQUIREMENTS
120 Volt, 60 Hertz, properly grounded dedicated circuit
protected by a 15 A or 20 A circuit breaker or time delay fuse.
GROUNDING
IMPORTANT: FOR PERSONAL SAFETY, THIS
APPLIANCE MUST BE PROPERLY GROUNDED.
• The power cord of this appliance should be equipped with a three-prong (grounding) plug which
mates with a standard three-prong grounding wall receptacle to reduce the possibility of electric
shock hazard from this appliance.
• The customer should have the wall receptacle and circuit checked by a qualified technician to be
sure the receptacle is properly grounded.
• When connecting the cord of this cooktop to a standard two-prong wall receptacle, it is the personal
responsibility and obligation of the customer to have it replaced with a properly grounded three-
prong wall receptacle.
DO NOT, UNDER ANY CIRCUMSTANCES, CUT OR REMOVE THE THIRD (GROUND)
PRONG FROM THE POWER CORD.
• A word about Ground Fault Circuit Interrupters-Ground Fault Circuit Interrupters are not required or
recommended for gas range receptacles. Ground Fault Circuit Interrupters are devices that sense
leakage of current in a circuit and automatically switch off power when a threshold leakage level is
detected. These devices must be manually reset by the customer. The National Electrical Code
requires the use of Ground Fault Circuit Interrupters in kitchen receptacles installed to serve
countertop surfaces. Performance of the cooktop will not be affected if it is operated from a Ground
Fault Circuit Interrupters protected circuit but occasional nuisance can occur.
CAUTION: The customer should have the circuit checked by a qualified technician to
make sure the receptacle is correctly grounded.
• DO NOT use an adapter plug because disconnecting of the power cord places undue strain on the
adapter and causes eventual failure of the adapter ground terminal.
• The customer must have the two-prong wall receptacle replaced with a three-prong (grounding)
receptacle by a qualified technician before using this cooktop.
• The installation of appliances designed for mobile home installation should conform with the
Manufactured Home Construction and Safety Standard, Title 24 CFR, Part 3280 (formerly the
Federal Standard for Mobile Home Construction and Safety, Title 24, HUD, Part 280) or, when such
standard is not applicable, the Standard for Manufactured Home Installations, latest edition
(Manufactured Home Sites, Communities and Set-Ups), ANSI A225.1, latest edition, or with local
codes. In Canada, mobile home installation must comply with the current CAN/CSA Z240/MH
Mobile Home Installation Code.
SEAL THE OPENINGS
• Seal any openings in the wall behind the cooktop and in the floor of the cabinet when hookups are
completed.
INSTALLATION INSTRUCTIONS

ASSEMBLE THE SURFACE BURNERS
CAUTION: DO NOT operate the burners without all parts in place.
• Place the burner caps and heads on the cooktop.
• Make sure that the caps and heads are placed in
the correct locations.
• Make sure the hole in the burner head is positioned
over the electrode.
CHECK IGNITION OF SURFACE BURNERS
Operation of all cooktop burners should be checked after the COOKTOP and gas supply lines
have been carefully checked for leaks.
ELECTRIC IGNITION
• Select a top burner knob, push down and then turn counterclockwise to the “LITE” position.
• You can hear a clicking sound indicating proper operation of the spark module.
• Once the air has been purged from the supply lines, burner should ignite within 4 seconds.
• After burner ignites, rotate knob out of the “LITE” position. Try each burner in succession until
all burners have been checked.
QUALITY OF FLAMES
• The combustion quality of burner flames needs to be confirmed visually.
• If burner flames look like A , call for service. B or C is normal burner flames, depending on the
type of gas you use.
• With LP gas, some yellow tipping on outer cones is normal.
INSTALLATION INSTRUCTIONS
-16-
LGE Internal Use OnlyCopyright © 2008 LG Electronics. Inc. All right reserved.
Only for training and service purposes
A Yellow flames
Call for service
B Yellow tips on outer cones
It is normal for LP gas
C Soft blue flames
It is normal for natural gas

-17-
LGE Internal Use Only Copyright © 2008 LG Electronics. Inc. All right reserved.
Only for training and service purposes
ADJUST THE SURFACE BURNER LOW FLAME (SIMMER) SETTING
For all surface burners except for the center burner
❶
Light all surface burners except for the center burner.
❷
Turn the knob on the burner being adjusted to “LO”(LOW).
❸
Remove knob.
❹
Insert a small, flat bladed screwdriver into the valve stem as shown in Fig.1.
❺
Turn the adjustment screw until the flame reaches the desired size.
❻
Replace the knob.
❼
Test The Flame Stability.
Test 1: • Turn the knob from “HI” to “LOW” quickly.
• lf the flame goes out, increase the flame size and test again.
Test 2: • With the burner on a “LOW” setting, open and close the oven or cabinet door quickly.
• If the flame is extinguished by the air currents created by the door movement,
increase the flame height and test again.
❽
Repeat steps 1 - 6 for each surface burner except for center burner.
Only For the center burner
❶
Disconnect power to appliance.
❷
Remove grates, burners caps, burner heads and knobs.
❸
Remove the all the screws on the cooktop by philips screwdriver.
❹
Remove cooktop by lifting up.
❺
Remove LED lamp module of the center valve by unclipping. In this case, the ignition switch
should be positioned properly.
❻
Replace the cooktop back and secure the screws of the cooktop.
❼
Position center burner head, center burner cap, center grate, center knob.
❽
Connect power to appliance.
❾
Light center burner.
❿
Turn the knob on the burner being adjusted to “LO”(LOW).
Remove knob.
Using a small, flat bladed screwdriver insert into the hole next to the valve
stem to adjust outer flame as shown in Fig.2.
Turn the adjustment screw until the flame reaches the desired size.
Replace the knob.
Test The Flame Stability.
Test 1: • Turn the knob from “HI” to “LOW” quickly.
• lf the flame goes out, increase the flame size and test again.
Test 2: • With the burner on a “LOW” setting, open and close the oven or cabinet door quickly.
• If the flame is extinguished by the air currents created by the door movement, increase
the flame height and test again.
After low flame setting, turn off the burner.
Disconnected power to appliance.
Remove knob, grate, burner cap, burner head.
Remove all screw of the cook top.
Remove cook top by lifting up.
Reposition center LED lamp module by hooking.
Reposition cook top and secure all screws of cook top.
Reposition burner heads, burner caps, grates and knobs.
Connect power to appliance.
INSTALLATION INSTRUCTIONS
Center adjustment screw
Fig. 1
Adjustment screw next to
the valve shaft
Fig. 2

USING THE GAS SURFACE BURNERS
Throughout this manual, features and appearance may vary from your model.
• Make sure all grates on the cooktop are properly placed before using any burner.
• Be sure the burners and grates are cool before you place your hand, a pot holder, cleaning
cloths or other materials on them.
• Make sure all burners are in place.
• Do not operate the burner for an extended period of time without cookware on the grate. The
finish on the grate may chip without cookware to absorb the heat.
HOW TO LIGHT A GAS SURFACE BURNER
• Be sure all the surface burners are placed in their respective positions.
• Push the control knob in and turn it to the “LITE” positions.
•
You can hear a little CLICKING noise - the sound of the electric spark igniting the burners.
• To control the flame size, turn the knob. If the knob stays at “LITE”, it will
continue to click.
•
When turning a burner to LITE, all the burners spark. Do not attempt to disassemble
or clean around any burner while another burner is on. An electric shock may result,
which could cause you to knock over hot cookware.
•
The medium (left front & rear) and the large (right front) burners are the primary burners for most cooking.
These general-purpose burners can be turned down from “HI” to “LO” suit a wide range of cooking needs.
• The extra large burner (center) is the maximum output burner. Like the other four burners, it
can be turned down from “HI” to “LO” for a wide range of cooking applications.
• This burner is also designed to quickly bring large amounts of liquid to a boil. It
has a special “SUPER BOIL” setting designed to be used with cookware 10
inches or larger in diameter.
•
The middle burners are for large pots/pans or for use with the griddle. (LSCG366ST Only)
• The extra large burner(daul) can be also turned down to “LO” for a low simmer
setting almost like the small burner.
SEALED GAS BURNERS
Your cooktop has five sealed gas burners. They offer convenience,
cleanability and flexibility to be used in a wide range of cooking
applications. The smallest burners are in the right rear this burner can
be turned. These burners can be turned down to “LO” for a very low
simmer setting. They provide precise cooking performance for delicate
foods such as sauces or food that require low heat for a long cooking
time.
IN CASE OF POWER FAILURE
In case of a power failure, you can light the gas surface burners on your cooktop with a match.
Hold a lit match to the burner, then push in and turn the control knob to the “LITE” position. Use
extreme caution when lighting burners this way. Surface burners in use when an electrical
power failure occurs will continue to operate normally.
OPERATING INSTRUCTIONS
-18-
LGE Internal Use OnlyCopyright © 2008 LG Electronics. Inc. All right reserved.
Only for training and service purposes
Push the control knob in
and turn it to the LITE
position.
Extra-large
burner only
Extra Large (dual)
Medium
Small
Large

-19-
LGE Internal Use Only Copyright © 2008 LG Electronics. Inc. All right reserved.
Only for training and service purposes
USING THE GAS SURFACE BURNERS
HOW TO SELECT FLAME SIZE
• NEVER let the flames extend up the sides of the cookware for safe
handling of cookware.
• Watch the flame, not the knob, as you reduce heat. When fast heating
is desired, the flame size on a gas burner should match the cookware
you are using.
• Flames larger than the bottom of the cookware will not result in faster
heating of the cookware and could be hazardous.
COOKWARE
• Aluminum: Medium-weight cookware is recommended because it heats quickly and evenly.
Most of the foods brown evenly in an aluminum skillet. Use saucepans with tight fitting lids
when cooking with minimum amounts of water.
• Cast-Iron: If heated slowly, most skillets will give satisfactory results.
• Stainless Steel: This metal alone has poor heating properties and is usually combined with
copper, aluminum or other metals for improved heat distribution. Combination metal skillets
usually work satisfactorily if they are used with medium heat as the manufacturer
recommends.
• Enamelware: Under some conditions, the enamel of some cookware may melt. Follow
cookware manufacturer’s recommendations for cooking methods.
• Glass: There are two types of glass cookware-those for oven use only and those for top of the
range cooking (saucepans, coffee and teapots). Glass conducts heat very slowly.
• Heatproof Glass Ceramic: Can be used for either surface or oven cooking. It conducts heat
very slowly and cools very slowly. Check cookware manufacturer’s directions to be sure it can
be used on gas ranges.
USING A WOK
• Do not use a wok support ring. Placing the ring over the burner or
grate may cause the burner to work improperly, resulting in carbon
monoxide levels above allowable standards.
• This can be hazardous to your health.
• We recommend that you use a 14-inch or smaller flat-bottomed wok.
Make sure the wok bottom sits flat on the grate. They are available at
your local retail store.
• Only a flat-bottomed wok should be used.
STOVE-TOP GRILLS
• Do not use stove top grills on your surface burners. If you use the
stove top grill on the surface burner, it will cause incomplete
combustion and can result in exposure to carbon monoxide levels
above allowable current standards.
• This can be hazardous to your health.
OPERATING INSTRUCTIONS

USING THE GRIDDLE
• Your non-stick coated griddle provides an extra-
large The griddle must only be used on the left
or other food usually prepared in a frying pan or
skillet.
NOTE: Your griddle will discolor over time as it
becomes seasoned with use.
• How to Place the Griddle: The griddle can only
be used on the left side grate. The griddle must
be properly placed on the center grate.
NOTE: Do not remove the left side grate when using the griddle.
IMPORTANT NOTES :
• Avoid cooking extremely greasy foods, grease spill over can occur.
• The griddle can become hot when surrounding burners are in use.
• Do not overheat the griddle. This can damage to the non stick coating.
• Do not use metal utensils that can damage the griddle surface. Do not cut foods on the
griddle.
• Do not place or store items on the griddle.
OPERATING INSTRUCTIONS
-20-
LGE Internal Use OnlyCopyright © 2008 LG Electronics. Inc. All right reserved.
Only for training and service purposes
CAUTION
• The griddle plate on the cooktop may
become very hot when using the cooktop,
oven or broiler systems. Always use oven
mitts when placing or removing the griddle
plate.
CAUTION
• Do not remove the griddle plate until the
cooktop grates, surfaces and griddle plate
are completely cooled.
The griddle must only be used
on the left side grate.
Other manuals for LSCG306ST
3
This manual suits for next models
1
Table of contents
Other LG Cooktop manuals

LG
LG LCE3610SB User manual

LG
LG HG6412A User manual

LG
LG LCE3081ST - 30in Smoothtop Electric Cooktop 5 Steady Heat... Instruction Manual

LG
LG LSCG307ST User manual

LG
LG LSCG367ST User manual

LG
LG LCE3010SBSP User manual

LG
LG LRE30757SW Use and care manual

LG
LG HN7413AG Instruction Manual

LG
LG LCG3691ST - 36" Gas Cooktop User manual

LG
LG LSE4617 Series User manual