© 2017 LUMO INTERACTIVE INC.
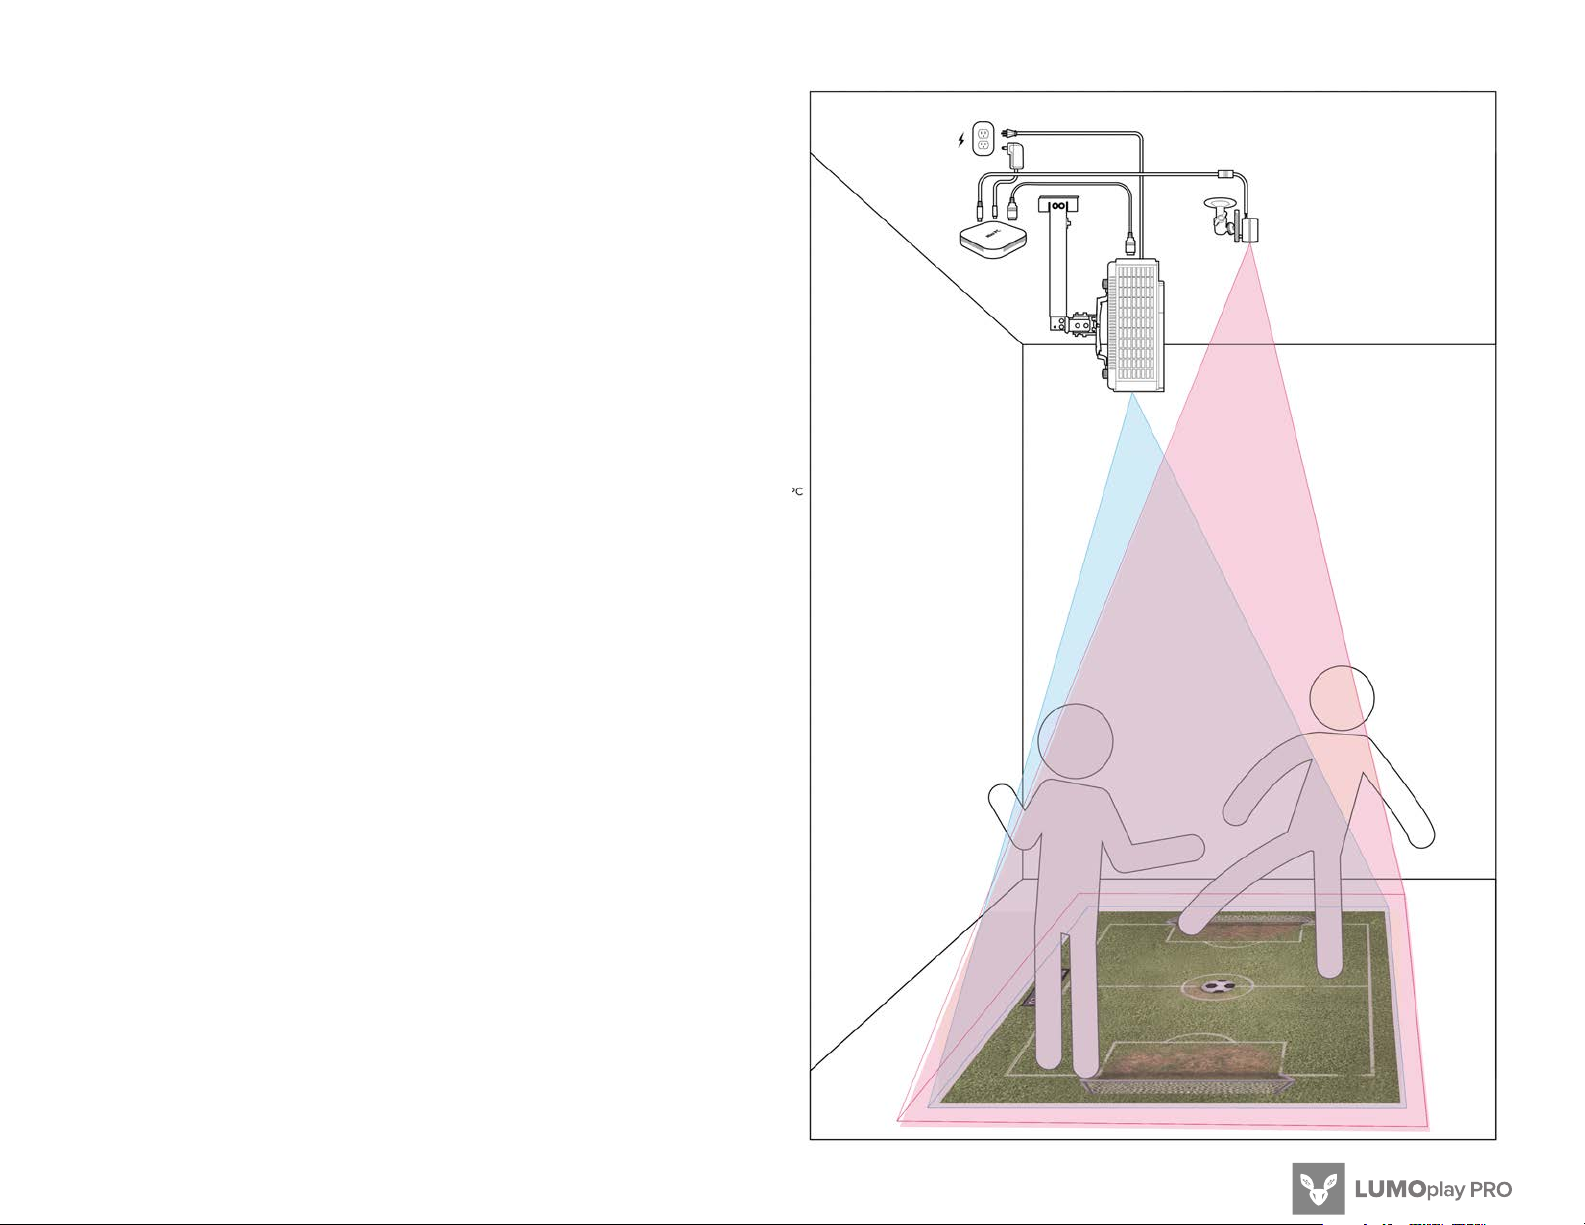
7Floor Projection Ceiling Mounted
INSTRUCTIONS FOR USE
— Connect to the Internet to download your Lumo
Play software from www.lumoplay.com, install it and
register the software.
— Follow the instructions that came with your
projector mount to install the projector mount on the
ceiling. Plug your projector into the power outlet.
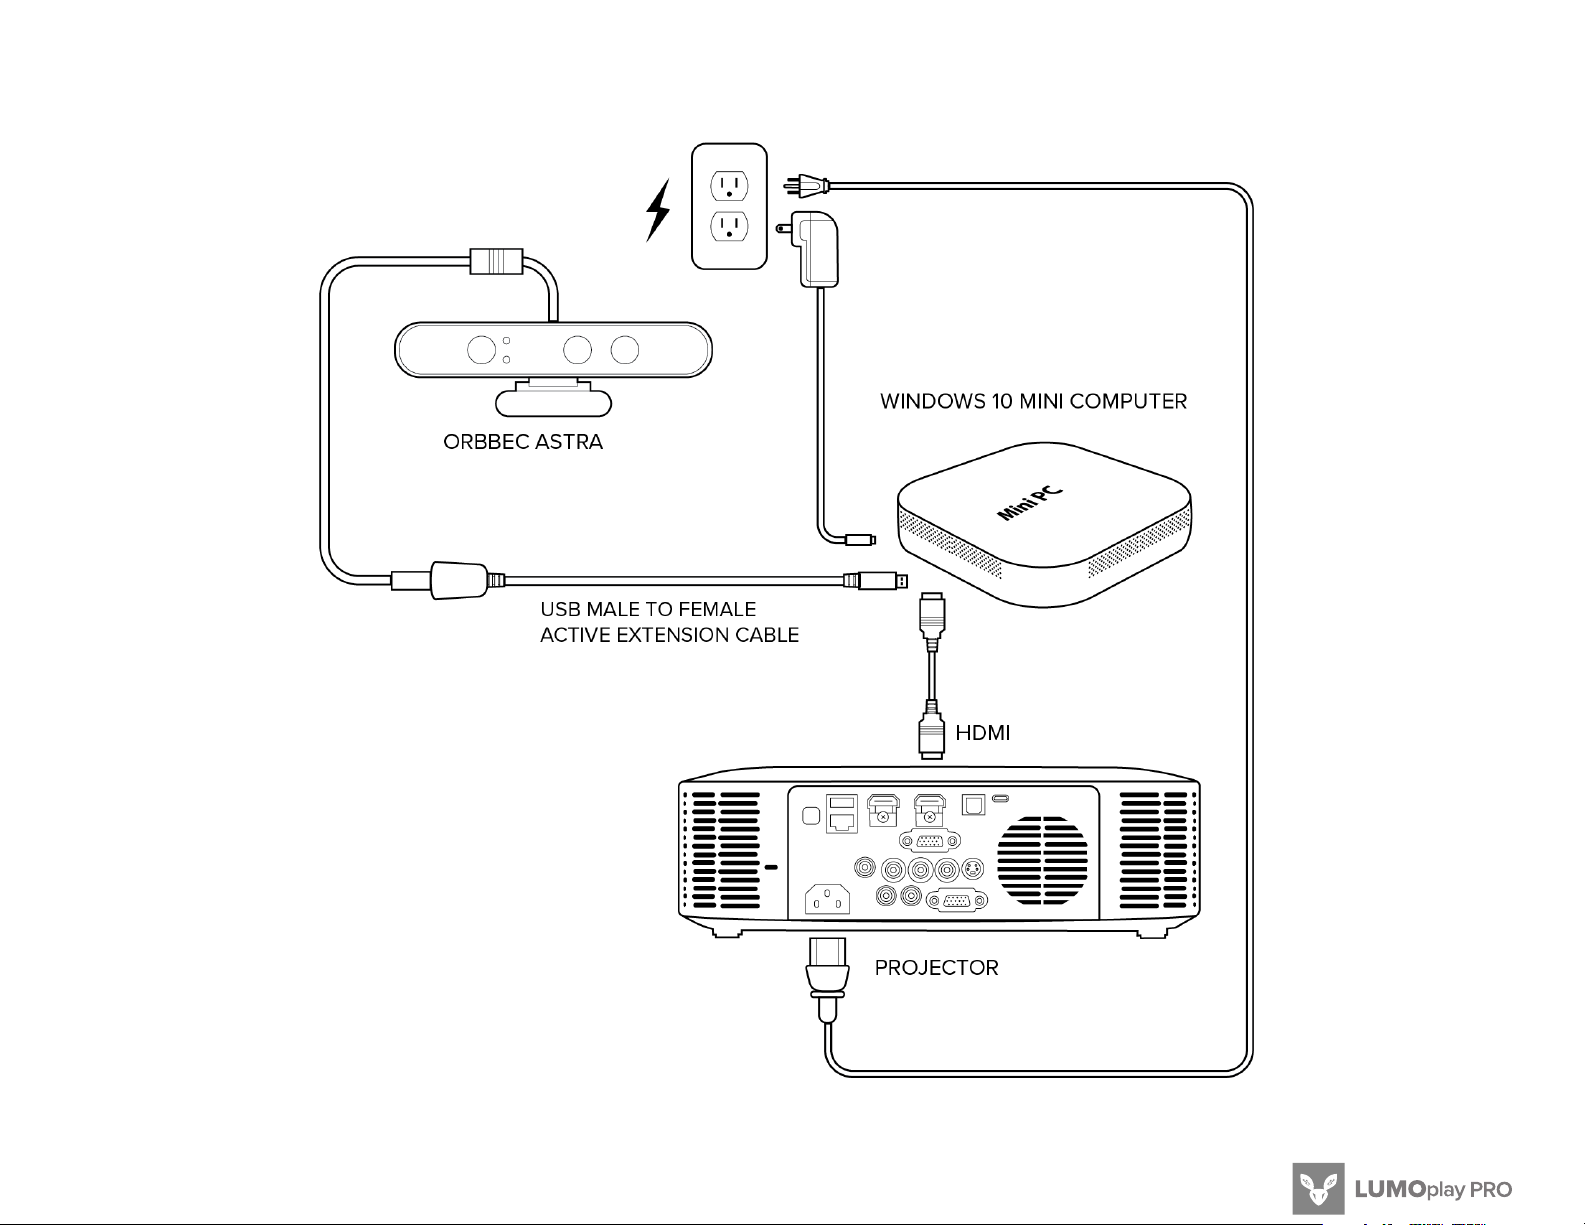
— Place your Windows 10 computer where it will
be stored permanently. Turn it on. Connect to the
Internet. Connect a wireless keyboard and mouse
to the computer. Connect the computer to the
projector using an HDMI cable.
— Follow the instructions that came with your
camera mount to install the Orbbec Astra camera on
the ceiling.
— Connect the USB male to female active
extension cable to the Orbbec Astra. Plug the
USB connector into a USB port of your Windows 10
computer.
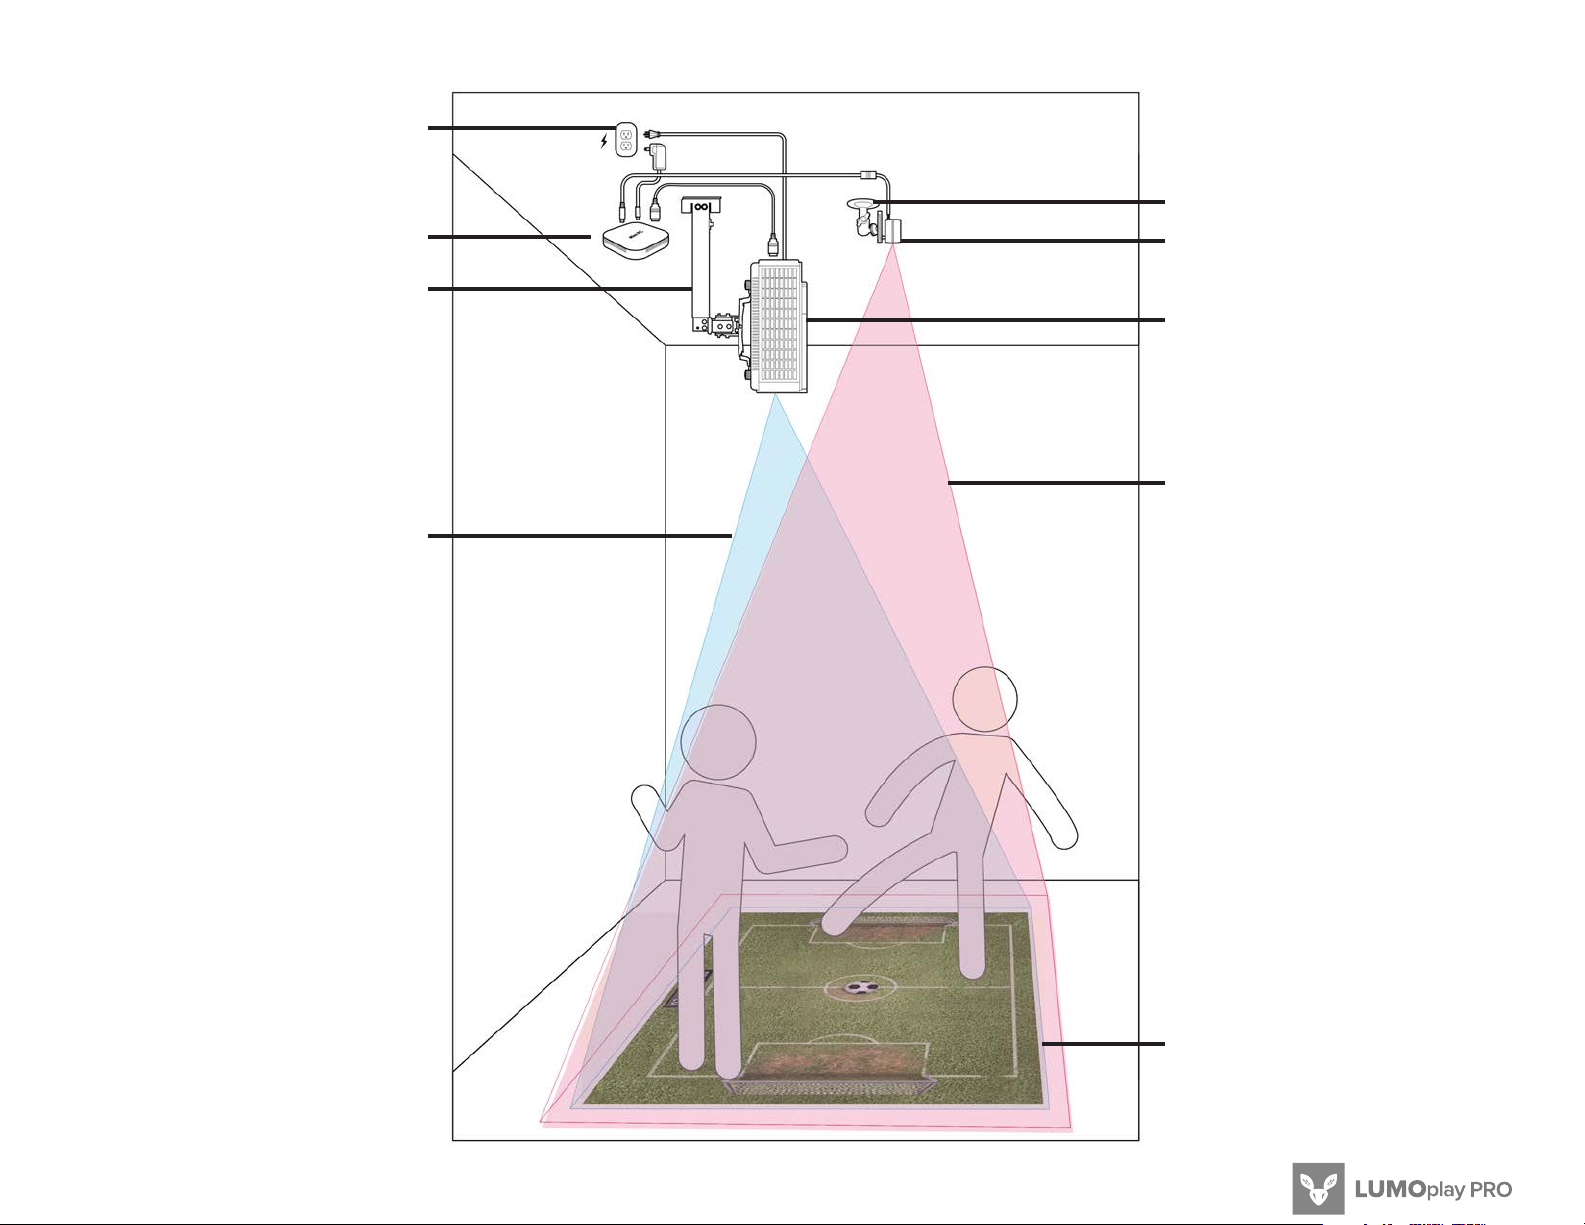
— Once the hardware is in position (see illustration
3) run the Lumo Play software and follow the
installation wizard to calibrate the software and run
a game.
ADVANTAGES FOR THIS SETUP
— Shadows are minimal and directly under users
— Equipment is out of reach
— Chances of equipment moving is low
— Need to recalibrate is low
— Accurate motion detection
DRAWBACKS FOR THIS SETUP
— Equipment is not accessible
— Not portable
GOOD TO KNOW
— Devices may get warm while in use; this is
completely normal and they will gradually cool down
again after they are turned o.
— Not all projectors are made for ceiling to floor
projection or other similar vertical projection. Please
check with your projector manufacturer to make
sure your projector can be safely used in a vertical
position (pointing at the floor). It is recommended
that you use LED or LED laser/hybrid projectors for
vertical projection. Projectors with LED bulbs and
heat vents on the side or back of the projector are
generally safe to use.
— We strongly recommend using cable protection
channels to keep stray power and usb cables away
from little hands.