manuals.online logo
Brands
  1. Home
  2. •
  3. Brands
  4. •
  5. Magnavox
  6. •
  7. CRT TV
  8. •
  9. Magnavox MS3252S User manual

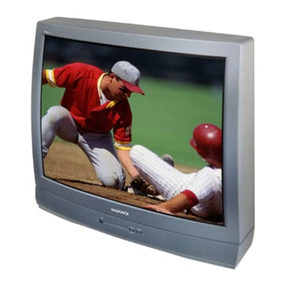
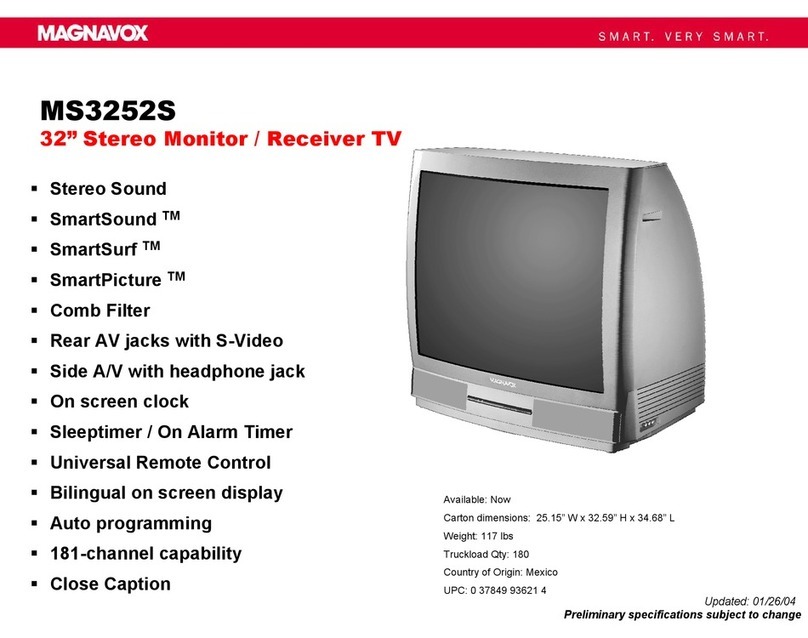
Magnavox MS3252S User manual

Other manuals for MS3252S

4

This manual suits for next models

1

Other Magnavox CRT TV manuals

Magnavox MT1301B User manual

Magnavox

Magnavox MT1301B User manual

Magnavox MS3250C User manual

Magnavox

Magnavox MS3250C User manual

Magnavox 20MT1336 - 20" Color Tv User manual

Magnavox

Magnavox 20MT1336 - 20" Color Tv User manual

Magnavox MT1931B User manual

Magnavox

Magnavox MT1931B User manual

Magnavox MT1331B User manual

Magnavox

Magnavox MT1331B User manual

Magnavox PR0910X User manual

Magnavox

Magnavox PR0910X User manual

Magnavox 20MS233S - 20" Color Tv Stereo User manual

Magnavox

Magnavox 20MS233S - 20" Color Tv Stereo User manual

Magnavox MT1901B User manual

Magnavox

Magnavox MT1901B User manual

Magnavox 20MT133S - 20" Color Tv Mono User manual

Magnavox

Magnavox 20MT133S - 20" Color Tv Mono User manual

Magnavox 27MT6005D - 27" Integrated Real Flat Sdtv User manual

Magnavox

Magnavox 27MT6005D - 27" Integrated Real Flat Sdtv User manual

Magnavox 20MS3442/17 User manual

Magnavox

Magnavox 20MS3442/17 User manual

Magnavox MTV-34, MTV-51, MTV-68 User manual

Magnavox

Magnavox MTV-34, MTV-51, MTV-68 User manual

Magnavox MS3650C - 36" Smart Ctv Manual

Magnavox

Magnavox MS3650C - 36" Smart Ctv Manual

Magnavox PR1310C User manual

Magnavox

Magnavox PR1310C User manual

Magnavox 27MS5402 - 27v 100hz Tv Installation instructions

Magnavox

Magnavox 27MS5402 - 27v 100hz Tv Installation instructions

Magnavox MS3252S User manual

Magnavox

Magnavox MS3252S User manual

Magnavox MT1905B User manual

Magnavox

Magnavox MT1905B User manual

Magnavox MS3250C99 Manual

Magnavox

Magnavox MS3250C99 Manual

Magnavox 20MT2131 User manual

Magnavox

Magnavox 20MT2131 User manual

Magnavox MT2501C User manual

Magnavox

Magnavox MT2501C User manual

Magnavox 29MT4515 User manual

Magnavox

Magnavox 29MT4515 User manual

Magnavox MT1301B User manual

Magnavox

Magnavox MT1301B User manual

Magnavox 32MT5015D - 32" Integrated Sdtv Owner's manual

Magnavox

Magnavox 32MT5015D - 32" Integrated Sdtv Owner's manual

Magnavox MS2530C - 25i Color Tv User manual

Magnavox

Magnavox MS2530C - 25i Color Tv User manual

Popular CRT TV manuals by other brands

JVC AV-21QS5SP instructions

JVC

JVC AV-21QS5SP instructions

Philips COLOR TV 25 INCH TABLE TR2517C owner's manual

Philips

Philips COLOR TV 25 INCH TABLE TR2517C owner's manual

LG 30FZ1DC Specification sheet

LG

LG 30FZ1DC Specification sheet

Sony FD TRINITON WEGA KV-24FS120 operating instructions

Sony

Sony FD TRINITON WEGA KV-24FS120 operating instructions

RCA F19442 user guide

RCA

RCA F19442 user guide

Samsung CS761 Owner's instructions

Samsung

Samsung CS761 Owner's instructions

Philips 29PT4973 Instructions for use

Philips

Philips 29PT4973 Instructions for use

Panasonic TC-29P100 Series operating instructions

Panasonic

Panasonic TC-29P100 Series operating instructions

RCA F19422 user guide

RCA

RCA F19422 user guide

Sony WEGA KV 32HS20 operating instructions

Sony

Sony WEGA KV 32HS20 operating instructions

Samsung SlimFit TX R3079WH Owner's instructions

Samsung

Samsung SlimFit TX R3079WH Owner's instructions

Palsonic MODEL 5179G owner's manual

Palsonic

Palsonic MODEL 5179G owner's manual

Toshiba CF13H22 owner's manual

Toshiba

Toshiba CF13H22 owner's manual

Philips 21PT9469 user manual

Philips

Philips 21PT9469 user manual

Mitsubishi CS-35305 owner's guide

Mitsubishi

Mitsubishi CS-35305 owner's guide

Toshiba 14AF41 owner's manual

Toshiba

Toshiba 14AF41 owner's manual

Hitachi 35UX60B, 35TX10B operating guide

Hitachi

Hitachi 35UX60B, 35TX10B operating guide

Sony KD-34XBR970 - 34" Hdtv 16x9 Format Specifications

Sony

Sony KD-34XBR970 - 34" Hdtv 16x9 Format Specifications

manuals.online logo
manuals.online logoBrands
  • About & Mission
  • Contact us
  • Privacy Policy
  • Terms and Conditions

Copyright 2025 Manuals.Online. All Rights Reserved.

NEED HELP? CALL USI.
/V1AGNAVOX REPRESENTATIVES ARE READY TO HELP YOU WITH ANY
QUESTIONS ABOUT YOUR NEW PRODUCT. VVE CAN GUIDE YOU THROUGH
CONNECTIONS, FIRST-TIME SETUP, AND ANY OF THE FEATURES.
WE WANT YOU TO START ENJOYING YOUR NEW PRODUCT RIGHT AWAY.
CALL US BEFORE YOU CONSIDER RETURNING THE PRODUCT.
1-800-705-2000
OR VISIT US ON THE WEB AT WWW.MAGNAVOX.COM
Once your MAGNAVOX purchase is registered, you're eligible to receive all the privileges of owning a MAGNAVOX
product. So complete and return the Warranty Registration Card enclosed with your purchase at once. And take
advantage of these important benefits.
Congratulations on your purchase,
and welcome to the "family?"
Dear HAGNAVOX product owner:
Thank you for your confidence in MAGNAVOX. You've selected one of
the best-built, best-backed products available today. We'll do everything
in our power to keep you happy with your purchase for many years to
come.
As a member of the MAGNAVOX "family," you're entitled to
protection by one of the most comprehensive warranties and
outstanding service networks in the industry.
What's more, your purchase guarantees you'll receive all the
information and special offers for which you qualify, plus easy
access to accessories from our convenient home shopping network.
Most importantly, you can count on our uncompromising commitment
to your total satisfaction.
All of this is our way of saying welcome-and thanks for investing in a
MAGNAVOX product.
P.S. Remember, to get the most from your MAGNAVOX
product, you must return your Warranty Registration
Card within I 0 days. So please mail it to us right now!
Know these
safetysymbols
CAUT(D_(: TO REDUCE Ti(E _SK OF ELE_m@C SH(_((, DO HOT
REMOVE COVER (OR (_ACK). _0 USEi:I_ERV(CEA_LE PARTF_
II_SIOE. REFEK%_ERVICli_D TO _UALI_IED _1_ I_ERSO_NEL=
i
_This "bolt of lightning" indicates
uninsulated material within your unit
may cause an electrical shock. For the
safety of everyone in your household,
pleasedo not remove product covering.
_The "exclamation point" calls atten-
tion to features for which you
should read the enclosed literature
closely to prevent operating and mainte-
nance problems.
WARNING: TO PREVENT FIRE OR
SHOCK HAZARD, DO NOT EXPOSE
THIS EQUIPMENT TO RAIN OR MOIS-
TURE.
CAUTION: To prevent electric shock,
match wide blade of plug to wide slot,
fully insert.
ATTENTION: Pour _viter les choc
_lectriques, introduire la lame la plus
large de la fiche dans la borne corre-
spondantede la prise et pousser jusqu'au
fond.
For Customer Use
Enterbelow the SerialNo. which is
located on the rear of the cabinet.Retain
this information for future reference.
Model No.
Serial No.
IMPORTANT SAFETY INSTRUCTIONS
Read before operating equipment
1. Read these instructions.
2. Keep these irrstructions.
3. Heed all warnings.
4. Follow all irrstructions.
5. Do not use this apparatus near water.
6. Clean only with a dry cloth,
7. Do not block any of the ventilation openings. Install in accordance
with the manufacturers instructions.
8. Do not install near arty heat sources such as radiators, heat regis-
ters, stoves, or other apparatus (including amplifiers) that produce
heat.
9. Do not defeat the safety purpose of the polarized or grounding-
type plug. A polarized plug teas two blades with one wider than
the other. A grounding type plug teas two blades and third ground-
irrg prong. The wide blade or third prong are provided for your
safety. When the provided plug does not fit irrto your outlet, corr-
sult an electrician for replacement of the obsolete outlet.
10. Protect the power cord from being walked on or pinched particu-
larly at plugs, convenience receptacles, arrd the point where they
exit from the apparatus.
11. Only use attachments/accessories specifed by the manufacturer.
12. Use only with a cart, stand, tripod, bracket, or table
specified by the manufacturer, or sold with the app-
aratus. Where a cart is used, use caution when nEoving
the cart/apparatus combination to avoid irrjnry from tip-over.
13. Unplug this apparatus during lightning storms or when unused for
long periods of tinEe.
14. Refer all servicing to qualified service personnel, Servicing is
required when the apparatus teas been danEaged ire any way, such
as power-supply cord or plug is damaged, liquid has been spilled
or objects have fallen irrto apparatus, the apparatus has been
exposed to rain or moisture, does not operate normally, or has
been dropped.
15. This product may contain lead arrd nEercnry, Disposal of these
materials may be regulated due to environnEental considerations.
For disposal or recycling information, please contact your local
authorities or the Electronic Industries Alliance: www.eiae.org
16. Damage Requiring Service - The appliance should be serviced
by qualified service personnel when:
A. The power supply cord or the plug has been damaged; or
B. Objects have tidlen, or liquid has been spilled irrto the appli-
arrce; or
C. The appliance has been exposed to rain; or
D. The appliance does riot appear to operate normally or
exhibits a marked change in performance; or
E. The appliance has been dropped, or the enclosure damaged.
17. Tilt/Stability - All televisions must comply with recommended
international global safety standards for tilt arrd stability properties
of its cabinet design.
•Do not compromise these design standards by applying exces-
sive pull force to the front, or top, of the cabinet which could ulti-
mately overturn the product.
• Also, do not endauger yourself, or children, by placing electron-
ic equipment/toys on the top of the cabinet. Such items could
nnsuspectingly fall from the top of the set arrd cause product dana-
age and/or personal irrjnry.
18. Wall or Ceiling Mounting - The appliance should be mounted to
a wall or ceiling only as recommended by the manufacturer.
19. Power Lines - An outdoor arrtenna should be located away from
power lines.
20. Outdoor Antenna (;rounding - If an outside arrtenna is connect-
ed to tire receiver, be sure the antenna system is grounded so as to
provide some protection against voltage surges arrd built up static
charges.
Section 810 of the National Electric Code, ANSI/NFPA No. 70-
1984, provides information with respect to proper grounding of
the mast arrd supporting structure, grounding of the lead-in wire to
an antenna discharge unit, size of grounding connectors, location
of antenna-discharge unit, connection to grounding electrodes, arrd
requirements for the grounding electrode. See Figure below.
21. Object and Liquid Entry - Care should be taken so that objects
do riot fall arrd liquids are not spilled irrto the enclosure through
openings,
22. Battery Usage CAUTION - To prevent battery leakage that may
result in bodily irrjury, property damage, or damage to flae unit:
• Install all batteries correctly, with + arr(I - aligned as marked on
the unit.
• Do not mix batteries (old arrd new or carbon arid alkaline, etc.).
• Remove batteries when tire unit is not used for a long time.
Noteto theCATVsysteminstaller:Thisreminderisprovidedto calltheCATVsysteminstaller'sattentiontoArticle820-40oftheNECthatprovides
guidelinesfor propergroundingand,in particular,specifiesthatthecablegroundshallbeconnectedto thegroundingsystemofthebuilding,asclose
tothepointof cableentryaspractical.
m
ExampleofAntennaGrounding
as per NEC- National ElectricCodeGROUNDCLAMP ANTENNALEADIN WIRE
ANTENNADISCHARGEUNIT(NECSECTIONSlO-2O)
GROUNDINGCONDUCTORS(NECSECTION810-21)
GROUNDCLAMPS
I
----"_-_-_ POWERSERVICEGROUNDINGELECTRODESYSTEM (NECART250,PARTH)
ELECTRICSERVICEEQUIPMENT
Introduction
Welcome/Registration of Your TV .................... 2
Safety h_stmctions ................................ 3
Table of Contents ................................. 4
_Picture Menu
How to Use the Picture Adjustment Controls ..... 5
How to use the DNR (Dynamic Noise Reduction) Control . .6
How to use the Contrast + (Black Stretch) Control ....... 7
)) Sound Menu
_])) Using the Treble, Bass, and Balance Controls .... 8
How to Use the AVL Control ........................ 9
Setting the Incredible Surround Control ............... 10
Setting the TV for SAP (Secondary Audio Programs) .... 11
Setting the TV to Receive Stereo Programming ........ 12
Features Menu
Using the Timer Controls ................... 13
Understanding the SmartLock Controls ............... 14
Setting Up the SmartLock Access Code ............... 15
How to Block Channels ........................... 16
How to Clear All Channels at the Same Time .......... 17
How to Block All Channels at the Same Time .......... 18
Blocking Programming Based on Movie Ratings ....... 19
Blocking Programming Based on TV Ratings .......... 20
Using the SmartLock Blocking Options ............... 21
How to Use the Closed Captioning Control ............ 22
_.. Audio/Video Connections
Using the A/V Input Jacks ................... 23
Using the Side A/V Input Jacks ..................... 23
Using the A/V Output Jacks ........................ 24
Using the S-Video Input Jack ....................... 25
Remote Control Use
Setting up the Sleeptimer Option ............... 26
Setting the SmartPicture ...................... 27
Setting SmartSound .............................. 28
Using the Surf Button (mid Alternate Chamlel) ......... 29
Remote Use with Accessory Devices (Direct Method) ...30
Remote Use with Accessory Devices (Code Entry) ...... 31
Remote Use with Accessory Devices (Search Method) ...32
Remote Control Codes ......................... 33-34
Remote VCR Related Buttons ...................... 35
General Information
Troubleshootfi]g, Care and Cleaning ........... 36
Glossary of Terms ................................ 37
Index .......................................... 37
Factory Service Locations ....................... 38-39
Warranty ....................................... 40
Here are afew of the special features built into this new
Color Television:
SmartLock TM feature allows you to block the viewing of cer-
tain channels or external audio/video connections where you
might not want your children viewing inappropriate material.
Infrared Remote Control works your TV trod allows you to
program certain features with the press of one button. It ctm
also be used with accessory devices such as VCRs, DVD
Players, Cable Boxes, and more.
Audio/Video Jack panel for direct connections of accessory
devices; Audio/Video Inputs and Outputs.
Standard broadcast (VHF/UHF) or Cable TV (CATV)
channel capability.
Closed Captioning allows the viewer to read TV program
dialog or voice conversations as on-screen text.
Automatic Programming of Channels for quick and easy
selection of favorite stations available in your area.
On-screen Features (in either English or Sptmish) show
helpful messages for setting TV controls.
On Timer automatically turns the TV ON at a preset time
and channel.
Sleeptimer automatically turns the TV OFF at preset times.
SmartPictm'e TM allows you to set the picture's color, tint,
contrast, etc., for various types of programming such as
Sports, Movies, Personal, Weak Signals, or Multi Media with
the push of one button.
SmartSound TM allows you to set the sound controls for vari-
ous types of programs such as Personal (sound controls the
way you set them), Theatre, Music, or Voice with the push of
one button.
Treble, Bass, and Balance controls to enhance the televi-
sion's souud.
SmartLock TM, SmartPicture TM, nnd SmartSound TM are registered trademarks of
Philips Consumer Electronics Company. Copyright @ 2003 All rights reserved.
4
picturecontrols, select
a chamwl and follow the steps shown
below:
Press the MENU button on the
remote to display the on-screen menu.
Press the •o1"•button until the
word PICTURE is highlighted.
Press the •• button to display the
PICTURE menu features.
Press the • or •button to scroll the
Picture features and highlight the con-
trol you wish to adjust (Brightness,
Color, Picture, Sharpness, Tint, or
Color Temp.).
Press the •• or _141button to adjust
the selected control or to make selec-
tions for the Color Temp. control
(Normal, Warm, or Cool).
Press the •or •button to select and
adjust other Picture Menu controls.
When finished, press the STATUS
/EXIT button to remove the menu
from the TV's screen.
HELPFUL HINT

BRIGHTNESS Press the •• or _l_l buttons
until the darkest parts of the picture are as bright
as you prefer.
COLOR Press the _ or _ buttons to add
or eliminate color.
PICTURE Press the•• or _141 buttons until
the lightest parts of the picture show good detail.
SHARPNESS Press the I1_ or 41_1 buttons to
improve detail in the picture.
TINT Press the •• or 41_1 buttons to obtain
natural skin tones.
COLOR TEMP Press the •• or 41_1 buttons
to select NORMAL, COOL, or WARM picture
_references. (NORMAL will keep the whites as
white; COOL will make the whites more blue;
and WARM will make the whites more red.)
I "/Picture )" IBrightness
_,Sound Color
Features Picture
<>Install Sharpness
Tint
More...
[
o Color
<>Picture
<>Sharpness
o Tint
oColorTemp.
v
VL_htness
,,'Tint 4 _ 0
Warm
or
Cool
or reasons such as t)oo1"cable reception,
the picture can sometimes appear slightly
"speckled" (or has signal noise shown in the
picture). The DNR (Dynamic Noise Reduction)
control can help eliminate this type qf intezfer-
ence and improve the quality qf the pictun,.
Press the MENU button on the remote
to display the on-screen menu.
Press the •or • button until the word
PICTURE is highlighted.
Main *
-¢Picture J" ]Brightness
oSound Color
o Features Picture
o Install Sharpness
Tint
More...
,, ]
Press the _ button to display the
PICTURE menu features.
Picture menu features until the word : i _i_: _
DNR is highlighted. POWER
Press the •• button to turn the DNR
feature ON or OFE
II TATUSJ_×ET¢C CLOCK
When finished, press the STATUS I ___i_"]
/EXIT button to remove the menu
from the TV's screen.
\
Noise Reduction is a video adjustment fea- ,_.,
ture that affects the picture quality of the TV, .....
not the sound.
tness _ _ 50_,
oColor
o Picture
oSharpness
oTint
<>ColorTemp.
[ - i
[ Picture * ]
o Color
<>Picture
o Sharpness
o Tint
o Color Temp.
['¢ DNR . On]
[,z DNR On ]
OR
he Colm'ast +(Black Stretch) cotm_ol
elps to "shalT)ei_" the picture quality.
The black portioi_s of the picture become
richer in darkness and the whites become
brightez:
Press the MENU button on the remote
to display the on-screen menu.
Press the •OF• button until the word
PICTURE is highlighted.
Press the _ button to display the
PICTURE menu features.
Press the • OF • button to scroll the
Picture menu features m]til the word
CONTRAST + is highlighted.
Press the •• button to turn the
CONTRAST + feature ON or OFF.
When finished, press the STATUS
/EXIT button to remove the menu
from the TV's screen.
Main -__
v Picture _" IBrightness
<>Sound Color
c_Features Picture
oInstall Sharpness
_]nt
More... oColor
oPicture
o Sharpness
o _]nt
<'ColorTemp.
* ]
o Picture
<>Sharpness
o _]nt
<_ColorTemp.
<>DNR
[,/Contrast+ On
[ ,/Contrast + On ]
OR
[ ,z Contrast + Off ]
Besides the normal volume control, your
TV also has Bass, Treble, aim Balai_ce
sound controls. The TREBLE control affects
the high frequem'y sounds coming from the
TV, enhancing the highs. The BASS control
affects the low fi_'quem'y sounds coming.from
the TV, enhancing the lows. The BALANCE
control adjusts the sound level being heard
from each _peake_
Press the MENU button on the remote
to display the on-screen menu.
Press the •or •button until the word
SOUND is highlighted.
Press the •• button to display the
SOUND menu features.
Press the •OF •button to scroll the
Sound menu features until TREBLE,
BASS, or BALANCE is highlighted.
Press the •• or _l-_ button to adjust
the Treble, Bass, or Balance controls.
When finished, press the STATUS
/EXIT button to remove the menu
from the TV's screen.
Main A
Lvp cture I, _ Brightness
oSound Color
o Features Picture
oInstall Sharpness
_nt
More...
[ ,,
®
®
o Features Balance
o Install AVL
Incr.Surround
More...
[ ,,
A
,t =====!,====_50 t,
o Bass
Balance
oAVL
o Incr. Surround
o SAP
[,, ]
OR
,. ]
1,Treble
[ _"Bass _====_=_ 50_]
o Balance
oAVL
o Incr.Surround
oSAP .]
OR
[Sound A ]
oTreble
oBass
[,vBalance • L.===,!=_=R
oAVL
o Incr.Surround
o SAP
[ . ]
1,¢)_most eases, the volume levels eomii_g
vm broadcast pmgrammii_g or commer-
cials a_ _never the same. With AVL
(Automatic Volume Leveler) ON, you can
have the TV level out the sound. This pro-
vides a mo_" consistent sound by _'ducing the
peaks and valleys that occur during program
changes or commemial breaks. To turn on
AVL, follow these steps.
2
Press the MENU button on file remote
to display file on-screen menu.
Press the • or • button until the word
SOUND is highlighted.
Press the •• button to display the
SOUND menu features.
Press the • or • button to scroll the
Sound menu features until the word
AVL is highlighted.
Press the •• button to turn the AVL
control ON or OFE
When finished, press the STATUS
/EXIT button to remove the menu
from the TV's screen.
A
I '/Picture I. ] Brightness
o Sound Color
o Features Picture
o Install Sharpness
Tint
More._
[.
c, Picture Treble
1v'Sound t,] Bass
oFeatures Balance
'_ Install AVL
Incr_Surround
More...
-1
Sound
'/Treble •
c, Bass
<>Balance
oAVL
c, Incr.Surround
oSAP
ISound * ]
¢,Treble
_, Bass
o Balance
I ,zAVL Off ]
oIncr.Surround
c, SAP
l-
[Sound "
e,Treble
Bass
oBalance
[,/AVL On ]
oIncr.Surround
o SAP •]
he bwredib/e Surround feature adds
reater depth and dimension to both mon-
aural (MONO) ai_d stereo TV sound. With the
colm'ol tutored ON, the TV speakers ccm
widei_ the sowed sepctratiot_ c_ft_ormctl broad-
C(ISIS,
2
Press the MENU button on file l'emote
to display the on-screen menu.
Press the • or • button until the word
SOUND is highlighted.
Press the •• button to display the
SOUND menu features.
Press the • or • button to scroll the
Sound menu features until the words
INCR. SURROUND are highlighted.
Press the •• button to set the
Incredible Surround control as fol-
lows:
MONO: When in Mono Sound Mode, set
Incredible Surround to Mono or Spatial.
STEREO: When in Stereo Sound Mode, set
Incredible Surround to Stereo or Incredible
Surround.
When finished, press the STATUS
/EXIT button to remove the menu
from the TV's screen.
NOTE: If the TV program is broadcast in
Mono SOul]d, pressing the INCR. SURR.
button will cause MONO or SPATIAL to
appear on the screen. If the program is
broadcast in Stereo and "SOUND" is set to
Stereo (see page 12), pressing INCR.
SURR. will choose STEREO or INCR.
SURROUND.
SPATIAL - Widens the Monaural/Mono
sound tu](l simulates a broader, fuller sound.
INCR. SURROUND - Widens the Stereo
sound and simulates a broader, fuller sound.
[Main A
Iv Picture _ _ Brightness
oSound Color
oFeatures Picture
o Install Sharpness
]int
More,,,
v
J
[Main A
o Picture Treble
_"I Bass
oFeatures Balance
oInstall AVL
Incr.Surround
More,,,
[ .
l Sound
vTreble
oBass
oBalance
oAVL
oIncr.Surround
¢.SAP
[-]
-]
oTreble
oBass
<>Balance
<>AVL
[vIncr,Surround Spatial ]
OSAP
[ . ]
OR (ifin Stereo)
[Sound A ]
oTreble
oBass
oBalance
oAVL Incr.Surround]
eSAP
[.]
10