Medion MD 22800 User manual

User Manual
Manual
del usuario
English .....03
Español .....31
LED HD PROJECTOR
PROYECTOR LED HD

Scope of delivery
3
Scope of delivery
1Control Panel
2Keystone ring
3Focus ring
4Projector
5Front light
6Height-adjustable foot
7Lens
8Speaker
9Power cord
10 External power supply
11 AV cable
12 HDMI cable
13 Remote control
38 Lens cover
39 Battery, 2 ×

Table of contents
4
Table of contents
Scope of delivery ....................................................................................3
General information ...............................................................................5
Reading and storing the user manual ........................................................ 5
Proper use........................................................................................................ 5
Explanation of symbols ..........................................................................5
Safety.......................................................................................................6
Signal symbol/word definitions ................................................................... 6
General safety instructions ........................................................................... 6
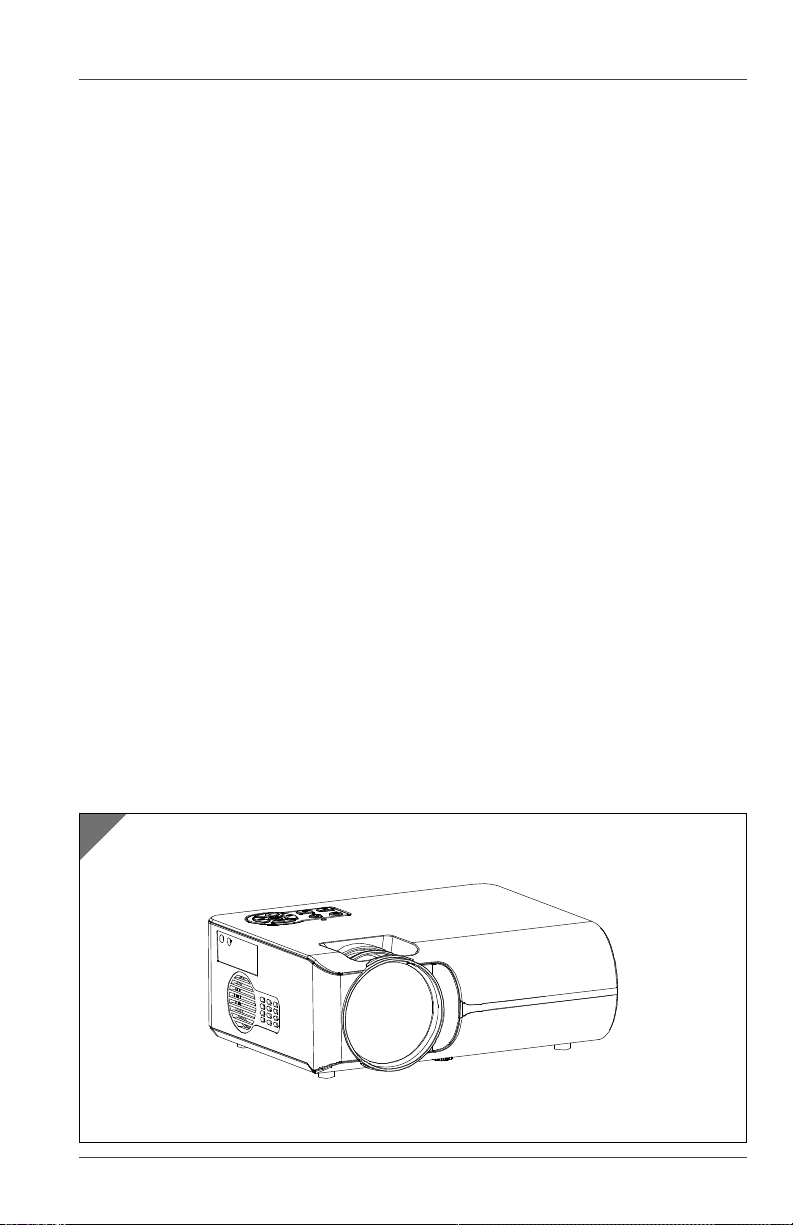
Product description ...............................................................................11
Set-up .....................................................................................................12
Checking the product and package contents...........................................12
Basic cleaning.................................................................................................12
Product assembly .......................................................................................... 12
Positioning options........................................................................................13
Use ......................................................................................................... 14
Turning the product on and off...................................................................14
Adjusting the projected image....................................................................15
Remote control............................................................................................... 17
Control Panel ..................................................................................................19
Input source................................................................................................... 20
Connecting audio ..........................................................................................22
Using the menus ............................................................................................22
Faults and troubleshooting.................................................................. 24
Cleaning and maintenance .................................................................. 24
Cleaning ......................................................................................................... 25
Maintenance and Care ................................................................................. 25
Storage ........................................................................................................... 26
Technical data ....................................................................................... 26
FCC statement........................................................................................ 27
Disposal ................................................................................................. 27
Disposing of the packaging .........................................................................27
Disposing of the product ..............................................................................27

General information
5
General information
Reading and storing the user manual
This user manual accompanies this LED HD projector (hereafter
referred to as the "product"), and contains important information
on setup and handling.
Before using the product, read the user manual carefully. This
particularly applies to the safety instructions. Failure to do so may result in
personal injury or damage to the product.
Store the user manual for further use. Make sure to include this user manual
when passing the product on to third parties.
Proper use
The product is exclusively designed for projecting TV, movies, video games,
slide shows and presentations. It is only intended for personal use and not
suitable for commercial purposes.
Only use the product as described in this user manual. Any other use is
considered improper and may result in damage to property or persons.
The manufacturer or vendor cannot be held liable for damages or injury
incurred through improper or incorrect use.
Explanation of symbols
The following symbols are used in this user manual, on the product or on the
packaging.
This symbol provides you with useful additional information
on handling and use.
If a product carries this mark, it means UL found that
representative product samples met UL’s safety requirements.
This FCC mark certifies that the electromagnetic interference
from the device is under the limits approved by the Federal
Communications Commission in the US.
Do not look directly into the lens when the product is on.
Read and save all instructions before using the product.

Safety
6
The international efficiency label indicates that the power
supply meets Level VI requirements.
This symbol identifies electrical devices that belong to the
protection class II.
Appliances labelled with this symbol are only suited for
household use (in dry indoor areas).
Products marked with this symbol have positive polarity.
They may only be connected with products that also have a
positive polarity.
The rated voltage and the rated current for direct current are
denoted by this symbol.
Safety
Signal symbol/word definitions
The following symbols and signal words are used in this user manual.
WARNING! This signal symbol/word designates a hazard
with moderate risk, which may result in
death or severe injury if not avoided.
NOTICE! This signal word warns of possible damage
to property.
General safety instructions
IMPORTANT SAFEGUARDS
When using electrical appliances, basic safety precautions
should always be observed. Please read and save all
instructions before using the appliance.
WARNING!
Risk of electric shock!
A faulty electrical installation, excessive line voltage, or incorrect
operation may result in an electric shock.

Safety
7
− Only connect the product if the line voltage of the outlet
corresponds to the data on the rating plate.
− Only connect the product to an easily accessible outlet
so that you can quickly disconnect it in the event of a
problem.
− Do not use the product if it is damaged or if the external
power supply or power cord is defective.
− If the external power supply or power cord of the product
is damaged, contact the customer service team for a
replacement. Do not use an external power supply
from other products. Only use an external power supply
approved by the manufacturer to avoid damage.
− Do not open the housing; instead, have a qualified
professional perform repairs. Contact a qualified
workshop for this. Liability and warranty claims are
waived in the event of repairs performed by the user,
improper connection or incorrect operation.
− Only parts that comply with the original device specifications
may be used for repairs. This device contains electrical
and mechanical parts which are essential for providing
protection against sources of danger.
− Do not use the product with an external timer or separate
remote control system.
− Do not immerse the product, the power supply unit, or the
power cord in water or other liquids.
− Never touch the power plug with wet or damp hands.
− Do not pull the power plug out of the outlet by the cord;
instead, always pull it out by the plug itself.
− Never move, pull, or carry the product by its power cord.
− Keep the product, the power supply unit, and the power
cord away from open flames and hot surfaces.
− Lay the power cord so that it does not pose a tripping
hazard.

Safety
8
− Do not kink the power cord and do not lay it over sharp
edges.
− Do not use the product in damp rooms or in the rain.
− Do not place the product such that there is a risk of it
falling into a tub or sink.
− Never reach to retrieve an electrical device if it has fallen
into water. In such a case, immediately disconnect the
power plug.
− Never insert any objects into the housing.
− Always switch the product off and unplug it when you are
not using it, when you intend to clean it, or in the event of
a malfunction.
WARNING!
Risk of explosion, leakage or health hazard!
Improper handling of batteries may result in explosion, leakage
or personal injury.
− WARNING: Do not ingest batteries – Chemical burn hazard!
Keep batteries away from children.
− If the remote control battery compartment does not close
securely, stop using the remote control and keep it away
from children.
− Only replace the batteries with the same or an equivalent
battery type.
− When inserting batteries, ensure that the polarity is correct
(positive (+) and negative (–)).
− Never expose batteries to excessive heat e.g. direct
sunlight or fire. Do not throw batteries in an open fire.
− Never disassemble batteries, do not short circuit them and
do not recharge batteries that are not rechargeable.
− Remove empty batteries from the remote control.
− Store both new and used batteries so that they are out of
the reach of children.

Safety
9
− If batteries leak, use gloves to remove them and dispose
of properly.
− If battery acid has leaked, avoid contact with your skin,
eyes, and mucous membranes. In the event of contact
with acid, immediately flush the applicable areas with
plenty of clean water and if necessary promptly consult a
physician.
− Do not mix old and new batteries.
− Do not mix alkaline, standard (carbon-zinc), or
rechargeable (ni-cad, nimh, etc.) batteries.
WARNING!
Risk of injury!
Improper handling of the product may result in injury.
− Do not look into the product's lens when the lamp is on.
The bright light may injure your eyes.
− The lamp becomes extremely hot during operation. Do not
touch it and let the product cool down after use.
WARNING!
Danger for children and persons with impaired physical,
sensory or mental capacities (e.g., partially disabled
persons, older persons with reduced physical and mental
capacities) or lack of experience and knowledge (e.g.,
older children).
− If they are supervised or have been instructed on how
to safely use the product and have understood the risks
associated with operating it, this product may be used by
children ages 8 and over as well as persons with impaired
physical, sensory or mental capacities, or those lacking
experience and knowledge. Children may not play with
the product. Cleaning and user maintenance must not be
performed by unsupervised children.

Safety
10
− Keep children under the age of 8 away from the product
and power cord.
− Do not leave the product unattended while in use.
− Make sure that children do not play with the plastic
wrapping. They may get caught in it when playing and
suffocate.
NOTICE!
Risk of damage!
Improper handling of the product may result in damage to the
product.
− Place the product on an easily accessible, level, dry, heat-
resistant and sufficiently stable work surface. Do not place
the product on the edge of the work surface.
− Never place the product on or near hot surfaces
(stovetops, etc.).
− Ensure that the power cord does not come into contact
with hot parts.
− Never expose the product to high temperatures (heaters
etc.) or to the effects of the weather (rain etc.).
− Do not use the product in a space that is poorly ventilated
or confined. Allow at least 20 in (50 cm) clearance from
walls and ensure free flow of air around the product.
− Do not use the product in locations where excessive
humidity, dust, or cigarette smoke may contaminate
optical components, shorten the product's life span and
darken the image.
− Never fill the product with liquid.
− Never attempt to clean the product by immersing it
in water and do not use a steam cleaner to clean it.
Otherwise, you could damage the product.

Product description
11
− Stop using the product if its plastic parts exhibit cracks or
breaks or are deformed. Only replace damaged parts with
corresponding original spare parts.
− Always turn on the product before turning on the
multimedia sources.
− Do not block the slots and openings of the product
provided for ventilation.
− Do not block the lens with any objects during operation
as this could cause the objects to become heated and
deformed or even cause a fire.
− Do not cover the product with a cloth or any other item
while in use.
− Always attach the lens cover when the product is not in
use.
− Always take off the lens cover before turning on the
product.
Save these instructions!
Keep the user manual for future reference.
Product description
The product is exclusively designed for projecting TV, movies, video games,
slide shows and presentations.
A

Set-up
12
Set-up
Checking the product and package contents
NOTICE!
Risk of damage!
If you are not cautious when opening the packaging with a
sharp knife or other pointed object, you may quickly damage
the product.
− For this reason, be very careful when opening it.
1. Take the product out of the packaging.
2. Check to make sure that all parts are included (see chapter "Scope of
delivery").
3. Check whether the product or individual parts are damaged. If this is the
case, do not use the product. Contact the manufacturer via the service
address indicated on the warranty card.
Basic cleaning
− Remove the packaging material.
− Clean all parts of the product before first use as described in the chapter
"Cleaning and maintenance".
Product assembly
1. Choose a suitable location to set up the product.
Your room layout or personal preference will dictate which location is
suitable. Take into consideration the size and position of your screen, the
location of a suitable power outlet, as well as the location and distance
between the product and the rest of your equipment.
2. Place the projector 4on a flat and stable surface with the lens 7facing
towards the direction you want to display the image to.
3. Connect the external power supply 10 to the power input at the rear of the
projector.
4. Connect the power cord 9to the external power supply.
5. Connect the plug of the power cord to a wall outlet.
The front light 5illuminates blue and the indicator light on top of the
projector illuminates red.
The product is now in standby mode.

Set-up
13
• If you want to install the product upside-down onto the
ceiling, ensure that the ceiling provides the appropriate
weight bearing capacity, use an appropriate projector
ceiling mount kit and follow the assembly instructions
carefully.
• Depending on the orientation of the product and whether
it is in front or behind the screen, the projection has to be
adjusted. Please use the appropriate setting in the main
menu "Picture" and sub-menu "Rotate" (see chapters
"Positioning options" and "Using the menus").
Positioning options
The product can be installed in four different configurations.
Orientation Sketch Explanation
Front Table Select this orientation with the
product placed near the floor in
front of the screen. This is the most
common way to position the product
for quick setup and portability.
Front Ceiling Select this orientation with the
product suspended upside-down
from the ceiling in front of the screen.
Note: A projector mount is required
to install the product from a ceiling.
Rear Table Select this orientation with the
product placed near the floor behind
the screen.
Note: A special rear projection screen
is required.
Rear Ceiling Select this orientation with the
product suspended upside-down
from the ceiling behind the screen.
Note: A projector mount is required
to install the product from a ceiling.
A special rear projection screen is
required.

Use
14
Use
Turning the product on and off
1
16
14
15
14 On/Off button
15 Source button
16 Indicator light
1. Take the lens cover off 38 .
Turn the product on by pressing the On/Off button 14 .
The indicator light 16 illuminates green.
The product turns on and displays the screen.
2. Make sure, that you have a source connected (see chapter "Input source").
If applicable, turn on the source such as a computer, notebook, etc..
The product detects the activated source automatically.
If the screen displays "No Signal", make sure the source connection cables
are securely connected.
If you connect multiple sources at the same time, use the source button 15
to switch between input sources (see chapter "Input source").

Use
15
3. To turn the product off, press the On/Off button again.
When English is set as operation language, the message "Push Power to
shut off" / "To cancel, push ESC" is displayed on the product's screen.
Press the On/Off button again to confirm, otherwise the message will
disappear after approx. 10 seconds.
Once you confirm by pressing the On/Off button, the indicator light
illuminates red and the product turns off.
Adjusting the projected image
Adjusting the projected image height
The product is equipped with an height-adjustable foot 6at the bottom of
the projector 4for adjusting the image height when the product is placed on
a surface.
2
4
6
1. To move the projected image up, screw the height-adjustable foot 6
counter-clockwise.
2. To lower the projected image, screw the height-adjustable foot clockwise.

Use
16
Adjusting the focus and keystone
3
2
3
ϰϴϮŌ
45”
60”
80”
120”
150”
200”
(1.47m)
ϲϮϯŌ
(1.9m)
ϴϰϯŌ
(2.57m)
ϭϮϴŌ
(3.9m)
ϭϱϵϰŌ
(4.86m)
ϮϬϲϳŌ
(6.3m)
4
− To focus the image, rotate the focus ring 3until the projected image is
clear. The product focuses at distances from 4.82 ft (1.47 m) to 20.67 ft (6.30 m)
(see Fig. 3 and 4).
− Rotate the keystone ring 2to skew the projected image in order to make
the projected image rectangular (see Fig. 3).

Use
17
Remote control
In order to use the remote control 13 insert the batteries 39
(see chapter "Maintenance and Care").
Make sure that the polarity is correct.
Apart from using the buttons on the control panel 1, the product can also be
controlled with the remote control.
5
28 17
19
26
25
22
24
18
19
27
20
22
23
21

Use
18
Button Symbol Function
On/Off button 28 Toggles the product
between standby mode and
on (see also chapter "Turning
the product on and off").
Operating keys 19 / /
/
Operating keys under
multimedia mode.
Confirmation/Play/
Pause button 25
Confirms selected settings
under menu mode;
confirms selected file under
multimedia mode. Play or
pause.
Exit button 24 Exits and saves menu
settings.
Menu button 26 Turns on the OSD menu, goes
back to previous OSD menu.
Arrow buttons 21 / / / Selects the desired
menu items and makes
adjustments.
Volume buttons 22 / Adjusts the sound level.
Focus button 18 Magnifies or reduces the
projected picture size.
The image zoom range is
75 %–100 %.
Mute button 17 Mutes volume or restores
volume.
Image flip button 27 Flips the projected image.
Digit button 23 n/a
Input button 20 Displays the source selection
bar.
Number buttons 0 / 1 / 2 / 3 / 4 / 5 / 6 /
7 / 8 / 9
n/a

Use
19
Control Panel
Apart from using the remote control 13 , the product can also be controlled
with the buttons on the control panel 1.
6
33
31
14
15
32
30
Button Symbol Function
On/Off button 14 Toggles the product
between standby mode and
on (see chapter "Turning the
product on and off").
Arrow buttons 31 / / / Selects the desired
menu items and makes
adjustments.
Confirmation button 30 Confirming selected
settings under menu mode;
confirming selected file
under multimedia mode.
Play or pause.
Menu button 32 Turns on the OSD menu,
goes back to previous OSD
menu.
Source button 15 Displays the source selection
bar.
Back button 33 Exits and saves menu
settings.

Use
20
Input source
Multimedia sources can be connected via the HDMI slots 35 , the USB ports 36
or the AV IN port 34 (see Fig. 7 and 8).
Before connecting a multimedia source to the product, make sure to use the
source connection cable appropriate for the source and turn all equipment off
before connecting the cables.
Ensure a tight fit of the cables before switching the product and multimedia
sources on.
One AV cable 11 and one HDMI cable 12 are part of the scope of delivery.
Additional cables may be purchased from electronics stores.
The yellow plug of the AV cable is for the video port and the red and white
plugs are for the left and right audio ports.
7
AV
AV IN AUDIO OUT
34 37
8
DC 24V 3A
HDMI1
IR
HDMI2
USB1
USB2
35 36

Use
21
34 AV IN port
35 HDMI slot, 2×
36 USB port, 2×
37 Audio OUT port
9
To select the multimedia source proceed as follows:
1. Press the input button 20 on the remote control 13 or the source button 15
on the control panel 1to enter the interface "Input Source" (see Fig. 9).
2. Use the arrow buttons 21 / 31 to select the appropriate source.
Alternatively, repeatedly press the input button or the source button to
scroll through the sources.
3. Confirm your selection by pressing the Confirmation/Play/Pause button 25
on the remote control or the confirmation button 30 on the control panel.
When selecting USB, the screen displays three types of media ("Movie" / "Photo" /
"Music") to choose from and the option "Setting".
While "Setting" directs you to the On Screen Display menu (see chapter "Using
the menus"), "Movie", "Photo" and "Music" allow you to browse the respective
files stored on the connected USB source.
Table of contents
Languages:
Other Medion Projector manuals