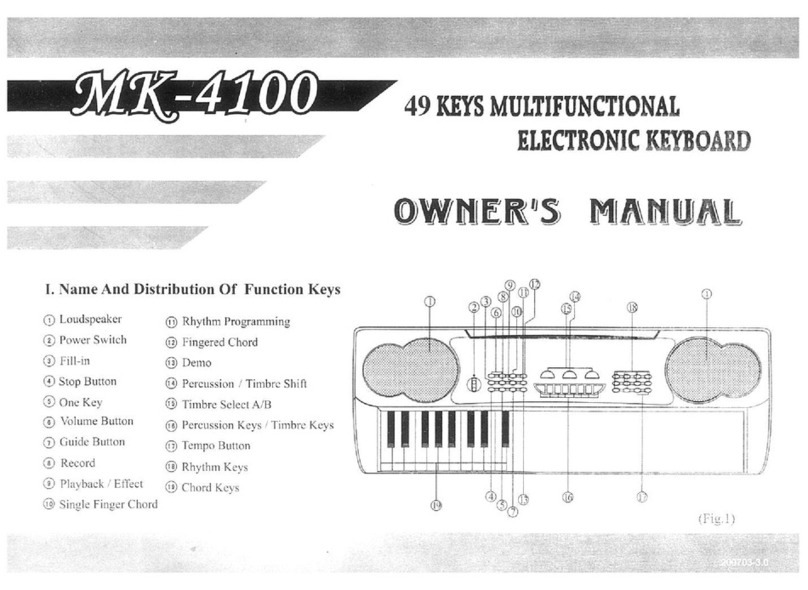
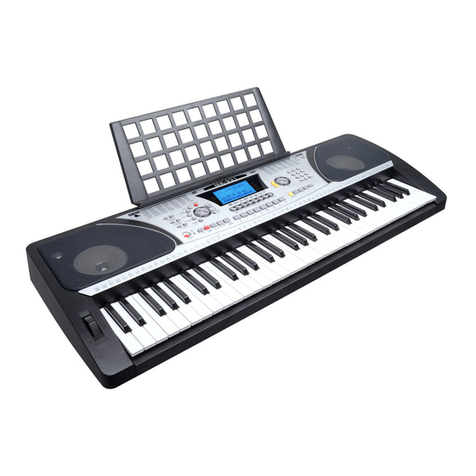
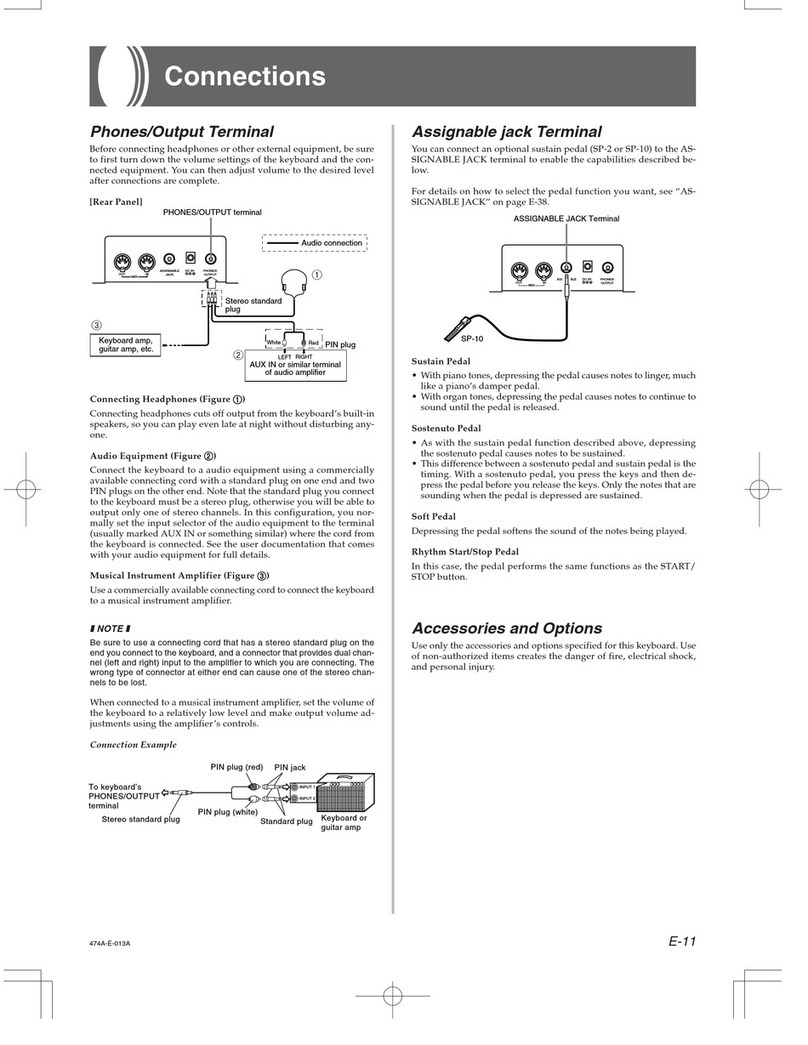
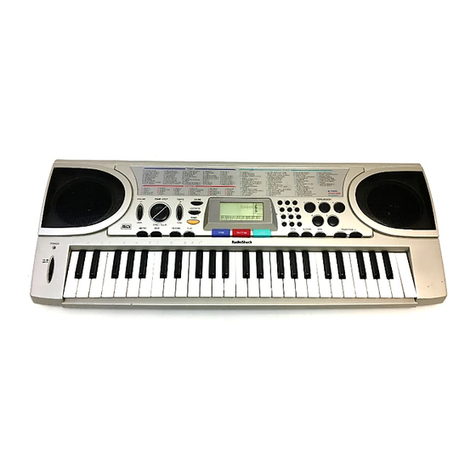
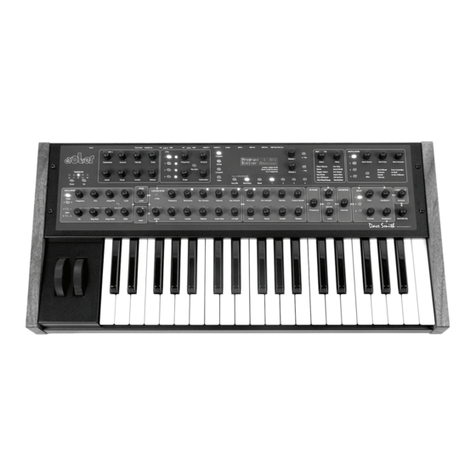
Meike MK 2117L User manual

MK 2117L
Instrukcja obsługi / User Manual
MK 2117L
Instrukcja obsługi / User Manual

MK 2117L
Instrukcja obsługi / User Manual
1
POLSKI
Spis treści
Bezpieczeństwo użytkowania ....................................................................................................2
Konserwacja urządzenia............................................................................................................2
Budowa i obsługa urządzenia....................................................................................................3
Informacja o zużytym sprzęcie elektrycznym i elektronicznym ................................................11

MK 2117L
Instrukcja obsługi / User Manual
2
Bezpieczeństwo użytkowania
Przed użyciem prosimy o szczegółowe zapoznanie się z instrukcją obsługi. Prosimy również
o zachowanie jej na przyszłość. Instrukcja zawiera zasady bezpiecznego korzystania z urzą-
dzenia.
Po otrzymaniu produktu należy go rozpakować i sprawdzić, czy produkt jest kompletny i czy
podczas transportu nie powstały żadne uszkodzenia. W przypadku uszkodzeń powstałych
podczas transportu, prosimy nie używać produktu i niezwłocznie skontaktować się ze sprze-
dawcą lub producentem.
UWAGA! URZĄDZENIA NIE WOLNO WYRZUCAĆ DO ODPADÓW DOMOWYCH.
To oznaczenie oznacza, że produkt nie może być wyrzucany razem z odpadami domowymi
w całej UE. W celu zapobiegnięcia potencjalnym szkodom dla środowiska lub zdrowia, zu-
żyty produkt należy poddać recyklingowi. Zgodnie z obowiązującym prawem, nie nadający
się do użycia sprzęt elektryczny i elektroniczny należy zbierać osobno, w specjalnie do tego
celu wyznaczonych punktach zbierania zużytego sprzętu, celem ich przetworzenia i ponow-
nego wykorzystania na podstawie obowiązujących norm ochrony środowiska.
Produkt opisany w tej instrukcji jest zgodny z dyrektywami europejskimi, dlatego jest ozna-
czony znakiem CE.
Urządzenie należy trzymać z dala od dzieci i niewykwalifikowanych osób. Producent nie po-
nosi odpowiedzialności za szkody spowodowane nieprawidłowym użytkowaniem.
Przed użyciem upewnij się, że obudowa nie jest uszkodzona.
Korzystać wyłącznie z dołączonego do produktu zasilacza dedykowanego DC 9V! Odłącze-
nie produktu od zasilania odbywa się poprzez pociągnięcie za wtyczkę przewodu zasilają-
cego –nie ciągnąć bezpośrednio za przewód zasilający! Odłącz urządzenie z zasilania
przed zdjęciem obudowy lub konserwacją. W razie stwierdzenia uszkodzenia przewodu za-
silającego – nie używaj go!
Urządzenie do użytku wewnętrznego w dobrze wentylowanym pomieszczeniu, trzymać
z dala od wilgoci. Nie należy narażać produktu na bezpośrednie działanie słońca. Nie wolno
przechowywać i korzystać z urządzenia w pobliżu źródeł ognia!
Nie wolno narażać urządzenia na pracę w wysokich temperaturach!
W razie wystąpienia zakłóceń w pracy urządzenia, natychmiast odłącz je od źródła zasila-
nia!
Konserwacja urządzenia
1. Urządzenie może użytkować tylko wykwalifikowany personel, szkody spowodowane użytkowaniem
niezgodnym z przeznaczeniem lub próbą samodzielnej naprawy nie podlegają gwarancji. Wewnątrz
opakowania nie ma żadnych części serwisowych, naprawy mogą być wykonywane wyłącznie przez
autoryzowany punkt serwisowy.
2. Nie pozwól, aby produkt wszedł w kontakt z olejem, tłuszczem lub jakimkolwiek podobnym płynem.
3. Regularne czyszczenie umożliwia długotrwałe użytkowanie oraz pozwala na zachowanie odpowied-
niego funkcjonowania urządzenia. Do czyszczenia używaj miękkiej, suchej szmatki.

MK 2117L
Instrukcja obsługi / User Manual
3
Budowa i obsługa urządzenia
Panel sterowania i gniazda
1. Głośniki.
2. Power On/Off.
3. Transpose.
4. Master Volume.
5. Tempo.
6. Accom Volume.
7. Start/Stop.
8. Fill-in.
9. Sync.
10. Single.
11. Fingered.
12. Record.
13. Programming.
14. Play.
15. Wyświetlacz
LED.
16. One-key/Fol-
low/Ensemble.
17. Demo all.
18. Demo one.
19. Keyboard percus-
sion.
20. Sustain.
21. Vibrato.
22. Numbers.
23. Timbre.
24. Rhythm.
25. Memory M1-M4.
26. Metronome.
27. Split.
28. Key Lighting.
29. Chord Zone.
30. Wejście audio.
31. Wejście mikrofo-
nowe MIC.
32. Wyjście słuchaw-
kowe PHO-
NES/OUTPUT.
33. Wejście zasilania
DC 9V.

MK 2117L
Instrukcja obsługi / User Manual
4
Przygotowanie urządzenia
Urządzenie wymaga użycia sześciu baterii 1,5V "AA" (brak w zestawie). Otwo-
rzyć pokrywę komory baterii z tyłu i włożyć baterie jedna po drugiej z zachowa-
niem prawidłowej polaryzacji. Założyć pokrywę, gdy komora jest w pełni zała-
dowana. Brak energii lub napięcia spowoduje utratę głośności i zniekształcenie
tonu dźwięku. Rozładowane lub uszkodzone baterie MUSZĄ być natychmiast
wymienione na nowe, aby zapewnić prawidłowe działanie urządzenia. Zawsze
wyjąć baterie, gdy produkt nie jest używany przez dłuższy czas.
Należy użyć dedykowanego zasilacza. Okrągłą wtyczkę przewodu zasilacza należy podłączyć
do portu zasilania znajdującego się z tyłu produktu, a następnie drugi koniec do gniazda zasila-
nia. Napięcie wejściowe zasilacza powinno być zgodne z napięciem zasilania.
Wyjście audio: po pierwsze, wyłączyć klawiaturę i zewnętrzne urządzenia audio, po drugie, podłą-
czyć wtyczkę przewodu audio do portu PHONES/OUTPUT na tylnym panelu klawiatury, a następnie
podłączyć drugi koniec do portu wejściowego zewnętrznego urządzenia audio.
Podłączenie słuchawek: Po podłączeniu słuchawek do portu PHONES/OUTPUT z tyłu klawia-
tury, głośnik zostanie automatycznie wyłączony. Dzięki temu można grać bez przeszkadzania
innym. Uwaga! Podczas korzystania z słuchawek nie należy zwiększać i utrzymywać przez
dłuższy czas maksymalnej głośności – może to spowodować uszkodzenia lub/i utratę słuchu.
Wejście Mic: Podłącz mikrofon do portu MIC, aby śpiewać podczas gry na klawiaturze.
Keyboard wyposażony jest w funkcję wejścia stereo. Sygnały dźwiękowe z telefonu komórkowego,
odtwarzacza MP3, komputera i innych urządzeń audio mogą być wprowadzane do systemu keybo-
ardu w celu odtworzenia. Najpierw należy wyłączyć keyboard, podłączyć wtyczkę przewodu audio
(brak w zestawie) do portu wyjściowego zewnętrznego urządzenia audio, a drugi koniec do portu
AUDIO INPUT na tylnym panelu urządzenia, a następnie włączyć produkt.
Podstawowa obsługa
Nacisnąć przycisk [POWER ON/OFF], keyboard podświetli się z obu stron, a wyświetlacz LED
włączy się i pokaże aktualne tempo "120"; można rozpocząć grę na keyboardzie zgodnie z za-
sadami instrukcji.
Podświetlana klawiatura – keyboard jest wyposażony w funkcję podświetlenia w trybach gry,
treningu i odtwarzania utworu demo; polega ona na pojawianiu się podpowiedzi świetlnych;
funkcja podświetlenia jest domyślnie włączona; nacisnąć [KEY LIGHTING], aby włączyć lub
wyłączyć funkcję podświetlenia.
Regulacja głośności głównej – nacisnąć [MASTER VOL +] lub [MASTER VOL -], aby zwiększyć
lub zmniejszyć głośność główną; nacisnąć jednocześnie [MASTER VOL+] i [MASTER VOL -],
aby przywrócić wartość domyślną; głośnością główną można również kontrolować głośność
akompaniamentu.
Regulacja głośności akompaniamentu - nacisnąć [ACCOM VOL +] lub [ACCOM VOL -] aby
zwiększyć lub zmniejszyć głośność akompaniamentu; nacisnąć jednocześnie [ACCOM VOL +]
i [ACCOM VOL -], aby przywrócić wartość domyślną.
Wybór tonu – klawiatura oferuje 255 tonów, od "000" do "254"; po włączeniu keyboardu funkcja
wyboru tonu zostanie włączona automatycznie; w innych trybach pracy należy naciśnąć przy-
cisk [TIMBRE], aby włączyć funkcję wyboru tonu, a na wyświetlaczu pojawi się napis "tnE";
domyślnie ustawiona jest barwa "000", można ją regulować naciskając odpowiednie przyciski
numeryczne lub naciskając przyciski "+" / "-".

MK 2117L
Instrukcja obsługi / User Manual
5
Perkusja –klawiatura udostępnia 61 brzmień instrumentów perkusyjnych; nacisnąć przycisk
[KEYBOARD PERCUSSION], aby przekształcić klawisz w klawisz perkusyjny; każdy klawisz
odpowiada jednemu instrumentowi perkusyjnemu; nacisnąć przycisk [KEYBOARD PERCUS-
SION] ponownie, aby wyłączyć funkcję perkusji.
Odtwarzanie utworów demo - w klawiaturze zapisano 50 utworów demo, od "000" do "049";
nacisnąć przycisk [Demo one], system przejdzie w tryb wielokrotnego odtwarzania aktualnego
utworu demo; w razie potrzeby odtworzenia innego utworu nacisnąć przycisk, aby zatrzymać
aktualny utwór i nacisnąć [Demon one] ponownie, aby odtworzyć następny utwór; nacisnąć
przycisk [Demo all] –system przejdzie w tryb odtwarzania kolejno wszystkich utworów demo;
w trakcie odtwarzania utworów demo można zmieniać ton utworów.
Funkcja rytmu
Wybór rytmu –keyboard udostępnia 255 rytmów, od "000" do "254", a domyślny rytm to "000";
nacisnąć przycisk [Rhythm], aby włączyć funkcję wyboru rytmu; po wyświetleniu "rhy" na wy-
świetlaczu, naciskać przyciski numeryczne lub przyciski "+"/"-", aby wybrać inne rytmy.
Kontrola rytmu:
oAktywacja –nacisnąć [START/STOP], aby włączyć rytm akompaniamentu; nacisnąć
[SYNC], po wyświetleniu na ekranie napisu "Syn" zagrać dowolny klawisz w strefie kla-
wiszy akordu (klawisz 1-19, od lewej) –rytm akompaniamentu zostanie aktywowany.
oFill-in –po włączeniu rytmu akompaniamentu naciśnij [FILL-IN], aby tymczasowy rytm
był odtwarzany podczas rytmu akompaniamentu; nacisnąć i przytrzymać [FILL-IN], aby
kontynuować odtwarzanie tymczasowego rytmu.
oZatrzymanie rytmu –podczas rytmu akompaniamentu nacisnąć [START/STOP], aby za-
trzymać rytm akompaniamentu.
Metronom –metronom zawiera cztery tempa, odpowiednio 1/4, 2/4, 3/4 i 4/4; naciskanie przy-
cisku [Metronome] pozwala na wybór między czterema tempami; nacisnąć ponownie przycisk
[Metronome], aby zatrzymać tempo.
Regulacja tempa –nacisnąć [TEMPO +] lub [TEMPO -] aby zwiększyć lub zmniejszyć tempo
rytmu; jednoczesne naciśnięcie dwóch przycisków spowoduje zresetowanie tempa do wartości
domyślnej.
Funkcje Single / Fingered Chord
Single Chord –po włączeniu rytmu nacisnąć [SINGLE]; po wyświetleniu na ekranie napisu "Sin"
można grać pojedynczy akord na klawiszach w strefie akordów keyboardu; nacisnąć ponownie
[SINGLE], na ekranie pojawi się napis "OFF" i funkcja pojedynczego akordu zostanie wyłą-
czona.
Fingered Chord –gdy rytm jest aktywny, naciśnij [FINGERED]; po wyświetleniu na ekranie na-
pisu "Fin", możesz zagrać akord na klawiszach w strefie akordów keyboardu; po ponownym
naciśnięciu [FINGERED] na ekranie pojawi się napis "OFF", a funkcja zostanie wyłączona.

MK 2117L
Instrukcja obsługi / User Manual
6
Palcowanie Fingered Chord (tonacja C-dur)
(Palcowanie Fingered Chord w tonacji C-dur prezentuje
poniższy rysunek – inne można uzyskać w drodze analogii)
Palcowanie Single Chord

MK 2117L
Instrukcja obsługi / User Manual
7
Funkcja pamięci stanu (status memory)
Dzięki funkcji pamięci stanu, można zapisać ton, rytm, tempo i inne parametry, które mają być
zmieniane podczas gry, co umożliwia szybką zmianę. Keyboard jest wyposażony w 3 pamięci
stanu, które mogą być wygodnie wczytywane w dowolnym momencie podczas gry.
Zapisywanie pamięci stanu – ustawić ton, rytm, tempo i akord zgodnie z własnymi wymaga-
niami, a następnie nacisnąć przycisk [Status Memory] i jeden z przycisków od [Memory 1] do
[Memory 3], aby zapisać aktualny stan.
Wczytywanie pamięci stanu – nacisnąć dowolny z przycisków od [Memory 1] do [Memory 3],
aby wczytać parametry ustawień zapisane w tej pamięci w miejsce aktualnego stanu.
Zapisana zawartość nie jest chroniona przed awarią zasilania – zapisana zawartość zostanie
utracona w razie odcięcia zasilania i ponownym uruchomieniu keyboardu.
Kontrola efektów
Transpose –dzięki funkcji Transpose można grać metodą palcowania C-tune; nacisnąć [Trans-
pose -], aby zmniejszyć ton o półton (sekunda mała), a C-tune zmieni się na B-tune; nacisnąć
[Transpose +], aby zwiększyć ton o półton (sekunda mała), a C-tune zmieni się na #C tune lub
bD tune; po dwukrotnym naciśnięciu przycisku [Transpose -], C-tune zmieni się na bB; po pię-
ciokrotnym naciśnięciu przycisku [Transpose +], C-tune zmieni się na F-tune; naciśnąć jedno-
cześnie przycisk [Transpose +] i [Transpose -], aby powrócić do C-tune "00"; nacisnąć przycisk
[Transpose +] i [Transpose -], aby dostosować poziom od "P-6" do "P06".
Sustain –nacisnąć przycisk [Sustain], a na wyświetlaczu pojawi się napis "SUS" – efekt sustain
zostanie włączony; nacisnąć ten przycisk ponownie, aby wyłączyć efekt sustain.
Vibrato –press [Vibrato] and "Vib" will show on the display –the vibrato effect will be activated;
press this button again to disable the vibrato effect.
Funkcja podziału klawiatury - nacisnąć [SPLIT], aby włączyć funkcję podziału klawiatury, a na
wyświetlaczu pojawi się napis "on"; 24 klawisze z lewej strony klawiatury zostaną rozdzielone
z pozostałą klawiaturą; podczas gdy lewa strefa klawiatury zwiększy się o jedną oktawę i za-
chowa oryginalną tonację, prawa strefa klawiatury zmniejszy się o jedną oktawę, aby zachować
tę samą wysokość dźwięku z lewą strefą klawiatury; tonacja prawej strefy klawiatury może być
ustawiona według potrzeb, tak aby różne tony mogły być odtwarzane przez lewą i prawą strefę
klawiatury w tym samym czasie; nacisnąć ponownie [SPLIT], aby wyłączyć tę funkcję.
Nagrywanie i programowanie rytmu
Nagrywanie –nacisnąć przycisk [REC], aby włączyć funkcję nagrywania; gdy funkcja nagrywa-
nia zostanie włączona przez naciśnięcie przycisku, na wyświetlaczu pojawi się napis "rEC";
w tym trybie wszystkie odtwarzane dźwięki zostaną nagrane; gdy pamięć zostanie zapełniona,
na wyświetlaczu pojawi się napis "FUL" i nagrywanie zostanie zatrzymane automatycznie.
oNacisnąć przycisk [PLAY], aby odtworzyć nagrane dźwięki, a na wyświetlaczu pojawi się
napis "PLy"; po zakończeniu odtwarzania keyboard przejdzie do trybu nagrywania, a na
wyświetlaczu pojawi się napis "rEC"; można nagrać nową melodię lub nacisnąć przycisk
[PLAY], aby odtworzyć nagraną melodię.
oNacisnąć [START/STOP] lub ponownie nacisnąć [REC], aby wyłączyć funkcję nagrywa-
nia, a wszystkie ponownie nagrane dźwięki zostaną usunięte.

MK 2117L
Instrukcja obsługi / User Manual
8
Programowanie rytmu –gdy funkcja programowania rytmu jest włączona przez naciśnięcie
przycisku [PROG], na ekranie pojawi się napis "Prg" i uaktywni się perkusja keyboardu; w tym
trybie można tworzyć własne rytmy, naciskając odpowiedni klawisz perkusji.
omaksymalnie można nagrać 32 instrument perkusyjne –po tym czasie na ekranie pojawi
się napis "FUL" i programowanie zostanie automatycznie przerwane.
oNacisnąć przycisk [PLAY], aby odtworzyć zaprogramowany rytm. Wcisnąć ponownie
przycisk [PLAY], aby zatrzymać odtwarzanie – na ekranie pojawi się napis "Prg" i funkcja
programowania zostanie włączona. Możesz ponownie zaprogramować rytmy lub możesz
ponownie nacisnąć przycisk [PLAY], aby je odtwarzać.
oWciśnięcie przycisku [START/STOP] lub ponowne naciśnięcie przycisku [PROG] spowo-
duje wyłączenie funkcji programowania i usunięcie wszystkich zarejestrowanych rytmów.
Tryb treningowy z podświetloną klawiaturą
Trening 1 –ONE-KEY
Naciśnij przycisk [ONE-KEY], aby włączyć funkcję nauki ONE-KEY. Możesz wybrać utwór do nauki,
naciskając przyciski numeryczne lub przyciski "+", "-". Klawiatura będzie podświetlać się zgodnie
z głównymi nutami melodii, wskazując nutę, którą należy zagrać, a ty możesz wykonać utwór, podą-
żając za podświetlającymi się klawiszami. W tym trybie można popełniać błędy podczas gry, a klawia-
tura nadal będzie grała prawidłowe nuty, przy czym na ekranie pojawią się poprawne nuty. Po zakoń-
czeniu jednego utworu, należy go powtórzyć. Nacisnąć [START/STOP] lub nacisnąć [ONE-KEY], aby
wyłączyć funkcję treningu ONE-KEY.
Trening 2 –FOLLOW
Naciśnij [FOLLOW], aby włączyć funkcję treningu Follow. Możesz wybrać utwór do nauki, naciskając
przyciski numeryczne lub przyciski "+", "-". Klawisze będą podświetlać się zgodnie z nutami utworu,
wskazując nuty do zagrania – należy podążać za granymi przez keyboard nutami utworu demo. Można
również uczyć się, podążając za nutami prezentowanymi na wyświetlaczu ekranu – keyboard będzie
"czekał" aż prawidłową nutę zostanie zagrana, zanim przejdzie do następnej. Uwaga: W tym trybie
keyboard gra tylko poprawne nuty i nie reaguje na źle zagrane nuty. Nacisnąć przycisk [START/STOP]
lub nacisnąć przycisk [FOLLOW], aby wyłączyć funkcję treningu Follow.
Trening 3 –ENSEMBLE
Nacisnąć [ENSEMBLE], aby włączyć funkcję treningu Ensemble. Możesz wybrać utwór do nauki, na-
ciskając przyciski numeryczne lub przyciski "+", "-". Keyboard będzie podświetlać klawisze i grać razem
z tobą. Klawiatura będzie podświetlać się zgodnie z nutami głównej melodii, wskazując nuty, które
należy zagrać – należy podążać za wskazówkami podświetlających się klawiszy. Jeśli nuta nie zosta-
nie zagrana w ciągu 3 sekund, keyboard automatycznie zagra właściwą nutę. Po zakończeniu jednego
utworu, należy go powtórzyć. Nacisnąć przycisk [START/STOP] lub nacisnąć przycisk [ENSEMBLE],
aby wyłączyć funkcję treningu Ensemble.

MK 2117L
Instrukcja obsługi / User Manual
9
Tabela tonów

MK 2117L
Instrukcja obsługi / User Manual
10
Tabela rytmów

MK 2117L
Instrukcja obsługi / User Manual
11
Informacja o zużytym sprzęcie elektrycznym i elektronicznym
Głównym celem regulacji europejskich oraz krajowych jest ograniczenie ilości odpadów powstałych
ze zużytego sprzętu elektrycznego i elektronicznego, zapewnienie odpowiedniego poziomu jego zbie-
rania, odzysku i recyklingu oraz zwiększenie świadomości społecznej o jego szkodliwości dla środowi-
ska naturalnego, na każdym etapie użytkowania sprzętu elektrycznego i elektronicznego. W związku
z powyższym należy wskazać, iż gospodarstwa domowe spełniają kluczową rolę w przyczynianiu się
do ponownego użycia i odzysku, w tym recyklingu zużytego sprzętu. Użytkownik sprzętu przeznaczo-
nego dla gospodarstw domowych jest zobowiązany po jego zużyciu do oddania zbierającemu zużyty
sprzęt elektryczny i elektroniczny. Należy jednak pamiętać, aby produkty należące do grupy sprzętu
elektrycznego lub elektronicznego utylizowane były w uprawnionych do tego punktach zbiórki.

MK 2117L
Instrukcja obsługi / User Manual
12
ENGLISH
Table of contents
Safety rules..............................................................................................................................13
Device maintenance ................................................................................................................13
Device construction and operation...........................................................................................14
Information about used electrical and electronic equipment....................................................22

MK 2117L
Instrukcja obsługi / User Manual
13
Safety rules
Please read the user manual in detail before use. Please also keep it for future reference.
The manual contains rules for the safe use of the device.
After receiving the product, please unpack and check whether it is complete and whether
there is any damage caused by transportation. If there is damage caused by transportation,
please do not use this product and contact the dealer or manufacturer as soon as possible.
WARNING! THE DEVICE MUST NOT BE DISPOSED OF WITH HOUSEHOLD WASTE.
This symbol indicates that this product must not be disposed of with household waste, ac-
cording to the EU and your national law. In order to prevent potential damage to the environ-
ment or health, the used product must be recycled. In accordance with current legislation,
unusable electrical and electronic devices must be collected separately at the designated
facilities for recycling, acting on the basis of applicable environmental standards.
The product described in this manual comply with European directives and it is therefore
CE marked.
Keep the device away from children and unqualified persons. The manufacturer is not liable
for damage caused by improper use.
Before use, make sure the housing is not damaged.
Use only the dedicated DC 9V power supply included with the product! Disconnect the prod-
uct from the power supply by pulling on the power plug –do not pull directly on the power
cord! Disconnect the device from the power supply before removing the housing or perform-
ing maintenance. If you find the power cord is damaged –do not use it!
Indoor device, use in a well-ventilated room, keep away from moisture. Do not expose the
product to direct sunlight. Do not store or use the device near a fire source!
Do not expose the device to high temperatures!
In the event of a malfunction, disconnect the device from the power supply immediately!
Device maintenance
1. The device may only be used by qualified personnel, damage caused by improper use or attempted
repair is not covered by the warranty. There are no service parts inside the packaging, repairs may
only be carried out by authorized service center.
2. Do not allow the product to come into contact with oil, grease or any similar liquid!
3. Regular cleaning allows of long term use and maintains proper operations. Use soft, dry cloth to
clean the product.

MK 2117L
Instrukcja obsługi / User Manual
14
Device construction and operation
Control panel and sockets
1. Speakers.
2. Power On/Off.
3. Transpose.
4. Master Volume.
5. Tempo.
6. Accom Volume.
7. Start/Stop.
8. Fill-in.
9. Sync.
10. Single.
11. Fingered.
12. Record.
13. Programming.
14. Play.
15. Display LED.
16. One-key/Fol-
low/Ensemble.
17. Demo all.
18. Demo one.
19. Keyboard percus-
sion.
20. Sustain.
21. Vibrato.
22. Numbers.
23. Timbre.
24. Rhythm.
25. Memory M1-M4.
26. Metronome.
27. Split.
28. Key Lighting.
29. Chord Zone.
30. Audio Input.
31. Mic Input.
32. Phones/Output.
33. Power supply In-
put DC 9V.

MK 2117L
Instrukcja obsługi / User Manual
15
Performance preparation
The instrument requires the use of six1.5V "AA" batteries (not included). Open
the battery compartment cover on the backside and load in the batteries one
by one with correct polarity. Replace the cover when the compartment is fully
loaded. Energy or voltage dissipation will result in the loss of volume and tim-
bre distortion. Discharged or bad batteries MUST be replaced immediately to
ensure the effect of performance. Always remove the batteries when you are
not using the product for alongtime.
The dedicated power adapter shall be used. Connect the output end of the adaptor to the power
port on the rear of the keyboard, and then the other end to the power socket. The input voltage of
the adaptor shall be compatible with the power supply voltage.
Audio output: firstly, turn off the keyboard and the external audio devices, secondly, connect one
end of the audio cable to the PHONES/OUTPUT port on the rear panel rear of the keyboard,
and then connect the other end to the audio input port of the audio devices.
Headphones connection: When connecting a headphone to the PHONES/OUTPUT port on the
back of the keyboard, the loudspeaker will be disabled automatically. This way, you can perform
without disturbing others. Note! When using a headphones, do not turn up and keep the volume
to the maximum for a long time, which may cause hearing loss.
Mic input: Connect a microphone to the MIC port to sing while playing the keyboard.
Thekeyboardisequippedwithastereoinputfunction.Soundsignalsfrommobilephone,MP3player,
computer and other audio devices can be input into the keyboard system for playing. Firstly, turn
offthekeyboard,connectoneendofaudiocable(notincluded)totheoutputportofanaudiodevice,
and the other end to the AUDIO INPUT port on the rear panel of the keyboard, and then turn on the
keyboard.
Basic performance
Press [POWER ON/OFF] button, and the keyboard will light up from both sides, and the LED
display will turn on and show the current tempo "120"; then you may play the keyboard as re-
quired.
Luminous keyboard –the keyboard is provided with luminous function, under the modes of play-
ing, training and playing demo song, the light hint will be provided; the luminous function is
defaulted to be enabled, press [KEY LIGHTING] to enable or disable the luminous function.
Master volume adjustment –press [MASTER VOL +] or [MASTER VOL -] to increase or de-
crease the overall volume; press [MASTER VOL+] and [MASTER VOL -] simultaneously toreset
to the default value; the master volume can also control the accompaniment volume.
Accompaniment volume adjustment –press [ACCOM VOL +] or [ACCOM VOL -] to increase or
decrease the accompaniment volume; press [ACCOM VOL +] and [ACCOM VOL -] simultane-
ously to reset to the default value.
Timbre selection –the keyboard provides 255 timbres, from "000" to "254", for your selection;
when turning onthe keyboard, the timbre selectionfunction will be turn on automatically; in other
states, press the [TIMBRE] button to enable the timbre selection function, and "tnE" will show
on the display; the timbre is defaulted to be "000", and it can be adjusted by pressing the corre-
sponding number buttons or pressing the "+" /"-" button.

MK 2117L
Instrukcja obsługi / User Manual
16
Playing percussion –the keyboard provides 61 kinds of keyboard percussions; press the [KEY-
BOARD PERCUSSION] button to convert the key to percussion key; each key corresponds to
one percussion instrument; press this button again to disable the keyboard percussion function.
Playing demonstration songs –50 demo songs have been stored in the keyboard, from "000"
to "049", for your selection; press the [Demo one] button, the system is in the state of playing
the present demo song repeatedly; for another one, press the button to stop the present song,
and again to play the next one; press the [Demo all] button, the system is in the stage of playing
all the demo songs successively; in the course of playing demo songs, the timbre of the songs
can be changed.
Auto rhythm
Rhythm selection –the keyboard provides 255 rhythms, from "000" to "254", for your selection,
and the rhythm is defaulted to be "000"; press the [Rhythm] button to enable the rhythm selection
function; after "rhy" is showed on the display, press the number buttons or the "+"/"-" buttons to
select other rhythms.
Rhythm control:
oActivation –press [START/STOP] to start accompaniment rhythm; press [SYNC], after
"Syn" is shown on the screen, play any key in the chord key zone (the 1st-19th key, from
left), the accompaniment rhythm will be activated.
oFill-in –after the accompaniment rhythm is activated, press [FILL-IN] to have a temporary
rhythm play during the accompaniment rhythm; if press and hold [FILL-IN], the temporary
rhythm will continue.
oStop rhythm –during the accompaniment rhythm, press [START/STOP] to stop the ac-
companiment rhythm.
Metronome –the metronome contains four tempos, 1/4, 2/4, 3/4 and 4/4, respectively; press the
[Metronome] continuously to select the four tempos; press the [Metronome] button again to stop
the tempo.
Tempo adjustment –press [TEMPO +] or [TEMPO -] to increase or decrease the rhythm speed;
pressing the two buttons simultaneously will cause reset tempo to the default.
Auto Bass Chord
Single chord –when the rhythm is activated, press [SINGLE]; after the "Sin" is shown on the
screen, you can play a single chord on the keys in the chord zone of the keyboard; press [SIN-
GLE] again, "OFF" will be shown on the screen, and the single chord function will be disabled.
Fingered chord –when the rhythm is activated, press [FINGERED]; after the "Fin" is shown on
the screen, you can play a figured chord on the keys in the chord zone of the keyboard; when
[FINGERED] is pressed again, "OFF" will show on the screen, and the fingered chord function
will be disabled.

MK 2117L
Instrukcja obsługi / User Manual
17
Fingered Chord Fingering (C Key)
(The C key fingered chord fingering is as shown in the following
figure, and the rest can be obtained by analogy)
Single Chord Fingering

MK 2117L
Instrukcja obsługi / User Manual
18
Status memory function
With the status memory function, you can save the tone, rhythm, tempo and other parameters
to be changed during playing, for fast shifting. This keyboard is equippedwith 3 status memories
which can be flexibly called at any time during playing.
Storage of status memory –set the tone, rhythm, tempo and chord as required, and then press
the [Status Memory] button and one of [Memory 1] to [Memory 3] to save the current status.
Calling of status memory –press any one of [Memory 1] to [Memory 3] to call the setting param-
eters saved under this memory to replace the current status.
No power failure protection is provided for the saved contents, and the saved contents will be
lost after the electronic keyboard is restarted after power cut.
Effect control
Transposing function –with the transposing function, you can play music of other tunes with C-
tune fingering method; press the [Transpose -] to decrease the tone by half-tone (minor second),
and the tune in C-tune keyboard zone will change to B-tune; press the [Transpose +] to increase
the tone by half-tone (minor second), and the tune in C-tune keyboard zone will change to #C
tune or bD tune; when pressing the [Transpose -] for twice, C-tune will shift to bB-tune; when
pressing the [Transpose +] for five times, C-tune will shift to F-tune; press [Transpose +] and
[Transpose-] simultaneously to recover to C-tune "00"; press [Transpose +] and [Transpose -]
to adjust the level from "P-6" to "P06".
Sustain function –press [Sustain] and "SUS" will show on the display –the sustain effect will be
activated; press this button again to disable the sustain effect.
Vibrato function –press [Vibrato] and "Vib" will show on the display –the vibrato effect will be
activated; press this button again to disable the vibrato effect.
Keyboard splitting function –press [SPLIT] to enable the keyboard splitting function, "on" will
show on the display; 24 keys on the left of the keyboard will split with the remaining keyboard;
while the left keyboard zone will increase by one octave and maintain the original tone, the right
keyboard zone will decrease by one octave to maintain the same pitch with the left keyboard
zone; the tone of the right keyboard zone can be set as needed so different tones can be played
by the left and right keyboard zones at the same time; press [SPLIT] again to disable this func-
tion.
Recording and rhythm programming
Recording –press the [REC] button to enable; when the recording function is enabled by press-
ing, "rEC" will show on the screen display; in this mode all playing notes will be recorded; when
the storage is full, "FUL" will show on the screen display and recording will stop automatically.
oPress the [PLAY] button to playback the recorded notes, and "PLy" will show on the
screen display; when playback is completed, it will enter to the recording mode and "rEC"
will show on the screen display; you can record a new melody or you can press [PLAY]
to playback the recorded melody.
oPress [START/STOP] or press [REC] again to disable the recording function and all rec-
orded note will be removed.

MK 2117L
Instrukcja obsługi / User Manual
19
Rhythm programming –when the rhythm programming function is enabled by pressing [PROG]
button, "Prg" will show on the screen and the keyboard percussion will be activated; in this
mode, you can create custom rhythms by playing the corresponding percussion key.
o32 percussions can be recorded at maximum –after that "FUL" will show on the screen
and programming will stop automatically.
oPress [PLAY] button to playback the programming rhythm. By pressing [PLAY] button
again to stop playback, "Prg" will show on the screen and programming function will be
enabled. You can re-program rhythms or you can press the [PLAY] button again to play-
back.
oPress [START/STOP] button or press [PROG] button again to disable the programming
function and all recorded rhythm will be removed.
Luminous key three-step intelligent training
Training 1 –ONE-KEY
Press [ONE-KEY] to enable the One-key training function. You can select the song to be learned by
pressing the number buttons or the "+", "-" buttons. The luminous keyboard will light on according to
the main melody notes,indicating the note to be played, and you canperform byfollowing the guidance
of the lighted key. This mode allows for mistakes when playing the keys, but the keyboard still plays
correct notes, and the screen will show the correct notes. After one song is finished, repeat the current
song to learn. Press [START/STOP] or press [ONE-KEY] to disable the training function.
Training 2 –FOLLOW
Press [FOLLOW] to enable the Follow Training function. You can select the song to be learned by
pressing the number buttons or the "+", "-" buttons. You can play according to the demonstration song,
the key will light on according to the melody notes, indicating the notes to be played, and you can play
correctly by following the guidance. You can also learn by following the notes shown on the screen
display, it will wait for you to play the correct note before it moves to the next one. Note: In this state,
the keyboard plays only the correct notes, and gives no response to the wrong notes. Press
[START/STOP] button or press [FOLLOW] button to disable the training function.
Training 3 –ENSEMBLE
Press [ENSEMBLE] to enable the Ensemble training function. You can select the song to be learned
by pressing the number buttons or the “+”, “-”buttons. The keyboard will screen the keynote and en-
semble with you. The luminous keyboard will light on according to notes of the main melody, indicating
the notes to be played, and you can play correctly by following the guidance of the luminous keyboard.
You need to play the correct note according the correct duration of the song. If a note is not played
within 3 seconds, the keyboard will automatically play the correct note. After one song is finished,
repeat the current song to be learn. Press [START/STOP] button or press [ENSEMBLE] button to
disable the training function.
Table of contents
Languages:
Other Meike Electronic Keyboard manuals
