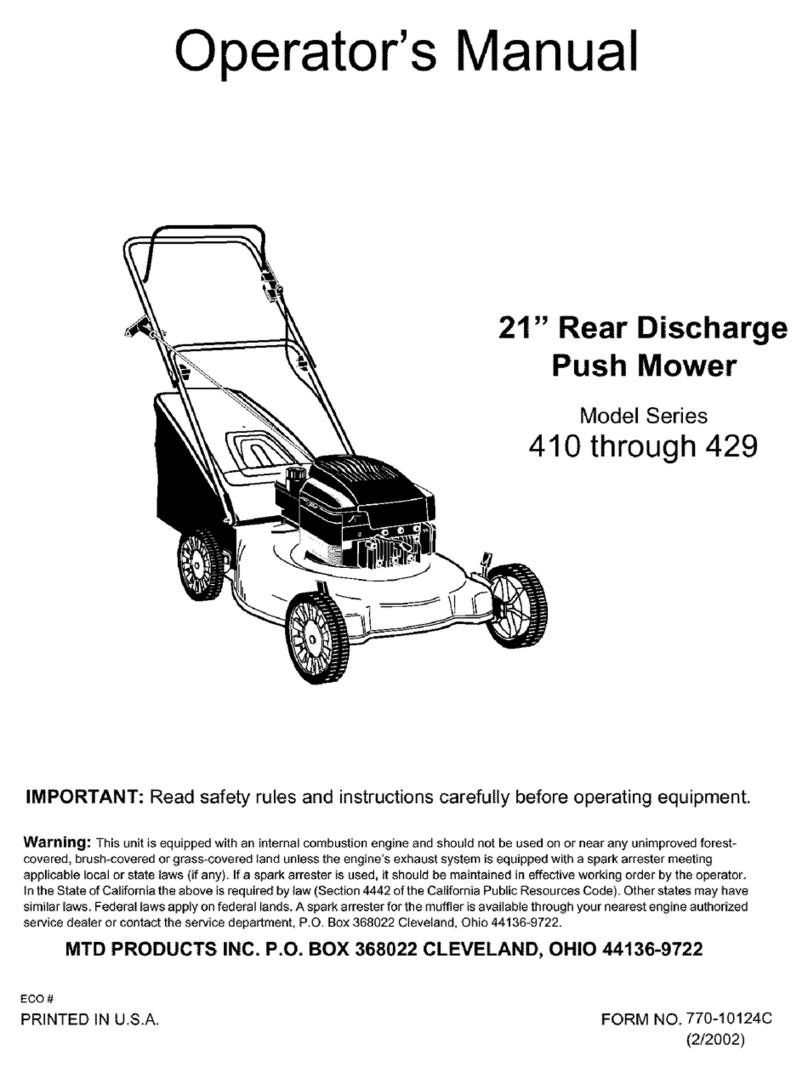
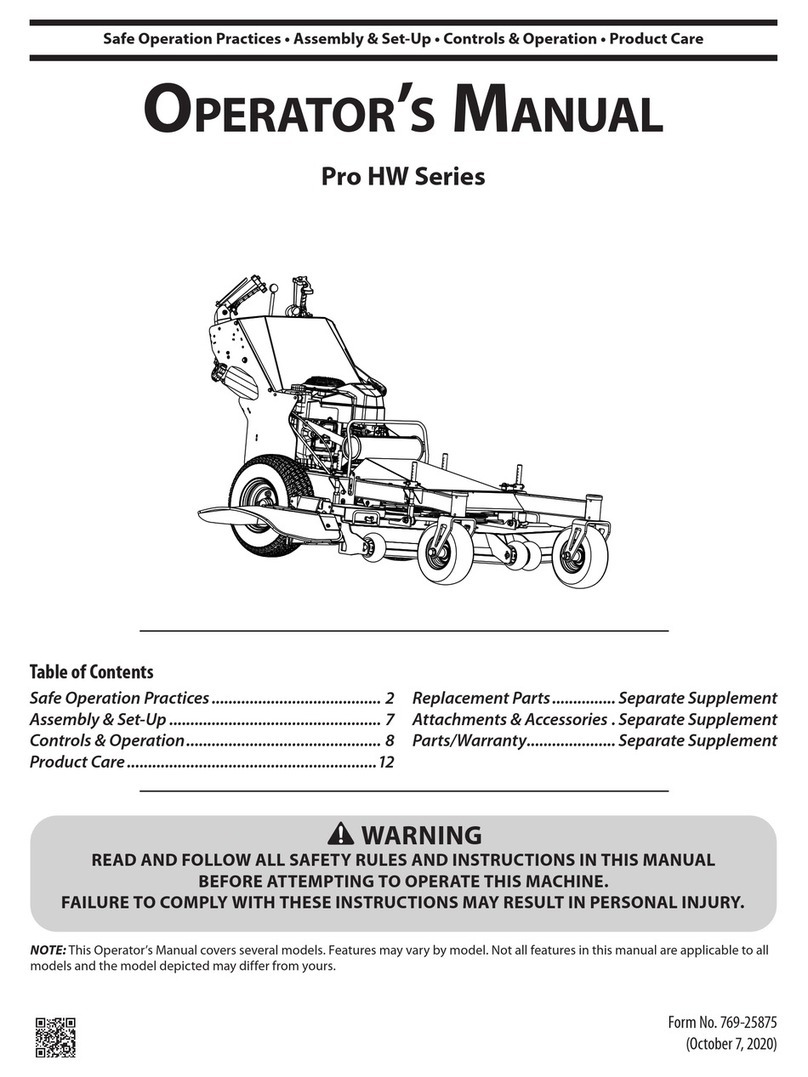
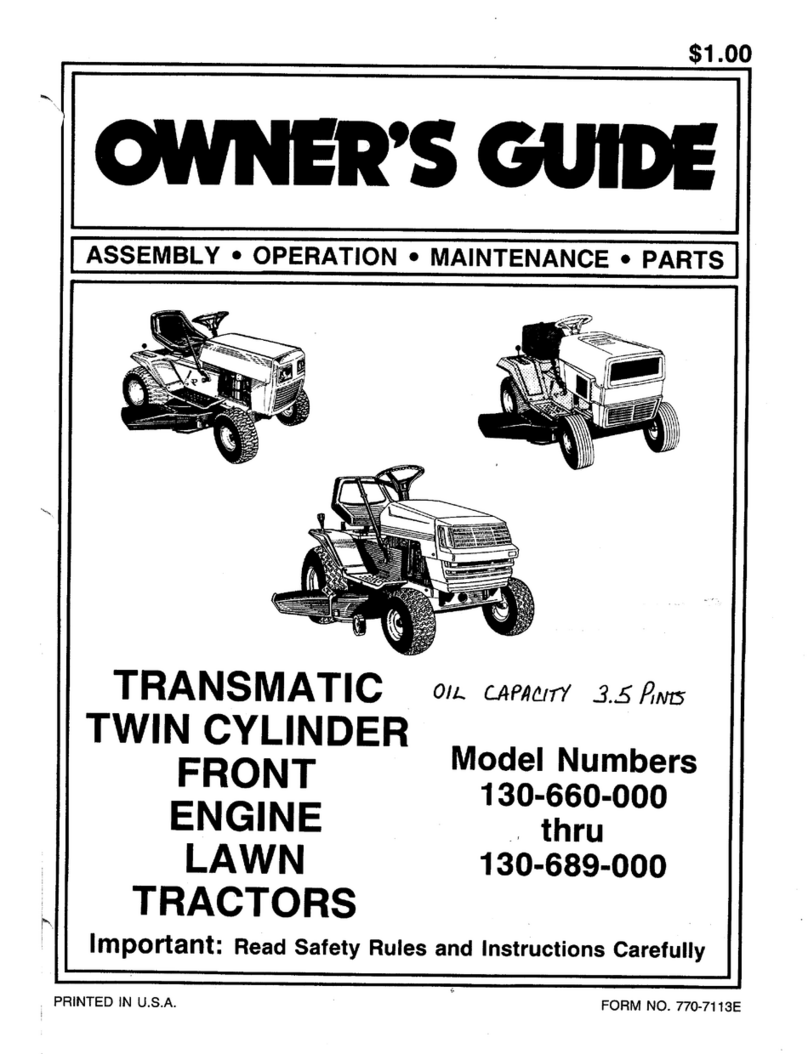
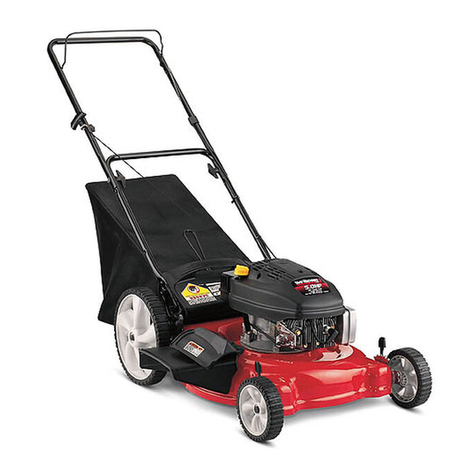
MTD 020 Series User manual

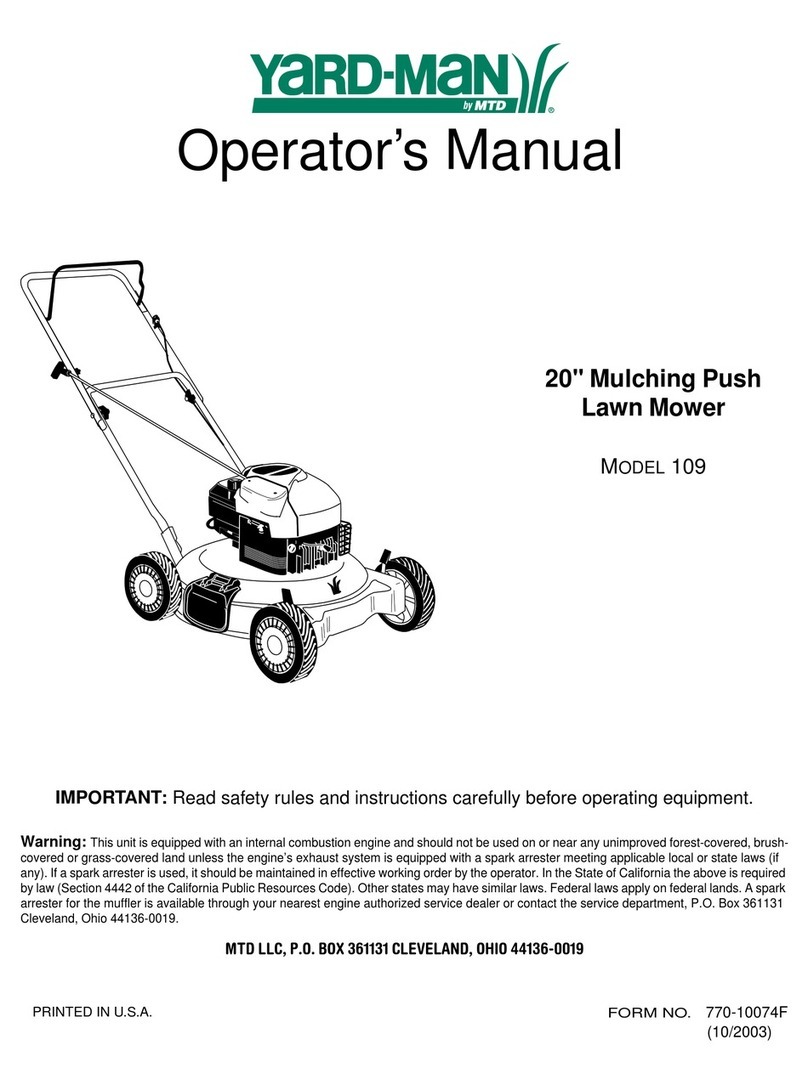
Operator's
Manual
20"
Rotary
Mower
ModelSeries
020
IMPORTANT:Readsafety
rulesand
instructions
carefully
beforeoperating
equipment.
Warning: This
unit
isequippedwithan
internalcombustronengrneand
should
notbeusedonor
nearanyunimproved
forest-
covered,brush-covered
or
grass-covered
land
unlessthe
engine'sexhaust
system
isequipped
with
asparkarrester
meeting
applicable
localorstate
laws
(if
any).
lfasparkarrester
is
used,
itshould
be
maintainedineffective
workingorderby
theoperator.
lntheStateofCalifornia
theaboveisrequiredby
law
(Section
4442
otIhe
California
PublicResources
Code).Otherstates
may
have
similar
laws.Federallawsapplyonfederal
lands.Asparkarrester
for
the
muffler
isavailablethrough
your
nearest
engine
authorized
servrcedealeror
contacttheservicedepartment,
P.O.
Box361
131Cleveland,
Ohio
44136-0019.
FORMNO.770-10419C
(912004\
PRINTEDINU.S.A.
MTDLLC.
P.0.BoX361131CLEVELAND,
0Hl044136-0019

Content
Customer
Support
lmportant
SaleOperationPractices
SlopeGauge
SettingUp
OperatingYourLawnMower
TABLEOFCONTENTS
Page
z
?
5
6
Gontent
MaintainingYourLawn
Mower
Troubleshooting
Parts
List
Warranty
Page
'11
13
1^
t.+
16
FINDING
MODELNUMBER
This
Operator'sManualis
an
important
part
of
your
newlawnmower.ltwillhelp
you
assemble,
prepare
and
maintain
theunitfor
best
performance.
Pleaseread
andunderstandwhatitsavs.
Before
you startassembling
your new
equipment,
please
locatethemodel
plate
onthe
equipment
andcopythe
information
fromitinthe
space
provided
below.Asamplemodel
plate
is
also
given
below.
You
can
locate
themodel
plate
by
standingattheoperating
position
and
lookingdown
atthe
rear
ofthedeck.Thisinformationwillbenecessarytousethe
manufacturer's
websiteand/orhelpfrom
theCustomerSupport
Departmentoranauthorized
servicedealer.
,/
Hmll( $,i'i*liu*
www rnldDrodLiils d)m aoo aoo 731 O
Copythe modelnumberhere:
Copytheserialnumberhere:
knowledqebase.Searchby
produa.
ke1nrord,or
phlase.
Loqinto checkthestatusof
yourquegions.
modiqr
your
inquiries,orupddle
yourpersonalprofile.
ServiceLocator
Needlocalassislance?Clickhereto find authorizedservicecentersinyourarea.
ManualsOnline
Heed a rnanual? Download literdturefor current models.
7,tlo,t,sir.:;r.rer
v4:i_i ,.3f,:;
1**H.uzgl:r
t:tst.t!,:::
':::,:
j:s:;l ;t
{zvt3L{'s**lt*{,
;t1/t;ry:
CUSTOMER
SUPPORT
PleasedoNOTreturn
theunittothe
retailer
lromwhichit was
purchased,
without
tirst
contactingCustomerSupport.
lf
you
have
difficultyassemblingthis
product
orhave
any
questions
regardingthecontrols,operationor
maintenanceofthisunit,youcanseekhe|piromt|e9'xRerts'
".<1 Visitmtdproducts.comformany
usefulsuggestions.ClicktheService&Supporloptionto
V gain
accesstousefulonline
information.
Choose
your
modelandclickontheappropriate
L- buttonforimmediate
assistance.
FindAnswers
lf
you
prefer
toreach
aCustomerSupport
Representative,
please
call1(800)800-7310.
I EnFine I
I M4nual
I
LclAJ
The
enginemanufacturer
isresponsible
forallengine-related
issueswithregardsto
performance,
power-rating,
specifications,warrantyandservice.
Pleaserefertotheengine
manufacturer's
Owner's/Operator'sManual,
packed
separately
with
your
unit,formore
information.

SECTI0N1: IMP0RTANTSAFE0PERATI0N
PRACTICES
WARNING: This
symbol
points
out
importantsafety
instructions
which,ifnot
followed,could
endangerthe
personal
safetyand/or
property
of
yourself
andothers.
Readand
follow
all
instructions
in
thismanualbeforeattemptingtooperatethis
machine.
Failuretocomply
withthese
instructionsmay
result
in
personal
injury.When
you
seethissymbol
-
heed
itswarning.
WARNING: EngineExhaust,someof
its
constituents,
andcertain
vehiclecomponents
containor
emitchemicalsknowntoStateofCaliforniatocause
cancerandbirth
defectsorother
reproductive
harm.
DANGER: Thismachinewasbuilttobeoperatedaccording
tothe
rules
for
safeoperation
inthis
rnanual.Aswith
anytypeof
power
equipment,
carelessness
orerroron
the
pafi
oftheoperator
can
resultin
serious
injury.Thismachineiscapableofamputating
handsand
feetandthrowingobjects.
Failure
toobserve
thefollowingsafetyinstructionscould
result
in
serious
injuryordeath.
Read
thisoperatols
manual
carefully
inits
entiretybefore
attemptingtoassemblethismachine.Read,understand,and
followall
instructions
onthemachineand
in
the
manual(s)
before
operation.Becompletelyfamiliarwiththecontrolsand
the
proper
useofthis
machine
beforeoperating
it.Keep
this
manual
in
asafe
place
for
future
and
regularreference
and
for
ordering
replacement
parts.
Thismachineisaprecisionpiece
of
power
equipment,nota
plaything.
Thereiore,
exerciseextremecautionatall
times.Your
unilhasbeendesignedto
perform
one
job:
tomow
grass.
Do
nol
useit
for
anyolher
purpose.
Never
allowchildrenunder
14
years
oldtooperatethis
machine.
Children
14
years
oldandovershouldreadandunderstandthe
instructions
in
thismanualandshouldbetrainedandsupervised
by
aparent.
Onlyresponsibleindividualswhoarefamiliar
with
theserulesofsafeoperationshouldbeallowedtousethis
machrne.
Thoroughlyinspect
thearea
wheretheequipmentisto
be
used.
Removeallstones.sticks,
wire,
bones,toysandother
foreign
objects
which
couldbetrippedoverorpicked
upandthrownby
the
blade.Thrownobjectscancauseserious
personal
injury.
Plan
your
mowing
pattern
toavoiddischargeotmaterial
toward
roads,sidewalks,bystandersandthe
like.
Also,avoid
discharging
material
against
awallorobstructionwhichmay
causedischarged
material
toricochet
backtoward
the
operator.
Tohelp
avoidbladecontactorathrownobject
injury,stayinthe
operatorzonebehindthe
handles
andkeepchildren,
bystanders,
helpers
and
pets
at
least75feetfromthemower
whileitisin
operation.Stop
machineif
anyone
entersthearea.
Always
wear
safety
glasses
orsafety
goggles
duringoperation
and
while
performing
anadjustmentorrepair
toprotect
your
eyes.
Thrown
objects
whichricochetcancauseseriousinjuryto
theeyes.
Wear
sturdy,
rough-soledwork
shoesandclose-fittingslacks
and
shirts.Shirtsand
pants
thatcoverthearmsand legs
and
steel-toedshoesare
recommended.Never
operate
thismachine
inbare
feet,
sandals,slipperyor
lightweight
(e.9.
canvas)shoes.
Donot
put
handsorfeetnearrotating
parts
orunderthecutting
deck.
Contactwiththebladecanamputatehandsandfeet.
Amissingordamageddischargecovercancausebladecontact
orthrownobject
inluries.
Many
injuries
occurasa result
ofthe
mower
being
pulled
over
thefootduringafallcausedbyslippingortripping.
Do
not
hold
ontothe
mowerif
you
arelalling;releasethehandle
immediately.
11. Never
pull
themowerback
toward
you
while
you
are
walking.lf
you
mustback
themoweraway
fromawallorobstruction
first
lookdownand
behindtoavord
trippingandthen
follow
these
SIEOS:
a. Stepback
fromthe
mower
to
fullyextend
your
arms.
b. Be
sure
you
are
well
balanced
withsure
tooting.
c. Pull
the
mowerbackslowly,
nomorethan
halfway
toward
you.
d. Repealthesestepsas
needed.
5. Do
notoperatethe
mowerwhileunderthe
influence
of alcohol
ordrugs.
6. Do
not
engage
theself-propelled
mechanismonunitsso
equipped
while
starting
engine.
7. Thebladecontrol
handle
is
asafety
device.Neverattemptto
bypass
its
operation.
Doingsomakesthesafetydevice
inoperatrveand
mayresult
in
personal
in1urythroughcontact
withtherotatingblade.
Thebladecontrol
handlemustoperate
easily
inbothdirectionsand
automaticallyreturntothe
disengaged
position
when
released.
8. Never
operate
themower
inwet
grass.
Alwaysbesureof
your
footing.Aslipand
iall
can
causeserious
personal
injury.lf
you
feel
you
are
losing
yourfooting,releasethebladecontrol
handle
immediatelyandtheblade
willstop
rotatingwithinthree
seconos.
9. Mow
only
in
daylightor
in
good
artificial
light.Walk,neverrun.
10. Slopthe
blade
when
crossing
gravel
drives,
walks
or
roads.
11. litheequipmentshould
startto
vibrateabnormally,stopthe
engine
andcheck
immediatelyforthecause.
Vibrationis
generally
a
warning
oJ
trouble.
12. Shuttheengineoffand
waituntiltheblade
comestoacomplete
stopbefore
removingthe
grass
catcheroruncloggingthechute.
Thecuttingblade
continuestorotaleforaiewsecondsafterthe
engine
is
shutoff
.Never
place
any
part
ofthe
bodyintheblade
areauntil
you
aresure
theblade
has
stopped
rotating.
.13.Neveroperate
mowerwithout
proper
trailshield,discharge
cover,
grass
catcher,
bladecontrol
handle
or
othersafety
protective
devices
in
place
andworking.
Neveroperatemower
withdamaged
safetydevices.
Failuretodoso,can
resultin
personal
injury.
14. Mufflerandenginebecome
hotandcancauseaburn.Donot
10ucn.
15. Onlyuse
parts
andaccessories
made
for
thts
machine
bythe
manufacturer.
Failuretodosocan
resultin
personal
injury.
16. lf
situations
occur
which
are
notcovered
in
this
manual.
use
care
and
good
judgment.
Contact
your
dealer
for
assistance.
Telephone
1
-800-800-731
0
for
the
name
of
your
nearestdealer.
General
10

Slopesarea majorfactorrelatedto
slipand
fall
accidentswhich
can
result
inseverein,ury.
Operationonslopes
requires
extracaution.lf
you
feel
uneasyonaslope,donot
mowit.For
your
safety,usethe
slope
gauge
included
as
part
ofthis
manual
to
measure
slopesbefore
operating
this
unit
on
gslopedor
hilly
area.lftheslopeis
greater
than
15
degrees,donotmowit.
Do:
1. Mowacrossthefaceofslopes;never
upanddown.Exercise
extremecaution
when
changingdirectionon
slopes.
2. Watchlorholes,ruts,rocks,hidden
obiects,orbumpswhich
can
cause
you
tosliportrip.
Tall
grass
can
hide
obstacles-
3. Alwaysbesureof
your
footing.Aslipand
fall
cancauseserious
personal
in1ury.lf
you
feel
you
are
losing
your
balance,
release
thebladecontrol
handleimmediately,
andtheblade
will
stop
rotating
within3seconds.
Do
Not:
'1
. Donotmowneardrop-offs,ditches
orembankments,
you
could
lose
your
footing
orbalance.
2. Donotmow
slopes
greater
than15degreesasshownonthe
srope
gauge.
3. Do
notmow
onwet
grass.
Unstablefooting
couldcauseslipping.
Children
Tragic
accidentscanoccuriftheoperatorisnot
alerttothe
presence
ofchildren.Children
are
often
attractedtothe
mower
andthemowing
activity.Theydonotunderstandthe
dangers.Neverassume
that
children
will
remain
where
you
last
sawthem.
1. Keeochildrenoutofthemowino
areaandunderthewatchful
careofa responsible
adultotherthantheoperator.
Bealertandturnmowerofiifachildentersthearea.
Before
and
whilemovrng
backwards,lookbehind
anddown
for
smallchildren.
Useextremecarewhen
approachingblindcorners,dooMays,
shrubs,
trees,
orotherobjectsthatmayobscure
your
vision
ofa
child
whomayruninto
the
mower.
Keep
children
awayfromhot
orrunning
engines.
They
can
suffer
burns
from
a hotmuffler.
6. Neverallowchildienunder14
years
oldtooperateapower
mower.Childrenl4 years
oldand
overshould
read
and
understandtheoperationinstructionsand
safety
rulesin
this
manual
andshouldbetrainedandsupervisedbya parent.
0fGasoline:
Toavoid
personal
injury
orproperty
damageuseextremecarein
handling
gasoline.
Gasoline
is
extremelyflammable
andthe
vapors
areexplosive.Serious
personal
rnjury
can
occurwhen
gasoline
is
spilled
on
yourself
or
your
clotheswhichcanignite.
Wash
your
skinandchangeclothesimmediately.
Useonlyanapproved
gasoline
container.
Never
fill
containersinsideavehicle
or
onatruckor
trailerbed
with
aplastic
liner.Always
place
containersonthe
ground
away
from
your
vehicle
before
filling.
Remove
gas-powered
equipment
from
thetruckortrailerand
refuelit
onthe
ground.
lf
this
is
not
possible,
thenrefuel
such
equipmentonatrailer
with
aportable
container,
rather
thanfrom
agasoline
dispenser
nozzle.
Keeo
the
nozzlein
contact
with
the
rim
ofthefueltankor
containeropeningat
all
timesuntilfuelingis
complete.Donot
useanozzlelock-open
device.
Extinguishallcigarettes,cigars,
pipes
andothersources
of
ignition.
9.
10.
11.
12.
Neverfuelmachineindoorsbecause
{lammable
vaporswill
accumulateinthearea.
Neverremove
gas
caporaddfuelwhiletheengineishot
or
running.Allowenginetocoolatleasttwominutes
before
refueling.
Neverover
fillfuel
tank.
Fill
tanktonomore
than/zinchbelow
bottomoffiller
neck
to
provrde
forfuel
expansion.
Replace
gasoline
capandtightensecurely.
lf
gasoline
is
spilled.
wipeit
offtheengineandequipment.Move
unittoanotherarea.
Wait5minutes
beforestartingtheengine.
Never
store
the
machine
or
fuel
container
near
anopenflame,
sparkor
pilot
light
asonawaterheater,
spaceheater,
furnace
.clothes
dryer
or
other
gas
appliances.
To
reduce
firehazard,keepmowerfreeof
grass,
leaves,
orother
debrisbuild-up.Clean
upoil
or
fuel
spillageandremove
any
fuel
soakeddebris.
15. Allowa mowertocoolat
least
5
minutes
beforestorino.
GeneralService:
1. Neverrunanengine
indoors
or
in
apoorly
ventilated
area.
Engineexhaustcontainscarbon
monoxide,
anodorlessand
deadly
gas.
2. Beforecleaning,
repairing.
or
inspecting,make
certaintheblade
andallmoving
parts
have
stopped.
Disconnect
thespark
plug
wire
and
ground
against
theengineto
prevent
unintended
startano.
Checkthebladeandengine
mountingbolts
at
frequentintervals
tor
proper
tightness.
Also,visuallyinspectbladefor
damage
(e.9.,
bent,
cracked,
worn)Replace
blade
with
theoriginal
equipmentmanufactures(O.E.M
)
bladeonly,
listedin
this
manual.
"Use
of
parts
which
do
notmeet
theoriginalequipment
specificationsmay
lead
toimproper
performance
and
compromisesafety!"
Mowerbladesaresharpandcancut.
Wrap
thebladeorwear
gloves,
anduseextra
cautionwhenservicingthem.
Keepallnuts,bolts,andscrewstightto
be
suretheequipment
is
in
safeworkingcondition.
Nevertamper
with
safetydevices.
Checktheir
proper
operation
regularly.
After
strikingaforeignobject.stoptheengine,disconnectthe
spark
plug
wireand
ground
against
the
engine.
Thoroughly
inspect
the
mower
for
anydamage.
Repair
thedamagebefore
startingandoperatingthe
mower.
Never
attempt
to
make
awheel
orcutting
height
adjustment
whiletheengine
isrunning.
9. Grasscatchercomponents,discharge
cover,
andtrailshieldare
subiectto
wearanddamagewhichcouldexposemoving
parts
or
allowobjects
tobethrown.
For
safety
protection,
frequently
checkcomponents
andreplaceimmediately
with
original
equipment
manufacturer's
(O
EM)
parts
only,
listedin
this
manual.
"Use
of
parts
which
do
notmeettheoriginalequipment
specifications
mayleadtoimproper
performance
and
compromisesafety!"
10. Donot
change
theengine
governor
settingoroverspeedthe
engine.
The
governor
controls
the
maximum
safeoperating
speedoftheengine.
11. Maintain
or
replacesafetylabels,as
necessary.
12. Observe
proper
disposallawsand
regulatrons.lmproper
disposaloffluidsand
materials
can
harmtheenvironment.
Restricttheuseofthis
power
machinetopersons
whoread,
understandand
followthe
warningsandinstructionsin
this
manual
andon
themachine.
Service
SafeHandling
3.
A
5.
2.
3.
4.
8.
6.
SECTI0N
2: SLOPEGAUGE
Usethis
page
asaguide
todetermineslopes
where
you
maynotoperatesafely.
Donotoperate
your
lawnmower
onsuchslooes.
O
I
--.{
z
U
I
T-
o
-J
T
a
fi
m
t-
=
=
m
!
=
o
t-
;
m
m
n
a\
€
m
f)
-
a'\
r
m
o
o
I
z
m
n
-T'l
@
g
t-
o
z
C)
o
u
-n
m
z
m
T
@
B'
gt
vt
,
T
I
I
,
,
,
I
rJ
,x
rO
rO
r-e
,d'
,-J
tfi
,o
-rc. -
1ff
t'
rfr
rD
rfr
to)
t9
f 'v.-
,:-
1A
,.L
r.T
lri
rF
r$
ltri
I
I
T
?Ft
7€
f,
z
2
o
99 3
?
P
tii x33
<orpcjl
5NQD5
loc da
l-A^
iAo qi r
5-! (, i
lll - - ^ (/
TX - \u =
=x
3
s
a
-\y--v,
Ya =p =
e€d a=
* o,='5. s,
XloEo
u, *(D\< o
^,^4.-
x x^' x
Y X E ='"
O:(,^='
(h J
fn.^-u6
r! ! ni c)
o x< =.!q
;* ii .= Y;
^'
)]-nr9
(u6
e.fi =;
crD
-i a^
oP "o*
! ! !(o
m^(u-
yr3 fR
-@ =,;
;+
<; r!I)
;P r.*
-n
g:o o=
aa ;€
o-o -E
o! o .i
€ I =X
-v,^.=' p-l
V6a
o X<
Y'-N) ='1
g'' b
xo
+m
-m
:<
(uo
<Q
^
iro
-+
-(u
:6
3>
d\-
^\J
f
x=
E=
v^
='c
a--

SECTI0N
3: SETTINGUP
NOTE: This
operator's
manualcoversvariousmodels
ofmowers.Followinstructions
pertaining
toyour unitonly.
Oncethe
cadon
has
beenopened,
you
willfind
several
loose
parts
likethe
wheels,handles,andchutedeflector.A
hardware
pack
is
also
includedin
thecarton.
Make
suretoremove
all
loose
parls
before
discardingthe
carton.
Follow
instructions
belowtoattachthese
loose
parls
to
your
mower
safely
and
properly
forbest
performance.
Hardware
Pack
For
convenience
of
assembly,identify
the
pieces
in
the
hardware
pack
accordingto
Frgure
1
below:
Figure1
6
EL
o
ctr
c,,!t
,.2..1'r t
i i'\ "/
\, \. __.r I \
'\, /
\....'---/
Qty.
4
',-t'^.\
i )l
Oty
4
Qty.4
(\l
o-
o
E
(t o
Qty.
2Qty.
2
st,
co
e-
o
CE
C5 LUo*
rf
o-
a
E
Q9 Qty.
2Qty.
2
t',4\t
{
t
\ ,)
)/)
\ \v;,/
t.-Yl"
Qty.4
t(?
o.
o
&,
C5 \r(-ll
\\ --- ,:.
OtV
Z
Qty.
2
(l)
o-
(a
E
c5
r/,^-\
| ! rl
l',
\--l /
Oty.
1

z-
Asetofadjustablewrenchesorindividual
wrenchesof
the
f
ol
lowin
g sizes:
7
I
1
6-i
nch,1/2-inch,9/16-i
nch,
5/8-
inch,and3/4-inch
NOTE:Referencetoright,
left,front,orbackof thelawn
mower is from the operating position only, unless
otherwisestated.
Disconnectspark
plug
wirefromthespark
plug
and
ground
it
againsttheengine.
lfengine
is
equipped
wilh
a rubber
boot,
attach
rubber
boottoaboltontheenqine
to
qround.
See
Fioure2.
Figure2
Attaching
LowerHandle
1. Liftthe
rear
ofthedeckandolace
it
on
ablock
securely.
2. Placethelowerhandle
overthe
deckandalignthe
holesonthedeck
with
thecorresponding
holeson
thehandle.
3. Secure
thelowerhandletothedeckusingthe
hex
screws,shoulderscrews,and
flange
lock
nutsfrom
group
4ofthehardware
pack.
See
Figure
3.
Figure3:
Attachinglowerhandle
tomowerdeck
Attaching
UpperHandle
1. Place
theupper
handle
in
position
overthe
lower
handlekeeping
thebladecontrol
handle
facing
up.
2. Securethe
upper
handletothe
lowerhandleusing
thecarriagebolts,
lockwashers,and
hexnutsfrom
group
2of
thehardware
pack.
See
Figure4.
t\ .,,-;a;
\ .r/."
\ (('
Carriase
Bolt \\ \\ ..U
. \\ o'.\ Hex
Nut
f \) 'i \ Lockwasher
Figure4: Attaching
upperhandleto
lowerhandle.
Attaching
BladeControl
Handle
NOTE: lf the bladecontrol
handlebecamedisplaced
either during shipping or during assembly, reattach it
now. lf the blade control handle is firmly secured in
place,you mayproceedtothenextstep.
1. Insert
the
curvedendofthe
bladecontrolhandle
intothe
righthole,
Figure5A.
2. Squeezethe
handle
in
and
inseftthestraightendof
into
the
leftholeoftheupper
handle,
Figure
58.
3. Squeeze
theblade
control
handle
againstthe
upper
handle
to
check
for
proper
assembly.
NOTE:Theholeintheblade
controlhandle
must
beon
the left side and the control handle must touch the
upperhandlewhensqueezed.
IMPORTANT:
The
blade
controlhandle
r- d -drgry
device.
DO
NOTattemptto
bypass
its
operations.
'c
tu
u'l
,:''
Figure5: Attachingthebladecontrol
handle
(optional)

1. Unwrap
the
brakecablefrom
theengineand
route
thecableunderthe
lower
handle.
Attaching"2"Fitting
2. TomakeiteagiertoattachtheZ
fitting,
removethe
left
sideofthe
bladecontrolhandle
asshown
in
Figure
6.
3. Hook
the
"2"
endofthebrake
cable
into
the
handle
from
theinsidetooutside.Fioure6.
Zfrtting
4. Reattach
the
left
sideofthebladecontrol
handle.
Securing
BrakeCable
WARNING: The
cablemustbe
routed
properly
toavoidcontact
with
allsharpedges
and
hot
surfaces.Suchcontactsdamagethe
cableandrenderthecontrols
inooerative.
Pressthesnapfittingin
place
asshowninFigure7.
Makesurethalthebladecontrol
handleis
ontooof
theupperhandle.
Upper
Handle
Cable
Tie
Figure8:Usethe
cabletielosecurethebrakecableto
the
lower
handle.
NOTE: Theholesin thedeckprovide
threecutting
heights.Usethesameholeforallfourwheelswhen
assembling.
Forexample,
ifyou desirethelowest
cutting
position,
assembleeach
wheel
atthe
highest
holeon thedeck.RefertotheCutting
Height
Adjustmentsection
for
moreinformation.
1. Using
hardwarefrom
group
1,
securethe
wheel
to
thedeckas
shown
inFigure
9.
The
small
bell
washer
should
beinstalledwiththecrownside
facinothe
wheel.
Figure9: Installingwheels
2. Securethe
wheeltothedeck
withthelarqebell
washerand
nut.Repeatonothersides.
/o\
5.
\-.,,
_...)\a'\
6.
7: Installing
thesnap
Securethecableto
thelowerlefthandlewith
a
cabletie
from
group
3ofthe
hardware
pack.
Trim
o{fextralengthofthecabletie.See
Figure
8.
\\".
\\,
\.n
A,\'\/
'k'\'
\\ \\
shalt
inside
snap
fitting

Attachinq
ChuteDeflector
Aligntheholes
on
the
chutedeflector
with
the
corresponding
holes
onthe
deck.
Using
group
5fromhardware
pack,place
carriage
bolts
from
undersideof
thedeck
andupthrough
the
chutedeflecior.
SeeFigure10.
Secure
eachboltwith
awasher
andlocknut.
z-
z.
Using
hardwarefrom
group
6,loosely
attachthe
eyebolttotheupperhandle
andthreadthelocknut
onlyafewturns.Donottighten.
SeeFigure11A.
Withthe
spark
plug
wire
disconnectedand
grounded,
depressthebladecontrolhandle
and
pull
theropeoutoftheengine.
Looptheropethrough
theeyebolt,
Figure
'l'18.
Tightentheeye
bolttothe
handle
usingthehex
locknut.
DONOTovediohten.
EyeBolt
3.
4.
HexLock
Nut
FlatWasher
Figure
10:Attaching
thechute
deflector
Figure11:Attaching
thestarterrope.
\r
SECTI0N
4: OPERATING
Y0URLAWN
M()WER
Know
vour
Lawn
Mower
Nowthat
you
have
setup
your
lawnmower
for
operation,
get
aqyaintedwithits
controls
and
features,
described
belowandillustrated
inFigure
12.Thisknowledge
will
allow
you
touse
your
new
equipmenttoitsfullest
potential.
BladeControl
Handle
The
bladecontrol
handleis
attachedto
theupper
handle.Depress
theblade
controlhandle
to
operatetheunit.Release
it
tostop
engineand
blade.
WARNING:
This
bladecontrol
mechanism
is
asafetydevice.
Never
attempt
tobypass
its
operations.
Recoil
Starter
Therecoil
staneris
attachedtotheright
upper
handle.
Stand
behindtheunitand
oull
therecoil
starter
rope
to
starttheunit.
Chute
Deflector
The
chutedeflector
discharges
grass
clippings
besideeachcuttinglap.
il. ri
..ll
' l: lllafle
tlonlroi
lliDdlN
'il.
\
\ lJrlDerllrndlc
\ Erakeii.rble
t1..
fl€corl
Slarler .:1,'
q\
-clartrr
ftolje '\i"
GasTafk
Chutell.ileclof
Figure12:
Partsofthemower

WARNING! Use
extreme
care
when
handling
gasoline.Gasoline
isextremely
flammable
and
the
vapors
are
explosive.
Never
fill
gasoline
indoors
or
while
the
engine
ishotor
running.
Extinguish
cigarettes,
cigars'
pipes,
and
other
sources
of
ignition-
. Attach
spark
ptug
wire
tospark
plug.
Make
certain
the
metal
cap
on
the
end
ofthe
spark
plug
wire
(inside
the
rubber
boot)
isfastened
securely
over
the
metal
tip
on
the
spark
plug'
WARNING: Theoperation
of
any
lawn
mower
can
result
in
foreign
oblects
being
thrown
into
theeyes,
whichcan
damage
your
eyes
severely.
Always
wear
safety
glasses
while
oO\!ing the
mower'
or
while
performingany
adjustments
or
repairs
on
it.
WARNING: Be
sure
noone
otherthan
the
operatoris
standing
nearthe
lawn
mower
while
starting
engine
oroperating
mower.
Never
run
engine
indoors
or
inenclosed,
poorlyventilated
areas.
Engine
exhaust
contains
carbon
monoxide,
an
odorless
and
deadly
gas'
Keep
hands,
feet'
hair'
and
loose
clothing
away
from
any
moving
parts
on
engine
and
lawn
mower'
1. Push
primer
three
times.
wait
about
two
seconds
between
each
push.In
temoerature
around
55o
For
below,
prime{ivetimes.
Do
not
prime
torestart
a
warm
englne.
2. Standing
behind
the
mower,
squeeze
the
blade
conlrol
handle
against
the
upper
handle.
See
Figure
13A.
3. ;"J.l;il.;;;#;;.'ilsetherfirmry, srasp
recoir
starter
!i"9]" and
purr [:?:Xt;:",l,l"1handre
(A)'then
|.op"
ort
with
a rapid,
continuous,
full
arm
stroke.
see
Figure
138.
Keeping
apull
recoil
starter
(B)
firm
grip
onthe
starter
handle,
letthe
rope
rewind
slowly.
Repeat
until
engine
cranks.
Let
the
rope
rewind
each
time
slowly.
1.Re|easeb|adecontro|hand|etostoptheengineandtheb|ade.
2. Disconnect
spark
plug
wire
from
spark
plug
and
ground
against
the
englne
Usinq
Your
Lawn
Mower
IMPORTANT:
Besure
the
lawn
isclear
of
stones,
sticks,
wire,
or
other
objects
which
could
damage
the
lawn
mower
or
the
engine.
Such
objects
could
be
accidently
thrown
by
the
mower
inany
direction
and
cause
serious
personal
injuryto
the
operator
and
others.
Gas
&
Oil
Fill-Up
1MpORTANT:
your
lawn
mower
was
shipped
without
any
oil
inthe
engine
or
gasolinein,the
gas
tank'
Follow
the
For
best
results,
do
notcut
wet
grass.
New
grass,thick
grass,
or
wet
grassmay
requlre
a
narrower
cut.
accompanying
engine
manual
to
fillup
both
the
oiland
gasoline
before
starting
forthe
firsttime'
For
subsequent
operation
ofthe
lawn
mower,
rtis
very
important
that
you
check
the
level
ofoil
and
gasolinebefore
operation'
. check
oil
levet
and
add
oil
ifnecessary.
Follow
engine
manual
for
this.
See
Figure
12
forlocatron
ofoil
fill'
. Service
the
engine
with
gasolineas
instructed
inthe
engine
manual.
See
Figure
12
for
location
o{
gas
tank'
WARNING: lf
you
strike
a
foreign
object,
stop
the
engine.
Remove
wire
from
the
spark
plug,
lhoroughly
inspect
the
mower
forany
damage,
and
repair
the
damage
before
restarting
and
operating
the
mower'
Extensive
vibration
ofthe
mower
during
operation
isan
indication
of
damage.
Theunit
should
be
promptly
inspected
and
rePaired.
a
a
For
ahealthier
lawn,
never
cut
off
more
than
one-
third
of
the
total
length
of
the
grass.
Your
lawn
should
becut
inthe
fallas
long
asthere
is
growth.
Adjust
groundspeed
according
to
thecondition
of
the
lawn.
Figure
1
3:
To
start
engine,
squeeze
10

Remove
the
carriagebolts
and
1. Remove
the
carriagebolts
andrelated
hardware
from
the
wheels,
Figure
14.
2. Reattach
thewheels
with
carriage
bolts
atanotherhole.
Remember
to
attachALLwheels
atthesamerelative
position
to
ensure
aneven
cut.
Reler
to
instructions
for
attaching
the
wheels
in
the
"Setting
Up"section
ofthis
manual.For
ahigher
cuttingheight,
use
thelowerhole
on
the
deck;For
alower
cuttingheight,
use
theupperhole"
Figure
14:CuttingHeight
Adlustments
SECTION
5: MAINTAINING
Y0URLAWN
M0WER
a
a
Always
observesafety
ruleswhen
performing
anymaintenance.
Thewarranly
onthislawn
mower
doesnot
cover
items
thathave
beensubjected
tooperator
abuseor
negligence.
To
receive
fullvaluefrom
thewarranty,
operatormustmaintain
the
lawn
mower
asinstructed
here
Changing
ofengine-governed
speedwill
void
enginewarranty.
Alladjustments
shouldbe
checked
at
least
onceeach
season.
Periodically
check
all
fasteners
andmake;ure
thesearetight.
\ WARNING: Always
stopengine,
didconnect
spark
plug,
and
ground
againstengine
beforecleaning,
lubricating
ordoing
anykind
ofmaintenance
on
your
machine.
(See
Figure15)
Blade
Control
Handle
. Lubricate
the
pivot
points
on
theblade
controlhandle
at
least
once
aseasonwith
light
oil.The
bladecontrol
must
operatefreelyin
both
directions.
SeeFigure15.
Wheels
. lf
thewheels
areremoved
for
anyreason,
lubricate
the
surface
ofthe
carriagebolt
andinner
surface
ofthewheel
withlight
oil.
Engine
Follow
theaccompanying
enginemanual
forlubrication
schedule
andinstruction.
Figure15:
Lubrication
areas
ilrrrff$
%
,\v,
. Cleanunderside
ofthemower
deckafter
each
useto
prevent
build-up
of
grass
clippings
orother
debris.Follow
thesteps
belowfor
this
job.
NOTE: Wedonotrecommend
theuseof pressure
washers
orgarden hosetoclean
yourunit. These
may cause
damagetoelectric
components,
spindles,
pulleys,bearings,
or theengine. Theuseof waterwillresultinshortened
life
andreduce
serviceability.
1. Disconnect
spark
plug
wire.
Drain
gasoline
from
thelawnmower,
or
place
a
piece
of
plastic
under
the
gas
cap.
2. Tip
themower
sothatitrests
onthehousing.
Keep
thesidewith
theaircleanerfacing
up.Hold
themowerfirmly.
WARNINGI Never
tip
themower
more
than90degreesin
anydirectionand
do
not
leave
themower
tipped
foranylength
oftime.Oil
candraininto
the
upper
part
oftheengine
causing
astarting
problem.
11

3. Scrape
andclean
theunderside
ofthedeck
withasuitable
tool.
Donolspray
withwater.
4. Putthe
mowerbackon
itswheelson
the
ground.
lf
you
had
put
plastic
under
the
gas
cap
earlier,
makesureto
removeit
now.
BladeCare
n WARNINGi Whenremovingthecuttingblade
forsharpening
or
replacement,
protectyour
handswith
a
ll pair
ofheavy
gloves
oruse
aheavy
rag
toholdtheblade.
--
Periodically
inspectthebladeadapter
for
cracks,especially
if
you
strikeaforeignobject.
Replace
when
necessary.Followthe
steps
below
forblade
service.
Disconnect
spark
plug
wiref
rom
spark
plug.
Turn
moweron
itsside
makingsurethatthe
airfilterand
thecarburetorare
up.
Removethebolt
andtheblade
bellsuppotl.See
Figure
16.
Removebladeand
adapter
fromthecrankshaft.
The
blade
canbe
sharpened
withafileorona
grinding
wheel.
Do
notattempttosharpen
theblade
while
itis
stillon
the
mower.
Whensharpening
theblade,
followtheoriginal
angleof
grind.
Grind
eachcutting
edgeequallyto
keepthebladebalanced.
a
1.
z.
3.
4.
5.
NOTE:Alwaysremovebladefromtheadapter
fortesting
balance.
6. Balancethe
bladeona roundshaftscrewdriver
tocheck.
Remove
metalf
rom
the
heavvsideuntil
itbalancesevenlv.
WARNINGt Anunbalanced
blade
willcauseexcessive
vibrationwhen
rotating
athighspeeds.
ltmay
causedamage
tothe
mowerandcouldbreak
causing
personal
injury.
7. Lubricatethe
enginecrankshaft
and
theinnersurJace
ofthe
bladeadapter
with
light
oil.
Slidetheblade
adapter
ontotheengine
crankshaft.
B. Placeblade
onthebladeadapter,
Figure
.16.
Check
thatthe
blade
is
aligned
and
seated
ontheblade
adapter
flanges.
NOTE: Ptacethebladeon theadaptersuch thattheside of theblademarked"Bottom"
(or with
part number)faces
groundwhenthemoweris in theoperating
position.
9. Placebladebellsupport
onthe
blade.
Alignnotcheson
theblade
bellsupport
withsmall
holesintheblade.
10.Replace
hexbolt
andtighten
hexbolttotorque:
450in.
lbs.min.,
600
in.lbs.
max.
IMPORTANT:
Toensure
safeoperation
of
your
mower,
periodically
checkthe
blade
bolt
forcorrecttorque.
0ff-Season
Storage
The
followingsteps
shouldbetaken
to
prepare
your
lawn
mower
forstorage.
1. Cleanand
lubricate
mowerthoroughly
asdescribed
inthelubrication
instructions.
IMPORTANT:
Wedo
notrecommendthe
useofapressure
washeror
garden
hose
toclean
your
unit.
2. Refertoengine
manual
forcorrectengine
storage
instructions.
3. Coat
mower'scuttingblade
with
chassis
grease
to
prevent
rustlng.
4. Store
mower
inadry,clean
area.
Donotstore
nexttocorrosive
materials,
suchas
f
ertiltzer.
NOTE: Whenstoring
any typeof powerequipment
in a poorty
ventilated
or metalstorage
shed,careshould
be
takento rust-prooftheequipment.IJsinga tight
oilorsiticone,
coatthe equipment.
especially
cablesandall moving
parts
of
your
lawn
mower
before
storage.
Figure
16:Mowerbladeand
hardware
12

SECTI0N
6: TR0UBLESH0OTING
4. Blockedfuel
line.
5. Faulty
spark
plug.
6. Engineflooded
Engineruns 1. Spark
plug
wireloose.
PROBLEM CAUSE REMEDY
Enginefails
to 1. Blade
controlhandle
disengaged.
1. Engage
bladecontrol
handle.
stad 2. Spark
plug
wire
disconnected. 2. Connectwiretospark
plug.
3. Fuel
tank
emptyorstalefuel. 3. Fill
tankwithclean,fresh
gasoline
4. Cleanfuelline.
5. Clean,adjust
gap,
or
replace.
6. Wait
afewminutes
torestart,
butdonot
prime.
1. Connect
andtightenspark
plug
wire.
erratic 2. Blocked
fuelline
orstalefuel. ;2. Cleanfuelline;fill
tank
with
clean,fresh
gasoline
3. Ventin
gas
plugged. r
3. Clearvent.
4. Water
or
dirt
infuel
svstem. ,
y',. Drainfuel
tank.
Refillwithf
reshfuel.
5. Dirtv
aircleaner. 5. Refer
toengine
manual.
6. Carburetor
outofadiustment. 6. Refertoenoinemanual
Engine
overheats1. Engine
oil
levellow. 1. Fill
crankcase
with
proper
oil.
2. Airflowrestricted. ,2. Remove
blower
housing
andclean.
3. Carburetornot
adjusted
properly. 3. Referto
engine
manual.
Occasional
skip 1
. Spark
plug
gap
too
close. 1. Adjust
gap
to.030".Refer
toengine
manual.
(hesitates)
at
high
speed
ldles
poorly 1. Spark
plug
fouled,faulty,
or
gap I1. Reset
gap
to.030"orreplace
spark
plug.
Refer
to
toowide. enginemanual.
2. Carburetor
improperly
adjusted. 2. Refertoenginemanual.
3. Dirty
aircleaner. 3. Refer
toenginemanual.
Excessive 1. Cuttingbladeloose
or 1. Tighten
bladeandadapter.Balanceblade.
vibration unbalanced. ,.2. Reolace
blade.
2. Bent
cuttinoblade.
Uneven
cut 1. Wheelsnot
positioned
correctly. 1. Placeallfourwheelsin
same
height
position.
NOTE:Forrepairs
beyondtheminoradjustmentslisted
above,contact
anauthorizedservicedealer.

SECTION
7: PARTS
LIST
FOR
SERIES
020
\'r
\ ,,
\"
2e, \\ 'o
'ri\ o
s, \)
16
l3
l4
r@
v
\<5
u
30
14

Series020
Ref.No. PartNo. PartDescription
ueitrio.
washei
SCiew
sle-t6
i i.o
CuttingDeck:
20"
Lower
Handle
Upper
Handle
Control
Handle
(Bail)
RearFlap
HingeClip
Screw3/8-24
x 1.5"
Group
8
Blade
BellSupport
BladeAdapter
CuttingBlade
DischargeChute
Carriage
Screw
1/4-20x 1.0"
FlatWasher
HexLockNut1/4-20
HexScrew5/16-18
x .75"
Flange
LockNut5/16-18
EyeBolt
CarriageBolt5/16-'18
x 1.5"
LockWasher
HexNut5/16-18
Wheel
ShoulderScrew
.498x 1.635
BellWasher
HexNut
3/8-16
Cable
Tie
ControlCable
(Model
021)
ControlCable
(Models
020&
022)
BellWasher
ShoulderScrew,
5/16-18
x.428"
BladeAdapter
Kit
(lncl.
Fef.8-10)
1.
z-
4.
o.
7.
8.
9.
10.
1'1.
12.
tJ.
14.
to.
17.
18.
19.
20.
21.
zz-
zJ.
24.
25.
26.
27.
71
0-06544
,782-0048
749-04037
749-10924
747-1161A
731-08728
17098
710-1044
,736-05244
'748-0376C
,742-0640
731
-0064
710-0932
736-0173
,712-0324
71
0-3008
712-30044
710-1205
710-0262
736-01
19
712-3010
734-1779
738-0533
736-01
05
712-3017
726-0240
746-0946
746-0957
736-0331
738-04033
753-0588
28.
29.
an
1q

F
MANUFACTURER'S
LIMITED
WARRANTY
FOR:
Thelimited
warranty
set
forthbelow
is
given
by
MTDLLC
with
resoect
tonew
merchandise
purchased
andused
inthe
United
States,
its
possessions
and
territories.
"MTD"warrants
this
product
against
defects
inmaterialand
workmanship
fora
period
ofone
(1)years
commencing
on
the
date
oforiginal
purchase
and
will,at
itsoption,
repair
or
replace,
freeofcharge,
any
part
foundtobe
defective
in
materials
or
workmanshrp.
This
limited
warrantyshall
only
apply
if
this
product
hasbeen
operated
and
maintained
in
accordance
withtheOperator's
Manual
furnished
withthe
product,
and
has
notbeen
subiect
to
misuse,abuse,
commercial
use,
neglect,
accident,
improper
malntenance,
alteration,
vandalism,
theft,
fire,water,
ordamage
because
of
other
peril
or
naturaldisaster.
Damage
resulting
fromthe
installatron
oruse
ofany
part,
accessory
or
attachment
not
approved
by
MTD
foruse
withthe
product(s)
covered
bythis
manual
will
void
your
warranty
astoany
resulting
damage
Normal
wear
parts
are
warrantedto
be
freefromdefects
in
material
and
workmanship
foraperiod
ofthirty
(30)
days
from
the
dateof
purchase.Normal
wear
parts
include,
but
not
limitedto
itemssuch
as:
batteries,
belts,
blades,
blade
adapters,
grass
bags,
riderdeck
wheels,seats,
snow
thrower
skid
shoes,
shave
plates,
auger
spiral
rubberand
tires.
HOW
TO
OBTAIN
SERVICE:
Warrantyservice
is
available,
WITHPROOF
OF
PUFCHASE,
through
your
localauthorized
service
dealer.
Tolocate
thedealer
in
your
area,
check
your
Yellow
Pages,orcontact
MTDLLCat
P.O.
Box361
131,
Cleveland,
Ohio
44136-0019,
orcall
1-800-800-7310
or
1-
330-220-4683
orlogontoourWebsite
at
www.mtdproducts.com.
Thislimited
warranty
does
notprovide
coverage
in
the
following
cases:
a. Theengine
orcomponent
parts
thereof.
These
items
maycarry
aseparate
manufacturer's
warranty.
Refer
to
applicable
manufacturer's
warranty
for
terms
and
conditions.
b. Logsplitter
pumps,
valves,and
cylinders
havea
separate
one
year
warrantY.
c. Routine
maintenance
itemssuch
as
lubricants'
filters,
bladesharpening,
tune-ups,
brake
adjustments,
clutch
adjustments,
deck
adjustments,
and
normal
deterioration
ofthe
exterior
finish
duetouse
or
exoosure.
d. Service
completed
by
someone
other
than
an
authorized
service
dealer.
e. MTDdoes
notextend
any
warranty
for
products
soldor
exported
outside
oftheUnited
States,
its
possessions
andterritorres.
except
those
soldthrough
MTD's
authorized
channels
of
exportdistribution.
f. Replacement
parts
that
are
not
genuine
MTD
parts.
S. Transportation
charges
and
service
calls.
No
implied
warranty,
includingany
implied
warranty
of
merchantability
offitness
foraparticular
purpose'
applies
after
theapplicable
period
ofexpress
written
warranty
above
as
totheparts
asidentified.
Noother
express
warranty,
whether
written
ororal,
except
as
mentioned
above,
given
byany
person
orentity,
including
adealer
orretailer,
with
respect
toany
product,
shall
bind
MTD.
During
theperiod
ofthe
warranty,
the
exclusive
remedy
isrepairorreplacement
ofthe
product
as
set
forthabove.
The
provisions
as
set
forthin
this
warranty
provide
the
sole
and
exclusive
remedy
arising
fromthesale.
MTD
shall
notbe
liable
for
incidental
orconsequential
loss
or
damage
including,
without
limitation,
expenses
incurred
forsubstitute
orreplacement
lawn
careservices
orfor
rental
expenses
totemporarily
replaceawarranted
product.
Somestates
donot
allowthe
exclusion
or
limitation
of
incidental
or
consequential
damages,
orlimitations
on
how
longan
implied
warranty
lasts,
sothe
above
excluslons
or
limitations
may
notaPPIY
to
You.
Innoevent
shall
recovery
ofany
kind
be
greater
thanthe
amount
ofthe
purchase
price
of
the
product
sold.
Alteration
ofsafety
features
oftheproductshall
void
thiswarranty-
You
assume
the
riskand
liability
forloss,
damage,or
injury
to
you
and
your
property
and/or
toothers
and
their
property
arising
outof
the
misuse
orinability
tousethe
product'
This
limited
warranty
shall
notextend
toanyone
other
than
the
original
purchaserorto
the
person
forwhom
itwas
purchased
asagift.
HOWSTATE
LAW
RELATES
TOTHIS
WARRANTY:
This
limited
warranty
gives
you
specific
legalrights'
and
you
may
also
haveother
rights
whichvary
fromstate
tostate.
IMPORTANT:
Owner
must
present
Original
Proof
of
Purchase
toobtain
warranty
coverage.
MTD
LLC,
p.0.
BOX
361131
CLEVELAND,
0Hl0
44136-0tI19;
Phone:
1-800-800-7310,1-330-220-4683
Other manuals for 020 Series
13
Other MTD Lawn Mower manuals