22
Finding the controls
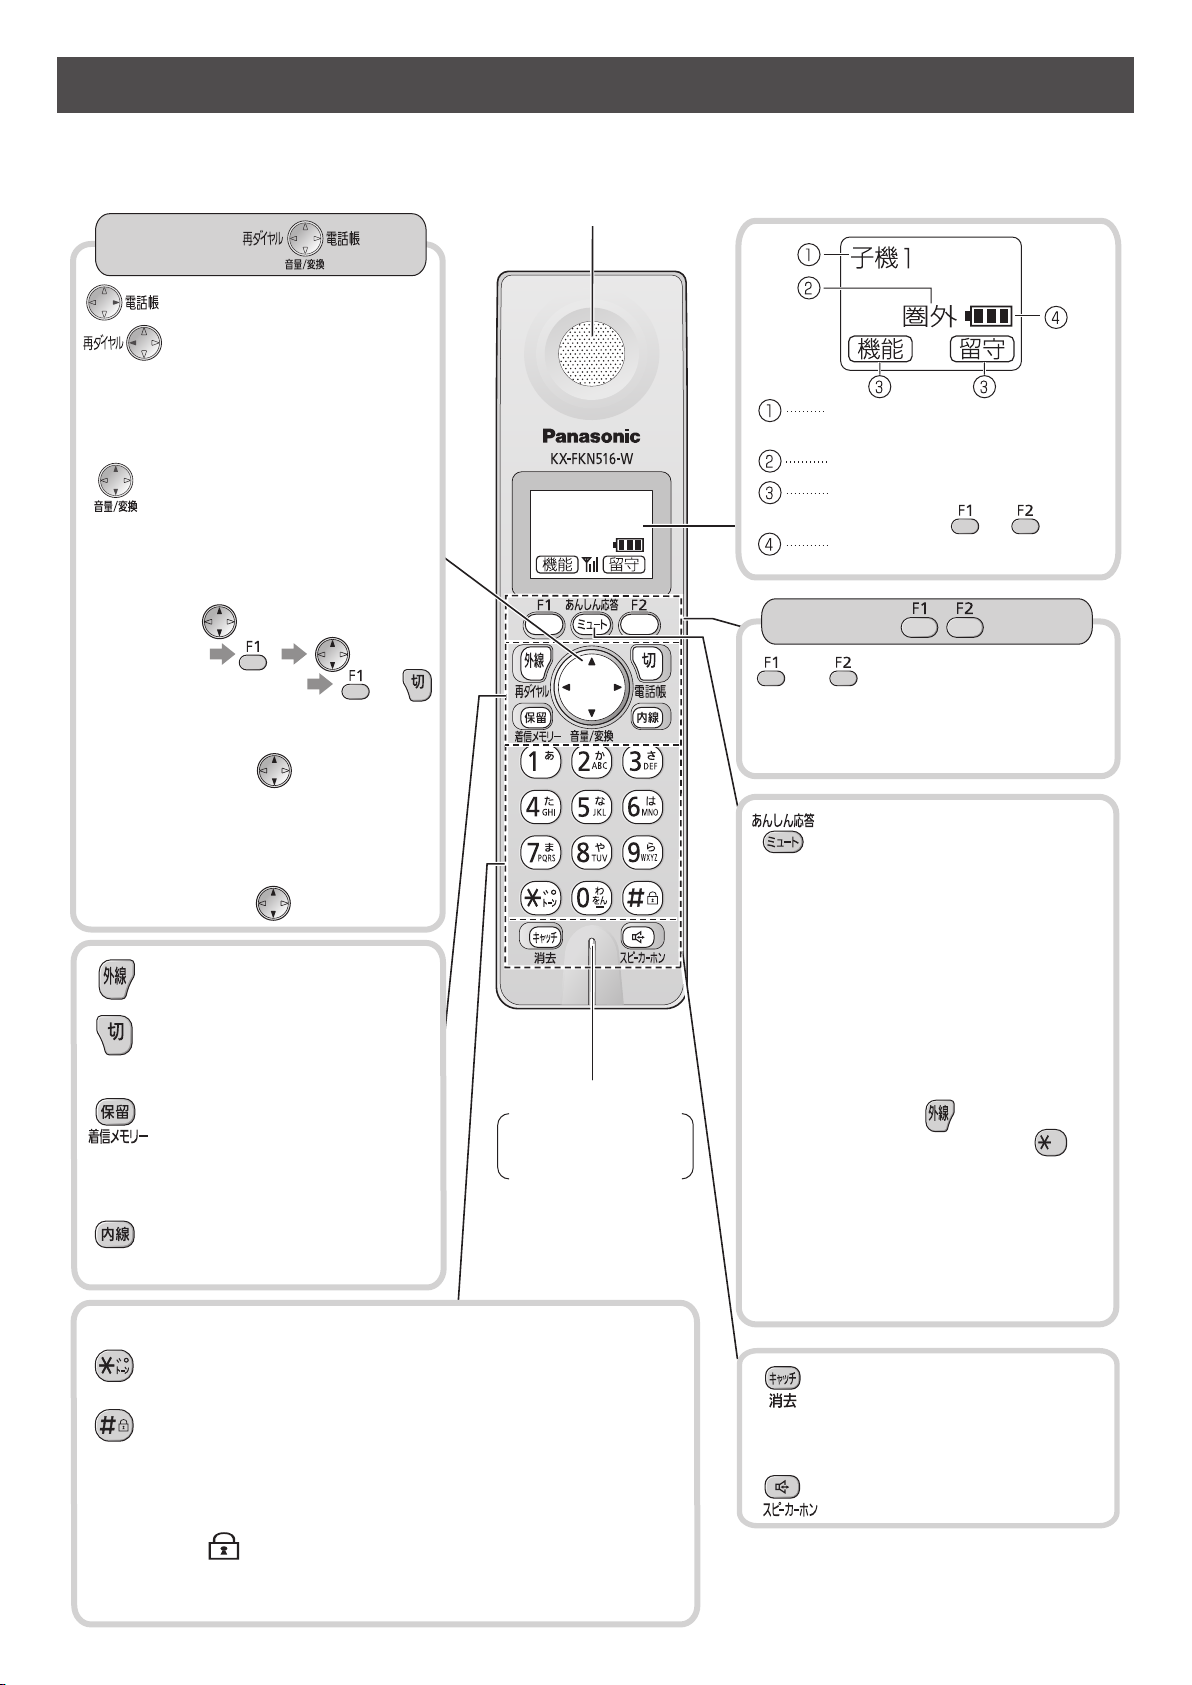
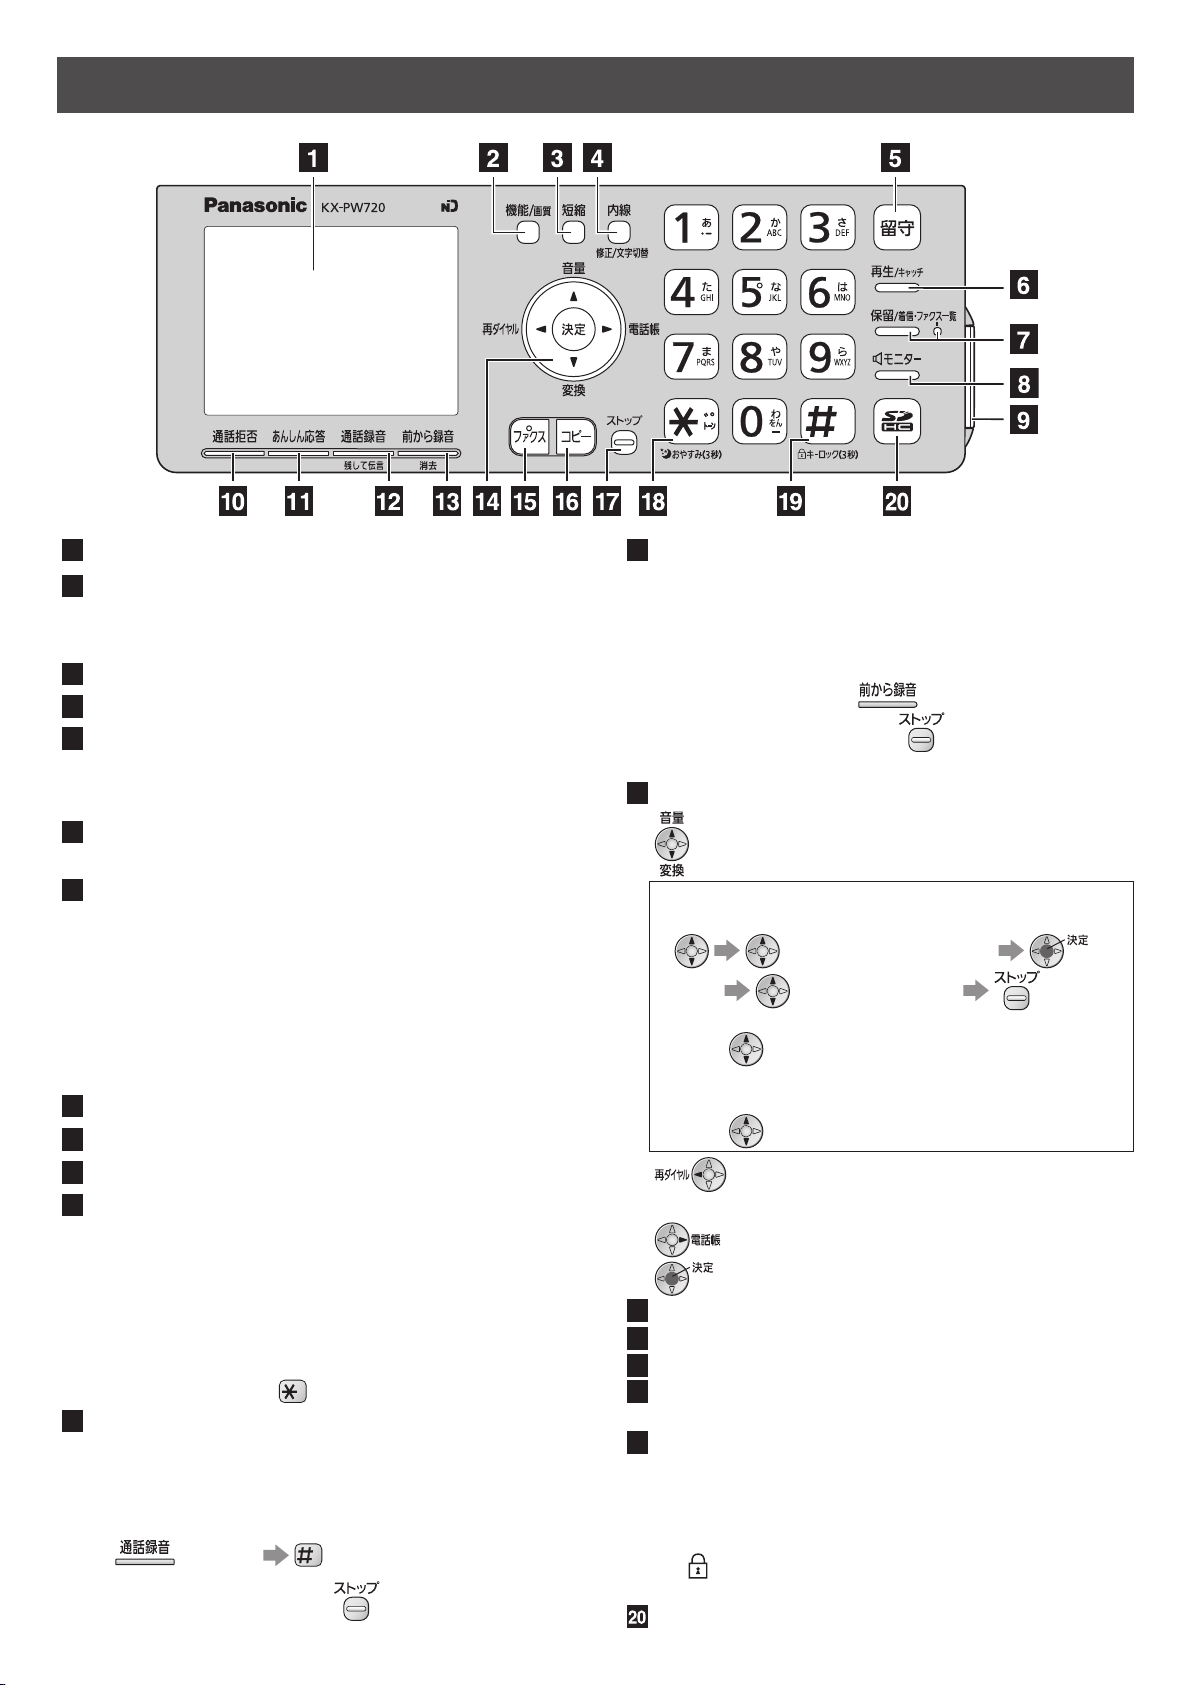
Main unit
Liquid crystal display
Function button initiates programming.
Resolution button selects the resolution
when faxing or copying.
Speed Dialer button
Intercom/Edit/Character Input Mode button
Auto Answer button & indicator
—light on: answering device activated.
—light off: used as a regular telephone.
Playback button plays back recorded messages.
Flash button (For call waiting service users.)
Hold button
Call/Fax List button starts a search in
— the Number Display (Caller ID) log.
— the fax list stored in memory.
Call/Fax List indicator lights when
— a call was missed.(For Number Display
service users.)
— a fax was stored in memory.
Monitor button
SD Memory Card cover
Block button for the undesired call
Secure button
While the unit is ringing, press this button.The unit
announces a message to the caller. The message
is announced in Japanese and means “This unit is
currently set to Caller Verifying mode. Could you
please speak out your name?”.
To talk to the caller, lift the handset.
To hang up, press .
Record button records a telephone conversation.
If an SD Memory Card is available (inserted), the
telephone conversation will be recorded to the SD
Memory Card.
To record a telephone conversation
(Record) (Cancel the precaution
voice message)
To stop recording, press (stop)
Enhanced Record button records the previous 10
minutes of the current telephone conversation.
If an SD Memory Card is available (inserted), the
telephone conversation will be recorded to the SD
Memory Card.
To record the previous 10 minutes of telephone
conversation, press (Enhanced record).
To stop recording, press (stop)
Erase button
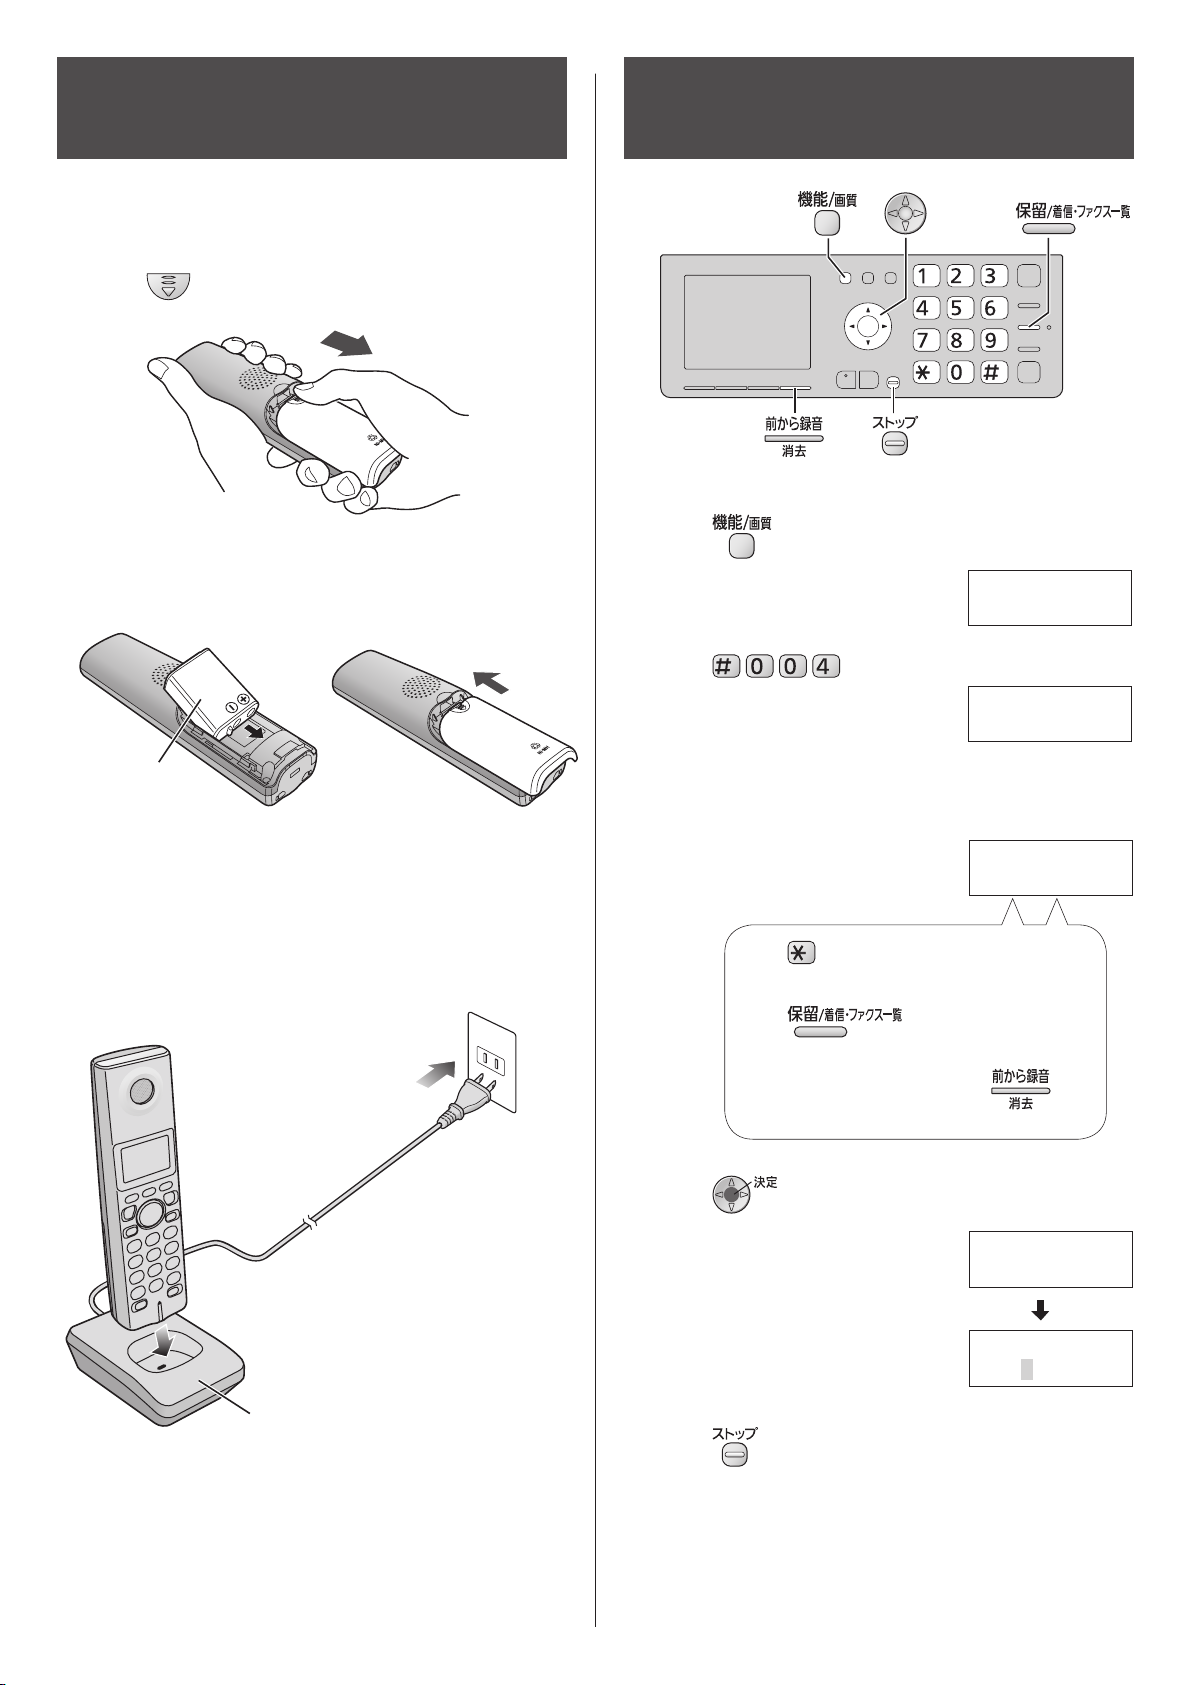
Volume/Change/Redial/Phonebook key
To adjust the volume (see below).
To change Hiragana into Kanji.
To adjust the ringer volume when the unit is on
stand by
(Select “”)
(Set) (press repeatedly) (stop)
To adjust the receiver volume while talking,
press repeatedly.
To adjust the speaker volume while listening to
the recorded messages or using the monitor,
press repeatedly.
To redial the phone numbers in the redial
list. The last 10 phone numbers dialed are
stored in memory.
To use the phonebook.
To store a parameter.
Fax button starts faxing.
Copy button starts copying.
Stop button
Tone button switches to tone dialing.
Night mode button
Sharp button
Key lock button can lock the main unit so that no
calls or settings can be made. To turn key lock on,
press this button for about 3 seconds until a single
beep is heard.
“ ” is displayed.
To turn key lock off, press this button for about 3 seconds.
SD button & indicator
KX-PW720DLE6_DWE6_QG.indb 2 2009/08/20 15:12:38