Parklands PUS4040 Little Roo Operating and maintenance manual

LITTLE ROO
InstrucƟonal
Manual
MODEL: PUS4040
BJ2010

1
OWNER S INFORMATION
This instruction book is written for a person with some mechanical ability. Like most service books,
not all the steps are described. Steps on how to loosen or tighten fasteners are steps anyone can
follow with some mechanical ability. Read and follow these instructions before you use the unit.
Know your product: If you understand the unit and how the unit operates, you will get the best
performance. As you read this manual, compare the illustrations to the unit. Learn the location and
the function of the controls. To help prevent an accident, follow the operating instructions and the
safety rules. Keep this manual for future reference.
IMPORTANT: Many units are not assembled and are sold in cartons. It is the responsibility of the
owner to make sure the assembly instructions in this manual are exactly followed. Other units are
purchased in an assembled condition. On assembled units, it is the responsibility of the owner to
make sure the unit is correctly assembled. The owner must carefully check the unit according to
the instructions in this manual before it is first used.
RESPONSIBILITY OF THE OWNER
The responsibility of the owner is to follow the instructions below.
1. Carefully read and follow the rules for safe operation.
2. Follow all the assembly and preparation instructions.
3. Inspect the unit.
4. Make sure that the operator of the unit knows how to correctly use all standard and accessory
equipment.
5. Operate the unit only with guards, shields, and other safety items in place and working correctly.
6. Correctly adjust the unit.
7. Service the unit only with authorized or approved replacement parts.
8. Complete all maintenance on the unit.
Engine Exhaust, some of its constituents, and
certain vehicle components c ontain or emit
chemicals known to the State of California to
cause cancer and birth defects or other repro-
ductive harm.
Battery posts, terminals and related accesso-
ries contain lead and lead compounds, chemi-
cals known to the State of California to cause
cancer and birth defects or other reproductive
harm. WASH HANDS AFTER HANDLING.

2
IMPORTANT
Safe Operation Practices for Walk Behind Mowers.
This cutting machine is capable of amputating hands and feet and throwing objects. Failure to ob-
serve the following safety instructions could result in serious injury or death.
I. General Operation
1. Read, understand, and follow all instruc-
tions on the machine and in the manual(s).
Be thoroughly familiar with the controls and
the proper use of the mower before starting.
2. Do not put hands or feet near or under rotat-
ing parts. Keep clear of the discharge open-
ing at all times.
3. Only allow responsible individuals, who are
familiar with the instructions, to operate the
mower.
4. Thoroughly i nspect t he m ower a nd a rea
where the equipment is to be used. Clear
the area of objects such as rocks, toys, wire,
bones, sticks etc., which could be picked up
and thrown by the blade.
5. Be sure the area is clear of other people be-
fore mowing. Stop mower if anyone enters
the area.
6. Do not operate the mower when barefoot or
wearing open s andals. Always w ear sub-
stantial foot wear.
7. Do not pull mower backwards unless abso-
lutely necessary. Look down and behind be-
fore and while moving backwards.
8. Do not operate the mower without proper
guards, plates, grass catcher or other safety
protective devices in place.
9. See manufacturer s instructions for proper
operation and installation o f accessories.
Only u se a ccessories a pproved b y the
manufacturer.
10. Stop t he b lade(s) when c rossing g ravel
drives, walks, or roads.
11.S top the engine ( motor) w henever y ou
leave the equipment, b efore cleaning t he
mower or unclogging the chute.
12. Shut the engine (motor) off and wait until the
blade comes to c omplete stop b efore re-
moving grass catcher.
13. Mow only in daylight or good artifi ial light.
14. Do not operate the mower while under the
infiuence of alcohol, drugs or other medica-
tion which can cause drowsiness or a ect
your ability to operate this machine safely.
15. Never operate mower in wet grass. Always
be sure of your footing; keep a firm hold on
the handle and walk; never run.
16. Disengage the self propelled mechanism
ordriveclutchonmowerssoequippedbe-
fore starting the engine (motor).
17. If the equipment should start to vibrate ab-
normally, stop the engine (motor) and check
immediately for the cause. Vibration is gen-
erally a warning of trouble such as a blade
that is damaged, a loose blade, or the en-
gine mounting bolts are loose.
18. Always w ear safety g oggles or safety
glasses with s ide shields when o perating
mower to protect your eyes from foreign ob-
jects which can be thrown from the unit.
19. Plan y our mowing p attern t o avoid dis-
charge of material toward roads, sidewalks,
bystanders and the like.
20. After striking a foreign object, stop the en-
gine. Remove the wire from the spark plug.
Inspect the blade and mower for damage. If
damaged, repair before starting and operat-
ing the mower.
21. Keep any washout ports and other mower
housing service openings c losed when
mowing.
II. Slope Operation
Slopes are a major factor related to slip and fall
accidents which can result in severe injury. All
slopes require extra caution. If you feel uneasy
on a slope, do not mow it.
DO:
Mow across the face of slopes; never up
and down. Do not mow excessively steep
slopes ( maximum 15 degrees) or a reas
where the ground is very rough. S ee the
Guide in the back of this manual to check
a slope. E xercise extreme caution when
changing direction on slopes.
Remove objects such as rocks, tree limbs,
etc.
Watch for holes, ruts, or bumps. Tall grass
can hide obstacles.
(Continued Following Page)
-

3
*A sterisked items do not apply to electric mowers.
IMPORTANT
DO NOT:
Do not mow near drop offs, ditches, or em-
bankments. The operator could lose footing
or balance.
Do not mow excessively steep slopes.
Do not mow on wet grass. Reduced footing
could cause slipping.
III. Children
Tragic accidents can occur if the operator is not
alert to the presence of children. Children are
often attracted to the mower and the mowing
activity. Never assume that children will remain
where you last saw them.
1. Keep children out of the mowing area and
under the watchful c are of a r esponsible
adult.
2. Be alert and turn mower off if children enter
the area.
3. Before and while moving backwards, look
behind and down for small children.
4. Never allow children to operate the mower.
5. Use extra care when approaching blind cor-
ners, shrubs, trees, or o ther o bjects t hat
may obscure vision.
IV.S ervice
*1. Use extra care in handling gasoline and oth-
er fuels. They are flammable and vapors are
explosive.
a. Use only an approved container.
b. Never remove gas cap or add fuel with
the engine running. Allow engine to cool
before refueling. Do not smoke.
c. Never refuel the machine indoors.
d. Never store the machine or fuel contain-
er inside where there is an open flame,
such as a water heater.
*2. Never r un a n engine indoors or i nside a
closed area.
3. Never make adjustments or repairs to items
such as the height adjusters or grass catch-
er with the engine (motor) running. Discon-
nect the spark plug wire, and keep the wire
away f rom the plug to prevent accidental
starting. Always wear eye protection when
you make adjustments or repairs.
4. Keep all nuts and bolts, especially blade at-
tachment bolts, tight and keep equipment in
good condition.
5. Never tamper w ith safety d evices. Check
their proper operation regularly.
6. To reduce fire hazard, keep mower free of
grass, l eaves, o r other debris b uild up.
Clean up oil or fuel spillage. Allow mower to
cool before storing.
7. Stop and inspect the equipment if you strike
an object. Repair, if necessary, before re-
starting.
8. Never attempt to make wheel height adjust-
ments while the engine (motor) is running.
9. Always disconnect electric mowers (live op-
erated) before c leaning, repairing, or a d-
justing.
10. Grass catcher components a re subject to
wear, damage, a nd d eterioration, which
could expose moving parts or allow objects
to be thrown. Frequently check components
and replace with m anufacturer s recom-
mended p arts, when n ecessary. For stor-
age, a lways make s ure grass catcher is
empty.
11. Mower blades are sharp and can cut. Wrap
the blade(s) or wear gloves, and use extra
caution when servicing them.
12. Do not change the engine governor setting
or over speed the engine.
13. Frequently check the blade for wear or dam-
ages such as cracks and nicks. A blade that
is bent or damaged must be immediately re-
placed w ith a factory replacement blade.
For safety and good cutting performance,
replace the blade every two years. F re-
quently check the blade bolt and the engine
mounting b olts. Replace damaged b olts
and tighten loose bolts.
14. Use only original equipment or authorized
replacement parts.
-
-

4
SAFE MOWING GUIDE
Every person w ho u ses power equipment
must learn the difference between proper and
improper use, safe and unsafe mowing prac-
tices. Read t he n ext few pages carefully.
They can help you learn. Too often the mow-
er u ser is i nexperienced, n ot p roperly in-
structed, or has not read the Instruction Book
and instructions on the unit before using it for
the first time. This can result in unsafe use en-
dangering the operator, bystanders, and t he
equipment. Another result can be a poor ap-
pearance of the area mowed.
Read t his Instruct io n Book . Read t he i n-
structions on the unit. Operate the mower ac-
cording to the Safe Mowing Guide and other
safety rules and recommendations in this In-
struction Book and on the unit. Make sure any-
one who uses the unit has read the instructions
and has been told how to operate the mower
safely.
Your mower is designed to provide good ser-
vice a nd d urability in n ormal residential cut-
ting. If the mower is not properly serviced and
maintained or used on unsuitable terrain or in
conditions n ot s uitable for mowing, p roduct
performance and safety will be reduced.
Proper attire is an important part of safe mow-
ing. S afety glasses protect the eyes f rom
thrown objects. Safety shoes with steel toes
can protect a foot from being cut by the blade.
Shirts and pants that cover the arms and legs
can stop or deflect a thrown object.
Practice using the mower before you actually
begin cutting grass. Select a large open level
area. Learn the location a nd function of t he
controls and how they work. It is important that
the blade can be stopped quickly in an emer-
gency. Learn how to cut and how to keep con-
trol of the mower at all times.
Many mowers are started manually. When us-
ing a pull start or rope start, place your feet
firmly and away from the blade. Hold the rope
handle s ecurely, b ut n ever w rap the rope
around your arm or fingers for a better grip .
The mower is designed for use by one person.
Always mow alone. Never carry passengers.
Carrying a passenger i s dangerous for the
passenger and the operator. A mower is not for
amusement or for carrying objects.
Is the area you are planning to mow wet? Nev-
er cut a wet lawn. Cutting wet grass can cause
an accident. It can affect mower performance
and also c ause p roblems with f uture lawn
growth and appearance. Wet grass is slippery
and might cause the operator t o fall or t he
mower to s lip. Someone could be h urt by
touching the blade. Wet grass tends to clog the
mower, causing poor discharge. Wet clippings
bunch up on the lawn retarding the growth of
grass. A w et mower can cause parts to rust
and reduce the useful life of the unit.
When y ou l ook o ver the lawn, r efresh y our
memory a bout h ard, i mmovable obstacles
such as pipes, stumps, and rocks and avoid
them. They can cause damage to the mower
or an accident injuring the operator or a by-
stander. Take a litter bag along and walk over
the area to be cut. Pick up any stones, toys,
wire, b ones, o r other loose objects. T hese
items can damage the mower or they can be-
come dangerous f lying objects if t he mower
blade hits them. The blade of a power mower
travels very fast. It can throw rocks and other
objects with force over long distances. Objects
thrown by mowers can break windows, cause

5
SAFE MOWING GUIDE
bruises, or even put out an eye. Often the per-
son hurt by a thrown object is a bystander such
as a child, another family member or a neigh-
bor. Keep people and pets completely a way
from the mowing area. Direct the mower s dis-
charge away from areas where people can be.
Planning y our mowing p attern h as a d ouble
beNefit. It can reduce chances of an injury and
make the clean up after mowing easier.
Are there ditches,
walls, or m ajor i n-
clines in the area to be
cut? Plan the mowing
pattern to avoid such
danger areas. I n-
clines and r ough t er-
rain m ust be m owed
carefully a nd s ome
areas must not be cut
with a m ower a t all.
With w alk behind
equipment, m ow
across the incline so
that if you or the mow-
er slip, you won t run
into each other.
Never mow slopes greater than 15 degrees.
See the Guide in the back of this Instruction
Book to check any slopes.
Ready to s tart c utting? Not yet. Be sure the
mower has been fully assembled according to
directions in the Instruction Book. Even if as-
sembly was done by a lawn and garden shop
or the store where the unit was purchased, it
must b e checked. Are all nuts, bolts and
screws tight? Does the engine have oil? These
items must be checked periodically t
hroughou
t
the life of the mower.
Your m ower h as a g asoline engine. Gas is
dangerous. Store fuel only in a approved gas
container. Do not store large amounts of gas.
Put out all cigarettes, pipes and cigars before
working with gasoline. Store fuel and the mow-
er itself in a well ventilated area away from any
possible source of ignition such a pilot light on
a furnace. If the mower is to be stored for an ex-
tended t ime, r emove the gas from t he t ank.
This minimizes the chance of a fire and keeps
the tank c lear o f deposits and o ld gasoline,
thus improving mower performance. Move the
mower outside before adding gasoline. Use a
funnel and wipe up any spilled fuel before start-
ing. R emember, g asoline expands when
heated so leave some expansion room. Also,
most mower gas caps are vented to allow for
expansion. Always use the proper cap. People
are needlessly burned by fires, hurt in explo-
sions, m owers and o ther p roperty are dam-
aged because of failure to follow basic safety
rules related to gasoline and fueling.
Never add gasoline to an engine that is running
or that is hot from recent use, this can cause an
accident. Remove dry grass and other debris
from the mower. Keeping the mower clean will
improve the performance, help the engine stay
cooler, extend t he Life of m oving parts, a nd
minimize the danger of fire. People get burned
working with and around their mowers for oth-
er reasons than fire and explosions. It takes
only a few seconds of operation for the engine
and the muffler to become hot. Do not touch
these parts when the mower is running. Stop
the engine and let it cool down before servicing
the mower. Remember, exhaust fumes can be
dangerous. Never operate the engine indoors
or in an enclosed area.
Getting a new mower can be a big event for a
family. Let family members satisfy their curios-
ity about the mower and at the same time, tell
them about its dangers. Remember, a mower
is not a toy and is not for use by children or any-
one lacking in age, strength or experience.
As with any power equipment, a mower can be
dangerous if not assembled, misused, or not
properly maintained. The most important rule
is to always use good judgement and common
sense.
Your m ower w ill cut thick grass and h eavy
plant stems with ease. Fingers and toes are no
more r esistant t o the mower s blade. M any
people are injured because they forgot and
reached into the discharge chute. Always treat
your lawn mower as if the blade is rotating.
Never perform any service or try to make any
adjustment,except carburetor, while t he e n-
gine is running.
Use only accessories suited for your mower.
Use of improper accessories can reduce the
safety designed into both the mower and the
accessory, it can even damage the unit. Read
and follow the instructions which come with the
accessory and the mower.

6
SAFE MOWING GUIDE
Use only original equipment or approved sub-
stitutions as service parts. If you need profes-
sional s ervice, select a s hop that i s an
Authorized S ervice C enter for your brand of
mower. If you plan to service the unit yourself,
follow directions in the Instruction Book.
As you mow, remember children and pets are
sometimes attracted to the activity. Be espe-
cially careful when trimming around shrubbery
or when backing up. If a t all possible, d on t
mow when moving backwards. It is dangerous
because vision is restricted. Also, blades are
designed t o cut while the unit is moving for-
ward so cutting performance is reduced when
mowing in reverse.
Never leave the mower running a nd u nat-
tended. Shut off the engine. Put the mower in
a position so that it can not roll. If the unit is
self propelled, make sure the drive control is
disengaged.
When mowing, be aware of your condition and
the weather conditions. After mowing a long
time, you will be tired. This is the time when
reactions slow down, your attention wanders;
the time when you are wide open for an acci-
dent. Take a short break. If temperatures are
high, take precautions to avoid becoming de-
hydrated. If you are angry, tired, or unable to
give your full attention to mowing, if you have
been consuming alcohol, medicines, or drugs,
do not use your mower or any type of power
equipment.
If weather conditions become worse while you
are cutting stop and finish later. Cutting grass
in the rain is no fun and it is dangerous. Always
seek shelter in an electrical storm. In extreme-
ly dry mowing conditions, your safety glasses
can serve a dual purpose by protecting your
eyes from dust and thrown objects, also a dust
or pollen mask can be helpful.
Your mower is equipped with a number of safe-
ty features which are important to the safety of
the operator and bystanders and must never
be altered or removed. If a safety feature be-
comes inoperable, lost, or damaged, it must be
repaired or replaced before the mower is used.
Engine speed is a key to safe mowing and a
nice looking lawn. The maximum speed of the
engine on your mower has been set at the fac-
tory. Do not change the engine governor in any
way.
Select the maximum engine and ground speed
that i s right for t he t errain a nd t he h eight of
grass. You g et t he b est cutting and bagging
performance when using a grass catcher by
operating the engine at maximum speed. Nev-
er walk fast or run just to get the job done soon-
er. On i nclines, reduce g round speed a nd
exercise extreme care.
It is best to mow only d uring daylight hours;
however, if you must mow in the late afternoon
or evening, make sure there is good artifi ial
light.
Your mower will require maintenance including
service and adjustments before and after use
as w ith any machine. T he f requency o f t he
maintenance is generally based on hours of
use, however, the frequency can vary because
of mowing conditions. Check the Instruction
Book f or m ore detailed instructions. Proper
maintenance protects your investment in the
mower and helps insure t hat it w ill function
safely and reliably.
Never attempt any
service (with the pos-
sible exception of car-
buretor adjustment)
with t he e ngine run-
ning. After turning the
engine off , always
disconnect t he s park
plug w ire to p revent
accidental r estarting
while the unit is being
serviced.
-

7
SAFE MOWING GUIDE
While mowing, if you hit a foreign object, stop
the engine. Remove the spark plug wire. Care-
fully a nd t horoughly inspect the mower for
damage. Make necessary r epairs before re-
starting. If the unit starts to vibrate abnormally,
stop the engine immediately and check for the
cause. V ibration i s generally a w arning o f
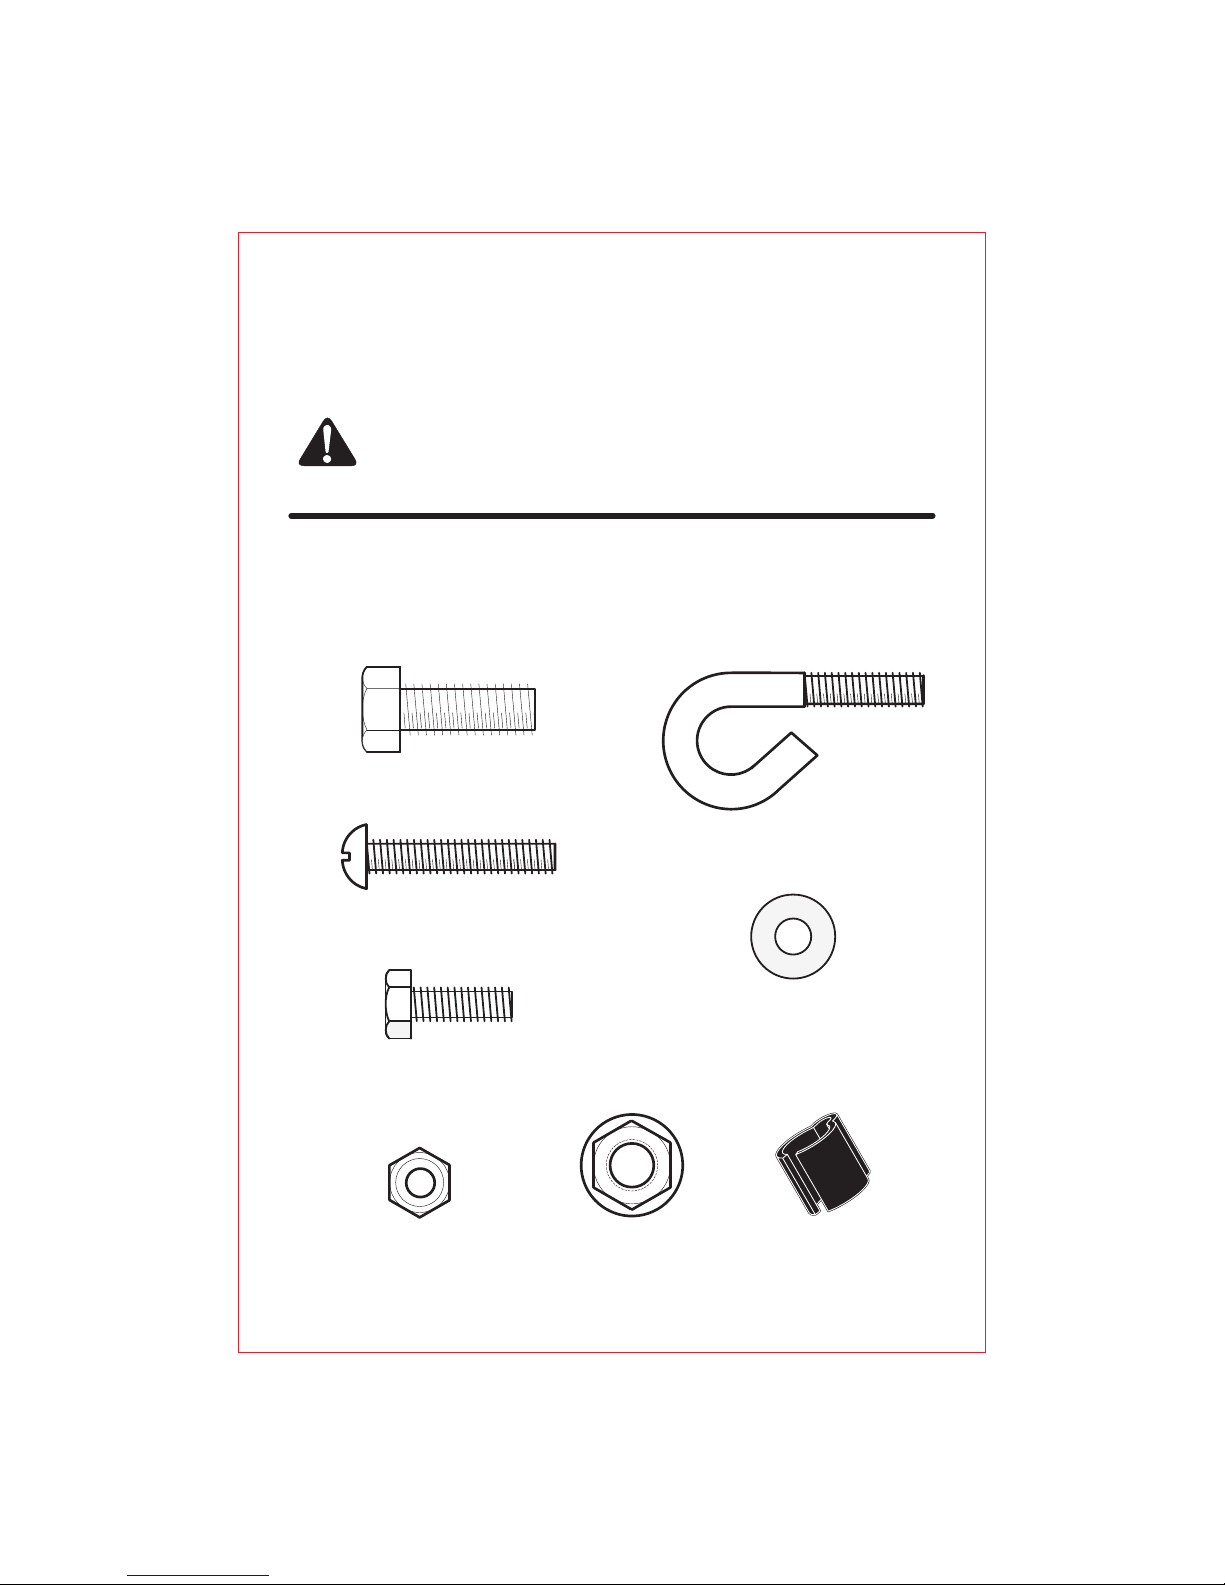
trouble. Keep all nuts, bolts, and screws tight.
The blade is the most dangerous part of the
mower and also the most important part in ob-
taining a nice l awn appearance. C heck t he
blade and the blade mounting hardware fre-
quently. Keep it tight. If the blade hits a solid
object, check it thoroughly for deformation or
cracks and replace if damaged. For safety,re-
place the blade every two years. A sharp blade
reduces the work load on the engine and cuts
grass more cleanly, for a better looking cut with
less work. The blade is always close to the out-
side of the mower housing. For best trimming
on s ide discharge mowers, cut with t he l eft
side of the housing toward the area that needs
trimming.
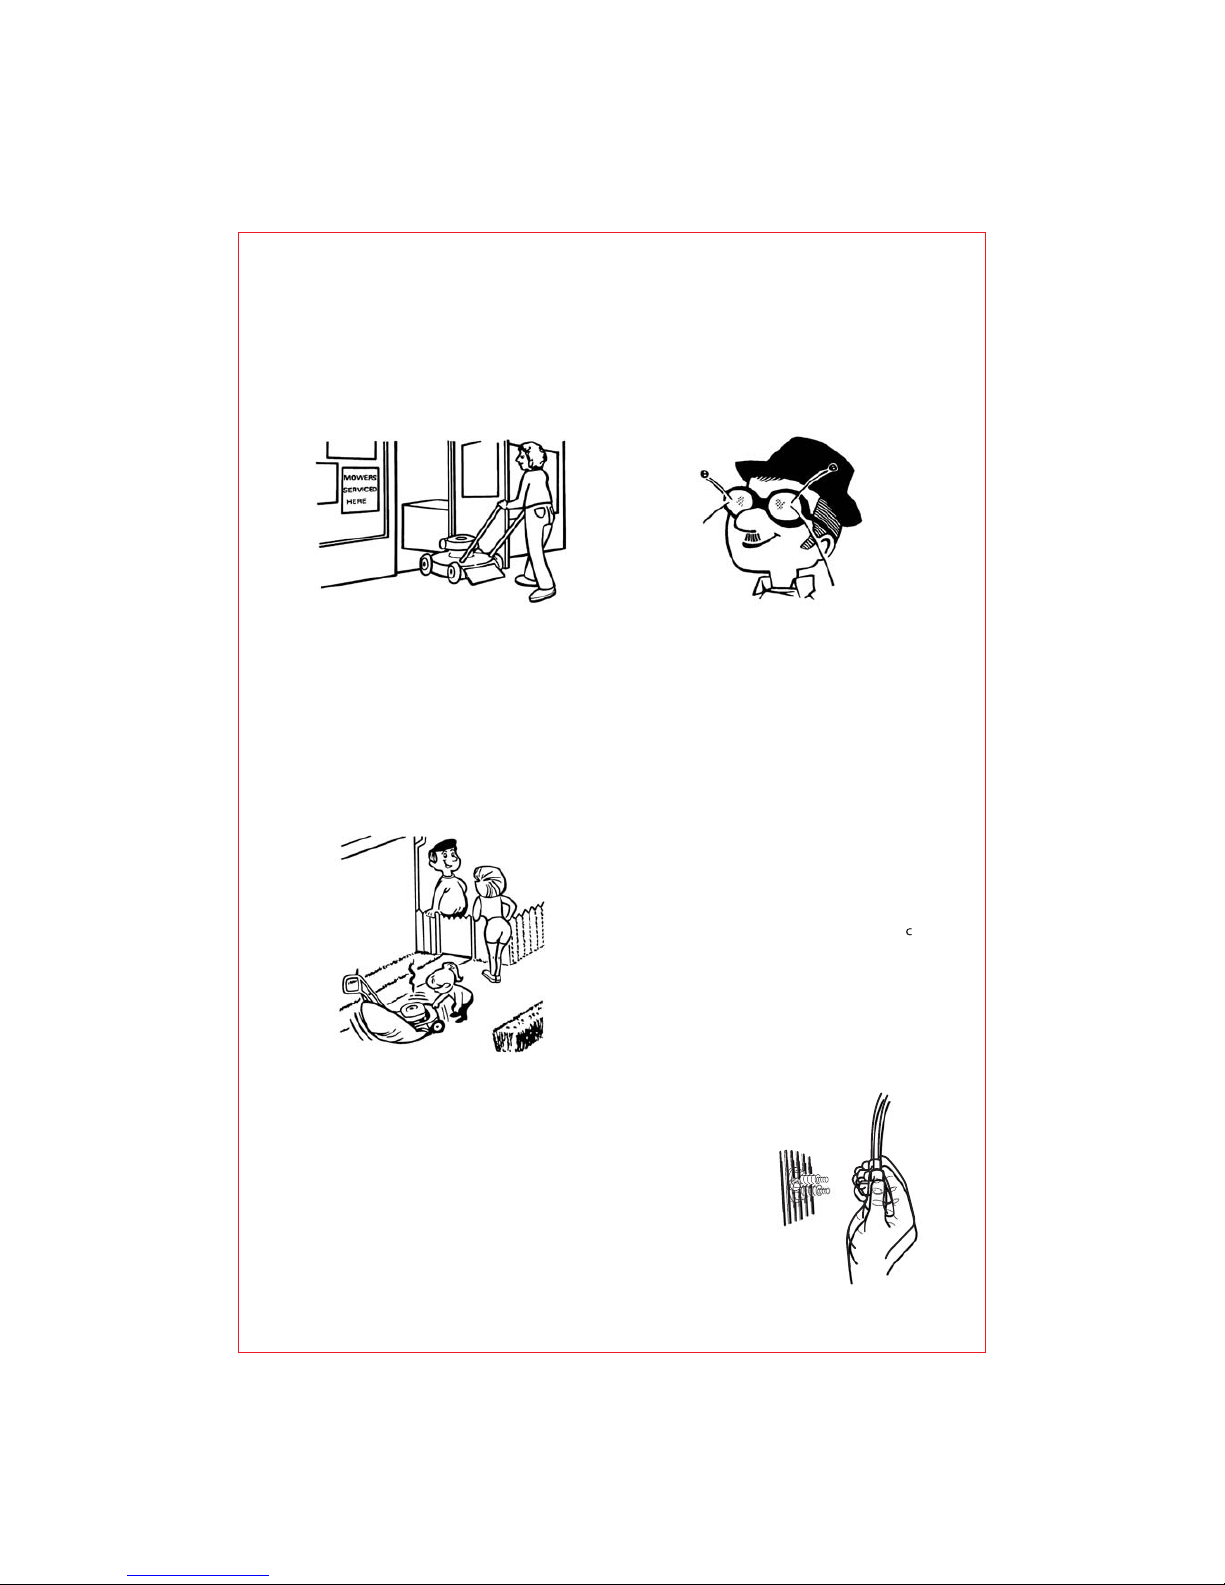
A useful accessory for your mower is a grass
catcher. There are grass catchers available for
most models. For best performance and safe-
ty, be sure the grass catcher is approved for
use with your mower. A ssemble as directed
and follow operating and safety i nstructions
with the catcher and in the Instruction Book.
Before m ounting, c hecking or e mptying the
grass catcher, always turn the engine off. Re-
member t o check the grass catcher before
each use for cracks, wear, or deterioration. Re-
place any part that is damaged with the man-
ufacturer s recommended r eplacement p art
before using the grass catcher again.
Proper c utting t echnique is i mportant i f you
want your lawn to look good. Avoid the tempta-
tion to cut grass too short. Cutting grass too
short can kill the plant, cause grass to turn yel-
low, or make the lawn look brown and thatchy.
Use the lower cutting heights in cool months
when the grass is lush. Use the higher cutting
heights in extremely dry periods. Cutting with
a dull blade or l ow e ngine speed b ruises,
shreds, and can uproot some grass making
the lawn look dull and brown a few days after
cutting. Always put the throttle control in FAST
position w hen mowing a nd b agging. W hen
bagging, slower ground speed will provide the
best results.
Change the mowing pattern slightly each time
you cut. If you always cut the same way, the
grass will develop a set and clippings will ac-
cumulate m ore heavily i n some a reas m ore
than in others causing grass to get thinner in
those areas. Do not service your mower over
the grass. Spilled oil and gas can kill the grass.
In tall grass or very heavy grass, do not try to
cut it all at once. Raise the height of cut on the
first cutting and lower it for the next cutting the
same day or within a few days. Another way is
to cut only part of the width of the mower and
adjust your ground speed (not the engine) to
move more slowly so the mower can clear it-
self as it moves forward.
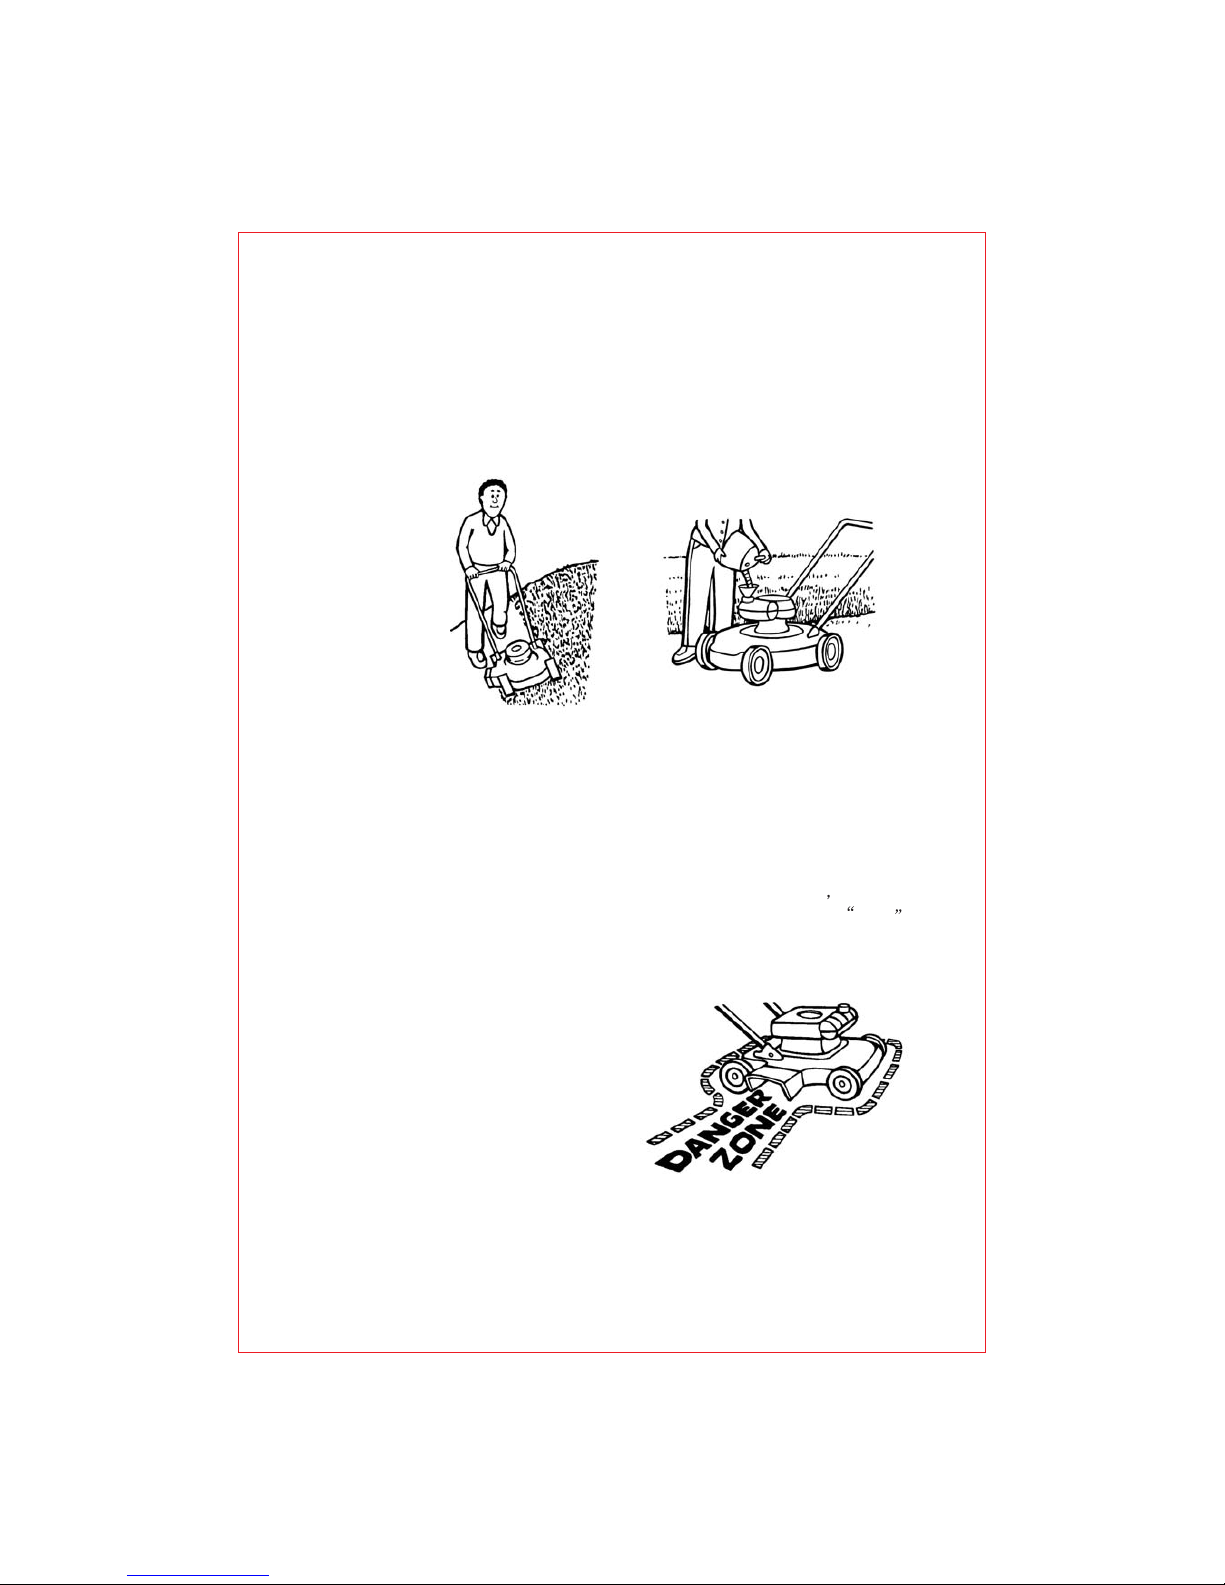
When c utting w ith a walk b ehind mower, a l-
ways push the unit. Do not pull it. Pushing the
unit keeps the operator behind the mower in
the operator s zone for better control. Push-
ing the unit also gives you a chance to see ex-
actly where and what you are mowing. There
will be times while you are mowing that you will
have to pull the mower backwards (such as
when t he f ront o f the mower has come u p
against a wall or fence). If you must back up,
make sure your feet are in the clear. Stand well
back from the mower, plant your feet firmly with
each step and back up being careful to look be-
hind you. Resume normal mowing as soon as
possible.
If your unit i s self propelled, remember that
the drive mechanism is not designed to do all
the work, but the unit can move without your
help. A lways keep your hands on the handle
near the controls when the engine is running.
Remember too that the self propelled mecha-
nism can be dangerous. Keep hands and feet
away from belts and chains. Always turn off the
engine before attempting to remove anything
that becomes entangled in the self propelled
system.
Remember, your mower is a useful tool, but it
can be dangerous. Follow the instructions in
this Instruction Book. Use the mower properly
and carefully and it will give you many hours of
trouble free, accident free operations.

8
STEPS TO FOLLOW
BEFORE MOWING
Be sure to dress correctly. Wear hard shoes, not sandals or tennis shoes.
Examine the blade. A blade that is bent, cracked, or damaged must be replaced with a factory
replacement blade.
Fill the fuel tank outside. Clean off spilled fuel.
Read and follow the Owner s Manual, the instructions with the engine, and the instructions with
any attachments. Owner s Manual instructions are for your safety and the safety of others.
Exhaust fumes are dangerous. Start the engine outside.
Make sure all safety devices are in place and working correctly.
Operation of the mower is only for a person that has experience.
Wet grass can be dangerous. Let the grass dry.
Instruct children and others to keep away from the work area.
Never cut the grass without good light.
Pick up loose objects. Remove them from the mowing area.
WHILE MOWING
Watch for fixed objects and avoid them. They can damage the mower or cause injury.
A hot engine and muffler will cause a burn. Do not touch.
Inclines and slopes must be carefully mowed. See the Guide in the back of this book to check
aslope.
Lack of daylight or good artifi ial light is cause to stop mowing.
Examine the mower, the blade, and other parts for damage after hitting a foreign object or if the
unit vibrates excessively.
Do not make adjustments or repairs without stopping the engine (except for carburetor). Dis-
connect the spark plug wire.
On or near roads, watch out for traffic. Direct discharge away from roads.
When mowing, avoid areas where traction is unsure. Before and while moving backwards, look
behind and down for small children.
In heavy grass, raise the cutting height. Cut slower. Stop the engine to remove clogged grass
from the mower.
Never remove any safety related parts.
Do not pour gasoline into a engine that is hot or running.
AFTER MOWING
Always let the mower cool before storing in an enclosed area.
Foreign material on the mower is dangerous. Clean off grass, leaves, grease and oil before
storing.
Tighten all loose nuts, bolts and screws before you use the unit.
Empty and clean any grass catcher or other accessory.
Remove the key or disconnect the spark plug wire to prevent unauthorized use.
Make sure the mower is not kept near a source of ignition. Gas fumes can cause an explosion.
Only original parts or factory approved substitutes can be used to service the mower.
When storing the mower for an extended period, remove the fuel from the fuel tank.
Instruct children to leave the mower alone. It is not a toy.
Never keep g asoline near a s ource of i gnition. A lways use an a pproved container. Keep
gasoline away from children.
Lubricate according to the Instruction Book. See Lubrication .
IMPORTANT Read the Instruction Book. Keep this book for future use and
reference.
WARNING: Look for this symbol to point out important
safety p recautions. It means: Attention! B ecome
Alert! Your Safety Is Involved.
-

9
ASSEMBLY
Read and follow the assembly and adjustment
instructions for your mower. All fasteners are
in the parts bag. Do not discard any parts or
material until the unit is assembled.
WARNING: B efore d oing a ny
assembly or maintenance to the
mower, remove the wire from the
spark plug.
NOTE: Torque is measured in foot pounds
(metric N.m). This measurement describes
how tight a nut or bolt must be. The torque
is measured with a torque wrench.
TOOLS REQUIRED
1P liers
2A djustable open end wrenches
1B lade type screwdriver
1P hillips screwdriver
PARTS BAG CONTENTS
The fasteners and other loose parts are shown below. The fasteners are shown at full size.
NOTE: Your model will not use every fastener shown on this page.
3x136
Screw
Locknut
15x116
43956
Guide, Rope
Flange Nut
15x84
17x37
Lockwasher
1x111
Bolt
1x121
Bolt
1101353
Fastener, Cable
-

10
ASSEMBLY
WARNING: T he c hute deflector
is necessary for your safety and
protection. D o not operate the
mower if the c hute deflector is
missing or is not installed cor-
rectly.
1. Attach the chute tor to the mower
housing with a bolt, washer, and nut
(Figure 1). Make sure the fasteners are
tight.
Figure 1
Bolt
1x121
Chute
Deflector
Washer
17x37
Nut
15x116
1. Put two and two in two sides,
the is assembled on bracket
flap (figure 2)
bolts nuts
lower handle
2. Assemble the upper part of the handle to
the lower part with the screws and lock-
nuts (Figure 3).
Figure 2
Bolt
1x111
Mower
Housing
Lower Handle
Locknut
15x116
Screw
3x136
Figure 3

11
ASSEMBLY
HOW TO ASSEMBLE THE CONTROLS TO THE HANDLE
Two types of handles are shown in Figure 4.
The engine o n your m odel w ill determine
which type of handle is on your model. Type A
is for models with Briggs & Stratton engines.
Type B is for models with Tecumseh engines.
Note: On models with Briggs & Stratton en-
gines, make sure the stop lever bracket is
on the lefts ide of the handle. On models
with Tecumseh engine, make sure the stop
lever bracket is on the rights ide of the han-
dle.
1. Mount the ends of the engine stop lever
into the top holes of the handle.
2. Attach the the stop cable to the handle as
shown in Figure 4.
Stop Cable
Handle
Engine
Stop Lever
Figure 4
Stop Lever
Bracket
Stop Cable
Handle Engine
Stop Lever
Stop Lever
Bracket
TYPE A
Models With
Briggs Engines
TYPE B
Models With
Tecumseh Engines
Cable
Fastener
1101353
Cable
Fastener
1101353

12
ASSEMBLY
3. Attach the engine stop cable to the en-
gine. Models with Briggs & S tratton en-
gines are shown in Figure 6. Models with
Tecumseh engines are shown in Figure 5.
4. Make sure the engine stop cable moves
freely. If the cable does not move freely, re-
peat the above steps.
CAUTION: A cable that is bent or damaged
will not work correctly. Before you use the
unit, replace a damaged cable.
5. Attach t he cable t o the handle w ith the
cable fastener(s) as shown in Figure 4.
CAUTION: If a cable fastener is missing, a
cable can be too near the muffler. Heat from
the m er can damage the cable. Before
you use the unit, replace a missing cable
fastener.
WARNING: The blade will rotate
when the engine runs.
6. Attach the recoil start grip and rope to
the right side of the handle with the rope
guide. Fasten with a locknut (Figure 7).
NOTE: If you cannot attach the recoil start
grip because the rope is too short, hold the
engine stop lever against the handle. Slow-
ly pull the recoil start grip.
Engine Stop
Cable
Engine
Stop Cable
Figure 5
Tecumseh
Engine
Figure 6
Engine Stop
Cable
Briggs
Engines
Engine Stop
Cable
Recoil Start
Grip
Figure 7
Locknut
15x116
Rope
Guide
uffl

13
ASSEMBLY
HOW TO ASSEMBLE THE
WHEELS WITH AXLE BOLTS
Assemble the wheels to the wheels axles
lock the washer around the axles to fix the
wheels.
Figure 8
HOW TO PREPARE THE ENGINE
ENGINE DOES NOT CONTAIN
OIL OR GASOLINE
See the engine manufacturer s instructions for
the type of gasoline and oil to use. Before you
use the unit, read the information on safety, op-
eration, maintenance, and storage.
WARNING: F ollow the e ngine
manufacturer s instructions f or
the type o f g asoline and oil to
use. A lways use a safety gaso-
line container. D o not smoke
when adding gasoline to the en-
gine. When inside an enclosure,
do not fill with gasoline. Before
you add gasoline, s top the
engine. Let the engine c ool f or
several minutes.
IMPORTANT: This unit is equipped with an
internal combustion engine and must not
be used on or near any unimproved forest
covered, brush covered or grass covered
land unless the engine s exhaust system is
equipped with a s park a rrester meeting
applicable local or state laws (if any). If a
spark arrester i s used, it m ust be m ain-
tained in effective working order by the op-
erator.
In the State of C alifornia t he above i s re-
quired by law (Section 4442 of the Califor-
nia Public Resources Code). Other states
may have similar laws. Federal laws apply
on f ederal l ands. See an A uthorized Ser-
vice C enter for a spark arrester f or the
muffl r.
NOTE: Actual s ustained h orsepower w ill
likely be lower due to operating limitations
and environmental factors.
FINAL ASSEMBLY
Before you use the mower, check the assem-
bly of the wheels, the handle, the chute deflec-
tor, a nd t he c ontrols. M ake sure a ll t he
fasteners are tight. Make sure the the engine
stop lever works correctly.

14
OPERATION
ENGINE STOP LEVER
Release the engine stop lever and the engine
and the blade will automatically stop. To run
the engine, hold the engine stop lever in the
Operating position (Figure 9).
Before you start the engine, operate the en-
gine stop lever several times. Make sure the
cable moves easily.
Figure 9
Engine Stop
Lever
Operating Position
HOW TO STOP THE ENGINE
To stop the engine, release the engine stop
lever. Disconnect the wire from the spark plug
to prevent the engine from starting.
If the engine will not stop, hold a screwdriver
against the spark plug and against the engine
cooling ns. The spark will go to ground and
the engine will stop. Before you start the en-
gine, check the engine stop cable. Make sure
the engine stop cable is assembled correctly.
Before you operate the unit, replace a bent or
damaged engine stop cable.
HOW TO START ENGINE
WARNING: T he b lade will rotate
when the engine runs.
IMPORTANT: Before you start the engine,
operate the engine s top lever several
times. Make s ure the engine s top cable
moves freely.
NOTE: The engine design does not include
a throttle control or an engine speed ad-
justment. T he e ngine is s et a t the best
speed f or cutting g rass, b agging g rass,
and for extended engine life.
1. Check the oil.
2. Fill t he f uel tank w ith regular u nleaded
gasoline. Make sure the gasoline is clean.
Leaded g asoline will increase d eposits
and shorten the life of the valves.
NOTE: Do not use gasohol or methanol. Do
not use premium unleaded gasoline.
WARNING: A lways use a safety
gasoline container. Do not smoke
when adding gasoline to the fuel
tank. When i nside an enclosure,
do not add gasoline. Before you
add gasoline, stop the engine and
let the engine c ool f or several
minutes.
3. Make s ure the spark plug w ire is c on-
nected to the spark plug.
4. The primer b utton i s on t he e ngine
(Figure 10). Push the primer button.Ev-
eryt ime you push the primer button,wait
two seconds. For the number of times re-
quired to push the primer button, see the
engine manufacturer s instructions.
Primer Button
Figure 10
NOTE: D o not use the primer b utton to
start a warm engine.
5. Stand behind the mower (Figure 11). Use
one hand to hold the engine stop lever in
the operating position as shown. Use the
other hand to hold the recoil start grip.
6. Rapidly pull the recoil start grip. Slowly
return the recoil start grip.
7. If the engine does not start in 5 or 6 tries,
See the Problem and Repair Instruc-
tions.
-
-

15
MAINTENANCE
ENGINE MAINTENANCE
Use the following maintenance section to keep
your unit in good operating condition. A ll the
maintenance information for the engine is in
the Engine Instruction Book . Before you start
the engine, read this book.
WARNING: Before you make an
inspection, adjustment (except
carburetor), or repair, discon-
nect t he w ire from t he s park
plug.
LUBRICATION
1. For maximum performance, lubricate the
wheels and all pivot points with engine oil
every 25 hours.
2. To lubricate the engine, refer to the Engine
Instruction Book .
NOTE: Do n ot l ubricate t he e ngine stop
cable. L ubricants will damage t he c able
and prevent the cable from moving freely.
Replace the cable if bent or damaged.
HOW TO CLEAN
THE MOWER HOUSING
WARNING: The blade will rotate
when t he e ngine runs. Before
you clean the mower housing,
stop the engine and disconnect
the wire from the spark plug.
Grass and other debris can keep the mower
from working correctly. After you mow, clean
the mower housing as follows.
1. Stop the engine.
2. Disconnect the wire from the spark plug.
3. Clean the top and the bottom of the mower
housing.
HOW TO ADJUST
THE HEIGHT OF CUT
WARNING: The blade will rotate
when t he e ngine runs. Before
you change the height of cut, dis-
connect t he w ire to t he s park
plug.
To change the height of cut,move the handle,
and make it in the suitable grade of the height
segment.
Figure 12
Lower
Higher
Cutting Height
Adjustment Lever
Wheel

16
MAINTENANCE
BLADE SERVICE
WARNING: B efore y ou i nspect
the blade or the blade adapter,
disconnect the wire to the spark
plug. If t he blade hits a n object,
stop t he e ngine. D isconnect t he
wire to the spark plug. Check the
unit for damage.
Frequently check the blade for wear or dam-
age such as cracks. Frequently check the bolt
that holds the blade. Keep the bolt tight. If the
blade hits an object, stop the engine. Discon-
nect t he w ire to t he s park p lug. C heck t he
blade adapter for damage. Check for a bent or
damaged blade, a badly worn blade, or other
damage. Before y ou o perate t he u nit, d am-
aged parts must be replaced with factory re-
placement parts. For safety, replace the blade
every two years. Keep a sharp e dge on t he
blade. A blade that is not sharp will cause the
ends of the grass to become brown. Remove
the blade as follows.
HOW TO REMOVE THE BLADE
WARNING: B efore y ou r emove
the blade, disconnect the wire to
the spark plug. The blade has
sharp edges. When you hold the
blade, use gloves or cloth materi-
al to protect your hands.
1. Drain the fuel tank.
2. Lift t he s ide of t he m ower t hat has the
mu ler or spark plug.
3. Use a piece of w ood t o keep t he b lade
from rotating.
4. Remove the bolt that holds the blade.
5. Check the blade according to the Blade
Service i nstructions. R eplace a b adly
worn or damaged blade with a factory re-
placement blade.
6. Mount the blade with the curved edges to-
ward the h ousing. If t he blade is upside
down, the blade will not cut correctly and
can cause an accident.
7. Fasten the blade with the original wash-
ers and bolt. Make sure the outside rims
of the Belleville washers are toward the
blade (Figure 13).
8. Tighten the bolt that holds the blade to a
torque of 30 foot pounds.
WARNING: Always keep the bolt
that holds the blade tight. A loose
bolt or blade can cause an acci-
dent.
Blade Adapter
Blade
Belleville
Washer
Washer
Bolt
Figure 13
Belleville Washer
Mulching Blade
Bolt
Blade Adapter
Flat Washer
HOW TO SHARPEN THE BLADE
WARNING: Vibration is the result
if t he b lade is n ot c orrectly bal-
anced. A b lade that i s damaged
with cracks can break and cause
an accident.
1. Sharpen the blade two times a year or ev-
ery 25 hours.
2. If the blade is on the unit, do not sharpen.
Remove t he b lade a ccording to t he i n-
structions in How To Remove The Blade .
3. Clean the blade with a brush, soap, and
water. Check the blade. Look for cracks,
nicks, or other damage. Replace a blade
that is badly worn, bent, or damaged with
a factory replacement blade.
4. Sharpen the blade with a file Make sure
you keep the original beveled cutting edge
(Figure 14).
(Continued following page)

17
MAINTENANCE
Ground
Blade is balanced
when parallel to
the ground.
Blade
File
Figure 14
5. Make sure the blade is balanced. Use a
screwdriver and hold the blade parallel to
the ground as shown. A blade that is bal-
anced will stay parallel to the ground. If the
blade is not balanced, the heavy end will
rotate t oward the ground. Sharpen the
heavy end until the blade is balanced.
6. A new blade will cut better than a badly
worn blade. Every two years replace the
old blade with a f actory r eplacement
blade.
CHECK THE LEVEL OF CUT
Test the unit in a small area. If the height of cut
is not level or if the cut grass is not discharged,
the cause can be: (1) the blade is bent or dam-
aged, (2) the blade is not sharp, (3) a worn
blade, (4) or a broken blade adapter. Before
you use the unit, correct the problem.
HOW TO PREPARE THE MOWER
FOR STORAGE
WARNING: Do not remove gaso-
line while inside a building, near
a or while y ou s moke.
Gasoline fumes c an c ause a n
explosion or a
fire
.
1. Drain the fuel tank.
2. Let the engine run until it is out of gasoline.
3. Drain the oil from the warm engine. Fill the
engine crankcase with new oil.
4. Remove the spark plug from the cylinder.
Pour o ne o unce o f oil into t he c ylinder.
Slowly pull the recoil start grip so that the
oil will protect the cylinder. Install a new
spark plug in the cylinder.
5. Clean the dirt and debris from the cylinder
cooling fins and the engine housing.
6. Clean the bottom of the mower housing.
7. Completely clean the mower to protect the
paint.
8. Put the unit i n a building that h as g ood
ventilation.
Fire
-

18
TROUBLE SHOOTING CHART
The Engine will not start.
1. Make sure the fuel tank is filled with clean gasoline. Do not use old gasoline.
2. On a cold engine, push the primer button (optional on some models). For the number of times
required to push the primer button, see the engine manufacturer s instructions.
3. Make sure the wire for the spark plug is connected to the spark plug.
4. Adjust the Carburetor. See the Engine Instruction Book .
5. There is too much gasoline in the engine cylinder. Remove and dry the spark plug. Put the
throttle control in the SLOW position. Pull the recoil -start grip several times. Install the spark
plug. Connect the wire to the spark plug. Start the engine.
6. The engine is difficult to start in heavy or high grass. Move the mower to a clean dry surface.
7. Make sure the engine stop lever is in the operating position.
8. Make sure the fuel valve is in the ON position. See the Engine Instruction Book .
9. On Electric Start models, charge the battery.
The Engine will not stop.
1. Release the engine stop lever.
2. Check the engine stop cable. Replace the cable if bent or damaged.
The Engine performance is bad.
1. Check the height of cut settings. Raise the height of cut if the grass is high.
2. Check the bottom of the blade housing. Clean the blade housing of grass and other debris.
3. Check the wire to the spark plug. Make sure the wire is connected.
4. Clean the engine cooling fins of grass and other debris.
5. Check the carburetor adjustments. See the Engine Instruction Book .
6. Check the spark plug gap. Set the spark plug gap at 0.030 .
7. Check the amount of oil in the engine. Fill with oil if necessary.
8. Check the engine air cleaner. See the Engine Instruction Book .
9. The gasoline is bad. Drain and clean the fuel tank. Fill the fuel tank with clean gasoline.
Excessive Vibration.
1. Remove the blade. Check the blade and balance if necessary. See the blade maintenance
instructions.
2. Check for a bent or broken blade. A DAMAGED BLADE IS DANGEROUS A ND MUST BE
REPLACED.
3. Check the blade adapter. REPLACE A BROKEN BLADE ADAPTER.
4. If the vibration continues, take the mower to an Authorized Service Center.
The grass will not discharge correctly.
1. Clean the bottom of the mower housing.
2. Check for a badly worn blade. Remove and sharpen the blade. For safety, replace the blade
every two years with a factory replacement blade.
The grass is not cut even.
1. Check the height adjustment at each wheel. The height adjustment must be the same for each
wheel.
2. Make sure the blade is sharp.
3. Check for a bent or broken blade. A DAMAGED BLADE IS DANGEROUS A ND MUST BE
REPLACED.
4. Check for a broken blade adapter. REPLACE A BROKEN BLADE ADAPTER.
Table of contents
Other Parklands Lawn Mower manuals