Pendo PENDOCAM HD VCHD5 User manual

PENDOCAMHDVCHD5
Digital Camcorder
UserManual

1
Preface
Thankyouforpurchasing this digitalvideo camera.This usermanualmustbe
carefullyreadbeforeoperating thedevice.Pleasemakesurethatyoukeepthis
manualsafelystored forfuturereference.
The contentscovered bythis manualrefertothe latestinformation when itwas
compiled.The screen display,illustration and otherinstructionscontained herein
areused tospecificallyand directlydescribe the operation ofthis videocamera.
Due tothe differenceintechnicaldevelopmentandperiod ofproduction,there
maybe slightdifferencesbetween the information inthis manualand the actual
device.
Description
The video camerashouldbe used inthe orderdescribed inthe diagrambelow:
Note:ifusinganewlyboughtmemorycardoracardpreviouslyusedin
anotherdigitalcamera/videocamera,it mustbeformattedfirstusingthisvideo
camera.Beforeformattingyourmemorycard,makesuretobackup all important
datausingothermediasuchasUSBflashdrives,internal/externalharddiskdrives
orDVDs/CDs
,etc
.
Connecttothecomputer
Checkthepowersupply
ofthevideocamera
Insertandformatthe
memorycard
VideoRecording/Image
Capture
Install thedriver

2
Instructions
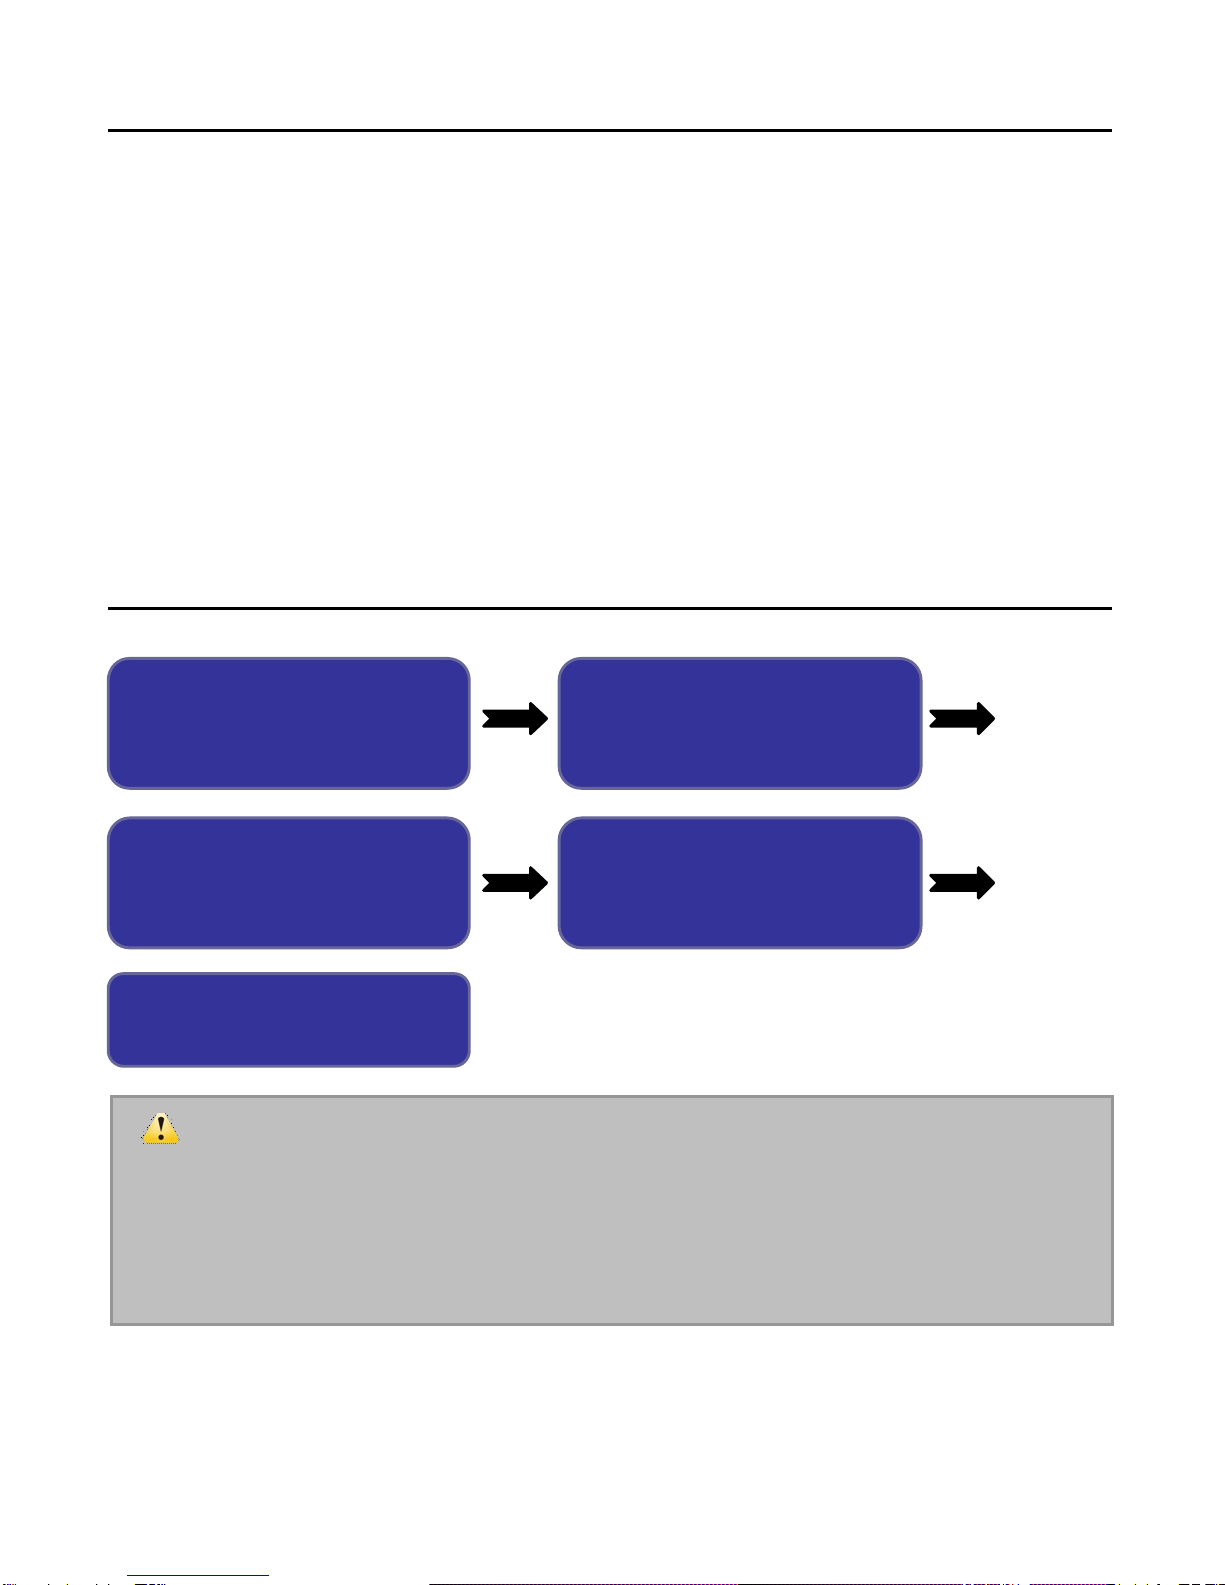
The videocamerahasnobuilt-inmemory,and thereforeSDcardsand MMC
cards(multi-mediamemorycard)shouldbeused.SD cardshavewriteprotection
switchestoprevent accidentaldeletion of dataorformatting.
Pushing theswitchon theSDcardtothebottomwill enablewriteprotection.
Pushing the switchon theSDcardto the top will disablewriteprotection.Before
capturing videosand images, pleasepushthe switchon theSD cardtothe top.
Application description of thememorycard
When anewlyboughtmemorycardis used orthememorycardcontains
data/images(fromothervideo cameras)whichcannotbe recognized,the
memorycardmust be formatted first beforeuse.
The videocameramustbeswitched offbeforeinserting orremovingthe
memorycard.
The reliabilityofthe memorycardwill be reduced overtime.Ifthedatainthe
memorycardbecomescorrupted orthememorycarditselfgetscorrupted,a
new cardwill need tobe used.
The memorycardis adelicateelectronic device.Itmustnotbe bent,
dropped orplaced underheavy pressure.
Itis notadvisabletoputthe memorycardinornearotherdevicesorareas
that emit strong electromagnetic fields, suchasamplifiersorTVreceivers.
The memorycardmust not be used inextremelyhotorcoldconditions.
Alwayskeepyourmemorycardclean.Preventanyliquidfromcoming into
contact withit. Makesuretowipe anyliquidwithasoft dryclothbeforeuse.
Placethe memorycardinitscasewhen not inuse.
Pleasebe awarethatthe memorycardwill becomewarmafterprolonged
usage whichis normal.
Copperstreaksof memorycard
Writeprotection switch

3
Itis notadvisabletousememorycardspreviouslyusedwithotherdigital
videocamerasordigitalcameras.Thesememorycardsmustbe formatted
inthis camerafirst beforeit can be used.
Memorycardsformatted inotherdigitalvideocamerasorothercardreaders
maynot be usableinthis camera.
Ifoneofthe following situationsoccur,the recorded datamaybecome
corrupted:
-The memorycardis misused orhandled improperly.
-Powerloss orthememorycardis takenoutduring recording,deleting,
formatting orreading.
Makesuretobackup all importantdatausing othermediasuchasUSB
flashdrives, internal/externalharddiskdrives, DVDs/CDs, etc.
Careand Maintenance
When the videocamerais notinuse, keepitinadryplaceand removethebattery
fromthe device.
Usethe wristsling whileoperating the devicetoavoidunintentional
damage.
Properprotectivecasemustbe used topreventcameralensand display
screen damage. If thesurfaceof the cameralensrequirescleaning, remove
the dust first byblowing airtoit andthen useadryclothorpaperandlightly
wipe the cameralens(Note: Useonlyaprescribed cleaning kit forcleaning
opticalequipmenttopreventdamage).Ifnecessary,detergentcan be used
towipe the cameralens.Neveruseorganic solventtoclean the video
camera.
Nevertouchthe surfaceof thecameralens.

4
Systemrequirements
Connecting this digitalvideocameratoyourcomputerrequiresthat yourcomputer
meetsthe minimumsystemrequirements.Itis stronglyrecommended tousea
computerwithbetterspecificationsinordertomaximizethe functionsof the video
camera.
MinimumSystemRequirement:
SystemRequired
Operating
System
Microsoft Windows2000, XP, VISTA, 7
CentralProcessing Unit
IntelPentiumIII667 orhigher
Memory 128 MBorMore
Sound and Video Mustbe abletosupportDirectX8orhigher
versions
CD-ROM Quad (4X)speed orHigher
Harddisk
At least 1GBof fre
espace
Others
One standardUSB 1.1orUSB 2.0interface
Features
The video camerahasseveralfeaturesand functions:
Digitalvideo camera
Digitalcamera(FiveMegapixels)
Mass Storage (Removablestorage)
Webcam(RequiresacompatiblePC)
8XDigitalZoom

5
Accessories
Afteropening thepackageofthevideocamera,youcan seethefollowing main
fittings:
USB cableInstallation CD Usermanual
AVcableLithiumBattery
Knowing yourVideoCamera
Displayscreen Menu key Powerkey
USBinterface AVinterface
Camerakey
Zoomkey
Workingindicatorlight
Direction key
OKkey
Playbackkey
Recordingkey
Shortcutkeydelete
HDMIinterface

6
Portraitindicatorlight
LEDfill light
CameraLens
Speaker
Wristslingbutton
Wristsling
Microphone

7
Function of ke
ys and indicatorlightsof thevideocamera
Key/Indicator
Light
Function
PowerKey Poweron and off thecamera.
RecordKey Recordimage.
CameraKey Takephotos.
ZoomKey Digitalzoom, zoomin/out photo(playbackmode).
Menu Key Open/closethe menu.
PlaybackKey Enter/exitplaybackmode.
UpKey Select menu and movephotos(whenthe photois
enlarged). Pauseplayback.
DownKey Select menu and movephotos(whenthe photois
enlarged),closethe screen
Left Key Select fileand menu, open the fill light and movephotos
(when the photois enlarged).
Right Key Select fileand menu, movephotos(when thephotois
enlarged). Cameramode shift.
OKKey Confirm, playandstop playback
Shortcut Key/
DeleteKey
Entershortcut keydeletestate.
Working Indicator
Light
Lightsup toindicatethat apictureis being taken.Steady
light willindicateif the deviceis connected tothe computer.
Portrait Indicator
Light
The light willshine during count downthe process when in
Portrait mode.

8
Startto use
Batteryinstallation
The video camerausesfourAAAalkaline batteriesoran originalrechargeable
lithiumbattery.Beforethe batteryis replaced,makesurethe powerswitchon the
cameraisset tooff.
Open the batterycoverand insertthe batteryfollowing the positive/negativepole
indicatoron the batterybinthenclosethe batterycover.
SD/MMC memorycardinstallation
Open the batterycoverand insertthe SD/MMC memorycardintothe groovefor
the memorycardfollowing the picturenearthe insertion point. Toremovethe
memorycard, press inthe SD/MMC and release.
Note:Beforeremoving the memorycard, makesurethat thedeviceis turned
off.
MakesurethattheSD/MMCcardis properlyinserted following the
figurenexttothegroove.Inserting the cardthe wrong waymay
damage the cardand/orthe video camera.
When the memorycardis used forthefirsttimeorhasbeen usedin
othervideo cameras, it shouldbe formatted at first.
Open
Press the powersupplyfortwosecondsand then releasetostartthe video
camera.
Modeshift
Inpicturetaking/recording mode,press the playback keytoshift toplaybackmode.
Inplaybackmode, press the playbackkeytoexitplaybackmode.

9
Recording
Inrecording mode,press the recording keytostartrecording and press the
recording keyagaintostop the recording.
Picturetaking
Underpicturetaking mode, press the camerakeytotakephotos.
Playback
Press the playbackkeytoenterplaybackmode tobrowsethrough photosand
playvideos.
Browsing photos:usethe left keyorrightkeytoselectphotosand usethe zoom
keytoenlarge the photo.Press the up/down/left/right keytomovethe photo.
Movieplay: useleft keyorright keytoselectthemovieyouwanttoplayandpress
the OKkeytostartthevideo.Press theOKkeyagaintostopthevideo.During the
playprocess, the playbackcan bepaused bypressing the up key. Oncethe video
hasbeen paused, youcan press the up keyagaintocontinue playing.
HDMI output
ConnecttheHDMIcabletotheHDMIportinthe cameraand totheHDMIinput
port of the video equipment orHDMIcompatibleTV.
Note:pleasestop anyrecording/sound recording orplaybackbeforeconnecting
the HDMIordisconnecting the HDMIcable.
TVoutput
Toconnectthe device toaTVusing theAVcable, connectthe yellowport tothe
videoinput port on the TVand thered/whiteport totheaudioinput port ontheTV.
Note:Pleasestop anyrecording/soundrecording orplayback beforeconnecting
ordisconnecting theAVcable.

10
Close
Toturnoffthe video camera,press and holddownthe powerkeyuntil the video
cameraturnsoff.
Ifthe video camerastaysinidlestateand no operation is carried outbeyond the
setautomatic closetime(one minute/three minutes/fiveminutes),the video
camerawill automaticallyturnofftosavepower.
Menu setting
Underpicturetaking/recording andplaybackmode,press the menu keytoopen
the menu and then press the up/down/left/rightkeytoselectan option.Press the
OKkeytoenterthe submenu.When selecting menu,thebackgroundofthe
selected menu option will be displayedwithhigh brightness.
▲Recording/picturetaking menu
Dateand timesetting
Press the menukeytoopenthemenu and thenpress the left andrightkeyto
entersetting menu. Press the downkeytoselect the “dateandtime”menu option
and press the OKkeytoentersetting window.

11
Insetting window,press the left andrightkeytoselectthe itemtobeadjusted
(dateandtime),then thebackgroundof the selected itemwill be displayedinblue.
Press the up keyordownkeytomakethe adjustment. Afteradjustmentis
completed,press the confirmation keyforconfirmation orpressthe menu keyto
cancelthe setting and exit. Finallypress the menu keytoexit the setting mode.
Connecting to thecomputer
Install the driversincluded inthe installation CD beforeconnecting the video
cameratothe computer.
Connectthepowersupplyofthevideo cameraandthenusethe USBcableto
connectthe video cameratothecomputer.USBmode is removableharddisk or
PCcamera.The video camerawill automaticallyenterremovablediskmode.To
enterPCcameramode,press theplayback key.[Whatdoesthis paragraph
actuallymean? Can wetighten up orremove?]
Progressiveoperation
Picturetaking/recording mode
The camerawillautomaticallyenterpicturetaking/recording mode afteritis
started.
Press the shutterkeytodirectlytakephotos.
Press the recording keytostartrecording and press the recording keyagainto
stop.
Press the TkeyorWkeytozoominand out.
Press the left keytoopen orcloseLED fill light (the fill light cannot beusedunder
playbackmode).
When the videocamerais inidlestate,press thedownkeytoshift amongthe
three screen displaystates, namely, closeicon, closescreen and normaldisplay.
◆Information displayed on the screen underpicturetaking/recording mode

12
SerialNO.
Icon name Description
1 Picturetaking
mode
Indicatesthatthe video camerais in
picturetaking mode.Picturetaking
can be carried outbypressing the
shutterkey
2 Whitebalance Indicatesthe currentwhitebalance
setting
3 Photometry
mode Indicatescurrent photometrymode
4 Exposure Indicatescurrentselected exposure
value
5 Image
Dimension Indicates currentdimension of
Resolution of photo
6 Image quality Indicatescurrentselected image
quality
7 Possiblenumber
of photos Indicatesthe remaining numberof
possiblephotos
6
7
14 13
15
11
3
2
12
8
9
10
1
5
4

13
8 SD card Indicatesan inserted memorycard
and indicatesthattheSDcardthat
is used haswriteprotection
9 Facedetection Open facedetection
10 Countdownof
portrait Indicationsofcountdownduring
portrait mode
11 Focusindication
Indicatescurrent digitalzoomtime
12 Quantityof
electricity
Indicatescurrentbatterystate.When
displayed inred,itmeansthatthe
batteryis used up and the video
camerawill automaticallyclose
13 Recording mode
Indicatesthatthe video camerais in
recording mode,press the recording
keytocarryout recording
14 Recording time Idletimemeansremaining feasible
recording time; recordtimemeansthe
recorded time
15 Video format Indicatesthe resolution ofcurrent
video
◆Menu setting
Press the menu keytoopen the mainmenu ofrecording/picturetaking and press
the left and rightkeytoselect the menu.Press theOKkeytoenterthesubmenu.
Inthesubmenu,press the menu keyorthe OKkeytoreturntothe mainmenu
and press theleft and rightkeytomakeselection and finallypress theOKkeyfor
confirmation.Afterreturning tothe mainmenu,press the menu keytoexitthe
menu.
During menu selection, the selected menu willbe highlighted inblue.

14
Recording menu option:
Mainmenu Submenu Description
4032x3000 12-million pixels Resolution
3264 x2448 8–million pixels Resolution
2592x1944 5-million pixels Resolution
2048X1536 3-million pixels Resolution
1280x720 Format withhigh Resolution
640X480 Format withmedium
Resolution
Excellent Best image quality
Good Good image quality
Normal Common image quality
Centralphotometry The photometrydependson
the centralarea
Multi-spot photometry The photometrydependson
multi-spot
Spot photometry The photometrydependson
one spot
on Open FD Photometry,
optimizefaceautomatically
off CloseFD Photometry
automatically
Auto Useautomatic white
balance, suitableformost
situations
Sunlight Suitableforsunlit
environment
Cloudy Suitableforcloudy
environment

15
FluorescentSuitableforworking with
fluorescent lamplight
source
FilamentSuitableforworking with
Filament lamplight source
Exposure / Useleft and rightkeysto
adjust exposure
compensation
Recording mode Close Usecommon mode for
taking singlepicture
2s Useportrait mode with2
second delay
10s Useportrait mode with10
second delay
Successive Useforsuccessivelytaking
photos
picturetaking
Specialeffect Normal Normaleffect
B&W Blackand whiteeffect
Retro Memorable/Agedeffect
NegativeNegativeeffect -showsdark
areasaslight and light
areasasdark
Red Reddisheffect
Green Greenisheffect
Blue Bluisheffect
DateStamp Off Turnoff DateStamping
Date Show datestampon picture
/ recording

16
Date&Time Show dateandtimeon
picture/ recording
Facedetect On Turnon facedetection
Off Turnoff facedetection
SmileCapture On Turnon smiledetection
Off Turnoff smiledetection
Blinkdetect On Turnon blinkrecognition
auto-capture
Off Turnoff blinkrecognition
auto-capture
Settingsmenu
InPicturetaking, recording orplayback mode, press theMenuKeyandpress the
left and right keystoenterthe settingsmainmenu. Tonavigatethe settingsmenu
usethe up,down,left andrightkeytoselect menu andpress the OKkeytoenter
the submenu.
Inthe submenu,press the menu keyorthe OKkeytoreturntothemainmenu and
presstheupkeyordownkeytoselectandfinallypresstheOKkeyforconfirmation.
Toexit the mainmenu, simplypress the menu keytoexit fromthe menu.
▲Settingsmenu
During menu selection, the selected menu willbe displayed

17
Mainmenu Submenu Description
Sound
Shutter Open/close
Open sound
No/1/2/3
Keysound Open/close
Volume 0/1/2/3
AutoReview
Off Noplayback afterpicturetaking
1second Playbackfor1second afterpicturetaking
3seconds Playbackfor3secondsafterpicturetaking
Power
Frequency
50 Hz Set thefrequencyof light sourceas50 Hz
60 Hz Set thefrequencyof light sourceas60 Hz
PowerSave
1minute Automatic closeunder1minuteof idlestate
3minutes Automatic closeunder3minutesofidlestate
5minutes Automatic closeunder5minutesofidlestate
Off Disablepowersavefeature
Dateand time
/ Set dateand timeand format of the date
Language
English Menu language is set toEnglish
FrenchMenu language is set toFrench
German Menu language is set toGerman
Italian Menu language is set toItalian
Dutch Menu language is set toDutch
Spanish
Menu
language
is
set
to
Spanish
Portuguese Menu language is set toPortuguese
TVout NTSC The TVmodelis set toNTSC
PAL
The
TV
model
is
set
to
PAL
Format
Yes/no
Format
memory
card
ResetAll Yes/no Restorefactorysetting

18
Whendateandtimeisset,usetheleftkeytoselecttheitemtobesetandpressthe
up keyordownkeytomakethe adjustment. Press the OKkeyforconfirmation and
press the menu keytocancelthe setting and returntothe mainmenu.
Picturetaking/recording mode
The camerawill automaticallyenterpicturetaking/recording mode oncepowered
on.Pressthecamerakeytostartpicturetakingandpresstherecording keytostart
and stop therecording.
Press the TkeyorW keytoactivatedigitalzoomfunction.
The 10 second delayportrait can be activated bypressing the right key.
Portraitmode:press the camerakeytostartcountdownandthe photowill be
taken after2secondsor10secondsdepending on the previoussettings.
Enabling LED fill light: press the left light keytoopen orclosethefill light. (Thefill
light cannot be used afterentering playbackmode.)
Toshift among three screen displays,including closeicon,closescreen and
normaldisplay, press the downkeyduring idlestate.
Note:During recording,itis advisablethatthe video camerabe keptsteady
byusing acamerasupport, suchastripod, toget clearphotos.
Afterpressing the shutterkeywhen taking pictures,the BUSYlight
indicatorwilllight up. During this time, the video camerashouldnot be
moved.OncetheBUSYlightis off, the video cameracan bemoved.
Thisistostop photosfromblurring.
◆Menu setting
Press the menu keytoopenpicturetaking/recording mainmenu andpress the
downkeyorupkeytoselecttheappropriatemenuandthenpress OKtoenterthe
submenu.Inthe submenu,press the menu keyorleft keytoreturntothe main

19
menu and press the downkeyorup keytoselectandthenpress the OKkeyfor
confirmation. Afterreturning tothe mainmenu, it is possibletoexit fromthe menu
bypressing the menu key.
During menu selection, the selected menu willbe highlighted inblue.
Picturetaking menu option:
Note: When adjusting exposurecompensation inthe exposuresubmenu,usethe
left and rightkeytoadjustthe exposurecompensation value and theimage
brightnessonthescreenwillchangeaccordingly.Afterthesettingisfinished,press
the OKkeyforconfirmation and toreturntothe mainmenu.Then press the menu
keyagaintoexit.
Setting menu
The operation method is the sameasthe method usedunderpicture
taking/recording mode.
Playbackmode
Usethe playbackkeytoenterplaybackmode.
Underplaybackmode,presstheleftkeytoselectthepreviousfileorpresstheright
keytoselect the next file.
Toplaythe file, press OK. The timerwill be displayedontheupperrightcornerof
the screen. Topauseplayback,press the up key.Toresumeplaybackpress the
recordkey.Press the menu keytostop playback.
When viewing photos,pressing the Tkeyzoomsinon the photo.Press OKto
confirm. Usethe up anddownkeystomovethe photo.
Table of contents