manuals.online logo
Brands
  1. Home
  2. •
  3. Brands
  4. •
  5. Pontiac
  6. •
  7. Automobile
  8. •
  9. Pontiac 1979 Firebird User manual

Pontiac 1979 Firebird User manual

....
.....
....
'"
....
"
.'. ,
•
~.h·
.-
~
''-
'.'
....
"
,.,.,
.'
." .
.':, .
.
'"
,:'
, "
• i ,
~.
i.-
"
,'.
;i.
.
~;'
.
':,
'.
.
...•
.
",
.
" ', ;
, ,
" "
" ,
!:
.
'"
, "
.>
"
..
'.
.
,.'
.
~
'(
.,,',
"
,,'
"
"
.,.
i'
" '
'.,'
.
...
:
....
'
..
-.
;.'
" ' '
...
'
,,'.,
.~
'
..
'
,.
~
~
.'
,
,~
'.
';
.
."-"
'," ..
....
. " "
... · 1
.....
.';.
.
~
.
','
i "
',"
':
"
;'
~
"
'-,
,;,'
....
":..".
,',p,
' .
.'.
"
.
';'
')
.:
.. "
....
~
,
.\
,,"
i
•.
~.~~;"·-::~><·1,~:
.
~.
;',
'
~
.~,."
" " ,.
,'.'
,i
,,~.;
-~,---
'
::,:"",
~
..
:. ' .
',;'
file:///C|/Documents%20and%20Settings/Tim/Desktop/carburetor-manual-welcome/index.htm[4/25/2009 11:42:20 AM]
www.carburetor-manual.com
Would you like some Free Manuals?
http://carburetor-manual.com/free-shop-manual-club-t-13.html
Also visit http://freeshopmanual.com for more Free Manuals
Also Visit my website for 7 FREE Download Manuals starting
with this one.
"The ABC's of Carburetion"
Click Here Now
A WORD TO PONTIAC OWNERS
...
This
manual
has been
prepared
to
acquaint
you with
the
operation
and
maintenance
of
your 1979 Firebird, Esprit,
Formula
or
Trans
Am,
and
to
provide
important
safety information.
It
is
supplemented
by
a
Maintenance
Schedule
and
Warranty
Information folder.
We
urge you
to read these
three
publications carefully. Follow
the
recommendations
to help assure
the
most enjoyable, safe, and troublefree
operation
of
your
car
.
While reading this
manual,
you will notice
that
some specifications
are
given
in
both metric
and
customary
units.
Where
precise
accuracy
is
not
needed, some conversions have been rounded to even
numbers
for your
handy use.
When it comes to service,
remember
that
your Pontiac
dealer
knows your
car
best
and
is
interested
in
your complete satisfaction.
Return
to your
dealer
for
Guardian
Maintenance
Service
and
any
other
repairs your
car
may require.
To
help dealers handle your needs,
Pontiac
maintains a number
of
Zone
Offices throughout the country.
If
you have a problem
that
has
not been
handled to your
satisfaction,
follow the procedure in Section 6,
"Owner
Assistance".
We
thank
you for choosing a Pontiac product,
and
want
tc1
assure you
of
our
continuing interest
in
your motoring pleasure
and
satisfaction.
Pontiac
Motor
Division
FOR
CONTINUING
SATISFACTION,
KEEP
YOUR
GM
CAR
ALL
GM.
GENERAL
MOTORS
PARTS
ARE
IDENTIFIED
BY
ONE
OFTHESE
TRADEMARKS:
NOTE
TO
CANADIAN OWNERS:
If preferred, a
French
Owner's
Manual
can
be obtained
from
either
your
Dealer
or
by writing to
General
Motors
of
Canada
Limited, Technical Publications
Department,
Oshawa,
Ontario.
L1J
5Z6."
Aux
proprietaires
canadiens:
On
peut
se
procurer
un
exemplaire
de ce
guide
en fran<;ais
aupres
du
concessionnaire
Oll
lIu service
des
publications
techniques,
General
Motors
du
Canada
Limitee,
Oshawa,
Ontario
L IJ
5Z6
.
1979
PONTIAC OWNER'S MANUAL
THIS
MANUAL SHOULD
BE
CONSIDERED A
PERMANENT
PART
OF
THIS
CAR. IT SHOULD
REMAIN
WITH
THE
CAR
WHEN
SOLD,
1'0
PROVIDE
THE
NEXT
OWNER
WITH
IMPORTANT OPERATING, SAFETY
AND
MAINTENANCE
INFORMATION.
Pontiac
Motor
Division
General MotorsCorporation
Pontiac, Michigan 48053
All information, illustrations and specifications contained in this manual
are based on the latest product information available
at
the time of
printing. The right
is
reserved to make changes
at
any time without
notice.
For vehicles sold
in
Canada, substitute the name General Motors of
Canada
Limit~d
wherever the name Pontiac Motor Division appears in
this manual.
Table
of
Contents
BEFORE DRIVING YOUR CAR 1
STARTING AND OPERATING
STEERING COLUMN CONTROLS
FLOOR CONTROLS
INSTRUMENT PANEL
OTHER CONTROLS AND FEATURES
IN CASE OF EMERGENCY 3
APPEARANCE CARE 4
SERVICE AND
MAINTENANCE
5
OWNER ASSISTANCE 6
SPECIFICATIONS
SERVICE
MANUALS
INDEX
SERVICE STATION INFORMATION
BEFORE DRIVING YOUR CAR 1-1
DRIVER DAILY CHECKLIST
BEFORE
ENTERING
CAR
Be
sure you know your
car
and itsequipment and how to use itsafely.
1.
See
that
windows, mirrors, and lights areclean andunobstructed.
2.
Check whether any tire is low
or
flat.
(If
any tire appears different
than normal, we recommend you check it with a tirepressuregage.)
3.
Check
that
all lights work.
4.
Look for fluid leaks.
5.
Be sureeverything is properly stowed.
6. Checkarea behind
car
if
about to
backup.
BEFORE
DRIVING
OFF
1.
Lock all doors.
2.
Adjust seatand head restraints.
3. Adjust inside andoutside mirrors.
4.
Fasten seat belts.
5.
Check
that
warning lights work as key
is
turned to
"Start."
6. Check all gages (including fuel).
7. Release parking brake (andsee
that
"Brake" light turns off).
GUARD AGAINST THEFT
For tips on how
to
protect your car and its contents, see the "Steering
Column Controls"section
of
this manual.
KEYS
Two different keys are provided
for the locks on your car. The key
code
is
stamped on the "knock
out"
plug
in
each key head.
•
Key
witb square bead (letter
"A")-for ignition lockonly.
•
Key
witb oval bead (letter
"R")-for all other locks.
For vehicle security:
• Record key code numbers;
then knock plugs out
of
keys.
• Keep the key codes in a safe place such as your wallet, not in tbe
car.
If
the original keys are lost, duplicates can be made using the key codes.
Contactany
GM
dealer
or
a locksmith.
II
1-2
BEFORE DRIVING YOUR CAR
If
you park
in
an attended lot, separate
and
leave your square-head
ignition key only. Lock your glove box and take the oval-head key with!
you. This will help prevent any illegal entry into the glove box and
trunk
compartments.
STOWING THINGS IN (OR ON) THE CAR
INSIDE REARVIEW MIRROR
The mirror can be adjusted up, down,
or
sideways to obtain the best view to the
front and rear. Move the mirror lever to
the night position to reduce glare from
headlights
of
vehicles behind you.
BEFORE DRIVING YOUR CAR
REMOTE CONTROL OUTSIDE MIRROR
The remote control lever for the left-hand
outside
reaniew
mirror
is
located on the
forward section
of
the left interior door
trim panel. Simply move the lever in the
desired direction to adjust the pOsition
of
the mirror.
Adjust the .outside mirror so you can
just
see the side
of
your car in the side
of
the
mirror closest to the car. This helps you
determine your relation to
objects
seen in
the mirror.
CONVEX MIRROR
1-3
Your car may have an optiorialconvex
outside
right hand rearview
mirror. (A convex mirror has a curved surface.) Adjust
the
convex mirror
so you can
just
see the side
of
your
car
iii
the portion
of
the mirror closest
to the vehicle. This type
of
mirror
is
designed to give a much wider view
to the rear and especially of the lane next to your car. However, cars and
other objects seen
in
a
cOnvex
mirror will look smaller and farther away
than those seen
in
a flat mirror. Therefore, use care when judging the size
or distance
of
a
car
or object seen
in
this convex mirror. Use your inside
mirror to determine the size and distance
of
objects seen in the convex
mirror.
MANUAL BUCKET SEAT ADJUSTMENT
The front seats may be adjusted forward
or rearward by moving the control lever
at
the front of the seat. Release the locking
mechanism; then exert slight body pressure
to move seat to desired position. Release
control lever to lock seat in desired
position.
NOTICE: Do not adjust a manually
operated driver's seat while the
..
car
is
moving. The seat could move suddenly and
unexpectedly and could cause the driver to
lose control
of
the
car
.
After adjusting a manually operated seat,
push forward and backward
on
the seat to
be
sure the seat adjusters have latched.
Take
the car to your dealer for
service ifyou find
that
your seat adjusters do not latch.
1-4
BEFORE DRIVING YOUR CAR
FRONT SEATBACK LATCHES
This car has front seatback latches
designed to hold the seatback upright
when properly latched. The release
le
ver
is
located
at
the bottom, on the outboard side
ofeach front seatback. To tilt the seatback
forward, lift the latch release lever. When
th~
seat
is
returned to the upright
po
sition,
the seatback
is
designed.to latch
by
itself.
Keep seat belt webbing and hardware clear
of
seat parts when you tilt folding seats
forward or backward. This helps prevent
damage to these belt systems.
SEAT BELTS
To help lessen the chance
of
injury
and/or
the severity of injury in
accidents or sudden stops, General Motors
urge
s
that
people riding
in
the
car
be properly restrained
at
all times, using the seat belts provided. This
includes women who
are
pregnant, and children
of
all ages. See following
pages for use
of
restraints by children and pregnant women.
FRONT SEAT LAP-SHOULDER BELT
• Adjust the front seat as needed and sit up straight and well back in
the seat.
• There are a number
of
ways the lap-shoulder belt may be put on
easily. For example.
..
• The lap-shoulder belt may be put on using one hand
by:
{l)
Holding the latch plate and pulling
the
belt as far as it will reach
across your waist (see illustration). (2) Then, hold the latch
plate
at
a right angle to thewebbing.
At
the same
time
slide it up
the belt
by
raising it toward the upper outside corner
of
the
windshield. (3) Finally, pull
the
latch
plate down across the body
and push it into the buckle until it
dicks
.
.• One easy two-handed method
is
to hold the webbing
just
behind
the latch plate using the nearest hand. Then bring it down across
your body. While holding the webbing
taut
with one hand, slide
the latch plate up the belt with the other hand. Finally, hold the
latch plate and push it into the buckle until it clicks.
• Position the
"lap"
portion
of
the belt across the lap as low on the
hips
as possible. Then adjust to a
snug
fit by holding the "shoulder"
portion
of
belt and pulling it
UPWARD
through the latch plate,
until the lap portion
is
snug across the lap. This reduces
the
risk
of
sliding under the belt during an accident.
BEFORE DRIVING YOUR CAR
LATCH
PLATE
1-5
• The shoulder portion
of
the front seat belt
is
designed to lock only
during a sudden stop or impact.
At
other times it
is
designed to
move freely with the person.
KEEP
BELOW
HIP
BONE
• For those who find the shoulder belt too snug, belt pressure against
the chest can be reduced by using the tension reliever built into the
retractor. To use this feature: (A)
Start
by pulling the shoulder belt
outward far
enough
so
that
when you let go, it returns to the chest
(Step
"A"
in the figure).
(8)
Then adjust
the
belt tension
by
pulling down slightly on the shoulder portion of the belt and letting
go (Step
"8"
in
the figure).
The
least amount
of
belt possible should
be pulled from the retractor (about one inch) to minimize belt
pressure.
• To release the tension reliever and get rid
of
slack, pull the shoulder
belt out and let it retract.
Or
lean far forward and then back.
1-6
BEFORE DRIVING YOUR CAR
•
To
unfastenthe belt, push in the button
in
the
center
of
the buckle.
• The retractor
is
designed to rewind the belt when the shoulder belt
is
pulled outward about six inches. Pulling on the belt
is
necessary
to cause it to retract. Hold the latch plate as it retracts to keep it
from possibly striking people or things nearby.
Ifneeded,
slide the
latch plate down the webbing to let the belt retract fully.
RESTRAINT OF PREGNANT WOMEN
General Motors urges
that
pregnant women use a lap-shoulder belt
whenever one
is
present. This will help lessen the chance
of
a pregnant
woman and her unborn child being injured
and/or
will help reduce the
severity of
theirinjury
in
an accident.
The
lapbelt
should be used alone if
a shoulder belt
is
not present. In either case,
the
lap belt should be worn
as
low
and snug over the hips as possible, as advised for regular seat belt
use (see the preceding instructions).
SEAT BELT LIGHT
IBUZZER
REMINDER
• When the key
is
turned to
"Run"or
"Start",
a reminder light
is
designed to come on for four to eight seconds.
It
is
to remind riders
to fasten their seat belts.
• If the driver's seat belt has not been buckled before turning the key
to
"Run"
or
"Start",
a buzzer
is
designed to sound
forfour
to eight
seconds (or until buckled) as a reminder.
If the seat belt or reminder system does not work as described, see your
dealer for service.
LAP BELTS FOR REAR SEATPASSENGERS
• Rear seat lap belts have retractors which are designed to take
up
extra webbing automatically.
•
In
a single motion, pull the rear seat outboard lap belt across the
lap far enough to push the latch plate into the buckle, until it clicks.
If the belt
is
not pulled out far enough to reach the buckle, let the
lap belt rewind fully into its retractor. This unlocks it so the belt can
be pulled out to the proper length.
• These belts .should be positioned, worn, and released as described
above under
"Front
Seat
Lap-Shoulder Belt". After fastening,
check that the belt
is
snug
by
pulling the belt firmly across the lap
toward the lap belt retractor. This will allow the retractor to take
up slack.
BEFORE DRIVING-YOUR 'CAR
ADDITIONAL REAR SEAT SHOULDER BELTS
Offered as an accessory
at
your dealer.
1-7
• When properly worn with a lap belt, a rear seat shoulder belt can
give riders added protection.
It
can prevent or reduce impact with
the insides
of
the car by restraining the upper body
in
a collision.
This
is
especially true
in
a frontal impact.
• To use the detachable shoulder belt, place the knob on the shoulder
belt end
in
the "keyhole"
on
the
lap belt latch plate ( before the lap
belt
is
fastened). Tilt the knob as needed to pass it
through
the slot.
-Pull the knob firmly upward to seat it
at
the narrow end
of
the
keyhole. Then fasten
the
lap belL Do this
in
reverse when taking off
the shoulder belt and
puttingit
away.
• Detachable shoulder belts can be made shorter by pulling on the
endofthe
belt coming from the adjustable latch plate.
• To make a detachable shoulder belt longer, place the adjustable
latch plate
at
a right angle to
thebeltw~bbing
and pull on the latch
plate. The belt should then slide easily.
• The detachable shoulder belt should have enough slack
to
put a
fist's width between your chest and the belt. This can be checked
by
putting a clenched fist between the belt and
__
your chest. (Place
thumb side
of
fist against
chest
with back
of
hand up.)
SEAT BELTINSPECTION
• Now
and
then check
that
belts, buckles, latch plates, retractors,
reminder systems,
guide
loops, and anchors work properly. Also
check for damage that could keep the restraint system from doing
its job.
• Keep sharp edges and damaging objects away from the belts and
other parts
of
the restraint system.
• Replace belts if cut, weakened, or frayed. Also have belts replaced
ifthey have been worn
in
a collision.
• Ifthere
is
any question, have parts replaced.
• Keep belts clean and dry.
• Clean only with mild soap and lukewarm water.
•
Do
not bleach or dye belts since
this
may badly weaken them.
CHILD RESTRAINT
Children
in
cars should be restrained to help lessen the chance
and/or
1-8
BEFORE DRIVING YOUR·CAR
severity of injury
in
accidents or sudden stops. General Motors dealers
offer restraint systems designed by
GM
for use with infants and small
children. For babies
up
to 20 pounds, General Motors recommends
uSe
of
the GM
"Infant
Love
Seat."
For children weighing 20 to
40
pounds, up
to 3 feet-4 inches in height, and who
are
able to sit up alone, General
Motors recommends use
of
the
GM
"Child Love
Seat."
In
using any infant or child restraint system, be sure to
read
and follow
all instructions on installation and use
that
come with the restraint
system.
I
f a child
isriding
in
a car without a General Motors (or other)
infant
or
child restraint system, take careas follows:
I.
Infants who cannot sit up by themselves should be restrained by
placing them
in
a bassinet, preferably covered and padded. Place it
crossways
in
the
car
(widthwise) on the rear seat.
The
bassinet
should be securely restrained with the car's regular seat belts.
Another method
is
to place
the
bassinet so that it rests against
the
back
of
the driver's seat, again crossways in the car.
2.
Never let a child stand or kneel on any seat. Children who can sit
up
by
themselves should be placed
on
a seat
and
re.strained with the
seat belts provided. When children ride
in
a rear seat, they should
be restrained with a lap belt. When children
ride
in the front seat,
both lap and shoulder belt should be worn.
If
the shoulder belt
irritates neck or face due to
thechild
'
ssize,
this may be reduced by
8EFOREbRIVING
YOUR CAR
1-9
placing the child closer to the center
of
the car.
If
irritation-
is
not
reduced, place the child
in
the rear seat.
3.
General Motors advises
that
children should be restrained properly
when riding. However, unusual conditions may prevent use
of
restraints, and require
thatasmall
child stand.
If
that
happens,the
child should stand
on
the floor behind thedriver's seat. This will help
reduce the chance
of
being
hurt
by a frontal force impact
in
case
of
an accident.
DOOR LOCKS
• Lock doors from inside 'by depressing door lock buttons on upper
door panels.
• Lock doors from outside by first depressing lock button then closing
door.
• Doors can also be locked from outside by using key.
All models have as a standard safety feature overriding door locks. When
the doors are locked, both the inside
and
outside door latch mechanisms
are inoperative, thus preventing inadvertent opening
of
the door by
movement
of
the inside handle.
1-10 BEFORE DRIVING YOUR CAR
ELECTRIC DOOR LOCKS
All doors may be locked or unlocked by
operating the switch marked
"LOCK,"
located
on
door trim pad on cars equipped
with electric door locks.
The
automatic locking
mechanism
does
not
at
any time interfere with manual
operation
of
any door lock button.
The
doors· will not unlock
or
open with the
inside door handle when the lock button is
depressed, but can be unlocked
individually by lifting the lock button.
SUN VISOR ADJUSTMENT .
•
Grasp
visor by the top edge
and
pull downward
to
position in upper
portion
of
windshield.
• Remove visor from it's retainer
(if
equipped), pull top edge down,
and swing visor to one side to position
at
side window.
• Adjustment
of
screw
at
pivot point will·loosen
or
tighten visor on its
shaft.
BEFORE DRIVING YOUR CAR
POWER WINDOWS
Optional power windows will
operate only when ignition switch
is
in
the
"RUN"
position. A
master control
is
provided
at
the
driver's position, and will operate
all door windows. An individual
switch
is
provided under each door
window for passenger use.
TRAILER TOWING
1-11
This
car
is
designed and intended to be used mainly to
carry
people.
Towing a trailer will affect handling, durability and economy.
Your
safety and satisfaction depend upon proper use
of
correct equipment.
Also, you should avoid overloads and
other
abusive use.
Tires
When towing trailers, tires should be inflated to the
"Cold
Tire Pressure"
for
"Max.
Load"
shown on
theTire
Placard
on the left front door.
The
allowable passenger and
cargo
load for this
car,
also shown on
the
same placard,
is
reduced
b'y
the trailer tongue weight whenever the trailer
is
attached
to the car.
Maintenance
More frequent service
is
required when using your
car
to
.pull a trailer.
Refer to Section A
of
the
Maintenance
Schedule folder for
Automatic
Transmission Fluid, Engine Oil, and
Rear
Axle Lubricant change
requirements for trailering.
Now and then check
that
all trailer hitch bolts and nuts
are
tight. Also,
see the Index in this manual
and
the
Maintenance
'Schedule folder
for
important facts on belts, cooling system
care
and
brake adjustment.

1-12 BEFORE DRIVING YOUR CAR
Break-In Schedule
See the new
car
break-in instructions
in
this manual. Also,
we
recommend you drive your new
car
for 500 miles (800 kilometres) before
trailer towing. At the end of this 500 mile break-in period, speeds over 50
mph
(80km/h)
and full throttle starts should be avoided during the first
500 miles (800 kilometres)
of
trailer towing. If a · new engine"
transmission or axle
is
installed
in
your car, the same
car
should be
observed.
NOTICE: Use only trailer hitches which permit normal operation
of
the
Energy Absorbing Bumper system, if so equipped. For example, a rigid
fore and aft connection between the bumper and any other part
of
the
car
may increase damage in the event
of
a collision.
TRAILER TOWING TIPS
Getting Started
Before entering traffic with ,a trailer equipped with electric brakes,
start
the car and trailer moving and apply the trailer brakes by hand to be sure
the trailer brakes are working and the trailer electrical system
is
connected.
Engine Cooling
In case your engine overheats, see
"Engine
~oolant"
in
the
"In
Case
of
Emergency" section
of
this manual.
BEFORE DRIVING
YOU~
CAR 1-13
Long UphillG
..
ades
When going up long grades, you can reduce the chance
of
engine
overheating by down-shifting the transmission to a lower gear and
reducing speed to 45 mph (70
kmjh)
or below.
Transmission
See the method for checking transmission fluid level in the "Service and
Maintenance" section
ofthisrnanual.
Parking
You should not park cars with trailers on a grade (hill).
However,if
you
must park on a grade, these steps must be followed:
I. Apply regular brakes.
2.
Have someone place wheel chocks under trailer wheels.
3. When wheel chocks
are
in
place, release regular brakes until chocks
absorb load. .
4.
Apply parking brake.
5.
Place transmission in "Park".
If
the
car
is
parked on a grade,
don't
shift the transmission lever to
"Park
j' until the trailer wheels are chocked and the parking brake
is
set.
Ifyou do, the weight
of
the
car
and trailer may exert so much force on
the
parking pawl in the transmission
that
it may be hard to get the shift lever
out of
"Park".
When starting, after being parked on a grade:
I. Apply regular brakes and hold until steps 2 and 3 below are
completed.
2.
Start
engine in
"Park
".
3.
Shift into gear and release parking brake.
4. Release regular brakes and drive until the chocks are free.
5. Apply regular brakes and have helper remove chocks.
OPERATION
IN
FOREIGN COUNTRIES
Your engine
is
designed to run on unleaded gasoline with an octane
rating ofabout 91, Research method.
If
you plan to drive your Firebird, Esprit, Formula or Trans
Am
outside
the U.S. and its jurisdictions or
Canada
, there
is
a chance the gasolines
available
in
some countries will not meet the needs of your engine. Low
octane rated gasolines may cause engine knocking or serious engine
damage, for which Pontiac Motor Divisionis not responsible.
Using leaded gasoline
in
a
car
with a catalytic converter may cause
the
converter to
lo
se its effectiveness as an emission control.
It
could also .
affect the emission warranty.
If
you must use leaded gasoline
in
a car
designed for unleaded fuel, converter modification and different
maintenance intervals will be required.
To
obtain gasoline information
BEFORE
DRIVING
YOUR
CAR
and a maintenance schedule for the countries in which you plan to travel,
write to: Pontiac Motor Division, Customer Services Department,
One
Pontiac Plaza, Pontiac, Michigan 48053. (In Canada, write to General
Motors
of
Canada
Limited, Customer Services Department, Oshawa,
Ontario LIJ 5Z6.)
When writing, please include:
• the Vehicle Identification
Number
and
• the countries
in
which you plan to travel.
Tires
If you plan to use your car
in
countries where speeds over
75
mph (120
km/h)
are permitted, see "Inflation Pressure" under
"TIRES"
in
Section 5 ofthis manual.
STARTING AND OPERATING 2-1
2-2
STARTING AND OPERATING
NEW CAR "BREAK-IN" PERIOD
You can drive your new
car
from its very first mile/kilometre without
following a formal "breakcin" schedule. However, there are things you
can do during the first
few
hundred miles/kilometres
of
driving
that
will
add to
the
future performance and economy ofyour car.
We .recommend you limit
your
speed during the first 500 miles (800
kilometres) to a maximum of 55 mph (90
km/h);
but do not drive for
long periods
at
any one constant speed, either fast or slow. During this
time, avoid full throttle starts and,
if
possible, avoid hard stops especially
during the first 200 miles (320kilometre,s) ofdriving.
Always drive
atmodetate
speed until the engine has completely warmed
up.
If
you plan to use your new
car
for trailer towing, see additional
information under
"Trailer
Towing" inSection I.
STEERING COLUMN AND SHIFT CONTROLS
ANTI
..
THEFT STEERING COLUMN LOCK
The
anti~theft
lock on the right side
of
the steering column has five
positions:

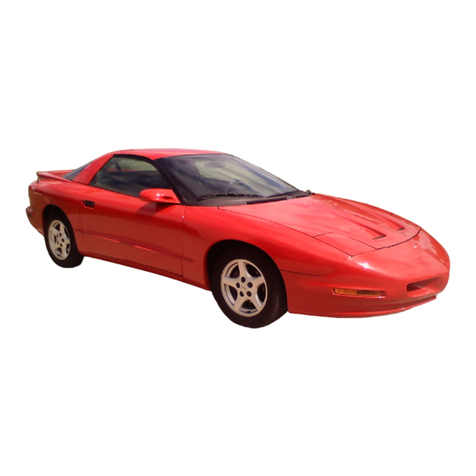
Other Pontiac Automobile manuals

Pontiac 1994 Firebird User manual

Pontiac

Pontiac 1994 Firebird User manual

Pontiac 2009 G3 Assembly instructions

Pontiac

Pontiac 2009 G3 Assembly instructions

Pontiac Grand Prix 2008 Assembly instructions

Pontiac

Pontiac Grand Prix 2008 Assembly instructions

Pontiac 2004 Aztek Assembly instructions

Pontiac

Pontiac 2004 Aztek Assembly instructions

Pontiac 1997 Trans Sport User manual

Pontiac

Pontiac 1997 Trans Sport User manual

Pontiac 1994 Trans Sport User manual

Pontiac

Pontiac 1994 Trans Sport User manual

Pontiac 2003 Sunfire User manual

Pontiac

Pontiac 2003 Sunfire User manual

Pontiac 2006 G6 User manual

Pontiac

Pontiac 2006 G6 User manual

Pontiac 2006 Vibe User manual

Pontiac

Pontiac 2006 Vibe User manual

Pontiac 1999 Grand Am User manual

Pontiac

Pontiac 1999 Grand Am User manual

Pontiac 1953 User manual

Pontiac

Pontiac 1953 User manual

Pontiac Fiero 1988 User manual

Pontiac

Pontiac Fiero 1988 User manual

Pontiac 2009 G3 User manual

Pontiac

Pontiac 2009 G3 User manual

Pontiac 2005 Montana User manual

Pontiac

Pontiac 2005 Montana User manual

Pontiac 2002 Firebird User manual

Pontiac

Pontiac 2002 Firebird User manual

Pontiac 2003 Grand Prix User manual

Pontiac

Pontiac 2003 Grand Prix User manual

Pontiac G6 2010 User manual

Pontiac

Pontiac G6 2010 User manual

Pontiac 1995 Grand Prix User manual

Pontiac

Pontiac 1995 Grand Prix User manual

Pontiac BONNEVILLE 1997 User manual

Pontiac

Pontiac BONNEVILLE 1997 User manual

Pontiac 1996 Trans Sport User manual

Pontiac

Pontiac 1996 Trans Sport User manual

Pontiac 2006 Pursuit User manual

Pontiac

Pontiac 2006 Pursuit User manual

Pontiac AZTEK 2003 User manual

Pontiac

Pontiac AZTEK 2003 User manual

Pontiac 1993 Bonneville User manual

Pontiac

Pontiac 1993 Bonneville User manual

Pontiac 2006 GTO Assembly instructions

Pontiac

Pontiac 2006 GTO Assembly instructions

Popular Automobile manuals by other brands

Skoda Octavia A7 owner's manual

Skoda

Skoda Octavia A7 owner's manual

Volkswagen ID.4 owner's manual

Volkswagen

Volkswagen ID.4 owner's manual

Volvo V70 SPORT owner's manual

Volvo

Volvo V70 SPORT owner's manual

Skoda OCTAVIA Workshop manual

Skoda

Skoda OCTAVIA Workshop manual

GMC 2007 Sierra owner's manual

GMC

GMC 2007 Sierra owner's manual

Hyundai 2007 Elantra owner's manual

Hyundai

Hyundai 2007 Elantra owner's manual

Volvo S40 - ANNEXE 244 overview

Volvo

Volvo S40 - ANNEXE 244 overview

BMW SERIE 5 SPORT WAGON 2002 owner's manual

BMW

BMW SERIE 5 SPORT WAGON 2002 owner's manual

Renault 2012 Clio user manual

Renault

Renault 2012 Clio user manual

Fiat 2015 500e owner's manual

Fiat

Fiat 2015 500e owner's manual

Hyundai SantaFe owner's manual

Hyundai

Hyundai SantaFe owner's manual

BMW isetta Maintenance manual

BMW

BMW isetta Maintenance manual

Porsche 911 TURBO - 1975 WORSHOP owner's manual

Porsche

Porsche 911 TURBO - 1975 WORSHOP owner's manual

Mercedes-Benz CLS owner's manual

Mercedes-Benz

Mercedes-Benz CLS owner's manual

freightliner Sprinter operating instructions

freightliner

freightliner Sprinter operating instructions

RAM Ram Dodge 2010 owner's manual

RAM

RAM Ram Dodge 2010 owner's manual

Toyota Tercel 1985 Repair manual

Toyota

Toyota Tercel 1985 Repair manual

Chrysler 300 SRT8 2013 owner's manual

Chrysler

Chrysler 300 SRT8 2013 owner's manual

manuals.online logo
manuals.online logoBrands
  • About & Mission
  • Contact us
  • Privacy Policy
  • Terms and Conditions

Copyright 2025 Manuals.Online. All Rights Reserved.