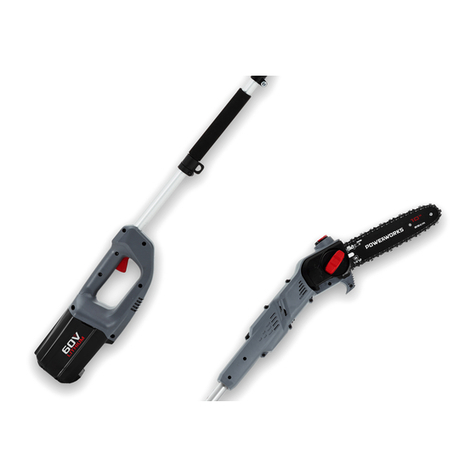
Power works PSF301 User manual

EN OPERATOR MANUAL
P0802185-01, Rev B
1400173
Polesaw
KO 사용 설명서고지톱
นาง้ชใรากอืมู่ค
操作手冊
ZH_TW 操作手冊
TH
ZH 杆锯
高枝鏈鋸
งูส้มไง่ิกง่ตแดัตยอ่ืลเ
PSF301
OriginalInstructions/기본 지침서/มิดเำนะนแำค /使用手册原版翻译/使用手冊原版翻譯

1 Description......................................... 5
1.1 Purpose.............................................................. 5
1.2 Overview........................................................... 5
2 General power tool safety
warnings............................................. 5
3 Installation......................................... 5
3.1 Unpack the machine.......................................... 5
3.2 Add the bar and chain lubricant.........................5
3.3 Assemble the guide bar and the chain............... 5
3.4 Fit the pole saw..................................................6
3.5 Extension of the pole saw..................................6
3.6 Use the shoulder strap........................................6
3.7 Cutting preparation............................................ 6
3.8 Install the battery pack.......................................6
3.9 Remove the battery pack................................... 6
4 Operation........................................... 6
4.1 Examine the chain lubrication........................... 6
4.2 Start the machine............................................... 6
4.3 Stop the machine............................................... 7
4.4 Delimbing a tree................................................ 7
4.5 Limb tree branches............................................ 7
5 Maintenance.......................................7
5.1 Adjust the chain tension.................................... 7
5.2 Sharpen the cutters.............................................7
5.3 Guide bar maintenance...................................... 7
6 Transportation and storage.............. 8
7 Troubleshooting................................. 8
8 Technical data....................................8
9 EC Declaration of conformity.......... 9
4
English
EN

1 DESCRIPTION
1.1 PURPOSE
The product fitted with a cutting attachment mounted on a
pole to enable the operator to cut the branches of standing
trees but not intends for cutting woods as normal chainsaw.
This appliance is not intended for use by persons (including
children) with reduced understanding, or lack of experience
and knowledge, unless they have been given supervision or
instruction concerning use of the appliance by a person
responsible for their safety.
Children should be supervised to ensure that they do not play
with the appliance.
1.2 OVERVIEW
Figure 1-20
1Trigger
2Lock-out button
3Pole
4Shoulder strap
5Collar
6Extension pole
7Guide bar cover
8Oil tank cap
9Chain
10 Bar
11 Scabbard
12 Pole saw head
13 Pole saw handle
14 Chain lubricant
15 Oil indicator
16 Battery
17 Chain cover lock
knob
18 Sprocket
19 Chain tension pin
hole
2 GENERAL POWER TOOL
SAFETY WARNINGS
WARNING
Read all safety warnings and all instructions. Failure to
follow the warnings and instructions may result in electric
shock, fire and/or serious injury.
Save all warnings and instructions for future reference.
The term "power tool" in the warnings refers to your mains-
operated (corded) power tool or battery-operated (cordless)
power tool.
3 INSTALLATION
3.1 UNPACK THE MACHINE
WARNING
Make sure that you correctly assemble the machine before
use.
WARNING
• If the parts are damaged, do not use the machine.
• If you do not have all the parts, do not operate the
machine.
• If the parts are damaged or missing, speak to the service
center.
1. Open the package.
2. Read the documentation in the box.
3. Remove all the unassembled parts from the box.
4. Remove the machine from the box.
5. Discard the box and package in compliance with local
regulations.
3.2 ADD THE BAR AND CHAIN
LUBRICANT
Examine the amount of oil in the machine. If the oil level is
low, add the bar and chain lubricant as follows.
IMPORTANT
Use bar and chain lubricant that is only for chains and chain
oilers.
NOTE
The machine comes from the factory without bar and chain
lubricant.
1. Loosen and remove the cap from the oil tank.
2. Put the oil into the oil tank.
3. Monitor the oil indicator to make sure that no dirt enters
in the oil tank while you add the oil.
4. Put the oil cap on.
5. Tighten the oil cap.
6. The whole oil tank will last for 15 - 40 minutes.
IMPORTANT
Do not use dirty, used or contaminated oil. Damage can
occur to the bar or chain.
3.3 ASSEMBLE THE GUIDE BAR AND
THE CHAIN
Figure 10-14
1. Remove the battery pack from the machine.
2. Loose the chain cover by turning the chain cover knob
counterclockwise.
3. Remove the chain cover.
4. Put the chain drive links into the bar groove.
5. Put the chain cutters in the direction of the chain
operation.
5
English EN

6. Put the chain in position and make sure that the loop is
behind the guide bar.
7. Hold the chain and bar.
8. Put the chain loop around the sprocket.
9. Make sure the chain tension pin hole on the guide bar fits
correctly with the bolt.
10. Install the chain cover.
11. Tighten the chain. Refer to Adjust the chain tension.
12. Tighten the chain cover knob when the chain is well
tensioned.
NOTE
If you start the machine with a new chain, have a test for
2-3 minutes. After that, examine the tension again and
tighten the chain if necessary.
3.4 FIT THE POLE SAW
Figure 2-3
1. Mount the pole saw head on pole saw handle to achieve
the standard length.
2. Slide the collar upwards.
3. Turn the collar clockwise to tight it.
3.5 EXTENSION OF THE POLE SAW
Figure 2-3
1. Fit the extension pole between the pole saw handle and
the pole saw head to achieve the maximum length.
2. Slide the collars upwards.
3. Turn the collars clockwise to tight them.
WARNING
Periodically check the tightness of the connection of the
collars.
3.6 USE THE SHOULDER STRAP
Figure 4
1. Attach the carabiner to the carrying ring on the pole.
2. Put on the shoulder strap.
3. Adjust the length of the strap so that the carabiner is
about the width of a hand below your right hip.
3.7 CUTTING PREPARATION
Figure 4
Before you start to cut, make sure that
• Wear heavy gloves for maximum grip and protection.
• Maintain a proper grip on the machine during operation.
• Use your right hand grip on the rear handle while
your left hand grip on the pole shaft.
• Keep your body to the left of the chain line.
• Never use a left-handed (cross-handed) grip, or any
stance that places your body or arm across the chain
line.
• Never stand directly under the limb you are cutting.
• Periodically examine the tightness of the collars during
operation.
3.8 INSTALL THE BATTERY PACK
Figure 5
WARNING
• If the battery pack or charger is damaged, replace the
battery pack or the charger.
• Stop the machine and wait until the motor stops before
you install or remove the battery pack.
• Read, know, and follow the instructions in the battery
and charger manual.
1. Align the lift ribs on the battery pack with the grooves in
the battery compartment.
2. Push the battery pack into the battery compartment until
the battery pack locks into place.
3. When you hear a click, the battery pack is installed.
3.9 REMOVE THE BATTERY PACK
Figure 5
1. Push and hold the battery release button.
2. Remove the battery pack from the machine.
4 OPERATION
NOTE
Remove the battery pack and keep hands clear of the lock
out button when you move the machine.
IMPORTANT
Examine the chain tension before each use.
4.1 EXAMINE THE CHAIN
LUBRICATION
NOTE
Do not use the machine without sufficient chain lubrication.
Figure 6
1. Examine the lubricant level of the machine from the oil
indicator.
2. Add the lubricant if it is necessary.
4.2 START THE MACHINE
Figure 7
6
English
EN

1. Pull the lock-out button with your thumb backward.
2. Press the trigger at the same time.
4.3 STOP THE MACHINE
Figure 7.
1. Release the trigger to stop the machine.
4.4 DELIMBING A TREE
Figure 8
WARNING
Make sure that there is nothing or nobody in the area where
the branches fall.
• Stand opposite the branch you will cut.
• Start to cut the higher branches.
• Then cut the lower branches.
• Cut downwards to prevent the bar from jamming.
4.5 LIMB TREE BRANCHES
Limbing is to remove the branches from a fallen tree.
Figure 9
1. Keep the larger lower branches to hold the log off the
ground.
2. Remove the small limbs in one cut.
3. Limb the branches with tension from the bottom to up.
4. Keep the larger lower branches as a support until the log
is limbed.
5 MAINTENANCE
CAUTION
Do not let brake fluids, gasoline, petroleum-based materials
touch the plastic parts. Chemicals can cause damage to the
plastic, and make the plastic unserviceable.
CAUTION
Do not use strong solvents or detergents on the plastic
housing or components.
WARNING
Remove the battery pack from the machine before
maintenance.
5.1 ADJUST THE CHAIN TENSION
Figure 10.13.14
CAUTION
Wear protective gloves if you touch the chain, bar or areas
around the chain.
1. Loosen the chain cover by turning the chain cover knob
counterclockwise.
NOTE
It is not necessary to remove the chain cover to adjust the
chain tension.
2. Turn the chain tension screw behind the bar and chain
clockwise to increase the chain tension.
3. Turn the chain tension screw counterclockwise to
decrease the chain tension.
4. When the chain is at the wanted tension, tighten the chain
cover.
5.2 SHARPEN THE CUTTERS
Sharpen the cutters if it is not easy for the chain to go into the
wood.
NOTE
We recommend that a service center, which has an electric
sharpener, perform important sharpening work.
Figure 15-18.
1. Tensioning chain.
2. Sharpen the cutters corner with a 5/32 in. (4 mm)
diameter round file .
3. Sharpen the top plate, side plate and depth gauge with a
flat file.
4. File all the cutters to the specified angles and the same
length.
NOTE
During the process,
• Keep the file flat with the surface to be sharpened.
• Use the midpoint of the file bar.
• Use light but firm pressure when sharpening the
surface.
• Lift the file away on each return stroke.
• Sharpen the cutters on one side and then move to the
other side.
Replace the chain if:
• The length of the cutting edges is less than 5 mm.
• There is too much space between the drive links and the
rivets.
• The cut speed is slow
• Sharpening the chain many times but it does not increase
the cutting speed. The chain is worn.
5.3 GUIDE BAR MAINTENANCE
Figure 19-20.
7
English EN

NOTE
Make sure that it is turned over periodically to keep
symmetrical wear on the bar.
1. Lubricate the bearings on the nose sprocket (if present)
with the syringe (not included).
2. Clean the bar groove with the scraping hook (not
included).
3. Clean the lubrication holes.
4. Remove burr from the edges and level the cutters with a
flat file.
Replace the bar if:
• the groove is not fit with the height of the drive links
(which must never touch the bottom).
• the inside of the guide bar is worn and make the chain
lean to one side.
6 TRANSPORTATION AND
STORAGE
Before you move the machine, always
• Remove the battery pack from the machine.
• Keep hands clear of the lock-out button.
• Put the scabbard on the guide bar and the chain.
Before you put the machine into storage, always
• Remove all residual oil from the machine.
• Remove the battery pack from the machine.
• Clean all unwanted material from the machine.
• Make sure that the storage area is
• Not available to children.
• Away from agents which can cause corrosion, such as
garden chemicals and de-icing salts.
7 TROUBLESHOOTING
Problem Possible cause Solution
The machine does
not start.
The poles are not
assembled cor-
rectly.
Assemble the
poles according to
the instructions.
The lock-out but-
ton and trigger are
not depressed at
the same time.
1. Push and hold
the lock-out
button
2. While you
hold the lock-
out button,
pull the trig-
ger.
3. Release the
lock-out but-
ton to start the
machine.
Problem Possible cause Solution
The bar and chain
gets hot and
smokes.
Oil tank is empty. Fill the oil tank.
The discharge
port is blocked.
1. Remove the
battery pack.
2. Remove dirt
from the dis-
charge port.
Inlet opening of
inner oil tank is
blocked.
1. Clean the oil
tank.
2. Fill with clean
bar and chain
lubricant.
The sprocket is
stuck and clogged
with debris.
1. Clean the
sprocket.
2. Fill with clean
bar and chain
lubricant.
The bar and chain
gets too hot and
can not cut.
The chain tension
is too tight or too
loose.
Refer to Adjust
the Chain Tension
in the manual.
The chain is dull Sharpen or re-
place the chain.
The chain is put
on backwards.
Take out the chain
and turn it in the
right direction.
The motor runs,
but the chain does
not cut correctly,
or the motor stops
after around 3
seconds.
When you use the
machine under
load, it stops.
1. Release the
trigger.
2. Start the ma-
chine again.
The chain is not
lubricated.
Lubricate the
chain to decrease
the friction.
8 TECHNICAL DATA
Voltage 40V DC
No load speed 8 m/s
Guide bar length 200 mm
Chain stop < 2 s
Chain oil capacity 50 ml
Weight (without battery
pack)
3.9 kg
Measured sound pressure
level
LpA= 87.7 dB(A), KpA= 3
dB(A)
Guaranteed sound power
level
LwA.d= 104 dB(A)
Vibration < 2.5 m/s2 , K = 1.5 m/s2
Chain 91PJ033X/CL15033X/
JL9D-1X33
8
English
EN

Guide bar 080NDEA318/
M1500833-1318TL/
M1430833-1041TL
9 EC DECLARATION OF
CONFORMITY
Name and address of the manufacturer:
Name: Globe (Jiangsu) Co., Ltd
Address: No. 65 (3-4) Xinggang Rd., Zhonglou
Zone, Changzhou 213101 China
Name and address of the person authorised to compile the
technical file:
Name: Micael Johansson
Address: Riggaregatan 53, 211 13 Malmö
Herewith we declare that the product
Category: Polesaw
Model: 2000373(PSF301)
Serial number: See product rating label
Year of Construction: See product rating label
• is in conformity with the relevant provisions of the
Machinery Directive 2006/42/EC.
• is in conformity with the provisions of the following
other EC-Directives:
• 2014/30/EU
• 2000/14/EC & 2005/88/EC
• 2011/65/EU & (EU)2015/863
Furthermore, we declare that the following (parts/clauses of)
European harmonised standards have been used:
• EN 60745-1, EN ISO 11680-1, EN 55014-1, EN 55014-2,
EN ISO 3744, ISO 11094, IEC 62321-3-1, IEC 62321-4,
IEC 62321-5, IEC 62321-6, IEC 62321-7-1, IEC
62321-7-2, IEC 62321-8
Measured sound pow-
er level:
LwA: 103 dB(A)
Guaranteed sound
power level:
LwA.d: 104 dB(A)
Conformity assessment method to Annex V Directive
2000/14/EC.
The EC type-examination certificate number:13SHN0023-01
issued byIntertek Deutschland GmbH (Notified body 0905),
Stangenstraβe 1, 70771 Leinfelden-Echterdingen.
Place, date: Malmö,
01.01.2020
Signature: Ted Qu, Quality Director
9
English EN

1설명................................................... 11
1.1 용도................................................................. 11
1.2 개요................................................................. 11
2일반 전동 공구 안전 경고............... 11
3설치................................................... 11
3.1 기계 포장을 풉니다....................................... 11
3.2 바와 체인 윤활유의 첨가.............................. 11
3.3 가이드 바와 체인을 조립합니다.................. 11
3.4 고지톱 장착.................................................... 12
3.5 고지톱 연장.................................................... 12
3.6 어깨끈 사용.................................................... 12
3.7 절단 준비........................................................ 12
3.8 배터리 팩 설치............................................... 12
3.9 배터리 팩을 분리합니다............................... 12
4작동...................................................12
4.1 체인 윤활 상태를 검사합니다...................... 12
4.2 기계 작동 시작............................................... 12
4.3 기계 작동 중지............................................... 13
4.4 나뭇 가지 제거............................................... 13
4.5 나뭇 가지 치기............................................... 13
5유지관리...........................................13
5.1 체인 장력 조절............................................... 13
5.2 톱날 연마........................................................ 13
5.3 가이드바 유지관리........................................ 13
6운송 및 보관.....................................14
7문제 해결..........................................14
8기술 자료..........................................14
9 EC 적합성 선언............................... 15
10
한국어
KO

1설명
1.1 용도
작업자는 연결봉에 절단 부착물이 장착된 제품을 이용하
여 서있는 나무의 가지를 절단할 수 있지만 일반 충전톱
처럼 나무를 절단하는 목적으로 이용하지 마십시오.
이해력이 낮거나 경험 및 지식이 부족한 사람(어린이 포
함)은 이 제품을 사용할 수 없습니다. 이러한 경우에는 안
전에 대해 책임을 질 수 있는 사람이 제품 사용을 감독하
거나 지시해야 합니다.
어린이가 제품을 가지고 장난을 치지 않도록 지도해 주십
시오.
1.2 개요
그림
1 - 4.
1악세레바
2잠금 버튼
3몸통봉
4어깨끈
5연결대
6연장봉
7가이드바 커버
8오일 탱크 캡
9체인
10 바
11 칼집
12 고지톱 헤드
13 고지톱 핸들
14 체인 윤활유
15 오일 표시기
16 배터리
17 체인 커버 잠금 노브
18 톱니바퀴
19 체인 장력 핀 구멍
2일반 전동 공구 안전 경고
경고
안전 경고 및 지침을 모두 읽어야 합니다.
경고와
지침
을
따르지
않으면
감전
,
화재
및
/
또는
상해로
이어질
수
있습니다
.
향후에 참고하기 위해 모든 경고와 지침 문서를 보관하십
시오.
경고에서
“
전동
공구”의
용어는
배터리로
작동되는
(
무
선
)
전동
공구를
의미합니다
.
3설치
3.1 기계 포장을 풉니다
경고
사용하기 전에 기계를 제대로 조립해야 합니다.
경고
•부품이 훼손되었을 경우에는 기계를 사용하지 마십
시오.
•부품이 모두 있지 않으면 기계를 사용하지 마십시
오.
•부품이 훼손되었거나 빠져 있을 경우에는 서비스 센
터에 연락하십시오.
1. 포장을 엽니다.
2. 상자에 있는 설명서를 읽습니다.
3. 상자에서 조립되어 있지 않는 부품들을 꺼냅니다.
4. 상자에서 기계를 꺼냅니다.
5. 현지 규율에 따라 상자와 포장을 폐기합니다.
3.2 바와 체인 윤활유의 첨가
기계의 오일 양을 검사합니다. 오일 수위가 낮으면 바와
체인 윤활유를 다음과 같이 첨가합니다.
중요
체인과 체인 주유기 전용의 바 및 체인 윤활유를 사용합
니다.
알림
기계가 공장에서 바 및 체인 윤활유 없이 출시됩니다.
1. 오일 탱크에서 캡을 풀어 분리합니다.
2. 오일을 오일 탱크에 넣습니다.
3. 오일을 첨가하는 동안 오일 탱크에 불순물이 들어가
지 않도록 오일 표시기를 모니터링합니다.
4. 오일 캡을 닫습니다.
5. 오일 캡을 조입니다.
6. 전체 오일 탱크 양은 15-40분 동안 사용할 수 있습니
다.
중요
깨끗하지 못하거나, 사용했거나, 오염된 오일은 사용하
지 마십시오. 바나 체인이 훼손될 수 있습니다.
3.3 가이드 바와 체인을 조립합니다.
그림
10-14
1. 배터리 팩을 기계에서 분리합니다.
2. 체인 커버 노브를 반시계 방향으로 돌려서 체인 커버
를 풉니다.
3. 체인 커버를 분리합니다.
4. 체인 동력전달 고리를 바 홈에 넣습니다.
5. 체인 톱날을 체인 작동 방향으로 넣습니다.
6. 체인을 제 위치에 넣고 루프를 가이드 바 뒤에 놓습니
다.
7. 체인과 바를 잡습니다.
8. 체인 루프를 톱니바퀴 주위에 넣습니다.
11
한국어
KO

9. 가이드 바의 체인 장력 핀 구멍이 볼트와 제대로 맞아
야 합니다.
10. 체인 커버를 장착합니다.
11. 체인을 팽팽하게 당깁니다.
체인
장력
조절
을 참조합
니다.
12. 체인 장력이 잘 맞춰지면 체인 커버 노브를 조입니다.
알림
기계를 새로운 체인으로 시작하려면 2-3분 실험을 거쳐
야 합니다. 그 이후에 장력을 다시 검사하고 필요할 경
우 체인을 팽팽하게 해야 합니다.
3.4 고지톱 장착
그림
2-3
1. 표준 길이를 맞추기 위해 고지톱을 고지톱 헤드에 장
착합니다.
2. 이음 고리를 위쪽으로 밉니다.
3. 이음 고리를 시계 방향으로 돌려 단단히 조입니다.
3.5 고지톱 연장
그림
2-3
1. 최대 길이에 맞추려면 고지톱 핸들과 고지톱 헤드 사
이에 연장봉을 장착합니다.
2. 이음 고리를 위쪽으로 밉니다.
3. 이음 고리를 시계 방향으로 돌려 단단히 조입니다.
경고
고리가 단단히 연결되었는지 주기적으로 확인합니
다.
3.6 어깨끈 사용
그림
4
1. 연결용 고리를의 운반 고리에 부착합니다.
2. 어깨끈을 걸칩니다.
3. 연결용 고리가 오른 쪽 엉덩이 아래에 손 너비만큼 내
려오도록 하여 끈의 길이를 조절합니다.
3.7 절단 준비
그림
4
절단하기 전에 지켜야 할 사항
•최대한으로 움켜 쥐고 손을 보호하기 위해 두꺼운 장
갑을 착용합니다.
•작동 과정에서 기계를 적절하게 쥐고 있어야 합니다.
•왼손으로 폴대를 잡은 상태에서 오른손으로 뒤 핸
들을 잡습니다.
•사용자 몸은 체인 라인의 왼쪽으로 가게 합니다.
•왼손으로(손을 교차하여) 잡지 말고 신체나 팔을
체인 라인을 가로지르도록 하는 자세를 취하지 마
십시오.
•절단하고 있는 나뭇가지 바로 아래에 서지 마십시오.
•작동 과정에서 이음 고리의 장력을 주기적으로 검사
합니다.
3.8 배터리 팩 설치
그림
5
경고
•배터리 팩이나 충전기가 훼손되었을 경우에는 배터
리 팩이나 충전기를 교체합니다.
•배터리 팩을 설치나 분리하기 전에 기계를 중지하고
모터가 멈출 때까지 기다립니다.
•배터리 및 충전기 사용 설명서 내의 지침사항을 읽
고, 숙지하고, 실행하십시오.
1. 배터리 팩의 훅을 배터리 칸의 홈에 고정시킵니다.
2. 배터리 팩이 제 위치에 잠궈질 때까지 배터리 칸으로
밀어 넣습니다.
3. 클릭 소리가 날 때 배터리 팩이 설치됩니다.
3.9 배터리 팩을 분리합니다
그림
5
1. 배터리 분리 버튼을 밀고 기다립니다.
2. 배터리 팩을 기계에서 분리합니다.
4작동
알림
배터리 팩을 분리하여 기계를 옮길 때는 손을 잠금 해제
버튼에서 뗍니다.
중요
항상 사용 전에는 체인 장력을 검사합니다.
4.1 체인 윤활 상태를 검사합니다
알림
체인에 윤활유가 충분하지 않으면 기계를 사용하지 마
십시오.
그림
6
1. 오일 표시기를 통해서 기계의 윤활유 수준을 검사합
니다.
2. 필요할 경우 윤활유를 추가합니다.
4.2 기계 작동 시작
그림
7
1. 엄지로 로그아웃 버튼을 뒤로 당깁니다.
2. 악세레바를 동시에 누릅니다.
12
한국어
KO

4.3 기계 작동 중지
그림
7
1. 악세레바를 해제하여 기계 작동을 멈춥니다.
4.4 나뭇 가지 제거
그림
8
경고
나뭇 가지가 떨어지는 곳에는 사물이나 물체가 없어야
합니다.
•절단하려는 가지의 반대편에 서야 합니다.
•더 높은 가지부터 절단하기 시작합니다.
•이후에 더 낮은 가지를 절단합니다.
•바가 걸리는 것을 예방하기 위해 아래 방향으로 절단
합니다.
4.5 나뭇 가지 치기
나뭇가지 치기는 쓰러진 나무에서 나뭇가지를 제거하는
것입니다.
그림
9
1. 크면서도 낮은 나뭇가지는 지면에서 통나무를 집어내
기 위해서 그대로 둡니다.
2. 작은 나뭇가지는 한 번 절단하여 제거합니다.
3. 바닥에서 위쪽으로 장력을 사용하여 나뭇가지를 칩니
다.
4. 더 크고 낮은 나뭇가지는 통나무 가지를 칠 때까지 지
지대로 이용합니다.
5유지관리
조심
브레이크 용액, 가솔린 또는 석유를 원료로 하는 물질이
플라스틱 부품에 닿지 않도록 해야 합니다. 화학물질은
플라스틱을 훼손시킬 수 있고 쓸모 없게 만들 수 있습니
다.
조심
플라스틱 하우징이나 부품에 강한 용제나 세제를 사용
하지 마십시오.
경고
유지관리하기 전에 배터리 팩을 기계에서 분리합니다.
5.1 체인 장력 조절
그림
10.13.14
조심
체인, 바 또는 체인 주위의 부위를 만질 경우에는 보호
장갑을 착용합니다.
1. 체인 커버 노브를 반시계 방향으로 돌려서 체인 커버
를 풉니다.
알림
체인 장력을 조절하기 위해서는 체인 커버를 분리할 필
요가 없습니다.
2. 바와 체인 뒤의 체인 장력 나사를 시계 방향으로 돌려
서 체인 장력을 늘리십시오.
3. 체인 장력 나사를 반시계 방향을 돌려서 체인 장력을
줄이십시오.
4. 체인이 원하는 장력에 도달하면 체인 커버를 조입니
다.
5.2 톱날 연마
체인이 목재에 쉽게 들어가지 않을 경우에는 톱날을 연마
해야 합니다.
알림
중요한 연마 작업은 전기 연마기를 구비하고 있는 서비
스 센터에서 하는 것이 바람직합니다.
그림
15-18
1. 장력 체인.
2. 톱날 코너는 5/32인치(4mm) 직경의 둥근 줄로 연마합
니다.
3. 평줄로는 상부판, 옆판 그리고 깊이게이지를 연마합
니다.
4. 모든 톱날을 지정한 각도와 동일한 길이에 맞춰 다듬
어야 합니다.
알림
진행 과정에서는,
•줄 면을 연마할 표면에 맞춥니다.
•줄봉의 중심을 사용합니다.
•표면을 연마할 때는 부드럽지만 확실한 압력을 사용
합니다.
•낙뢰가 치면 항상 줄을 치워야 합니다.
•톱날을 한 면을 연마하고 나서 다른 면으로 옮깁니
다.
체인을 교체해야 할 경우:
•칼날의 길이나 5mm 미만이다.
•드라이브 링크와 리벳 사이에 공간이 너무 크다.
•절단 속도가 느리다.
•체인을 너무 많이 연마하여 절단 속도가 올라하지 않
는다. 체인이 낡았다.
5.3 가이드바 유지관리
그림
19-20.
13
한국어
KO

알림
바가 대칭적으로 닳게 하려면, 주기적으로 그것을 돌려
야 합니다.
1. 구리스펌프(포함되어 있지 않음)를 사용하여 사슬톱
니바퀴(있을 경우)의 베어링에 윤활유를 바릅니다.
2. 바 홈은 스크래핑 고리(포함되지 않음)로 청소합니다.
3. 윤활유 구멍도 청소합니다.
4. 가장자리의 불순물을 제거하고 체인은 평줄로 높이를
맞춥니다.
바를 교체해야 할 경우:
•홈이 드라이브링크(바닥에 닿아서는 안됨)의 높이와
맞지 않는다.
•가이드바의 내부가 낡았고 체인이 한 쪽면에 닿게 된
다.
6운송 및 보관
기계를 옮기기 전에 항상 지켜야 할 것들:
•배터리 팩을 기계에서 분리합니다.
•로그아웃 버튼을 손으로 대지 않습니다.
•바카바를 가이드바와 체인에 장착합니다.
기계를 보관하기 전에 항상 지켜야 할 것들:
•기계에서 잔류 오일을 모두 제거합니다.
•배터리 팩을 기계에서 분리합니다.
•모든 이물질을 기계에서 청소합니다.
•보관 구역은
•어린이들이 이용할 수 없습니다.
•정원용 화학제와 해동 제빙염 같이 부식의 원인이
될 수 있는 물질을 제거합니다.
7문제 해결
문제 가능한 원인 해결 방안
기계가 시작하지
않습니다.
연결봉이이 제대
로 결합되지 않
았습니다.
봉을 지침에 따
라 조립합니다.
로그아웃 버튼과
악세레 바가 동
시에 밀려지지
않습니다.
1. 로그아웃 버
튼을 밀고 기
다립니다
2. 로그아웃 버
튼을 잡은 상
태에서 악세
레 바를 당깁
니다.
3. 로그아웃 버
튼을 해제하
여 기계 작동
을 시작합니
다.
문제 가능한 원인 해결 방안
바와 체인이 뜨
거워지고 연기가
납니다.
오일 탱크가 비
어 있습니다.
오일 탱크를 채
웁니다.
배출 포트가 막
혀 있습니다.
1. 배터리 팩을
분리합니다.
2. 배출 포트에
서 오물을 제
거합니다.
내부 오일 탱크
의 주입구가 막
혀 있습니다.
1. 오일 탱크를
청소합니다.
2. 깨끗한 바 및
체인 윤활유
로 채웁니다.
톱니바퀴에 이물
질이 묻어서 막
혀 있습니다.
1. 톱니바퀴를
청소합니다.
2. 깨끗한 바 및
체인 윤활유
로 채웁니다.
바와 체인이 너
무 뜨거워져서
절단할 수 없습
니다.
체인 장력이 너
무 팽팽하거나
너무 느슨합니
다.
사용 설명서의
체인 장력 조절
장을 참조합니
다.
체인 기능이 둔
해짐
체인을 연마하거
나 교체합니다.
체인을 거꾸로
장착함.
체인을 빼내어
오른쪽 방향으로
돌립니다.
모터가 작동하지
만 체인이 제대
로 절단하지 않
거나 모터가 약 3
초 후에 멈춥니
다.
부하 중의 기계
를 사용할 때 기
계가 멈춥니다.
1. 악세레바를
풉니다.
2. 기계 작동을
다시 시작합
니다.
체인에 윤활유가
칠해져 있지 않
습니다.
체인에 윤활유를
칠해서 마찰을
줄입니다.
8기술 자료
전압 40V DC
무부하 속도 8 m/s
가이드바 길이 200 mm
체인 정지 < 2 s
체인 오일 용량 50 ml
중량(배터리 팩 제외) 3.9 kg
측정된 음압 레벨 LpA= 87.7 dB(A), KpA= 3
dB(A)
보증된 음향 출력 레벨 LwA.d= 104 dB(A)
진동 < 2.5 m/s2 , K = 1.5 m/s2
14
한국어
KO

체인 91PJ033X/CL15033X/
JL9D-1X33
가이드바 080NDEA318/
M1500833-1318TL/
M1430833-1041TL
9 EC 적합성 선언
제조사 이름 및 주소:
이름: Globe (Jiangsu) Co., Ltd
주소: No. 65 (3-4) Xinggang Rd., Zhonglou Zone, Changz-
hou 213101 China
기술 파일 제출 담당자의 이름 및 주소:
이름: Micael Johansson
주소: Riggaregatan 53, 211 13 Malmö
당사 제품에 대한 선언
카테고리:고지톱
모델: 2000373(PSF301)
일련 번호:제품 정격 라벨 참조
제조 연도:제품 정격 라벨 참조
•기계류 지침 2006/42/EC의 관련 조항을 준수합니다.
•아래와 같은 그 외 EC-지침들의 조항을 준수합니다.
• 2014/30/EU
• 2000/14/EC & 2005/88/EC
• 2011/65/EU & (EU)2015/863
또한 당사는 아래와 같은 유럽 통일 규격(의 부분/절)을
사용했음을 선언합니다.
• EN 60745-1, EN ISO 11680-1, EN 55014-1, EN 55014-2,
EN ISO 3744, ISO 11094, IEC 62321-3-1, IEC 62321-4,
IEC 62321-5, IEC 62321-6, IEC 62321-7-1, IEC
62321-7-2, IEC 62321-8
측정된 음향 출력 레
벨:
LwA: 103 dB(A)
보증된 음향 출력 레
벨:
LwA.d: 104 dB(A)
부첨 VI 지침 2000/14/EC의 적합성 평가 방식.
EC 유형-검사 인증 번호: 13SHN0023-01발행자Intertek
Deutschland GmbH (Notified body 0905), Stangenstraβe 1,
70771 Leinfelden-Echterdingen.
장소 및 날짜: Mal-
mö, 01.01.2020
서명: Ted Qu, 품질 관리자
15
한국어
KO

1.................................................17
1.1 ........................................................... 17
1.2 ................................................................ 17
2
.....................................................17
3................................................ 17
3.1 ....................................................17
3.2 .............................................17
3.3 ........................................ 17
3.4 ..............................................17
3.5 ......................................... 18
3.6 ...........................................................18
3.7 ....................................................... 18
3.8 ......................................................18
3.9 ....................................................... 18
4................................................ 18
4.1 ...............................................18
4.2 ................................................... 18
4.3 ..........................................................18
4.4 ...................................................18
4.5 ................................................................ 18
5........................................... 19
5.1 ................................................19
5.2 ........................................................ 19
5.3 .................................................. 19
6............................19
7.......................................... 19
8.........................................20
9 EC..................... 20
16
TH

1
1.1
()
1.2
1-20
1
2
3
4
5
6
7
8
9
10
11
12
13
14
15
16
17
18
19
2
/
"" ()
()
3
3.1
•
•
•
1.
2.
3.
4.
5.
3.2
1.
2.
3.
4.
5.
6. 15 - 40
3.3
10-14
1.
2.
3.
4.
5.
6.
7.
8.
9.
10.
11.
12.
2-3
3.4
2-3
1.
2.
3.
17
TH

3.5
2-3
1.
2.
3.
3.6
4
1.
2.
3.
3.7
4
•
•
•
•
• ()
•
•
3.8
5
•
•
•
1.
2.
3.
3.9
5
1.
2.
4
4.1
6
1.
2.
4.2
7
1.
2.
4.3
7
1.
4.4
8
•
•
•
•
4.5
9
1.
2.
3.
4.
18
TH

5
5.1
10.13.14
1.
2.
3.
4.
5.2
15-18
1.
2. 5/32 (4 .)
3.
4.
•
•
•
•
•
• 5 .
•
•
•
5.3
19-20.
1. () ()
2. ()
3.
4.
• ()
•
6
•
•
•
•
•
•
•
•
•
7
1.
2.
3.
19
TH

1.
2.
1.
2.
1.
2.
3
1.
2.
8
40V DC
8 m/s
200 mm
< 2 s
50 ml
() 3.9 kg
LpA= 87.7 dB(A), KpA= 3
dB(A)
LwA.d= 104 dB(A)
< 2.5 ./2 , K = 1.5 ./
2
91PJ033X/CL15033X/
JL9D-1X33
080NDEA318/
M1500833-1318TL/
M1430833-1041TL
9 EC
:
: Globe (Jiangsu) Co., Ltd
: No. 65 (3-4) Xinggang Rd., Zhonglou Zone, Changz-
hou 213101 China
:
: Micael Johansson
: Riggaregatan 53, 211 13 Malmö
:
: 2000373(PSF301)
:
:
• Machinery Directive 2006/42/EC
• EC
• 2014/30/EU
• 2000/14/EC 2005/88/EC
• 2011/65/EU (EU)2015/863
(/)
• EN 60745-1, EN ISO 11680-1, EN 55014-1, EN 55014-2,
EN ISO 3744, ISO 11094, IEC 62321-3-1, IEC 62321-4,
IEC 62321-5, IEC 62321-6, IEC 62321-7-1, IEC
62321-7-2, IEC 62321-8
: LwA: 103 dB(A)
: LwA.d: 104 dB(A)
VI Directive 2000/14/EC
EC: 13SHN0023-01
Intertek Deutschland GmbH (Notified body 0905),
Stangenstraβe 1, 70771 Leinfelden-Echterdingen
: Malmö,
01.01.2020
: Ted Qu
20
TH

1描述...................................................22
1.1 目的................................................................. 22
1.2 概览................................................................. 22
2电动工具通用安全警告...................22
3安装...................................................22
3.1 打开机器包装................................................. 22
3.2 添加导板链条润滑油..................................... 22
3.3 安装导板和锯链............................................. 22
3.4 安装高枝锯..................................................... 22
3.5 高枝锯的延长................................................. 23
3.6 使用肩带......................................................... 23
3.7 切割准备......................................................... 23
3.8 安装电池......................................................... 23
3.9 取下电池包..................................................... 23
4操作...................................................23
4.1 检查链条润滑情况......................................... 23
4.2 启动机器......................................................... 23
4.3 停止机器......................................................... 23
4.4 砍伐枝桠 ........................................................ 23
4.5 砍树枝............................................................. 23
5维护...................................................24
5.1 调整链条张紧度............................................. 24
5.2 打磨锯齿......................................................... 24
5.3 导板维护......................................................... 24
6运输和存放.......................................24
7常见故障处理...................................24
8技术数据...........................................25
9 EC 符合性声明................................ 25
21
简体中文
ZH

1描述
1.1 目的
本产品的切割装置安装在锯杆上,使操作员能够切割立
木的树枝,但不能像普通链锯一样用于切割木材。
对本机器不够了解或缺乏经验和知识的人员(包括儿
童),必须由其安全负责人给予本机器使用方面的指导
或在其安全负责人监督下才能使用本机器。
应对儿童进行监督,确保其不玩弄本机器。
1.2 概览
图
1-20
1扳机
2反自锁按钮
3锯杆
4肩带
5旋帽
6延长杆
7导杆罩
8油箱盖
9链条
10 导杆
11 刀鞘
12 高枝锯头
13 高枝锯后手柄
14 链条润滑油
15 油位指示器
16 电池
17 链罩锁钮
18 链轮
19 链条锁紧销孔
2电动工具通用安全警告
警告
请阅读全部安全警告和使用说明。
未能遵循这些警告
和使用说明可能会导致触电、火灾和
/
或严重伤害。
保留所有警告和使用说明以备将来参考。
警告中的「电动工具」一词指您的电池式
(
无线
)
电动工
具。
3安装
3.1 打开机器包装
警告
须确保正确安装机器后再使用。
警告
•如果部件损坏,切勿使用机器。
•如果部件不全,请勿操作机器。
•如果部件损坏或丢失,请与服务中心联系。
1. 打开包装。
2. 阅读包装箱中的文档。
3. 从包装箱中取出所有未安装的部件。
4. 从包装箱中取出机器。
5. 根据当地法规丢弃包装箱和包装。
3.2 添加导板链条润滑油
检查机器中的润滑油量。如果油位太低,请按下面的步
骤添加导板链条润滑油。
重要
请使用仅适用于链条和链条注油器的导板链条润滑油。
注
出厂时,机器中没有导板链条润滑油。
1. 拧松并取下油箱上的油箱盖。
2. 将润滑油倒入油箱中。
3. 随时查看油位指示器,加油时确保油箱中没有污物。
4. 盖上油箱盖。
5. 拧紧油箱盖。
6. 整箱润滑油可使用 15 至40 分钟。
重要
切勿使用不干净、使用过或被污染的润滑油,否则可能
损坏导板或链条。
3.3 安装导板和锯链
图
10-14
1. 取下电池包。
2. 逆时针旋转侧盖锁紧旋钮,使侧盖松动。
3. 取下侧盖。
4. 将链条传动链节放入刀槽中。
5. 沿链条运行的方向放置锯齿。
6. 将链条放置到位,确保链环位于导板后方。
7. 握住链条和导板。
8. 将链环缠在链轮四周。
9. 确保导板上的链条锁紧销孔与面板上的张紧螺栓重
合。
10. 安装侧盖。
11. 拧紧链条。请参考
“调整链条张紧度”。
12. 调整好链条张紧度后,拧紧侧盖锁紧旋钮。
注
首次开始使用装有新链条的链锯时,应先测试 2至3分
钟。然后再次检查链条张紧度,必要时张紧链条。
3.4 安装高枝锯
图
2-3
1. 将高枝锯头安装在高枝锯后手柄上,以获得标准长
度。
2. 将旋帽向上滑动。
3. 顺时针旋转旋帽,将其拧紧。
22
简体中文
ZH
This manual suits for next models
1
Table of contents
Languages:
Other Power works Pole Saw manuals
