SPECIFIC SAFETY RULES AND/OR SYMBOLS
Hold tool by insulated gripping surfaces when performing an operation
where the cutting tool may contact hidden wiring. Contact with a “live” wire will
also make exposed metal parts of the tool “live” and shock the operator.
Hold power tool by insulated gripping surfaces, when performing an operation
where the fastener may contact hidden wiring or its own cord. Fasteners contacting
“live” may make exposed metal parts of the power tool “live” and could give the operator
an electric shock.
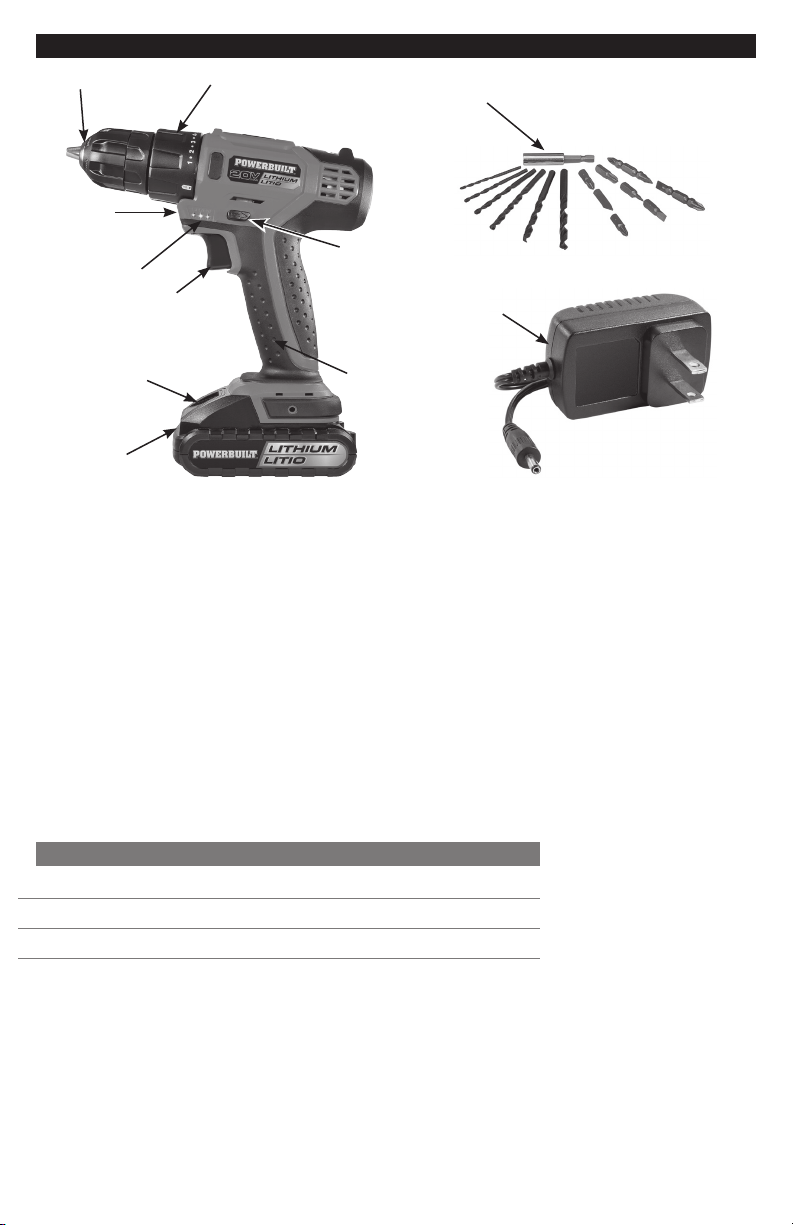
SAFETY RULES FOR CORDLESS DRILL / DRIVERS
Always wear safety goggles or eye protection when using this tool. Use a dust
mask or respirator for applications which generate dust.
Do not grasp the tool or place your hands too close to the spinning chuck or
drill bit. Your hand may be lacerated or may cause injury.
Secure the material being worked on. Never hold it in your hand or across
your legs. Unstable support can cause loss of control and injury.
Position yourself to avoid being caught between the tool or side handle and
walls or posts. Should the socket or bit become bound in the work, the reaction torque
of the tool could crush your hand or leg.
Check to see that keys and adjusting wrenches are removed from the
Cordless Drill before switching the tool “ON”. Keys or wrenches can fly away at
high velocity striking you or a bystander.
When using the Cordless Drill, always maintain a firm grip on the tool with
both hands.
Hold tool by insulated gripping surfaces when performing an operation
where the cutting tool may contact hidden wiring. Contact with a “live” wire will
also make exposed metal parts of the tool “live” and shock the operator.
Keep the handle of the Cordless Drill dry, clean, and free from oil and grease.
Do not run the Cordless Drill while carrying it at your side. A spinning socket or bit
could become entangled with clothing and injury may result.
Disconnect the plug or remove the battery pack from tool and place the switch
in the locked or “OFF” position before making any assembly adjustments,
changing accessories, performing any inspection, maintenance or cleaning
procedures. Such preventive safety measures reduce the risk of starting the tool
accidentally.
Do not use the Cordless Drill if it has been damaged, left outdoors in the
rain, snow, wet or damp environments, or immersed in liquid.
Maintain labels and nameplates on the Cordless Drill. These carry important
information. If unreadable or missing, contact Alltrade for a replacement.
7