SKIPIO SGF-6 User manual

MERCHANDISER
FREEZER GLASSDOOR
User Manual
MODEL SGF-6
www.skipio.com.au
Y E A R
Sydney Head Office
T
+61 - 02 - 8798 - 5061 / 5283 / 5581
F
+61 - 02 - 8798 - 5707
Please read this manual thoroughly prior to use.
Please make sure that it is an actual breakdown by reading this manual prior to service request.

Index
2
Features and
Benefits of the
Skipio
Glass Door
Freezer
Delicate LED LAMP
Delicate LED Lamps will maximise luxurious display effects.
Innovative Design for energy efficiency
High efficiency design saves electricity usage drastically.
Cycle Type
By using HOT GAS Cycle, the unit is able to moderate temperature precisely.
Highly Efficient, Low sound Compressor
Highly Efficient and low sound compressor used.
Designed for Safety
Understanding
and Preparation
3Name of the Components
4Safety Precautions
6Grounding
Reference Frequently asked questions
9Troubleshooting
10
11
Specification
Installation
Procedures
7Installation
8Temperature Adjustment
Precautions
prior to use
The inner temperature may change due to frequent use of the doors, the amount of
stored food and surrounding conditions.
When the amount of food stored is small, please raise the temperature.
If a power outage happens or the power cord is unplugged and then plugged in again,
the set temperature before the power outage is displayed automatically.
Please adjust the temperature according to the room temperature
Do not store any type of medicine, chemical, restorative, or medicinal herb, etc.
- Compensation is not available in the event of the above situations
The unit is for 240V only. Do not use a transformer
to raise the voltage in the areas of 110V.
Do not use an adapter for 110V.
(This can cause an electric shock or fire.)

Name of the Components
Side ViewFront View
Evaporator
Glass Door
Digital
Control
Castor
Lamp
Evaporator Motor
Condenser
Condenser
Motor
Compressor
Adjustable Leg
Keyhole
for Door Lock
Compressor
Cover
3
Shelf
4
Precautions
Do not use this unit for uses other than its intended use.
If the unit is used for other purposes than its intended use or used unsafely,
any damage occurred will not be compensated under the consumer protection laws.
(Applicable to all models)
• Please follow all the recommended safety precautions listed in this manual to
prevent any danger or property damage.
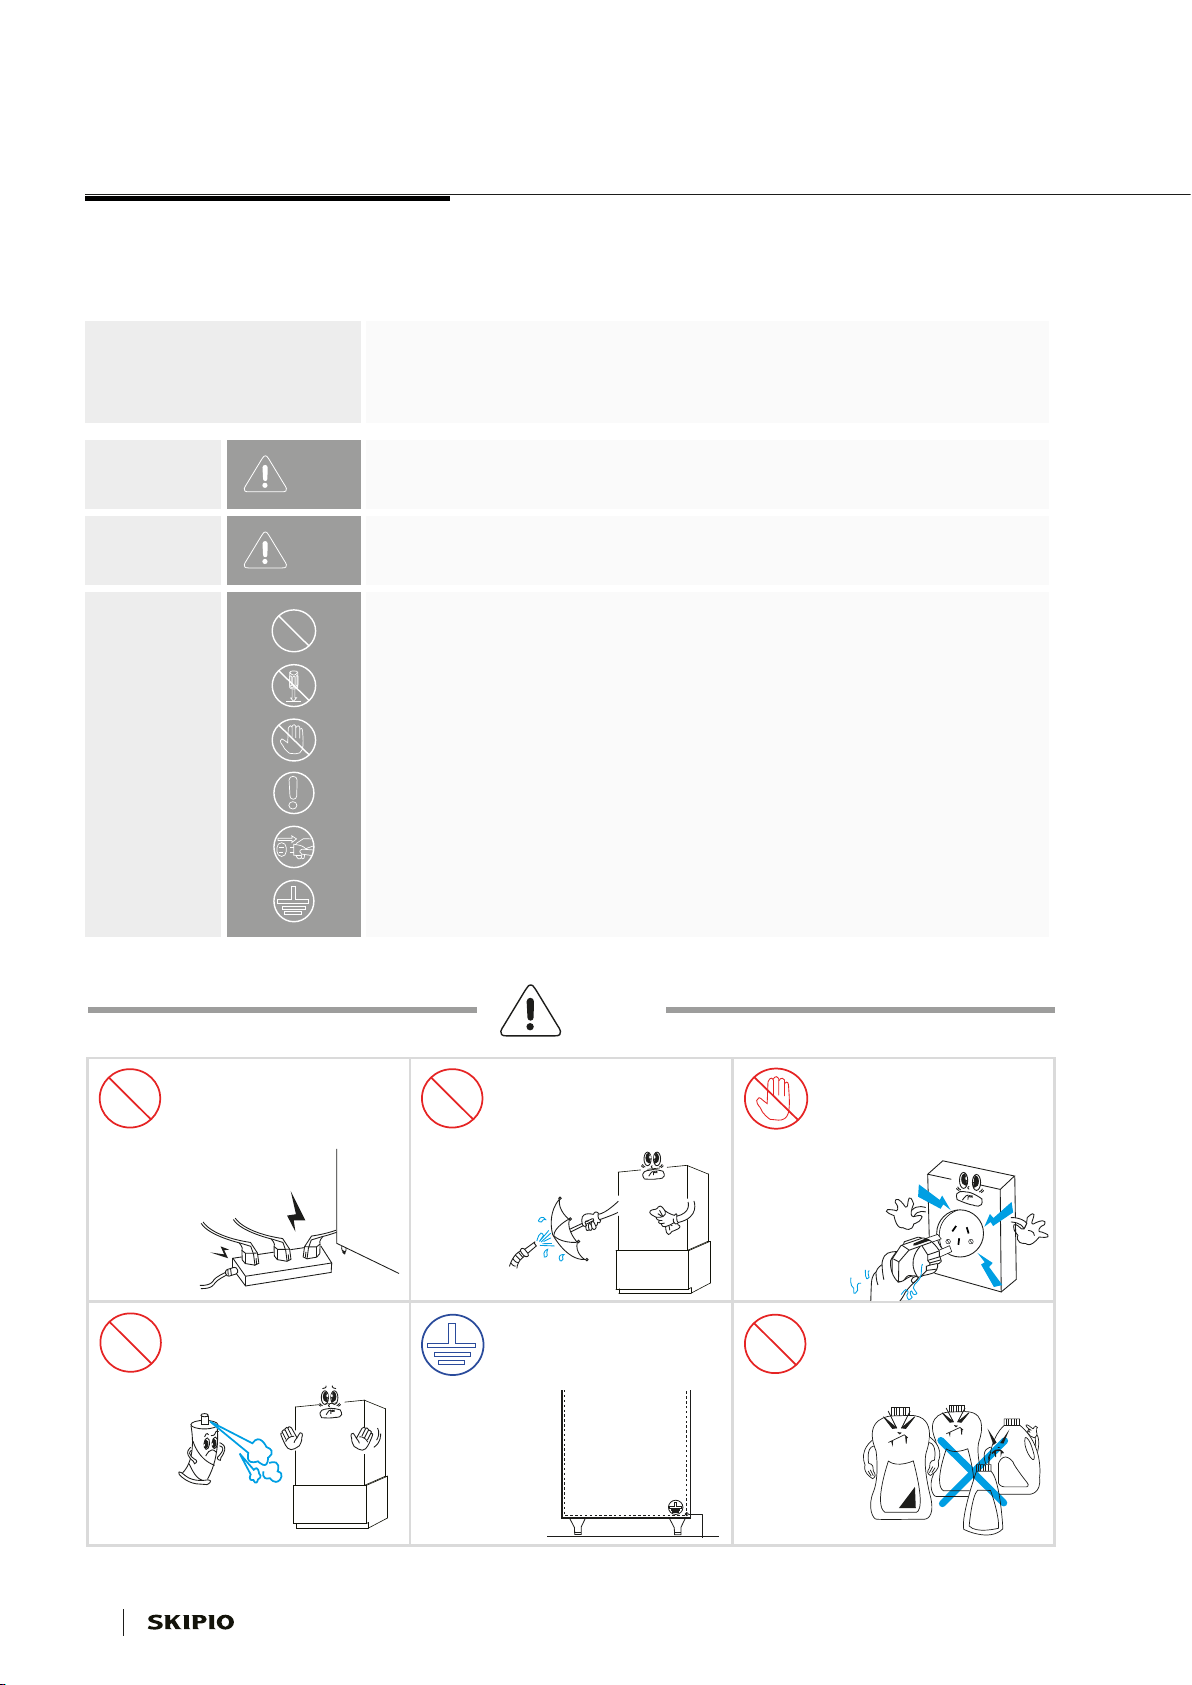
Safety Precautions
The content
of warning
May cause death or severe injury.
Warning
The content
of Caution
May cause minor injury or property damage.
Caution
The content
of safety
signs and
messages
Prohibited
Disassembly prohibited
Contact prohibited
Must comply
Disconnect the power plug
Grounding required to prevent an electric shock
Warning
Prohibited
Prohibited ProhibitedGrounding
Prohibited Wet hand
prohibited
Do not plug into a power board
with other equipment, and plug
into a designated power point instead.
- This can cause a damage
to the unit or fire.
Do not use flammable sprays near
the unit.
- It can cause an explosion or fire.
Grounding is required, otherwise
this can cause a breakdown or
electric shock.
Do not store any volatile or
flammable materials around the
unit such as benzene, paint thinner,
alcohol, LP-gas, and certain chemicals.
- This may cause explosion.
Do not spray water onto inside
or outside of this unit. This can
cause a fire or electric shock.
- Wet hand prohibited.
Do not touch the power plug,
electrical parts, and the control
panel with wet hands.
- This can cause an electric shock and
an injury.
5
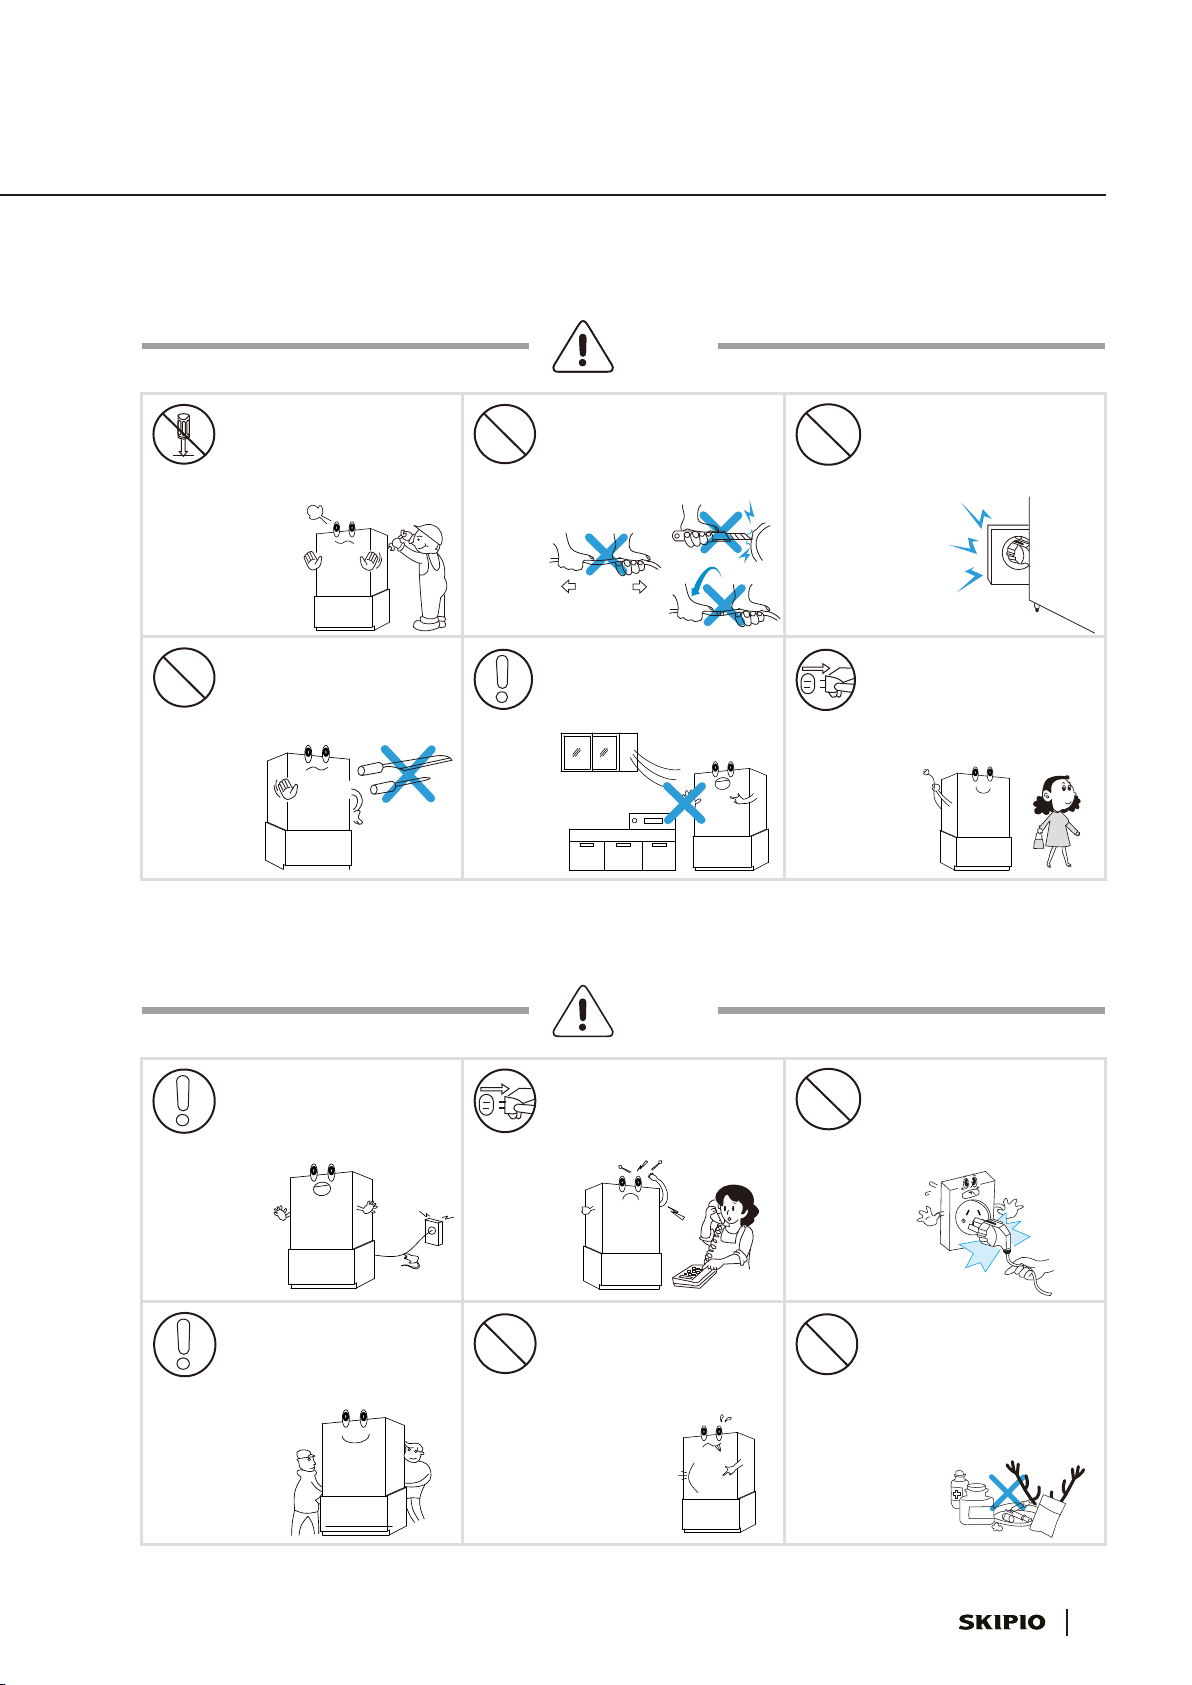
Safety Precautions
Warning
Disassembly
prohibited
Do not disassemble, repair or modify
the unit. Do not let a child play with it,
change the settings, or operate the
unit by themselves.
-These can cause an injury,
fire, or electric shock.
Do not damage, modify, bend,
pull, or twist the power cord.
-A damaged power cord can cause
a fire or electric shock.
Make sure that the power plug
is not pressed against and give
enough room to plug in and out.
- Damaged power plug can cause a
fire from overheating.
Do not use any sharp objects
on the unit.
- Will damage the unit.
Prohibited
Warning
Prohibited
When the unit is not being used
for a long time or in the case of
thunder or lightning, disconnect
the power plug.
-Even though it is not being used,
if the unit is plugged in, there could
be an electric shock and fire from
overheating.
Prohibited
If suspected leak, please do not
touch the unit and open a
window for ventilation.
Cautions
Place the unit where there is no
inhabitation of animals such as mice.
-They can gnaw on electric wires.
If strange sounds, smells, or smoke
is detected, immediately disconnect
the power plug and contact your
local dealer for service.
When trying to plug out, do not
pull the wire, instead grab the
body of the power plug and pull.
-If the end of the power cord gets
destroyed, a fire or electric shock can
occur.
When moving the unit, make
sure that it is carried by several
people as it is heavy.
-Unit must be upright when
transporting the unit.
Prohibited
ProhibitedProhibited
Do not store any type of medicine,
chemical, restorative, or medicinal
herb/s.
- Any products which require precise
temperature control can be spoiled
or have unexpected dangerous
reactions.
-Compensation is not available in the
event of the above situations.
Do not store excessive amount of
food.
-Do not put any electronic devices
inside the unit, this can cause an
injury, electric shock, or fire.
Cautions
Cautions
Disconnection
of the power plug
Disconnection
of the power plug

6
• To prevent a short circuit or electric shock, grounding is required.
Grounding
Safety Precautions
Make sure that the power socket
is not wet or dusty and push it all
the way in when plugging in.
-Any substance, dust on the plug or
unstable contact can cause a fire.
If unit is plugged out from the
power socket, please wait 5
minutes before plugging back in.
-It may damage the unit if plugged
in too soon.
If the power socket’s holes are
loose, do not plug in.
-This can cause an electric shock or fire.
Do not place hands underneath
the unit.
-Sharp-pointed parts can cause an
injury.
Prohibited
5 min!
AC 240V with
ground prong
As it is 240V, there is no need to ground.
(Even AC 200V sockets with a hole for grounding
may not have ground wires connected inside the
building, so please confirm this before use)
AC 240V socket with no
ground prong
1Please connect ground wires to copper
ground plate, then bury the plate underground.
- Copper Plate Size: Thickness:
over 0.7mm / over 900cm2
Length: over 17cm
2Please plug into the designated power point
with a ground wire connected properly.
※Do not connect to the surfaces of the below for grounding.
Ground prongs
240V
wall socket
Ground wire
: over 75cm
Power point
with a ground wire
Ground wire
Gas valve Plastic water valve Phone cable
Warning Warning
Wet hand
prohibited
Copper plate
Cautions

7
240V
humid
Install the unit indoor.
-The unit is designed for indoor use only.
-Using the unit outdoor can damage the unit
and may cause low performance.
Make sure to install the unit on solid and
even surfaces.
- Installation on unstable surfaces can cause
vibration, leaks and noise.
- If the surface is not even, place a solid board
underneath the unit.
- Lock the wheels so that the unit is fixed to the
surface.
Avoid placing the unit in areas which
heat or flammable gases are frequently
produced.
- Coal briquettes or flammable gases can cause
the change of colour of the unit’s exterior or
shorten the life of the unit as it can get rusty.
Please install the unit in a good ventilated
place.
-Will make the unit run efficiently.
-If you cannot install in a good ventilated place,
installing an exhaust fan is a good idea.
Do not place the unit in areas where water
can be splashed on to the unit, there are
a lot of dusts, or highly humid.
-If the unit is installed where it is humid or
there is contact with water, the unit can get
rusty and it can also cause a short circuit.
-Keep the unit out of direct sunlight or any
heating object.
Avoid placing the unit where there is
direct sunlight or near any equipment
such electric or petrol stove which produce
heat.
Please place the unit in room temperatures
between 10°C to 35°C for optimal
performance.
-Room temperatures below 10°C will make it
harder to defrost parts inside the unit.
-Room temperature above 35°C will make the
unit work harder to maintain temperature
thus shortening its lifespan and core parts
breaking down.
Check the rated voltage of the area
before plugging in the unit.
- This unit is for 240V only.
- This unit cannot be used in the areas of 110V.
(Using a transformer to raise the voltage will
cause breakdown of the unit.)
Installation
5cm
please check!
Please plug in the unit 2 to 3 minutes after
installing the unit into a 240V socket.
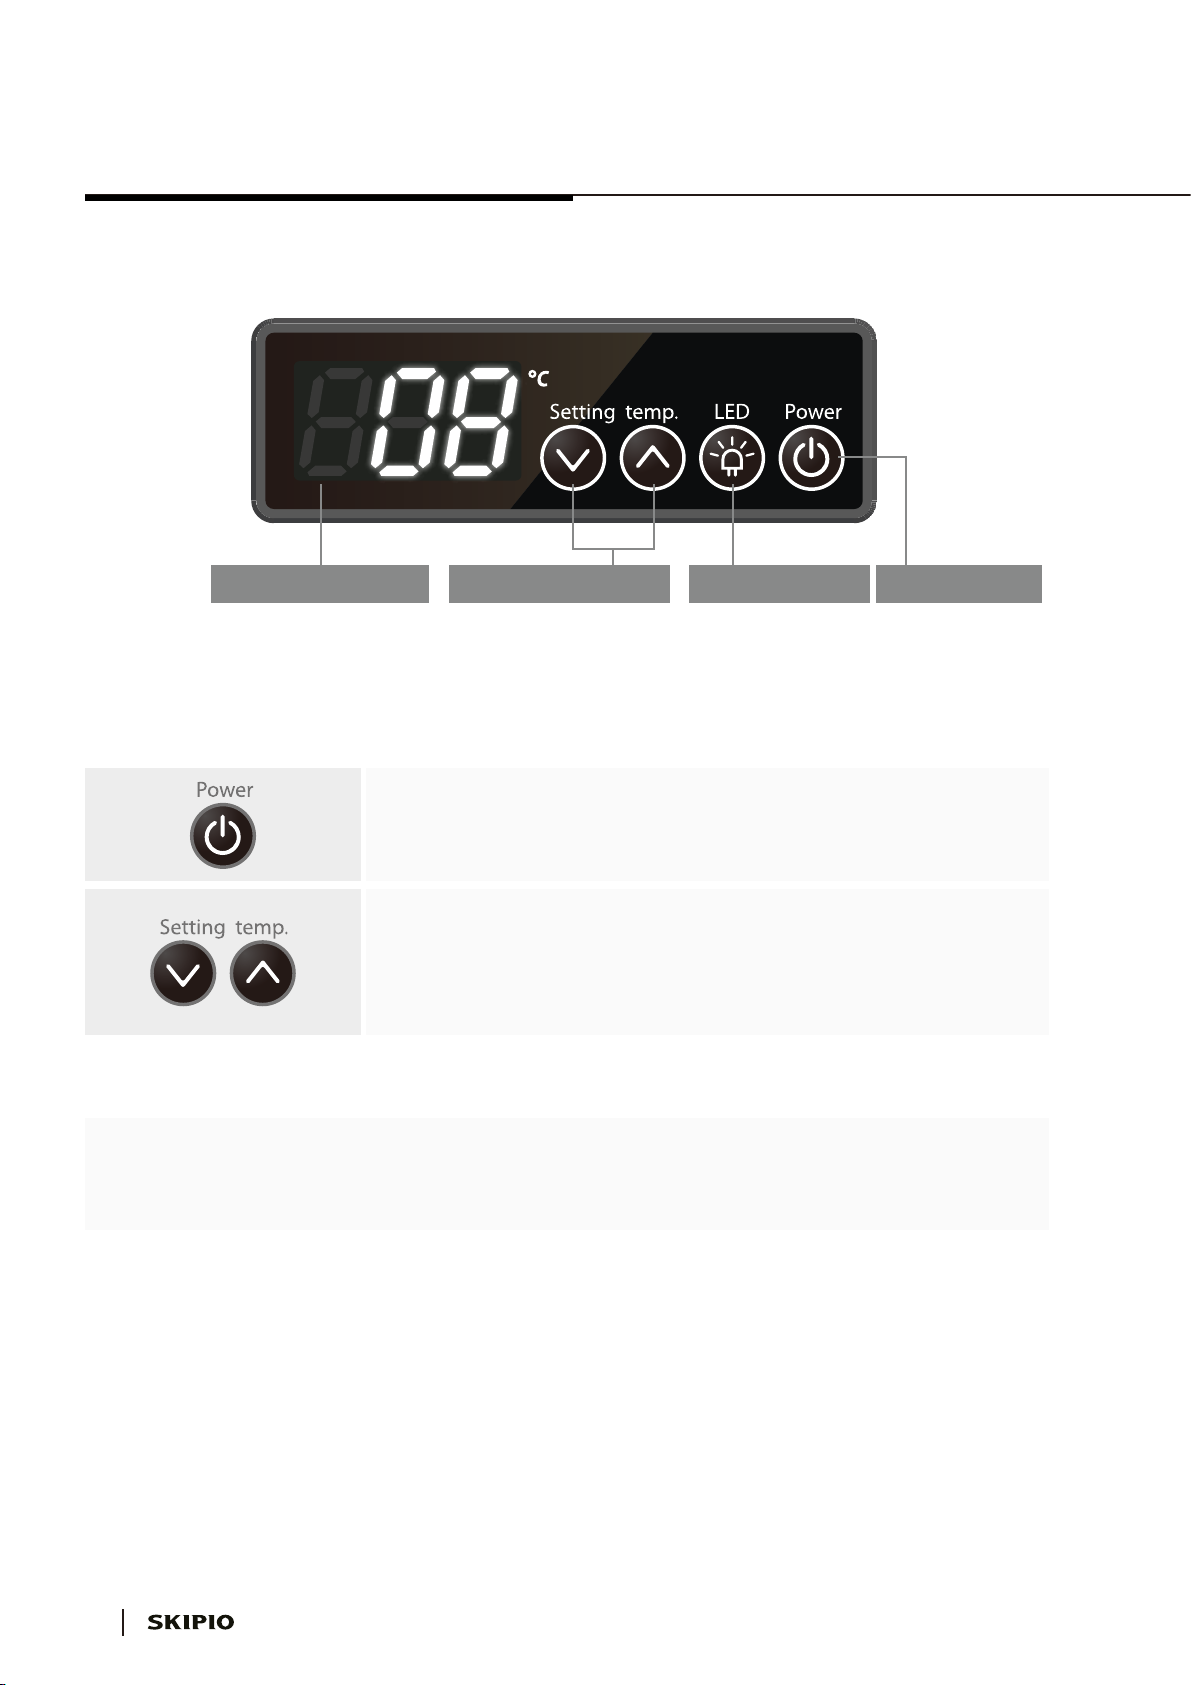
• Please press the power button to turn on the unit.
•
Once plugged in, the unit will turn on. There may be cases where the unit will turn on,
but the compressor will start running 5 minutes later.
-Shows current and set
temperatures.
Temperature Display
-Turns on/off the
LED light.
LED Lamp Button
-Turns the unit on/off.
(exept LED)
Power Button
-Up and down buttons used
to set desired temperatures.
Temperature Set Buttons
•
Please use the Down button or Up button to set your desired temperature.
Please wait 3 seconds after setting your desired temperature for the desired
temperature to be set.
•
For each time you press the Down button or Up button, the temperature will move
in intervals of a degree.
• How to control Temperature
• To preserve food properly, please use an adequate temperature.
• If you plug the unit out then back in or turn off and turn back on, the unit will drop to previously set temperature.
• Please note
8
Temperature Adjustment

Problem Possible Cause Possible Solution
Unit is not dropping
temperature or dropping
temperature.
Hear weird sounds from unit.
1. Is the unit plugged in? 1. Please plug in the unit.
2. Is the set temperature on the unit high? 2. Please set the temperature lower.
3. Is the unit close to any heat sources? 3. Please move the heat sources away.
4. Is there anything close to the unit? 4. Please make sure there is at least 10cm
gap in the front and back of the unit.
7. Is the exhaust blocked off? 7. Please remove objects that are blocking
the exhaust.
2. Please move the unit away for walls and
objects. Unit needs 10cm gap.
2. Is the unit too close to a wall or an object?
1. Is the unit level or is on a weak surface? 1.Please place unit on a levelled plane and
on a hard surface.
3. Are there any objects next to the unit? 3. Please remove objects.
4. Is there any foreign objects inside the
compressor compartment? 4. Please remove foreign objects.
5. Is the door completely shut?
Is the door being open frequently?
5. Please close the door and try to not open
the door frequently.
6. Is there anything in front of the compressor? 6. Please remove anything that is obstructing the
airflow of the compressor.
Troubleshooting
9

These are sound that the unit makes when turned on for
the first time from the compressor. Over time, the sounds
will die down as the unit goes over its cycle.
You may hear these sounds when the unit is in its cycle to
drop the temperature as well.
This is cause due to the room temperature being too
different to the temperature inside, the unit door’s being
open for a long time, or if there is a lot of food inside
without lids.
10
Frequently Asked Questions
Hear liquid flowing/dripping inside the unit.
Hear sounds from inside the unit.
(Humming sounds, clicking sounds,
motor running sounds etc)
There is condensation on the glass.
Question Answer
Condensation from the evaporator inside.
This is so that the evaporator does not freeze.
11
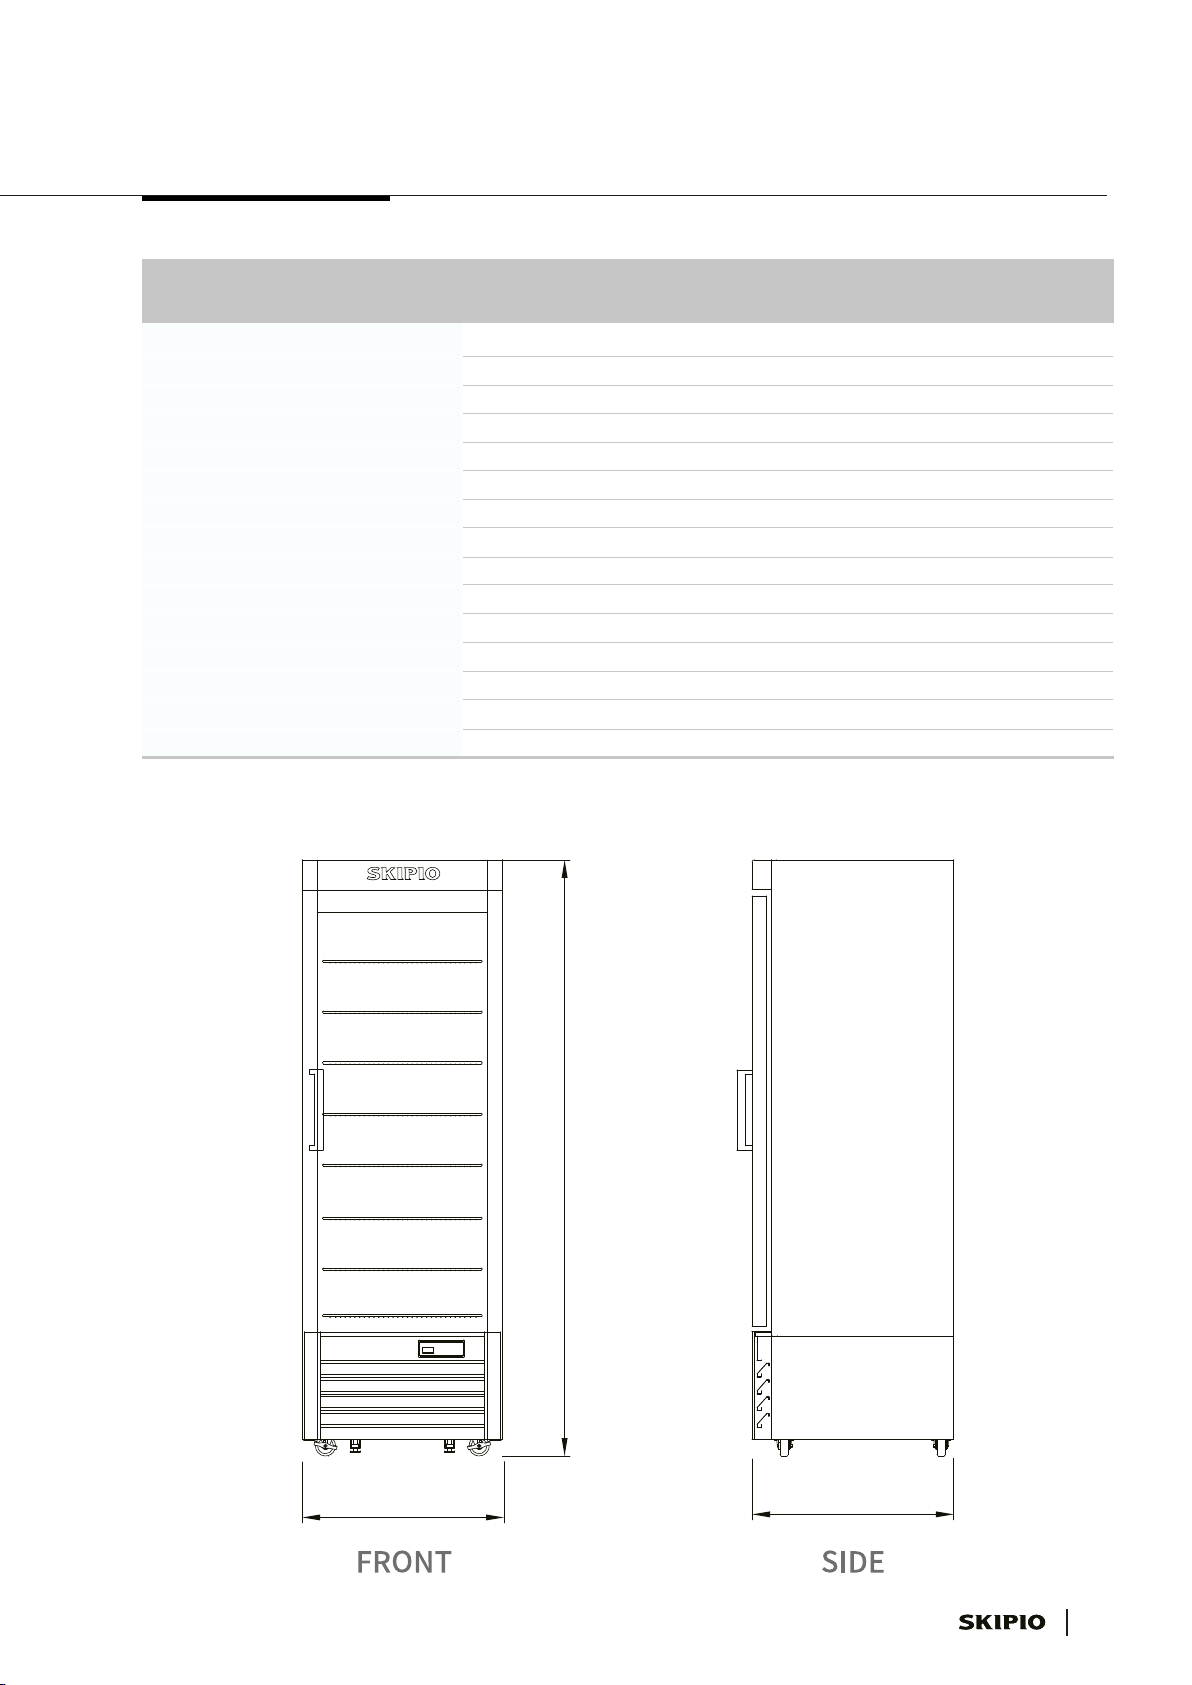
Specification
Freezer
470
670 x 675 x 1995
110
1
3.5
R-404a
LED lamp 12 V Dc
Fan cooling type
Digital
Polyurethane / Cyclopentane + CFC Free
Refrigerant
Lamp
Cooling Type
240 / 50 / 1
Swing 1 door / Heating Glass
Temperature Control Type
Insulation Type
Amps (A)
Weight (Kg)
Voltage (V/Hz/Ph)
Door type
Compressor (HP)
# of Shelves 8EA
Inner Temperature (℃) -13 ~ -25
Capacity (ℓ)
Cabinet dimension (WxDxH mm)
Classification
SGF-6
MODEL
D
H
W

www.skipio.com.au
Melbourne Branch
Sydney Head Office
T
+61 - 02 - 8798 - 5061 / 5283 / 5581
T
+61 - 03 - 8405 - 3359 / 9408 - 4081
Table of contents
Other SKIPIO Freezer manuals

Popular Freezer manuals by other brands


SMC Networks
SMC Networks HRGC001-A Series Service manual

Defy
Defy C420 owner's manual

Frigidaire
Frigidaire FPUH19D7LF l'utilisation et l'entretien

Sub-Zero
Sub-Zero 700 Series Service & parts manual

Silver King
Silver King SKF27AG/CFID Technical manual & replacement parts list

AEG
AEG RCB646E3MX user manual


