Stardom iTANK i310-SB2 User manual

iTANK i310 Series User Manual
For models : i310-SB2 /i310-SB3 /i310-WBS3
Ver 1.0


4
10
16
22
28
32
38
»
iTANK i310 Series User Manual
..................................................
»
iTANK i310 Benutzerhandbuch
...................................................
»
iTANK i310 Manuel d'utilisation
...................................................
»
Manual de Usuario de iTANK i310
..............................................
»
iTANK i310 系列產品使用說明
....................................................
»
iTANK i310 シリーズユーザーマニュアル
.......................................
»
iTANK i310 Series 시리즈 사용 설명서
........................................

4
iTANK i310 Series User Manual
English
Deutsch
Français
Español
中文
日本語
한국어
Forewords
Thank you for purchasing STARDOM products. This manual will introduce the STARDOM
iTANK i310 Series. Before using your iTANK, please read this manual thoroughly. Although
all information contained in this user manual has been carefully veried before publishing,
however, the actual product specification will be based on the time of delivery from
STARDOM. Any updates to the product specications or relevant information may be found
on www.stardom.com.tw. Products are subject to change without prior notications.
If you have any questions regarding the products of STARDOM, or you would like to know
the latest product information, user manual update, or rmware update, please contact your
local supplier or visit www.stardom.com.tw for further information.
Copyright © RAIDON TECHNOLOGY, INC. All rights reserved.
Table of Contents
1. Package Contents and Product Views
2. Environmental Requirements
3. Hard Drive Requirements and Precautions
4. Hardware Installation
5. Visual Status Indicator Denitions
6. Introduction of the STARDOM Host Adapters
7. Frequently Asked Questions
8. Product Application

5
iTANK i310 Series User Manual
English
Deutsch
Français
Español
中文
日本語
한국어
1. Package Contents and Product Views
Open the package and you should nd the following :
i310-SB2 i310-SB3
i310-SB2 x 1
(with Removable drive tray enclosed x 1)
i310-SB3 x 1
(with Removable drive tray enclosed x 1)
AC Power Cable x 1 AC Power Cable x 1
12V DC Adapter x 1 12V DC Adapter x 1
eSATA Cable x 1 eSATA Cable x 1
USB 2.0 Cable x 1 USB 3.0 Cable x 1
User Manual x 1 User Manual x 1
Accessories Kit x 1 Accessories Kit x 1
i310-WBS2 i310-WBS3
i310-WBS2 x 1
(with Removable drive tray enclosed x 1)
i310-WBS3 x 1
(with Removable drive tray enclosed x 1)
AC Power Cable x 1 AC Power Cable x 1
12V DC Adapter x 1 12V DC Adapter x 1
eSATA Cable x 1 eSATA Cable x 1
USB 2.0 Cable x 1 USB 3.0 Cable x 1
FireWire 400 (1394a) Cable x 1 FireWire 400 (1394a) Cable x 1
FireWire 800 (1394b) Cable x 1 FireWire 800 (1394b) Cable x 1
User Manual x 1 User Manual x 1
Accessories Kit x 1 Accessories Kit x 1
Please make sure that the contents listed above are not damaged or missing. If there are
damages or missing contents, please contact your supplier immediately.
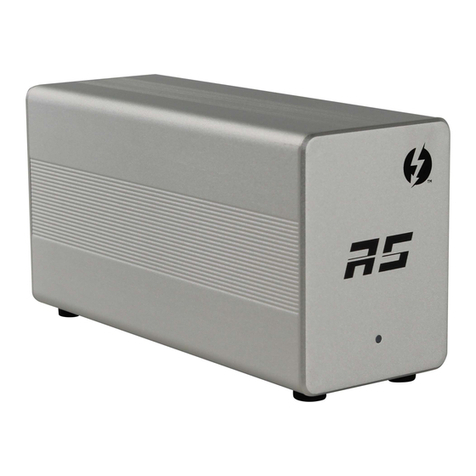
i310-SB2 / i310-SB3 Front and Rear Views
e-SATA
USB 3.0 POWER
SWITCH
DC IN
e-SATA
DC IN
POWER
SWITCH
USB 2.0

6
iTANK i310 Series User Manual
English
Deutsch
Français
Español
中文
日本語
한국어
i310-WBS2 / i310-WBS3 Front and Rear Views
FW800 FW800 FW400 E-SATA USB2.0 OFF / ON
+5V +12V
GND
DC IN
FW800 FW800 FW400 E-SATA USB3.0 OFF / ON
+5V +12V
GND
DC IN
Note :
Only one interface connection on the iTANK may be used at once per one computer system.
The secondary FireWire 800 (1394b) connection on the iTANK i310-WBS2 / i310-WBS3 is provided to
connect and extend to another FireWire 800 (1394b) device.
2. Environmental Requirements
Operating Temperature : 0 ~ 40 ℃ (32 ~ 104 F)
Storage Temperature : -10 ~ 70 ℃ (14 ~ 158 F)
Line Voltage: 100 ~ 240V AC
3. Hard Drive Requirements and Precautions
1. Only one interface connection may be used at once per computer system.
2. The actual storage capacity of iTANK series recognized by the system may differ from
the capacity stated on the hard drive once the drive has been formatted.
3. Please make sure that the hard drive you will be installing into the enclosure unit is free
from bad blocks or defects to avoid system crashes or data loss.
4. Whenever removing the enclosed drive from the enclosure body or unplugging the
enclosure unit from the computer system, always remember to safely remove the
designated drive from your operating system rst.
5. When connected to the computer system, it’s prohibited to remove, insert or swap the
hard drive while data transfer is being performed.
6. It is highly recommended for users to back up important data contained within the drive
of the iTANK unit on a regular basis or whenever the user feels necessary to a remote or
a separate storage device. Stardom will not be responsible for any lost of data caused
during the use of the iTANK unit or the recovery of the data lost.

7
iTANK i310 Series User Manual
English
Deutsch
Français
Español
中文
日本語
한국어
4. Hardware Installation
Please follow the instructions below to complete the hardware installation:
Step 1 Open the package and take out the product making sure that all the enclosed
contents are not damaged or missing. Should you find damages or missing
contents, please contact your supplier immediately.
Step 2 Place the enclosure on a stable surface, ensure that it is well ventilated without
blockage to the vent and kept away from locations near water or where the
product may become vulnerable resulting in damages.
Step 3 Use the provided key in the accessories kit and inserted into the key access
opening to eject the removable drive tray latch and extract the removable drive
tray.
Step 4 Remove the drive stabilizer from the removable tray then mount the hard drive
onto the tray and secure it with the screws enclosed in the accessories kit. Once
completed, insert the drive tray back to the drive position and push the latch into
place.
Step 5 Choose one of the provided cables of your preference to connect the preferred
interface connection on the enclosure unit to the computer.
Step 6 Attach the AC power cable to the DC power adapter then connect one end to the
power socket on the enclosure unit and the other end to the power socket. Once
completed, you may power on the unit.

8
iTANK i310 Series User Manual
English
Deutsch
Français
Español
中文
日本語
한국어
Once your computer has also booted, your operating system should recognize the drive
automatically. If the hard drive installed requires formatting, follow the formatting instructions
given by the operating system to format the drive volume to your preference. Once the
formatting has been completed, the device is ready for use.
5. Visual Status Indicator Denitions
1. When the front indicator is blue, this means the power of the unit is turned on and the
hard drive is idling.
2. When the front indicator blinks between blue and purple, this means the drive is being
accessed for operation.
6. Introduction of the STARDOM Host Adapters
If you require a host adapter to be used with this system, please log onto www.stardom.
com.tw to nd the recommended adapter or contact STARDOM for more information.
7. Frequently Asked Questions
Q1. Which drive format should I choose to format the hard drive in the i310?
A : It depends on the computer system you most often use. See the below suggestions:
1. Use NTFS format for Windows 2000 / XP / Vista / Windows 7 system
2. Use HFS+ (Mac OS Extended) format for a Mac OS X system
3. Choose FAT32 format if you’ll use the i310 in both Windows and Mac environments
(the maximum size of one single le may not exceed 4 GB).
8. Product Application
EX : i310 Series & PD520 Series
i310


10
iTANK i310 Benutzerhandbuch
English
Deutsch
Français
Español
中文
日本語
한국어
Über diese Anleitung
Vielen Dank für den Kauf eines STARDOM Produkts.
Dieses Bedienungsanleitung beschreibt das STARDOM iTANK i310 Produkt. Bevor Sie
dieses Produkt benutzen, lesen Sie diese Anleitung bitte sorgfältig durch.
Obwohl alle Informationen in dieser Anleitung vor der Veröffentlichung sorgfältig überprüft
wurden, beziehen sich die tatsächlichen Produktspezikationen auf die Zeit der Auslieferung
durch STARDOM. Aktualisierungen der Produktspezikationen können auf der Webseite
www.stardom.com.tw gefunden werden. Änderungen der Produkte ohne vorherige
Nachricht
vorbehalten. Wenn Sie Fragen zu den Produkten von STARDOM haben, oder mehr
über die aktuellsten Produktinformationen, Aktualisierungen der Bedienungsanleitung oder
Firmwareupdates erfahren möchten,
kontaktieren Sie bitte Ihren Händler vor Ort oder besuchen
Sie www.stardom.com.tw für weitere Informationen.
Copyright © RAIDON TECHNOLOGY, INC. All Rechte vorbehalten.
Inhaltsverzeichnis
1. Packungsinhalt und Produktansichten
2. Betriebsbedingungen
3. Hardwarevoraussetzungen und Vorsichtsmaßnahmen
4. Hardwareinstallation
5. Beschreibung der visuellen Statusanzeige
6. Beschreibung des STARDOM Host Adapters
7. Oft gestellte Fragen
8. Produkt-Anwendung

11
iTANK i310 Benutzerhandbuch
English
Deutsch
Français
Español
中文
日本語
한국어
1. Packungsinhalt und Produktansichten
Öffnen Sie das Paket und Sie sollten die folgenden Dinge vornden:
i310-SB2 i310-SB3
i310-SB2 x 1
(mit integriertem Wechselrahmen x 1)
i310-SB3 x 1
(mit integriertem Wechselrahmen x 1)
Stromkabel x 1 Stromkabel x 1
12V DC-Adapter x 1 12V DC-Adapter x 1
eSATA Kabel x 1 eSATA Kabel x 1
USB 2.0 Kabel x 1 USB 3.0 Kabel x 1
Bedienungsanleitung x 1 Bedienungsanleitung x 1
Zubehörset x 1 Zubehörset x 1
i310-WBS2 i310-WBS3
i310-WBS2 x 1
(mit integriertem Wechselrahmen x 1)
i310-WBS3 x 1
(mit integriertem Wechselrahmen x 1)
Stromkabel x 1 Stromkabel x 1
12V DC-Adapter x 1 12V DC-Adapter x 1
eSATA Kabel x 1 eSATA Kabel x 1
USB 2.0 Kabel x 1 USB 3.0 Kabel x 1
FireWire 400 (1394a) Kabel x 1 FireWire 400 (1394a) Kabel x 1
FireWire 800 (1394b) Kabel x 1 FireWire 800 (1394b) Kabel x 1
Bedienungsanleitung x 1 Bedienungsanleitung x 1
Zubehörset x 1 Zubehörset x 1
Bitte stellen Sie sicher, dass die oben aufgelisteten Inhalte nicht beschädigt sind oder
fehlen. Falls Schäden oder fehlende Inhalte festgestellt werden, kontaktieren Sie bitte
umgehend Ihren Händler.
i310-SB2 / i310-SB3 Vorder- und Rückansichten
e-SATA
USB 3.0 POWER
SWITCH
DC IN
e-SATA
DC IN
POWER
SWITCH
USB 2.0

12
iTANK i310 Benutzerhandbuch
English
Deutsch
Français
Español
中文
日本語
한국어
i310-WBS2 / i310-WBS3 Vorder- und Rückansichten
FW800 FW800 FW400 E-SATA USB2.0 OFF / ON
+5V +12V
GND
DC IN
FW800 FW800 FW400 E-SATA USB3.0 OFF / ON
+5V +12V
GND
DC IN
Hinweis :
Pro Computersystem kann immer nur ein Anschluss des iTANK genutzt werden.
Der sekundäre FireWire 800 (1394b) Anschluss des iTANK i310-WBS2 / i310-WBS3 wird zum
Anschluss anderer FireWire 800 (1394b) Geräte verwendet.
2. Betriebsbedingungen
Betriebstemperatur : 0 ~ 40°C (32 ~ 104°F)
Lagertemperatur : -10 ~ 70°C (14 ~ 158°F)
Spannung : 100 ~ 240V AC
3. Hardwarevoraussetzungen und Vorsichtsmaßnahmen
1. Pro Computersystem kann immer nur ein Anschluss genutzt werden.
2. Beachten Sie, dass die von Ihrem Computersystem angezeigte Speicherkapazität von
der auf der Festplatte angegebenen Kapazität abweichen kann, nachdem das Laufwerk
formatiert wurde.
3. Bitte stellen Sie sicher, dass die in den Wechselrahmen zu installierende Festplatte
keine fehlerhaften oder defekten Sektoren aufweist, um einen Systemabsturz oder
Datenverlust zu vermeiden.
4. Vergessen Sie nicht, Ihr Laufwerk zunächst von Ihrem Betriebssystem zu entfernen,
bevor Sie das installierte Laufwerk aus dem Wechselrahmen entfernen oder das Gerät
vom Computersystem trennen.
5. Während der Verbindung mit dem Computersystem ist ein Entfernen, Einlegen oder
Austauschen der Festplatte zu vermeiden, wenn ein Datentransfer ausgeführt wird.
6. Es wird dringend empfohlen, alle auf dem Laufwerk im iTANK befindlichen Daten
regelmäßig oder wenn immer es der Benutzer für nötig hält auf einem fern gewarteten
oder externem Speicherlaufwerk zu sichern. Stardom ist weder verantwortlich für
Datenverluste, die während der Benutzung des iTANK Geräts entstehen, noch für die
Wiederherstellung verlorener Daten.

13
iTANK i310 Benutzerhandbuch
English
Deutsch
Français
Español
中文
日本語
한국어
4. Hardwareinstallation
Bitte folgen Sie den unten stehenden Anweisungen, um die Hardwareinstallation
durchzuführen:
Schritt1
Öffnen Sie die Verpackung und nehmen Sie das Produkt heraus. Stellen Sie sicher,
dass sämtliche Inhalte unbeschädigt sind und nicht fehlen. Falls Sie Schäden oder
fehlende Inhalte feststellen sollten, kontaktieren Sie bitte umgehend Ihren Händler.
Schritt2 Stellen Sie das System auf eine stabile Unterlage. Stellen Sie sicher, dass es gut
belüftet ist, die Öffnungen nicht blockiert werden und von Orten in der Nähe von
Wasser oder an denen das Produkt beschädigt werden könnte ferngehalten wird.
Schritt3 Benutzen Sie den mitgelieferten Schlüssel im Zubehörset und stecken Sie ihn in
die Schlüsselzugangsöffnung, um die Wechselrahmenklappe auszuwerfen und
den Wechselrahmen zu entnehmen.
Schritt4 Entfernen Sie die Laufwerksstabilisierung vom Wechselrahmen. Legen Sie dann
die Festplatte in den Wechselrahmen und sichern Sie sie mit den Schrauben
aus dem Zubehörset. Legen Sie den Wechselrahmen nach Abschluss wieder die
Laufwerksposition ein und legen Sie den Hebel um.
Schritt5 Wählen Sie eines der mitgelieferten Kabel, um eine geeignete Verbindung des
Wechselrahmens mit dem Computer herzustellen.
Schritt6 Verbinden Sie das AC Stromkabel mit dem DC Netzadapter. Stecken Sie dann
ein Ende in die Netzbuchse des Wechselrahmens und das andere Ende in die
Steckdose. Danach können Sie das Gerät einschalten.

14
iTANK i310 Benutzerhandbuch
English
Deutsch
Français
Español
中文
日本語
한국어
Nach dem Start Ihres Computers sollte Ihr Betriebssystem das Laufwerk automatisch
erkennen. Falls das installierte Laufwerk formatiert werden muss, folgen Sie bitte den
Anweisungen des Betriebssystems zur Formatierung der Festplatte, um das Laufwerk nach
Ihren Wünschen zu formatieren. Sobald die Formatierung abgeschlossen wurde, ist das
Laufwerk zur Nutzung bereit.
5. Beschreibung der visuellen Statusanzeige
1. Wenn die vordere Anzeige blau leuchtet, bedeutet dies, dass das Gerät eingeschaltet ist
und sich die Festplatte im Leerlauf bendet.
2. Wenn die vordere Anzeige blau und lila blinkt, bedeutet dies, dass gerade auf das
Laufwerk zugegriffen wird.
6. Beschreibung des STARDOM Host Adapters
Wenn Sie für die Nutzung dieses Systems einen Host Adapter benötigen, melden Sie sich
bitte auf www.stardom.com.tw an, um den empfohlenen Adapter zu nden oder kontaktieren
Sie STARDOM, um weitere Informationen zu erhalten.
7. Oft gestellte Fragen
Q1. Welches Laufwerksformat sollte ich wählen, um die Laufwerke für den i310 zu
formatieren?
A : Das hängt von Ihrem verwendeten Computersystem ab. Siehe folgende Vorschläge:
1. Benutzen Sie das NTFS Format für Windows 2000 / XP / Vista / Windows 7.
2. Benutzen Sie das HFS+ (MAC OS Extended) Format für ein MAC OS X System.
3. Wählen Sie das FAT32 Format, wenn Sie den i310 sowohl in Windows als auch
Mac Umgebungen benutzen (die maximale Größe einer einzelnen Datei darf 4GB
nicht überschreiten).
8. Produkt-Anwendung
EX : i310 Serie & PD520 Serie
i310


16
iTANK i310 Manuel d'utilisation
English
Deutsch
Français
Español
中文
日本語
한국어
Avant-propos
Merci pour l’achat d’un produit STARDOM.
Ce manuel présente la série de produits iTANK i310. Veuillez entièrement lire ce manuel
avant l’utilisation de l’ iTANK i310. Toutes les informations contenues dans ce manuel ont
été attentivement véri ées avant la publication, toutefois, les caractéristiques actuelles du
produit sont basées sur le moment de livraison par STARDOM. Toutes mises à jour des
caractéristiques du produit ou des informations relatives sont disponibles sur www.stardom.
com.tw Les produits sont sujets à des modications sans notice préalable.
Droit de Reproduction © RAIDON TECHNOLOGY, INC. Tous droits réservés.
Table des matières
1. Contenu de la boîte et description du produit
2. Conditions ambiantes
3. Besoins en matériel et précautions
4. Installation du matériel
5. Dénition des indicateurs visuels de statut
6. Introduction des adapteurs de centre serveur STARDOM
7. Foire Aux Questions
8. l'application du produit

17
iTANK i310 Manuel d'utilisation
English
Deutsch
Français
Español
中文
日本語
한국어
1. Contenu de la boîte et description du produit
Ouvrez l’emballage et vous devriez trouver les éléments suivant :
i310-SB2 i310-SB3
i310-SB2 x 1
(avec 1 x lecteurs amovibles fermés)
i310-SB3 x 1
(avec 1 x lecteurs amovibles fermés)
1 x Câble d’alimentation AC 1 x Câble d’alimentation AC
1 x Adaptateur DC 12V 1 x Adaptateur DC 12V
1 x Câble eSATA 1 x Câble eSATA
1 x Câble USB 2.0 1 x Câble USB 3.0
1 x Manuel de l’utilisateur 1 x Manuel de l’utilisateur
1 x Kit d’accessoires 1 x Kit d’accessoires
i310-WBS2 i310-WBS3
i310-WBS2 x 1
(avec 1 x lecteurs amovibles fermés)
i310-WBS3 x 1
(avec 1 x lecteurs amovibles fermés)
1 x Câble d’alimentation AC 1 x Câble d’alimentation AC
1 x Adaptateur DC 12V 1 x Adaptateur DC 12V
1 x Câble eSATA 1 x Câble eSATA
1 x Câble USB 2.0 1 x Câble USB 3.0
1 x Câble FireWire 400 (1394a) 1 x Câble FireWire 400 (1394a)
1 x Câble FireWire 800 (1394b) 1 x Câble FireWire 800 (1394b)
1 x Manuel de l’utilisateur 1 x Manuel de l’utilisateur
1 x Kit d’accessoires 1 x Kit d’accessoires
Veuillez vous assurer que le contenue énuméré ci-dessus n’est ni endommagé ni manquant.
S’il y a des éléments endommagés ou manquant, veuillez contacter votre fournisseur
immédiatement.
i310-SB2 / i310-SB3 Vues de devant et de derrière
e-SATA
USB 3.0 POWER
SWITCH
DC IN
e-SATA
DC IN
POWER
SWITCH
USB 2.0

18
iTANK i310 Manuel d'utilisation
English
Deutsch
Français
Español
中文
日本語
한국어
i310-WBS2 / i310-WBS3 Vues de devant et de derrière
FW800 FW800 FW400 E-SATA USB2.0 OFF / ON
+5V +12V
GND
DC IN
FW800 FW800 FW400 E-SATA USB3.0 OFF / ON
+5V +12V
GND
DC IN
Remarque :
Une seule interface de connexion de l’iTANK peut être utilisée à la fois et pour un seul ordinateur.
La seconde connexion FireWire 800 (1394b) de l’iTANK i310-WBS2 / i310-WBS3 permet la
connexion et l'extension vers un autre appareil FireWire 800 (1394b).
2. Conditions ambiantes
Température de fonctionnement : 0 ~ 40 °C (32 ~ 104°F)
La température de stockage : -10 ~ 70°C (14 ~ 158°F)
Tension secteur : 100 ~ 240V C.A.
3. Besoins en matériel et précautions
1. Une seule interface de connexion à la fois peut être utilisée par système d’ordinateur.
2. Veuillez noter que la capacité de stockage réelle afchée par le système d'exploitation
peut être différent que la capacité afchée sur le disque dur après qu'il ait été formaté.
3. Assurez-vous que le disque dur à installer dans le boîtier et opérationnel et ne contient
pas de blocs défectueux an d’éviter le plantage du système ou la perte de données.
4. Lors du retrait du disque du boîtier ou de la déconnexion du boîtier de l’ordinateur,
rappelez-vous de d’abord retirer proprement le disque désigné au niveau du système
d'exploitation.
5. Lors de la connexion à un système informatique, il est interdit de retirer, insérer ou
échanger le disque dur pendant le transfert de données.
6. Il est extrêmement recommandé aux utilisateurs de sauvegarder les données
importantes contenues dans le disque du de l’iTANK sur un support de base ou, si
l’utilisateur le souhaite, vers un appareil de stockage distant et distinct. Stardom nesera
pas tenu responsable de la perte de données survenant lors de l’utilisation de l’iTANK, ni
de la récupération des données perdues.

19
iTANK i310 Manuel d'utilisation
English
Deutsch
Français
Español
中文
日本語
한국어
4. Installation du matériel
Veuillez suive les instructions ci-dessous an de réaliser l’installation du matériel:
Etape1 Ouvrez la boîte et sortez le produit en vous assurant que tous les éléments inclus ne
sont pas endommagés ni manquant. Si vous trouviez des éléments endommagés
ou manquant, veuillez contacter votre fournisseur immédiatement.
Etape2 Placez le boîtier sur une surface stable,vérifiez la bonne aération du lieu sans
blocage du vent et gardez à distance de lieux proche d’eau ou d’endroits rendant le
produit vulnérable et pouvant causer des dommages.
Etape3 Utilisez la clé fournie dans le kit d’accessoires et insérez-là dans l’ouverture pour
éjecter le cache du plateau de disque extractible et enlever le plateau de disque
extractible.
Etape4 Enlevez les xations du disque de la baie amovible puis monter s’y le disque dur et
xez-le avec les vis contenues dans le kit d’accessoires. Une fois réalisée, insérez
la baie de disque dans son emplacement et verrouillez.
Etape5 Choisissez l’un des câbles fournis, suivant votre interface, pour la connexion du
boîtier à l’ordinateur.
Etape6 Attachez le câble d’alimentation AC à l’adaptateur DC puis branchez une extrémité
sur la prise du boîtier et l’autre extrémité dans la prise de courant. Une fois réalisée,
vous pouvez démarrer le boîtier.

20
iTANK i310 Manuel d'utilisation
English
Deutsch
Français
Español
中文
日本語
한국어
Une fois que votre ordinateur est démarré, le système d’exploitation devrait reconnaître
automatiquement le disque. Si le disque dur nécessite un formatage, suivez les instructions
de formatage fourni par le système d’exploitation an de formater le volume du disque
comme vous le souhaitez. Une fois le formatage terminé, l’appareil est prêt à l’emploi.
5. Dénitions d’indicateur de statut de disque dur
1. Lorsque le témoin avant est bleu, cela signie que l’appareil est sous tension et que le
disque est en attente.
2. Lorsque le témoin avant clignote du bleu au violet cela signie un accès au disque dur.
6. Introduction des adapteurs de centre serveur STARDOM
Si vous avez besoin d’utiliser un adapteur de centre serveur avec ce système, veuillez
entrer sur www.stardom.com.tw pour trouver l'adapteur recommandé ou pour contacter
STARDOM pour plus d'information.
7. Foire aux questions
Q1. Quel format de disque devrais je choisir pour formater le disque dur dans le i310 ?
A : Cela dépend du système informatique que vous utilisez le plus souvent. Voir les
suggestions ci-dessous :
1. Utilisez le format NTFS pour le système du Windows 2000 / XP / Vista / Windows 7
2. Utilisez le format HFS+ (OS de Mac prolongé) pour un système d'OS X de Mac
3. Choisir le format FAT32 si vous allez utiliser i310 dans des environnements de
Windows et de Mac (la taille maximum d'un chier peut ne pas dépasser 4 gb).
8. l'application du produit
EX : i310 Série & PD520 Série
i310
This manual suits for next models
2
Table of contents
Languages:
