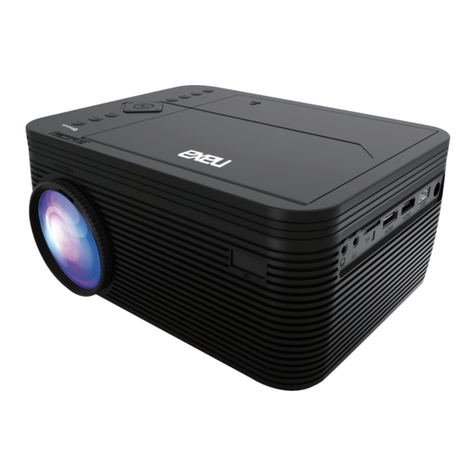
STOBE HPX User manual


Dear Customer,
Your projector is in your hands! Let's get started!
Do you have any questions about it? Please read this manual thoroughly
before using the projector. Are you satisfied with your projector? If you
have any issues, email your order number and description of your issue
to the seller’s customer service. Send your email ASAP, as we want to
fix your issues as quickly as possible.
Customers sometimes can experience some confusion when using the
projector. Rather than trying to communicate directly with us, many
buyers instead, just leave a review on the product page. However, most
negative reviews are caused by misuse rather than a defect in the
product itself.
Actually, many problems can be easily solved, such as no signal, no
sound etc. We promise, all the projectors have been carefully checked
and packaged before shipping. Therefore, if you have any questions,
please contact us and give us an opportunity to help you. We guarantee
that we will provide you a satisfactory solution.
Thanks for your understanding!
Kind Regards,
STOBE.

List of Contents
Product Packing List ................................................ 1
Product Description.................................................. 1
Projector Specification ............................................. 3
Remote control......................................................... 5
Thank you ................................................................ 7
Note ......................................................................... 7
Safety....................................................................... 7
Installation................................................................ 8
Supply ...................................................................... 8
Cleaning................................................................... 8
FAQ.......................................................................... 9
PROJECTOR CONNECTIONS.............................. 12
Adjust the Tilt Base and Hang Ceiling .................... 14
STARTING PROJECTOR ...................................... 14
Projection Distance and Size ................................. 16

1
Product Packing List
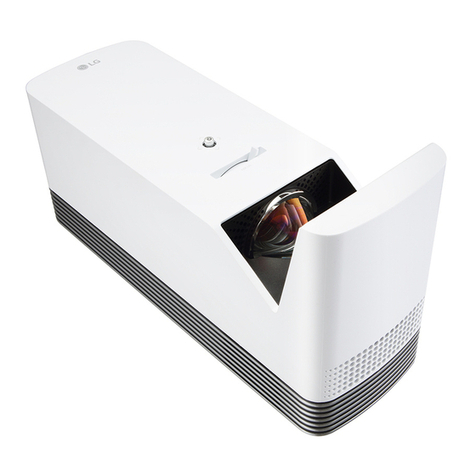
Product Description
● Smart Projector * 1 ● Power Cord * 1 ● User Manual * 1
● HDMI Cable * 1 ● Remote Control * 1 (Batteries not included)
01.Lens
02.IR receiver front
03. IR receiver back
04. Earphone
05. AV
06. HDMI
07. USB
08. USB

2
Name
Description
01
Lens
Beamer lens
02
IR receiver front
Frontside remote controller receiver
03
IR receiver back
Backside remote controller receiver
04
Earphone
Input earphone
05
AV
Audio input
06
HDMI
HDMI Cable plug in
07
USB
USB port 1
08
USB
USB T port for screen mirror
09
Power Cable Port
Plug the power cable
10
ON/OFF
Turn ON/OFF button
11
Left (focus)
Screen focus to the left
12
OK
Confirm
13
Right (focus)
Screen focus to the right
09. Power Port
10. ON/OFF
11. Left (focus)
12. OK
13. Right (focus)

3
Projector Specification
Model No
HPX
projection technology
LCD
Product size
210*190*145
LED chipset useful life
30000h
Lens focus
High transmission all glass lens
Illumination uniformity
95%
contrast ratio
10000/1
Projection Range
1.2-3.0m
optimum dimension
40-100 inch
Trapezoidal correction
Electronic trapezoidal
Electronic scale
Electronic zoom screen size at the same
distance
input interface
USB*2/HDMI*1/headset *1/bluetooth support
Color
Black/Gray
physical resolution
1920×1080P
illuminant
LED
Lumen
350 ansi Lumen
The power of the machine is
100-240
105W
Number of colors supported
16.77 million colors
Throw Ratio
1.4;1
projection size
40-200 inch
projective mode
Forward throw, back throw table top throw
dBA
25-30dB
Support language
optional
Support the resolution
1080P 2k 4k

4
Electronic scale
Electronic zoom screen
size at the same
distance
Support
language
optional
input interface
USB*2/HDMI*1/headset
*1/bluetooth support
Support the
resolution
1080P 2k 4k
The multimedia
version
Play U disk, USB*2/HDMI*1/ headset *1/ Bluetooth support
mirroring version
In addition to multimedia functions, the following functions are
added: A: support Apple Android mobile phone wireless B:
Apple wireless screen interaction C: LAN APP push
hardware
equipment
android10.0,cpu:H700,WIFI:Realtek 8189 5G/2.4GHz
802.11b/g/n,Bluetooth BT 4.2
Android version
2+8G memory: In addition to multimedia functions, add the
following functions: live TV, download any application through
the electronic market
certified power
cable
Japan PSE- United States UL- European standard CE
Remote control
Full function remote control (remote control distance test ≥5
meters)
Accessories List
projection device×1、remote control×1、Power cable×1、
HDMI in×1(optional)、user manual×1
Test equipment
and environment
requirements
Requires using TF card USB test, device with HDMI, headset
test.
working environment:
0~+35℃
Reliability requirements:
0~+40℃humidity70%
Cooling mode:
Double fan cooling
Net weight:
2.1kg without box and 2.8kg with box
Relative operating humidity
10~90% @No condensation
Aging environment Requirements
37+3 degrees humidity 70% for 4 hours

5
Remote control
*Voice Version:Smart Voice Remote Control (Only equipped with voice
version)
For the first time use, please follow this method to pair:
•Press and hold the • • keys at the same time to enter the
automatic pairing mode.
Manual pairing:
1. Press the menu key •51', and select Settings in the pop-up interface;
2. After entering the interface, select Bluetooth settings, and press OK
to enter the Bluetooth setting manual pairing mode;
3. Press the ... button, the indicator light or the remote control flashes to
enter the pairing mode, and search for Bluetooth devices for pairing
and connection

6
1: power supply
2: Mute
3. Retreat quickly
4: Focus +
5: Focus –
6: Fast forward
7: signal source
8: The menu
9: The direction key
10: The home page
11: the number keys
12: The volume –
13: the volume +
14: Switch
15: Settings
16: The mouse
17: Confirm
18: Return
19: Suspended
20: Delete

7
Thank you
Thank you very much for purchasing the mini projector.
Please read this instruction manual carefully before using it.
Also, please do not throw the manual away, so you can check it at any
time.
If in doubt, do not hesitate to contact the customer service.
We provide after-sales service to ensure satisfaction.
Note
The Mirror display function doesn't support protected videos due to
copyright protection. (Netflix, Amazon Prime Video and Hulu etc.)
Connect a laptop, fire tv stick, Roku, or Chromecast to play them.
The projector is mainly used for home theater, NOT
RECOMMENDED for a large conference, teaching activity, or
commercial usage. Recommended use in a dark environment for a
better effect. Don't expect to use this projector outdoors in broad
daylight, it will work perfectly at sunset or nighttime.
If the projector has no sound or the Dolby icon is on your screen.
Please check the Audio Setting on your Amazon Fire TV and try turning
off Dolby Digital Plus to ensure the sound working. [On your Amazon
Fire TV or Fire TV Stick, go to Settings > Display & Sounds > Audio >
Dolby Digital Output > and then turn Dolby Digital Plus OFF. OR choose
the PCM (Setup-Audio output-PCM).]
Safety
These safety instructions are to ensure the long life of the projector and
to prevent fires and malfunctions. Read them carefully and pay attention
to all warnings.

8
Installation
1. For the best projection, use the projector in a dark room.
2. Place the projector on a flat, level surface in a dry area away from
dust and moisture.
3. Exposure to direct sunlight, smoke or steam may damage internal
components.
4. Handle the projector carefully. Falling or shaking can damage
internal components.
5. Do not place heavy objects on top of the projector.
Supply
1. The projector is designed to operate with a 110-240 V ~ 50/60 Hz AC
adapter. Ensure that the power supply meets this requirement before
using the projector.
2. Handle the power cord carefully and avoid bending it too much. A
damaged cord can cause electric shock or fire.
3. If the projector will not be used for a long time, unplug the power
cord from the outlet.
Cleaning
1. Unplug the projector before cleaning it.
2. Periodically clean the case with a damp cloth. If it is very dirty, use a
mild detergent. Never use strong detergents or solvents such as
alcohol or thinners.
3. Use a blower or lens paper to clean the lens and be careful not to
scratch or damage the lens.

9
FAQ
1. While switching on, the indicator light does not work
①. The power supply may not be connected correctly
②. Check the overheating protection system
2. Using the power button on the remote control does not turn on
the projector
①. The remote control batteries are empty
②. The signal between the remote control and the IR sensor is
obstructed
③. Strong direct light on the IR sensor?
3. No image on the screen
①. Is the channel setting correct?
②. Is there an input signal?
③. Is the input cable inserted correctly or is it in the wrong position?
④. Is the refresh rate above 75KHz in PC Mode?
4. The Image works, but there is no sound.
①. Are the input cables connected correctly?

10
②. Volume at minimum or silent
③. Check that the audio format of the video is in the supported list
④. Dolby sound is not supported, exit to play again.
- Fire stick: Enter “Setting” and find “Display & Sound”. Then select
“on” for “navigation sounds”. Select “Stereo (or PCM)” for
“surround sound”.
- Try Youtube if your player is Netflix, Amazon Prime, Hulu, and
Disney+.
The problem will happen when playing these applications because
of copyright.
5. Turns off automatically after being turned on for a while
①. Is the fan blocked or improper air flow?
②. Small or large voltage fluctuations
③. Check the overheating protection system
6. I can’t find devices connected with hard drives or flash drives
①. Re-insert the device
②. Check if the device is working

11
7. Unable to play video
①. Is the video format correct?
②. Is the file corrupted?
③. The device is damaged
8.The image has color distortion
①. Make sure the video source has a fine resolution
②. Adjust the colors: enter Menu-Picture-Color Temperature, then
select different modes and adjust the value accordingly.
③. Reset the projector to manufacturer setting: enter Menu-Setup-
Reset to restore factory default.
9. The image has a dark spot or the machine is smoking.
①. Check if the fan is working. Unplug the projector and contact
support team for assistance.
②. Make sure the outlet and projector power adapter are not wet or
humid which will cause sparks or smoke when turning on the projector.
10. The image is blurry or out of shape?
①. Adjust the focus ring by moving it leftward/rightward till it shows the
best images.

12
②. Place projector on a flat surface horizontally or vertically. An
inclination of any angle may result in blurry displays or uneven colors.
③. Darker environment suggested to achieve the best projection
performance.
④. Check the distance of the projector to the screen. There should be
1.12m-2.8m/44inch-110inch between the projector and projection
wall/screen.
PROJECTOR CONNECTIONS
1. Connecting to the Computer
Using the HDMI cable to connect with the projector.
(An HDMI connection is recommended for projecting movies, videos,
and other files which need to be HD.)
(1) Turn on your computer and the projector;
(2) Connect the HDMI cable to your computer's HDMI port;
(3) Connect the other end to any available HDMI port on your projector;
(4) Choose the Source to enter the interface of HD Input Source;
(5) Select HDMI source to project any files on your computer;
(6) On your laptop, press “WIN+P” to change your Display mode.

13
Computer
only
The default option –only displays on the main
monitor.
Duplicate
Duplicating the desktop on each monitor
connected.
Extend
Makes all of your monitors act like one big
monitor extending the desktop across all of them
Projector only
Displays only on the secondary monitor like a
projector
(7) You can change your screen resolution:
Choose Start → Control Panel → Appearance and Personalization
→ Adjust Screen Resolution

14
Adjust the Tilt Base and Hang Ceiling
Adjust the tilt base:
Install the screws (not included in the package) in the screw holes
dedicated for it, lift the front edge of the projector to the desired height,
turn the foot and release the button to lock the tilt base to the
appropriate position.
Hang ceiling:
Please purchase the additional projector stand and M5 screw.
Install the projector stand to place the screw holes on the bottom of the
projector and hang the projector on the ceiling.
(Note: You can install the Tripod Stand to place the screw holes.
STARTING PROJECTOR
Turn on the projector
1. Install two AAA batteries in the remote control before using it.
2. Press the Power key on the remote or panel, the indicator light will
become red.
3. Remove the lens cover of the projector, the lamp starts working 2
seconds after that, when an image is projected on the screen the
machine is working smoothly. If the first projection screen is not the
startup screen, press the " " button.
4. Adjust the keystone ring to get a rectangle shape.

15
5. Adjust the focus ring or rotate the lens of the projector to get the best
image performance. (If it is still blurry, please try to adjust the
projection distance.)
6. If you connect other devices, be sure to select the corresponding
source. If you do not select the correct source, the projector will not
be able to detect the signal.
7. Press the Menu button on the remote control to enter the OSD
Language to set your preferred language.
Turn off the projector
1. Press the Power button when the projector is in use, this will cause it
to switch to standby mode.
2. When the projector has switched into standby mode, the light will
blink red.
Keystone and Focus
If the projected image is in a trapezoidal shape, it can be resolved by
Keystone correction.

16
Note: If the Keystone correction fails to resolve image shape, please
adjust the projector position.
The projected image may be blurry or difficult to see, this is due to lack
of Focus adjustment with the lens, please follow the processes below to
adjust the Focus.
Projection Distance and Size
Please follow the data in chart below, to adjust the image size
and the distance. (Aspect Ratio: 16:9, Default)
Distance (ft.)
Screen Size
3.4
33’’
5.9
60’’
7.8
80’’
9.7
100’’
11.6
120’’
14.4
150’’
The image size depends on the distance between projector and screen, there may
be 3% deviation among above listed data. Different settings cause various distances.
Thank you very much for purchasing the projector.
Please read this instruction manual carefully before use. Also, please keep it handy
so you can check it at any time.
If you have any problem, please feel free to contact us, we will always try to offer you
a satisfactory solution.

17
•
Select the desired signal source channel in the pop-up interface, such as
"HDMI","AV",etc.;
•
Select the desired signal source channel in the pop-up interface, such as
"HDMI","AV",etc.;
•
Press the "OK" button on the remote control to enter the corresponding signal
source state.
Source settings
Table of contents
