Spindelmäher
Art. 3909
Spindelmäher
Art. 3909
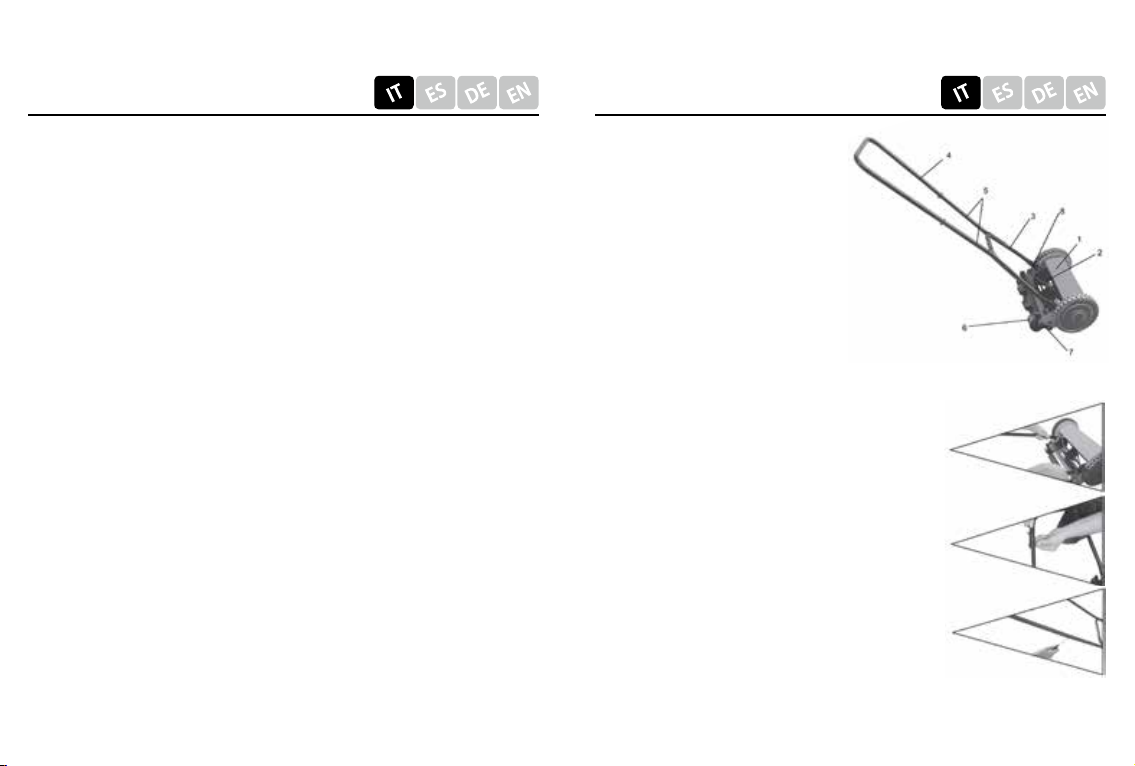
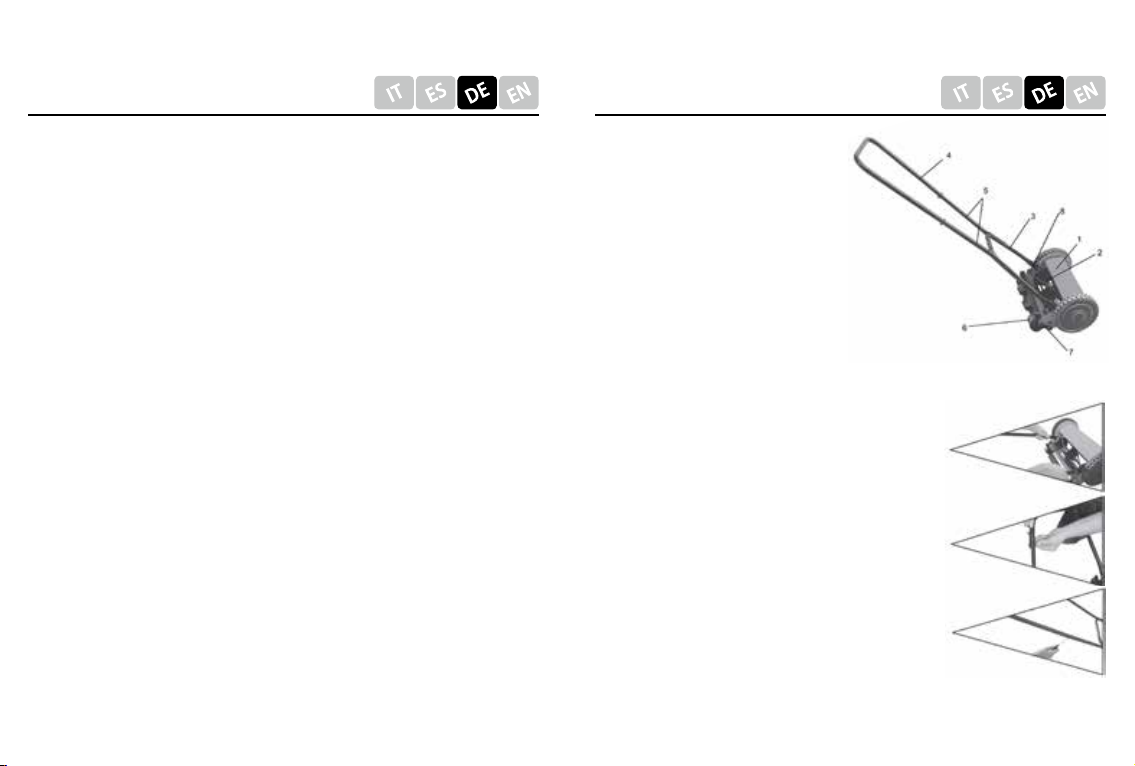
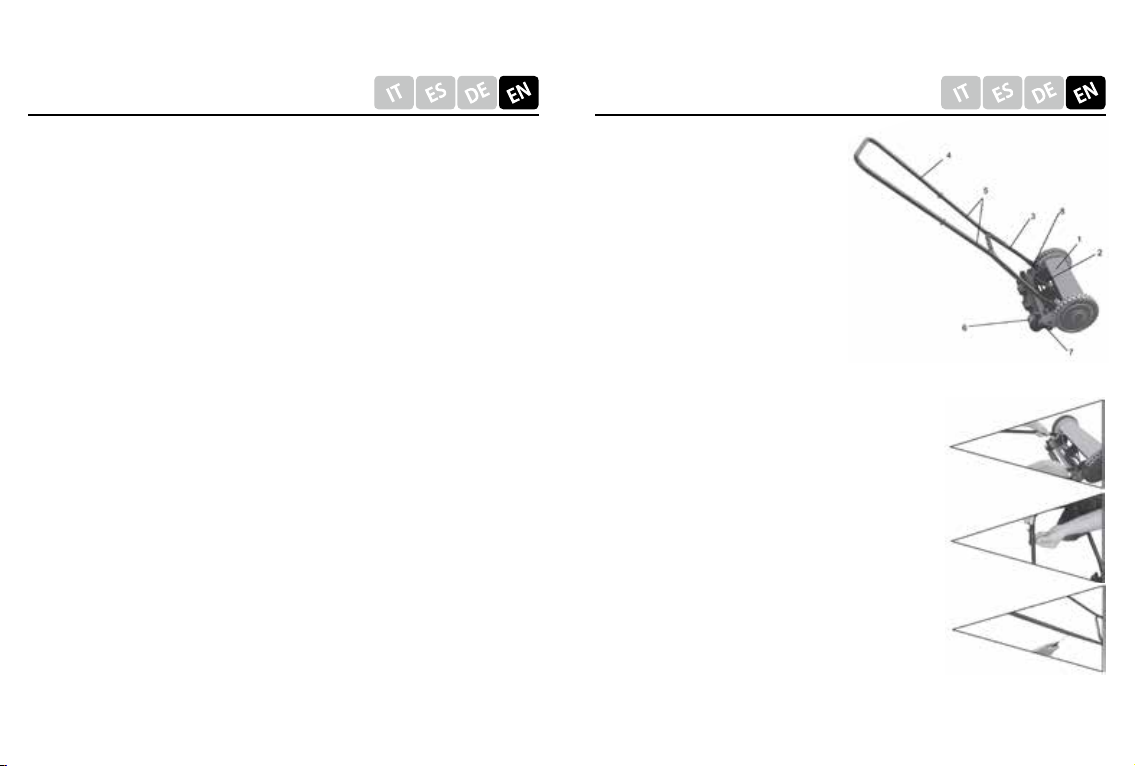
BESTANDTEILE
1. Gehäuse
2. Messer
3. Unteres Griffstück
4. Oberes Griffstück
5. Mittleres Griffstück
6. Rollen
7. Höheneinstellung
8. Messerspindel Einstellknopf
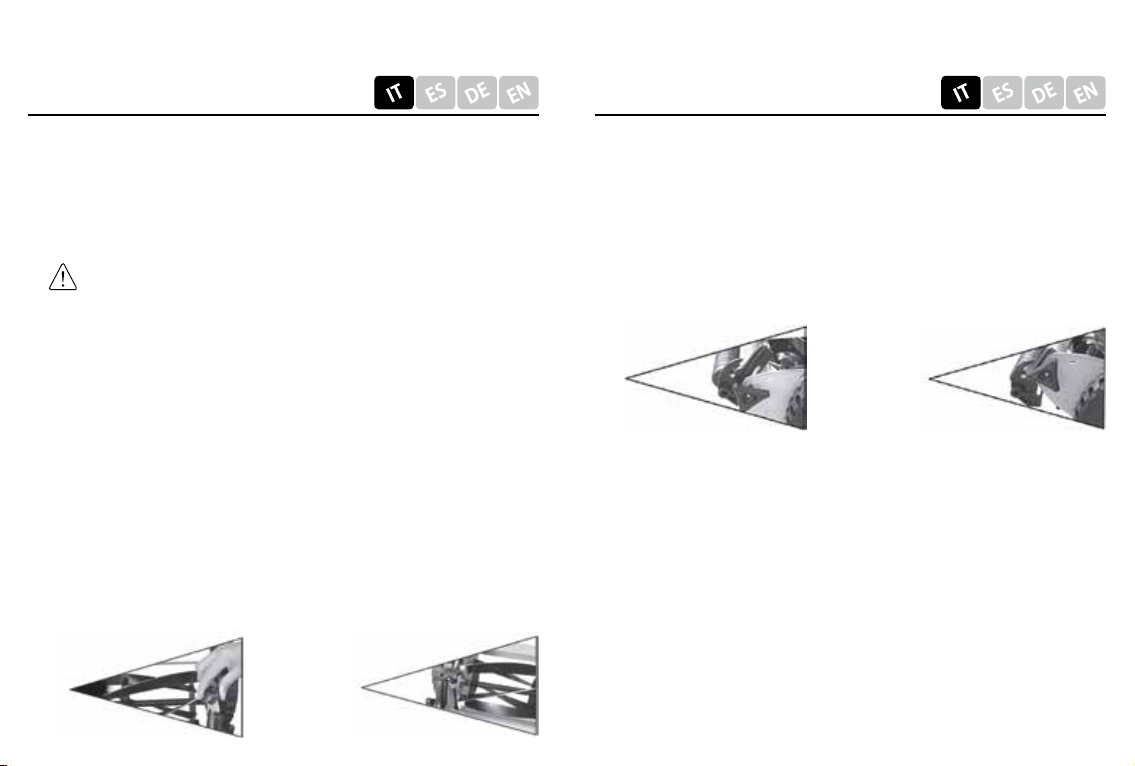
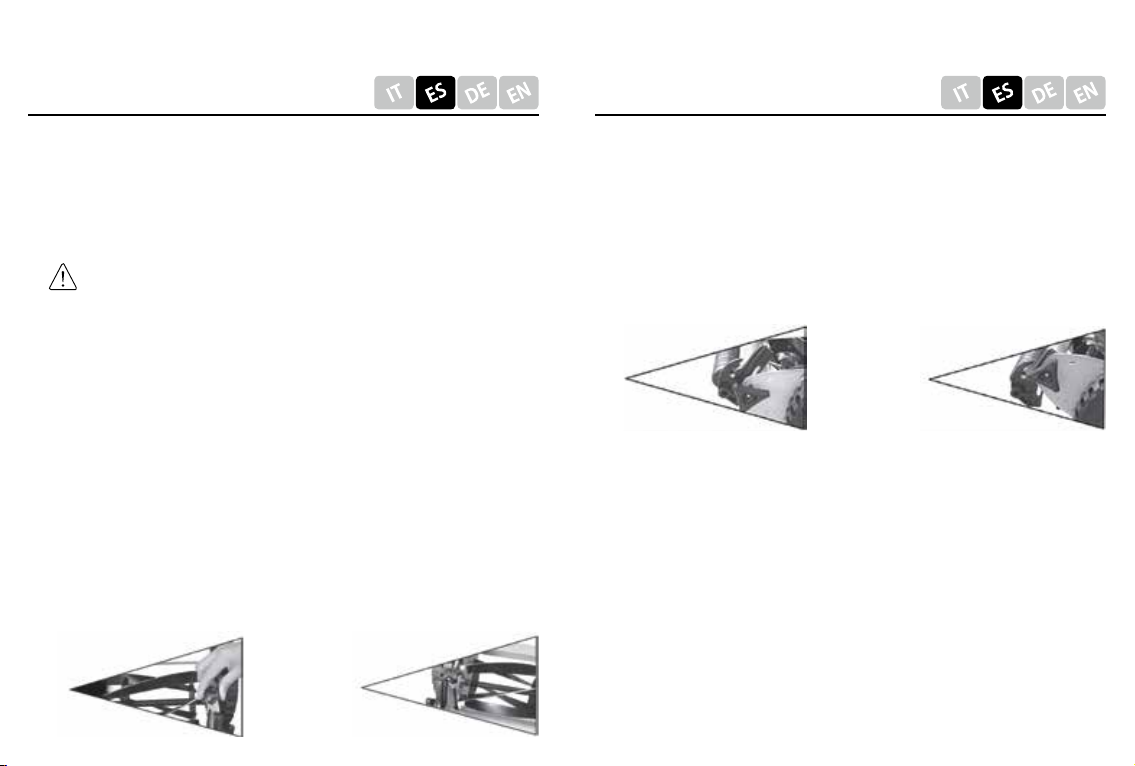
MONTAGE
Abb. 3
Abb. 2
Abb. 1
1. Befestigen Sie das untere Griffstück
indem Sie die Öffnungen der Stange
an den beiden Befestigungsbolzen des
Spindelmähers anbringen (Abb. 1).
2. Befestigen Sie das mittlere Griffstück
am unteren Griffstück und fixieren Sie
die Griffstücke mit den mitgelieferten
Schrauben und Muttern (Abb. 2)
3. Befestigen Sie das obere Griffstück am
mittleren Griffstück und fixieren Sie
die Griffstücke mit den mitgelieferten
Schrauben und Muttern. (Abb. 3)
SICHERHEITSHINWEISE
1. Lesen Sie die Bedienungsanleitung aufmerksam durch, bevor Sie
den Spindelmäher benutzen.
2. Überprüfen Sie die Rasenfläche, auf der Sie den Spindelmäher
benutzen wollen und entfernen Sie alle Gegenstände, die vom
Gerät erfasst werden könnten, wie z.B. Steine oder Äste.
3. Halten Sie Hände und Füße fern von rotierenden Teilen. Auch
wenn das Produkt keinen Motor hat, beginnt der Schneidevorgang
sobald die Räder in Bewegung gesetzt werden.
4. Halten Sie Hände und Füße während des Mähens in sicherem
Abstand zu den Messern.
5. Tragen Sie beim Mähen immer festes Schuhwerk. Verwenden
Sie den Spindelmäher niemals, wenn Sie barfuß sind oder offene
Schuhe tragen.
6. Mähen Sie in geraden Bahnen und Schritttempo um ein sauberes
Ergebnis zu erzielen. Das Produkt ist nicht für das Mähen sehr
steiler Hänge geeignet.
7. Verwenden Sie den Spindelmäher nicht auf feuchtem oder nassem
Rasen. Achten Sie darauf Bäume oder Zäune nicht zu streifen, da
der Spindelmäher dadurch beschädigt werden könnte.
8. Stellen Sie sicher, dass der Spindelmäher in einem guten Zustand
ist bevor Sie ihn verwenden. Verwenden Sie den Spindelmäher
nicht wenn er beschädigt ist.
Danke, dass Sie sich für den Kauf des Stocker Spindelmähers
entschieden haben. Dieses Handbuch enthält wichtige Hinweise zur
Sicherheit, Funktion und Wartung des Produkts. Bewahren Sie die
Anleitung an einem sicheren Ort auf und stellen Sie sicher, dass sie
auch für andere Nutzer immer verfügbar ist.