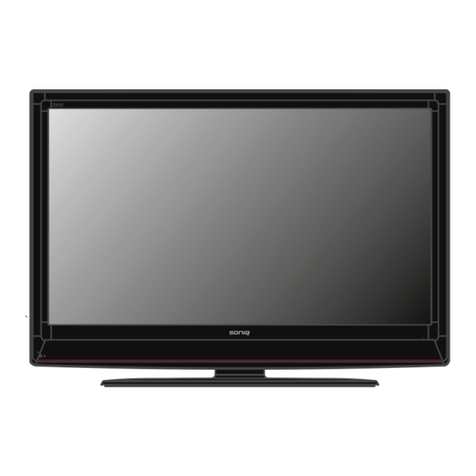
STRATO TFT-3201 User manual

1
European WEEE & RoHS Directives
On 13th February 2003, the Official Journal published the Waste Electrical and Electronic
Equipment (WEEE) Directive, and the Directive on Restrictions on Hazardous Substances
in Electrical and Electronic Equipment (RoHS).
Waste Electrical and Electronic Equipment (WEEE) Directive 2002/96/EC
The WEEE Directive covers almost all types of consumer and industrial electrical and electronic
equipment operating at maximum voltages of 1000V a.c. or 1500 V d.c. in 10 categories,
including computers & IT equipment, certain toys product, household
appliances, mobile phones, TV’s, DVD’s,
lighting and Medical devices, etc. The WEEE
Directive will place the responsibilities on
producer for separate collection points to the
environmentally sound treatment, re-use and
recycling will be covered by producers for their
own products. A crossed wheelie bin symbol
(Fig.1) Shall also be marked on the product.
Restriction of the Use of Certain hazardous
Substances in Electrical and Electronic
Equipment (RoHS) Directive 2005/95/EC
The available evidence indicates that measures on the collection, treatment, recycling and
disposal of waste electrical and electronic equipment (WEEE) as set out in the WEEE Directive
are necessary to reduce the waste management problems inked to the heavy metals concerned
and the flame retardants concerned in spite of those measures, however, significant parts of WEEE
will continue to be found in the current disposal routes. Even if WEEE were collected separately and
submitted to recycling processes, its content of mercury, cadmium, lead, chromium VI, PBB and PBDE
would be likely to pose risks to health or the environment.
The purpose of this Directive is to approximate the laws of the Member States on the restrictions of the
use of hazardous substances in electrical and electronic equipment and to contribute to the protection
of human health and the environmentally sound recovery and disposal of waste electrical and electronic
equipment.
fig.1

2
Important Safeguards
Safety of users has been taken into consideration during the design and manufacturing phase
of this product, but inappropriate operation may cause electric shock or fire. To prevent the
product from being damaged, the following rules should be observed for the installation, use
and maintenance of the product. Read the following safety instructions before starting the
operation.
The User Manual uses the following symbols to ensure a safe operation and prevent
any damage to operators or properties:
WARNING----- Ignorance or inappropriate use may cause
damage to the product.
ATTENTION--- Ignorance or inappropriate use may cause injury
to the user.
Prohibition
Warning (Attention) symbol (indicating “Electric Shock”).
Do not install the product on sloping or unstable surface:
The product may drop or tip over.
Only the marked power source can be used for the product:
Any power source other than the specified one may
cause fire or electric shock.
Keep the product away from moisture:
- Do not expose this appliance to rain or moisture.
- If water penetrates into the product, stop the operation; unplug
the connector and contact your dealer. Continuous use in this
case may result in fire or electric shock.
Examples:
WARNING
Do not place any objects on the top of the product:
Spilled water or metal objects may cause short circuit, fire or
electric shock if they penetrate into the housing of the product.
WARNING

3
Do not install the product close to smoke or moisture:
Fire or electric shock may be caused when the product is
installed close to smoke or moisture.
Do not install the product in an area with heavy dust or
high humidity:
Fire or electric shock may be caused when the product is
installed in a place with heavy dust or high humidity.
ATTENTION
Instructions for moving the product:
Ensure that the power connector and any other leads are unplugged before
moving the product.
The power cable should be kept away from heat sources:
The heat produced by any heat source may melt the covering of the power
cable.
WARNING
Avoid using dropped or damaged appliances:
If the product is dropped and the housing is damaged, the internal
components may function abnormally. Unplug the connector
immediately and contact the manufacturer for repair. Continuous use of the
product may cause fire or electric shock.
WARNING
Do not touch the power cord during lightning:
To avoid electric shock, avoid handling the power cord during
electrical storms.
Never use a damaged power cord:
Heavy objects, heat or tensile force may damage the power cord and cause
fire or electric shock.
Do not change or open the back cover:
Removing the back cover of the product may cause fire or electric shock.
Contact the manufacturer when inspection or adjustment is required.
Do not use the product if any abnormality occurs:
If any smoke or odor becomes apparent, unplug the connector
and contact the manufacturer immediately. Do not try to repair
the product by yourself.

4
Hold the power connector when removing the power cable:
Pulling the power cable itself may damage the wires inside the cable and
cause fire or electric shock.
Do not touch the connector with wet hands:
To avoid risk of electric shock.
Insert batteries in accordance with instructions:
Insert the batteries with correct polarities (positive and negative ).
Incorrect polarities may cause breakage and leakage of the batteries,
injure users and contaminate the remote control. Remove the batteries
if the product will not be used for an extended period. This will prevent
leakage and consequential damage.
Do not block or cover the vents:
Blocking the vents may cause overheating and fire. Do not install the product
in a place with little or no ventilation. Never cover the vents
with towels, blankets or dusters.
Unplug the connector:
Unplug the power connector when the product will not be used
for a long time.
ATTENTION
Unplug the connector
Unplug the connector
Use extreme care to make sure you are never in a position where your body (or any item you
are in contact with, such as a ladder or screwdriver) can accidentally touch overhead power
lines. Never locate the antenna near overhead power lines or other electrical circuits. Never
attempt to install any of the following during lightning activity:
a). an antenna system; or
b). cables, wires, or any home theater component connected to an antenna or phone system.
Always make sure the antenna system is properly grounded to provide adequate
protection against voltage surges and built-up static charges.
Antenna lead-in wire
Antenna discharge unit
Grounding conductors
Power service grounding
electrode system
Electric service equipment
Ground clamp
Ground clamp

5
✽ Notes others
• Although the LCD screen is made with high-precision technology and has effective pixels
of 99.99% or more, black dots may appear or bright points of light (red, blue, or green)
constantly on the LCD screen.
This is a structural property of the LCD panel and is not a malfunction.
• LCD (Liquid Crystal Display) may cause interference in image, sound, etc. of the other
electronic equipment that is easy to receive electromagnetic waves (i.e. AM radios and
video equipment) under certain installed conditions. If this happens try to relocate your unit
to overcome this.
• The screen on this TV is manufactured from glass. To prevent damage, never strike the
glass with a sharp or heavy object.
• If you have the LCD screen facing to the sun, the LCD screen will be damaged. Locate
the TV away from windows.
• This product is designed for indoor use only.
• Operating environment:
Temperature: 5°C ~30°C
Humidity: 20% to 85% non-condensing
Precaution
1. Read these instructions.
2. Keep these instructions.
3. Heed all warnings.
4. Follow all instructions.
5. Do not use this apparatus near water.
6. Clean only with dry cloth.
7. Do not block any ventilation openings. Install in accordance with the manufacturer’s
instructions.
8. Do not install near any heat sources such as radiators, stoves, or other apparatus (including
amplifiers) that product heat.
9 Do not defeat the safety purpose of the polarized or grounding-type plug. A polarized plug has
two blades wider than the other. A grounding type plug has two blades and a third grounding
prong. The wide blade or the third prong are provided for your safety. If the provided plug
does
not fit into your outlet, consult an electrician
for replacement of the obsolete outlet.
10. Protect the power cord from being walked on or pinched particularly at plugs, convenience
receptacles, and the point where they exit from the apparatus.
11. Only use attachments/accessories specified by the manufacturer.
12. Use only with the cart, stand, tripod, bracket, or table specified by the
manufacturer, or sold with the apparatus. When a cart is used, use
caution when moving the cart/apparatus combination to avoid injury
from tip-over.
13. Unplug this apparatus during lightning storms or when unused for long periods of time.
14. Refer all servicing to qualified service personnel. Servicing is required when the apparatus
has been damaged in any way, such as the power supply cord or plug is damaged, liquid has
been spilled or objects have fallen into the apparatus, the apparatus has been exposed to rain
or moisture, does not operate normally, or has been dropped.
15. The apparatus shall not be exposed to dripping or splashing and that no objected filled with
liquids, such as a vase, shall be placed on the apparatus.

6
Contents
European WEEE & RoHS Directives .............1
Important Safeguards ....................................2
Precaution .......................................................5
1. Before use ...................................................7
1.1 Open the Package .................................7
1.2 Installation .............................................7
2. Product Features ........................................8
3. Accessories ...............................................8
4. Names and Functions of Parts .................9
4.1 Side View ..............................................9
4.2 Front View .............................................9
4.3 Rear View ............................................10
4.4 Remote Control ................................... 11
5. Connection Accessory Devices ..............14
6. Basic Operation ........................................18
6.1 Power ON/OFF ...................................18
6.2 Selection of Input Mode .......................18
6.3 OSD Option Adjustment ......................19
6.4 Using the Teletext Function .................20
6.5 OSD Functions ....................................21
6.5.1 Video Page Menu ........................21
Adjustment of “Contrast”,
“Brightness” and “Saturation” ..........21
Adjustment of “Hue” ........................21
Adjustment of “Sharpness” ..............21
Selection of “Phase” setting ............21
Selection of “Colour
Temperature” ...................................22
Selection of “Advance
Picture Adjust” .................................22
6.5.2 Audio Page Menu ........................23
Adjustment of “Bass”,
“Treble” and “Balance” ....................23
Selection of “Surround” ...................23
6.5.3 Misc Page Menu ..........................23
Selection of “Language” ..................23
Selection of “
Blue Back
” ..................23
Using “Default” ................................24
6.5.4 TV Page Menu .............................24
Selection the “Region Selection” .....24
Using the “Auto Search” ..................24
Using the “Manual Scan” .................25
Using the “Fine Tune” ......................25
Selection of the “Sound System” .....25
Using the “Channel Name” ..............25
Using the “Channel Skip” ................26
Using the “Program Edit” .................26
Channel Selection ...........................27
Channel Preview .............................27
6.5.5 Geometric Page Menu ................27
Adjustment of “Contrast”
and “Brightness” ..............................27
Using “Colour Temperature” ............27
Using “Auto Setting” ........................28
Using “Phase” and
“Manual Clock” ................................28
Using “Display Adjustment” .............28
7. Technical Specification ............................29
8. Supported Signal Modes .........................30
9. Cleaning and Simple
Troubleshooting ......................................31

7
1. Before use
This product is a 32” WXGA (wide-screen with XGA resolution) LCD TV. It has passed the CE
approvals, and is ideal for consumer use. This product is a precision electronic
product. Users
should read the following instructions carefully to maximise the performance of the product:
1.1 Open the Package
- The product is packaged in a carton together with the standard accessories. Any optional
accessories shall be packed separately in another carton.
- Due to the size & weight of the product, it is recommended that it should be moved by a
minimum of two people.
- The protective glass and the glass substrate are installed on the front of the product.
Since both glasses can be broken and scraped easily, move the product carefully.
Never place the unit with the glass facing downwards unless it is protected with soft pads.
- When opening the carton, check that the product is in good condition and that all standard
accessories and items are included.
1.2 Installation
- Please use caution if wall mounting this product. Follow all directions from the
manufacturer
of the wall mount and be sure to securely fasten the product to the mount.
While the TV can be wall mounted, improper wall installation may void the warranty.
- Due to the higher power consumption, always use the cord exclusively designed for this
product. If an extended line is required, please consult with your service agent.
- The product should be installed on a flat surface to avoid tipping. The distance between the
back of the product and the wall should be maintained for proper ventilation.
- Avoid installing the product in the kitchen, bathroom or any other places with higher humidity
so as not to shorten the service life of the electronic components.
- Please ensure the product is installed horizontally, any 90 degree clockwise or
counterclockwise installation may induce poor ventilation and subsequent component damage.
- To protect the screen and avoid screen burn, do not hold on a static picture for a long time.

8
2. Product Features
This 32” LCD TV Player provides high quality image displays and is suitable for a variety of multi media
applications:
1. Available input signals
- The product provides an HDMI input connector.
- The product provides Full Scart and Half Scart input connectors.
- The product provides VGA (D-Sub 15 PIN) input connector.
The product supports PC images resolutions up to (1024 x 768@60Hz) with a vertical
frequency of 60Hz.
- The product provides component video (RCA) input connectors. It supports the high quality
input images of DVD and HDTV (480p/720p/1080i).
- The product provides composite video (RCA) input connectors.
- The product provides three sets of stereo audio input connectors, one set of audio output
connector (RCA).
Note: For the supported signal modes, please refer to page 30.
2. Power Management Function
This device provides an automatic power control function.
3. WXGA LCD TV Panel
The WXGA LCD TV panel provides high resolution and high contrast image. The number of
pixels is 1366 (H) x 768 (V). The contrast is 1000:1.
4. Others
- The LCD TV unit provides cool, Normal, warm and user colour temperature options. The user
may customise their favourite colour temperature.
3. Accessories
Stand x 1
User Manual x 1
Remote Control x 1
Battery (UM-4/R03P/AAA) x 2
Warranty Card x 1
Quick Start Guide x 1

9
4. Names and Functions of Parts
4.1 Side View
The functions of the buttons are described as follows:
Sketch map STANDBY: Press (Standby) to turn on and turn off.
VOL.+/-
A. They are used as <,>buttons in the OSD Menu screen.
B. Press to adjust the volume.
CH.+/-
A. They are used as ∧, ∨ buttons in the OSD Menu screen.
B. Press to scan through channels. To scan quickly through
channels, press and hold down either of the two buttons.
MENU: Press to display the menu. Press again to exit the menu.
SOURCE: Press to cycle display TV, AV, YPbPr, SCART 1,
SCART 2, VGA or HDMI source, your choice is highlighted
on the display. When displaying the OSD-menu, press to
confirm.
Sketch map
4.2 Front View
(IR) Infrared Receiver: Receives IR signals from the remote control.
(Power on / Standby) LED: Press (Power) to turn on and off.
Indicator on (Red) Standby mode
Indicator on (Green) Power on mode

10
4.3 Rear View
Sketch map
Connect the power cord to the device and an earthed 100~240V, 50/60Hz AC outlet.
Push the power switch (O: Off, I: On). The power indicator on the front of the panel should now
display red, indicating that the LCD TV is in standby mode.
Signal input and other terminals:
A. HDMI IN: For high quality picture display purposes. Connects to HDMI or DVI (DVI to HDMI
Adapter-not provided) digital output connector of the DVD or HDTV Set-top box.
B. D-Sub (VGA) IN: For PC display purposes. Connects to the Mini D-Sub 15 Pins analogue
output connector of the PC display card.
C. VGA/DVI AUDIO IN: Connect the audio input terminal to the audio output terminal of DVD or
HDTV Set-top box with VGA/DVI output terminal.
D. AUDIO OUT: Connect to an audio amplifier or other TV set that has an audio input.
E. Y Pb/Cb Pr/Cr IN: Connect the Component video input terminal to the Component output
terminal of the video output device.
Y Pb/Cb Pr/Cr AUDIO IN: Connect the audio input terminal to the audio output terminal of the
video output device.
F. VIDEO IN: Connect the component video input terminal to the video output terminal of the
video output device.
VIDEO AUDIO IN: Connect the audio input terminal to the audio output terminal of the Video
output device.
G. HALF SCART IN: Connects to the composite video or Y/C output terminal of the video output
device (such as DVD or VHS) that with SCART terminal output.
H. FULL SCART IN: Connects to the composite video or RGB output terminal of the video output
device (such as DVD or VHS) that with SCART terminal output.
I. RF IN: Connects antenna or 75 Ohm coaxial Aerial to receive TV/CABLE signal.
Note: HDMI=High Definition Multimedia Interface
ABI
C
D
EFG
H

11
4.4 Remote Control
Standby ( ): Press to turn on and off.
Mute ( ): Press to mute the sound.
Press again to restore the sound.
0~9 Number Buttons: Press 0~9 to
select a channel, (also used to input the
password), the channel changes
after
2 seconds.
Recall: Press to return to previous channel.
Source: Press to select the signal
source, such as TV, AV, YPbPr,
SCART 1
SCART 2, VGA or HDMI.
Zoom: Press to change the picture size
from 1/8 ~ 8X. (This button is not available
for “Auto” in PIC. Size.)
Pic Size: Press to change the screen
size, such as Auto, Full, 4:3 or Panoramic.
(This button is not available for VGA.)
Freeze: Press to freeze the picture,
press again to restore the picture. (This
button is not available for VGA mode.)
Sleep: Press repeatedly until it displays
the time in minutes (15 Min, 30 Min, 60
Min, 90 Min, 120 Min and, Off) that require
the TV to remain
on before shutting off.
To cancel sleep
time, press Sleep button
repeatedly until sleep Off appears.
S. Mode: Press repeatedly to select the
sound mode: Normal, News, Cinema,
Concert and User.
P. Mode: Press repeatedly to cycle
through the picture mode: Cinema,
Normal
, Vivid, Hi-Bright and User.
System:This button is activated for AV/TV
input source. When in TV mode, press
repeatedly to cycle through the system
options: AUTO, PAL and SECAM.
(Continued on next page)
When in AV mode, pressing it will display the following sequence: AUTO, PAL, NTSC3.58,
NTSC4.43 and SECAM.
Display: Press to display the channel information which will disappear after 3 seconds.
: Press to select
the Multi sound, such as Mono, Stereo, Nicam Dual I, Nicam Dual II and
Nicam Stereo.
Surround: Press to select the surround, On or Off
.
Favourite: Press repeatedly to cycle through the favourite channel.
Add/Erase: Press to add or delete favourite or unwanted channels.

12
These buttons are not in use.
Enter
:
P
ress to confirm or enter.
VOL +/-: Press to adjust the volume.
CH +/- : Press to select the channel
forward or backward.
<, >,∧, ∨: Press <,>,∧, ∨ to move
the on-screen cursor.
Menu: Press to enter into the on-screen
setup menu, press again to exit, and it
has the function of exit in the Sub Menu.
These buttons are not in use. Press will display
“NOT EFFECT”.
Teletext Function:
Text: Press this button to active teletext.
Press again to exit teletext.
CE: Press to clear the error input for Teletext
page number.
Index
: Press to display the index page at
any time while you are viewing teletext.
Sub. Page
: Press to enter the sub page
mode. You can use
∧/∨
button to
display the sub page. Press again to exit.
Hold
: Press to hold the current page and
press again to release holding of the page.
Reveal
: Press the button once to reveal
hidden information (solutions to puzzles,
riddles, ect.)
Txt.Size: Press repeatedly to double the
character size
in the following order:
Upper half of the page, Lower half of
the page, Return to normal size.
Mix: Press repeatedly to turn on
Teletext Teletext blending with TV
program Teletext and TV program side
by side Teletext mode.
List: Press this button to list mode, press again
to exit.
These buttons are not in use. Press will display “NOT EFFECT”.
Colour Buttons:
Red: Press this button to access the red item or page.
Green: Press this button to access the green item or page.
Yellow: Press this button to access the yellow item or page.
Blue: Press this button to access the blue item or page.
Note: Press CH +/- button on the remote control can turn on TV set from standby mode.

13
Insertion of Batteries:
- Turn the remote control upside down, press and slide off the battery cover.
- Insert two 1.5V (AAA) batteries into the compartment, take care to observe the and
markings indicated inside.
- Replace the cover and slide in until the lock clicks into place.
Range of Remote Control
Sketch map
30°
20°
20°
30°
- Ensure the remote control is pointed towards the remote control window on the display unit.
- No obstacles should be placed between the remote control and the remote control window.
- The effective receiving range for the signal is within 5-8 meters from the front of the remote
control window, and 30° to the left or right side and 20° above or below the control window.
Care For Remote Control
- Avoid spilling liquids on the remote.
- Avoid dropping or otherwise jarring the remote.
- Always store the remote control in dry and normal room temperatures.
- If the remote is not performing satisfactorily, replaced the batteries. The batteries should be
replaced after one year as a precaution.
- If the remote control will be idle for a long time (above 1 month) take out the batteries to
avoid leakage from the batteries.
- Clean the entire remote control especially the battery compartment if any leakage found.
- Do not mix different types of new and used batteries together to avoid leakage.

14
5. Connection Accessory Devices
DVD or Set-top box
Connecting the DVD player or HDTV Set-top box to the HDMI input
Switch off the LCD TV and external equipment before connecting cables.
. Connect the LCD TV to the DVD player or HDTV Set-top box with the HDMI cable.
. Connect the DVI AUDIO input terminal to the audio output terminal of HDTV Set-top
box with
DVI output terminal, and a DVI to HDMI conversion cable should be adopted.
. Please ensure the Power Cord is connected and the Power Switch button turned on before
it is operated.
. Press Standby button to turn on the LCD TV, then turn on external equipment.
.
The
LCD TV
and DVD or Set-top box are working at the same time.
Press Source button to
select HDMI signal source.
Note:
The above step 2 is used if you connect DVI output to the HDMI input of the LCD TV.
The
above step 1
is used
if you connect HDMI output to the HDMI input of the
LCD TV
.
HDMI do not support PC.
DVI
HDMI
white
DVD or Set-top box
red

15
White
Red
Connecting the Computer
Switch off the LCD TV and external equipment
before connecting cables.
.
Connect the
LCD TV
to the computer with the
D-Sub (VGA)
cable.
.
Connect the audio output of the computer
to the audio input on the LCD TV.
. Please ensure the Power Cord is
connected and turn on the Power Switch
button before it is operated.
. Press the Standby button to turn on the LCD
TV,
then
turn on the external equipment.
. The LCD TV and Computer are working at
the same time. Press Source button to
select VGA signal source.
Connecting the DVD player or HDTV
Set-top box using YPbPr input
Switch off the LCD TV and external equipment
before connecting cables.
. Connect the YPbPr output of the DVD
or HDTV Set-top box to the YPbPr
input of the LCD TV.
. Connect the audio output of the DVD
player or HDTV Set-top box to the audio
input of the LCD TV.
. Please ensure the Power Cord is
connected and turn on the
Power
Switch
button before it is operated.
. Press Standby button to turn on the LCD
TV, then turn on external equipment.
. Press Source button to select YPbPr
signal
source. DVD or Set-top box
Red White
Red
Blue
Green

16
Connecting the DVD, VCR or other video apparatus
Switch off the LCD TV and external equipment before
connecting cables.
. With an AV cable, connect the VIDEO input of the
LCD TV to the VCR or other video apparatus. With an
AUDIO cable, connect the AUDIO OUT of the VCR
or other video apparatus to the AUDIO IN of the LCD
TV.
. Please ensure the Power Cord is connected and turn
on the Power Switch button before it is operated.
. Press Standby button to turn on the LCD TV, then
turn on external equipment.
. To watch the VCR or other video apparatus, please
press Source button to select AV.
Connecting audio amplifier or other TV set
Switch off the LCD TV and external equipment before
connecting cables.
. Connect the AUDIO OUTPUT of the LCD TV to the
AUDIO INPUT of the audio amplifier apparatus or
other TV set.
.
Press Standby button to turn on the LCD TV,
then turn on the external equipment.
DVD or VCR player
Red
White
Yellow
Audio Amplifier
Red
White

17
Connecting the VCR/DVD/other device that
has SCART
Switch off the LCD TV and external equipment
before connecting cables.
. Connect the VCR/DVD’s SCART Out to the
LCD TV’s SCART In terminal.
. Press the Power button to turn on the LCD
TV, then turn on the external equipment.
. Press the Source button to select SCART1
or SCART2 signal source.
VCR/DVD Player
Connecting directly to cable or an antenna
Switch off the LCD TV and external equipment before connecting cables.
Using 75 Ohm coaxial Aerial: Connect directly to the RF terminal of the tuner.

18
6. Basic Operation
6.1 Power ON/OFF: The Display is in Standby mode
- Press Standby ( ) button on the remote control
or on the front panel to turn on the unit. The
power indicator changes from red to green.
- Press Standby ( ) button on the remote control
or on the front panel again to return the display
to standby mode. The power indicator changes
from green to red.
6.2 Selection of Input Mode
- Press the Source button to select the signal source you desire. The signal sources are
displayed in the following sequence:
When there is no signal from the selected source, the warning message will be displayed
as per illustration. Either change the channel in TV mode or press Source button to change
source.
When selecting the signal source, the screen will display the information of the selected input
source.
59
Mono
AV No signal
TV AV YPbPr SCART 1 VGASCART 2 HDMI

19
6.3 OSD Option Adjustment
Learning about the menu system
After you have installed the batteries into the remote control, you will need to
set some preferences on the TV using the menu system.
- The buttons for OSD option adjustment include: Menu, ∧, ∨, <, >, Enter buttons.
- Press the Menu button to open the OSD Menu then press <, >button to select the pages.
The pages are displayed in the following sequence (circular display):
- Press the Menu button on the remote control or on the front panel, it will change in the
following sequence:
Sub Menu
Main Menu exit
Video Audio Misc TV Geometric
Main Menu exit
Press the Menu button to display the
menu system.
Press <,> button to select the menu
pages.
Press
∧, ∨
button to select an item.
P
ress
∧, ∨, <, >
button to select
or adjust a setting
.
If you do not
make a selection within
15 seconds, the main menu closes
automatically; the other menus close
automatically within 6 seconds.
Press the Menu button to return or exit
OSD-menu.
Enter
∧
,
∨
,
<
,
>
Menu

20
6.4 Using the Teletext Function
Teletext is a free service broadcast by most TV stations which give up-to-the-minute information
news, weather, television programs, Share price, subtitles, and many other topics.
To operate TELETEXT
Select a TV station on which Teletext is being transmitted.
Press the Text button once to to bring up the teletext screen.
Two page numbers, TV station name, date, and time are displayed on the screen headline.
The first page number indicates your selection, while the second shows the current page
displayed.
Press the Text button again to switch to Mix mode and press twice to switch off teletext.
The previous program reappears.
Teletext Page Selection
Enter the required Teletext page as a three digit numbers.
The selected page number is displayed at the top left corner of the screen. The Teletext
page counter searches until the selected page number is located, so that the desired page
is displayed on the screen.
The ∧, ∨buttons can be used to select the preceding or following page.
Fast find using the 4 coloured buttons.
Four subject-headed pages can be selected quickly by pressing the corresponding coloured
buttons Red, Green, Yellow, or Blue on the remote control.
Useful features for Teletext
Mix
Press the Mix button to switch to Mix mode and press twice to switch off teletext.
The previous program reappears.
Index
Press this button to select the index page that displays the list of teletext contents.
Hold
The teletext page you have selected may contain more information than is on the screen;
The rest of the information will be displayed after a period of time on a sub page.
Press Hold button to stop the automatic page change.
The hold symbol will be displayed at the top left-hand corner on the screen and the
automatic page change will be stopped.
Press Hold button again to continue.
Reveal
Press this button once to display concealed information, such as solutions of riddles,
puzzles or a quiz.
Press this button again to conceal the revealed answers.
Txt. Size
Press to double the size of the displayed text.
Press this button again to restore the normal displayed.
Sub. Page
Press this button to enter the sub page mode. You can use ∧, ∨ button to display sub
page; Press again to exit.
CE
Press to clear the error input for Teletext page number.
List
Press this button to list mode, press again to exit.
This manual suits for next models
1
Table of contents

