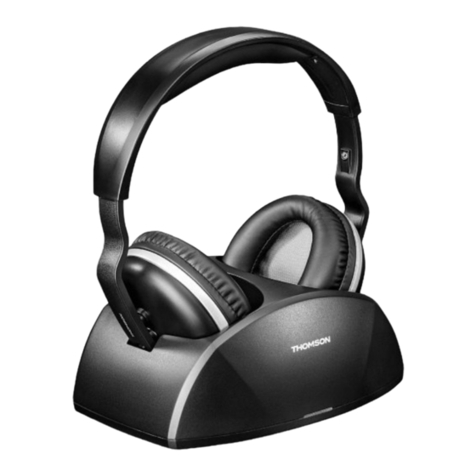
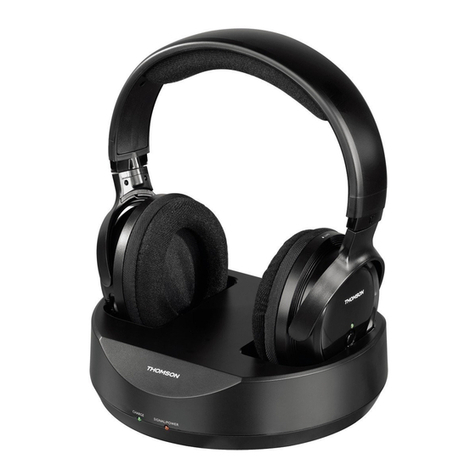
THOMSON WHP3001BK User manual

WirelessUHF headphones
asue sanslUHF
UHF-Funk-Kopfhörer

GOperating Instructions
FMode d‘emploi
DBedienungsanleitung
EInstrucciones de uso
IIstruzioni per l‘uso
OManual de instruções
RРуководство по эксплуатации
NGebruiksaanwijzing
PInstrukcja obsługi
HHasználati útmutató
JΟδηγίες χρήσης
CNávod kpoužití
QNávod na použitie
TKullanma kılavuzu
SBruksanvisning
LKäyttöohje
MManual de utilizare

Left
Pic. 1
Pic. 2 Pic. 3
6
4
1
2
5mm
not isolated
R
5
3
t
Righ
7

2
GOperating Instructions
Thank you for choosing aThomson product.
Take your time and read the following instructions and information
completely.Please keep these instructions in asafe place for
futurereference. If you sell the device, please pass these operating
instructions on to the new owner.
1. Explanation of Warning Symbols and Notes
Warning
This symbol is used to indicate safety instructions or to draw
your attention to specic hazards and risks.
Note
This symbol is used to indicate additional information or
important notes.
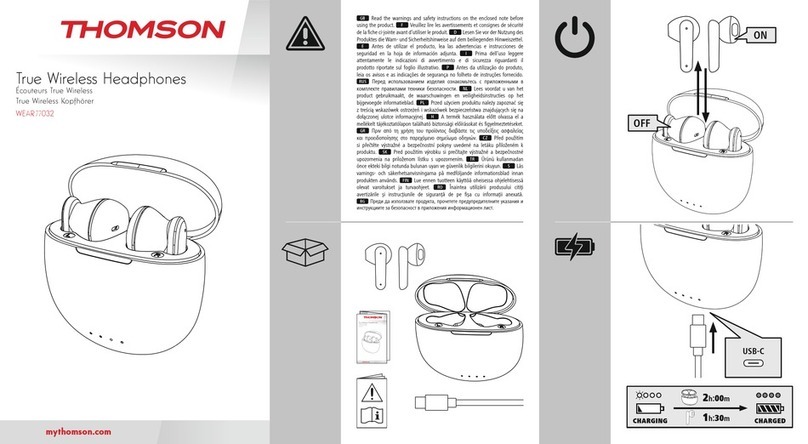
2. Controls and displays, Fig. 1+3
1. Charge status LED indicator (green)
2. Power/signal LED indicator (red)
3. Power button
4. Volume control
5. Auto-Tune button
6. Frequency channel switch
7. Power LED indicator (green)
3. Package contents
•1WHP3001BK UHF wireless headphones
•1transmitter with charging station
•2NiMH AAA batteries
•1power supply unit
•1audio adapter cable, RCAstereo to 3.5 mm jack
•1jack adapter 6.3 mm/3.5 mm
4. Safety Notes
Warning
•Using this product limits your perception of ambient noise.
Forthis reason, do not operate any vehicles or machines
while using this product.
•Always keep the volume at areasonable
level. Loud volumes, even over short
periods, can cause hearing loss.
•Never open, damage or swallow batteries or allow them to
enter the environment. They can contain toxic, environmentally
unfriendly heavy metals.
•Do not tamper with or damage/heat/disassemble the batteries/
rechargeable batteries.
•The product is intended for private, non-commercial use only.
•Use the product for its intended purpose only.
•Children should be supervised to ensurethat they do not play
with the device.
•Do not use the product in areas wherethe use of electronic
devices is not permitted.
•Only connect the product to asocket that has been approved for
the device. The socket must be installed close to the product and
easily accessible.
•Disconnect the product from the network using the power button
–ifthis is not available, unplug the power cordfromthe socket.
•Lay all cables so that they do not pose atripping hazard.
•Do not bend or crush the cable.
•Do not drop the product and do not expose it to any major shocks.
•Dispose of packaging material immediately according to locally
applicable regulations.
•Do not modify the product in any way.Doing so voids the warranty.
•Do not use the product if the adapter,connection cable or power
cable is damaged.
•Do not attempt to service or repair the product yourself.Leave
any and all service work to qualied experts.
•Do not open the device or continue to operate it if it becomes
damaged.
•The batteries and charging station included in the delivery go
together and should always be used in combination.
5. Technical specifications
Transmitting mode UHF stereo
Frequency band(s) 863.53 –864.53 MHz
Maximum radio-frequency
power transmitted <5dBm
Operating voltage
Transmitter: 8V,70mA
Receiver: 2.4 V,
(2 x1.2 VNiMH AAA)
Frequency range 20 Hz –20KHz
Distortion <2%
Signal-to-noise ratio >54dB
Range 100 mmax. (outdoors)
20–30 m(indoors)
Operating time 8hrs (at medium volume)
6. Installing the transmitter/charging station, Fig. 3
•Connect the power supply to the power socket on the rear side
of the transmitter.
•Connect the power supply to amains socket.
•Connect the RCAplugs of the audio adapter cable to the RCA
sockets on the rear side of the transmitter.Connect the other
end (jack plug) to the headphone jack of your audio source
(television, hi- system, DVD player,MP3 player,etc.).
•The redLED (2) lights up.
7. Installing the receiver/headphones, Fig. 2
•Carefully pulloff the earpad on the right-hand side.
•Insert the two batteries supplied, making sureyou observe
correct polarity.
•Reinsert the earpad until it audibly clicks into place.
8. Getting started
•Switch on the audio source connected to the transmitter (TV or
audio player).
•Switch on the headphones by pressing the Power button (3). The
LED (7) of the headphones lights up green. Make surethat the
redLED (2) is lit. This conrms that the rechargeable batteries
arecharged.

3
•Put the headphones on and set the volume to the desired level.
•Beforeusing the headphones for the rst time, make surethat
the battery is fully charged. Charge the battery for at least 24
hours beforethe rst use.
•Switch off the headphones if they arenot being used and put
them back onto the transmitter’scharging contacts.
Note
•If you cannot get an optimum signal frequency,press the
Auto-Tune button (5) on the headphones.
•If you cannot get an adequate frequency,change the
frequency channel on the rear side of the transmitter.Then
conrm the corresponding channel on the headphones by
pressing the Auto-Tune button.
•To get the best sound experience with your headphones, you
should set the volume of the sound source (TV,stereo system,
etc.) as high as possible and reduce the volume on the
headphones themselves.
The transmitter will automatically switch off if it receives no audio
signal for approximately 2minutes, or if the signal from the audio
source is too weak for awless reception. As soon as the signal
strength is sucient, the transmitter will automatically switch back
on. The headphones do not switch off automatically.
9. Charging, Fig. 3
•Switch off the headphones.
•Place the headphones in the charging station as shown, and
make surethat the charging contacts of both devices properly
touch each other.
•The green LED (1) lights up. Charging begins automatically.
Note
•To prevent damage to the batteries, always switch off the
headphones when they arenot in use.
•Beforeusing the product for the rst time, the batteries
should be fully charged. To guarantee an acceptable charge,
the batteries should initially be charged for 24 hours.
Subsequent charging cycles then last approximately 10 hours.
•The batteries will not be charged if the transmitter is off.
10. Troubleshooting
10.1 No sound
•Check that the power supply plug is fully inserted into the mains
socket and the other end is properly connected to the power
supply socket on the transmitter.
•Make surethat the headphones areon.
•The battery in the headphones may have insucient remaining
charge. Charge the battery.
•Check that your TV,hi- system or audio source is switched on
and achannel is correctly congured to send an audio signal.
•Increase the volume using the control on the headphones.
•The connected audio/video device may not be in playback mode.
Please start the playback.
•The output volume of the audio source may be too low.Adjust
the volume accordingly.
10.2 Distortion
•Press the Auto-Tune button.
•Set adifferent frequency channel (1, 2or3). Then press the Auto-
Tune button again.
•The battery in the headphones may have insucient remaining
charge. Charge the battery.
•Increase the volume using the control on the headphones.
•The distance between the headphones and the transmitter may
be too great. Move the two devices closer together and turn the
headphones in the direction of the transmitter.
•The input level of the audio signal may be too low.Increase the
volume of the audio source.
11. Care and Maintenance
Only clean this product with aslightly damp, lint-free cloth and do
not use aggressive cleaning agents.
12. Warranty Disclaimer
Hama GmbH &Co. KG assumes no liability and provides no
warranty for damage resulting from improper installation/mounting,
improper use of the product or from failuretoobserve the operating
instructions and/or safety notes.
13. Service and Support
Please contact Hama Product Consulting if you have any questions
about this product.
Hotline: +49 9091 502-115 (German/English)
Further support information can be found here: www.hama.com
14. Recycling Information
Note on environmental protection:
After the implementation of the European Directive
2012/19/EU and 2006/66/EU in the national legal system,
the following applies: Electric and electronic devices as
well as batteries must not be disposed of with household
waste. Consumers areobliged by law to return electrical and
electronic devices as well as batteries at the end of their service
lives to the public collecting points set up for this purpose or point
of sale. Details to this aredened by the national law of the
respective country.This symbol on the product, the instruction
manual or the package indicates that aproduct is subject to these
regulations. By recycling, reusing the materials or other forms of
utilising old devices/Batteries, you aremaking an important
contribution to protecting our environment.
15. Declaration of Conformity
Hereby,Hama GmbH &CoKG declares that the radio
equipment type [00131957, 00131958] is in compliance
with Directive 2014/53/EU.The full text of the EU
declaration of conformity is available at the following internet
address:
www.hama.com->00131957->Downloads
www.hama.com->00131958->Downloads

4
FMode d‘emploi
Nous vous remercions d’avoir choisi un produit Thomson.
Veuillez prendreletemps de lirel‘ensemble des remarques et
consignes suivantes. Veuillez conserver ce mode d‘emploi àportée
de main an de pouvoir le consulter en cas de besoin. Transmet-
tez-le au nouveau propriétaireavec l’appareil le cas échéant.
1. Explication des symboles d‘avertissement et des
remarques
Avertissement
Ce symbole est utilisé pour indiquer des consignes de sécurité
ou pour attirer votreattention sur des dangers et risques
particuliers.
Remarque
Ce symbole est utilisé pour indiquer des informations
supplémentaires ou des remarques importantes.
2. Éléments de commande et d’achage (g. 1+3)
1. Voyant LED pour l’état de charge (vert)
2. Voyant LED Power/signal (rouge)
3. Touche d’alimentation (Power)
4. Réglage du volume
5. Touche auto-balayage (Auto-Tune)
6. Commutateur de canal de fréquence
7. Voyant LED d’alimentation Power (vert)
3. Contenu de l’emballage
•1casque sans l UHF WHP3001BK
•1émetteur avec station de charge
•2batteries LR03/AAA NiMH
•1bloc secteur
•1câble adaptateur audio stéréo RCAsur jack 3,5 mm
•1adaptateur jack 6,3mm/3,5mm
4. Consignes de sécurité
Avertissement
•L‘utilisation du produit limite votreperception des bruits am-
biants. N‘utilisez donc pas le produit lorsque vous conduisez
un véhicule ou faites fonctionner une machine.
•Maintenez en permanence un niveau de volume
raisonnable. Un volume excessif -
même àcourte durée -est susceptible
d‘endommager votreouïe.
•Ne tentez pas d‘ouvrir les piles ou les batteries, faites attention
àceque des petits enfants ne les avalent pas et ne les jetez pas
avec les ordures domestiques. Elles sont susceptibles de contenir
métaux lourds toxiques et nocifs pour l‘environnement.
•Ne modiez pas et/ou ne déformez/chauffez/désassemblez pas
les batteries/piles.
•Ce produit est destiné àune installation domestique non commerciale.
•Utilisez le produit exclusivement conformément àsadestination.
•Les enfants doivent êtresurveillés n de garantir qu‘ils ne jouent
pas avec le produit.
•N‘utilisez pas le produit dans les zones dans lesquelles l‘utilisa-
tion d‘appareils électroniques est interdite.
•Utilisez l‘appareil exclusivement branché àune prise de courant
appropriée. La prise de courant doit êtresituée àproximité du
produit et doit êtrefacilement accessible.
•Coupez le produit du secteur àl‘aide de l‘interrupteur -
débranchez la prise de courant en cas d‘absence d‘interrupteur.
•Posez tous les câbles de telle sorte qu’ils ne présentent aucun
risque de chute.
•Faites attention ànepas plier ni coincer le câble.
•Protégez le produit des secousses violentes et évitez tout choc ou
toute chute.
•Recyclez les matériaux d’emballage conformément aux prescrip-
tions locales en vigueur.
•N’apportez aucune modication àl’appareil. Des modications
vous feraient perdrevos droits de garantie.
•N‘utilisez pas le produit lorsque l‘adaptateur,lecâble de
connexion ou le câble d‘alimentation sont endommagés.
•Ne tentez pas de réparer l’appareil vous-même ni d’effectuer
des travaux d’entretien. Déléguez tous travaux d‘entretien àdes
techniciens qualiés.
•Ne tentez pas d‘ouvrir le produit en cas de détérioration et cessez
de l’utiliser.
•Les piles rechargeables et la station de charge sont prévues pour
fonctionner ensemble et doivent êtreutilisées exclusivement dans
la combinaison livrée.
5. Caractéristiques techniques
Mode d’émission Stéréo UHF
Bandes de fréquences 863.53 –864.53 MHz
Puissance de radiofré-
quence maximale <5dBm
Tension de service
Émetteur :8V,70mA
Récepteur :2,4 V,
(2x LR03/AAA 1,2 VNiMH)
Plage de fréquence 20 Hz –20KHz
Distorsion <2%
Rapport bruit >54dB
Portée 100 mmaxi (en plein air)
20-30 m(en intérieur)
Autonomie 8h(àpuissance moyenne)
6.
Installation de l’émetteur /delastation de charge (g. 3)
•Connectez le bloc secteur àlaprise de raccordement située
derrièrel’émetteur.
•Branchez le bloc secteur àune prise de courant.
•Branchez les connecteurs RCAducâble adaptateur audio aux
prises RCAsituées au dos de l’émetteur.Connectez l’autreextré-
mité (jack) àlasortie casque de votresource audio (téléviseur,
système Hi-Fi, lecteur DVD, lecteur MP3, ...).
•La LED rouge (2) s’allume.
7. Installation du récepteur /ducasque (g. 2)
•Retirez le coussinet du côté droit avec précaution.
•Insérez les deux batteries fournies en respectant la polarité.
•Remettez le coussinet en place :ildoit s’enclencher de manièreaudible.

5
8. Mise en service
•Activez la source audio àlaquelle l’émetteur est connecté (TV ou
composant audio).
•Mettez le casque sous tension en appuyant sur la touche Power
(3). Le voyant LED (7) du casque s’allume en vert. Assurez-vous
que le voyant LED (2) est bien allumé en rouge. il indique que les
batteries sont complètement chargées.
•Placez le casque sur vos oreilles et réglez le volume au niveau souhaité.
•Avant la premièreutilisation, veillez àceque la batterie soit
entièrement chargée. Chargez la batterie pendant au moins 24
heures avant la premièreutilisation.
•Éteignez le casque si vous ne l’utilisez pas et replacez-le sur les
contacts de charge de l’émetteur.
Remarque
•Appuyez sur la touche Auto-Tune (5) du casque si vous ne
trouvez pas de fréquence de réception optimale.
•Changez le canal de fréquence au dos de l’émetteur dans le
cas où vous ne trouvez pas de fréquence susamment stable.
Sélectionnez, ensuite, le canal approprié en appuyant sur la
touche Auto-Tune du casque.
•Vous devriez régler le volume de la source audio (TV,chaine
HiFi, etc.) assez fort et le diminuer àl’aide du réglage du
volume du casque an d’obtenir le meilleur résultat sonore.
La diffusion de l’émetteur est automatiquement interrompue si
aucun signal audio n’est reconnu sur une période d’env.2minutes
ou si le signal de la source audio est trop faible pour en assurer
la parfaite réception. Lorsque le volume du signal est de nouveau
susant, l’émetteur se réactive tout seul. Le casque ne se met pas
automatiquement hors tension.
9. Recharge Fig. 3
•Éteignez le casque.
•Placez le casque dans la station de charge comme illustré, et
assurez-vous que les contacts de charge des deux appareils se
touchent correctement.
•Le voyant LED (1) s’allume en vert. La charge commence auto-
matiquement.
Remarque
•An d’éviter tout endommagement sur les piles, veuillez toujours
éteindreles micro-casques lorsque ceux-ci ne sont pas utilisés.
•Les piles doivent êtreentièrement chargées avant la première
utilisation. Une charge initiale de 24 heures est nécessaire
pour garantir une bonne durée de vie des piles. Les charges
suivantes seront d’environ 10 heures.
•Les batteries ne se rechargent pas lorsque l’émetteur est éteint.
10. Recherche des pannes
10.1 Aucun son
•Vériez si le bloc secteur est, sur une extrémité, bien inséré dans
la prise et, sur l’autreextrémité, correctement connecté àlaprise
d’entrée de bloc secteur de l’émetteur.
•Assurez-vous que le casque est sous tension.
•Il se peut que sur le casque, l’état de charge de la batterie
indique une décharge partielle. Rechargez la batterie.
•Vériez si votretéléviseur,votrechaîne Hi-Fi ou une autrecompo-
sante audio est bien allumé(e) et qu’un canal de transmission de
signal audio est bien sélectionné.
•Augmentez le volume àl’aide du régulateur situé sur le casque.
•L’appareil audio/vidéo connecté ne se trouve peut-êtrepas dans
un mode de lecture. Veuillez l’activer.
•Il se peut que le niveau de sortie de la source audio soit trop
faible. Réglez le volume comme il se doit.
10.2 Distorsion
•Appuyez sur la touche Auto-Tune.
•Réglez un autrecanal de fréquence (1, 2ou3). Appuyez à
nouveau sur la touche Auto-Tune.
•Il se peut que sur le casque, l’état de charge de la batterie
indique une décharge partielle. Rechargez la batterie.
•Augmentez le volume àl’aide du régulateur situé sur le casque.
•La distance entrelecasque et l’émetteur est peut-êtretropgrande.
Rapprochez les deux appareils et orientez le casque vers l’émetteur.
•Le niveau d’entrée du signal audio est peut-êtretropbas. Aug-
mentez le volume de la source audio.
11. Soins et entretien
Nettoyez la balance uniquement àl’aide d’un chiffon non breux
légèrement humide ;évitez tout détergent agressif.
12. Exclusion de garantie
La société Hama GmbH &Co. KG décline toute responsabilité en cas de
dommages provoqués par une installation, un montage ou une utilisa-
tion non conformes du produit ou encoreprovoqués par un non respect
des consignes du mode d‘emploi et/ou des consignes de sécurité.
13. Service et assistance
En cas de question concernant le produit, veuillez vous adresser au
service de conseil produits de Hama.
Ligne téléphonique directe :+49 9091 502-115 (allemand/anglais)
Vous trouverez ici de plus amples informations concernant l‘assis-
tance:
www.hama.com
14. Consignes de recyclage
Remarques concernant la protection de l’environnement:
Conformément àladirective européenne 2012/19/EU et
2006/66/CE, et an d‘atteindreuncertain nombred‘objectifs
en matièredeprotection de l‘environnement, les règles
suivantes doivent êtreappliquées: Les appareils électriques et
électroniques ainsi que les batteries ne doivent pas êtreéliminés avec
les déchets ménagers. Le pictogramme “picto” présent sur le produit,
son manuel d‘utilisation ou son emballage indique que le produit est
soumis àcette réglementation. Le consommateur doit retourner le
produit/la batterie usager aux points de collecte prévus àcet effet. Il
peut aussi le remettreàun revendeur.Enpermettant enn le recyclage
des produits ainsi que les batteries, le consommateur contribueraàla
protection de notreenvironnement. C‘est un acte écologique.
15. Déclaration de conformité
Le soussigné, Hama GmbH &CoKG, déclareque
l‘équipement radioélectrique du type [00131957,
00131958] est conforme àladirective 2014/53/UE. Le texte
complet de la déclaration UE de conformité est disponible àl‘adresse
internet suivante: www.hama.com->00131957->Downloads.
www.hama.com->00131958->Downloads

6
Vielen Dank, dass Sie sich für ein Thomson Produkt entschieden haben!
Nehmen Sie sich Zeit und lesen Sie die folgenden Anweisungen und
Hinweise zunächst ganz durch. Bewahren Sie diese Bedienungsan-
leitung anschließend an einem sicheren Ort auf,umbei Bedarf dar-
in nachschlagen zu können. Sollten Sie das Gerät veräußern, geben
Sie diese Bedienungsanleitung an den neuen Eigentümer weiter.
1. Erklärung von Warnsymbolen und Hinweisen
Warnung
Wirdverwendet, um Sicherheitshinweise zu kennzeichnen oder um
Aufmerksamkeit auf besondereGefahren und Risiken zu lenken.
Hinweis
Wirdverwendet, um zusätzlich Informationen oder wichtige
Hinweise zu kennzeichnen.
2. Bedienungselemente und Anzeigen Pic 1+3
1. LED-Anzeige Ladestatus (grün)
2. LED-Anzeige Power/Signal (rot)
3. Power-Taste
4. Lautstärkeregler
5. Auto-Tune-Taste
6. Schalter Frequenzkanal
7. LED-Anzeige Power (grün)
3. Verpackungsinhalt
•1WHP3001BK UHF-Funk-Kopfhörer
•1Sender mit Ladestation
•2AAA NiMH Akkus
•1Netzteil
•1Audio-Adapterkabel Cinch-Stereo auf Klinke 3,5 mm
•1Klinkenadapter 6,3mm/3,5mm
4. Sicherheitshinweise
Warnung
•Die Benutzung des Produktes schränkt Sie in der Wahrnehmung
von Umgebungsgeräuschen ein. Bedienen Sie daher während
der Benutzung keine Fahrzeuge oder Maschinen.
•Halten Sie die Lautstärke immer auf einem ver-
nünftigen Niveau. Hohe Lautstärken können -
selbst bei kurzer Dauer –zuHörschäden führen.
•Akkus und Batterien nie öffnen, beschädigen, verschlucken oder
in die Umwelt gelangen lassen. Sie können giftige und umwelt-
schädliche Schwermetalle enthalten.
•Verändern und/oder deformieren/erhitzen/zerlegen Sie Akkus/
Batterien nicht.
•Das Produkt ist für den privaten, nicht-gewerblichen Haushalts-
gebrauch vorgesehen.
•Verwenden Sie das Produkt ausschließlich für den dazu vorgese-
henen Zweck.
•Kinder sollten beaufsichtigt werden, um sicher zu stellen, dass sie
nicht mit dem Produkt spielen.
•Benutzen Sie das Produkt nicht in Bereichen, in denen elektroni-
sche Geräte nicht erlaubt sind.
•Betreiben Sie das Produkt nur an einer dafür zugelassenen
Steckdose. Die Netzsteckdose muss in der Nähe des Produktes
angebracht und leicht zugänglich sein.
•Trennen Sie das Produkt mittels des Ein-/Ausschalters vom Netz –wenn
dieser nicht vorhanden ist, ziehen Sie die Netzleitung aus der Steckdose.
•Verlegen Sie alle Kabel so, dass sie keine Stolpergefahr darstellen.
•Knicken und quetschen Sie das Kabel nicht.
•Lassen Sie das Produkt nicht fallen und setzen Sie es keinen
heftigen Erschütterungen aus.
•Entsorgen Sie das Verpackungsmaterial sofort gemäß den örtlich
gültigen Entsorgungsvorschriften.
•Nehmen Sie keine Veränderungen am Produkt vor.Dadurch
verlieren sie jegliche Gewährleistungsansprüche.
•Verwenden Sie das Produkt nicht, wenn das Netzteil oder die
Netzleitung beschädigt sind
•Versuchen Sie nicht, das Gerät selbst zu warten oder zu reparieren.
Überlassen Sie jegliche Wartungsarbeit dem zuständigen Fachpersonal
•Öffnen Sie das Produkt nicht und betreiben Sie es bei Beschädi-
gungen nicht weiter.
•Akkus und Ladestation sind aufeinander abgestimmt und dürfen
nur in der ausgelieferten Kombination verwendet werden.
5. Technische Daten
Sendemodus UHF stereo
Frequenzband/
Frequenzbänder 863.53 –864.53 MHz
Abgestrahlte maxi-
male Sendeleistung <5dBm
Betriebsspannung Sender :8V,70mA
Receiver :2,4 V, (2x AAA 1,2 VNiMH)
Frequenzbereich 20 Hz –20KHz
Verzerrung <2%
Rauschabstand >54dB
Reichweite max.100 m(im Freien)
20-30 m(in Gebäuden)
Laufzeit 8h(bei mittlerer Lautstärke)
6. Installation Sender /Ladestation Pic 3
•Verbinden Sie das Netzteil mit der Anschlussbuchse auf der
Rückseite des Senders.
•Verbinden Sie das Steckernetzteil mit einer Steckdose.
•Verbinden Sie die Cinch-Stecker des Audio-Adapterkabels mit den
Cinchbuchsen auf der Rückseite des Senders. Verbinden Sie das an-
dereEnde (Klinkenstecker) mit der Kopfhörer-Ausgangsbuchse Ihrer
Audioquelle (Fernseher,HiFi-System, DVD-Player,MP3-Player,...).
•Die rote LED (2) leuchtet nun.
7. Installation Empfänger /Kopfhörer Pic 2
•Ziehen Sie vorsichtig das Ohrpolster auf der rechten Seite ab.
•Legen Sie die zwei mitgelieferten Akkus ein und beachten dabei
die korrekte Polarität.
•Setzen Sie das Ohrpolster wieder ein bis es hörbar einrastet.
8. Inbetriebnahme
•Schalten Sie die Audioquelle ein, mit der der Sender verbunden
ist (Fernseher oder Audiokomponente).
DBedienungsanleitung

7
•Schalten Sie den Kopfhörer ein, indem Sie die Power-Taste (3)
drücken. Die LED (7) des Kopfhörers leuchtet grün. Vergewissern
Sie sich, dass die rote LED (2) leuchtet. Sie bestätigt, dass die
auadbaren Akkus geladen sind.
•Setzen Sie den Kopfhörer auf und stellen Sie die Lautstärke wie
gewünscht ein.
•Stellen Sie vor dem ersten Gebrauch sicher,dass der Akku
vollständig geladen ist. Bitte laden Sie den Akku vor der ersten
Verwendung für mindestens 24 Stunden.
•Schalten Sie den Kopfhörer aus, wenn er nicht benutzt wirdund
stellen Sie ihn zurück auf die Ladekontakte des Senders.
Hinweis
•Sollten Sie keine optimale Empfangsfrequenz nden, drücken
Sie die Auto-Tune-Taste (5) am Kopfhörer.
•Sollten Sie keine ausreichende Frequenz nden, wechseln
Sie den Frequenzkanal an der Rückseite des Senders. Dann
bestätigen Sie durch Drücken der Auto-Tune-Taste den
entsprechenden Kanal am Kopfhörer.
•Um das optimale Klangerlebnis Ihrer Kopfhörer zu erreichen,
sollten Sie die Lautstärke der Tonquelle (TV,Stereoanlage,...)
möglichst hoch einstellen und die Lautstärke am Kopfhörer
selbst reduzieren
Die Übertragung des Senders wirdautomatisch abgeschaltet, wenn
über einen Zeitraum von ca. 2Minuten kein Audiosignal mehr
erkannt wirdoder das Signal der Audioquelle zu schwach für einen
fehlerfreien Empfang ist. Sobald die Signalstärke wieder ausrei-
chend ist, schaltet sich der Sender selbstständig wieder ein.
Der Kopfhörer schaltet sich nicht automatisch ab.
9. Ladevorgang Pic. 3
•Schalten Sie den Kopfhörer aus.
•Stellen Sie den Kopfhörer wie abgebildet in die Ladestation und
stellen Sie dabei sicher,dass sich die Ladekontakte beider Geräte
korrekt berühren.
•Die grüne LED (1) leuchtet nun. Der Ladevorgang startet
automatisch.
Hinweis
•Um Beschädigungen der Batterien zu vermeiden, schalten Sie
die Kopfhörer bitte immer aus, wenn sie nicht in Gebrauch sind.
•Vordem ersten Gebrauch müssen die Batterien vollständig
aufgeladen sein. Eine 24-stündige Initialladung ist nötig, um
eine akzeptable Lebensdauer der Batterien zu garantieren.
Die folgenden Ladevorgänge dauern dann ca. 10 Stunden.
•Bei ausgeschaltetem Sender werden die Akkus nicht geladen.
10. Fehlersuche
10.1 Kein Ton
•Überprüfen Sie, ob das Steckernetzteil vollständig in der Steck-
dose eingerastet und am anderen Ende korrekt mit der Netzteil-
Eingangsbuchse des Senders verbunden ist.
•Stellen Sie sicher,dass der Kopfhörer eingeschaltet ist.
•Der Ladestand des Akkus im Kopfhörer könnte eine zu geringe
Restladung haben. Laden Sie den Akku.
•Überprüfen Sie, ob Ihr TV-Gerät, IhreHiFi-Anlage oder Audiokom-
ponente eingeschaltet und ein Kanal zur Audiosignalübertragung
eingestellt ist.
•Erhöhen Sie die Lautstärke mithilfe des Reglers am Kopfhörer.
•Möglicherweise bendet sich das angeschlossene Audio-/Video-
Gerät nicht im Wiedergabemodus? Bitte entsprechend einschalten.
•Der Ausgangspegel an der Audioquelle könnte zu niedrig einge-
stellt sein. Stellen Sie die Lautstärke passend ein.
10.2 Verzerrung
•Drücken Sie die Auto-Tune-Taste.
•Stellen Sie einen anderen Frequenzkanal (1,2 oder 3) ein.
Danach drücken Sie erneut die Auto-Tune-Taste.
•Der Ladestand des Akkus im Kopfhörer könnte eine zu geringe
Restladung haben. Laden Sie den Akku.
•Erhöhen Sie die Lautstärke mithilfe des Reglers am Kopfhörer.
•Die Entfernung zwischen Kopfhörer und Sender ist möglicher-
weise zu groß. Bringen Sie beide Geräte näher zusammen und
drehen Sie den Kopfhörer in Richtung des Senders.
•Der Eingangspegel des Audiosignals ist evtl. zu niedrig. Erhöhen
Sie die Lautstärke der Audioquelle.
11. Wartung und Pege
Reinigen Sie dieses Produkt nur mit einem fusselfreien, leicht feuch-
ten Tuch und verwenden Sie keine aggressiven Reiniger.
12. Gewährleistungsausschluss
Die Hama GmbH &Co. KG übernimmt keinerlei Haftung oder
Gewährleistung für Schäden, die aus unsachgemäßer Installation,
Montage und unsachgemäßem Gebrauch des Produktes oder einer
Nichtbeachtung der Bedienungsanleitung und/oder der Sicherheits-
hinweise resultieren.
13. Service und Support
Bitte wenden Sie sich bei Fragen zum Produkt gerne an die Hama-
Produktberatung. Hotline: +49 9091 502-115 (Deu/Eng)
WeitereSupportinformationen nden sie hier: www.hama.com
14. Entsorgungshinweise
Hinweis zum Umweltschutz:
Ab dem Zeitpunkt der Umsetzung der europäischen
Richtlinien 2012/19/EU und 2006/66/EG in nationales
Recht gilt folgendes: Elektrische und elektronische Geräte
sowie Batterien dürfen nicht mit dem Hausmüll entsorgt
werden. Der Verbraucher ist gesetzlich verpichtet, elektrische und
elektronische Geräte sowie Batterien am Ende ihrer Lebensdauer an
den dafür eingerichteten, öffentlichen Sammelstellen oder an die
Verkaufsstelle zurückzugeben. Einzelheiten dazu regelt das jeweilige
Landesrecht. Das Symbol auf dem Produkt, der Gebrauchsanleitung
oder der Verpackung weist auf diese Bestimmungen hin. Mit der
Wiederverwertung, der stoichen Verwertung oder anderen Formen
der Verwertung von Altgeräten/Batterien leisten Sie einen wichtigen
Beitrag zum Schutz unserer Umwelt.
15. Konformitätserklärung
Hiermit erklärt die Hama GmbH &CoKG, dass der
Funkanlagentyp [00131957, 00131958] der Richtlinie
2014/53/EU entspricht. Der vollständige Text der
EU-Konformitätserklärung ist unter der folgenden Internetadresse
verfügbar: www.hama.com->00131957->Downloads.
www.hama.com->00131958->Downloads
8
EInstrucciones de uso
Le agradecemos que se haya decidido por un producto de Thomson.
Tómese tiempo yléase primerolas siguientes instrucciones e
indicaciones. Después, guarde estas instrucciones de manejo en
un lugar seguroparapoder consultarlas cuando sea necesario. Si
vende el aparato, entregue estas instrucciones de manejo al nuevo
propietario.
1. Explicación de los símbolos de aviso ydelas indicaciones
Aviso
Se utiliza paracaracterizar las indicaciones de seguridad opara
llamar la atención sobrepeligros yriesgos especiales.
Nota
Se utiliza paracaracterizar informaciones adicionales o
indicaciones importantes.
2. Elementos de manejo eindicadores Fig. 1+3
1. Indicador LED estado de la carga (verde)
2. Indicador LED corriente/señal (rojo)
3. Tecla Power
4. Regulador de volumen
5. Tecla Auto-Tune
6. Interruptor canal de frecuencia
7. Indicador LED corriente (verde)
3. Contenido del paquete
•Auriculares de radiofrecuencia UHF WHP3001BK
•1emisor con estación de carga
•2baterías AAA NiMH
•1fuente de alimentación
•1cable adaptador RCAparaaudio estéreo ajack de 3,5 mm
•1adaptador de jack de 6,3mm/3,5mm
4. Instrucciones de seguridad
Aviso
•El uso del producto le limita la percepción de ruidos del
entorno. Portanto, no maneje vehículos omáquinas mientras
usa el producto.
•Mantenga siempreelvolumen aunnivel
razonable. Losvolúmenes altos pueden
causar daños auditivos, también en
caso de exposición breve aellos.
•Nunca abra, deterioreoingierabaterías opilas recargables o
las deseche en el medio ambiente. Pueden contener metales
pesados tóxicos ydañinos paraelmedio ambiente.
•No modique ni deforme/caliente/desensamble las pilas recarga-
bles/baterías.
•El producto es paraeluso doméstico privado, no comercial.
•Emplee el producto exclusivamente paralafunción paralaque
fue diseñado.
•Se debe vigilar alos niños paraasegurarse de que no juegan con
el aparato.
•No utilice el producto en áreas donde no se permitan aparatos
electrónicos.
•Utilice el producto sólo conectado auna toma de corriente
autorizada. La toma de corriente debe estar colocada cerca del
producto ydeforma accesible.
•Desconecte el producto de la redeléctrica mediante el interruptor
on/off –denoexistir éste, desenchufe el cable eléctrico de la
toma de corriente.
•Tienda todos los cables de modo que no constituyan un peligro
de tropezar.
•No doble ni aplaste el cable.
•No deje caer el producto ni lo someta asacudidas fuertes.
•Deseche el material de embalaje en conformidad con las disposi-
ciones locales sobreeldesecho vigentes.
•No realice cambios en el aparato. Esto conllevaría la pérdida de
todos los derechos de la garantía.
•No utilice el producto si el adaptador,eladaptador,elcable de
conexión oelcable eléctrico están dañados.
•No intente mantener oreparar el aparato por cuenta propia.
Encomiende cualquier trabajo de mantenimiento al personal
especializado competente.
•No abraelproducto ynolosiga operando de presentar deterioros.
•La batería ylaestación de carga están diseñados parafuncionar
conjuntamente ydeben emplearse exclusivamente en la combi-
nación suministrada.
5. Datos técnicos
Modo de emisión UHF estéreo
Banda obandas de frecuencia 863.53 –864.53 MHz
Potencia máxima de radiofre-
cuencia <5dBm
Tensión de servicio
Emisor: 8V,70mA
Receptor: 2,4 V
(2 AAA 1,2 VNiMH)
Rango de frecuencia 20 Hz –20KHz
Distorsión <2%
Relación señal/ruido >54dB
Alcance
máx. 100 m(al airelibre)
20-30 m(en interiores)
Tiempo de funcionamiento
8h(avolumen medio)
6. Instalación emisor/estación de carga -Fig. 3
•Conecte la fuente de alimentación con la hembrilla de conexión
situada en la parte posterior del emisor.
•Conecte la fuente de alimentación auna toma de corriente.
•Conecte el conector jack del cable adaptador de audio con las
hembrillas RCAsituadas en la parte posterior del emisor.Conecte
el otroextremo (conector jack) con la hembrilla de salida para
auriculares de su fuente de audio (televisor,equipo HiFi, repro-
ductor de DVD, reproductor de MP3...).
•El LED rojo (2) se enciende.
7. Instalación receptor/auriculares -Fig. 2
•Retirecuidadosamente la almohadilla del lado derecho.
•Introduzca las dos baterías suministradas teniendo en cuenta la
polaridad correcta.
•Vuelva acolocar la almohadilla, debe oír cómo encaja.

9
8. Puesta en funcionamiento
•Encienda la fuente de audio con la que esté conectado el trans-
misor (televisor ocomponente de audio).
•Encienda los auriculares manteniendo pulsada la tecla Power (3).
El LED (7) de los auriculares luce ahoradecolor verde. Asegúrese
de que el LED rojo (2) está encendido. Dicho LED conrma que
las pilas recargables están cargadas.
•Póngase los auriculares yajuste el volumen al nivel deseado.
•Antes del primer uso, asegúrese de que la batería está plenamen-
te cargada. Cargue la batería durante mínimo 24 horas antes de
proceder ausar el dispositivo por primeravez.
•Apague los auriculares cuando no los utilice yvuelva acolocarlos
sobrelos contactos de carga del transmisor.
Nota
•De no encontrar ninguna frecuencia de recepción óptima,
pulse la tecla Auto-Tune (5) de los auriculares.
•De no encontrar ninguna frecuencia que resulte suciente,
cambie el canal de frecuencia desde la parte posterior del
transmisor.Seguidamente, conrme el canal correspondiente
pulsando la tecla Auto-Tune de los auriculares.
•Para alcanzar un sonido óptimo con sus auriculares, debe
ajustar el volumen de la fuente de audio (TV,equipo estéreo,...)
al mayor nivel posible yr
educir el volumen de los auriculares.
La transmisión del emisor de desactiva automáticamente si no se
detecta señal de audio durante un periodo de aprox. 2minutos osi
la señal de la fuente de audio es demasiado débil parauna recep-
ción sin fallos. El emisor se reactiva automáticamente en cuanto se
vuelve adetectar una intensidad de señal suciente. Losauriculares
no se apagan automáticamente.
9. Proceso de carga g. 3
•Apague los auriculares.
•Coloque los auriculares en la estación de carga tal ycomo se
muestraenla imagen yasegúrese de que los contactos de carga
de ambos dispositivos permanecen en contacto.
•El LED verde (1) se enciende ahora. La carga se inicia de forma
automática.
Nota
•Para evitar daños en las pilas, asegúrese siempredeapagar
los auriculares cuando no estén usándose.
•Las pilas deben estar completamente cargadas antes del
primer uso. Se requiereuna carga inicial de 24 horas de
duración paragarantizar una vida útil aceptable de las pilas.
Losprocesos de recarga siguientes durarán aprox. 10 horas.
•Con el transmisor apagado, las pilas recargables no se recargan.
10. Búsqueda de fallos
10.1 No hay sonido
•Compruebe si la fuente de alimentación enchufable está comple-
tamente enchufada alatoma de corriente ysisuotroextremo
está correctamente conectado alahembrilla de entrada para
fuente de alimentación del emisor.
•Asegúrese de que los auriculares están encendidos.
•Es posible que la carga restante de la batería de los auriculares
sea demasiado baja. Cargue la batería.
•Compruebe si su TV,equipo HiFi ocomponente de audio está en-
cendido ysisehaajustado un canal paralatransmisión de audio.
•Aumente el volumen mediante el regulador situado en los auriculares.
•¿Es posible que el dispositivo de audio/vídeo conectado no se en-
cuentreenelmodo de reproducción? Actívelo como corresponda.
•Es posible que el nivel de salida de la fuente de audio sea dema-
siado bajo. Ajuste el volumen como corresponda.
10.2 Distorsión
•Pulse la tecla Auto-Tune.
•Ajuste otrocanal de frecuencia (1, 2ó3). Seguidamente, vuelva
apulsar la tecla Auto-Tune.
•Es posible que la carga restante de la batería de los auriculares
sea demasiado baja. Cargue la batería.
•Aumente el volumen mediante el regulador situado en los auriculares.
•Es posible que la distancia entrelos auriculares yelemisor
sea demasiado grande. Acerque ambos dispositivos ygirelos
auriculares hacia el emisor.
•Es posible que el nivel de entrada de la señal de audio sea dema-
siado bajo. Aumente el volumen de la fuente de audio.
11. Mantenimiento ycuidado
Limpie este producto sólo con un paño ligeramente humedecido
que no deje pelusas ynoutilice detergentes agresivos.
12. Exclusión de responsabilidad
Hama GmbH &CoKGnoseresponsabiliza ni concede garantía por
los daños que surjan por una instalación, montaje omanejo inco-
rrectos del producto opor la no observación de las instrucciones de
manejo y/o de las instrucciones de seguridad.
13. Servicio ysoporte
Si tiene que hacer alguna consulta sobreelproducto, diríjase al
asesoramiento de productos Hama.
Línea directa: +49 9091 502-115 (Alemán/Inglés)
Encontrar más información de soporte aquí: www.hama.com
14. Instrucciones paradesecho yreciclaje
Nota sobrelaprotección medioambiental:
Después de la puesta en marcha de la directiva Europea
2012/19/EU y2006/66/EU en el sistema legislativo
nacional, se aplicaralosiguiente: Losaparatos eléctricos y
electrónicos, así como las baterías, no se deben evacuar
en la basuradoméstica. El usuario está legalmente obligado a
llevar los aparatos eléctricos yelectrónicos, así como pilas ypilas
recargables, al nal de su vida útil alos puntos de recogida
comunales oadevolverlos al lugar donde los adquirió. Losdetalles
quedaran denidos por la ley de cada país. El símbolo en el
producto, en las instrucciones de uso oenel embalaje hace
referencia aello. Gracias al reciclaje, al reciclaje del material oa
otras formas de reciclaje de aparatos/pilas usados, contribuye Usted
de forma importante alaprotección de nuestromedio ambiente.
15. Declaración de conformidad
Porlapresente, Hama GmbH &CoKG, declaraque el tipo
de equipo radioeléctrico [00131957, 00131958] es
conforme con la Directiva 2014/53/UE. El texto completo
de la declaración UE de conformidad está disponible en la dirección
Internet siguiente: www.hama.com->00131957->Downloads.
www.hama.com->00131958->Downloads
10
IIstruzioni per l‘uso
Grazie per avereacquistato un prodotto Thomson!
Prima della messa in esercizio, leggete attentamente le seguenti
istruzioni eavvertenze, quindi conservatele in un luogo sicuroper
una eventuale consultazione. In caso di cessione dell‘apparecchio,
consegnate anche le presenti istruzioni al nuovo proprietario.
1. Spiegazione dei simboli di avvertimento edelle indicazioni
Attenzione
Viene utilizzato per contrassegnareleindicazioni di sicurezza op-
pureper rivolgerel‘attenzione verso particolari rischi epericoli.
Avvertenza
Viene utilizzato per contrassegnareinformazioni supplementari o
indicazioni importanti.
2. Elementi di comando eindicazioni g. 1+3
1. LED stato di carica (verde)
2. Indicazione aLED alimentazione/segnale (rosso)
3. Tasto power
4. Regolatoredel volume
5. Tasto Auto-Tune
6. Interruttorecanale di frequenza
7. LED indicazione di alimentazione (verde)
3. Contenuto della confezione
•1cua radio FM WHP3001BK
•1trasmettitorecon stazione di carica
•2batterie AAA NiMH
•1alimentatore
•1cavo adattatoreaudio stereo RCAsujack 3,5 mm
•1adattatorejack 6,3mm/3,5mm
4. Indicazioni di sicurezza
Attenzione
•L‘utilizzo del prodotto limita la percezione dei rumori ambien-
tali. Perciò, durante l‘utilizzo, non manovrareveicoli o
macchine.
•Regolareilvolume su un livello adeguato.
Il volume troppo forte può causare
danni all’udito, anche per breve durata.
•Non apriremai batterie obatterie ricaricabili, non danneggiarle,
ingerirle, né disperderle nell‘ambiente. Possono conteneremetalli
pesanti dannosi etossici.
•Non modicare, né deformare, surriscaldare, smontarelebatte-
rie/le batterie ricaricabili.
•Il prodotto èconcepito per l’uso domestico privato, non com-
merciale.
•Utilizzareilprodotto esclusivamente per lo scopo previsto.
•Sorvegliareibambini per accertarsi che non giochino con
l‘apparecchio.
•Non utilizzareilprodotto in zone in cui non sono ammesse le
apparecchiatureelettroniche.
•Collegareilprodotto solo auna presa appositamente omologata.
La presa deve trovarsi nei pressi del prodotto ed esserefacilmente
accessibile.
•Scollegareilprodotto dalla rete mediante l‘interruttoreon/off; se
questo non èpresente, estrarreilcavo di rete dalla presa.
•Disporretutti icavi in modo da non inciamparsi.
•Non piegare, né schiacciareilcavo.
•Non farecadereilprodotto enon sottoporlo aforti scossoni!
•Smaltireimmediatamente il materiale d‘imballaggio attenendosi
alle prescrizioni locali vigenti.
•Non apportaremodiche all’apparecchio per evitarediperderei
diritti di garanzia.
•Non utilizzareilprodotto se l‘adattatore, il cavo di allacciamento
oilcavo di rete sono danneggiati.
•Non tentarediaggiustareoripararel’apparecchio da soli. Fare
eseguirequalsiasi lavorodiriparazione al personale specializzato
competente.
•Non aprireilprodotto enon utilizzarlo più se danneggiato
•Le batterie elastazione di carica sono stati realizzati per comba-
ciareperfettamente epossono essereutilizzati solo insieme.
5. Dati tecnici
Modalità di
trasmissione stereo UHF
Bande di frequenza 863.53 –864.53 MHz
Massima potenza ara-
diofrequenza trasmessa <5dBm
Tensione di esercizio
Trasmettitore: 8V,70mA
Ricevitore: 2,4 V,
(2x AAA 1,2 VNiMH)
Gamma di frequenza 20 Hz –20KHz
Distorsione <2%
Rapporto segnale/
rumore >54dB
Portata
max. 100 m(all’aperto)
20-30 m(all’interno di edici)
Durata 8h(avolume medio)
6. Installazione trasmettitore/stazione di carica Pic 3
•Collegarel‘alimentatorealla presa di allacciamento sul retrodel
trasmettitore.
•Inserirelaspina dell’alimentatoreinuna presa.
•Collegarelaspina RCAdel cavo adattatoreaudio alle prese RCA
sul retrodel trasmettitore. Collegarel’altraestremità (spina jack)
alla presa di uscita delle cue della sorgente audio (TV,sistema
HiFi, lettoreDVD, lettoreMP3, ...).
•Il LED (2) rosso orasiaccende.
7. Installazione Ricevitore/cue Pic 2
•Rimuoveredelicatamente il cuscinetto auricolaresul lato destro.
•Inserireledue batterie in dotazione prestando attenzione alla
polarità corretta.
•Applicarenuovamente il cuscinetto auricolarenché non si sente
lo scatto.
8. Messa in funzione
•Accenderelasorgente audio acui ècollegato il trasmettitore(TV
ocomponenti audio).

11
•Accenderelecue premendo il tasto accensione Power (3). Il
LED (7) verde delle cue èaccesso. Accertarsi che il LED rosso(2)
sia acceso. Conferma che le batterie ricaricabili sono cariche.
•Indossarelacua eregolareilvolume come desiderato.
•Prima del primo utilizzo, accertarsi che la batteria sia completa-
mente carica. La prima volta la batteria deve esserecaricata per
almeno 24 ore.
•Spegnerelecue quando non vengono utilizzate epoggiarle sui
contatti di carica del trasmettitore.
Avvertenza
•Nel caso in cui non si trovi la frequenza di ricezione ottimale,
premereiltasto Auto-Tune (5) sulle cue.
•Se non si dovesse trovareuna frequenza suciente, cambiare
il canale di frequenza sul retrodel trasmettitore, Quindi
scegliereilcanale corrispondente sulla cua premendo il
tasto Auto-Tune.
•Perottenereuna riproduzione ottimale del suono sulle cue,
ènecessario che il volume del trasmettitore(TV,impianto
stereo...) sia piuttosto alto eilvolume sulle cue stese
piuttosto basso.
La trasmissione del trasmettitoreviene disattivata automaticamente
se per ca. 2minuti non viene più riconosciuto alcun segnale audio
oseilsegnale della sorgente audio ètroppo debole per garantire
una ricezione perfetta. Non appena la potenza del segnale è
suciente, il trasmettitoresiriaccende automaticamente. Le cue
non si spengono automaticamente.
9. Caricamento Pic. 3
•Spegnerelecue.
•Riporrelacua nella stazione di carica come mostrato in gura
eaccertarsi che icontatti di carica dei due apparecchi si tocchino
correttamente.
•Adesso si accende il LED verde (1). Il processo di carica si avvia
automaticamente.
Avvertenza
•Perevitaredidanneggiarelabatteria, spegneresemprela
cua quando non viene utilizzata.
•Prima del primo utilizzo la batteria deve esserecompletamen-
te carica. Pergarantireuna durata accettabile ènecessaria
una carica iniziale di 24 ore. Iprocessi di carica successivi
durano circa 10 ore.
•Spegnendo il trasmettitorelebatterie non si caricano.
10. Ricerca guasti
10.1 Nessun audio
•Vericareche l’alimentatoresia inserito completamente nella
presa esia collegato correttamente all’altraestremità nella presa
di ingresso alimentatoredel trasmettitore.
•Accertarsi che le cue siano accese.
•Lo stato di carica della batteria nella cua potrebbe avereuna
carica residua ridotta. Caricarelabatteria.
•VericareselaTV, l’impianto Hi-Fi oicomponenti audio sono acce-
si eseimpostato un canale per la trasmissione del segnale audio.
•Alzareilvolume mediante il regolatoresulla cua.
•Èpossibile che l’apparecchio audio/video collegato non si trovi in
modalità di riproduzione? Attivarelamodalità di riproduzione.
•Il livello di uscita sulla sorgente audio potrebbe essereimpostato
troppo basso. Adeguareilvolume.
10.2 Distorsione
•Premereiltasto Auto-Tune.
•Impostareunaltrocanale di frequenza (1, 2o3). Quindi premere
nuovamente il tasto Auto-Tune.
•Lo stato di carica della batteria nella cua potrebbe avereuna
carica residua ridotta. Caricarelabatteria.
•Alzareilvolume mediante il regolatoresulla cua.
•Èpossibile che la distanza tralacua eiltrasmettitoresia
troppo grande. Avvicinareidue apparecchi eruotarelacua in
direzione del trasmettitore.
•Il livello d’ingresso del segnale audio potrebbe esseretroppo
basso. Aumentareilvolume della sorgente audio.
11. Curaemanutenzione
Pulirequesto prodotto solo con un panno umido eche non lascia
pelucchi enon utilizzaremai detergenti aggressivi.
12. Esclusione di garanzia
Hama GmbH &Co.KGnon si assume alcuna responsabilità per i
danni derivati dal montaggio ol‘utilizzo scorretto del prodotto,
nonché dalla mancata osservanza delle istruzioni per l‘uso e/o delle
indicazioni di sicurezza.
13. Assistenza esupporto
In caso di domande sul prodotto, rivolgersi alla Consulenza
prodotto Hama.
Hotline: +49 9091 502-115 (ted./ing.)
Ulteriori informazioni sul supporto sono disponibili qui: www.hama.com
14. Indicazioni di smaltimento
Informazioni per protezione ambientale:
Dopo l’implementazione della Direttiva Europea 2012/19/
EU e2006/66/EU nel sistema legale nazionale, ci sono le
seguenti applicazioni: Le apparecchiatureelettriche ed
elettroniche elebatterie non devono esseresmaltite con i
riuti domestici. Iconsumatori sono obbligati dalla legge a
restituireIdispositivi elettrici ed elettronici elebatterie alla ne
della lorovita utile ai punti di raccolta pubblici preposti per questo
scopo onei punti vendita. Dettagli di quanto riportato sono deniti
dalle leggi nazionali di ogni stato. Questo simbolo sul prodotto, sul
manuale d’istruzioni osull’imballo indicano che questo prodotto è
soggetto aqueste regole. Riciclando, ri-utilizzando imateriali o
utilizzando sotto altraforma ivecchi prodotti/le batterie, darete un
importante contributo alla protezione dell’ambiente.
15. Dichiarazione di conformità
Il fabbricante, Hama GmbH &CoKG, dichiarache il tipo
di apparecchiaturaradio[00131957, 00131958] è
conforme alla direttiva 2014/53/UE. Il testo completo della
dichiarazione di conformità UE èdisponibile al seguente indirizzo
Internet:
www.hama.com->00131957->Downloads
www.hama.com->00131958->Downloads

12
OManual de instruções
Agradecemos que se tenha decidido por este produto Thomson!
Antes de utilizar oproduto, leia completamente estas indicações e
informações. Guarde, depois, estas informações num local seguro
paraconsultas futuras. Se transmitir opr
oduto paraumnovo
proprietário, entregue também as instruções de utilização.
1. Descrição dos símbolos de aviso edas notas
Aviso
Éutilizado paraidenticar informações de segurança ou chamar
aatenção paraperigos eriscos especiais.
Nota
Éutilizado paraidenticar informações adicionais ou notas
importantes.
2. Elementos de comando eindicadores Fig. 1+3
1. Indicador LED de estado da carga (verde)
2. Indicador LED de alimentação/sinal (vermelho)
3. Botão Power
4. Regulador do volume de som
5. Botão Auto-Tune
6. Interruptor canal de frequência
7. Indicador LED Power (verde)
3. Conteúdo da embalagem
•1auscultadores sem os UHF WHP3001BK
•1emissor com estação de carregamento
•2pilhas recarregáveis AAA NiMH
•1fonte de alimentação
•1cabo adaptador áudio RCAestéreo, Jack de 3,5 mm
•1adaptador Jack 6,3 mm/3,5 mm
4. Indicações de segurança
Aviso
•Autilização do produto limita-o na percepção do ruído
ambiente. Porisso, enquanto utiliza oproduto não conduza
ou operemáquinas.
•Mantenha sempreumvolume de som
não exagerado. Um volume de som
elevado, mesmo durante um período
curto, poderá causar lesões auditivas.
•Nunca abra, danique, ingiraouelimine pilhas ebaterias parao
ambiente. Estas podem conter metais pesados tóxicos eprejudi-
ciais paraoambiente.
•Não alterenem deforme/aqueça/desmonte pilhas/baterias.
•Oproduto está previsto apenas parautilização doméstica enão
comercial.
•Utilize oproduto apenas paraanalidade prevista.
•Crianças deverão ser sempremonitorizadas paragarantir que
não utilizem oaparelho como brinquedo.
•Não utilize oproduto em áreas nas quais não são permitidos
aparelhos electrónicos.
•Ligue oproduto apenas auma tomada elétrica adequada. A
tomada elétrica deve estar localizada na proximidade do produto
edeve ser facilmente acessível.
•Desligue oproduto da rede eléctrica com obotão de ligar/
desligar –seoproduto não possuir este botão, retireacha da
tomada eléctrica.
•Instale todos os cabos de forma aque não se possa tropeçar neles.
•Não dobrenem esmague ocabo.
•Não deixe cair oproduto nem osubmeta achoques fortes.
•Elimine imediatamente omaterial da embalagem em conformi-
dade com as normas locais aplicáveis.
•Não efectue modicações no aparelho. Perdados direitos de
garantia.
•Não utilize oproduto se oadaptador,ocabo de ligação ou o
cabo eléctrico estiverem danicados.
•Não tente fazer amanutenção ou reparar oaparelho. Qualquer
trabalho de manutenção deve ser executado por técnicos
especializados.
•Não abraoproduto nem outilize caso este esteja danicado.
•As pilhas eaestação de carregamento estão sincronizadas entre
si esópodem ser utilizadas na combinação fornecida.
5. Especicações técnicas
Modo de emissão Estéreo UHF
Banda(s) de frequências 863.53 –864.53 MHz
Potência máxima transmitida <5dBm
Tensão de funcionamento
Emissor: 8V,70mA
Recetor: 2,4 V,
(2x AAA 1,2 VNiMH)
Gama de frequências 20 Hz –20KHz
Distorção <2%
Relação sinal/ruído >54dB
Alcance máx. 100 m(ao ar livre)
20-30 m(em edifícios)
Tempo de funcionamento 8h(com volume médio)
6. Instalação do emissor/estação de carga Fig. 3
•Ligue afonte de alimentação àtomada de ligação na parte
traseiradoemissor.
•Ligue acha da fonte de alimentação auma tomada elétrica.
•Ligue as chas RCAdocabo adaptador áudio às tomadas RCAna
parte traseiradoemissor.Ligue aoutraextremidade (cha Jack) à
tomada de saída dos auscultadores da sua fonte áudio (televisão,
sistema HiFi, leitor de DVD, leitor de MP3, ...).
•OLED vermelho (2) acende.
7. Instalação recetor/ausculltadores Fig. 2
•Retirecuidadosamente aalmofada do auricular no lado direito.
•Coloque as duas pilhas juntamente fornecidas, tendo em atenção
apolaridade correta.
•Volte acolocar aalmofada do auricular até encaixar de modo audível.
8. Colocação em funcionamento
•Ligue afonte de áudio que está conectada ao emissor (televisor
ou componentes de áudio).
•Ligue os auscultadores premindo obotão Power (3). OLED (7) dos
auscultadores acende averde. Certique-se de que oLED verme-
lho (2) acende. Este LED indica que as baterias estão carregadas.

13
•Coloque os auscultadores eajuste ovolume de som como desejar.
•Antes da primeirautilização, certique-se de que as baterias
estão totalmente carregadas. Carregue as baterias durante, pelo
menos, 24 horas antes da primeirautilização.
•Desligue os auscultadores se não os utilizar evolte acolocá-los
nos contactos de carga do emissor.
Nota
•Quando encontrar uma frequência de entrada ideal, prima o
botão Auto-Tune (5) nos auscultadores.
•Caso não encontrenenhuma frequência satisfatória, mude
ocanal de frequência na parte de trás do emissor.Depois,
premindo obotão Auto-Tune, conrme orespetivo canal nos
auscultadores.
•Para obter um som ideal dos seus auscultadores, deve
ajustar ovolume da fonte áudio (TV,aparelhagem estéreo,...)
paraumnível alto ereduzir ovolume de som nos próprios
auscultadores
Atransmissão do emissor éautomaticamente desligada se não
for detetado qualquer sinal de áudio durante um período de
aproximadamente 2minutos ou se osinal da fonte de áudio for
muito fraco parauma receção sem falhas. Assim que aintensidade
do sinal voltar aser suciente, oemissor volta aligar-se de forma
automática. Os auscultadores não se desligam automaticamente.
9. Processo de carregamento Fig. 3
•Desligue os auscultadores.
•Coloque os auscultadores conforme ilustrado na estação de
carregamento ecertique-se de que os contactos de carga de
ambos os aparelhos tocam corretamente.
•OLED verde (1) acende. Oprocesso de carregamento inicia-se
automaticamente.
Nota
•De modo aevitar danos na bateria, desligue sempreos
auscultadores quando não os estiver autilizar.
•Antes da primeirautilização, énecessário carregar totalmente
as baterias. Énecessário um carregamento inicial de 24
horas paragarantir uma vida útil aceitável das baterias. Os
processos de carga seguintes demoram aproximadamente
10 horas.
•Com oemissor desligado, as baterias não são carregadas.
10. Diagnóstico de falhas
10.1 Sem som
•Verique se acha da fonte de alimentação está totalmente
encaixada na tomada elétrica eseaoutraextremidade está cor-
retamente ligada àtomada de entrada da fonte de alimentação
do emissor.
•Certique-se que os auscultadores estão ligados.
•Oestado da carga da bateria nos auscultadores poderá ter uma
carga restante demasiado baixa. Carregue abateria.
•Verique se oseu televisor,sistema Hi-Fi ou componente de
áudio está ligado eseestá ativado um canal paraatransmissão
do sinal de áudio.
•Aumente ovolume de som através do regulador nos auscultadores.
•Será possível que odispositivo de áudio/vídeo ligado não se
encontrenomodo de reprodução? Ligue-o em conformidade.
•Onível de saída do som na fonte de áudio poderá estar denido
paraumvalor demasiado baixo. Regule ovolume de forma
adequada.
10.2 Distorção
•Prima obotão Auto-Tune.
•Congureoutrocanal de frequência (1, 2ou3). Depois, prima
novamente obotão Auto-Tune.
•Oestado da carga da bateria nos auscultadores poderá ter uma
carga restante demasiado baixa. Carregue abateria.
•Aumente ovolume de som através do regulador nos auscultadores.
•Adistância entreosauscultadores eoemissor é, possivelmente,
demasiado grande. Aproxime os dispositivos erode os ausculta-
dores na direção do emissor.
•Onível de entrada do sinal de áudio é, eventualmente, demasia-
do baixo. Aumente ovolume da fonte de áudio.
11. Manutenção econservação
limpe oproduto apenas com um pano sem apos ligeiramente
humedecido enão utilize produtos de limpeza agressivos.
12. Exclusão de garantia
AHama GmbH &CoKGnão assume qualquer responsabilidade
ou garantia por danos provocados pela instalação, montagem ou
manuseamento incorrectos do produto enão observação do das
instruções de utilização e/ou das informações de segurança.
13. Contactos eapoio técnico
Em caso de dúvidas sobreoproduto, contacte oserviço de assis-
tência ao produto da Hama.
Linha de apoio ao cliente: +49 9091 502-115 (alemão/inglês)
Para mais informações sobreosserviços de apoio ao cliente, visite:
www.hama.com
14. Indicações de eliminação
Nota em Protecção Ambiental:
Após aimplementação da directiva comunitária 2012/19/
EU e2006/66/EU no sistema legal nacional, oseguinte
aplica-se: Os aparelhos eléctricos eelectrónicos, bem
como baterias, não podem ser eliminados juntamente
com olixo doméstico. Consumidores estão obrigados por lei a
colocar os aparelhos eléctricos eelectrónicos, bem como baterias,
sem uso em locais públicos especícos paraeste efeito ou no ponto
de venda. Os detalhes paraeste processo são denidos por lei
pelos respectivos países. Este símbolo no produto, omanual de
instruções ou aembalagem indicam que oproduto está sujeito a
estes regulamentos. Reciclando, reutilizando os materiais dos seus
velhos aparelhos/baterias, esta afazer uma enorme contribuição
paraaprotecção do ambiente.
15. Declaração de conformidade
O(a) abaixo assinado(a) Hama GmbH &CoKGdeclaraque
opresente tipo de equipamento de rádio [00131957,
00131958] está em conformidade com aDiretiva
2014/53/UE. Otexto integral da declaração de conformidade está
disponível no seguinte endereço de Internet:
www.hama.com->00131957->Downloads
www.hama.com->00131958->Downloads

14
RРуководство по эксплуатации
Благодарим за покупку изделия фирмы Thomson.
внимательно ознакомьтесь снастоящей инструкцией. Храните
инструкцию внадежном месте для справок вбудущем. Вслучае
передачи изделия другому лицу приложите иэту инструкцию.
1. Предупредительные пиктограммы иинструкции
Внимание
Данным значком отмечены инструкции, несоблюдение
которых можетпривести копасной ситуации.
Примечание
Дополнительная или важная информация.
2. Органы управления ииндикации, рис. 1+3
1. Светодиодный индикатор зарядки (зеленый)
2. Светодиодный индикатор «Питание/сигнал» (красный)
3. Кнопка питания
4. Регулятор громкости
5. Кнопка автоматического сканирования
6. Выбор канала
7. Светодиодный индикатор питания (зеленый)
3. Состав комплекта
•Радионаушники 1WHP3001BK УВЧ
•1передатчик сзарядным устройством
•2никель-металлгидридных аккумулятора, ААА
•1блок питания
•1аудиокабель-переходник сразъемами «тюльпан» стерео и
джек-штекером 3,5 мм
•1джек-переходник 6,3 мм/3,5 мм
4. Техника безопасности
Внимание
•Во время эксплуатации изделия снижается степень
восприятия окружающих звуков ишумов. Запрещается
использовать изделие во время вождения автомобиля и
управления машинами.
•Не превышать нормальную громкость.
Воздействие громкого звука, вт.ч. в
течение короткого времени, может
привести кповреждению органов слуха.
•Аккумуляторы ибатареи не открывать, не разбирать, не
глотать, не утилизировать сбытовым мусором. Вбатареях
могут содержаться вредные тяжелые металлы.
•Батареи не деформировать, не нагревать, не разбирать.
•Изделие предназначено только для домашнего применения.
•Запрещается использовать не по назначению.
•Не оставлять детей без присмотра во избежание их доступа
кустройству.
•Не применять взапретных зонах.
•Прибор разрешается подключать только ксоответствующей
розетке электросети. Розетка электросети должна находиться
рядом сустройством влегко доступном месте.
•Отключать спомощью выключателя электросети, апри его
отсутствии вытащить провод из розетки.
•Кабели не должны создавать помехи перемещению людей.
•Кабель не сгибать инезажимать.
•Не ронять. Беречь от сильных ударов.
•Утилизировать упаковку всоответствии сместными нормами.
•Запрещается вносить изменения вконструкцию. Впротивном
случае гарантийные обязательства аннулируются.
•Запрещается эксплуатация при неисправном блоке питания
или поврежденном кабеле питания.
•Запрещается самостоятельно ремонтировать устройство.
Ремонт разрешается производить только квалифицирован-
ному персоналу.
•Изделие не открывать. Запрещается эксплуатировать неис-
правное изделие.
•Аккумуляторы изарядное устройство согласованы друг сдру-
гом, поэтому их разрешается применять только совместно.
5. Технические характеристики
Режим передачи УВЧ, стерео
Диапазон/диапазоны
частот 863.53 –864.53 МГц
Максимальная излу-
чаемая мощность <5dBm
Рабочее напряжение
Передатчик: 8В,70мА
Приемник: 2,4 В(2x AAA 1,2 В,
никель-металлгидридные)
Диапазон частот от 20 Гц до 20 кГц
Искажения <2%
Отношение сигнал/шум
>54дБ
Дальность действия
до 100 м(свободного
пространства)
20-30 м(внутри здания)
Время работы 8ч.(при средней громкости)
6. Установка передатчика/зарядного устройства, рис. 3
•Подключите блок кпитания кразъему питания на задней
панели передатчика.
•Подключите блок питания крозетке электросети.
•Штекер-«тюльпан» аудиокабеля-переходника подключите к
гнезду-«тюльпан», который расположен на задней панели пе-
редатчика. Другой конец кабеля-переходника (джек-штекер)
подключите кгнезду наушников источника звука (телевизор,
стерео-система, проигрыватель DVD, проигрыватель МР3...).
•Загорится красный светодиодный индикатор (2).
7. Установка приемника /наушников, рис. 2
•Снимите правую амбушюру, соблюдая осторожность.
•Вставьте два аккумулятора (в комплекте), соблюдая полярность.
•Установите амбушюру на место до фиксации.
•Выключите наушники иподключите их кзарядному устройству
(не менее 12 часов). Во время заряда горит красная лампа.
8. Ввод вэксплуатацию
•Включите источник звука (телевизор или аудиоаппаратуру), с
которым соединен передатчик.

15
•Включите гарнитуру, нажав кнопку питания (3). Загорится
зеленый светодиодный индикатор гарнитуры (7). Убедитесь
втом, что красный светодиодный индикатор (2) горит. Он
указывает на то, что аккумулятор заряжен.
•Наденьте наушники иотрегулируйте громкость.
•Перед началом эксплуатации полностью зарядите аккумуля-
тор. Перед первым использованием аккумулятор необходи-
мо заряжать не менее 24 часов.
•Если наушники не используются, отключайте их иустанавли-
вайте на зарядные контакты передатчика.
Примечание
•Чтобы найти оптимальную частоту передачи, нажмите
кнопку автоматического сканирования (5) на наушниках.
•Если на частоте не обеспечивается необходимое качество,
переключитесь на другой частотный канал (переключатель
находится на задней панели передатчика). Затем нажмите
кнопку автоматического сканирования на наушниках,
чтобы подтвердить выбор соответствующего канала.
•Для оптимального качества звучания необходимо макси-
мально увеличить звук на источнике звука (телевизоре, сте-
реосистеме ит.п.) иуменьшить звук на самих наушниках.
Передача сигнала автоматически отключается через 2минут при
отсутствии или при слабом приеме звукового сигнала. Как только
уровень сигнала возрастет, передатчик автоматически выходит из
ждущего режима. Наушники не отключаются автоматически.
9. Порядок заряда, рис. 3
•Выключите наушники.
•Установите наушники на зарядное устройство (см. рисунок)
так, чтобы обеспечить надежный контакт.
•Загорится зеленый светодиодный индикатор (1). Процесс
загрузки начнется автоматически.
Примечание
•Во избежание повреждения аккумулятора по окончании
использования наушники следует выключать.
•При вводе вэксплуатацию необходимо полностью зарядить
аккумуляторы. Чтобы обеспечить оптимальный срок служ-
бы аккумулятора перед началом использования наушников
заряжайте аккумулятор не менее 24 часов. Вдальнейшем
для заряда аккумуляторов потребуется ок. 10 часов.
•При выключенном передатчике зарядка аккумулятора не
выполняется.
10. Поиск иустранение неисправностей
10.1 Отсутствует звук
•Проверьте подключение блока питания кэлектросети ик
разъему передатчика.
•Включите наушники.
•Проверьте заряд аккумуляторов наушников. При необходи-
мости зарядите аккумулятор.
•Источник сигнала (телевизор, звуковая аппаратура) иканал
передачи звукового сигнала должны быть включены.
•Отрегулируйте громкость на наушниках.
•Источник сигнала, возможно, находится не врежиме воспро-
изведения. При необходимости исправьте.
•Низкий уровень сигнала источника звука. Отрегулируйте громкость.
10.2 Искажения
•Нажмите кнопку автоматического сканирования.
•Установите другой частотный канал (1, 2или 3). Затем
нажмите кнопку автоматического сканирования еще раз.
•Проверьте заряд аккумуляторов наушников. При необходи-
мости зарядите аккумулятор.
•Отрегулируйте громкость на наушниках.
•Передатчик иприемник находятся вне зоны действия. Пере-
местите передатчик иприемник ближе друг кдругу.
•Слишком низкий входной сигнал источника звука. Увеличьте
громкость источника сигнала.
11. Уход итехническое обслуживание
Чистку изделия производить только безворсовой слегка
влажной салфеткой. Запрещается применять агрессивные
чистящие средства.
12. Отказ от гарантийных обязательств
Компания Hama GmbH &Co. KG не несет ответственность за ущерб,
возникший вследствие неправильного монтажа, подключения и
использования изделия не по назначению, атакже вследствие не-
соблюдения инструкции по эксплуатации итехники безопасности.
13. Отдел техобслуживания
По вопросам ремонта или замены неисправных изделий обра-
щайтесь кпродавцу или всервисную службу компании Hama.
Горячая линия отдела техобслуживания:
+49 9091 502-115 (немецкий, английский)
Подробнее смотрите здесь: www.hama.com
14. Инструкции по утилизации
Охрана окружающей среды:
Смомента перехода национального законодательства
на европейские нормативы 2012/19/EU и2006/66/EU
действительно следующее: Электрические и
электронные приборы, атакже батареи запрещается
утилизировать собычным мусором. Потребитель, согласно зако-
ну, обязан утилизировать электрические иэлектронные
приборы, атакже батареи иаккумуляторы после их использова-
ния вспециально предназначенных для этого пунктах сбора,
либо впунктах продажи. Детальная регламентация этих
требований осуществляется соответствующим местным
законодательством. Необходимость соблюдения данных
предписаний обозначается особым значком на изделии,
инструкции по эксплуатации или упаковке. При переработке,
повторном использовании материалов или при другой форме
утилизации бывших вупотреблении приборов Вы помогаете
охране окружающей среды. Всоответствии спредписаниями по
обращению сбатареями, вГермании вышеназванные
нормативы действуют для утилизации батарей иаккумуляторов.
15. Декларация производителя
Настоящим компания Hama GmbH &CoKGзаявляет,
что радиооборудование типа [00131957, 00131958]
отвечает требованиям директивы 2014/53/ЕС. С
полным текстом декларации осоответствии требованиям ЕС
можно ознакомиться здесь:
www.hama.com->00131957->Downloads
www.hama.com->00131958->Downloads
16
NGebruiksaanwijzing
Hartelk dank dat uvoor een product van Thomson heeft gekozen.
Neem de td om de volgende aanwzingen en instructies volledig
door te lezen. Bergdeze gebruiksaanwzing vervolgens op een goe-
de plek op zodat uhem als naslagwerk kunt gebruiken. Op zodat u
hem als naslagwerk kunt gebruiken. Mocht uhet toestel verkopen,
geeft udan ook deze gebruiksaanwzing aan de nieuwe eigenaar.
1. Verklaring van waarschuwingssymbolen en instructies
Waarschuwing
Wordtgebruikt voor veiligheidsinstructies of om de aandacht te
trekken op bijzonderegevaren en risico‘s.
Aanwijzing
Wordtgebruikt voor extrainformatie of belangrijke informatie.
2. Bedieningselementen en indicatoren afb. 1+3
1. Ledindicator Laadstatus (groen)
2. Ledindicator Power/Signaal (rood)
3. Power-toets
4. Volumeregelaar
5. Auto-Tune-toets
6. Schakelaar frequentiekanaal
7. Ledindicator Power (groen)
3. Inhoud van de verpakking
•1WHP3001BK UHF draadloze koptelefoon
•1zender met laadstation
•2AAA NiMH accu‘s
•1voedingsadapter
•1audio-adapterkabel Cinch-stereo op stereostekker 3,5 mm
•1stereostekker-adapter 6,3mm/3,5mm
4. Veiligheidsinstructies
Waarschuwing
•De gebruikmaking van het product beperkt uinde waar-
neming van omgevingsgeluiden. Bedient uomdeze reden
tdens het gebruik ervan geen voertuigen of machines.
•Houd het geluidsvolume te allen tde op
een verstandig niveau. Grote geluids-
volumen kunnen –zelfs kortstondig –
tot gehoorbeschadiging leiden.
•Accu‘s en batteren nimmer openen, beschadigen, inslikken of
in het milieu terecht laten komen. Z kunnen giftige en zware
metalen bevatten welke schadelk zn voor het milieu.
•De accu‘s/batteren niet wzigen en/of vervormen/verhitten/
demonteren.
•Het product is bedoeld voor niet-commercieel privegebruik in
huiselke kring.
•Gebruik het product uitsluitend voor het doel waarvoor het
gemaakt is.
•Kinderen dienen onder toezicht te staan, teneinde te waarborgen
dat z niet met het product spelen.
•Gebruik het product niet binnen omgevingen, waarin elektroni-
sche apparatuur niet is toegestaan.
•Sluit het product alleen aan op een daarvoor geschikt en intact
stopcontact. Het stopcontact moet in de buurt van het product
zn aangebracht en goed bereikbaar zn.
•Het product met behulp van de aan/uit schakelaar van het
net scheiden –indien deze niet ter beschikking is, trek dan de
netstekker uit het stopcontact.
•Leg alle kabels zodanig dat z geen struikelgevaar vormen.
•De kabel niet knikken of inklemmen.
•Laat het product niet vallen en stel het niet bloot aan zware
schokken of stoten.
•Het verpakkingsmateriaal direct en overeenkomstig de lokaal
geldende afvoervoorschriften afvoeren.
•Verander niets aan het toestel. Daardoor vervalt elke aanspraak
op garantie.
•Gebruik het product niet indien de adapter,deaansluitkabel of
de netkabel is beschadigd.
•Probeer niet het product zelf te onderhouden of te repareren. Laat on-
derhouds- en reparatiewerkzaamheden door vakpersoneel uitvoeren.
•Open het product niet en gebruik het niet meer als het bescha-
digd is.
•Accu‘s en laadstation zn op elkaar afgestemd en mogen uitslui-
tend in deze geleverde combinatie worden gebruikt.
5. Technische gegevens
Zendmodus UHF stereo
Frequentieband(en) 863.53 –864.53 MHz
Maximaal radiofre-
quent vermogen <5dBm
Bedrijfsspanning
Zender :8V,70mA
Ontvanger :2,4 V
(2x AAA 1,2 VNiMH)
Frequentiebereik 20 Hz –20KHz
Vervorming <2%
Ruisafstand >54dB
Bereik max. 100 m(buiten)
20-30 m(in gebouwen)
Looptijd 8h(bij gemiddeld volume)
6. Installatie zender /laadstation Afb. 3
•Sluit de stekker van de voedingsadapter op de aansluitpoort op
de achterzde van de zender aan.
•Sluit de voedingsadapter op een stopcontact aan.
•Sluit de Cinch-stekker van de audio-adapterkabel op de Cinch-
poort op de achterzde van de zender aan. Sluit het andereeinde
(stereostekker) op de koptelefoon-uitgangspoort van uw audiobron
aan (televisietoestel, HiFi-systeem, DVD-speler,MP3-speler,...).
•Het rode ledje (2) brandt nu.
7. Installatie ontvanger /koptelefoon Afb. 2
•Trek voorzichtig het oorkussen op de rechterzde los.
•Plaats de twee meegeleverde accu‘s en let daarb op de juiste
polariteit (+) en (-).
•Plaats het oorkussen weer terug en let erop dat het hoorbaar vastklikt.

17
8. Inbedrfstelling
•Schakel de audiobron in waarmee de zender is verbonden (televi-
sietoestel of audiocomponent).
•Schakel de koptelefoon in door op de Power-toets (3) te drukken.
Het ledje (7) van de koptelefoon brandt groen. Controleer of het rode
ledje (2) brandt. Dit ledje bevestigt dat de accu‘s zn opgeladen.
•Zet de koptelefoon op en stel het geluidsvolume in zoals udat wenst.
•Controleer vóór het eerste gebruik of de accu volledig is opgeladen.
De accu vóór het eerste gebruik minimaal gedurende 24 uur opladen.
•Schakel de koptelefoon uit zodrahniet wordt gebruikt en plaats
hem terug op de laadcontacten van de zender.
Aanwijzing
•Indien ugeen optimale ontvangstfrequentie kunt vinden, druk
dan op de Auto-Tune-toets (5) op de koptelefoon.
•Indien ugeen voldoende frequentie vindt, schakel dan het
frequentiekanaal op de achterzde van de zender om. Aan-
sluitend bevestigt udoor op de Auto-Tune-toets te drukken
het betreffende kanaal op de koptelefoon.
•Om de optimale geluidsbeleving van uw koptelefoon te erva-
ren, dient uhet volume van de geluidsbron (tv,stereo-instal-
latie,...) naar mogelkheid hoog in te stellen en het volume
op de koptelefoon zelf te reduceren.
Het doorsturen van geluid door de zender wordt automatisch
uitgeschakeld indien gedurende ca. 2minuten geen audiosignaal
meer wordt herkend of als het signaal van de audiobron te zwak
is voor een storingsvre ontvangst. Zodradesignaalsterkte weer
voldoende is, schakelt de zender zich automatisch weer in. De
koptelefoon schakelt zich niet automatisch uit.
9. Opladen Afb. 3
•Schakel de koptelefoon uit.
•Plaats de koptelefoon zoals is afgebeeld in het laadstation en
controleer daarb dat de laadcontacten van beide toestellen
correct contact met elkaar maken.
•Het groene ledje (1) brandt nu. Het opladen start automatisch.
Aanwijzing
•Teneinde beschadiging van de accu‘s te voorkomen dienen de
koptelefoons te allen tijde uitgeschakeld te zijn indien zij niet
in gebruik zijn.
•Vóór het eerste gebruik dienen de accu‘s volledig te zijn
opgeladen. De eerste oplading dient 24 uur te duren om
een acceptabele technische levensduur van de accu‘s te
waarborgen. De volgende oplaadcycli duren dan ca. 10 uur.
•Bij een uitgeschakelde zender worden de accu‘s niet opgeladen.
10. Lokaliseren van storingen
10.1 Geen geluid
•Controleer of de voedingsadapter volledig in het stopcontact is ge-
stoken en of het andereeinde correct op de zender is aangesloten.
•Controleer dat de koptelefoon is ingeschakeld.
•De laadcapaciteit van de accu in de headset kan te gering zn.
Accu opladen.
•Controleer of uw TV-toestel, uw HiFi-installatie of audiocompo-
nent is ingeschakeld en er een kanaal voor de audiosignaal-over-
dracht is ingesteld.
•Vergroot het geluidsvolume met behulp van de regelaar op de
koptelefoon.
•Mogelk bevindt zich het aangesloten audio-/videotoestel niet in
de weergavemodus? Eventueel inschakelen.
•Het uitgangsniveau op de audiobron kan te laag zn ingesteld.
Geluidsvolume juist instellen.
10.2 Vervorming
•Druk op de Auto-Tune-toets.
•Stel een ander frequentiekanaal (1, 2of3)in. Druk daarna
opnieuw op de Auto-Tune-toets.
•De laadcapaciteit van de accu in de headset kan te gering zn.
Accu opladen.
•Vergroot het geluidsvolume met behulp van de regelaar op de
koptelefoon.
•De afstand tussen de koptelefoon en zender is mogelk te groot.
Breng beide componenten dichter b elkaar en draai de koptele-
foon in de richting van de zender.
•Het ingangsniveau van het audiosignaal is eventueel te laag.
Geluidsvolume van de audiobron verhogen.
11. Onderhoud en verzorging
Reinig dit product uitsluitend met een pluisvre, licht vochtige doek
en maak geen gebruik van agressieve reinigingsmiddelen.
12. Uitsluiting van garantie en aansprakelkheid
Hama GmbH &Co. KG aanvaardt geen enkele aansprakelkheid of
garantieclaims voor schade of gevolgschade, welke door ondeskun-
dige installatie, montage en ondeskundig gebruik van het product
ontstaan of het resultaat zn van het niet in acht nemen van de
bedieningsinstructies en/of veiligheidsinstructies.
13. Service en support
Neem b vragen over het product contact op met de afdeling
Productadvies van HAMA.
Hotline: +49 9091 502-115 (Duits/Engels)
Meer support-informatie vindt uhier: www.hama.com
14. Aanwzingen over de afvalverwerking
Notitie aangaande de bescherming van het milieu:
Tengevolge van de invoering van de Europese Richtln
2012/19/EU en 2006/66/EU in het nationaal juridisch
system, is het volgende van toepassing: Elektrische en
elektronische apparatuur,zoals batteren mag niet met het
huisvuil weggegooid worden. Consumenten zn wettelk verplicht om
electrische en elctronische apparaten zoals batteren op het einde van
gebruik in te dienen b openbareverzamelplaatsen speciaal opgezet
voor dit doeleinde of b een verkooppunt. Verderespecicaties
aangaande dit onderwerp zn omschreven door de nationale wet van
het betreffende land. Dit symbool op het product, de gebruiksaanw-
zing of de verpakking duidt erop dat het product onderworpen is aan
deze richtlnen. Door te recycleren, hergebruiken van materialen of
anderevormen van hergebruiken van oude toestellen/batteren, levert
ueen grote bdrage aan de bescherming van het mileu.
15. Conformiteitsverklaring
Hierb verklaar ik, Hama GmbH &CoKG, dat het type
radioapparatuur [00131957, 00131958] conform is met
Richtln 2014/53/EU.Devolledige tekst van de EU-conformiteits-
verklaring kan worden geraadpleegd op het volgende internet-
adres: www.hama.com->00131957->Downloads
www.hama.com->00131958->Downloads
18
PInstrukcja obsługi
Dziękujemy za zakup naszego produktu!
Przed pierwszym użyciem należy dokładnie przeczytać instrukcję
obsługi. Instrukcję należy przechować, gdyż może być jeszcze
potrzebna.
1. Objaśnienie symboli ostrzegawczych iwskazówek
Ostrzeżenie
Używane wcelu zwrócenia uwagi na szczególne
niebezpieczeństwo lub ryzyko.
Wskazówki
Używane wcelu zwrócenia uwagi na szczególnie przydatne
informacje.
2. Elementy obsługi isygnalizacji rys. 1+3
1. Dioda LED stanu ładowania (zielona)
2. Dioda LED Zasilanie /Sygnał (czerwona)
3. Przycisk zasilania
4. Regulator głośności
5. Przycisk Auto-Tune
6. Przełącznik kanału częstotliwości
7. Dioda LED zasilania (zielona)
3. Zawartość opakowania
•1słuchawki radiowe UHF WHP3001BK
•1nadajnik ze stacją ładowania
•2akumulatory AAA NiMH
•1zasilacz sieciowy
•1kabel -przejściówka audio cinch stereo na jack 3,5 mm
•1przejściówka jack 6,3 mm/3,5 mm
4. Wskazówki bezpieczeństwa
Ostrzeżenie
•Podczas używania produktu ograniczona jest percepcja
dźwięków zotoczenia. Ztego powodu stosując produkt, nie
obsługiwać pojazdów ani maszyn.
•Głośność ustawiać zawsze na rozsądny poziom.
Wysoki poziom głośności może –nawet jeżeli
trwa krótko –prowadzić do uszkodzenia słuchu.
•Nie otwierać, uszkadzać ani nie połykać akumulatorów lub baterii
oraz chronić je przed kontaktem ze środowiskiem. Mogą one
zawierać toksyczne iszkodliwe dla środowiskametale ciężkie.
•Nie modykować /deformować /podgrzewać /rozkładać
akumulatorów /baterii.
•Produkt jest przeznaczony do prywatnego, niekomercyjnego
użytku domowego.
•Stosować produkt wyłącznie zgodnie zprzewidzianym przezna-
czeniem.
•Dzieci powinny być nadzorowane, aby nie używały urządzenia
do zabawy.
•Nie używać produktu wmiejscach, gdzie nie jest dozwolone
stosowanie urządzeń elektronicznych.
•Podłączać produkt tylko do odpowiedniego gniazda wtykowego.
Gniazdo wtykowe musi znajdować się wpobliżu produktu ibyć
łatwo dostępne.
•Odłączać produkt od sieci za pomocą wyłącznika zasilania –
jeżeli nie jest on na wyposażeniu, wyciągnąć przewód sieciowy z
gniazda wtykowego.
•Wszystkie kable poprowadzić tak, aby nie stanowiły one ryzyka
potknięcia się.
•Nie zginać ani nie zakleszczać kabla.
•Chronić produkt przed upadkiem isilnymi wstrząsami.
•Materiały opakowaniowe należy natychmiast poddać utylizacji
zgodnie zobowiązującymi przepisami miejscowymi.
•Nie modykować urządzenia. Prowadzi to do utraty wszelkich
roszczeń ztytułu gwarancji.
•Nie używać produktu, jeżeli zasilacz sieciowy,kabel przyłączenio-
wy bądź przewód sieciowy są uszkodzone.
•Nie próbować naprawiać samodzielnie urządzenia. Prace serwi-
sowe zlecać wykwalikowanemu personelowi fachowemu.
•Nie otwierać produktu inie używać go, gdy jest uszkodzony.
•Akumulator istacja ładowania są do siebie dopasowane imogą
być użytkowane tylko wdostarczonym zestawie.
5. Dane techniczne
Tryb nadawania UHF stereo
Częstotliwość transmisji 863.53 –864.53 MHz
Maksymalna moc transmisji <5dBm
Napięcie robocze
Nadajnik: 8V,70mA
Odbiornik: 2,4 V,
(2x AAA 1,2 VNiMH)
Zakres częstotliwości 20 Hz –20KHz
Zniekształcenia
częstotliwościowe <2%
Odstęp od poziomu
szumów >54dB
Zasięg maks. 100 m(na zewnątrz)
20-30 m(wbudynkach)
Czas pracy 8h(przy średniej głośności)
6. Instalowanie nadajnika /stacji ładowania -rys. 3
•Połączyć zasilacz sieciowy zgniazdem przyłączeniowym ztyłu
nadajnika.
•Połączyć zasilacz sieciowy zgniazdem wtykowym.
•Połączyć wtyki cinch kabla -przejściówki audio zgniazdami cinch
ztyłu nadajnika. Połączyć drugi koniec (wtyk jack) zgniazdem
wyjściowym słuchawek źródła audio (telewizor,system HiFi,
odtwarzacz DVD, odtwarzacz MP3, ...).
•Dioda LED (2) świeci teraz na czerwono.
7. Instalowanie odbiornika /słuchawek -rys. 2
•Ostrożnie ściągnąć poduszkę słuchawkową zprawej strony.
•Włożyć dwa dołączone akumulatory,zwracając uwagę na prawi-
dłową biegunowość.
•Ponownie założyć poduszkę słuchawkową, aż się słyszalnie
zatrzaśnie.
This manual suits for next models
1
Table of contents
Languages:
Other THOMSON Wireless Headphones manuals

THOMSON
THOMSON WHP1211 User manual

THOMSON
THOMSON WHP5407 User manual

THOMSON
THOMSON WEAR77032 User manual

THOMSON
THOMSON WHP5327 User manual

THOMSON
THOMSON YLS0056A-E080040 User manual

THOMSON
THOMSON WEAR7701BK User manual

THOMSON
THOMSON Senior 4in1 User manual

THOMSON
THOMSON WEAR7811 User manual

THOMSON
THOMSON WEAR7701 User manual

THOMSON
THOMSON YLS0056A-E080040 User manual