Toshiba 32PB10E User manual

LCD Colour TV
OWNER'S MANUAL
Owner's Record
You will find the model number and serial number on
the back of the TV. Record these numbers in the spaces
provided below. Refer to them whenever you call upon
your TOSHIBA dealer regarding this product.
Model number:
Serial number:
32PB10E
32PB10T
32PB10V
32PB10ZE
40PB10E
40PB10T
40PB10V
40PB10ZE
©2011 TOSHIBA CORPORATION
All Rights Reserved VX1A002041A0
TD/J
110419c1_3240PB10ETV_En.indd 1 11.4.19 1:56:51 PM

2
Introduction / Getting started
• YoualsocanusethecontrolsontheTVifthey
havethesamenameasthosereferredtoon
theremotecontrol.
• Pleasereadallsafetyandoperating
instructionsinthismanualcarefully,andkeep
thismanualforfuturereference.
Important Safety Instructions
Besuretoobservethefollowinginstructionsand
precautionstoensuresafeuseofthisTV.
Installation
1)
WARNING: To prevent injury, this apparatus
must be securely attached to the floor/wall in
accordance with the installation instructions.
Install the TV in a horizontal, stable
location. Attach the TV to the stand
with the mounting screw of supplied
accessories.
• IftheTVisnotinstalledsecurely,itmaylean
orfalloverandcauseaninjury.
• Topreventinjury,usetheexclusiveoptional
standorwall-hangingbrackettoinstall
thisTVontheoororwallsecurelyin
accordancewithaqualiedtechnician.
Top view
Screw hole
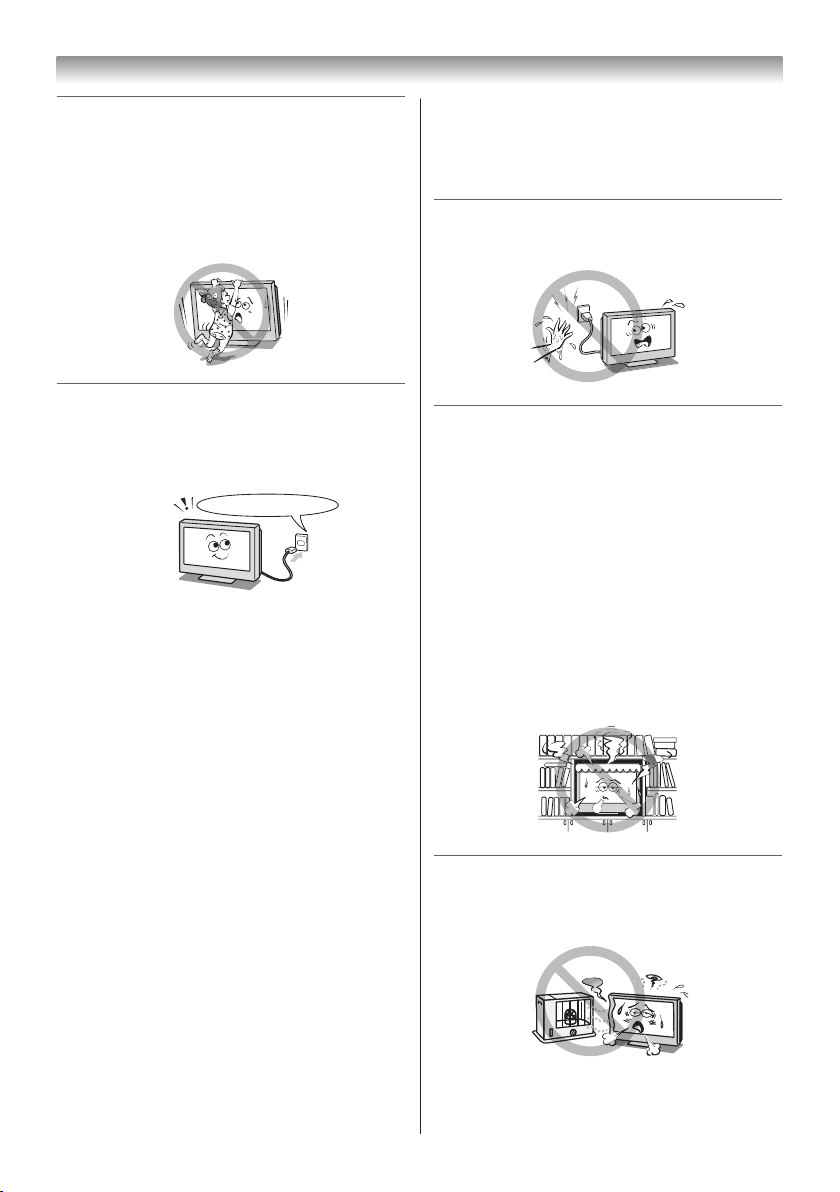
2) Never place the TV in an unstabilized
location such as on a shaky table, incline
or location subject to vibration.
• Onlyusecabinetsorstandsrecommended
bytheTVmanufacturer.
• Onlyusefurniturethatcansafelysupport
theTV.
• EnsurethattheTVisnothangingoverthe
edgeofthesupportingfurniture.
• NeverplacetheTVontallfurniture(for
example,cupboardsorbookcases)without
anchoringboththefurnitureandtheTVtoa
suitablesupport.
• NeverstandtheTVonclothorother
materialplacedbetweentheTVand
supportingfurniture.
TheTVmaydroporfalloff,whichmaycause
aninjuryordamage.
Contents
Introduction / Getting started
Connectinganaerial.............................. 7
ExploringyournewTV........................... 7
TVfrontandsidepanelcontrols............ 7
TVbackpanelconnections.................... 8
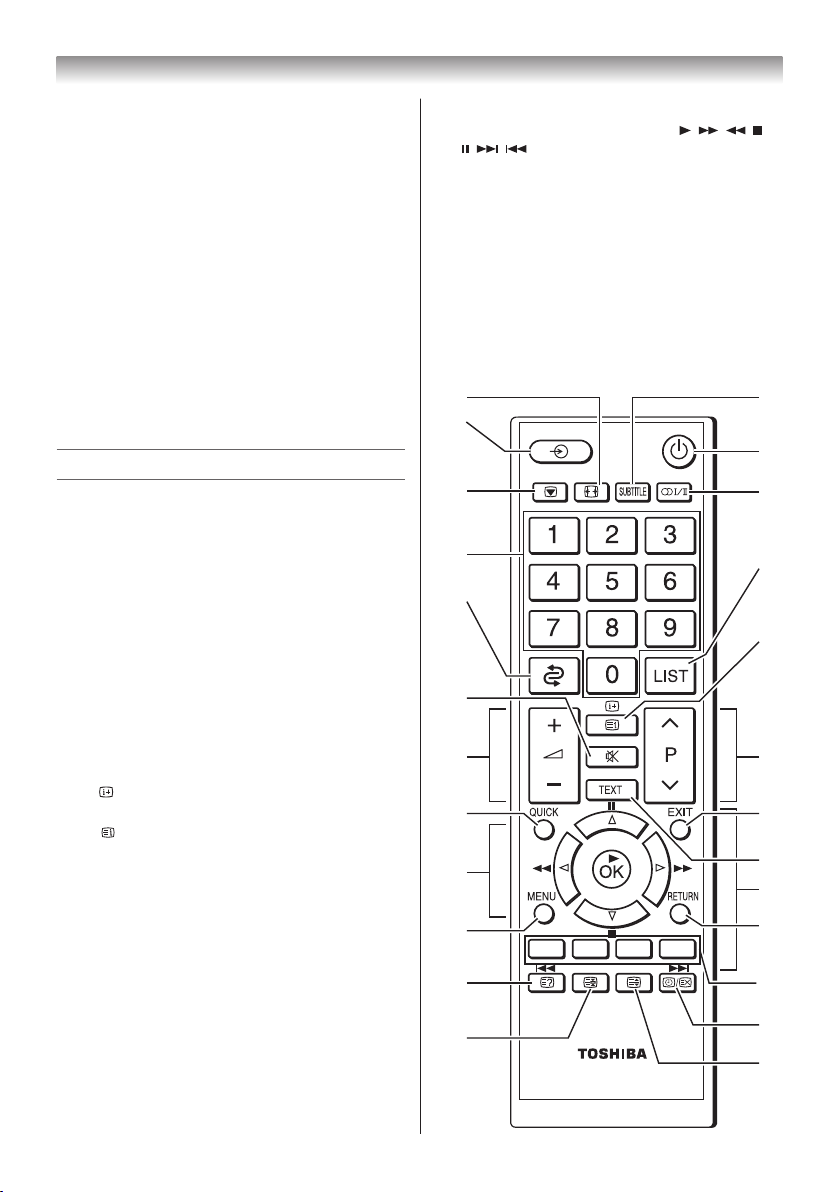
Learningabouttheremotecontrol......... 9
TurningtheTVon................................. 10
TuningtheTVforthersttime............. 10
UsingtheQuickMenu.......................... 11
Learningaboutthemenusystem......... 11
WatchingTVprogrammes.................... 12
Programmingchannelsinto
theTV’schannelmemory..................... 12
Selectingthevideoinput
sourcetoview...................................... 14
ChannelList......................................... 14
Using the TV’s features
Pictureadjustment............................... 15
Soundadjustment................................ 18
Otherfeaturessettings......................... 20
Teletext................................................. 21
Connecting your TV
Backconnections................................. 23
ConnectingHDMIorDVIdevices......... 24
SelectingthePC/HDMI1Audiomode. 25
SettingtheHDMI1Audiomode........... 25
Connectingacomputer........................ 26
UsingthePCSettings.......................... 27
UsingtheMediaPlayer........................ 27
Reference section
APPENDIX........................................... 31
Troubleshooting.................................... 33
Broadcastsystem................................. 34
Specications....................................... 35
Welcome to Toshiba
•ThankyouforpurchasingthisToshibaLCD
ColourTV.Thismanualwillhelpyouusethe
excitingfeaturesofyournewTV.
• Instructionsinthismanualarebasedonusing
theremotecontrol.
110419c1_3240PB10ETV_En.indd 2 11.4.19 1:56:52 PM

3
Introduction / Getting started
3) Never stand or climb on the TV.
• Educatechildrenaboutthedangersof
climbingonfurnituretoreachtheTVorits
controls.
Beespeciallycarefulinhouseholdswith
childrentopreventthemthroughclimbingon
topoftheTV.Itmaymove,fallover,break,
becomedamagedorcauseaninjury.
4) Always connect the power plug to an
appropriate electrical outlet equipped with
110-240V, AC 50/60Hz.
NeverusetheTVoutsidethespeciedvoltage
range.Itmaycauseareoranelectricshock.
Check!
Ex. 110-240V AC, 50/60Hz
WARNING ABOUT THREE-WIRE
GROUNDING-TYPE PLUG:
• Thisproductshallbeconnectedtoamain
socketoutletwithaprotectiveearthing
connection.
• Neverremovetheearthingpinonthepower
plug.Thissystemisequippedwithathree
pinearthing-typepowerplug.Thisplugwill
onlytanearthing-typepoweroutlet.Thisis
asafetyfeature.Ifyouareunabletoinsert
theplugintotheoutlet,contactanelectrician
toreplacethewalloutlet.
• Neverdefeatthepurposeoftheearthing
plug.
About the fuse (only for E models)
Inathreepinearthing-type,thefusetted
inthisplugisapprovedbyASTAorBSIto
BS1362.Itshouldonlybereplacedbya
correctlyratedandapprovedtypeandthe
fusecovermustberetted.
About the earth
Anappliancewithprotectiveearthterminal
shouldbeconnectedtoamainsoutletwitha
protectiveearthconnection.
About the use
• Makesuretoinserttheplugsrmly,when
pluggingtheACpowercordintotheTVset
endandwalloutletend.
• Makesuretoholdtheplug,when
unpluggingtheACpowercord.
• Neveruseothercordexceptforsupplied
ACpowercord,andneverusethesupplied
powercordforanyotherpurpose.
5) Never insert or remove the power plug with
wet hands.
Thismaycauseanelectricshock.
6) Never block or cover the slots and
openings in the cabinet.
• NeverplacetheTVsothatitisfacing
upwardoronitsside.
• NeverplacetheTVinacloset,bookcaseor
othersimilarareawheretheventilationis
poor.
• Neverdrapeanewspaper,tableclothor
curtainontheTV.
• WheninstallingtheTVagainstawall,
alwayskeeptheTVatleast10cmaway
fromthewall.
• NeverplacetheTVonasoftunstable
surface,suchasacarpet,oracushion.
TheinsideofthisTVwilloverheatifthe
ventilationholesarecovered,blockedor
sealed,whichmayresultinare.
7) Never place the TV near a heater or in
direct sunlight.
Thesurfaceofthecabinetorpowercordmay
meltandresultinareoranelectricshock.
110419c1_3240PB10ETV_En.indd 3 11.4.19 1:56:53 PM

4
8) Never place the TV in an area exposed to
high humidity levels, such as in a bathroom
or close to a humidifier.
Thismaycauseareoranelectricshock.
9) Never place the TV next to a stove where it
will be exposed to oil, smoke, or steam, or
in a location where there is a large quantity
of dust.
Thismaycauseareoranelectricshock.
10
)Precautions for moving the TV
• WhenmovingtheTV,besuretoremovethe
plugfromthewalloutletanddisconnectthe
aerialcableandaudio/videocables,any
steadytiesandmountingscrew.Areoran
electricshockmayresultifthepowercordis
damaged.
• WhencarryingtheTV,atleasttwopeople
areneeded.Besuretocarryitupright.
• NevercarrytheTVwiththescreenfacingup
ordown.
11)
Precautions for installing on outdoor aerial
Anoutsideaerialsystemshouldnotbelocated
inthevicinityofoverheadpowerlines,orother
electriclightorpowercircuits.
Iftheaerialfallsdownordrops,itmaycause
aninjuryoranelectricshock.
Introduction / Getting started
Use
1) Never place hot objects or open flame
sources, such as lighted candles or
nightlights, on or close to the TV.
Hightemperaturescanmeltplasticandleadtores.
2) The apparatus shall not be exposed to
dripping or splashing and that no objects
filled with liquids, such as vases, shall be
placed on the apparatus.
Whenliquidsarespilledorsmallitemsare
droppedinsidetheTV,thismaycauseareor
anelectricshock.
IfsmallobjectsdropinsidetheTV,turnoffthe
TVandremovethepowerplugfromtheoutlet
immediatelyandcontactaservicetechnician.
3) Never insert objects (metal or paper)
or pour water inside the TV through
ventilation holes and other openings.
Theseitemsmaycauseareoranelectric
shock.Iftheseobjectsareinsertedinsidethe
TV,turnofftheTVandremovethepowerplug
fromtheoutletimmediatelyandcontacta
servicetechnician.Beespeciallycarefulthat
childrendonotinsertobjectsintheTV.
Clip
4) When the TV will not be used for a long
period of time, such as during vacation or
travel, remove the power plug from the wall
outlet for safety.
• TheTVisnotcompletelydisconnectedfrom
thepowersupplyline,asminutecurrentis
consumedevenwhenthe1Powerswitchis
turnedoff.
110419c1_3240PB10ETV_En.indd 4 11.4.19 1:56:54 PM

5
• TheMainsplugoranappliancecoupleris
usedasthedisconnectdevice,therefore
thedisconnectdeviceshallremainreadily
operable.
5) Never pull on the power cord when
removing the plug from the wall outlet.
Alwaysholdtheplugrmlywhenremoving
it.Ifthepowercordisyanked,thecordmay
becomedamagedandareoranelectric
shockmayoccur.
6) Never cut, break, modify, twist, bunch up or
bent the cord or apply excessive force or
tension to it.
Neverplaceheavyobjectsonthecordorallow
ittooverheatasthismaycausedamage,a
reoranelectricshock.Contactaservice
technicianifthepowercordisdamaged.
7) If there is thunder or lightning, never touch
the aerial cable or other connected cables.
Youmaysufferanelectricshock.
Service
1) Never repair, modify or disassemble the TV
by yourself.
Itmaycauseareoranelectricshock.
Consultaservicetechnicianforinspectionandrepairs.
2) When a malfunction occurs, or if smoke or
an unusual odor comes from the TV, turn
off the TV and remove the power plug from
the outlet immediately.
Makesurethatthesmokeorsmellhas
stopped,thencontactaservicetechnician.
IftheTVisstillusedinthiscondition,itmay
causeareoranelectricshock.
3) If the TV is dropped or the cabinet is
broken, turn off the TV and remove the
power plug from the outlet immediately.
IftheTVhaspowerinthiscondition,itmay
causeareoranelectricshock.Ifthecabinet
isbroken,becarefulwhenhandlingtheTVto
preventaninjury.
Contactaservicetechnicianforinspectionandrepair.
4) When the TV reaches the end of its useful
life, ask a qualified service technician to
properly dispose of the TV.
Note:
Thelampunitcontainsasmallamountof
mercury.Disposalofmercurymayberegulated
duetoenvironmentalconsiderations.
Disposeoftheusedlampunitbytheapproved
methodforyourarea.Fordisposalorrecycling
information,pleasecontactyourlocalauthorities.
Introduction / Getting started
110419c1_3240PB10ETV_En.indd 5 11.4.19 1:56:55 PM

6
Cleaning
1) Remove the power plug before cleaning.
Neverusesolventssuchasbenzineorthinner
tocleantheTV.
• Thesesolventsmaydistortthecabinetor
damageitsnish.
• Ifrubberorvinylproductsremainincontact
withtheTVforalongtime,astainmay
result.
Ifthecabinetbecomesdirty,cleanitwitha
soft,drycloth.
WhencleaningthesurfaceoftheLCDdisplay,
wipethepanelsurfacegentlywithasoft,dry
cloth.
2) Periodically disconnect the power plug
from the outlet and check it.
If dust has collected on the power plug
connectors, clean off the dust with a dry
cloth.
Thisdustmaycauseareduetoreduced
insulationontheplug.
Clean here
Important information
1) About LCD screen
• IfyouhavetheLCDscreenfacingtothe
sun,theLCDscreenwillbedamaged.Be
awareoflocatingtheTVclosetoawindow
oroutdoors.
• NeverpresstheLCDscreenstronglyor
scratchit,andneverputanythingonit.
TheseactionswilldamagetheLCDscreen.
2) About cabinet and LCD screen
Neversprayvolatilecompoundssuchas
insecticideonthecabinetandLCDscreen.
Thismaycauseadiscolourationordamage
thecabinetandLCDscreen.
3) About afterimage
Ifastillpictureisdisplayed,anafterimage
mayremainonthescreen,howeveritwill
disappear.Thisisnotasignofmalfunction.
4) Some pixels of the screen do not light up
TheLCDdisplaypanelismanufactured
usinganextremelyhighlevelofprecision
technology,howeversometimessome
pixelsofthescreenmaybemissingpicture
elementsorhaveluminousspots.Thisisnot
signofmalfunction.
5) About Interference
TheLCDdisplaymaycauseinterference
inimage,sound,etc.ofotherelectronic
equipmentthatreceiveselectromagnetic
waves(e.g.AMradiosandvideoequipment).
6) About using under the low temperature
places
IfyouusetheTVintheroomof0°Corless,
thepicturebrightnessmayvaryuntilthe
LCDmonitorwarmsup.Thisisnotasignof
malfunction.
Exemptions
• Toshibaisnotliableforanydamagecaused
byres,naturaldisaster(suchasthunder,
earthquake,etc.),actsbythirdparties,
accidents,owner’smisuse,orusesinother
improperconditions.
• Toshibaisnotliableforincidentaldamages
(suchasprotlossorinterruptioninbusiness,
modicationorerasureofrecorddata,etc.)
causedbyuseorinabilitytouseofproduct.
• Toshibaisnotliableforanydamagecaused
byneglectoftheinstructionsdescribedinthe
owner’smanual.
• Toshibaisnotliableforanydamagecausedby
misuseormalfunctionthroughsimultaneous
useofthisproductandtheconnected
equipment.
Introduction / Getting started
110419c1_3240PB10ETV_En.indd 6 11.4.19 1:56:56 PM

7
Connecting an aerial
Optimumreceptionofcolourrequiresagood
signalandwillgenerallymeanthatanoutdoor
aerialmustbeused.
Theexacttypeandpositioningoftheaerialwill
dependuponyourparticulararea.
YourToshibadealerorservicepersonnelcan
bestadviseyouonwhichaerialtouseinyour
area.
Beforeconnectingtheaerialcable,turnoffall
mainpowerswitches.
IN
OUT
VHF and/or UHF aerial
300 7twin-lead feeder
75 7
aerial
terminal
Aerial adaptor
(not supplied)
Aerial cable
(75 7 coaxial)(not supplied)
75 7aerial
terminal
75 7coaxial cable
Plug
(not supplied)
Media Recorder TV back view
Exploring your new TV
Installing the remote control batteries
Removethebatterycover.
InserttwoR03(AAA)batteriesmatchingthe–/+
polaritiesofthebatterytothe–/+marksinside
thebatterycompartment.
Cautions:
• Dispose of batteries in a designated disposal
area. Batteries must not be exposed to
excessive heat such as sunshine, fire or the
like.
Introduction / Getting started
• Attentionshouldbedrawntotheenvironmental
aspects of battery disposal.
• Nevermixbatterytypesorcombineused
batterieswithnewones.
Notes:
• If the remote control does not operate correctly,
or if the operating range becomes reduced,
replacebothbatterieswithnewones.
• Ifthebatteriesaredeadorifyouwillnotuse
the remote control for a long time, remove the
batteries to prevent battery acid from leaking
into the battery compartment.
Effective range
within 5 m
TV front and side panel controls
• YoucanoperateyourTVusingthebuttonson
thesidepanelortheremotecontrol.Theback
ofthepanelprovidetheterminalconnections
toconnectotherequipmenttoyourTV(-
“ConnectingyourTV”pages23–30).
• Fortheuseofeachcontrol,seethepagesin
brackets.
TV front view
1
Left side view
Point the
brightness sensor
(-page 18).
2
3
4
5
6
7
USB
11(power LED)—Powerindicator
(-page10).
110419c1_3240PB10ETV_En.indd 7 11.4.19 1:56:57 PM

8
Introduction / Getting started
TV front view
1
Left side view
Point the
brightness sensor
(-page 18).
2
3
4
5
6
7
USB
21(power on/standby)—Presstoturnthe
TVon/standby(- page10).
3pBb (programme position)—Whenno
menuisonscreen,thesebuttonsselectthe
programmeposition.(-page12).
U u(MENU up/down)—Whenamenuis
on-screen,thesebuttonsfunctionasup/
downmenunavigationbuttons(exceptfor
theinputsourceselection)(-page11).
42–+(volume)—
Whennomenuison-
screen,thesebuttonsadjustthevolumelevel.
I i(MENU left/right)—Whenamenuis
on-screen,thesebuttonsfunctionasleft/right
menunavigationbuttonsoradjustsettings
(-page11).
5MENU—Presstoaccessthemenusystem
(-page11).
RETURN—Whenamenuison-screen,
thisbuttonwilltakeyoubacktotheprevious
menu(-page12).
6o(input source selection)—Whenno
menuisonscreen,thisbuttonselectsthe
inputsource(-page14).
OK—Whenamenuison-screen,this
buttonwillmakeaselectionortakeyouto
thenextavailablemenulayer(-page11).
7USB (input terminal)—InsertyourUSB
storagedevice(photo,movie,music)(-
page28).
TV back panel connections
Power cord
*
ACIN
RGB/PC
AUDIO
R
1 2
L /MONO
Y
PR/CRPB/CB
DIGITAL
(2) COMPONENT / VIDEO INPUT
AUDIO
VIDEO
AUDIO
VIDEO
R
L /MONO
PC/HDMI 1
(AUDIO)
AUDIO(FIXED)
(1)
Cable holder
*
Power cord *
* Make sure to insert the plugs firmly, when
plugging the AC power cord into the TV set end
and wall outlet end.
* Make sure to hold the plug, when unplugging
the AC power cord.
* Never use other cord except for supplied AC
power cord, and never use the supplied power
cord for any other purpose.
* The exact power cord will vary according to the
country.
Cable holder *
* You can use the cableholder to hold the aerial
cable, video and audio cables etc.
Never grasp the holder when moving the TV.
13
14
15
8
10 11 12
9
16
8 oDIGITAL AUDIO (OPTICAL) (output
terminal)—Forusewhenconnectingan
amplierwithopticaltypedigitalaudioinput
(-page24).
9oHDMI1 (input terminal)—High-Denition
MultimediaInterfaceinputreceivesdigital
audioanduncompresseddigitalvideofrom
anHDMIdeviceoruncompresseddigital
videofromaDVIdevice(-pages25,26).
10
o
HDMI2 (input terminal)—High-
DenitionMultimediaInterfaceinputreceives
digitalaudioanduncompresseddigitalvideo
fromanHDMIdevice(
-
page25).
11oRGB/PC (input terminal)—Foruse
whenconnectingapersonalcomputer(PC)
(-page26).
110419c1_3240PB10ETV_En.indd 8 11.4.19 1:56:59 PM

9
Introduction / Getting started
12
oPC/HDMI 1 (AUDIO) (input terminal)—
PCaudioinputterminalissharedwithHDMI
analogueaudioinputterminal,andtheiruse
canbeconguredintheSETUPmenu(-
pages25,26).
13A(aerial input terminal)—Analogueaerial
signalinput(-page7).
14o(1) (Video 1 input terminals)—
Standard(composite)videoandstandard
(analogue)stereoaudioinputs(-page23).
15OAUDIO (output terminals)—Standard
audiooutputs(FIXED)(-page23).
16o (2) COMPONENT / VIDEO INPUT (input
terminals)—High-denitioncomponent
videoandstandard(analogue)stereoaudio
inputs,orstandard(composite)videoand
standardstereoaudioinputs(-page23).
Learning about the remote control
Location of controls
1 PictureSize(-page15)
2 Subtitleon/off(-page21)
3 Inputsourceselection(TV,VIDEOor
COMPONENT,HDMI,PC)(-page14)
4 Poweron/Standby(-page10)
5 Picturestill(-page16)
6 Stereo/Bilingualselection(-pages18,19)
7 Numberbuttons(0-9)(-pages12,20,21)
8 TodisplaytheChannelList(-page14)
9 Toreturntothepreviousprogramme(-
page12)
10 • Todisplayon-screeninformation
(-page12)
• Initial/IndexfunctionforTeletext
(-page22)
11 SoundMute(Thisbuttonturnsthesoundoff/
on.)
12 ProgrammepositionUu(-page12)
13 Volume–+(Thesebuttonsadjustthevolume
level.)
14 EXIT(-page12)
15 ToaccesstheQuickMenu(-page11)
16 Teletexton/SuperimposeTeletext/off
(-page21)
17 •Menursvw(-page11)
•OK(-page11)
18 Toreturntothepreviousmenu(-page12)
19MENU(-page11)
20 WhenusingtheMediaPlayer(
(-pages29,30)
21 Teletextcontrolbuttons(Fourcoloured
buttons:Red,Green,Yellow,Blue)
(-pages21,22)
22 Torevealconcealedtext(- page22)
23 •Toselectapagewhileviewinganormal
picture(-page22)
•Toselectthetimedisplay(-page22)
24 Toholdawantedpage(-page22)
25 Toenlargetheteletextdisplaysize
(-page22)
CT-90380
21
4
6
8
10
12
20
14
16
18
21
23
25
5
7
9
11
13
15
17
19
22
24
3
110419c1_3240PB10ETV_En.indd 9 11.4.19 1:56:59 PM

10
Introduction / Getting started
Turning the TV on
Switching on the TV
Connectthepowercordtoawalloutlet,the
1powerindicatorlightsinred(standbymode).
1 Press ontheremotecontrolorontheTV
leftsidepanel,the1powerindicatorlightsin
green.
Note:
Ifyouwatchblackandwhiteprogrammeswhen
the Colour SystemmodeissettoAuto,colour
noise may appear on the screen. In this case
select the appropriate Colour System (For the
system of each country or region, refer to pages
13, 34).
Switching off the TV
1 Press ontheremotecontrolorontheTV
leftsidepaneltoswitchtothestandbymode.
Notes:
• WhentheTVwillnotbeusedforalongperiod
of time, such as during vacation or travel,
removethepowerplugfromthewalloutlet.
• TheTVwillautomaticallyturnitselfoffafter
approximately 15 minutes if it is tuned to a
vacant channel or a station that completes its
broadcastfortheday.Thisfunctiondoesnot
workinexternalinputorBluescreenOffmode.
TheTVwillautomaticallyturnitselfoffafter
approximately 2 hours if you do not operate the
TVafterturnedonbyontimerfunction.
• IfpoweriscutoffwhileyouareviewingtheTV,
the Last Mode Memory function turns on the
TVautomaticallywhenpowerisappliedagain.
Ifpowerisgoingtobeoffforalongtimeand
youaregoingtobeawayfromyourTV,unplug
thepowercordtopreventtheTVfromturning
on in your absence.
Tuning the TV for the first time
BeforeswitchingontheTV,putyourdecoderand
mediarecordertostandby,iftheyareconnected,
andensurethattheaerialisconnected.Tosetup
theTV,usethebuttonsontheremotecontrolas
detailedonpage9.
1 Pressthe button.TheQuick Setup
screenwillappear.Thisscreenwillappear
thersttimethattheTVisswitchedon.
Quick Setup
Language English
2 Pressvorwtoselectthemenulanguage
(English,Chinese(CS),Malay,Thai,
Vietnamese,Russian,Arabic,Persianor
French).
3 PressQ,todisplaytheLocationmenu(-
page14).
PressvorwtoselectStoreorHome.For
normalhomeuse,selectHome.
Location
Home
To use the TV for displaying in
a store showroom, please select [Store].
[Home] mode is recommended
for normal use.
Store mode:
AutoViewmenuisnotavailable.
4 PressQtodisplaytheAutoViewmenu(-
page16).
PressvorwtoselectYesorNo.
AutoView
Yes
AutoView mode automatically
adjusts picture settings to suit
ambient light conditions. Do you
wish to enable AutoView mode?
5 PressQtodisplaytheAuto Signal Booster
menu(-pages13),andthenvorwto
selectYesorNo.
Auto Signal Booster
Yes
Signal Booster boosts weak analogue broadcast signals.
If you select [Yes], the TV will automatically set this
feature to [On] or [Off] according to signal strength.
Do you wish to enable automatic control?
Yes mode:
Thisfunctionperformsautomaticdistinction
ofOnorOff.
6 PressQtodisplaytheAuto Tuningstartup
screen.PressQtostarttheautomaticsearch.
Auto Tuning
Progress Found
1% 0
Whentheautomaticsearchiscompleted,
theTVwillautomaticallyappeartheManual
Tuningmenu(-page13).
1
Manual Tuning
Pos. Label
2
3
4
5
6
7
8
110419c1_3240PB10ETV_En.indd 10 11.4.19 1:57:01 PM

11
Introduction / Getting started
7 ClosingtheQuick Setupmenu,pressEXIT.
Note:
TheQuick Setup menu can also be display at
any time from the SETUP menu.
Using the Quick Menu
PressQUICKtodisplaytheQuick Menuand
usesorrtoselecttheoption.
Quick Menu
Picture Mode
Picture Size
Sleep Timer
Media Player
Bass Boost
Super Live
00:00
Off
On
Dynamic
Signal Booster
Note:
Quick Menu items are different depending on
the current mode.
Mode Quick menu item Description
Whenviewinga
TVprogrammeor
picturesfromthe
externalinput
PictureMode -page16.
PictureSize -page15.
SleepTimer -page20.
MediaPlayer -page27.
BassBoost -page19.
SignalBooster -page13.
WhenusingMedia
Player(PhotoList)
IntervalTime -page28.
Repeat -page28.
SleepTimer -page20.
WhenusingMedia
Player(Photo
Play)
IntervalTime -page28.
Repeat -page28.
BackgroundMusic -page29.
PlayList -page29.
SleepTimer -page20.
WhenusingMedia
Player(MovieList)
Repeat -page29.
SleepTimer -page20.
WhenusingMedia
Player(Movie
Play)
Repeat -page29.
PlayList -page29.
SleepTimer -page20.
WhenusingMedia
Player(MusicList)
Repeat -page30.
SleepTimer -page20.
WhenusingMedia
Player(Music
Play)
Repeat -page30.
PlayList -page30.
SleepTimer -page20.
Learning about the menu system
Wesuggestyoufamiliarizeyourselfwiththe
displaychartsbeforeusingthemenusystem:
• PressMENUtodisplaymenu,thenpressvor
wtoselectmainmenuheadings.
• Presssorrtoselectanitem.
• Pressvorwtoselectoradjustsetting.
• PressQtodisplaythenextmenu.
Displaying the menu chart
SETUP
Language
Auto Tuning
Manual Tuning
Manual Settings
AV Connection
PC Settings
Picture Position
Quick Setup
Location
Ver XXX.XXX
English
Home
PICTURE
Picture Settings
3D Colour Management
Base Colour Adjustment
Active Backlight Control
Auto Brightness Sensor
Noise ReductionNoise Reduction
Off
Off
On
TIMER
Sleep Timer
On Timer
On Timer Position
0 0 : 0 0
0 0 : 0 0
01
SOUND
MTS
Dual
Bass
Treble
Balance
Advanced Sound Settings
Stable Sound
Dynamic Range Control
Dual 1
Auto
Off
On
0
0
0
FUNCTION
Media Player
Teletext
Teletext Language
Panel Lock
Automatic Power Down
Auto
1
Off
Off
Auto Format
4:3 Stretch
Blue Screen
Side Panel
On
Off
On
1
PICTURE
SOUND
SETUP
TIMER
FUNCTION
110419c1_3240PB10ETV_En.indd 11 11.4.19 1:57:01 PM

12
Notes:
• Inthevideoinputmode( o1, o2 and HDMI),
Auto Tuning and Manual Tuning are not
available. Instead, Manual Settings appears in
the SETUP menu (-page 14).
• Ifyouconnectexternalequipmentvia
component video source to external input,
Colour System selection in the Manual
Settings menu is not available.
• Ifyoudonotmakeaselectionforawhile,the
menu display disappears automatically.
• Ifyouwanttoclosethemenudisplayinstantly,
press EXIT or MENU.
• Toreturntothepreviousmenu,pressRETURN.
• InthePCinputmode,PC Settings appears in
the SETUP menu (-page 27).
• Inthe480i,576ior1080iinputsignalsmode,
you can select the Cinema Mode in the
Picture Settings menu (-page 17).
• Whenyouusethecolourmanagementfunction
(-page18),youcanselecttheBase Colour
Adjustment in the PICTURE menu.
• VerXXX.XXXintheSETUP menu is for service
use only.
Watching TV programmes
Selecting the menu language
Choosefrom9differentlanguages(English,
Chinese(CS),Malay,Thai,Vietnamese,Russian,
Arabic,PersianorFrench)fortheon-screen
display.
1 PressMENU,thenpressvorwtodisplay
SETUPmenu.
2 PresssorrtoselectLanguage.
3 Pressvorwtoselectthedesiredlanguage.
Changing the position
1 Enterthedesiredpositionnumberusingthe
Numberbuttonsontheremotecontrol.
Forpositionsbelow10,use0andthe
requirednumbere.g.,forposition1.
2 YoucanalsochangethepositionbyusingPU
orPu.
Thepositionwillbedisplayedonthescreen
withtheMono/Stereo/Dualaudiostatus.
Note:
Changingpositionsbetweendifferentformat
channels takes several seconds.
Switching between two positions
Youcanswitchtwopositionswithoutentering
actualpositionnumbereachtime.
1 Selecttherstpositionyouwanttoview.
2 SelectthesecondpositionwiththeNumber
buttons(0-9).
3 Press .Thepreviouschannelwillbe
displayed.
2 EFGH
3 IJKL Dual
Eachtimeyoupress ,theTVwillswitchback
andforthbetweenthetwopositions.
Displaying the on-screen information
1 Press todisplaythefollowingon-screen
information.
4 ABCD
Theinformationwilldisappearin6seconds.
•Positionorexternalinputmodeselected
•Positionskipon/offinformation
•Label(ifset)
•Mono/Stereo/Dualaudiostatus
2 Toerasethedisplayinstantly,press again.
Programming channels into the TV’s
channel memory
• First,usetheAuto Tuningfunctiontopresetall
theactivechannelsinyourareaautomatically.
Then,arrangethepresetchannelswiththe
Manual Tuningfunctionsothatyoucantune
intoonlydesiredchannels.
• UsetheManual Tuningoperationifdesired
channelscannotbepresetwiththeAuto
Tuningorifyouwouldliketopresetchannels
tospecicpositionnumbersonebyone.
Introduction / Getting started
110419c1_3240PB10ETV_En.indd 12 11.4.19 1:57:02 PM

13
Introduction / Getting started
Auto Tuning
1 FromtheSETUPmenu,presssorrto
selectAuto Tuning.
2 PressQtodisplaytheAuto Signal Booster
menu(-page10),pressvorwtoselect
YesorNo.
3 PressQtodisplaytheAuto Tuningmenu.
Auto Tuning
Previous settings will be Lost!
Press EXIT for no change.
Press OK key to start auto tune.
4 PressQtostarttheautomaticsearch.
Thesearchwillbeginforallavailablestations.
5 Whentheautomaticsearchiscompleted,
theTVwillautomaticallyappeartheManual
Tuningmenu.
6 ClosingtheAuto Tuningmenu,pressEXIT.
Note:
Whenyoupresetthechannelwhichsound
of broadcast transmission system adopts “M”
system, the sound system may not be tuned
correctlyiftheradiowavestransmitbadly.Atthat
time, preset the channel by Manual Tuning.
ThecountriessuchasMyanmar,Brazil,Chile,
Colombiaapplytothiscase.Seepage34for
more details.
Manual Tuning
1 FromtheSETUP menu,presssorrto
selectManual Tuning.
2 PressQtodisplaytheManual Tuning
menu.
Presssorrtoselecttheprogramme
positionyouwanttoarrange.
3 PressQtodisplaythebreakdownmenu.
Pressvorwtoselectanitem,thenpresss
orrtoselecttheitemasshownbelow.
Manual Tuning
Position
0
1B/G A 0
On
A C E G
H
FDB
A. Position selection
B. System (Sound) (-page 34)
C. Colour System (-page 34)
A:Automatic(factoryset),P:PAL,
S:SECAM,4:NTSC4.43(MHz),
3:NTSC3.58(MHz)
Ifthecolourofacertainchannelis
abnormal,theautomaticcoloursystem
selection(A)mayhavemalfunctioned,or
soundsystemselectioniswrong.Insuch
acase,selectanothercolourand/orsound
system(-page34).
D. Position skip selection
Presssorrtoturnthepositionskip
optionon“8”oroff“(”.
Thepositionwillthenbeskippedwhenyou
selectchannelswithPUorPu.
The“8”markwillappearbesidea
positionnumberwhenyouusethe
Numberbuttonontheremotecontrol.
E. Channel search operation
Pressrtosearchupthebandorsto
searchdowntheband.
Presssorrrepeatedlyuntilyourdesired
channelisdisplayed.
Whenastationisfound,itwillbe
displayed.
NEVERPRESSANYOTHERBUTTONS
WHILETHESETISTUNING.
F. Manual Fine Tuning
Presssorruntilbetterpictureand
soundareobtained.
G. Signal Booster
Ifthereceivingsignalisweak/strongand
thepictureisnoisy,thepicture maybe
improvedwhenusingthisfunction.
PressthesorrtoturntheSignal
BoosterOnorOff.
H. Label
Stationlabelsappearunderthe
programmepositiondisplayeachtimeyou
turnontheTV,selectachannel,orpress
.
To change or create station labels:
1) Presssorrrepeatedlytoselecta
characterfortherstspace,thenpress
vorw.
*(blank space)
2) Repeatstep1)toentertherestofthe
characters.Ifyouwouldlikeablank
spaceinthelabelname,youmust
chooseablankspacefromthelistof
characters.
PressQtostoreyoursettings.
110419c1_3240PB10ETV_En.indd 13 11.4.19 1:57:03 PM

14
Setting the Location
YoucanselecteitherHomeorStoremode.
Homeisrecommendedfornormalhomeuse.
SelectStorewhenusingaTVfordisplayingina
shop,etc.
1 FromtheSETUP menu,presssorrto
selectLocation.
2 PressvorwtoselectHomeorStore.
Sorting positions
• TheTViscapableofreceivinganumberof
differentchannelsdependinguponwhereyou
live.
• Sortingprogrammepositionisaneasyway
ofstoringeachchannelontheprogramme
positionofyourchoice.
Ex.:ToswapchannelABCD(Prog.1)forchannel
MNOP(Prog.4):
1 FromtheSETUP menu,presssorrto
selectManual Tuningmenu,andthenpress
Q.
2 PresssorrtoselectthechannelABCD,
thenpressw.
1ABCD
EFGH
IJKL
MNOP
Manual Tuning
Pos. Label
2
3
4
5
6
7
8
3 Pressstoselectthenewposition“4”,then
pressv.
4 PressrtoselectthechannelMNOP,then
pressw.
5 Pressrtoselectthenewposition“1”,then
pressv.
6 ConrmnewManual Tuningmenu.
Selecting the video input source to view
1 Press ontheremotecontroluntil
thevideoinputmodelistappearsonthe
screen,thenpresss,ror toselect
appropriateinputsource(orpressoonthe
TVleftsidepaneltoselectrequiredinput
sourcedirectly).
Introduction / Getting started
2 PressQ.
TV(analogueaerialinput),
VIDEO1(o(1),standardvideoinput),
VIDEO2(o(2)COMPONENT/VIDEO
INPUT,standardorcomponentvideoinput),
HDMI1,HDMI2(HDMIinput),
PC(oRGB/PC,PCinput)
Setting the Manual Settings menu
1 FromtheSETUPmenu,pressvorwto
selectManual Settings,andthenpressQ.
2 Pressvorwtoselectanitem,andthen
presssorrtoselecttheitemasshown
below.
Manual Settings
Colour System : Auto
VIDEO A
A B
A. Colour System
ConrmthatColour Systemissetto“A”
(Auto).Ifnot,select“A”withsorr.
Note:
Onlystandardvideosignalinput,thisfunction
is available.
B. Label
Thelabelallowsyoutolabeleachinput
sourceforyourTV.
To change or create labels:
1) Presssorrrepeatedlytoselecta
characterfortherstspace,thenpress
vorw.
*(blank space)
2) Repeatstep1)toentertherestofthe
characters.Ifyouwouldlikeablank
spaceinthelabelname,youmust
chooseablankspacefromthelistof
characters.
PressQtostoreyoursettings.
Channel List
1 Pressthe button.TheChannel Listwill
appear.
2 Presssorrtoselectachannel,andpress
Qtowatch.
110419c1_3240PB10ETV_En.indd 14 11.4.19 1:57:04 PM

15
Using the TV’s features
Picture adjustment
• Mostofthepicturecontrolsandfunctionsare
available.Howeverfeaturesnotavailablewillbe
greyedout.
Selecting the Picture Size
1 Press untilthePicture Sizelistappears
onthescreen,thenpresssorrtoselect
theappropriatePicture Size(orpress
repeatedlytoselectthedesiredPicture Size
directly).
2 PressQ.
Native
Thissettingwilldisplaytheimagecorrectly
withoutdistortionorpictureclipping.
Wide
Usethissettingwhenwatchingawide-screen
DVD,widescreenvideotapeora16:9broadcast
(whenavailable).Duetotherangeofwide-
screenformats(16:9,14:9,20:9etc.),youmay
seebarsonthetopandbottomofthescreen.
4:3
Usethissettingtoviewatrue4:3broadcast.
Super Live
Thissettingwillenlargea4:3imagetotthe
screenbystretchingtheimagehorizontallyand
vertically,holdingbetterproportionsatthecentre
oftheimage.Somedistortionmayoccur.
Cinema
Whenwatching“allsidespanelformat”lms/
videotapes,thissettingwilleliminateorreduce
theblackbarsonallthesidesofthescreen
byzoominginandselectingtheimagewithout
distortion.
Subtitle
Whensubtitlesareincludedonaletterboxformat
broadcast,thissettingwillraisethepictureso
thatthemostoftextisdisplayed.
Subtitle
14:9
Usethissettingwhenwatchinga14:9broadcast.
PC Normal
UsethissettingforPCconnectedviaHDMI
orRGB/PCterminalwhenreceivingPCsignal
format.Thissettingwilldisplaytheimage
correctlywithoutdistortionorpictureclipping.
PC Wide
UsethissettingforPCconnectedviaHDMI
orRGB/PCterminalwhenreceivingPCsignal
format.Thissettingwilldisplaytheimagewithout
pictureclipping.
110419c1_3240PB10ETV_En.indd 15 11.4.19 1:57:07 PM

16
Using the TV’s features
Dot by Dot
“DotbyDot”isanon-scalingdisplay.Depending
ontheinputsignalformat,thepictureis
displayedwithsidepanelsand/orbarsatthetop
andbottom(i.e.VGAinputsource).
Notes:
• InthePCconnectedviaHDMIorRGB/
PCterminal(- page26),thepicturesize
selection is PC Wide, PC Normal or Dot by
Dot only.
• Usingthespecialfunctionstochangethe
sizeofthedisplayedimage(e.g.changingthe
height/widthratio)forthepurposeofpublic
display or commercial gain may infringe on
copyrightlaws.
• Iftheaspectratiooftheselectedformatis
differentfromtheoneoftheTVtransmission
or video programme, it can cause a difference
invision.Changetothecorrectaspectratio
picturesize.
• WhenusingthePCconnectedviaHDMIor
RGB/PCterminal,themovingimagequality
may be deteriorated.
Using the picture still
• Press tofreezethepicture.
EvenifanimageisfrozenontheTVscreen,the
picturesarerunningontheinputsource.Audio
continuestobeoutputaswell.
Toreturntoamovingpicture,press again.
(Moving) (Still)
Note:
If you use this function except for the purpose of
yourprivateviewingandlistening,itmayinfringe
thecopyrightprotectedbythecopyrightlaws.
Adjusting the Picture Position
Adjustmenttothepositionofthepicturemaybe
madetosuityourviewingpreferences.
1 FromtheSETUP menu,presssorrto
selectPicture Position.
2 PressQ,thenpresssorrtoselectthe
itemyouwanttoadjust.
Picture Position
Horizontal Position
Vertical Position
Reset
0
0
3 Pressvorwtoadjustthesettingsasdesired.
Horizontal Position
0
Notes:
• WhenthepicturesizeisinWideor4:3mode,
onlytheHorizontalpositioncanbeadjusted.
• WhenthepicturesizeisinNative, PC Wide,
PC Normal and Dot by Dot mode, none of this
functionwillbeavailable.
Resetting the Picture Position
ThisfunctionresetsyourPicture Position
settingstothefactorysettings.
1 FromthePicture Positionmenu,presssor
rtoselectReset.
2 PressQ.
Activating the Picture Mode
ThisTVoffersthechoiceofpersonalisingthe
picturestyle.
AutoView, Dynamic,Standard,Mild,Movie,
Eco Mode 1, Eco Mode 2,GameandPCare
presetoptionsandaffectmanyfeatures/settings
withintheTV.
Notes:
• BecausetheAutoView mode automatically
adjustspicturesettingsbasedonambientlight
conditions, the Auto Brightness Sensor is
greyedoutwhenitisselected.
• IfusingEco Mode 1 or Eco Mode 2willbe
changedthedarkscreen,andyouwillbeable
toreducepowerconsumption.
TheEco Mode 2 is effect better than the Eco
Mode 1.
TheBacklight mode is not available in the Eco
Mode 1 or the Eco Mode 2.
• Game mode is available in external input mode
(otherthanaerialinput).Whenyouselect
Gamemode,suitablewidescreenformatswill
be selected.
• PCmodeisavailableinRGB/PCinputmodeor
HDMI input mode.
1 FromthePICTUREmenu,presssorrto
selectPicture Settings.
110419c1_3240PB10ETV_En.indd 16 11.4.19 1:57:08 PM

17
Using the TV’s features
2 PressQ,thenpresssorrtoselect
Picture Mode.
Picture Settings 1/2
Picture Mode
Backlight
Contrast
Brightness
Colour
Tint
Sharpness
Black/White Level
Dynamic
High
100
50
50
0
0
100
3 Pressvorwtoselectthepicturemodeyou
preferandpressQ.
Activating the picture preferences
Youcancustomisecurrentpicturemode
settingsasdesired.Forexample,whileselecting
"Dynamic,"ifyouchangethefollowingitems,
suchasPicture Settingsitems,yournewsetting
issavedasDynamic-user.
1 FromthePicture Settingsmenu,presss
orrtoselecteitherBacklight,Contrast,
Brightness,Colour,TintorSharpnessand
pressQ.
2 Pressvorwtoadjustthesettings.
Setting the Black/White Level
Black/White Levelimprovesthecontrastofthe
picture.
1 FromthePicture Settingsmenu,presssor
rtoselectBlack/White Level.
2 PressvorwtoselectHigh, Off, Lowor
Middle.
Using the Cinema Mode
Amovielm’spicturerunsat24framesasecond,
whereasmoviesoftwaresuchasDVD,etc.,that
youenjoywatchingonTVathomerunsat30
(NTSC)or25(PAL)framesasecond.Toconvert
thissignaltoreproduceasmoothmotionand
picturequality,selecttheOnmode.
Effective signal and setup conditions:
• WhentheVideoinputmodeisselected.
• Whentheinputsignalformatis480i,576ior
1080isignals.
1 FromthePictureSettingsmenu,presssor
rtoselectCinema Modeonthe2ndpage.
Picture Settings 2/2
Cinema Mode
Colour Temperature
Reset
Off
2 PressvorwtoselectOnorOff.
Note:
WhenaDVDmoviewithsubtitleisplayingback,
thismodemaynotworkcorrectly.
Adjusting the Colour Temperature
Colour Temperatureincreasesthewarmthor
coolnessofthepicturebysettingthered,green
orbluetint.
1 FromthePicture Settingsmenu,presssor
rtoselectColour Temperatureonthe2nd
page,thenpressQ.
2 PressvorwtoselectCool, Natural,orWarm
tosuityourpreference.
Colour Temperature
Colour Temperature Cool
Red Level
Green Level
Blue Level
0
0
0
3 PresssorrtoselectRed Level, Green
LevelorBlue Level,thenpressvorwto
adjustthesettingasrequired.
Resetting the Picture Settings
1 FromthePicture Settingsmenu,presss
orrtoselectResetonthe2ndpage,then
pressQ.
Activating the Noise Reduction (NR)
IfthereceivingsignalofMPEGisamosquito
(grained)noisedependingonthecompression
andconversion,thepictureisweakandthe
pictureisblurry,thepicturemaybeimproved
whenusingthisfunction.
1 FromthePICTUREmenu,presssorrto
selectNoise Reduction,andthenpressQ.
Noise Reduction
Auto NR On
MPEG NR Auto
DNR Auto
2 PresssorrtoselectAuto NR,andthen
pressvorwtoselectOnorOff.
Off mode :
MPEG NRmenuandDNRmenuareavailable.
•MPEG NRmode:Low,Middle,HighorOff
•DNR(DigitalNoiseReduction)mode:Low,
Middle,HighorOff
Note:
DNRfunctionisavailablefor480iand576i
signals.
110419c1_3240PB10ETV_En.indd 17 11.4.19 1:57:09 PM

18
Using the TV’s features
2PressvorwtoselectOnorOff.
Sound adjustment
Setting the MTS (Multi-channel TV Sound)
Auto mode
TheMTS Automodeautomaticallyrecognize
stereo/bilingualprogrammesdependingonthe
broadcastsignal.
1 PressMENU,andthenpressvorwto
displaytheSOUNDmenu.
2 PresssorrtoselectMTS,andthenpress
vorwtoselectAutoorMono.
Mono mode
Ifyouexperiencenoiseorpoorreceptionofany
stereo/bilingualprogramme,settheMTSmode
toMono.
Noisewillbereducedandreceptionmay
improve.
Note:
Ifyouexperiencenoisewithaparticular
programmeonwhosechannelreceptionis
usuallygood,trysettingMTSmodetoAuto,
thenswitchgto eMono (monaural).
Selecting the Dual 1 or Dual 2 mode
YoucanhearonlyDual 1orDual 2sound
selected,wheneverbilingualprogrammesare
received.
1 PressMENU,andthenpressvorwto
displaytheSOUNDmenu.
2 PresssorrtoselectDual,andthenpress
vorwtoselectDual 1orDual 2.
Notes:
• WhentheMTSsettingisinMono mode, the
Dual menu is not selectable.
• TheDual menu setting status remains even if
theTVisturnedoff.
Selecting the stereo programmes
1 Whenastereoprogrammeisreceived,d
Stereoappears.
10 ABCD Stereo
2 Pressgtoselectthestereo/monaural
mode.dStereoandeMonoappear
cyclicallyonthescreen.
Adjusting the Colour Management
Youcanadjustthepicturecolourqualityby
selectingfrom6basecolouradjustments:Red,
Green,Blue,Yellow,MagentaorCyan.
1 FromthePICTUREmenu,presssorrto
select3D Colour Management.
2 Pressvorw,thenpressvorwtoselect
On.
3 PressQ,thenpresssorrtoselectBase
Colour Adjustment.
4 PressQ,thenpresssorrtoselectan
itemyouwanttoadjust.
Base Colour Adjustment
Hue Saturation Brightness
Red 0 0 0
0 0 0
0 0 0
0 0 0
0 0 0
0 0 0
Green
Blue
Yellow
Magenta
Cyan
Reset
5 Pressw,thenpressvorwtoselectHue,
SaturationorBrightness.
6 Presssorrtoadjustthesettingsas
required.
Hue Saturation Brightness
Red 00 0
Resetting the Base Colour Adjustment
Theresetfunctionadjuststhebasecolour
adjustmenttothefactorysettings.
1 FromtheBase Colour Adjustmentmenu,
presssorrtoselectReset.
2 PressQ.
Using the Active Backlight Control
Inordertoimprovescreenvisibility,theActive
Backlight Controlsetsthescreenbrightness
automaticallyduringdarkscenes.
1 FromthePICTUREmenu,presssorrto
selectActive Backlight Control.
2 PressvorwtoselectOnorOff.
Activating Auto Brightness Sensor
WhentheAuto Brightness Sensorisactivated,
itwillautomaticallyoptimisethebacklighting
levelstosuitambientlightconditions.
1 FromthePICTUREmenu,presssorrto
selectAuto Brightness Sensor.
110419c1_3240PB10ETV_En.indd 18 11.4.19 1:57:09 PM

19
Using the TV’s features
Using the Advanced Sound Settings
Bass Boosthelpstocreaterichbass.
Voice Enhancementhelpstoemphasize
dialogue.Itwillbeeasiertohearvoicesover
otherbackgroundaudio.
1 FromtheSOUNDmenu,presssorrto
selectAdvanced Sound Settings,andthen
pressQ.
2 Presssorrtoselecttheitemyouwantto
adjust.
Advanced Sound Settings
Bass Boost
Voice Enhancement On
Off
Voice Enhancement : Toturnthevocal
emphasiseffectOn
orOff.
Bass Boost:
Toselectthedesired
bassexpansionlevel
OnorOff.
Using the Stable Sound
TheStable Soundfunctionlimitsthehighest
volumeleveltopreventextremechangesin
volumewhenthesignalsourcechanges(for
example,topreventthesuddenincrease
involumethatoftenhappenswhenaTV
programmeswitchestoacommercial).
1 FromtheSOUNDmenu,presssorrto
selectStable Sound.
2 PressvorwtoselectOnorOff.
Note:
TheStable Soundeffectisactiveonlywhenthe
sound outputs from the speaker.
Dynamic Range Control
Thisfeatureallowscontrolofcompressionfor
digitalaudiosignalexcludingthosewithMPEG-1
andMPEG-2audio.
1 FromtheSOUNDmenu,presssorrto
selectDynamic Range Control.
2 PressvorwtoselectOnorOff.
Setting the Digital Audio Output
1 FromtheSETUPmenu,presssorrto
selectAV Connection,andthenpressQ.
2 PresssorrtoselectDigital Audio
Output.
Stereo
Selecting the bilingual programmes
1 Whenabilingualprogrammeisreceived,
jDualappears.
2 Pressgtoselectthesoundtobe
heard.Thesounddiffersaccordingtothe
transmissionsystem:NICAMorGerman
stereo/bilingualbroadcast.
Display
Sound to be heard
NICAM
German stereo/
bilingual broadcast
jDual1 SubIsound Mainsound
JDual2 SubIIsound Subsound
eMono Mainsound —
Note:
ThesesettingsarenotstoredintheTVmemory.
Selecting the monaural programmes
Ifsounddistortion,interruptionsorsilence
arisesinthelowsoundvolumelevel,settingthe
eMono 2modewillmitigatetheproblem.
1 Whenamonauralprogrammeisreceived,e
Monoappears.
2 Pressgtoselectamonauralmodethat
iseasytohear.eMono 1andeMono 2
appearcyclicallytothescreen.
Note:
Onsomecases,thereceptionofstereo/bilingual
broadcastsmaynotbepossibleafterswitching
on the eMono 2 mode.
Adjusting the sound quality
1 FromtheSOUNDmenu,presssorrto
selectanitemyouwanttoadjust.
2 Pressvorwtoadjustthesettingsas
required.
Selection
vPressing w
Bass weaker stronger
Treble weaker stronger
Balance decreasesthe
rightchannel
decreasesthe
leftchannel
110419c1_3240PB10ETV_En.indd 19 11.4.19 1:57:10 PM

20
Using the TV’s features
AV Connection
PC/HDMI 1 Audio PC
HDMI 1 Audio Digital
Digital Audio Output Auto
3 PressvorwtoselectAutoorPCM
Auto: ThismodeoutputsDolbyDigitalor
PCMtothedigitalaudiooutputsocket
providingitisbeingbroadcast.
PCM:Selectthiswhena2chdigitalstereo
amplierisconnectedtotheTV.When
youselectaDolbyDigitalorMPEG
audiotrack,thesoundisconvertedto
thePCM(2ch)formatandoutput.
Other features settings
Selecting the TIMER menu
TheTimerisespeciallyusefulifyouwanttheTV
toturnitselfonoroffafteraselectedperiodof
time.
1 PressMENU,andthenpressvorwto
displaytheTIMERmenu.
2 Presssorrtoselecttherequiredtimer
mode(Sleep Timer(TurnofftheTV)orOn
Timer).
3 PresstheNumberbuttons(0-9),vorwto
settheOnorOffdelaytime.
Thetimerdisplaywillsetby10minutes,upto
12hoursand50minutes.
4 WhensettingtheOntimer,presssorrto
selecttheOn Timer Positionandenterthe
programpositionnumberyouwanttowatch.
PressEXITtoexitthemenu.SettheStandby
modebypressing ontheremotecontrol.
Note:
TheTVwillautomaticallyturnitselfoffafter
approximately 2 hours if you do not operate the
TVafterturnedonbyontimerfunction.
Using the Auto Format
WhentheTVreceivesatrueHDMIsignalpicture
andtheAuto FormatisOn,itwillautomatically
bedisplayedinHDMIsignalformat,irrespective
oftheTV’sprevioussetting.
1 PressMENU,thenpressvorwtodisplay
theFUNCTIONmenu.
2 PresssorrtoselectAuto Format,then
pressvorwtoselectOnorOff.
Activating Blue Screen
WiththeBlue ScreenfunctionOn,thescreen
willautomaticallyturnblueandthesoundwillbe
muted(exceptforPCinput)whennosignalis
beingreceived.
1 FromtheFUNCTIONmenu,presssorrto
selectBlue Screen.
2 PressvorwtoselectOnorOff.
Note:
InthePCinputmodeorTeletextmode,this
function is not available.
Setting the Automatic Power Down
TheTVwillautomaticallyturnitselfoff(standby)
afterapproximately4hours,ifyoudon’ttouch
thecontrolbuttonsontheremotecontroloron
theTVcontrolpanel.
1 FromtheFUNCTIONmenu,presssorrto
selectAutomatic Power Down.
2 PressvorwtoselectOnorOff.
Panel Lock
Panel LockdisablesthebuttonsontheTV.All
buttonsontheremotecontrolcanstillbeused.
1 FromtheFUNCTIONmenu,presssorrto
selectPanel Lock.
2 PressvorwtoselectOnorOff.
Note:
WhenPanel Lock is On,areminderwillappear
whenthebuttonsontheTVarepressed.
Ifthestandbybuttonispressed,theTVwill
switchoffandcanonlybebroughtoutofstandby
by using the remote control.
Activating the 4:3 Stretch
When4:3 Stretchisactivated,thisfunctionwill
switch4:3formatprogrammesintoafullscreen
picture.
1 FromtheFUNCTIONmenu,presssorrto
select4:3 Stretch.
2 PressvorwtoselectOnorOff.
Note:
In HDMI signal format, this function is available.
Adjusting the brightness of Side Panel
YoucanadjustthebrightnessofSide Panelin
14:9or4:3,etc.mode.
1 FromtheFUNCTIONmenu,presssorrto
selectSide Panel.
110419c1_3240PB10ETV_En.indd 20 11.4.19 1:57:10 PM
This manual suits for next models
7
Table of contents