trendmedic TM-9500 Professional Quick start guide
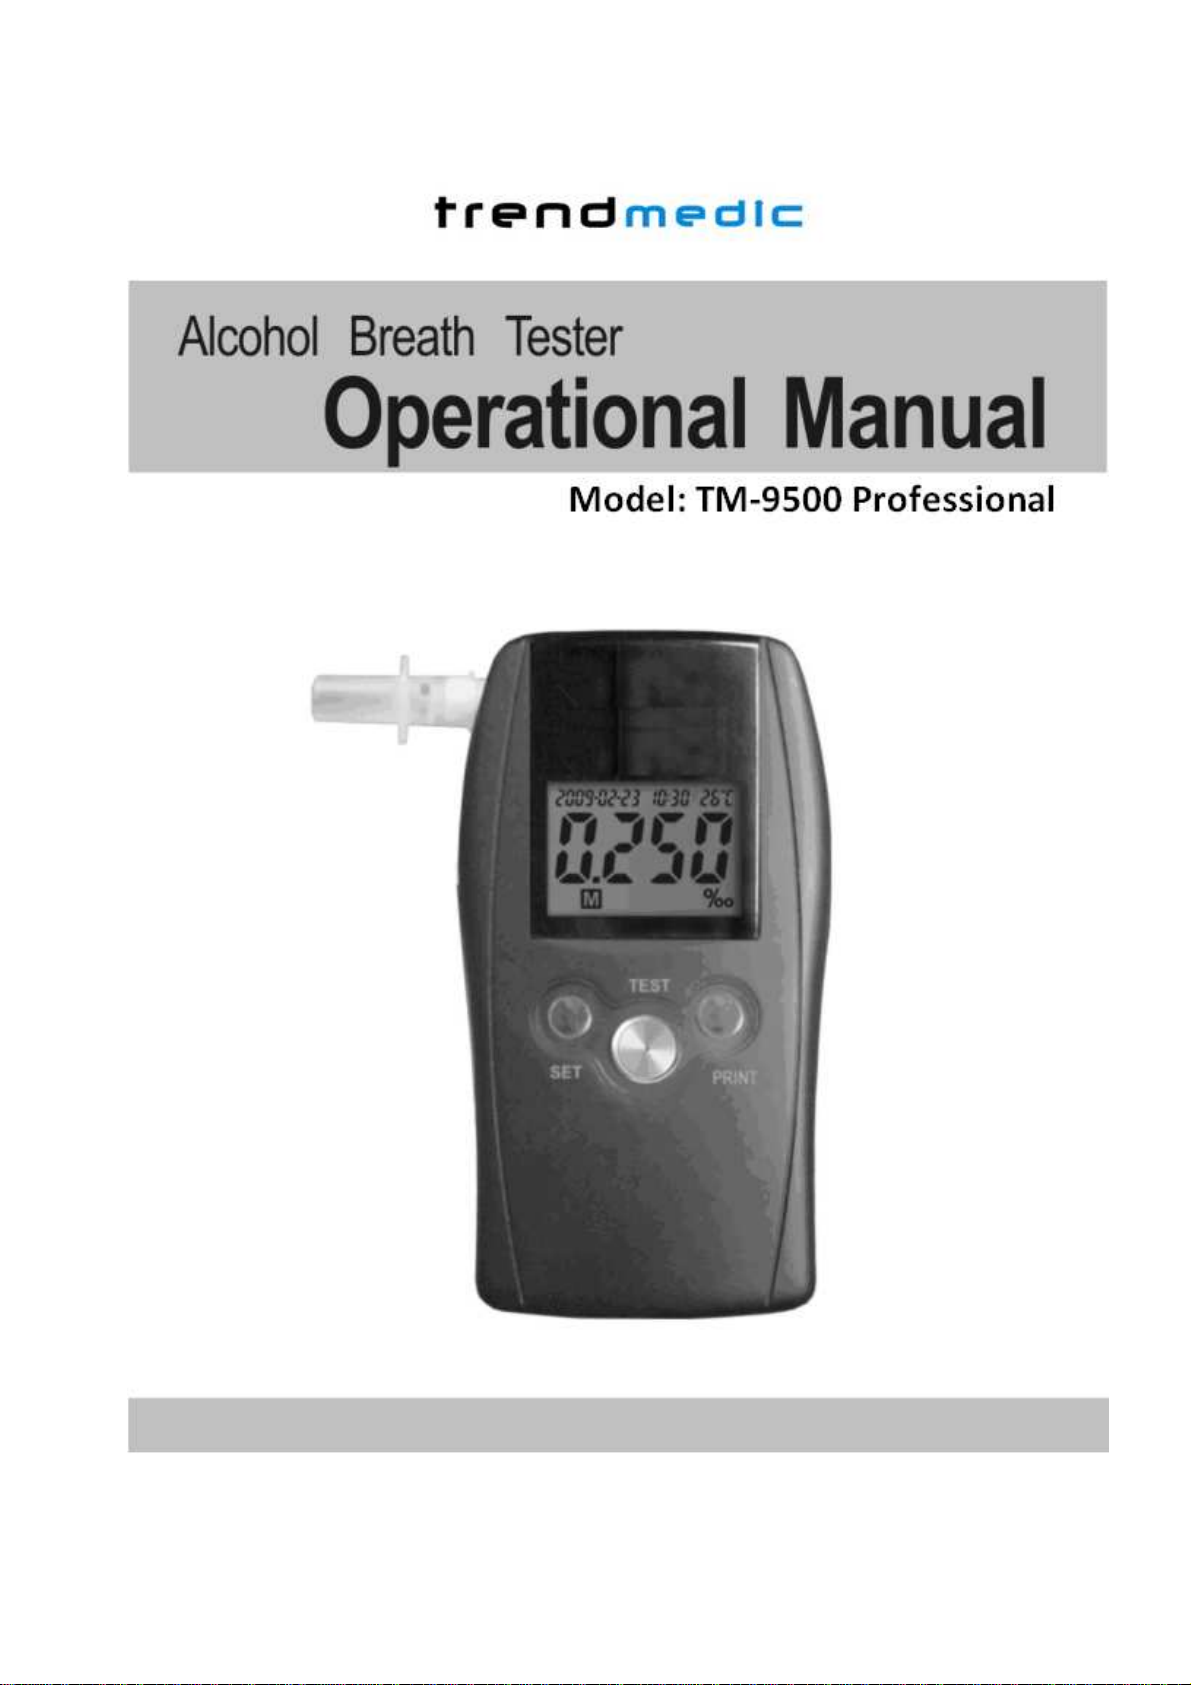

TABLE OF CONTENTS
Introduction-----------------------------------------------------------------------------------------1
Correct Measurement----------------------------------------------------------------------------1
Description of Parts-------------------------------------------------------------------------------1
Power Supply-------------------------------------------------------------------------------------- 2
Operation and Setup----------------------------------------------------------------------------- 2
Accessories-----------------------------------------------------------------------------------------6
Error and Troubles--------------------------------------------------------------------------------6
Important Notes------------------------------------------------------------------------------------7
Specifications---------------------------------------------------------------------------------------7
Calibration and Record---------------------------------------------------------------------------8
Precautions------------------------------------------------------------------------------------------9
Warranty----------------------------------------------------------------------------------------------9
Introduction
The device is intended to measure alcohol in the human breath. Measurements obtained by this
device are used in the diagnosis of alcohol intoxication.
Preparation for Correct Measurement
• Before testing, wait at least 15 minutes after your last drinking.
•
Only use the device in a temperature 0°C ~ 40°C or 32°F ~104°F.
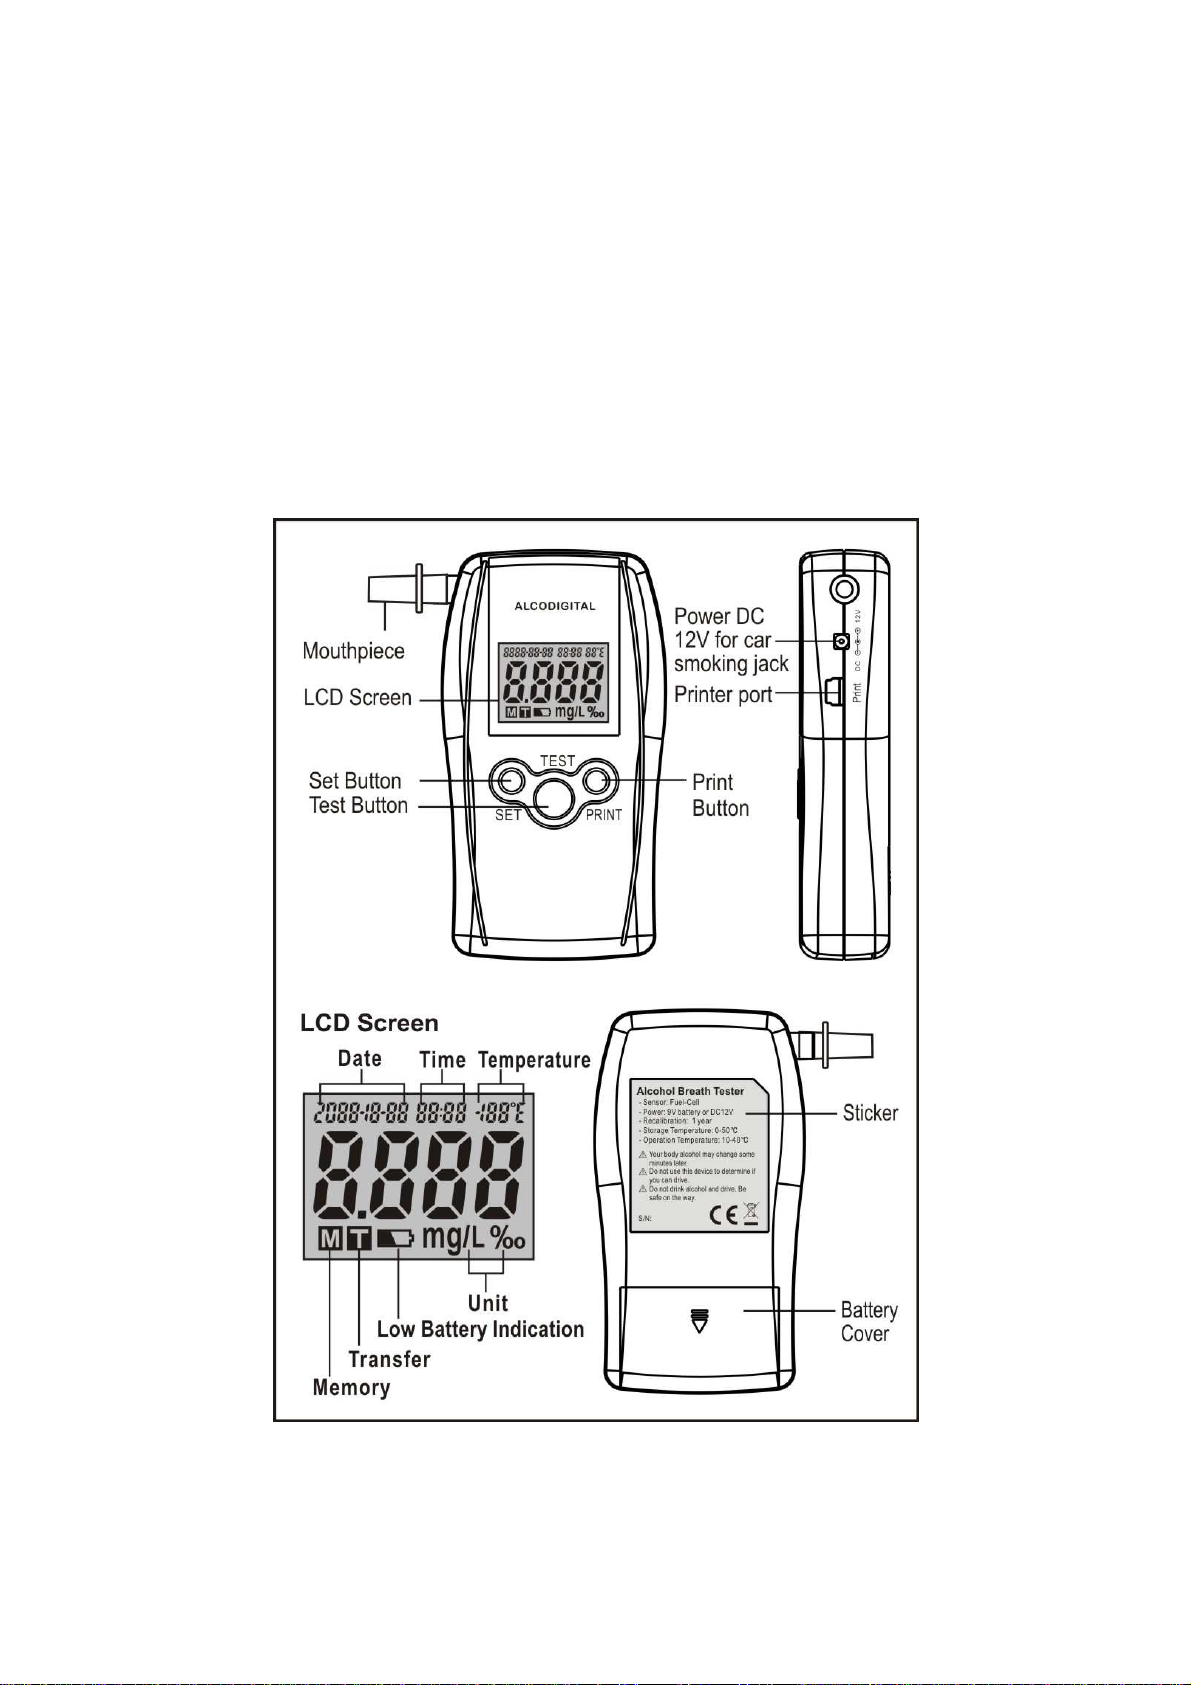
Description of parts
Power Supply
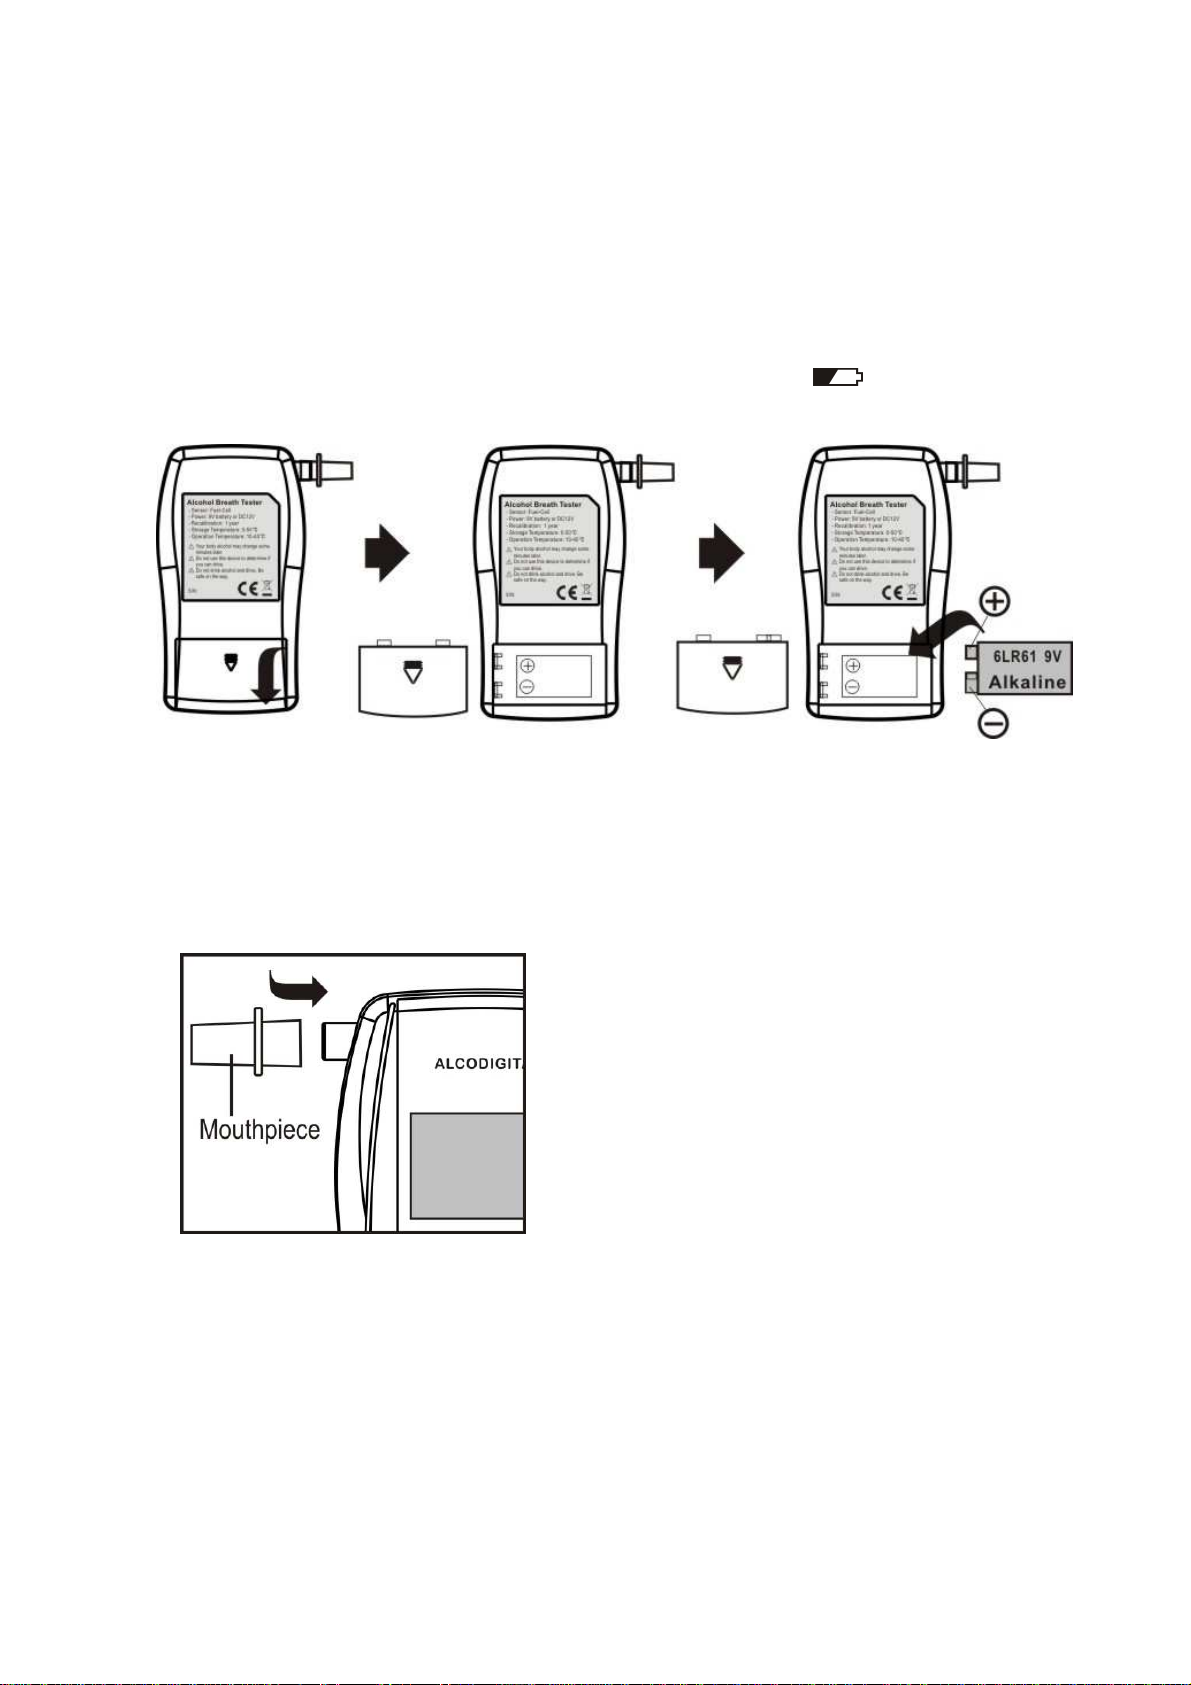
• Slide back the battery cover on the back of the device.
• Insert 1 piece 9V battery, making sure that the “+/-“symbols are correctly.
• If the power is too low, the unit may display a battery symbol “ “and the device may
not use correctly. You need to change a new battery.
• The device can also be used from DC12V input.
Operation and Setup
(Test mode)
• Insert one of the mouthpieces into the ‘blow in’ hole.
• Press and hold the TEST button until power on. Release it after power on.
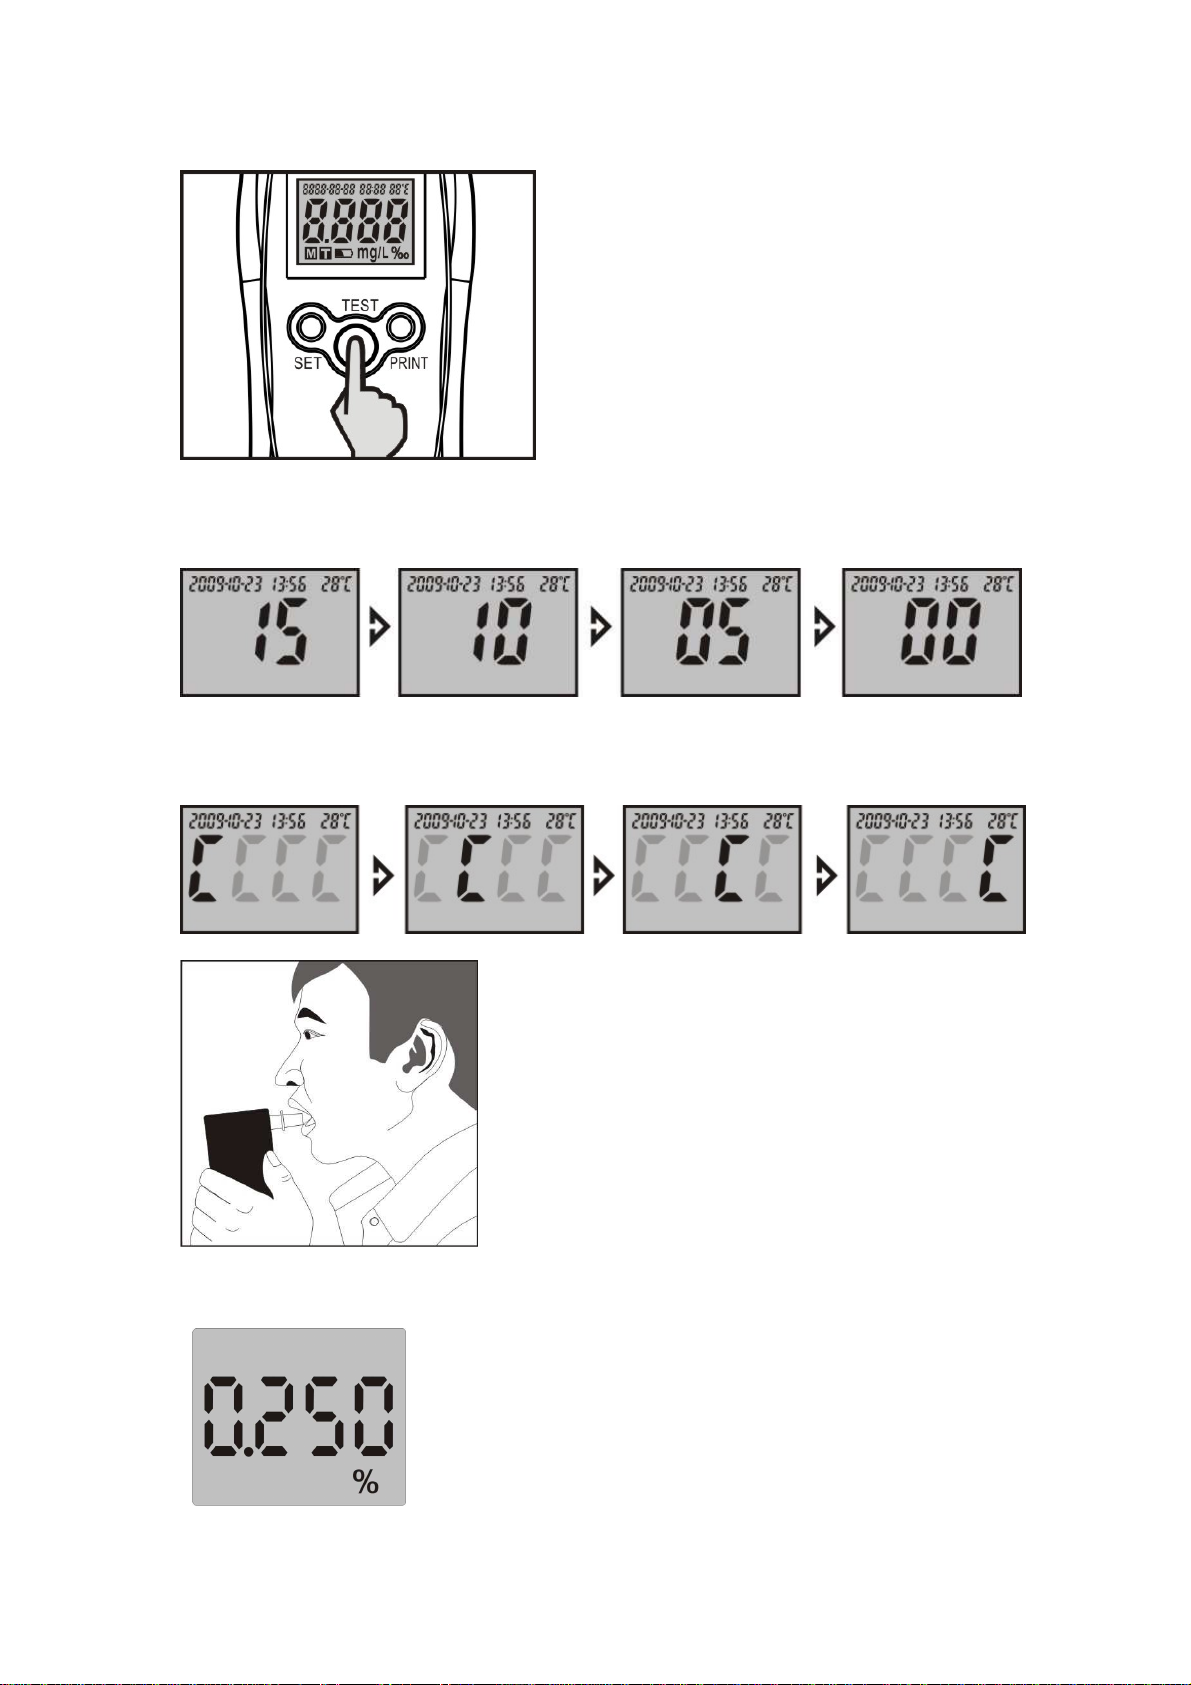
• The WAIT displays on the screen and countdown 15, 14, and 13… to zero.
• The BLOW displays on the screen, and displays “C” with flashing. Take a deep breath,
blowing steady into the mouthpiece until beeping stops (about 6 seconds).
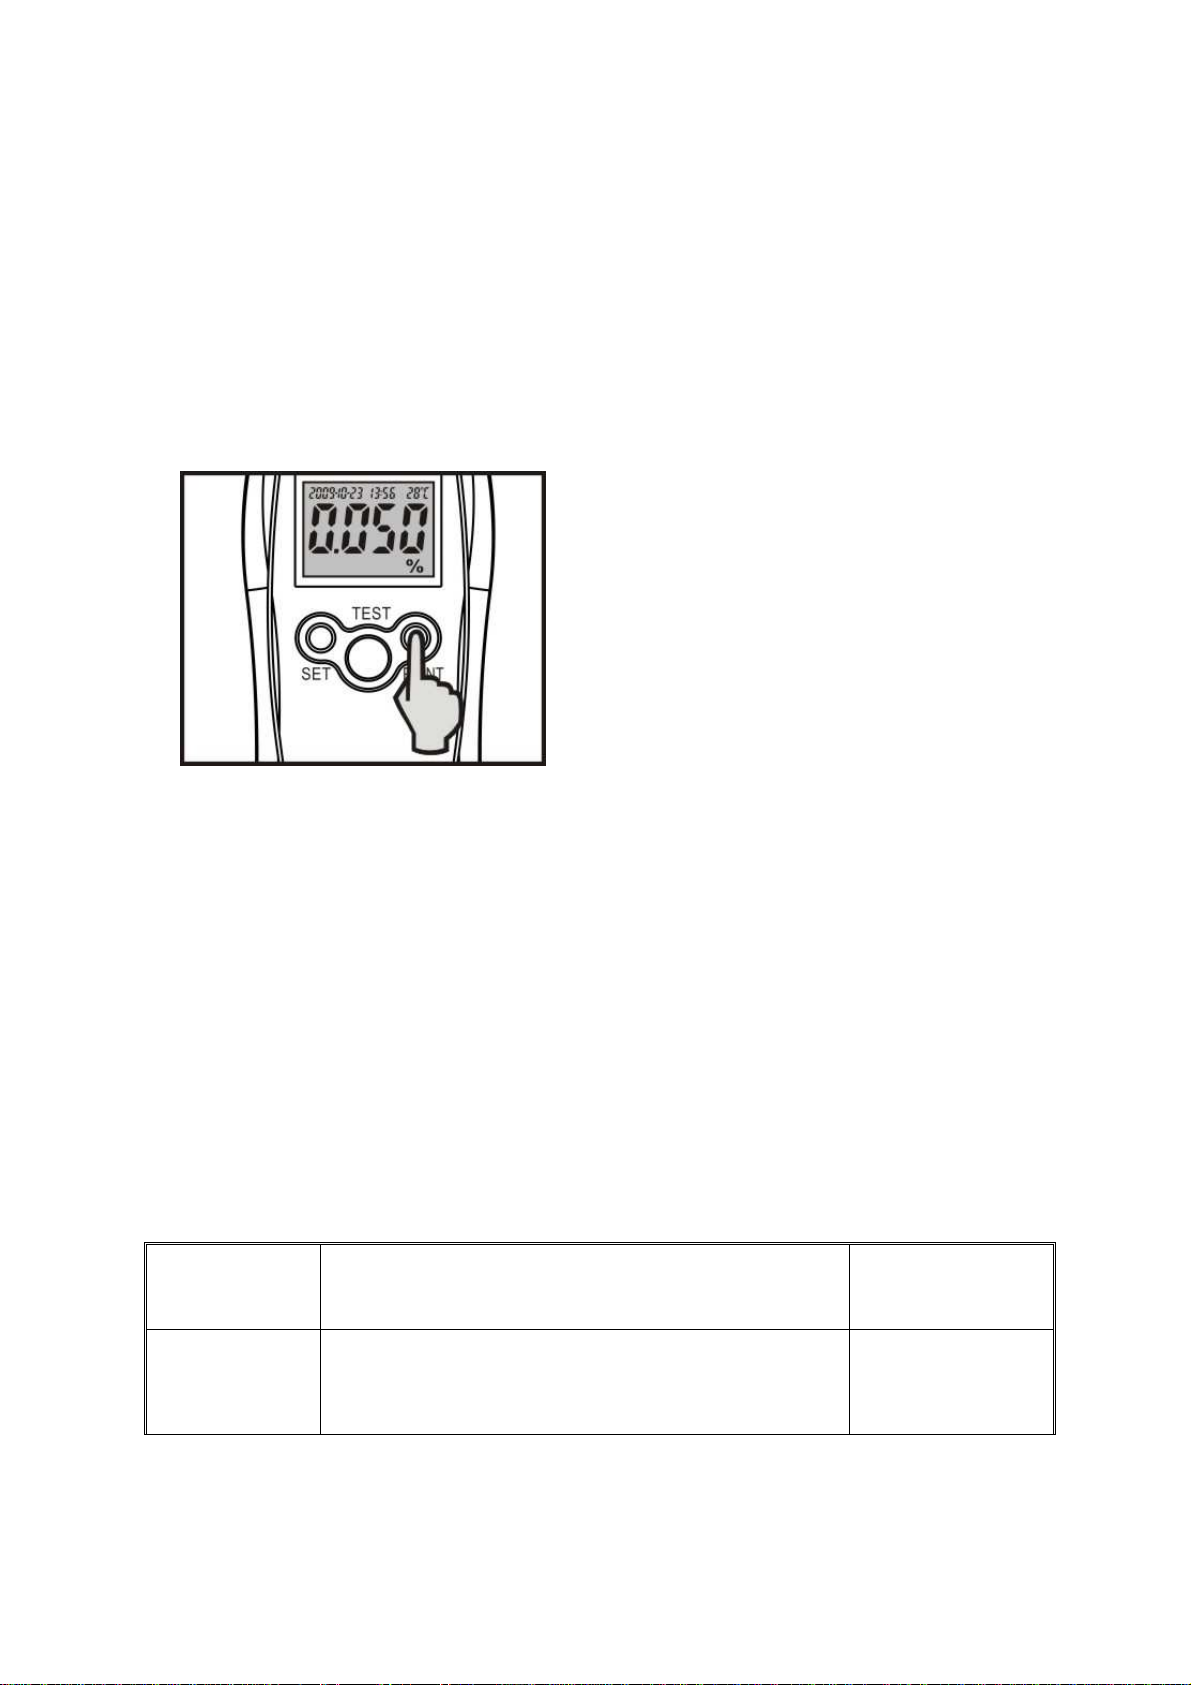
• Your test result will be displayed on the screen for 20 seconds.
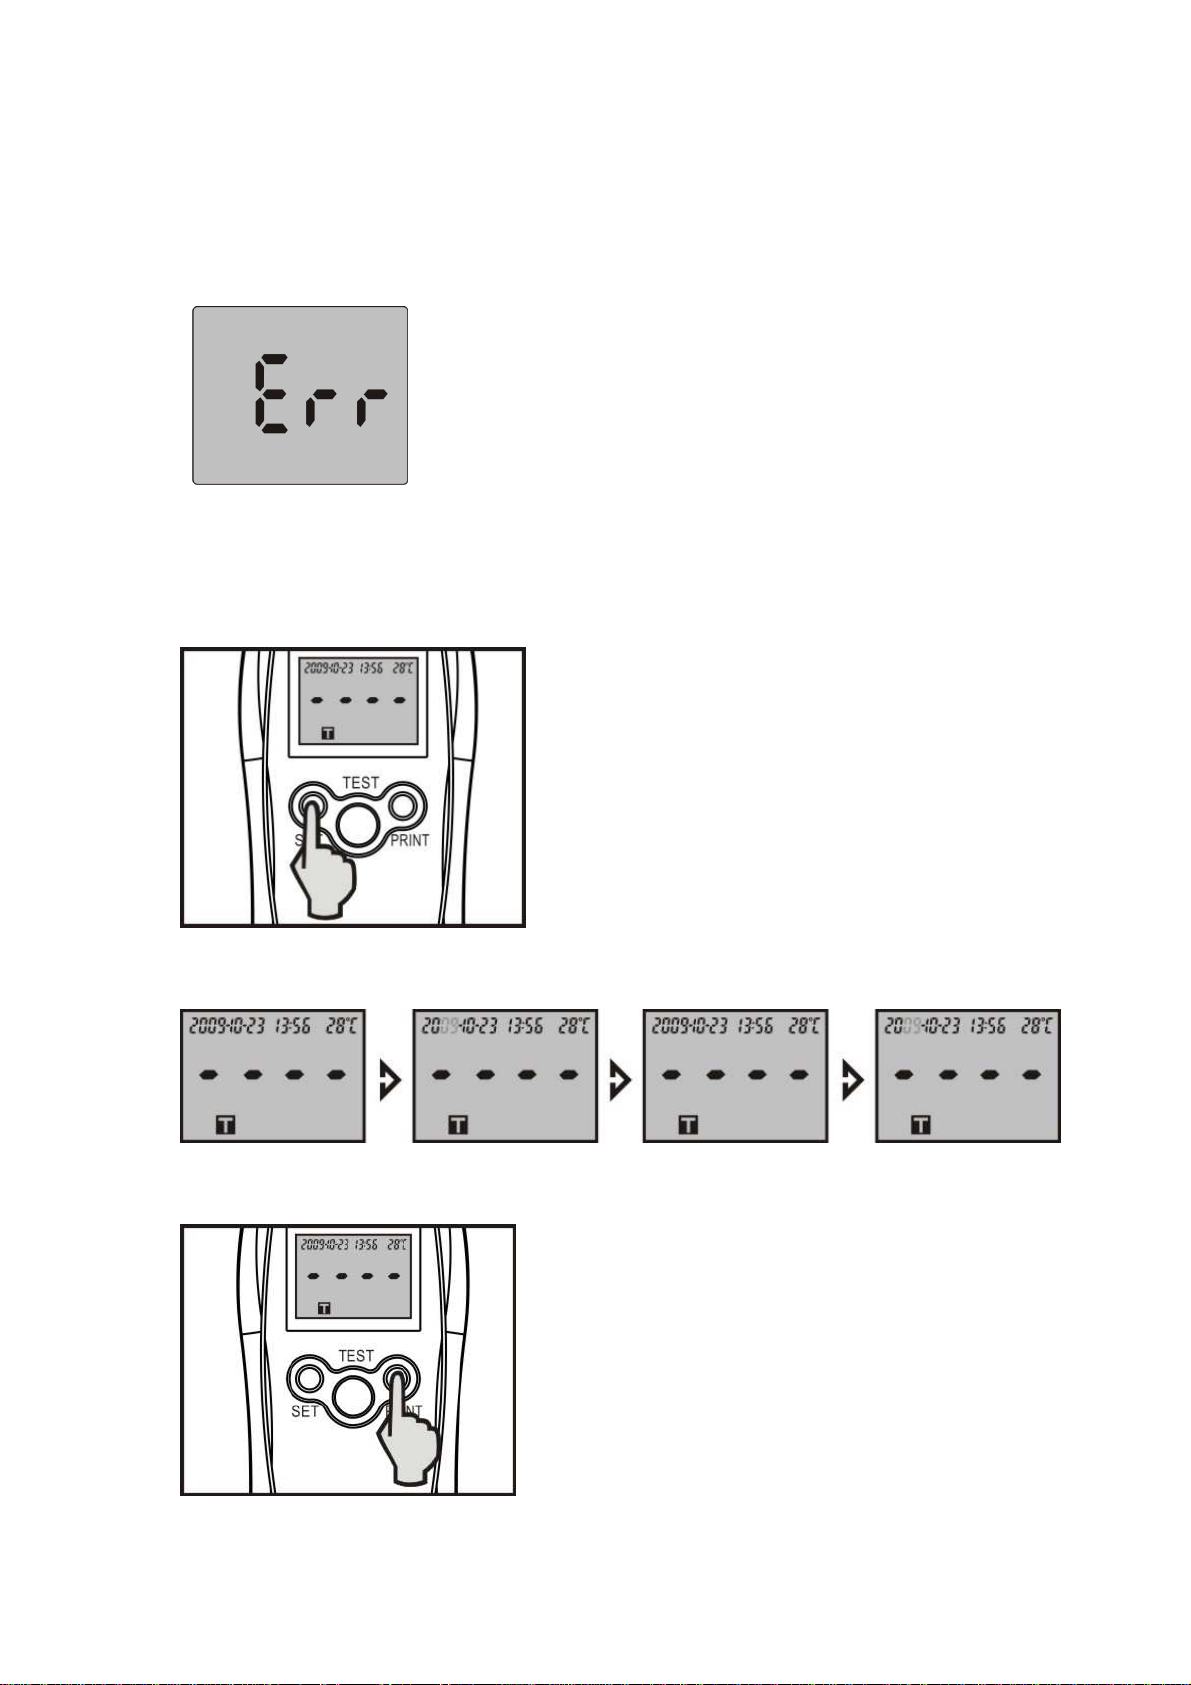
• It will show error when incorrect blowing. Refer to the chapter of the “Errors and
Troubles” in detail. The device will be turned off after indicated error.
(Setup Date/time)
• Press SET button for 2 seconds to enter the SETUP mode.
• Follow up the screen with flashing position to select the date or time.
• Press PRINT button to change the date or time.
• Press SET to go to next stage.
(Print)
• Connect the specific portable printer to the unit.
• Press PRINT button 2 seconds to print the last record.
Accessories
• Mouthpieces
• Carrying pouch (option)
Errors or Troubles
Error message
or Troubles
Description
Remarks
No display
-Press and hold the TEST button until power on.
-Check the battery
-Battery will be terminated by DC jack.
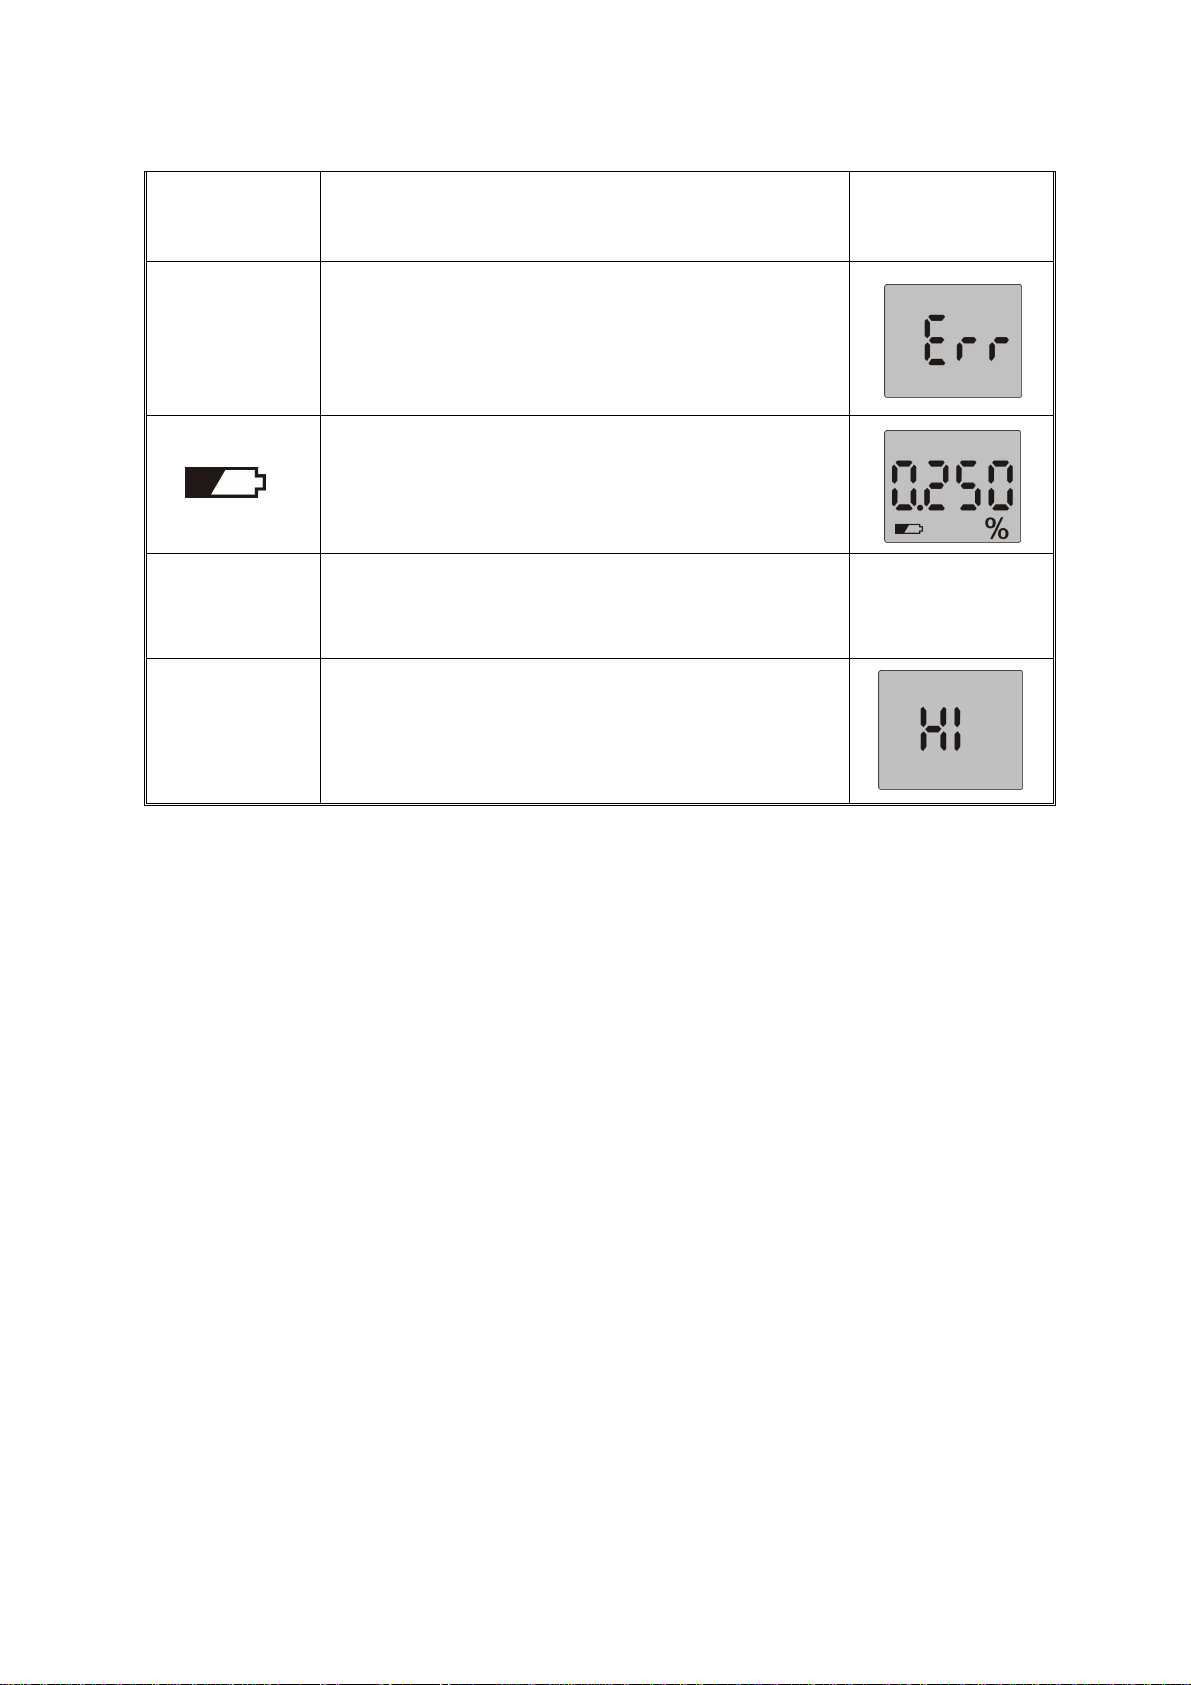
Auto Off
-Low battery
-Over the period of test stage
Err
-Blowing unsteady or interrupt
-Blowing less than 6 seconds
-Blowing flow too weak
-No blow during BLOW mode.
-Change temperature suddenly
-Low battery indication
-Need to change new battery
-Use alkaline battery
Alarm sound
-Blowing mode
-Error message indication
-Above alcohol set point
HI
-The blood alcohol content above the display range.
-Display range: 0.300%BAC
Important notes
• Before testing, wait at least 15 minutes after your last drinking.
• The blowing time must be enough until beeping stops.
• It may show ERR (error) if none, interrupt or shorter blowing.
• If the device changes temperature suddenly, wait some minutes to use.
• Only use the device in a temperature 0°C~ 40°C or 3 2°F ~104°F.
• The car smoking plug will terminate the power of battery when plugging.
• Calibration interval: 12 months
• Never store the device in a corrosive gas room.
• Never store the device under sun exposure area.
• Avoid dropping or subjecting the device to a strong shock.
Specifications
• European Fuel Cell Sensor

• Blowing time: 6 seconds
• Blowing flow: 10L/min
• Display range: 0.000-2.000‰BAC
• Show “HI” if above the display range
• Accuracy: +/-0.05‰BAC at 0.50‰BAC
• Memory: 10 records (no download)
• 5 mouthpieces included
• Warm up time: 15 seconds
• Testing Time: 10 seconds
• Repeat test: less than 60 seconds.
• Audible sound alarm if above 0.50‰BAC
• 4 digits display with status and backlight
• Power supply: 9V battery or DC 12V
• Battery for standard testing is about 500 times
• Low battery indication and auto power off function
• Operation: 0°C ~ 40°C or 32°F ~ 104°F.
• Store: -10ºC ~ 50ºC (14°F~122°F)
• Size: 126x69x29mm
• Calibration interval: 12 months
• Blowing pressure and interrupt detection
Calibration and Record
• You should have your alcohol tester calibrated every 12 months. Failure to do so may
cause your readings to be inaccurate.
Calibration Record
Date First Used Serial Number
#
Calibration Date
Remarks
Recalibration by

Precautions
• Your blood alcohol content (BAC) may change some minutes later.
• You should have your alcohol tester calibrated every 12 months. Failure to do so may
cause your readings to be inaccurate.
• Do not use this device to determine if you can drive.
• You cannot use the test results of device in court of law.
• You cannot use the test result of device against police’s unit.
Warranty
ONE-YEAR LIMITED WARRANTY
We warrant this unit to be free from defects in workmanship or material under normal use for
warranty period ONE (1) YEAR from the date of retail purchase.
The warranty period does not include the recalibration service. The warranty covers parts and
labor on covered repairs and ground freight back to the local customer.

If a defect arises and we receives a valid claim within the Warranty Period, at its option, we will
either
(1) Repair the unit,
(2) Exchange the unit, which is new or used functionally equivalent to the original unit,
(3) Refund the purchase price of the unit.
For warranty service please follow these instructions:
1. Call or email to obtain an RMA number.
2. Return the unit postage paid, insured and in a proper box.
3. You should obtain a proof of delivery receipt, and must pay the cost for shipping to us.
4. You must enclose the following with the unit:
a. The completed RMAform and description of the problem.
b. Your name, return address (Not PO Box)
c. Your phone number.
d. A copy of your sales receipt or invoice.
Table of contents
Other trendmedic Test Equipment manuals


