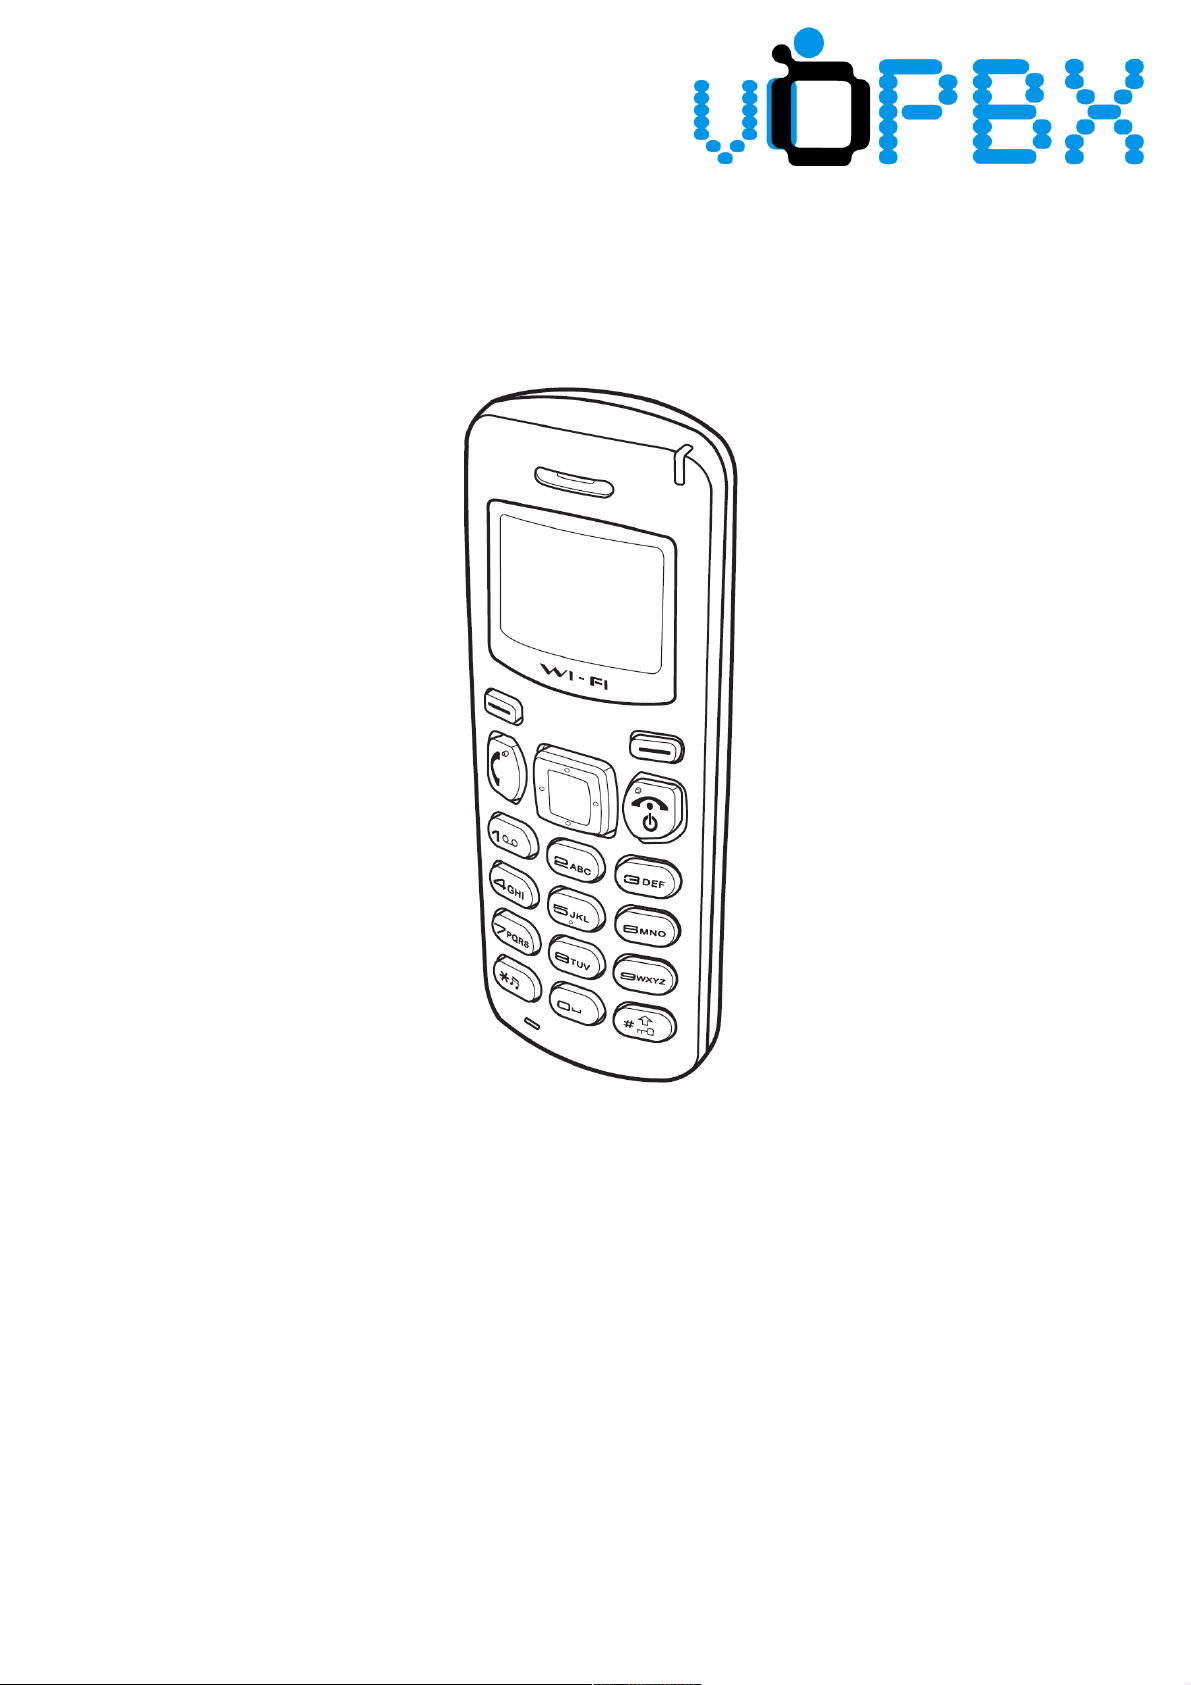
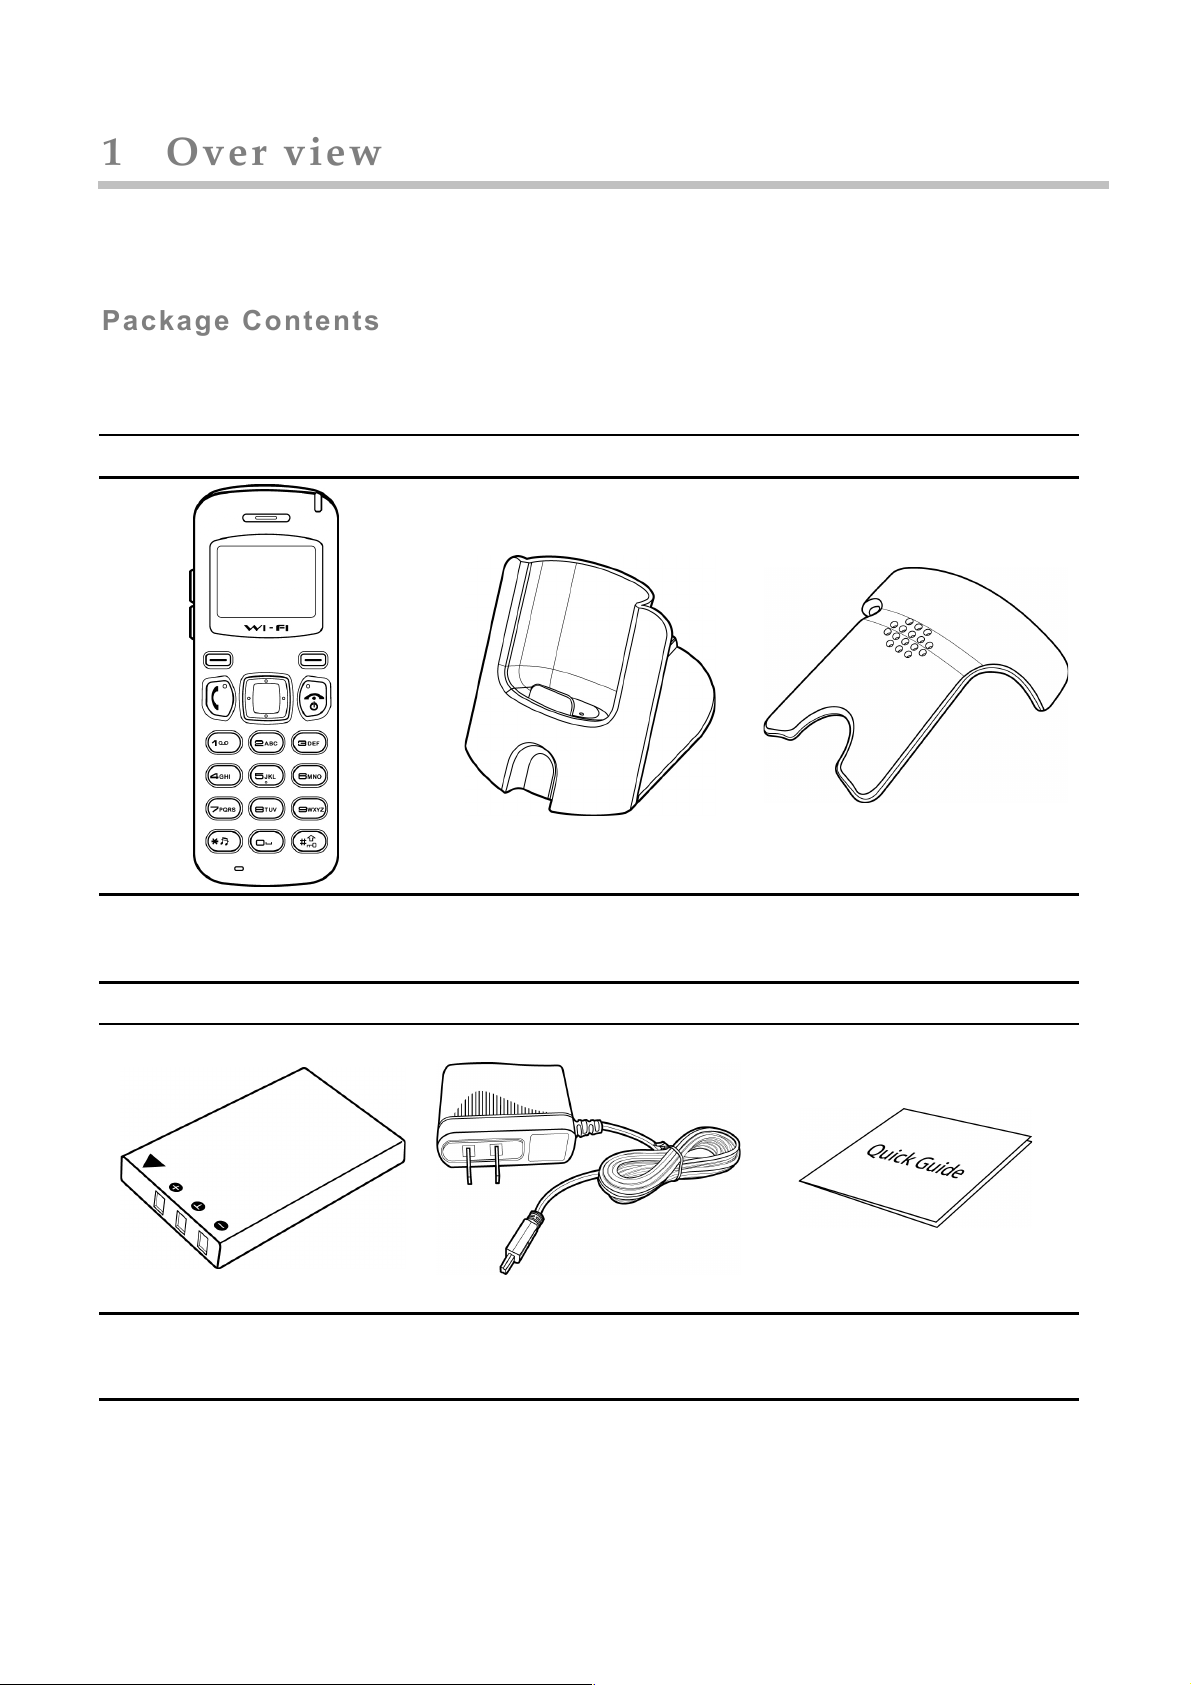
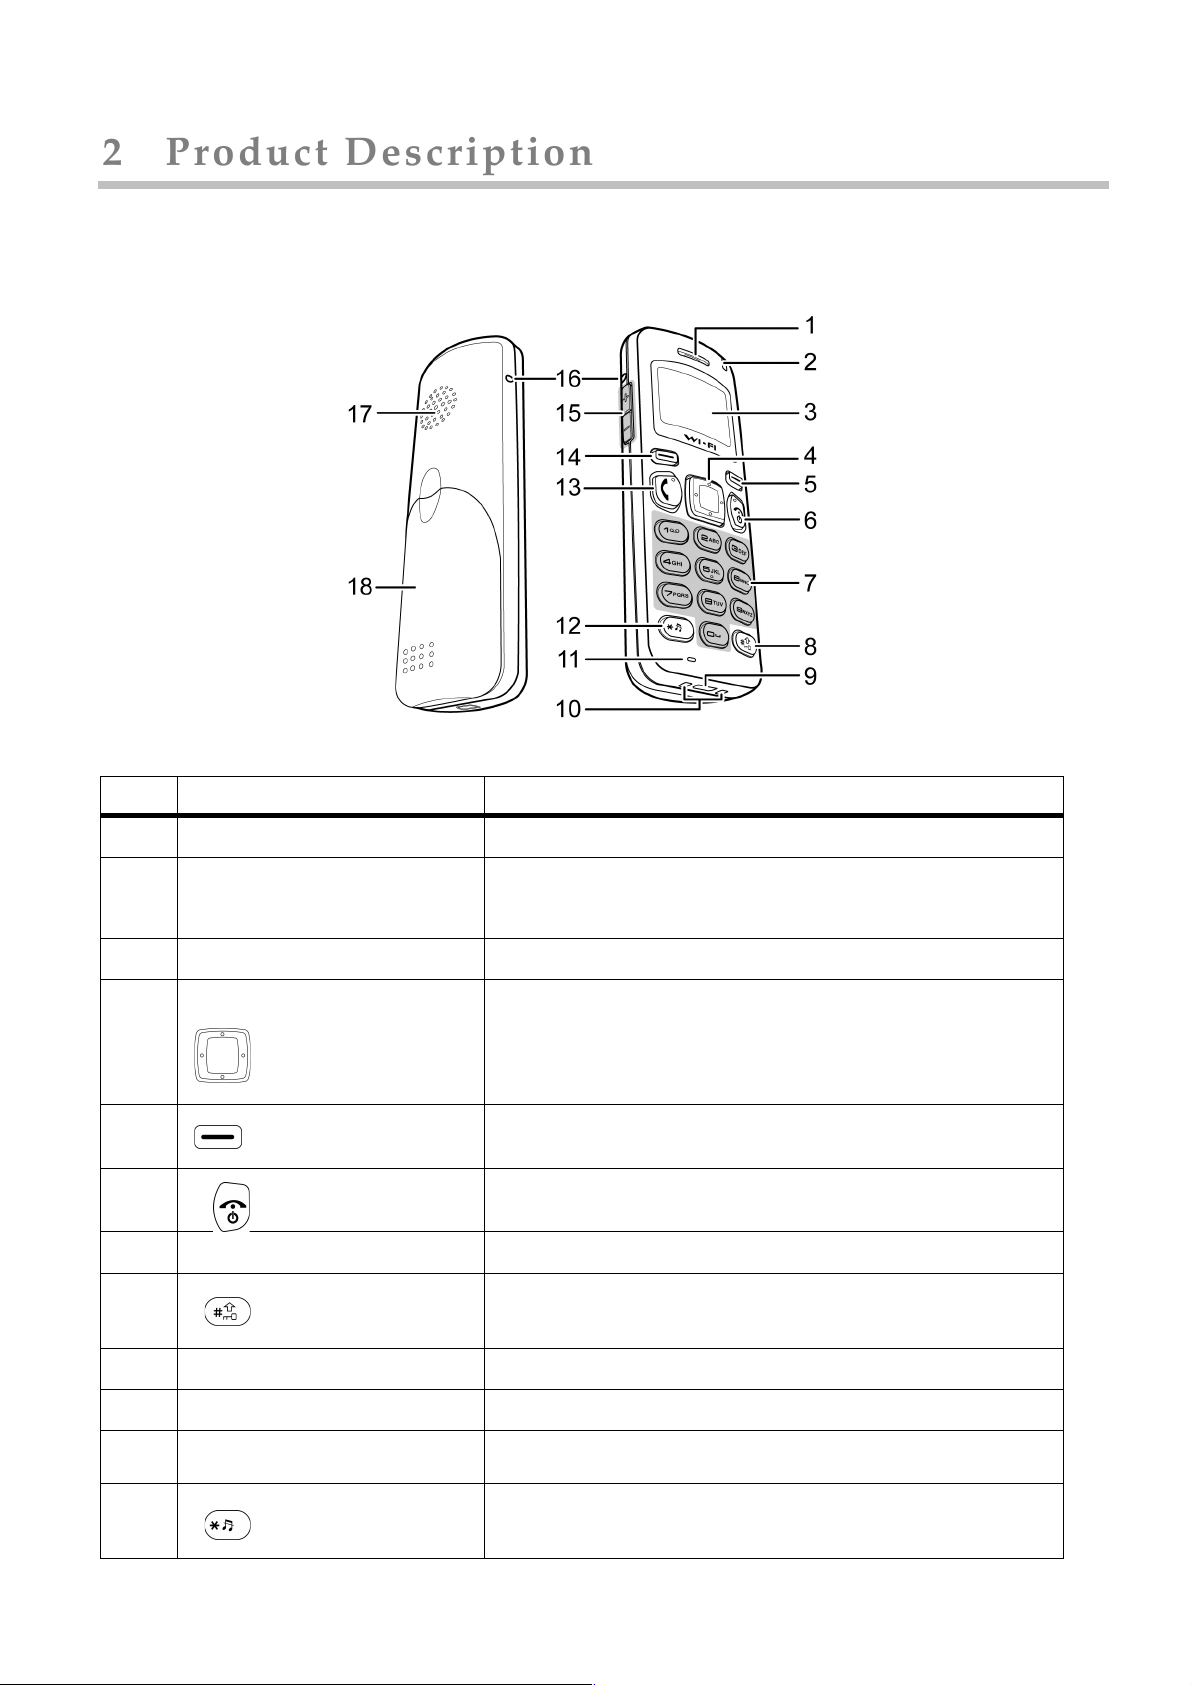
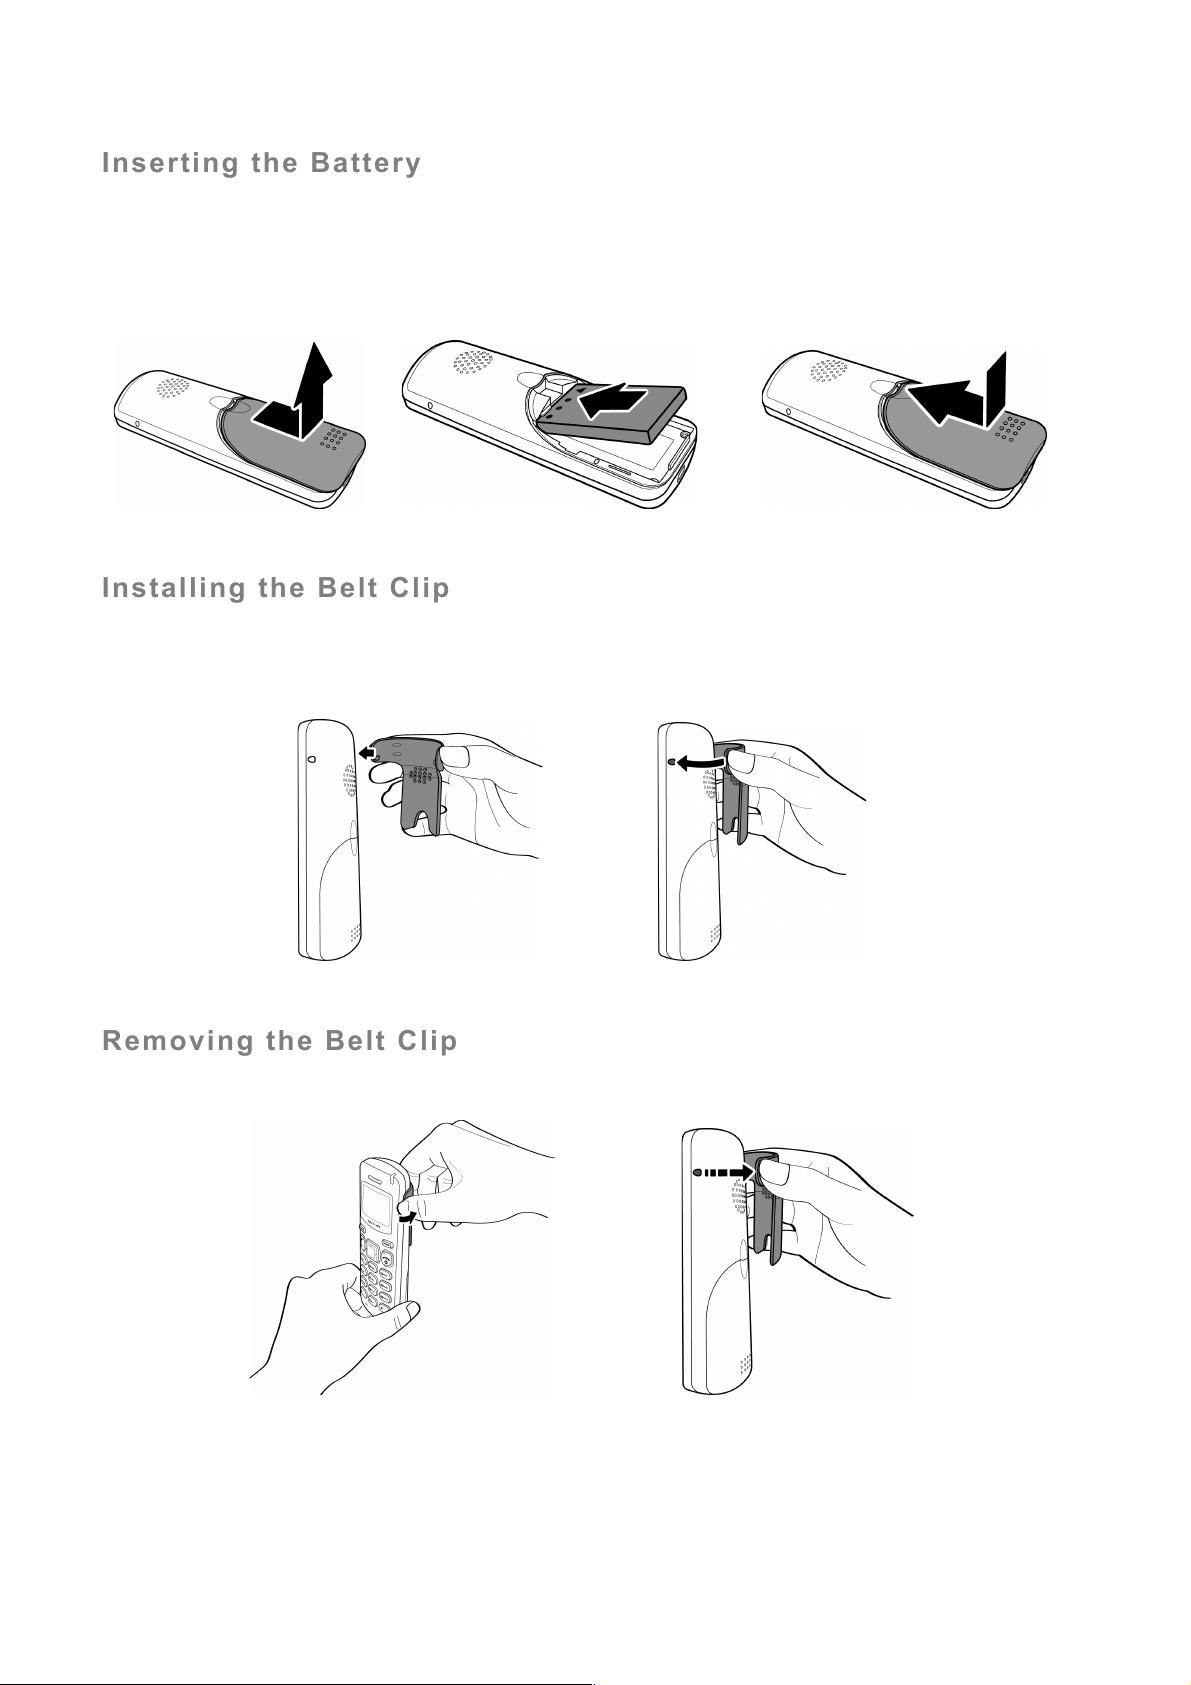
Vopbx WiFi Phone User manual

WiFi Phone
User Manual
V 1.04


i
Preface''
1. Regulatory Information FCC Regulation
This model phone complies with part 15 of the FCC Rules. Operation is subject to the condition that this device does
not cause harmful interference.
This device complies with Part 15 of the FCC Rules. Operation is subject to the following two conditions: (1) this
device may not cause harmful interference and (2) this device must accept any interference received, including
interference that may cause undesired operation.
This equipment has been tested and found to comply with the limits for a Class B digital device, pursuant to Part 15
of the FCC Rules. These limits are designed to provide reasonable protection against harmful interference in a residential
installation.
This equipment generates uses and can radiate radio frequency energy and, if not installed and used in accordance
with the instructions, may cause harmful interference to radio communications.
However, there is no guarantee that interference will not occur in a particular installation if this equipment does
cause harmful interference to radio or television reception, which can be determined by turning the equipment off and
on, the user is encouraged to try to correct the interference by one or more of the following measures:
Reorient or relocate the receiving antenna.
Increase the separation between the equipment and the receiver.
Connect the equipment to an outlet on a circuit different from that to which the receiver is connected.
Consult the dealer or an experienced radio/TV technician for help.
Changes or modifications not expressly approved by the party responsible for compliance could void the user's
authority to operate the equipment.
The antenna(s) used for this transmitter must not be co-located or operating in conjunction with any other antenna or
transmitter.
This EUT is in compliance with SAR for general population uncontrolled exposure limits in ANSI/IEEE C95.1-1999
and has been tested in accordance with the measurement methods and procedures specified in OET Bulletin 65
Supplement C.
2. European regulation
Products with the CE mark comply with the Radio & Telecommunication Terminal Equipment Directive
(1999/5/EEC), the Electromagnetic Compatibility Directive (89/336/EEC) and the Low Voltage Directive (73/23/EEC) -
as amended by Directive 93/68/ECC - issued by the Commission of the European Community.
Compliance with these directives implies conformity to the following European Standards:
1999/5/EEC Radio & Telecommunication Terminal Equipment Directive (R&TTE) EN 301 511
Specific Absorption Rate (SAR) Standard: EN50360 June 2001, EN 50361 June 2001, EN50371 June 2001
73/23/EEC Low Voltage Directive (LVD) Standard: IEC 60950-1:2001, EN 60950-1:2001+A11:2004
89/336/EEC Electromagnetic Compatibility (EMC-Directive) Standard: EN 301 489-1/17 Test Report
The manufacturer cannot be held responsible for modifications made by the user and the consequences thereof,
which may alter the conformity of the product with the mark.
3. RF exposure regulation (SAR)
This model phone meets the government's requirements for exposure to radio waves. This phone is designed and
manufactured not to exceed the emission limits for exposure to radio frequency (RF) energy set by the Federal
Communications Commission of the U.S. Government.
The FCC has granted an Equipment Authorization for this model phone with all reported SAR levels evaluated as in
compliance with the FCC RF exposure guidelines. SAR information on this model phone is on file with the FCC and can
be found under the Display Grant section of http://www.fcc.gov/oet/fccid after searching on FCC ID: Q3MMIP200
For body worn operation, this phone has been tested and meets the FCC RF exposure guidelines for use with an
accessory that contains no metal and positions the handset a minimum of 1.5 cm from the body. Use of other
enhancements may not ensure compliance with FCC RF exposure guidelines. If you do not use a body- worn accessory
and are not holding the phone at the ear, position the handset a minimum of 1.5 cm from your body when the phone is
switched on.

ii
Table of Contents
1 OVER VIEW .................................................................................................................................1
Package Contents ...........................................................................................................................1
2 PRODUCT DESCRIPTION ........................................................................................................2
Inserting the Battery.......................................................................................................................4
Installing the Belt Clip ...................................................................................................................4
Removing the Belt Clip..................................................................................................................4
Charging Your WiFi Phone ...........................................................................................................5
3 GETTING STARTED ..................................................................................................................6
Setting the Access Point (AP)........................................................................................................6
Setting the SIP Profile....................................................................................................................8
Setup Complete ..............................................................................................................................8
4 MMI MENU ..................................................................................................................................9
DISPLAY SCREEN ............................................................................................................................9
MAIN MENU..................................................................................................................................10
Phonebook....................................................................................................................................10
Call Log........................................................................................................................................11
Phone Settings..............................................................................................................................11
Select AP......................................................................................................................................15
AP Find ........................................................................................................................................15
Select Profile ................................................................................................................................16
Information...................................................................................................................................16
WPS Registration.........................................................................................................................16
5 OPERATION ..............................................................................................................................18
MAKING A CALL ...........................................................................................................................18
ANSWERING A CALL .....................................................................................................................18
CALL OPTIONS ..............................................................................................................................19
6 SPECIFICATION .......................................................................................................................20

Chapter 1 Over view
1
1 Over
1 Over
view
view
This WiFi Phone enables you to make VoIP phone calls through IEEE 802.11 b/g wireless network. Read this user
manual carefully to learn how to operate this product and take advantage of its features.
Package Contents
Package Contents
When unpacking the WiFi phone, ensure all the following items are present and undamaged. If anything appears to be
missing or broken, contact your dealer for a replacement.
WiFi Phone
Charging Cradle
Belt Clip
WiFi phone
Handset battery charger
(* optional)
Can be used to clip the phone
after installation
Li-ion Battery
AC Power Adapter
Quick Guide
For WiFi phone use only,
rechargeable.
Can be directly plug into the
phone or plug into the charging
cradle to charge the phone.
Ready reference for installation
and basic phone settings.

Chapter 2 Product Description
2
2 Product Description
This chapter describes the phone features and other accessories to familiarize you with the functions of your WiFi phone.
No.
Item
Description
1
Receiver
Transmits voice output
2
Charge Status
Indicates charge status:
Off—charger off
Red—charger on
3
LCD Display
112 x 64 pixel monochrome graphics display with backlight
4
Navigation Keys
Navigates through menus
Left— select Profile; decrease volume during a call
Right— call log; increase volume during a call
Up—show dialed numbers
Down—Phonebook
5
Right Soft Key
Displays the Phonebook
Clears input / cancel or Mute during a call
6
Power/End Key
Power on or power off
End conversation; exit (back)
7
Numeric Key
Enter numbers and text
8
Pound Key
Change text output in text mode. For example: AB, ab, 12, Ab.
Press and hold to enable key lock
9
USB Jack
Connects mini USB / charger jack
10
Charging Pad
Contacts to the charging cradle
11
Microphone
Receives voice inputs
12
Star Key
Enter symbols in text mode
Press and hold to mute ring tone

Chapter 2 Product Description
3
13
Call Key
Dial manually entered or Phonebook numbers
Show call history
Press and hold for 2 seconds will start WPS search
14
Left Soft Key
Select a menu or submenu
Confirm menu option
15
Speaker Volume
Use to increase or decrease volume during a call
16
Belt Clip Gap
Use to hold the belt clip
17
Speaker
Transmits voice output (hand free mode) or plays ring tone
18
Battery Compartment
Contains the Li-ion battery.

Chapter 2 Product Description
4
Inserting the Battery
To insert the battery into your WiFi phone, perform the following steps:
1. Slide off the battery compartment cover.
2. Insert the battery as shown, making sure the battery labels are facing up.
3. Replace the battery compartment cover until it clicks into place.
Installing the Belt Clip
1. Fit the belt clip lock into the gap on one side of the phone.
2. Then fit the belt clip lock into the gap on the other side of the phone. A click sound will be heard to
indicate belt is locked into place.
Removing the Belt Clip
Gently pull the fitted lock from one side of the phone to release the belt clip.

Chapter 2 Product Description
5
C
Charging Your WiFi Phone
harging Your WiFi Phone
To directly charge your WiFi phone using the provided AC power adapter, do the following:
1. Connect one end of the AC power adapter cable to the port at the rear of the cradle.
2. Plug the AC power adapter into the mains socket.
To charge your WiFi phone using the charging cradle, do the following:
1. Plug the USB jack of the AC power adapter to the cradle then insert the cable wire to the rib to fix the cable
properly.
2. Plug the AC power adapter into the mains socket then place your phone on the cradle for charging to begin.
Note: 1. We recommend that you charge the battery for five hours before using your WiFi phone for the first time.
2. The phone is turned on automatically when charging begins.
3. When the phone is charging status, the charging LED lights red.

Chapter 3 Getting Started
6
3
3Get
Get ting Started
ting Started
This WiFi phone has a built-in Starting wizard for first-time use to setup the phone. It will guide you step by step from
wireless AP setup to SIP account setup.
Note: Starting wizard can only be seen after performing master reset and boot for the first time.
Setting the Access Point (AP)
1. When the phone is powered on for the first time, it guides you to search for a wireless network. Press the
Ok soft key to start.
2. There are three ways to connect to a wireless network:
Push AP WPS Button
Manual
PIN Mode
Using the AP Button
To setup using the AP button, when you see the display as illustrated on step 2, push the WPS button on
your AP.
The phone displays the following screen:
After connecting, registering and completing setup, the phone proceeds to Create SIP Profile
module. See “Setting the SIP Profile” below.

Chapter 3 Getting Started
7
Using PIN Mode
To setup using PIN mode, press the PIN Mode soft key.
1. Get the PIN CODE from the display to enter the Access Point WPS PIN field and press “Submit”.
2. The phone displays the PIN. Press the Ok soft key. The phone displays the following screen:
3. Press the Select soft key.
4. The phone proceeds to Create SIP Profile module. See “Setting the SIP Profile” below.
Manual Setup
To setup manually, press the Manual soft key.
1. The phone starts searching for AP.
2. The phone displays the available network. Select the option then press the Select soft
key.
Note: The network icons indicate the type of security required to connect. Refer to the table below:
Icon
Description
WPA passkey is required to connect.
WEP passkey is required to connect
No passkey required.
3. Enter network passkey using the numeric keypad on your phone.
4. When passkey confirmation is complete, the following screen appears:

Chapter 3 Getting Started
8
5. Press the Yes soft key to connect. The phone proceeds to Create SIP Profile module.
See “Setting the SIP Profile” below.
Setting the SIP Profile
After connecting to a wireless network, you can now create an SIP profile.
1. Press the Ok soft key to continue.
2. Setup the SIP profile. To setup SIP Profile, see “AP Settings”.
Setup Complete
Setup Complete
When setup is complete, press the Ok soft key to start using your phone.

Chapter 4 MMI Menu
9
4 MMI
4 MMI Menu
Menu
Display Screen
Display Screen
The illustration below shows an overview of the layout of the display screen and its icons.
The display screen elements are described in the table below:
No.
Indicator
Description
1
WiFi signal
Displays the WiFi signal strength. The presence of four bars indicates the
strongest signal and the presence of a single bar indicates the weakest signal.
2
Key lock mode
Indicates the keypad is locked.
3
Mute mode
Indicates the system ring tone is muted.
4
Battery
charging level
The presence of all the four bars indicates that the battery is fully charged or has
100% charge. Charging is indicated by a moving charging bar.
5
Connection mode
Displays the current connection mode. “P2P” or “SIP profile name”
P2P means AP association and gets IP address successfully.
6
Standby logo
Displays the logo when this WiFi phone is under normal operation mode.
7
Time
Display time.
8
Date
Display date.
9
Menu soft key
Press the left soft key to activate Menu. Displayed commands vary.
10
Name Soft key
Press the right soft key to activate Phonebook. Displayed commands vary.

Chapter 4 MMI Menu
10
Main Menu
Main Menu
The menu directory enables you to access the phone settings and set up the device according to the network conditions and
your preferences. The menu is set up in a simple and easily accessible manner.
1. Press the Menu soft key to access the main menu.
2. Scroll through the main menu options using the navigation key.
3. To choose a menu setting, press the Select soft key.
4. Press the Power/End key to go back to the previous level of the menu.
When you access the menu, the display screen shows the menu and the soft key items. Soft key items vary depending on
the menu options.
Phonebook
Phonebook
Your WiFi Phonebook can hold up to 50 contacts which you can access quickly from the main screen by pressing the right
soft key.
You can search for a specific entry by typing the first letters of the required entry or press the Options soft key to enter the
submenu.
Adding Contacts
To add a contact to the Phonebook, perform the following steps:
1. Press the Options soft key to enter Options submenu.
2. Select New Entry.
3. Enter the name of the contact in the Name field.
4. Press the down key to select type of entry.
5. Use the navigation key to scroll to either SIP, No, or IP, and then press the down key to enter value.
6. Enter the value of selected entry type.
7. Press the Save soft key to save contact.
Note: You can only save one entry type per contact.

Chapter 4 MMI Menu
11
Modifying a Contact
To modify a contact, perform the following steps:
1. Select the contact to modify.
2. Press the Options soft key to display menu.
3. Select Edit.
4. Edit the necessary information.
5. Press the Save soft key to save settings.
Deleting Contacts
To delete a contact, perform the following steps:
1. Select the contact to delete.
2. Press the Options soft key to display menu.
3. Select whether to:
•Delete: Delete selected contact.
•Delete All: Delete all contacts in the Phonebook.
4. A confirmation message appears, press the Yes soft key to confirm delete or the No soft key to cancel.
Call Log
Call Log
Your WiFi phone stores information about all calls received, missed or dialed. The lists are stored and displayed from the
newest to the oldest entries. The oldest entries are deleted as new entries are added.
Received Calls
The Received Calls list consists of all answered calls.
Missed Calls
The Missed Calls list consists of the calls that are not answered.
Dialed Calls
The Dialed Calls list consists of the most recent numbers dialed.
To go to desired call entry, use the navigation pad then press the Select soft key. Options are displayed on the menu:
•Details:Display the type, time, and date of the selected entry.
•Save: Save the selected entry to the Phonebook.
•Delete: Delete the selected entry from the current Call Log.
•Delete All: Delete all entries from the current Call Log.
•Dial: Dial the selected entry.
Use the left soft key to confirm the action.
Phone
Phone Settings
Settings
Phone Settings menu allows you to configure general handset settings (SIP Profile) as well as to reset the WiFi phone to
factory defaults and upgrade the firmware.

Chapter 4 MMI Menu
12
Language
The Language menu allows you set the on screen display language of your WiFi phone.
Select from the list of languages then press the Select soft key.
Note: Multi-language in menu other than English are only prototypes and some translations are missing.
Ring Settings
The Ring Settings menu allows you to configure the ring tone and volume settings of your WiFi phone.
Tone
To set a ring tone, perform the following steps:
1. From the Ring Settings submenu, select Tone.
2. Select the desired tone among: Simple ring (default) and Wav ring.
3. Press the Select soft key.
Volume
To set the volume, perform the following steps:
1. From the Ring Settings submenu, select Volume.
2. Use the navigation keys to increase or decrease the volume from 0 to 4 on the sliding scale.
3. Press the Save soft key.
Time/Date
The Time/Date menu allows you to set the date and time of your WiFi phone. It has the following submenus:
•Set Time: To set the correct time.
•Time Format: To select the time format among: 24 hours or am/pm.
•Set Date: To set the correct date.
•Date Format: To select among the date format options.
Profile Settings
Create new profile or edit existing ones using the Profile Settings menu.
To create or modify a profile, perform the following steps:
1. Select New Profile to create a new profile or the profile name of the existing one to modify.
2. Press the Select soft key.
3. Select the options to enter the necessary information:
•Edit SIP: To enter the SIP User name, Password, Display name.

Chapter 4 MMI Menu
13
•Edit Domain. To enter Domain, and Domain port.
•Edit Out Proxy: To enter the SIP Out Proxy and Domain Port of the profile.
•Edit STUN: To enter the SIP STUN Server and STUN Port of the profile.
•Edit Expire Time: To enter SIP Expire Time.
Note: Default value “20” means SIP expire time set to 20 sec.
Inputs value “0” means SIP expire time set to 3600 sec, maximum value “999”.
4. Select other options:
•Save: Save the settings by entering the name for the new profile settings.
•Save As: Save and apply the settings to a selected profile.
•Delete: Delete the selected profile.
•Set Active: Activate the selected profile.
Audio Settings
The Audio Settings menu allows you to enable or disable tone settings. To do this, perform the following steps:
1. Select the audio options:
•Keypad Tone: Check/Uncheck to enable/disable keypad tone.
•Range Warning: Check/Uncheck to enable/disable range warning tone.
•Battery Low: Check/Uncheck to enable/disable battery low warning tone.
2. Press the Check / Uncheck soft key to enable or disable the function.
3. Press the Ok soft key to save and apply changes.
Display Settings
The Display Settings menu allows you to set the display name and backlight duration time.
Handset Name
Select this submenu option to enter desired display name.
1. Enter the desired display name in Edit display name.
2. Press the Save soft key to save.
Note: Press the key to toggle between character text formats.
Backlight Duration
Select this submenu option to set the time duration (in seconds) for the backlight to remain on after the keypad is
turns inactive.
1. Select the duration option among: 10s, 15s, 25s, and 45s.
2. Press the Select soft key.
AP Settings
Use the AP Settings menu to set the default access point, configure phone IP and security settings.
To configure the AP settings, perform the following steps:
1. Select the available network.
2. Press the Default soft key to set selected AP as default.
3. Press the Options soft key to modify selected AP settings.
•IP Settings: Select DHCP or configure Static settings including IP Address, Subnet Mask, Gateway
Address, and DNS Address.
•Security Settings: Enter the Security protocol. The key options are WPA Passphrase, WPA Key,
WEP64 Key, WEP64 Passphrase, WEPl28 Key, and WEP128 Passphrase
•Delete: Delete the selected AP.
Master Reset
Use the Master Reset menu to restore the phone settings to its factory defaults.
1. When Master Reset option is selected, a warning message appears to prevent accidental deletion of your
settings.
2. Press the Yes soft key to continue reset or the No soft key to cancel.

Chapter 4 MMI Menu
14
Firmware Upgrade
Your WiFi phone supports firmware upgrades as they become available from the vendor.
To upgrade your firmware, perform the following steps:
1. Using a USB to mini-USB cable, to connect the WiFi phone and PC.
2. Select Firmware Upgrade from the menu to launch the firmware upgrade screen.
3. The following message is displayed: Phone must be connected to computer. Phone will now power-down.
4. Press the Continue soft key to continue.
5. When performing firmware upgrade from a computer for the first time and Windows detects the new USB
device, it will activate the Hardware Update Wizard.
6. Locate and install your USB driver by selecting Install from a list of specific location on the Hardware
Update Wizard window if you install on a Windows platform.
7. Click Finish to exit the wizard when the window displays information about finishing installing the software
for DFU (Device Firmware Upgrade) mode. See illustration below:
8. Locate and execute the DFU executable file. A Device Firmware Upgrade window will show up.
9. Click Browse to locate the DFU file, and then click Download to upgrade firmware.

Chapter 4 MMI Menu
15
10. Detach the USB to mini-USB cable and click Close to exit when the window displays Reset complete, please
detach device from USB.
NOTE: Upgrading to the new firmware may require performing master reset. Please see firmware release note for
more information.
Select AP
Select AP
Use the Select AP menu to connect to an existing AP.
1. When you select Select AP option, the phone lists the available networks.
2. Select the desired network.
3. Press the Connect soft key to connect.
AP Find
AP Find
You can scan the local area for WiFi reception. With in WiFi reception range, you can set the AP as default or connect
through the Select AP menu.
To scan for AP, perform the following steps:
1. When you select AP Find option, the phone starts searching for AP and the display shows Searching…
2. The lists of available connection are shown. Select the desired connection. Press the Select soft key to establish
connection.
3. If required, enter the necessary security information.
It normally automatic select applicable encryption menu for you. Press “Select “ to enter encryption.

Chapter 4 MMI Menu
16
Note: The network icons indicate the type of security required to connect. Refer to the table below:
Icon
Description
WPA passkey is required to connect.
WEP passkey is required to connect
No passkey required.
Select Profile
Select Profile
Use the Select Profile menu to select from existing profiles or delete profiles that are no longer required.
1. Select the profile.
2. Press the Select soft key to activate the profile or press the Delete soft key to delete the profile.
Information
Information
The Information menu displays phone information including IP, AP, SIP, Firmware version and MAC address information.
To display the information page, select the Information option from the main menu.
WPS Registration
WPS Registration
This WiFi phone has an easy built-in way for user to connect their wireless AP. It’s known as WiFi Protected Setup (WPS).
The WPS is used for connecting to a new AP device without knowing various encryption methods that AP may have. The
WPS feature simplifies various encryption methods into two choices:
One is by PIN Method, the other one is by Push Button.
Push button Method
Enter WPS page, the WiFi phone is entering WPS Push button standby mode. If the AP supports push button, you may
hold the AP WPS push button for seconds to start the PBC method. When the AP WPS button has been enabled, in a short
moment you should see this WiFi phone begin to initial AP setup and enroll stage.
PIN Method
PIN (Personal Identification Number) can be found by supporting AP WPS PIN CODE setting area. Enter the pin code, the
WiFi phone will start entering AP setup and enroll stage.
NOTE: WPS can only be proceeding with one available WPS wifi phone at the same time, using one wifi phone setups up in
WPS mode each time. If the wifi phone can not associate to AP successfully for two times, you may consider to reboot both
Table of contents