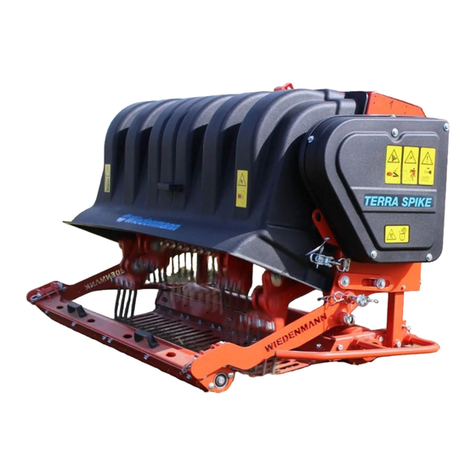
Wiedenmann TERRA SLIT User manual

Translation of original
Operating Instructions
Deep Aerator
TERRA SLIT
499.001
From equipment I.D. No. :
Status : January 2010
499 99 01

All information, illustrations and specifications in these operating instructions are based on the latest information available at the time of
publication. We reserve the right to make design changes at any time without prior notification.
2

All information, illustrations and specifications in these operating instructions are based on the latest information available at the time of
publication. We reserve the right to make design changes at any time without prior notification. 3

All information, illustrations and specifications in these operating instructions are based on the latest information available at the time of
publication. We reserve the right to make design changes at any time without prior notification.
4
Preface
READ THESE OPERATING INSTRUCTIONS CAREFULLY to familiarise yourself
with the correct way to operate and service your machine, and to
prevent personal injury or damage to the machine.
These operating instructions and the adhesive safety signs on your
machine can also be obtained in other languages (your dealer can
order these for you).
THESE OPERATING INSTRUCTIONS ARE a permanent part of your machine and
should be handed over to the new owner if the machine is sold.
MEASUREMENTS in these operating instructions are given in the metric
system. Only use suitable parts and screws. Different wrenches are
required for metric and inch screws.
THE DESIGNATIONS "RIGHT" AND "LEFT" are based on the forward direction
of travel of the mounted equipment or attached machine.
ENTER THE PRODUCT IDENTIFICATION NUMBERS in the appropriate “Technical
data” or “Product - Identification Number” sections. Please ensure
that all figures are accurately entered. These numbers can be of
invaluable assistance for tracing the machine should it be stolen.
Your dealer also needs these numbers when you order spare parts. We
recommend that you additionally file these identification numbers in
a secure place away from the machine.
BEFORE DELIVERY OF THIS MACHINE, your dealer performed a pre-delivery
inspection to ensure optimal performance.
THIS DEVICE IS EXCLUSIVELY DESIGNED for commercial use and use in
green areas and grounds maintenance, for slitting, loosening or
aereating sports grounds or golf courses ("SPECIFIED USE").
Usage for any other purpose beyond this is considered as contrary to
the intended use. The manufacturer accepts no liability for damage
or injury resulting from this improper use. These risks are borne
solely by the user. Compliance with and strict adherence to the
operating, maintenance and repair conditions as specified by the
manufacturer also form essential elements of the intended usage.
FORESEEABLE INCORRECT USE/MISUSE. It is not permitted to use the
attached or trailed device to transport persons or things.
THIS MACHINE MUST ONLY BE operated, maintained and repaired by persons
familiar with all its particular characteristics and acquainted with
the relevant safety regulations.
The relevant accident prevention regulations, all other generally
recognised safety-related, occupational medicine and road traffic
regulations must be adhered to.
Any modifications carried out to this machine without the express
approval of the manufacturer excludes the manufacturer of all
liability for any resulting damage.

All information, illustrations and specifications in these operating instructions are based on the latest information available at the time of
publication. We reserve the right to make design changes at any time without prior notification. 5
T A B L E OF CO N T E N T S Page
* * * * * * * * * * * * * * * * * * * * * * * * * * * * * * * * * * * * * * * * * * * * * * * *
1.0. Safety Measures.................................................... 6-14
1.1. Adhesive Safety Signs...................................... 11+12
1.2. Safety Equipment........................................... 13
1.3. Safety instructions........................................ 14
2.0. Assembly........................................................... 15-22
2.1. General Information........................................ 15
2.2. Mounting knives............................................16
2.3. Installing hollow tines and half discs..................... 17
2.4. Installing cutting blades and half discs................... 18
2.5. Mounting additional weight.................................19
2.6. Mounting the hydraulic weight transfer unit................19
2.7. Attaching rear roller......................................20
2.8. Mounting the chassis with drawbar..........................21+22
3.0. Transport......................................................... 23-26
3.1. General Information........................................ 23
3.2. Transporting TERRA SLIT.................................... 24+25
3.3. Transportation with three-point hitch...................... 26
3.4. Transportation with drawgear............................... 26
4.0. Connecting to the Tractor.......................................... 27-29
4.1. General Information........................................ 27
4.2. Ballast.................................................... 27
4.3. Connecting to the tractor.................................. 28
4.4. Hitching to the tractor....................................29
4.5. Support for drawbar........................................29
5.0. Disconnecting from the Tractor.....................................30+31
5.1. General Information........................................30
5.2. Dismantling the TERRA SLIT.................................30
5.3. Disconnecting the TERRA SLIT...............................31
6.0. Before initial operation........................................... 32-34
6.1. General Information........................................ 32
6.2. Displays and adjustment elements........................... 33
6.3. Adjusting the TERRA SLIT...................................34
6.4. Adjusting the rear roller..................................34
7.0. Operation..........................................................35-37
7.1. General Information........................................35
7.2. Driving characteristics....................................36
7.3. Working with the TERRA SLIT................................36
7.4. Driving characteristics....................................37
8.0. Maintenance........................................................38-46
8.1. General Information........................................38
8.2. Maintenance and inspection list............................39
8.3. Lubrication................................................40
8.4. Cleaning TERRA SLIT........................................41
8.5. Care and maintenance of the hydraulic system...............42
8.6. Hydraulic connection diagram...............................43
8.7. Wheels and Tyres........................................... 44
8.8. Disassembly / disposal..................................... 45
8.9. Unauthorised modification and spare part manufacturing..... 46
9.0. Additional Equipment............................................... 47-49
9.1. Scope of Delivery.......................................... 47
9.2. Permissible equipment combinations......................... 47
9.3. Tools...................................................... 48
9.4. Special equipment.......................................... 49
10.0. Technical Specifications........................................... 50-55

All information, illustrations and specifications in these operating instructions are based on the latest information available at the time of
publication. We reserve the right to make design changes at any time without prior notification.
6
1.0. Safety Measures
RECOGNISE WARNING SYMBOLS
This symbol draws your
attention to the safety
instructions attached to the
machine or contained in these
operating instructions. It
means that there is a risk of
injury.
Follow all recommended safety
instructions as well as the
accident prevention
regulations.
FOLLOW THE SAFETY INSTRUCTIONS
Ensure that you carefully read
all safety instructions
contained in these operating
instructions as well as all
those attached to the machine.
The warning signs must be kept
in good condition, i.e.
readable. Replace missing or
damaged warning signs. Ensure
that new equipment and spare
parts are provided with the
appropriate safety signs.
Replacement warning signs are
available from your dealer.
Familiarise yourself with the
operation of the machine and
its control devices before
working with the machine. Never
allow a person without the
appropriate knowledge to
operate the machine.
Keep your machine in good
working order. Unauthorised
modifications to the machine
can impair the function,
operational reliability and
service life of the machine.
If you do not understand any
part of these operating
instructions and need
assistance, please contact your
dealer.

All information, illustrations and specifications in these operating instructions are based on the latest information available at the time of
publication. We reserve the right to make design changes at any time without prior notification. 7
1.0. Safety Measures
OBSERVE THE ROAD TRAFFIC REGULATIONS
Always observe local road traffic
regulations when using public
roads.
WEAR PROTECTIVE CLOTHING
Wear close-fitting clothing and
the appropriate safety equipment
for the work at hand.
Prolonged exposure to loud noise
can result in impairment or loss
of hearing.
Wear a suitable hearing
protective device such as
earmuffs or earplugs.
A safe operation of the machine
requires the full attention of
the operator. Do not wear radio
or music headphones while
operating the machine.
STAY CLEAR OF ROTATING DRIVE SHAFTS
Carelessness in the area of the
rotating drive shafts can
result in serious injury or
even death.
Always ensure that all shaft
protection devices are fitted
i.a.w. regulations and that the
universal-joint shaft sheath
tubing can turn freely. Wear
close-fitting clothing. Shut
off the engine and wait until
all moving parts are at a
standstill before adjusting or
cleaning as well as connecting
or disconnecting the PTO–driven
machines.

All information, illustrations and specifications in these operating instructions are based on the latest information available at the time of
publication. We reserve the right to make design changes at any time without prior notification.
8
1.0. Safety Measures
SAFETY AND PROTECTIVE DEVICES
Safety and protective devices must
be kept in proper working order
and be fitted to the relevant
location.
Always disengage the drive sections and
shut off the engine before removing
any of the safety and protective devices.
Keep hands, feet and clothing away
from moving parts.
EXERCISE CAUTION IN THE CASE OF LINE LEAKAGE
Leaking high-pressure fluids
can penetrate the skin and
cause serious injury.
For this reason, depressurise
the system before disconnecting
lines. Ensure that all line
connections are leak-proof
before the pressure builds up
again in the system.
It is difficult to see
hydraulic oil leaking from a
small opening. For this reason,
use a piece of cardboard when
searching for leaks. Protect
the hands and body from high-
pressure fluids.
If any fluid penetrates the
skin, this must be immediately
removed by a doctor who has
experience with this kind of
injury. Failure to seek medical
attention can lead to serious
infection.
Doctors unfamiliar with this
type of injury should reference
a knowledgeable medical source.

All information, illustrations and specifications in these operating instructions are based on the latest information available at the time of
publication. We reserve the right to make design changes at any time without prior notification. 9
1.0. Safety Measures
USE SAFETY LIGHTS AND EQUIPMENT
Avoid collisions with other
road users. Slow moving
tractors with mounted or towed
equipment, and self-propelled
machines on public roads pose a
specific danger. Frequently
check for traffic coming behind
you, especially when making
turns. Ensure safe traffic
conditions by using hand
signals or indicators.
Use headlights, hazard warning
lights, indicators and other
safety equipment i.a.w. the
respective legal provisions.
Keep safety equipment in good
working order. Replace missing
or damaged parts. A set of
safety lights is available from
your dealer.
AVOID HEAT DEVELOPMENT NEAR
PRESSURISED FLUID LINES
A highly flammable mist can
form due to heat development
near pressurised fluid lines.
This can result in severe
burns. Do not cause heat
development by welding,
soldering or using a welding
torch near pressurized fluid
lines or other flammable
materials. Pressurised lines
can be accidentally cut through
when heat goes beyond the
immediate flame area.

All information, illustrations and specifications in these operating instructions are based on the latest information available at the time of
publication. We reserve the right to make design changes at any time without prior notification.
10
1.0. Safety Measures
REMOVE PAINT BEFORE WELDING
OR HEATING PARTS
Welding should only be carried
out by persons with a relevant
qualifying certificate i.a.w.
EN287.
Avoid the formation of toxic
fumes and dust.
Hazardous fumes can be
generated when paint is heated
due to welding, soldering, or
using a welding torch.
All work is to be performed
outdoors or in a well-
ventilated area. Dispose of
paints and solvents i.a.w. the
appropriate regulations.
Remove paint before welding or
heating parts:
•The dust generated due to the
sandblasting or grinding of
parts must not be inhaled.
For this reason, wear
suitable breathing
protection.
•Where a solvent or paint
stripper is used, it must be
rinsed off using water and
soap before carrying out any
welding. Then wait at least
15 minutes before welding or
heating for the fumes to
disperse.

All information, illustrations and specifications in these operating instructions are based on the latest information available at the time of
publication. We reserve the right to make design changes at any time without prior notification. 11
1.0. Safety Measures
1.1. Adhesive Safety Signs
Warning symbols
Warning signs serving to draw
your attention to dangers are
attached to the machine at
several important positions.
The hazard is identified via a
warning triangle. A second
symbol informs you how the
injury can be prevented by
acting appropriately. These
warning signs, their placement
on the machine and a brief
explanation are given below.
Operating instructions
These operating
instructions contain all
important information
necessary for the safe
operation of the machine.
Carefully observe all
safety egulations in order
to prevent accidents.
Protective covering
Never reach into crushing
hazard zones while parts
located there can still
move.
499.07
499.01

All information, illustrations and specifications in these operating instructions are based on the latest information available at the time of
publication. We reserve the right to make design changes at any time without prior notification.
12
1.0. Safety Measures
1.1. Adhesive Safety Signs
Protective cover
Protective cover prevents
access to tools. The protective
cover is secured on both sides
for safeguarding.
Parking safeguard
Before placing the machine on
the ground, the ball cock on
both hydraulic cylinders must
be locked to prevent lowering.
Tools
Never touch the moving parts
of the machine. Wait until
they have come to a complete
standstill.
499.04
499.03
499.06

All information, illustrations and specifications in these operating instructions are based on the latest information available at the time of
publication. We reserve the right to make design changes at any time without prior notification. 13
1.0. Safety Measures
1.2. Safety Equipment
GENERAL SAFETY SIGN REQUIREMENTS
A safety sign with the following safety practices or similar information shall be provided on
the machine. The label should preferably be visible from the operator’s position.
a) Read the operating instructions.
b) Do not operate the machine without safeguards, shields, and where the safety devices
are not in place and working.
c) Do not operate the machine when children and others are nearby.
d) Do not allow untrained personnel to operate the machine.
ATTENTION DANGER !
Never use the TERRA SLIT without safety equipment.
Otherwise, you expose yourself and others to extreme
danger.
⇒Moving parts can result in serious injuries.
Where to find safety equipment on your machine
A =Undetachable parking supports
inserted as spacers on the right
and left .
C = protective cover, can only be
removed with tools.
B =Undetachable parking supports
inserted as spacers on the right
and left .
D= hassis securely attached as spacer
on the right and left .
C
D
DC499.09
A
A
A
CB
A

All information, illustrations and specifications in these operating instructions are based on the latest information available at the time of
publication. We reserve the right to make design changes at any time without prior notification.
14
1.0. Safety Measures
1.3. Safety instructions
•In addition to the
information provided in
these Operating
Instructions, please also
observe generally applicable
safety and accident-
prevention standards !
•Familiarise yourself with
all equipment and operating
elements and their functions
before starting work. Ensure
that all protective
equipment has been properly
installed. It is too late to
do this when you have
started work !
•In the working area, the
user is responsible for the
safety of other persons !
•Before moving off, ensure
that the immediate area of
the machine is clear e.g. no
children nearby.
Ensure that your visibility
is not impaired !
•Keep all persons clear of
the danger zone of the
machine !
•Switch off the machine and
the tractor motor when
performing any maintenan.
•Special care should be taken
when working and turning on
a slope.
- DANGER OF TOPPLING !
•CAUTION !
The equipment version with a
drawbar is NOT approved for
travel on public roads!

All information, illustrations and specifications in these operating instructions are based on the latest information available at the time of
publication. We reserve the right to make design changes at any time without prior notification. 15
2.0. Assembly
2.1. General Information
Place the TERRA SLIT on the
ground with parking supports in
topmost position.
For this work, please use your
personal protective equipment
(PSA) such as: gloves, goggles,
ear protectors.
If, instead of Wiedenmann
additional weights, any random
objects are inserted as
ballast, the following must be
observed:
1. The permissible weight
according to the information
provided in the technical
data must be complied with.
2. The objects must be firmly
attached to the ballast
frame so as to prevent
shifting.

All information, illustrations and specifications in these operating instructions are based on the latest information available at the time of
publication. We reserve the right to make design changes at any time without prior notification.
16
2.0. Assembly
2.2. Mounting knives
Knives can be mounted in two
ways :
1. 150 mm division
for 40 knives
2. 75 mm division
for 76 knives
The correct position for
standard knives
The correct position for power
knives
The correct position for fine-
cut knives

All information, illustrations and specifications in these operating instructions are based on the latest information available at the time of
publication. We reserve the right to make design changes at any time without prior notification. 17
2.0. Assembly
2.3. Installing hollow tines and half discs
Version 1:
8 spoons are mounted per half
set of discs
Version 1:
8 spoons are mounted per half
set of discs
Discs are always attached to
the same side.
No more than ten half sets of
discs may be fitted with hollow
spoons.
This corresponds to:
division = 150 mm

All information, illustrations and specifications in these operating instructions are based on the latest information available at the time of
publication. We reserve the right to make design changes at any time without prior notification.
18
2.0. Assembly
2.4. Installing cutting blades and half discs
8 cutting blades are mounted
per set of half discs
Version 1:
10 sets of half discs are
attached to every second disc
This corresponds to:
division = 150 mm
Version 2:
19 sets of half discs are
attached to every disc
This corresponds to:
division = 75 mm
Discs are always attached to
the same side.

All information, illustrations and specifications in these operating instructions are based on the latest information available at the time of
publication. We reserve the right to make design changes at any time without prior notification. 19
2.0. Assembly
2.5. Mounting additional weight
ATTENTION !
Only carry out mounting work
when the machine is connected.
Lower the connected machine
onto the ground.
Switch off the tractor and
secure it against
unintentional start up.
Attach retainers (A) manually
on both sides of the ballast
frame.
Connect suspension to ring
bolts of the additional weight.
Lift additional weight onto
mounting position using an
auxiliary device.
Installation without auxiliary
devices requires 2 persons.
Installation load is 22 kg.
Fasten all fixing screws
tightly.
2.6. Mounting the hydraulic weight transfer unit
Mounting instructions are
included in the scope of
delivery of the weight transfer
unit.
It contains the following:
1. Important information before
installation
2. Mounting description
3. Adjustment description
4. Important points for correct
use

All information, illustrations and specifications in these operating instructions are based on the latest information available at the time of
publication. We reserve the right to make design changes at any time without prior notification.
20
2.0. Assembly
2.7. Attaching rear roller
Installation without auxiliary
devices requires 2 persons.
Installation load is 22 kg.
Align bore (A) of side arms
with bore (B) on frame.
Insert bolts on both sides and
secure with spring cotter.
Insert bolts on both sides and
secure with spring cotter.
Insert adjustment bar (D) into
threaded bolts and secure.
For transportation, adjustment
bars must be inserted with
bore (E) into side arm bolts
and secured.
Only use the slotted hole (F)
when operating the rear roller.
Other manuals for TERRA SLIT
1
This manual suits for next models
1
Table of contents
Other Wiedenmann Lawn And Garden Equipment manuals