manuals.online logo
Brands
  1. Home
  2. •
  3. Brands
  4. •
  5. Xalingo
  6. •
  7. Play Set & Playground Equipment
  8. •
  9. Xalingo Castelo Medieval Operation instructions

Xalingo Castelo Medieval Operation instructions

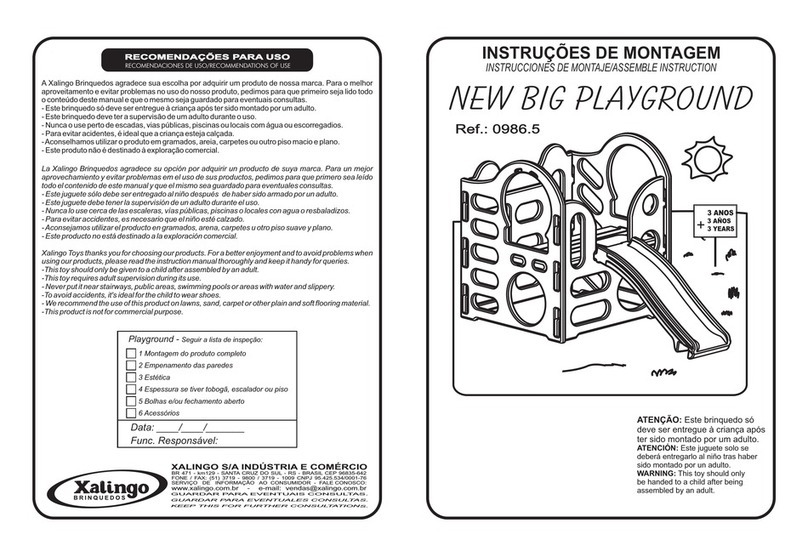
Ref.: 0970.9
A Xalingo Brinquedos agradece sua escolha por adquirir um produto de nossa
marca. Para o melhor aproveitamento e evitar problemas no uso do nosso
produto, pedimos para que primeiro seja lido todo o conteúdo deste manual e que
o mesmo seja guardado para eventuais consultas.
- Este brinquedo só deve ser entregue à criança após ter sido montado por um
adulto.
- Este brinquedo deve ter a supervisão de um adulto durante o uso.
- Nunca o use perto de escadas, vias públicas, piscinas ou locais com água ou
escorregadios.
- Para evitar acidentes, é ideal que a criança esteja calçada.
- Aconselhamos utilizar o produto em gramados, areia, carpetes ou outro piso
macio e plano.
- Este produto não é destinado à exploração comercial.
La Xalingo Brinquedos agradece su opción por adquirir un producto de suya marca. Para un mejor aprovechamiento y
evitar problemas em el uso de sus productos, pedimos para que primero sea leído todo el contenido de este manual y
que el mismo sea guardado para eventuales consultas.
- Este juguete sólo debe ser entregado al niño después de haber sido armado por un adulto.
- Este juguete debe tener la supervisión de un adulto durante el uso.
- Nunca lo use cerca de las escaleras, vías públicas, piscinas o locales con agua o resbaladizos.
- Para evitar accidentes, es necesario que el niño esté calzado.
-Aconsejamos utilizar el producto en gramados, arena, carpetes u otro piso suave y plano.
- Este producto no está destinado a la exploración comercial.
Xalingo Toys thanks you for choosing our products. For a better enjoyment and to avoid problems when
using our products, please read the instruction manual thoroughly and keep it handy for queries.
-This toy should only be given to a child after assembled by an adult.
-This toy requires adult supervision during its use.
- Never put it near stairways, public areas, swimming pools or areas with water and slippery.
-To avoid accidents, it's ideal for the child to wear shoes.
- We recommend the use of this product on lawns, sand, carpet or other plain and soft flooring material.
-This product is not for commercial purpose.
RECOMENDAÇÕES PARA USO
KEP T S F F THER UL AT ONS.
E HI OR UR CONS T I
XALINGO S/A INDÚSTRIA E COMÉRCIO
BR 471 - km129 - SANTA CRUZ DO SUL - RS - BRASIL CEP 96835-640
FONE / FAX: (51) 3719 - 9800 / 3719 - 1009 CNPJ 95.425.534/0001-76
SERVIÇO DE INFORMAÇÃO AO CONSUMIDOR - RAMAL 803
www.xalingo.com.br - e-mail: [email protected]
GUARDAR PARA EVENTUAIS CONSULTAS.
RECOMENDACIONES DE USO/RECOMMENDATIONS OF USE
INSTRUÇÕES DE MONTAGEM
INSTRUCCIONES DE MONTAJE/ASSEMBLE INSTRUCTION
o
s
s
n
o
e
s
t
i
i
t
s
i
e
V
www.xalingo.com.br
Segurança
CE-BRI/ICEPEX-N 00188-76
NM 300/2002
SEGURANÇA DE BRINQUEDOS
OCP 0046
ATENÇÃO: Este brinquedo só deve ser
entregue à criança após ter sido montado por
um adulto.
Warning: This toy should only be given to a child after
assembled by an adult.
Atención!: Este juguete sólo debe ser entregado al niño
después de haber sido armado por un adulto.
!
F
E
B
C
D
6
7
Figura 3
G
8
Figura 4
9
Figura 5
H
10
Figura 6
E
B
D
4
5
C
Figura 2
4
5
E
B
1
1
2
2
C
Figura 1
A
3
3
1 - Encaixar as laterais B e C na frente A conforme mostram as setas 1 na figura 1.
1 - Encajar los laterales B y C en el frente A conforme muestran las flechas 1 en la figura 1.
1 - Attach sides B and C to the front A according to the arrows 1 in picture 1.
2 - Depois de encaixar a lateral, deve-se pressioná-la de cima para baixo,
na parte superior da torre, conforme mostram as setas 2 na figura 1,
até ouvir um clique. Assim, as duas peças deverão estar coincidentes
na parte superior da torre.Repetir o processo com a outra lateral.
2 - Luego de encajar el lateral, presione de arriba hacia
abajo, la parte superior de la torre, conforme muestran
las flechas 2 de la figura 1, hasta oir un click. Asi,
ambas piezas deberan coincidir en la parte superior
de la torre. Repetir estos pasos con el otro lateral.
2 - After attaching the sides, press them, top
to bottom, at the superior part of the tower,
according to the arrows 2 in the picture 1,
until it clicks in. This way, both parts
should coincide on the superior part
of the tower. Repeat the process with
the other side.
3 - Encaixar a plataforma E nas laterais B
e C conforme indicam setas 3 na figura 1.
3 - Encajar la plataforma E en los lateralesB y
C conforme indican las flechas 3 de la figura 1.
3- Attach platform E to the sides B and C
according to the arrows 3 in picture 1.
4 - Encaixar a parte traseira D nas laterais B e C conforme mostram as setas 4 na figura 2.
4 - Encajar la parte trasera D en las laterales B y C conforme muestran las flechas 4 de la figura 2.
4 - Attach the rear part D to the sides B and C according to the arrows 4 in picture 2.
5 - Depois de encaixar a parte traseira, deve-se pressionar
a lateral de cima para baixo, na parte superior, conforme
mostram as setas 5 na figura 2, até ouvir um clique.
Assim, as duas peças deverão estar coincidentes
na parte superior da torre. Repetir o processo
com o outro lado da peça.
5 - Luego de encajar la parte trasera, presione el
lateral de arriba hacia abajo, en la parte superior,
conforme muestran las flechas 5 de la figura 2,
hasta oir un click. Asi, ambas piezas deberan
coincidir en la parte superior de la torre.
Repetir el proceso con el otro lado de la pieza.
5 - After attaching the rear part, press the side part,
top to bottom, at the superior part, according
to the arrows 5 in picture 2, until it clicks in.
This way, both parts should coincide on the
superior part of the tower. Repeat the process
with the other side.
6 - Inclinar el tobogan F y hacerlo descender hasta encastrar en su encaje
la pieza trasera D conforme muestra la flecha 6 de la figura 3.
6 - Inclinar o escorregador F e descê-lo até encostar em seu encaixe
na peça traseira D conforme mostra seta 6 da figura 3.
6- Tilt the slippery slide F and bring it down attaching it to the
rear part D according to the arrow 6 in the picture 3.
7 - Desinclinar o escorregador F deixando-o
paralelo com a plataforma E, conforme
indicação da seta 7 da figura 3.
7 - Colocar el tobogan F paralelo con a plataforma E,
conforme indica la flecha 7 de la figura 3.
7- Tilt back the slippery slide F leaving it parallel with
platform E according to the arrow 7 in the picture 3.
8 - Dar um nó em uma das extremidades da corda
G. Feito isso, definir em qual das laterais do castelo,
mostradas anteriormente como B ou C, você deseja
instalar a escada, conforme indicação da seta 8 da figura 4.
8 - Hacer un nudo en una de las extremidades de la cuerda
G. Luego, definir el lateral del castillo (B o C) donde instalara
la escalera, conforme indica la flecha 8 de la figura 4.
8 - Tie a knot to one of the ends of the rope G, then chose witch side of the
castle B or C you want to attach it, according to the arrow 8 in the picture 4.
9 - Passar a outra extremi-dade da corda, de fora para dentro do
castelo, pelo orifício situado na parte superior da lateral que você
escolheu, conforme indicação da seta 9 da figura 5.
9 - Pasar la otra extremidad de la cuerda, de afuera hacia adentro del
castillo, por el orifício situado en la parte superior del lateral que usted
eligio, conforme indica la flecha 9 de la figura 5.
9 - Pull the other side of the rope inside out from the castle through
the hole at the superior part of the side you've chosen, according to
the arrow 9 in the picture 5.
10 - Passar a corda pelo orifício de um dos degraus H e dar
outro nó, deixando-o frouxo para ajustar posteriormente. Assim,
fazer sucessivamente com os outros dois degraus. Feito isso,
repetir os passos desta página a partir do item 8 com a outra
corda, colocando-a na outra extremidade do degrau. Por último,
regular a altura dos degraus e apertar bem os nós que foram
dados na corda, conforme indicação da seta 10 da figura 6.
10 - Pasar la cuerda por el orifício de uno de los escalones H y hacer
otro nudo, dejandolo flojo para ajustar posteriormente. Asi, hacer
sucesivamente con los otros dos escalones. Luego, repetir los pasos
de esta página a partir del item 8 con la otra cuerda, colocandola en
la otra extremidad del escalon. Por último, regular la altura de los
escalones y ajustar bien los nudos, conforme indica la flecha 10 de
la figura 6. Adjunto em la caja figuras con instrucciones de montaje.
10 - Pull the rope through the hole in one of the steps H and tie another
loose knot (adjust it later) Follow this procedure on the other steps. Done
this, repeat the instructions on this page, from item 8, with the other rope,
placing it to the other extreme of the step. Finally, adjust the height of the
steps and tie well the knots, according to the arrow 10 in the picture 6.

This manual suits for next models

1

Other Xalingo Play Set & Playground Equipment manuals

Xalingo 0956.9 User manual

Xalingo

Xalingo 0956.9 User manual

Xalingo POLYPLAY ATLAS Operation instructions

Xalingo

Xalingo POLYPLAY ATLAS Operation instructions

Xalingo PLAYGROUND JUNIOR Operation instructions

Xalingo

Xalingo PLAYGROUND JUNIOR Operation instructions

Xalingo Gangorra Polvo Maluco Operation instructions

Xalingo

Xalingo Gangorra Polvo Maluco Operation instructions

Xalingo 0988.7 Operation instructions

Xalingo

Xalingo 0988.7 Operation instructions

Xalingo 0986.5 Operation instructions

Xalingo

Xalingo 0986.5 Operation instructions

Xalingo ENCHANTED CUBBY HOUSE Operation instructions

Xalingo

Xalingo ENCHANTED CUBBY HOUSE Operation instructions

Xalingo PLAY DOGHOUSE Operation instructions

Xalingo

Xalingo PLAY DOGHOUSE Operation instructions

Xalingo Playground Modular Global Operation instructions

Xalingo

Xalingo Playground Modular Global Operation instructions

Xalingo Playground Modular Star Operation instructions

Xalingo

Xalingo Playground Modular Star Operation instructions

Xalingo 0997.6 Operation instructions

Xalingo

Xalingo 0997.6 Operation instructions

Xalingo PLAYGROUND MODULAR TOTAL PLUS Operation instructions

Xalingo

Xalingo PLAYGROUND MODULAR TOTAL PLUS Operation instructions

Xalingo 0956.6 Operation instructions

Xalingo

Xalingo 0956.6 Operation instructions

Xalingo 0989.8 Operation instructions

Xalingo

Xalingo 0989.8 Operation instructions

Xalingo POLYPLAY COLOSSOS Operation instructions

Xalingo

Xalingo POLYPLAY COLOSSOS Operation instructions

Xalingo MULTI BALANCO Operation instructions

Xalingo

Xalingo MULTI BALANCO Operation instructions

Xalingo Playground Modular Global Operation instructions

Xalingo

Xalingo Playground Modular Global Operation instructions

Xalingo Playground Modular Plus Operation instructions

Xalingo

Xalingo Playground Modular Plus Operation instructions

Xalingo 0968.4 Operation instructions

Xalingo

Xalingo 0968.4 Operation instructions

Popular Play Set & Playground Equipment manuals by other brands

SPORTSPOWER M7TDY Assembly instruction

SPORTSPOWER

SPORTSPOWER M7TDY Assembly instruction

Evo J-604000 Assembly instructions

Evo

Evo J-604000 Assembly instructions

BOERPLAY BBI.104.HUP installation instructions

BOERPLAY

BOERPLAY BBI.104.HUP installation instructions

Costway NP11072 manual

Costway

Costway NP11072 manual

Swing-N-Slide TIMBER-BILT Lookout Mountain manual

Swing-N-Slide

Swing-N-Slide TIMBER-BILT Lookout Mountain manual

LifeSpan Kids WALLABY 2 CUBBY HOUSE owner's manual

LifeSpan Kids

LifeSpan Kids WALLABY 2 CUBBY HOUSE owner's manual

Trigano ULTRA Xplorer manual

Trigano

Trigano ULTRA Xplorer manual

Trigano Jardin BAXTER manual

Trigano Jardin

Trigano Jardin BAXTER manual

Swing-N-Slide TIMBER-BILT TB 1521 quick start guide

Swing-N-Slide

Swing-N-Slide TIMBER-BILT TB 1521 quick start guide

PARK WAREHOUSE 622pg175 manual

PARK WAREHOUSE

PARK WAREHOUSE 622pg175 manual

Lifetime 90065 manual

Lifetime

Lifetime 90065 manual

HAGS Lillie w Dolly installation guide

HAGS

HAGS Lillie w Dolly installation guide

stilum gravis 1A Mounting instructions

stilum

stilum gravis 1A Mounting instructions

UPlay Today ABT-DXBN-P(N) Assembly instructions

UPlay Today

UPlay Today ABT-DXBN-P(N) Assembly instructions

Ledon Luffe Assembly instructions

Ledon

Ledon Luffe Assembly instructions

Alice's Garden ALIZE Assembly instructions

Alice's Garden

Alice's Garden ALIZE Assembly instructions

BOERPLAY Multi Swing with bird's nest swing 120cm... manual

BOERPLAY

BOERPLAY Multi Swing with bird's nest swing 120cm... manual

Soulet 004558 Assembly instructions

Soulet

Soulet 004558 Assembly instructions

manuals.online logo
manuals.online logoBrands
  • About & Mission
  • Contact us
  • Privacy Policy
  • Terms and Conditions

Copyright 2025 Manuals.Online. All Rights Reserved.